
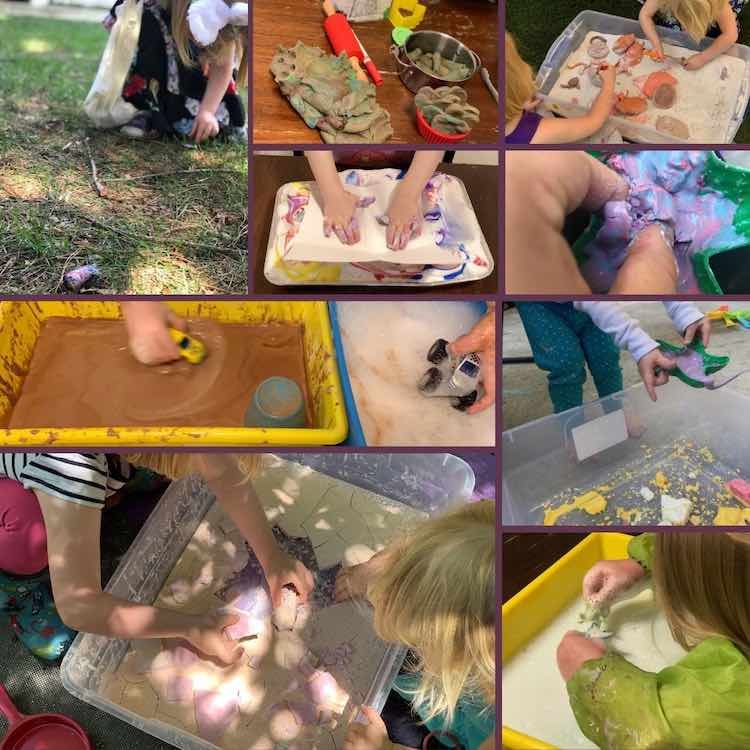
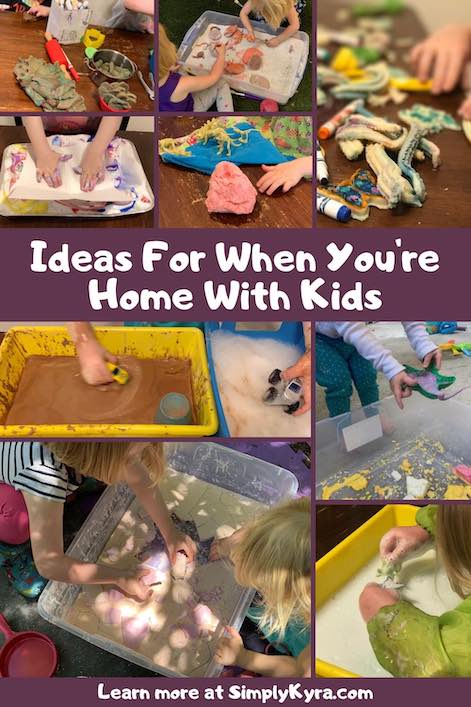
Ideas For When You're Home With Kids

With everyone self-isolating for the Coronavirus (COVID-19) lately I’ve been sharing many of my sensory play ideas for kids through the Facebook groups I’m in. I wanted to create a post containing all these links in one place so it’s simpler to share and easier to find what you’re looking for. If there’s anything you want to add or if you have any questions feel free to comment at the bottom of the page or within the specific post you’re talking about. I would love for this to be a great resource for anyone stuck staying inside now or in the future.
A lot of these ideas are geared towards sensory bins so they’ll be easier to do if you can corral the items within a container or bin. Any bin works though it would be best if the edges are tall enough to contain the stuff without being too tall to block your kid from using it easily. I recommend using a metal or disposable casserole dish, a large container, or a bowl; although, for some items, you can simply lay out a tablecloth or picnic blanket and ignore a bin. My kids are currently three and five so some of these ideas may be too young for older kids. That said many of the items, like oobleck or playdough, being fun to play with at any age. If your child is older, making the item may be the most enjoyable part while a younger child might prefer just playing with it for hours. If you want to extend the length of play you could change up the materials or add their favorite toys when you see them getting bored. I’ve blogged about all of these ideas previously so I’ve included all the links, within my site, below and if they’re external links I’ll let you know where they link to.
When I know I’m stuck inside I like to make the days easier by coming up with a variety of options we can do and their priorities. This way when kids get bored I know what to pull out and if I don’t use all the planned activities I have a jump-start for the next day’s downtime. For instance on Sunday night I planned a variety of ideas to do on Monday, one of which was making banana bread as our bananas were getting pretty yellow. On Monday we ended up doing other things although in the evening I noticed the bananas starting to smell so I moved the banana bread up to a higher priority for Tuesday. Tuesday morning I mentioned we should make banana bread but they kept choosing other options all morning and most of the afternoon until finally, later in the afternoon, they were ready. My banana bread got made and they had a blast. Would we have had a blast making the bread in the morning? Probably. Did the day go smoother letting them know about the banana bread and waiting for them to be ready? Most definitely.
As an aside, for the sensory bins you know your child best. You know if they’re too young for these and you know how close of an eye they need while they play. With that said here we go!
Do you have dish soap… or not?
Adding something as simple as dish soap is a great way to upgrade water play and make it more interesting. That said water play itself could be a blast too. I remember the first time Zoey did a sensory bin before she could even sit up by herself. I pulled out a large shallow bin, placed it over towels, and put a new clean set of sand toys in it. I gave Ada a bucket of water and they played together under supervision. Ada had a blast pouring water through the toys while Zoey laid on her stomach splashing at the water in the bin. For bigger kids you could grab a taller bin, fill it with water, and have them test if the water-safe toys are able to float or if they sink. This is especially easy if you have swimming pool toys laying around.
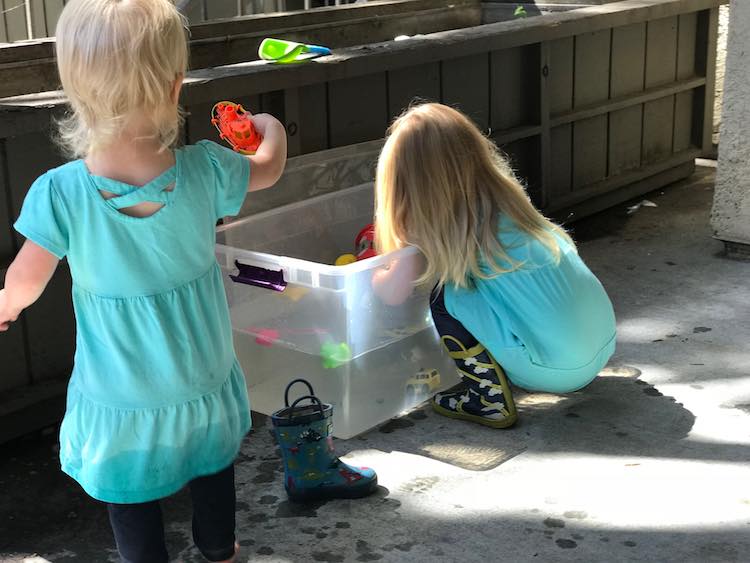
Now with dish soap you can easily make a soapy bin for them to play in. Are they getting bored? Why not bring Doc McStuffins into it. I changed up the bubbly water play by getting them to clean the ‘dusty musties’ from their toys once. This optimal setup had a soapy water bin, a plain water bin, and a kitchen towel so they could easily wash, rinse, and dry the toys off; repeatedly. Lately, with both kids playing, they each get their own single bin of soapy water and, once they’re tired of it, I switch the soapy water out for plain water. Clean up is easy since it’s just soap and water so all you need to do is sop it up with an absorbent towel. If you have a blender or stand mixer you can easily make tons of bubbles for your sensory bins and, if you want, add a bit of food dye to tint it. For a while, back when school started in the Fall, I often had smoothies after Ada left for school. Since I was using the blender anyway I would thoroughly rinse out the blender and then blend up a batch of soapy bubbles for Zoey to play in while I enjoyed my breakfast. The blender was cleaned out and I had time to sit while she played beside me.
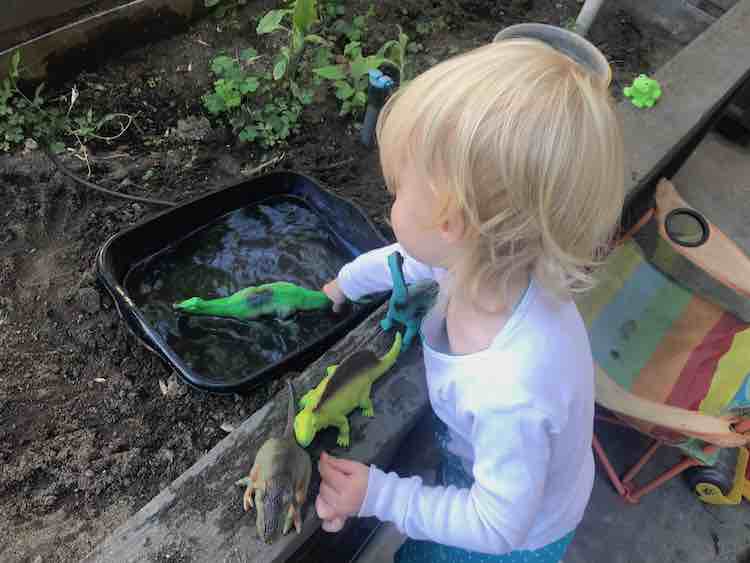
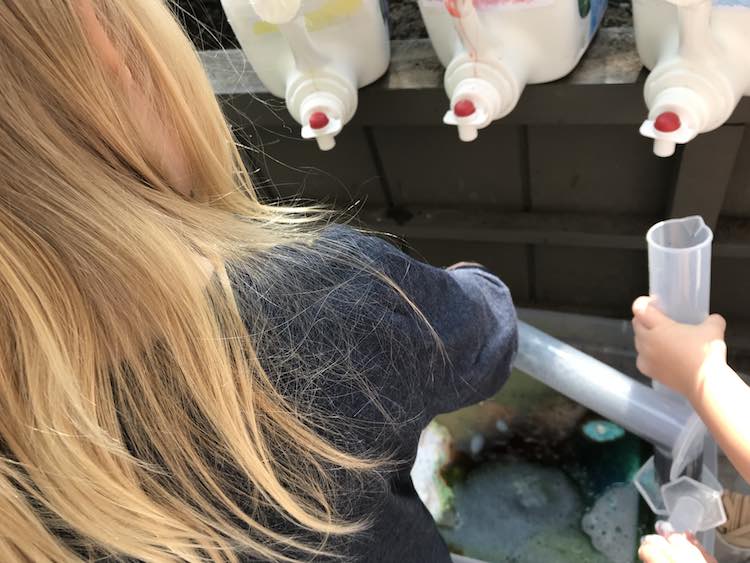
I’ve also taken emptied laundry detergent bottles and, leaving them un-rinsed, filled them up again with water. I normally take these outside where either I or the kids can pour the water into an empty sand bucket so Ada and Zoey can clean their playhouse or toys on their own time using a vegetable scrubber or paintbrush. Do you have a large bin outside? Pour that water into the bin and give the kids a vegetable brush or washcloth so they can soak and scrub their dirty outside toys. Even if they give up halfway through the toys are still cleaner than when they started and they were entertained for a while. For the larger laundry jugs I’ve often left them outside over a couple days in a place where the kids can easily fill their own buckets with water. Often this is plain water but sometimes they ask for soapy water so I added dish soap before refilling the jugs again. If you want this on a smaller scale I discovered I could change this up by embedding buckets within our raised garden beds so the kids had easy standing access to their very own dinosaur ‘swimming pools’ that they played with for hours.
How about baking soda and vinegar?
If you have baking soda and vinegar on hand you can make some pretty awesome explosions. Plus, like the dish soap above and the cornstarch below, these are grocery store items which makes it easier to stock back up when you’re out. I’ve done this on smaller scale where you fill an ice cube tray with drops of food dye (different color combinations in each), fill each section up with baking soda, and then give the kids the filled ice cube tray and a cup of water with pipettes or spoons. The kids add the vinegar to the ‘plain’ baking soda and get surprised by whichever color is hidden underneath when it bubbles up. On a larger scale I’ve also used emptied laundry jugs with dyed vinegar in it and graduated cylinders for a birthday party so they could mix up their own color of vinegar and add baking soda to it for unique explosions. You could also create your own explosion in a more traditional volcano or you could use something more unique. I know pumpkins aren’t as numerous right now but before Halloween one year we had painted sugar pumpkins so after Halloween I had to come up with a way to say goodbye to them. We ended up cutting into them, played with the guts, and then used the pumpkins as a bowl to contain the baking soda and vinegar explosion.
What about cornstarch?
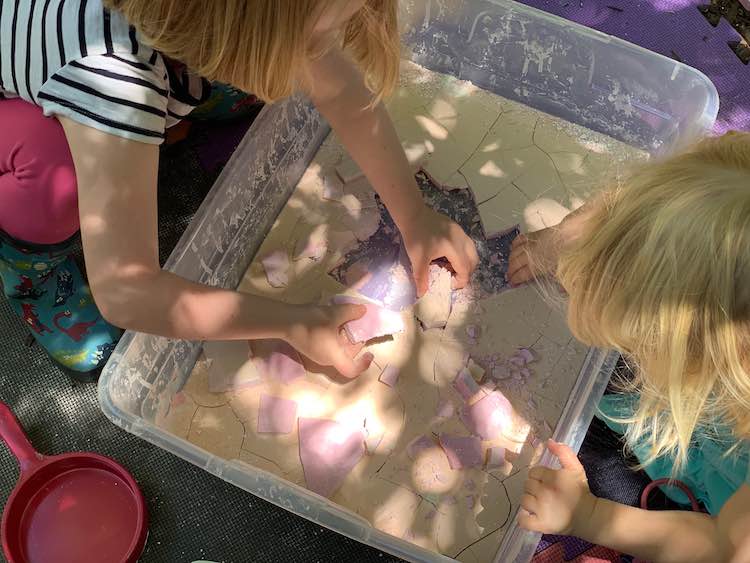
If you have some cornstarch laying around you could make oobleck by adding water to it. This is a non-Newtonian fluid that is so much fun to play with. I’ve previously explained more about what it is and at the bottom of that post I mention how you can extend the play further with videos showing oobleck dancing on a subwoofer (videos are so much easier to clean than doing it yourself). Are your kids getting tired of oobleck? You can change it up by using food dye to make it any color. Out of food dye or bored of it? I once used cocoa powder in oobleck to create a ‘muddy’ inside sensory bin for the girls to run their monster trucks through. You can easily put a bin of soapy water next to the oobleck to make cleaning the vehicle, repeatedly, part of the fun. The girls may have made their mud a bit too runny but you could always use less water to make it more oobleck-like. If you want to change it up yet again you could make oobleck and put it into an ice cube tray, or a large container, and freeze it in your freezer. The really cool think about frozen oobleck cubes are that they don’t really lose their shape when they thaw. This makes a bowl of frozen oobleck cubes look really neat. Also since they don’t merge and flow easily if you want to mix colors, for example taking a blue frozen oobleck cube and a red one, you have to work them together, to make purple, so this is perfect and mesmerizing way to check out color mixing. I’ve done this before on a smaller scale with just my kids and then later made it much bigger. Is it hot and sunny where you are? Why not leave out a bin of oobleck and let it dry out? The kids love breaking apart their dried out oobleck and making oobleck sand. We do this outside and it eventually gets ‘cooked’ in a pot at their outdoor kitchen set. Just a warning though the oobleck powder goes everywhere and tracked inside on their clothing enough times that I eventually put a temporary hold on making it. This ban was lifted a month or so ago. Also this can go on for weeks with the same batch of cornstarch, with significant loses, as after a while Ada asks for water to reconstitute the oobleck which is then dried out, broken up, and played with again.
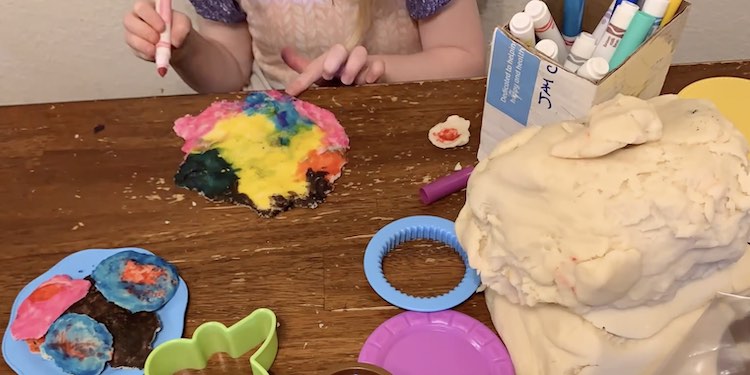
Do you want playdough?
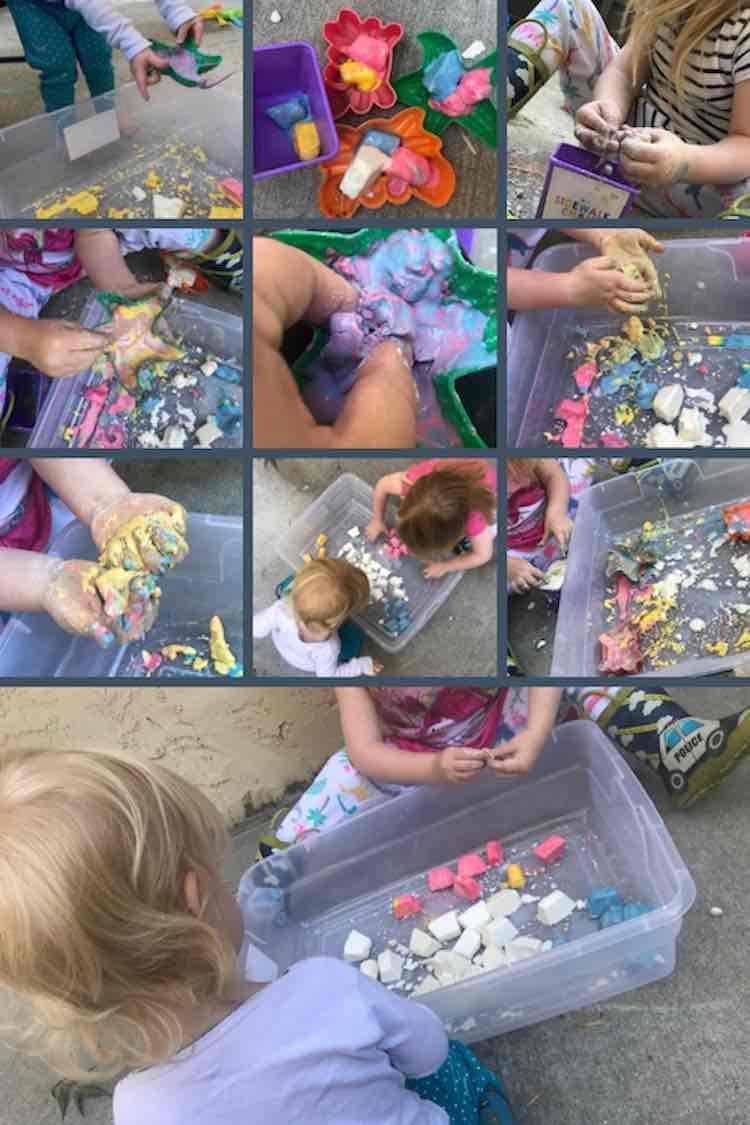
I love how my homemade playdough feels and it lasts so long if you wrap it up properly or seal it in a freezer bag. You only need flour, salt, oil, cream of tartar, and boiling water to make it and I love how it doesn’t matter as much if they taste it since I knew what is inside it. If you want different colors you can use water-based food dye to change it up and I’ve also made it smell good with different baking flavor extracts. If you want different colors outside of the food dye realm or are out of food dye itself I’ve attempted to color it with different kids’ paints before. The paint does make the playdough wetter though so you’ll need to add more flour to balance it out. Or, if you have washable markers, you can make plain white playdough and let the kids color it. This works perfect with cookie cutters and a rolling pin as they can make their shapes and then color it in. The playdough, over time, keeps getting prettier and prettier as the markers add marbling. If you don’t have playdough toys, or the kids are bored with them, you could grab your baking supplies (muffin tins, birthday candle, cookie cutters, etc) or grab some of their toys. For a bit there I combined plastic dinosaurs with playdough to make a dinosaur footprints sensory bin.
Do you have water guns laying around?
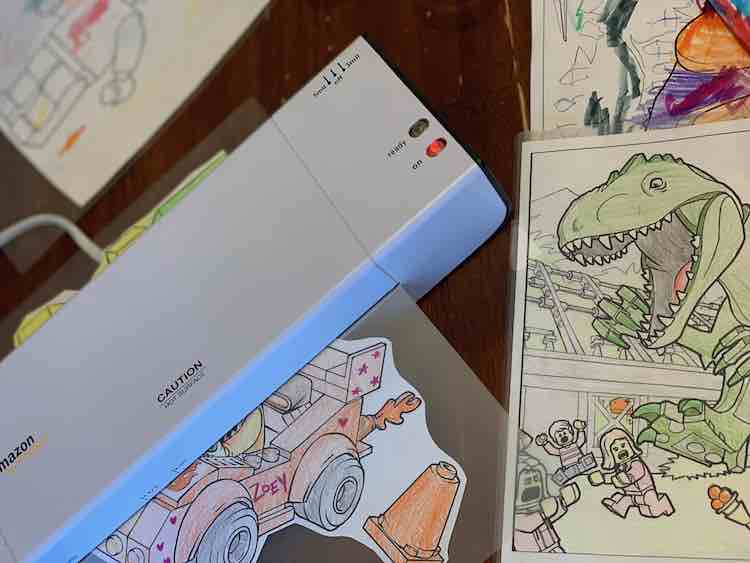
Why not get them to design their own targets? They could draw their own or use coloring pages ripped out of their coloring books or printed off from online. You could hang them up as is with masking tape and have them spray it until it dissolves. If they want to save their artwork you could always laminate the whole picture, or part of it if they cut it out, to protect it from the water. I haven’t tried it but putting the paper inside a sheet protector and sealing the hole or just using packing tape on the paper itself might also work if sealed completely.
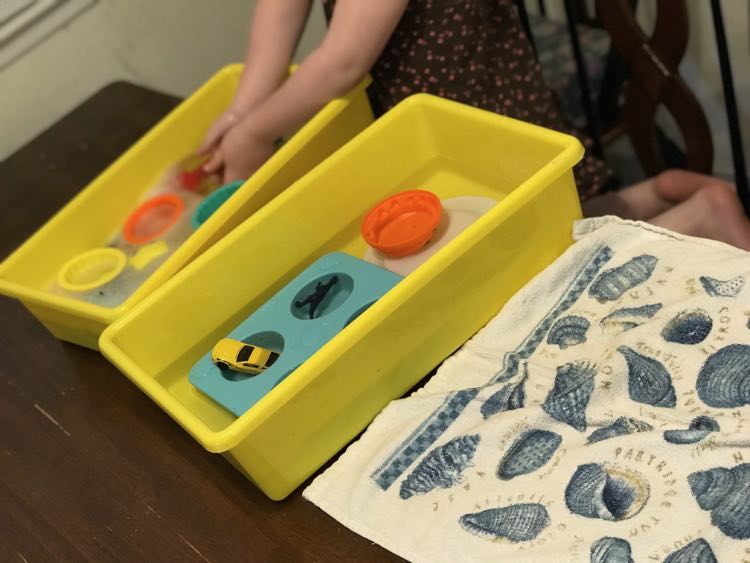
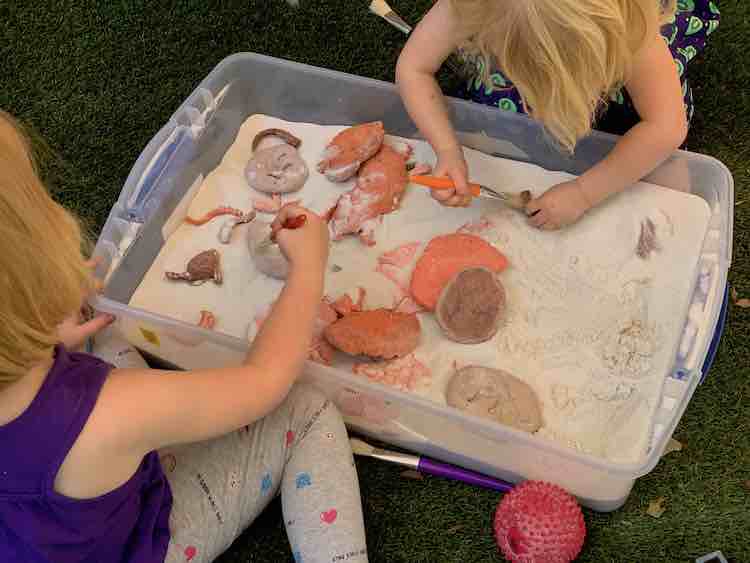
What about sand, flour, and salt? Do you have them?
For Ada’s birthday last year we made salt dough fossils and hid them within sand for a dinosaur dig. You could make so many different things out of salt dough and hide them in sand or something similar. For my favorite fossils I bought a fossil ice cube tray specifically for the party, but it took a while to make them so most of the fossils ended up just being balls of salt dough squished down with a dinosaur fossil toy imprinted into it. I’m sure you could use any water-safe toy to press into your salt dough. If your child is a dinosaur fan we’ve previously visited the Royal Tyrrell Museum in Drumheller, Alberta, Canada and they have a YouTube channel with educational videos. If you want to plan a future dinosaur trip the city of Drumheller has a bunch of dinosaur themed stuff too.
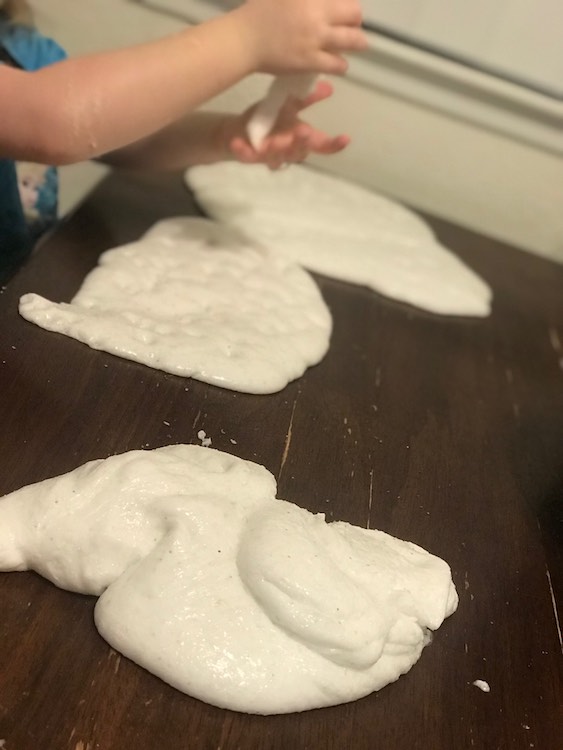
Slime… yah or no way?
I know there are a ton of slime videos out there but just in case you want one more we once made InstaSnow and once we were done playing with it we turned it into snow slime. If you have foam balls we also once added that to slime too; although it wasn’t as unique as the snow slime.
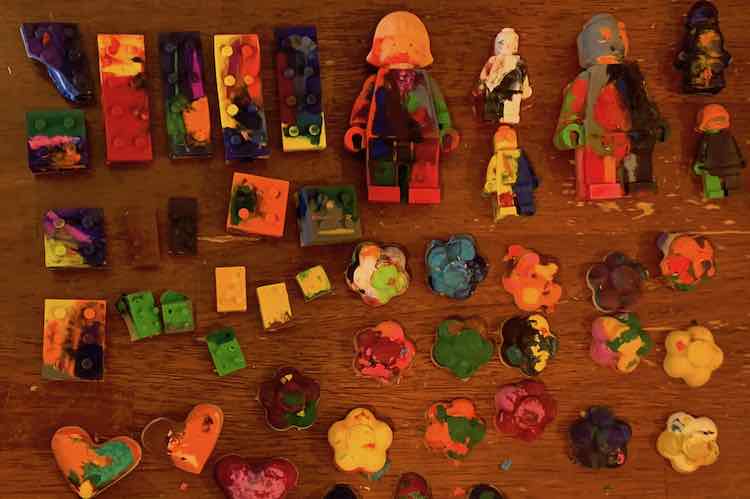
What about old broken crayons and a silicon mould or cupcake liners?
If you have a silicone mould or cupcake liners you could melt down your old broken crayons to make new ones. Only caveat is you wouldn’t be able to use it for food-stuff afterwards. If you have tons of broken crayons you could make each one a different color or you could mix it up and make multicolored crayons.
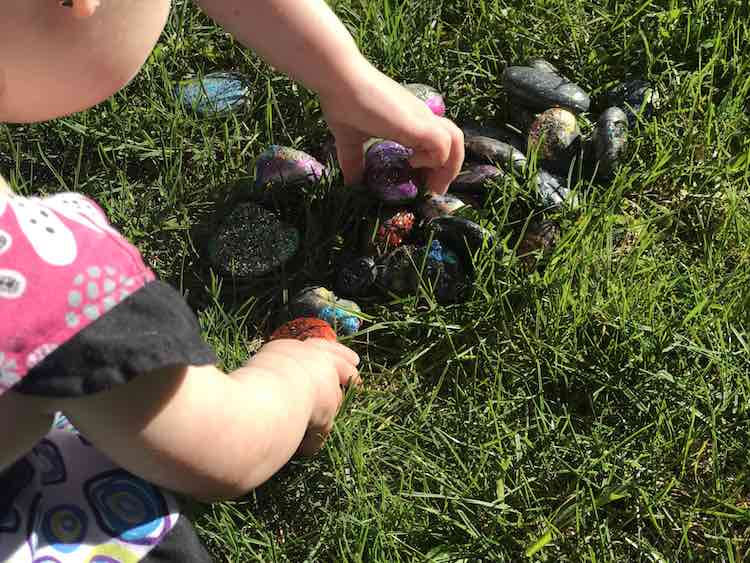
Do you have rocks?
For Zoey’s second birthday I bought a bunch of rocks and corralled them with some toy vehicles in a bin for an all terrain vehicle sensory bin. If you have rocks in your backyard that could also work. You could extend the play by having your kids hunt them down and wash them in soapy water before creating your main sensory bin. Rocks could work with so many different toys including racing cars over them, moving them with construction vehicles, having (LEGO/Little People/DUPLO) people climb and explore them, or stomping dinosaurs over them to name a few. Even washing them off could be a sensory bin in itself especially if you add a couple toys there to. While washing the rocks you could include a boat and ask them how many rocks you need to add to make the boat sink. Talking about rocks with Easter coming up I’ve also had the kids paint rocks, if you don’t have to return them clean to your yard, and we then went on an Easter ‘egg’ hunt that year for fun. For older kids you could paint rocks adding more details and spending more time on it and then once your shelter-in-place lifts you could hide them around for people to find.
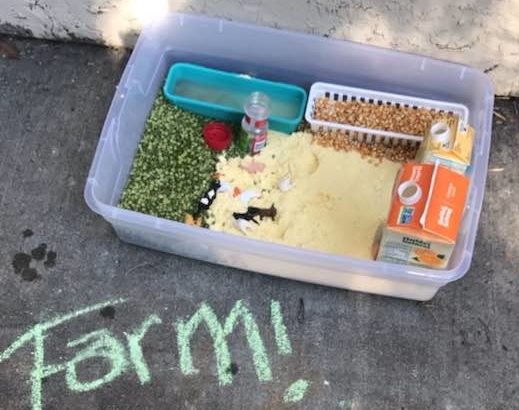
Do you have empty screw top cartons?
I know we don’t want to waste food right now but I figured I should share the farm sensory bin I did for Ada’s third birthday because I took an empty juice carton and turned it into a silo. For the party I created a farm using cornmeal, lentils, and popcorn kernels but you could also do this with sand or some other sensory material too. The silo was cool because you could use a funnel to pour the grains, or sand, into the spout and it comes out the bottom available to scoop and pour again. If you have kids with a bigger age gap I could see the older one creating, or helping you create, a farm and your younger one getting to place with each piece as it’s created. Word of advice… keep it contained if you use food stuff. That year the lentils and cornmeal got mixed into the oobleck and a couple hours later in direct sunlight it stank and I had to threw it all out. Keeping it inside and dry means you could put it in a container when you’re done and pull it out many more times to play with.
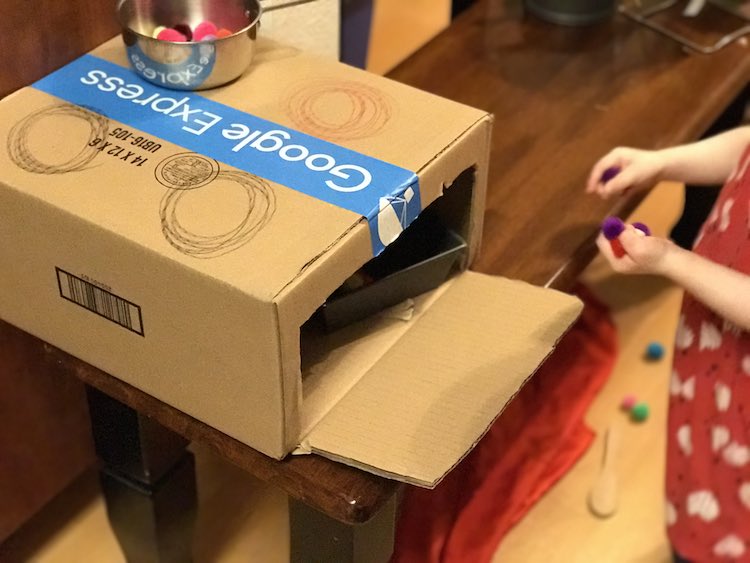
Cardboard boxes?
You could always take a shallow cardboard box, tape it close, cut open the front, and draw circles on top to create a stove and oven kitchen set. It was so simple and Ada played with it for several weeks until it either fell apart or she got bored and we recycled it. I can’t really remember which happened. If you have a large box you could cut a door in the side to make a house or add a pipe-cleaner and paper plate for a simple cardboard vehicle with a working steering wheel. If you have an end table, or similar piece of furniture you aren’t using, you could grab several boxes and put them inside the end table, with masking tape, to create a kitchen set. Ours has an oven, fridge, and cupboard made of cardboard boxes and, before it was upgraded, a paper stovetop taped on top. Or you could simply open a box, lay it flat, and use water, either in a spray bottle or with a paintbrush, to ‘paint’ the cardboard.
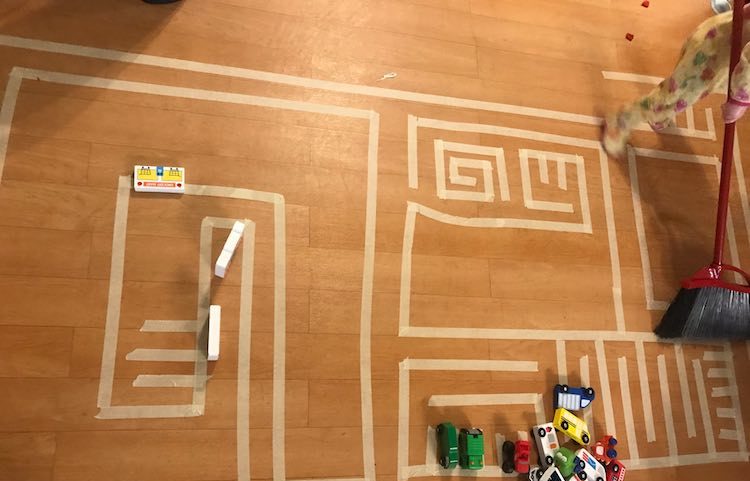
Do you have masking tape?
Why not create a roadway system to drive your vehicles along? This could be as simple as single tape roads to a complicated city system. You could make this on the floor or attach it to a large piece of wood or cardboard so it could moved from room to room or laid down at an angle as a ramp. Or use the masking tape for something different and make a kid-sized maze or tightrope they have to balance on. Add other items like pillows or chairs to your masking tape shapes and come up with your own obstacle course. I’ve even seen masking tape laid out in a doorway or hallway akin to a spider web that people have to crouch or climb over to get through.
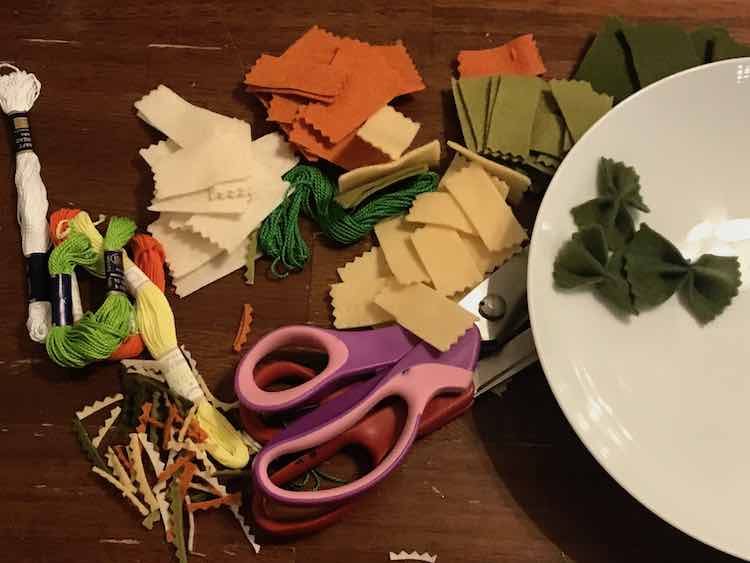
Do you have felt, thread, and a sewing needle?
If so you, or an older kid, could make simple bow tie pasta for their kitchen set. Depending on the color of felt you have it just might make you think you dropped actual real pasta on the ground as it looks that good.
Do you have a solar powered toy?
You could always sent up a simple science lesson on what solar powered means. We once bought a solar-powered dancing scarecrow from the Dollar Tree and I was able to explain why it dances and why it doesn’t to Ada. It also made a great dance with me toy.
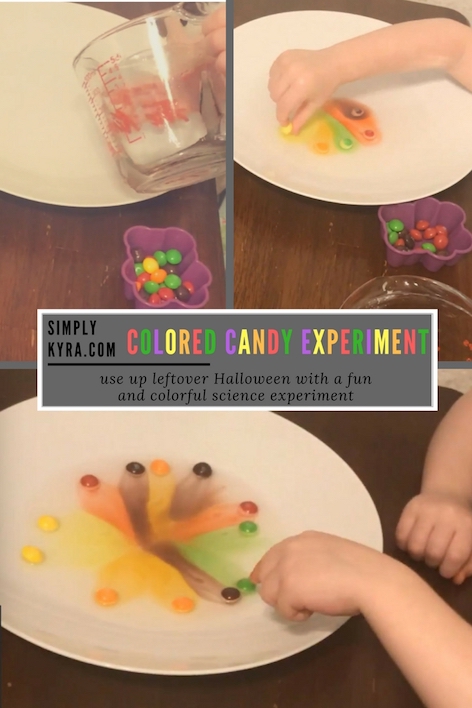
Extra candy?
If you have skittles or some other candy with a dyed outside you can add them to water for a cool color experiment. Word of warning my kids wait for the bottom to be white, as all the color leaches out, and then flips it so the other side goes white. They then declare it to be done and eats them. If you’re good with them getting sticky and eating candy this is an awesome way to get them to not be bored.
Flowers?
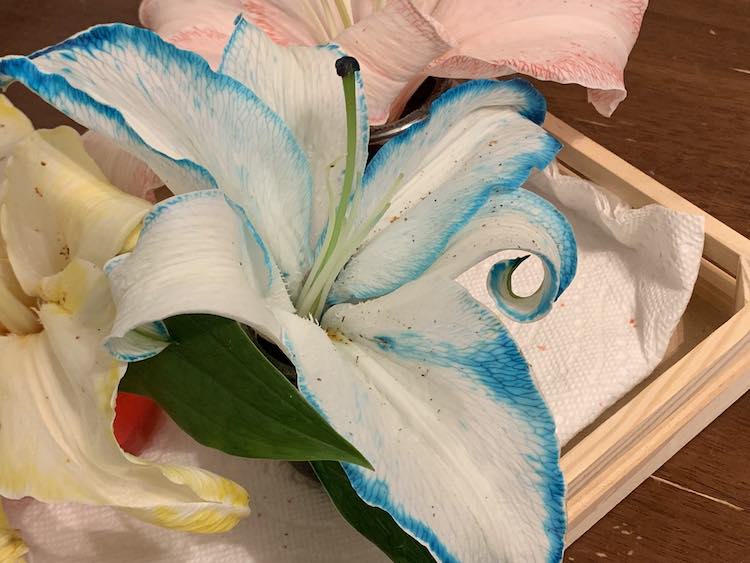
Do you have flowers on your patio or yard? If you have white flowers you could always use food dyed water to see if they change color. I tried this a couple times but they really worked last year when I had some white lilies. If you have any other flowers you could always take them inside and have the kids dissect them. I added in some scissors, tweezers, knife (I used a regular silverware knife last year), and magnifying glass and let them go to town and, mostly, treated it like a sensory bin. You could look up diagrams of flowers and go over it before and after so it becomes a biology class too.
Have a toddler (a.k.a. extra miscellaneous stuff)?
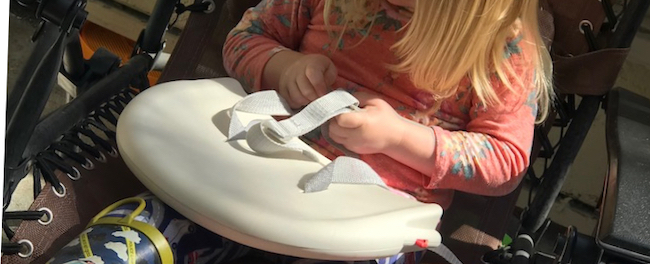
Do you have buckles laying around? I used the back insert of my highchair’s booster seat, once we didn’t need it anymore, for a while so my toddler could practice on buckling and unbuckling a three-point harness. Ada actually got jealous so I grabbed the umbrella stroller and they took turns sitting in the stroller or a chair buckling and unbuckling either the stroller or the highchair back. It was the best find ever that summer.
If you have bubble mix and your toddler keeps spilling it you could always use masking tape to attach it to the fence or a post so it’s accessible for them to use but hard for them to spill. The only issue I had with ours was the difficulty of getting the lid back on and refilling the wand through the small top when it was attached. Since the lid was hard it was often left off and the wands got rained in several times.

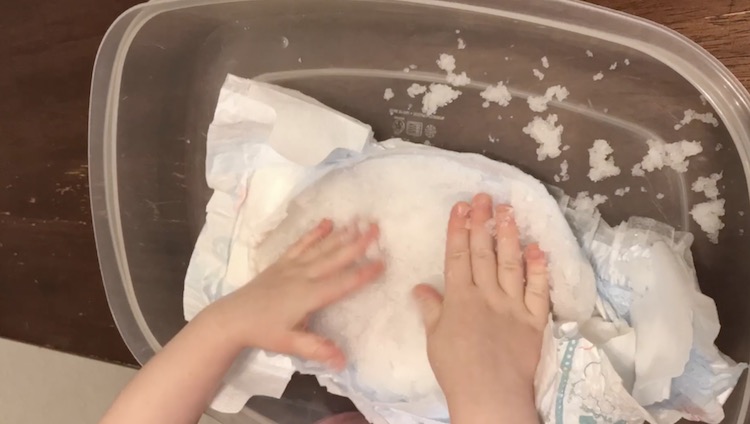
Do you have extra diapers? Guessing probably not, but just in case we once took a disposable diaper once and used the inside like snow in a sensory bin. Just a word of warning the interior of the diaper contains a super absorbent polymer (SAP) that is derived from petroleum so we were careful to only do this once and when we did it we added a bunch of water to the diaper first, before opening it, so no powder would puff out.
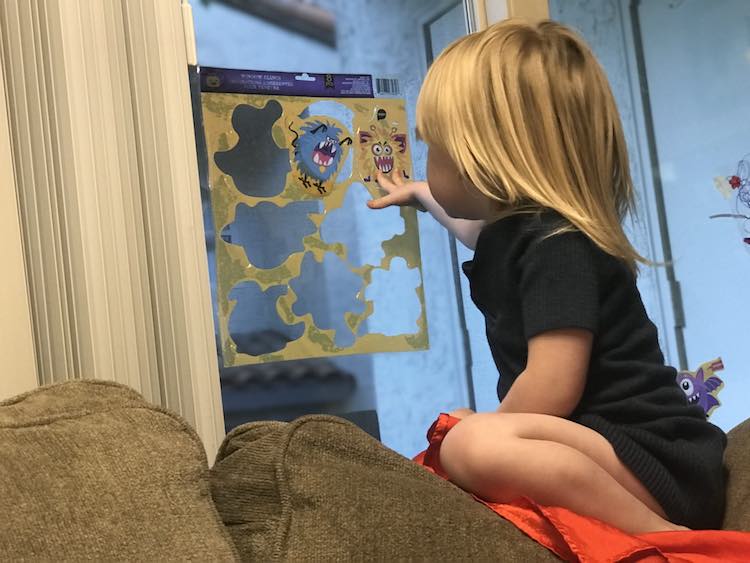
If you still have access to stores you could buy a sheet of window cling stickers. Make it simple with few stickers if your child is younger and once you get home they have a puzzle on the window using the stickers and the outer sheet together. Or better yet grab a sheet of magnets if you can find it. Then it can go on your fridge and I found it lasted longer in our household compared to the window clings.
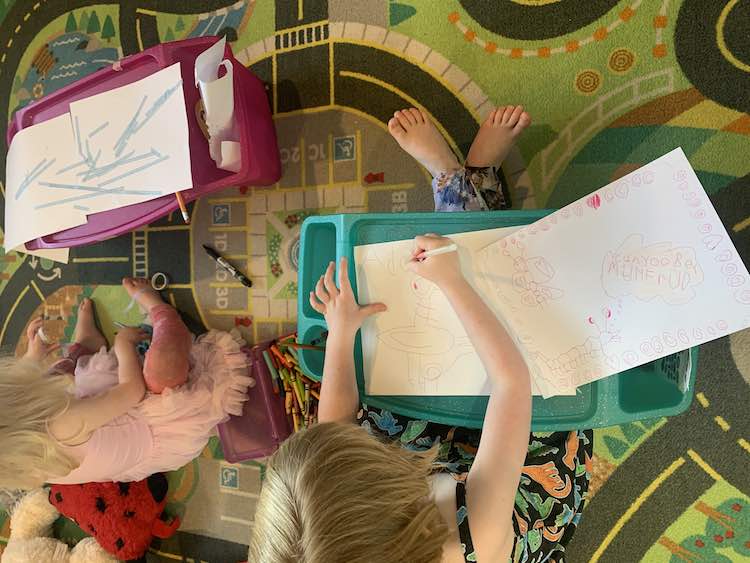
Do you want to do art? Here’s some general things we’ve done.
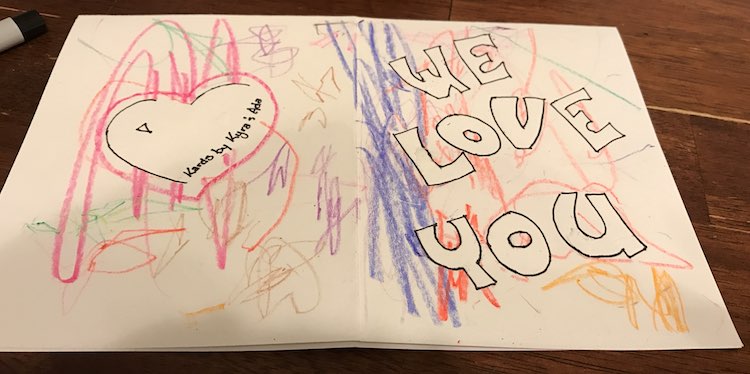
I know we probably don’t want to mail anything right now but I’ve posted several ideas on how to make cards in the past and you could always use the same ideas for art if you’d like. Is your child smaller but wants to color? I’ve used masking tape to create negative space on folded paper so Ada’s scribbles becomes cards with a unique background and words in block print across it. Another time, for Christmas cards, I attempted potato stamps and ended up getting only smudges. I used a sharpie to make the stamped objects look like Christmas tree ornaments hanging on a tree. As an aside if you’re trying to get your child be okay with making mistakes and turning those mistakes into something else I absolutely love the book Beautiful Oops by Barney Saltzberg. (Including links to a search on YouTube videos and the publisher’s book page.)
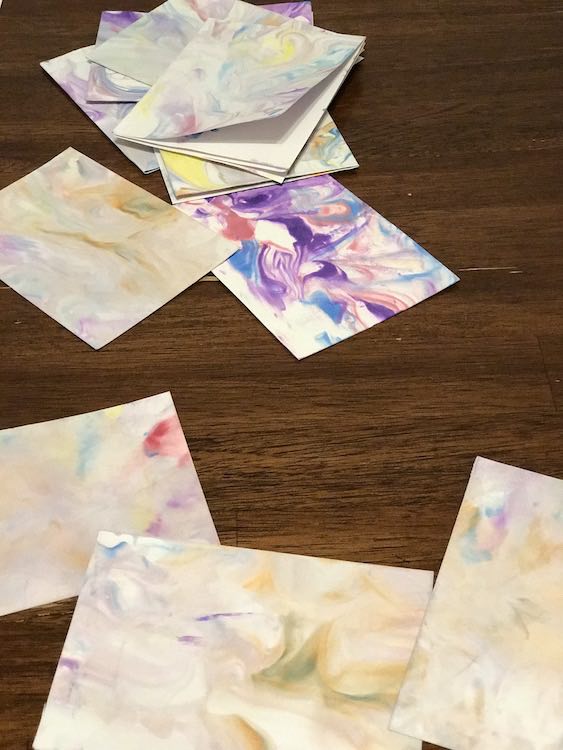
Do you have shaving cream hanging around? If you add watercolors, swirl it, and dip paper in it you can create some really cool feeling marbled paper.
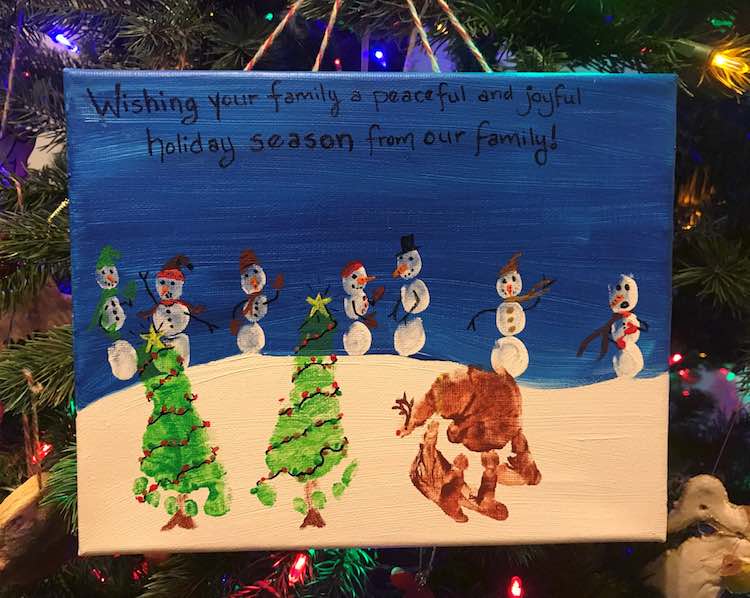
If you want to play with fingerprints, footprints, or hand prints I’ve made a bunch of seasonal canvases using acrylic paint and the prints. These were while my kids were smaller but I did them on cards or small canvas so you could always use a larger sheet of paper to make yours. For Christmas I made a Christmas scene using hand prints, footprints, and fingerprints that I put on cards and a canvas sign. Other canvases include Easter bunny footprints, hand and footprints for ‘loved’, turkey hand prints, and ghost feet.
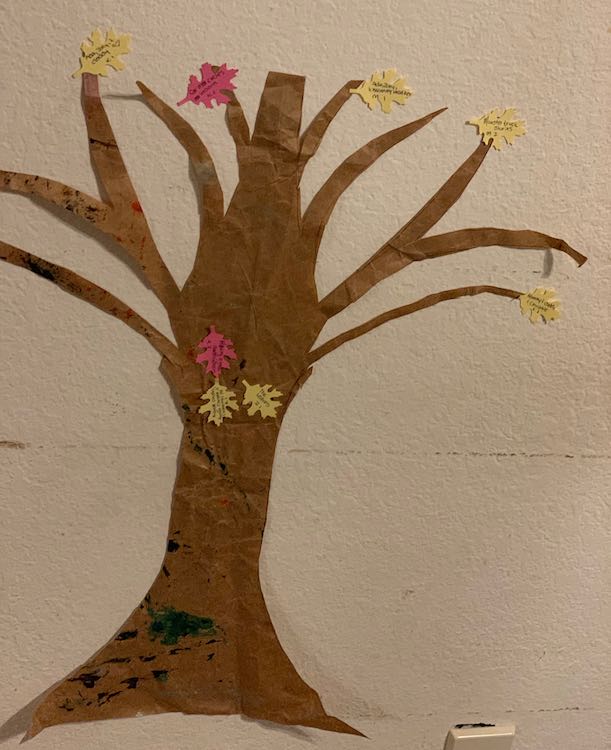
Are you hoping to infuse a bit more gratefulness into your life right now?
At Thanksgiving the last two years we created a simple paper tree and added leaves showing what we were grateful for. The kids loved it. I know it’s not Thanksgiving right now but I could see that being something fun if you want everyone to notice the good about their days. On that note I’ve been using an app called Grateful (link to Apple app store) where each day I add one thing I’m grateful for each day. That way every time I see the app on my home-screen or go into it I see the good things about my days instead of the bad.
I think that’s most, if not all, of my kid-specific sensory activities I’ve posted. I have menus at the top of my page if you’re interested in browsing through my science and sensory play options yourself. If you have a sewing machine I’ve posted a bunch of things I’ve sewn before under sewing machine although some of the smaller objects may work for hand stitching too. I also have general craftiness which includes some of the crafts listed above, some hand sewn projects, and others like dinosaur themed crazy hair and fixing the bottom of your dresser with a glue gun (which I just did again yesterday). I also have a section for food and desserts and a miscellaneous section including free at home workouts I use to de-stress. Oh, if you’re looking for some awesome animals on your television while the kids play or do homework another time when we were stuck inside I created a list of zoos and aquariums that offer live streams of their animals.
Here are some of the other fun kid things I’ve come across lately although I haven’t had time to go through any of the linked lists other than a brief overview.
- Mo Willems, the author of Don’t Let The Pigeon Drive The Bus!, is putting on a daily, on weekdays, noon art lesson through The Kennedy Center. On Tuesday the girls and I watched the first and second episode and they both loved it. The most recent episode is on The Kennedy Center‘s website along with downloadable drawing directions (at least I could only find the second episode to view and download and not the first on the second day), but you can find them all on YouTube too (link to the first day’s episode).
- A giant bullet list of ideas for being home with kids, in a Google document, from Princess Awesome & Boy Wonder.
- There’s this amazing Facebook post by Joy filled with resources on Facebook.
- We Are Teachers posted a principal’s, Kim Jones McClelland, list on 40 low-tech kid activities that are great for elementary students.
- What Moms Love website has 87 Energy-Busting Indoor Games & Activities For Kids (Because Cabin Fever Is No Joke) on their website.
- I loved listening to Patty Shukla as the kids grew up. She has free videos on YouTube and I listen on Apple music, but I also noticed, on her Facebook page, that she’s offering, paid, online music classes. Makes me wonder what other children’s artists might also be offering something so it doesn’t hurt to check out your favorite artists’ websites.
- After coming across Patty Shukla I looked up the Laurie Berkner Band, my other favorite, and found educational videos steaming on her site.
- Playbill posted 15 Broadway Plays and Musicals You Can Watch On Stage From Home.
- Here’s a list, through Travel + Leisure, of 12 famous museums offering virtual tours. If you have a favorite museum, zoo, or aquarium that you wish you could visit why not check online. See what they have on their website or look them up on YouTube or Facebook.
- There’s a list of educational companies offering free subscriptions due to the schools closing. They used to host the list on Google Docs but it got too large so they put it on it’s own website. It looks like you can submit new items through a google form, if you find something that isn’t on the list, so I’m guessing it’s constantly changing.
- Cambridge University Press is making over 700 higher education textbooks on Cambridge Core available for free until the end of May 2020.
- There’s also the Internet Archive offering “millions of free books, movies, software, music, websites, and more”.
- Check out your favorite Facebook groups or see if there’s a mommy, or general group, for your area. I’ve seen idea sharing lists in a bunch of my fabric and sewing groups along with my local mommy group. And of course there’s NextDoor if you haven’t joined yet.
Updated to add:
- We recently came across Science Mom on YouTube. I loved watching her 5 facts every kid should know about the coronavirus with my kids and I’ve also watched 5 facts everyone should know about PANDEMICS by myself. The main reason I’m adding her to my list are her past videos and her live 2 hour live-streaming. My kids have only watched the first day at this time but it was amazing and it’s definitely on our list of things to watch.
Hope you aren’t feeling too shut in right now. If you come up with any other great ideas I’d love to hear about them in the comments below. I also have a Facebook page, an Instagram account, and an email list where I update you with any new blog posts if you’re interested. I hope one of these ideas help you out and the rest of your week goes well. Stay safe out there.
Did this save you time?