

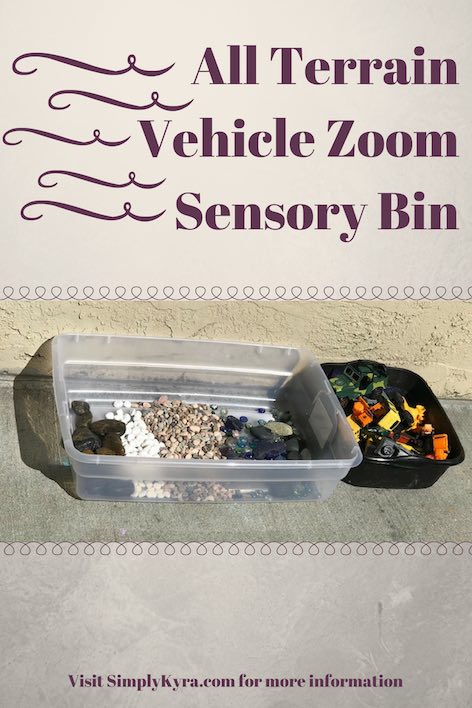
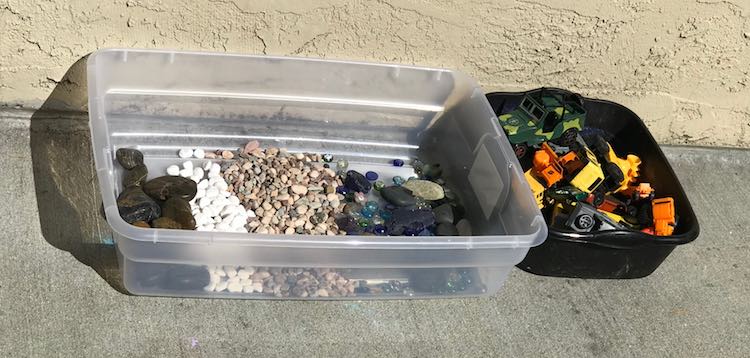
All Terrain Vehicle Zoom Sensory Bin

As Zoey’s 2nd birthday approached I had a vague idea of what I wanted to do outside, but waited until after we visited the local Dollar Tree to cement my plans. While there we came across a lot of vehicles which both the kids love. I decided to replenish our outside vehicle supply and unleashed the kids to pick their favorite vehicles. I then added bagged rocks to make an all terrain vehicle sensory bin for the kids to zoom the vehicles over. Of course if you’re dealing with younger children that still put found objects in their mouth you will have to watch them with the rocks.
Materials
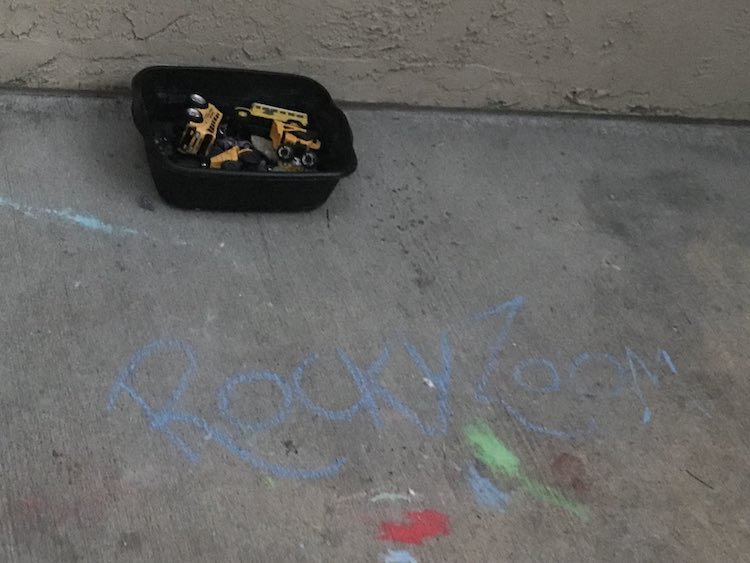
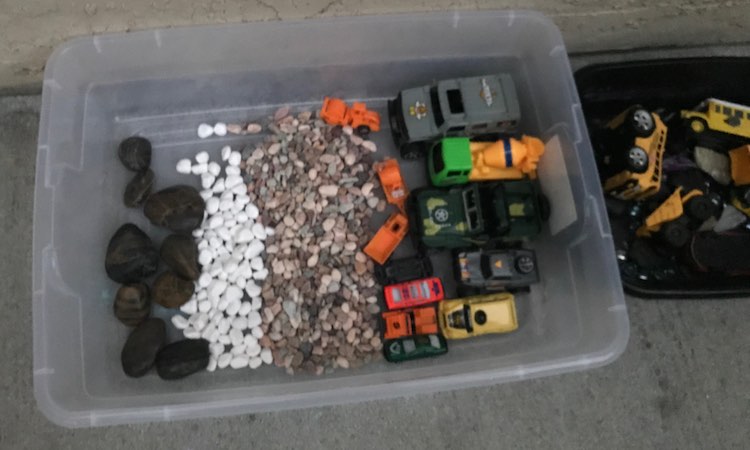
- Many vehicles – I bought them from the local Dollar Tree so I wouldn’t mind if they broke and they were fine getting wet
- Rocks to drive your vehicles over – These were a mixture from the Dollar Tree and previously bought rocks through the floral department at Michaels. The odd glimmer is a glass pebble that you’d buy to fill a vase
- Bin if you want to attempt to keep your rocks contained – bought for Ada’s 3rd birthday the previous year from WalMart in the storage area
- Optional container to hold the excess vehicles when not in use
- Anything else you can think of
After buying and setting aside the vehicles and rocks I had to wait until closer to the party to set up. As the kids were going to be too busy to go on the deck the day before and there was no chance of rain I actually did the preliminary set up two nights before the birthday party and then moved all the new items outside the night before. The first night I set out the mix of old rocks and vehicles in an extra bin (dishwashing bin from the Dollar Tree last year) and used sidewalk chalk to mark out the title of the vehicle zone. I figured this way it was set up and easier for me but if for some reason the kids went on the deck it didn’t matter because it was all the old toys.
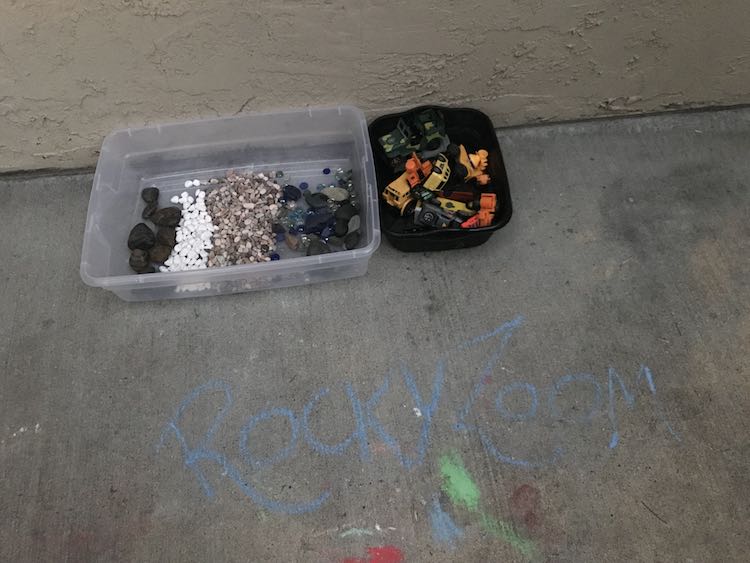
The night before the birthday party I brought the new vehicles and rocks outside to set up. Originally I made rows of the rocks and put the new vehicles in the bin beside them. I then remembered our mixture of rocks we already had so moved the new vehicles into the extra bin with the old vehicles and added the mixed rocks to the main bin. I figured this would be perfect since if there was only one person playing they could chose their favorite vehicle and zoom it over the rocks without the other vehicles in the way. I then put the lid back on the bin so the sun wouldn’t directly heat up the rocks in the morning. This also helped block the view just in case it can be seen from inside.
Then right before the party started you can take the lid off the bin and it’s all ready to go. If I were to do this again the only thing I might’ve changed was to try to find a spot more out of the sun for the rocks.
I don’t have any photos of this being played with, but I do know that some of the rocks joined the sinking category from the sink or float sensory bin. Overall, it was a great bin and the vehicles were able to zoom over the deck and into the other sensory bins as well.
Extending Play
- Take some sidewalk chalk to draw roads on the cement. Depending on the age of your kids you can either draw it out ahead of time so they can fully enjoy the road maze or start it out and leave out the chalk for them to finish. I wonder what types of buildings they might add to the side of the road? Will there be bridges?
- Instead of smaller rocks you could use smaller items like sand or dirt.
- You could also go bigger depending what’s already in your yard and get the kids to drive over large boulders. Maybe even build on the previous point and add a road to your boulder.
- Why not make a race track or some other more creative scene with the rocks or dirt.
- If you’re looking at investing in a new toy for your kid’s outdoor space you could take bricks or wooden planks cut to size and draw a dashed line on them so your kids can create their own larger roadway. MamaPapaBubba’s Instagram account shows using bricks with yellow dashed lines on them though I could see long pieces of wood balanced over to taller items for a bridge too.
I hope you enjoy this sensory bin idea. I would love to see how simple you keep yours or how complicated it got. Feel free to reach out with what you did in the comments below, on my Facebook page, or through Instagram.
Did this save you time?