
Shaving Cream Marbling

A while back I tried paper marbling using shaving cream and watercolors after reading about it on Jean Van’t Hul’s website The Artful Parent. Ada and I had a blast and were able to make some pretty amazing cards. Afterwards I set aside the videos and photos I took that day and never got around to posting them as it seemed a bit repetitive. Last year I remembered the shaving cream marbled cards we made and pulled it out to do again. Ada and Zoey’s marbled paper turned out great and I kept meaning to share this with you in case you were also looking into marbling or making gorgeous cards.

Materials
Any of the below items that include a price were bought from the local Dollar Tree while the other items I already had on hand.
- Poster board (2 for $1)
- Short disposable cake pan (2 for $1)
- Shaving cream ($1)
- Spatula ($1) to scrap off the shaving cream
- Watercolors
- (Optional) Variety of other paper like cardstock or printer paper to make cards
- (Optional) Scissors or X-Acto knife to cut the poster board
To do the shaving cream marbling you need to grab a container or tray that’s wide enough to hold the paper you want to marble and shallow enough that the edges don’t get in your way. You then fill the container with shaving cream. Since the shaving cream expanded once it came out of the can I found it best to spray it back and forth leaving spaces between the rows. If it doesn’t expand enough to cover the blank spaces you can always go back and fill it in.
Next you drop the watercolors onto the shaving cream. On The Artful Parent post she used plastic pipettes but since I was keeping the paint under control to minimize mess I instead dripped it directly from the bottle instead. Then you grab a stick, chopstick, or something long enough and swirl the colors around. The second time around we used paper straws which I don’t recommend as they got soggy quickly.

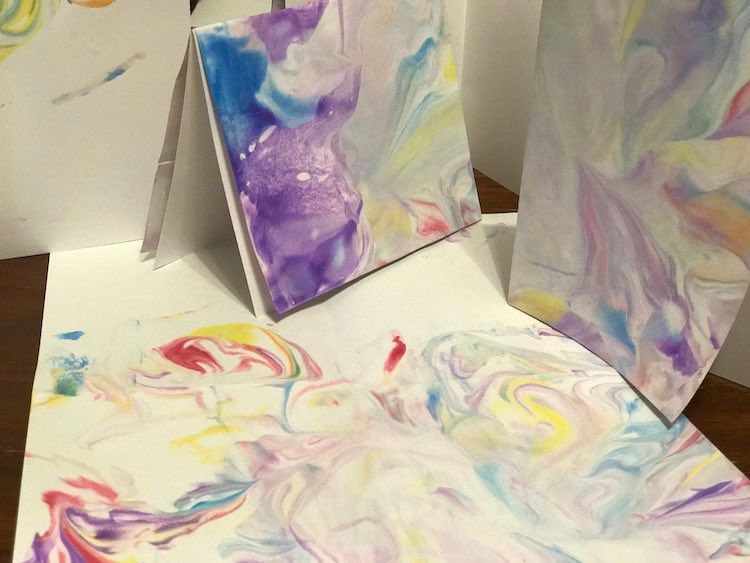
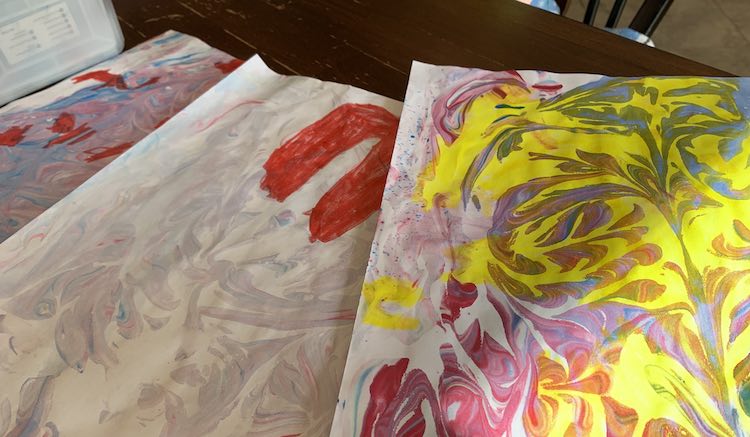
Once you like how the watercolors look you can take your paper and lay it overtop of the shaving cream. You need to make sure it fully touches the watercolors otherwise you’ll get blank spaces on your paper. Once you’re happy remove the paper and scrape the excess shaving cream off of the paper. The watercolors and a residue from the shaving cream stay behind on the paper and leaves it gorgeous. I then continued taking each of Ada’s paper once she was done, scraping off the shaving cream, and hung each one up to dry.

While drying the paper curled a bit so once it fully dried I folded them back into their card shapes and placed them under a stack of books to help flatten them.

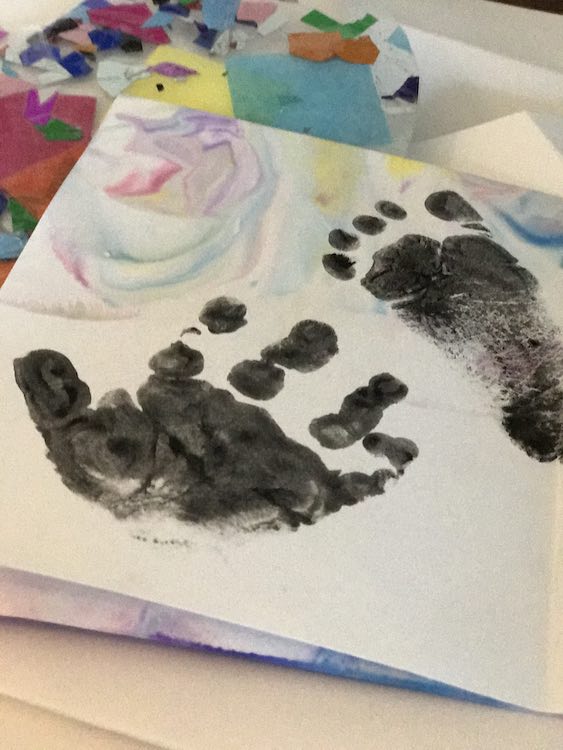
Since these cards were to be from both Ada and Zoey I grabbed a black stamp pad and stamped Zoey’s hand and footprints to the cards so each one would have a piece of both girls.
The previous marbling was done years ago by Ada with my help while Zoey napped. Last year, with Mother’s day and my sister’s birthday approaching, I thought to pull this out again. Even though I had two girls doing it instead of one it still worked out. Instead of hovering helping Ada I let them be more independent this time around. I still sprayed the shaving cream and dropped the watercolors but they were on their own swirling and doing the paper. After they finished each paper they set it aside and I went around swiping the shaving cream off before setting the paper aside to dry.

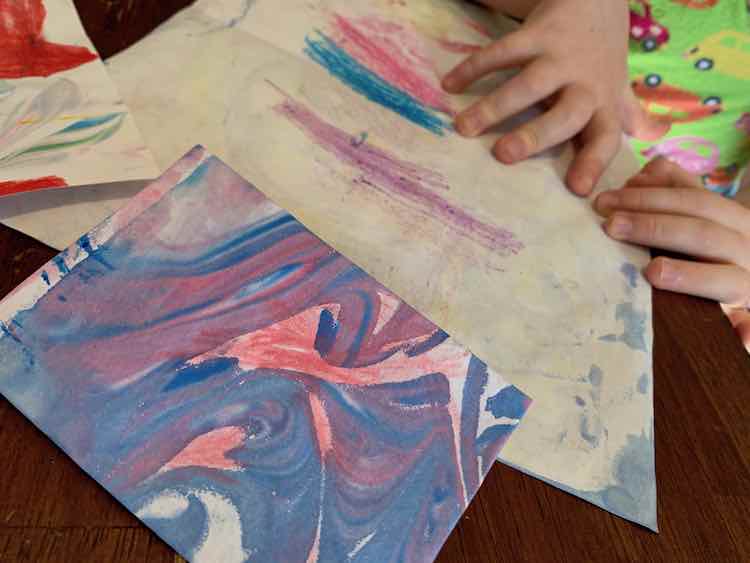
The first time around I had clipped the damp paper to our art-line with clothespins but I hadn’t put the line back up after we moved so this time around I set the paper on cooling trays or on an unfolded cardboard box. Once dry I folded the cards and let the kids go to town coloring them. Again, if they curled you could always put something heavy on them so they flatten into their proper shape.
After we were done marbling the paper, while we waited for them to dry, I added water to the shaving cream in the kids’ bins to create a fun sensory play bin. Once they got tired of that I dumped out the contents of the bin and switched it out for plain water.

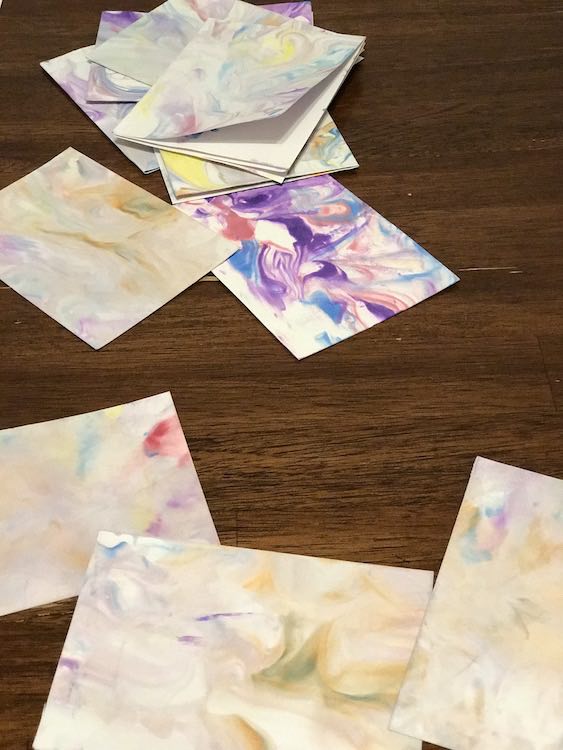
I love how each card comes out so unique looking and I especially love how they feel as the shaving cream leaves a film on the surface of the paper. This is a project that’s easy to get the supplies for and makes for an amazing finished product; however, you do need to be present with younger kids so I somehow keep putting off doing this for awhile each time.
Looking back at our first attempt I realized I could’ve used a smaller cake pan as the whole surface area wasn’t used so some of the marbling was lost with each dip, but other than that the depth of the cake pan was perfect. I had debated using my baking pan but I figured with a toddler I didn’t want to have to worry about it breaking. I was also out of cardboard during that time so I used a plastic spatula to scrap all the shaving cream off the card. In contrast, the second time with both girls, I used our plastic sensory bins with higher sides and a piece of cardboard to scrape the shaving cream off. I noticed as time went on the cardboard got soggy and I had to grab a new piece of cardboard so a spatula may have been better if I had remembered that.
For the paper the first time around I used poster board cut down in size to make inserts for cards but later decided to instead cut the marbled poster board into heart shapes for Ada to play with and glue down. I also pre-folded some cardstock so we could marble one of it’s sides and then turn them into greeting cards. The second time around I used plain computer paper and it still worked out great.
If you want to do this again my source for the shaving cream marbling was The Artful Parent. I’d love to hear from you whether you tried this or not. Feel free to share in the comments below, on my Facebook page, or through Instagram. I hope you have a great day and the paper turns out amazing!
Did this save you time?