

Our Amazing Halloween Costumes: Zoey's Black Cat

Last year, while figuring out Zoey’s black cat Halloween costume while shopping on Joann’s website, I came across several cute kitty headbands along with a spool of two inch fur trim that I knew would make a perfect cat tail. I combined those elements with some black knit fabric I already had on hand and some black store-bought staples to create the perfect costume!
Backstory and Overview
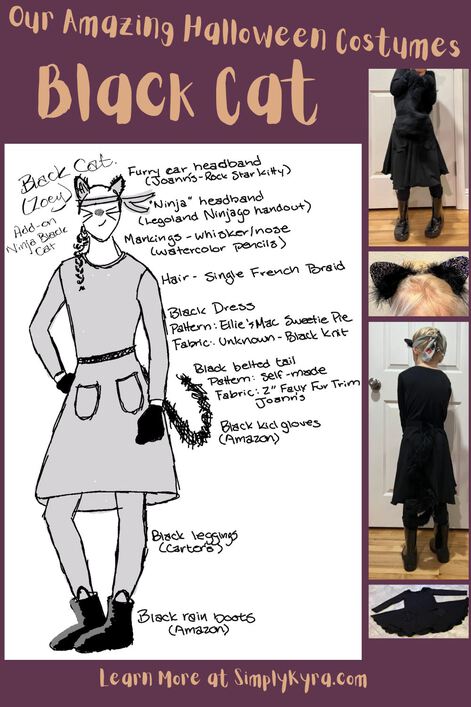
From the beginning Zoey knew exactly what she wanted to be for Halloween. The only variation, over the month or two leading up, was specifying her hair style and adding a LEGO® ninja headband. Both of these elements were dropped on the morning of Halloween so she basically went with her first idea. After jotting all those individual elements into a single note on my phone I then decided to sketch out the final plan taking into account all the elements Zoey had listed. I was able to then show her the sketch to triple check that our visions matched up and I wasn’t forgetting any pivotal steps. This sketch was officially Zoey approved and I’m now sharing it for you here:

The Parts of the Costume
Here’s where we bought some items and how we assembled the rest to create this costume.
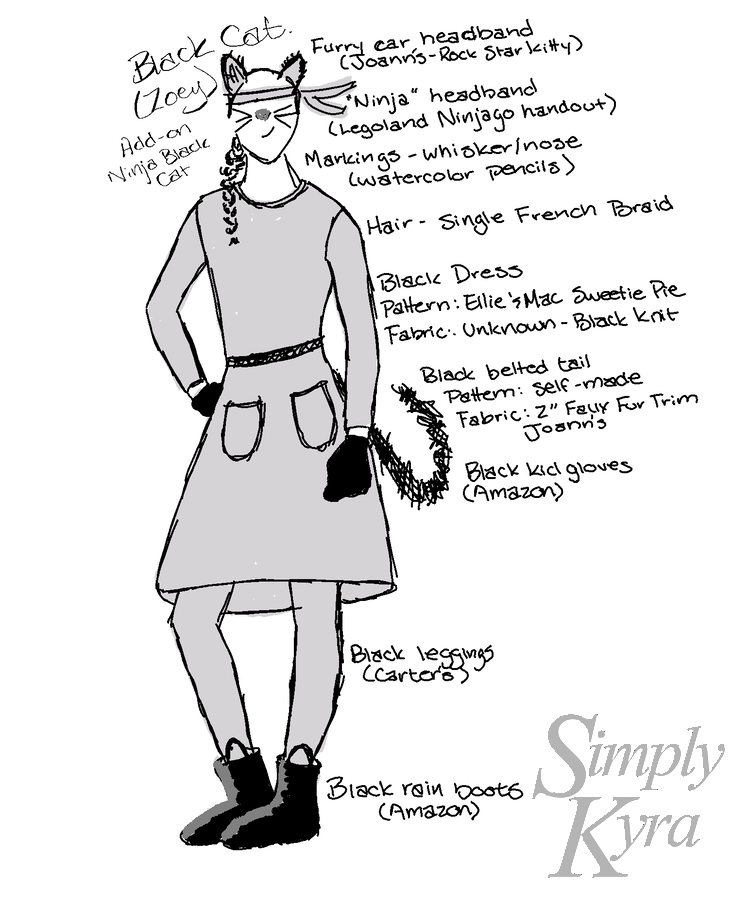
Black Dress
- Pattern: Ellie and Mac Sweetie Pie Tunic and Dress
- Fabric: Unknown – Thin Black Knit bought previously
Zoey’s favorite two dresses are both Ellie and Mac’s Sweetie Pie Tunic and Dress pattern so when I found out she wanted to be a black cat I knew this had to be the new cat outfit. I decided to go with a simple thin black knit I already had in my fabric stash. Then, while cutting the fabric, I made sure to also include the optional pockets and then, momentarily, considered adding a cute cat decal or something sticking out from one of those pockets. I put off the work of adding a mini cat which I’m so glad I did as later, when Zoey saw me cutting other fabric with cats on it, was appalled at the idea of it being for her as a cat can’t have a cat on it’s own skin!


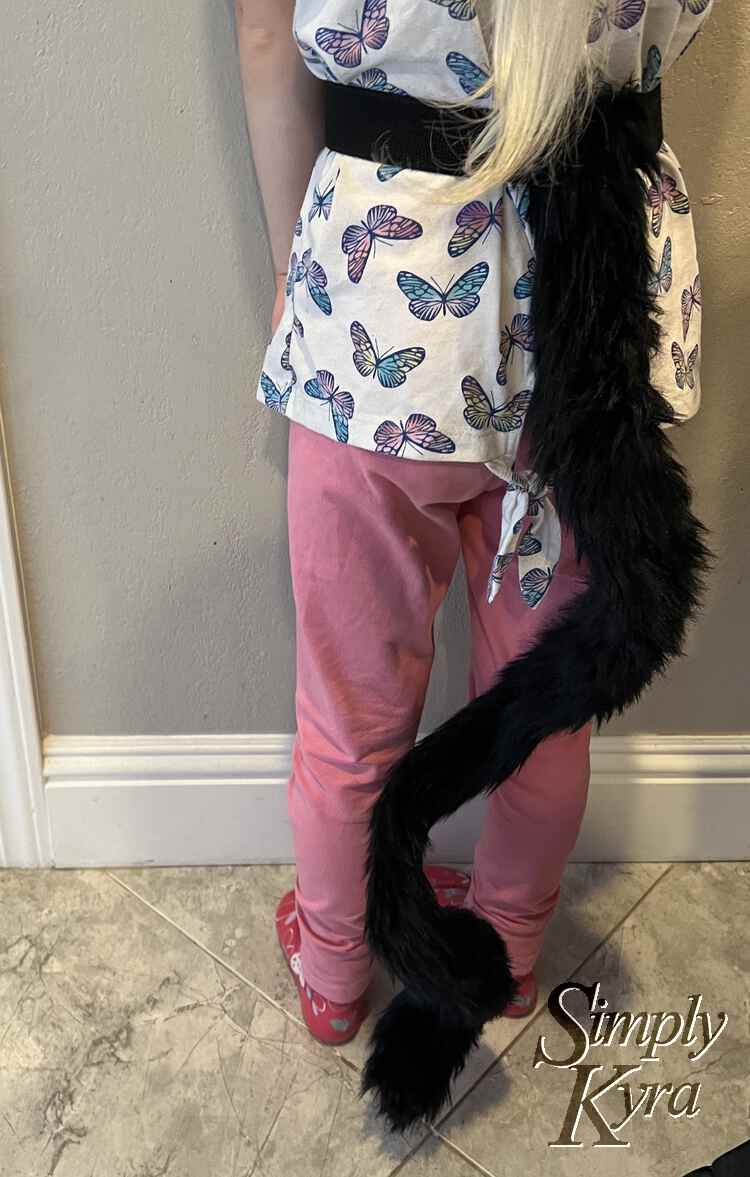
Tail
- Materials: wire, faux fur trim, and elastic
- Pattern: Made it up myself and posted it under Our Amazing Halloween Costumes: How I Made a Custom Cat Tail
I knew going into this costume that I had to make a tail but wasn’t quite sure how to approach it. One thing led to another and this incredible tail was born which even fits me! I’ve previously gone over how I put it together so you can check it out here.
Purchases
Through Amazon we purchased black rubber boots and kid gloves. Our go to place for leggings is Carters so when I realized we might not have black leggings I jumped on there too. While looking on Joann’s website for fabric I came across these adorable headbands with kitty ears already attached. I let Zoey choose and she went with the furry and sparkly Rock Star ones over the alternative lacey option.

Whiskers and Nose
- Materials: Watercolor Pencil Crayons
I bought a tin of water color pencil crayons years ago when I was still in middle school. I’ve since used them when I need whiskers or really anything else by dipping the tip of my pencil in running water and using it to draw directly on my face. This time around I put off looking for them, discovered my black was missing, pivoted to using an eyeliner or something, realized I no longer own any, and, after several other options, finally went back to the watercolor pencil crayons but switched to brown rather than black for the whiskers. Zoey was fine with the brown but chose to only have the whiskers before school, but later after seeing other cats around school decided to add a pink nose before trick or treating.
Final Costume
I absolutely adore how adorably cute this costume turned out! Zoey absolutely loved being a black cat.


I absolutely adore how most of the costume elements can be worn on their own throughout the year without anyone thinking Halloween… especially after the time spent on the previous year’s Princess Skateboarder that wasn’t worn once after the main event.
I hope this helps you out whether you, or someone else, wants to be a black cat or something else. If it does I’d love to hear how in the comments below. Either way I hope you have an incredible day!
If you’re interested in getting any of my future blog updates you can join my email list located right under the search bar or underneath this post.
Did this save you time?