

My Adorably Deviled Easter Egg Chicks

Last year, sometime before Easter, I came across the most adorable deviled egg chicks online. I lost track of that particular recipe but on Easter when the kids started dying eggs I knew I needed to make them. That afternoon, as suppertime approached, I looked up random deviled egg recipes and went for the most boring one hoping the kids would like it the best before whipping up these wonky but oh so adorably cute chicks. I had to share in case it's something you and yours would love too.
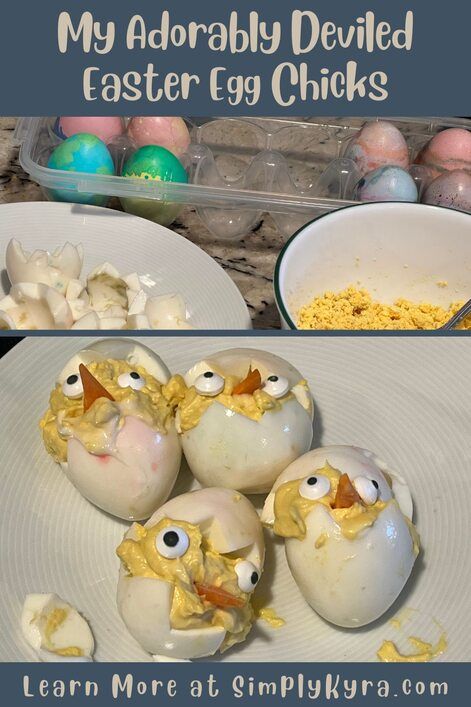
Last Easter, as the kids dyed eggs, I remembered some adorable chicks I'd seen online and wondered if I should try my hand at making them. As suppertime approached I realized why not and jumped into gear finding a carrot, locating the last of the eye sprinkles, grabbing four decorated eggs, and quickly looked up a deviled egg recipe so I'd know what to do with the yolks. I wanted a recipe that was simple as my kids can be picky so I ultimately decided to only mix up the yolks with mayonnaise and some mustard for the color. With a vague plan in place and my tools assembled I got to work.
Word of warning: Earlier Ada had declared which egg was her favorite and that she wanted that one for breakfast. Luckily, I had also determined which one was Zoey's favorite too so I knew to leave those two alone and I confirmed I could use any other egg before charging ahead.
After selecting my eggs I carefully peeled them before carefully cutting a zig zag pattern along the center of each egg with a steak knife. Once cut I carefully wiggled the two halves until they came apart making sure to keep an eye out for any connected points. With the one half completely free I next carefully wiggled the hard yolk out of the other half. The two white shell-looking halves were placed carefully on a plate while the yolks were dropped into a bowl. Once the eggs were all cut I grabbed a fork and started mashing the yolks to make the deviled egg mixture.
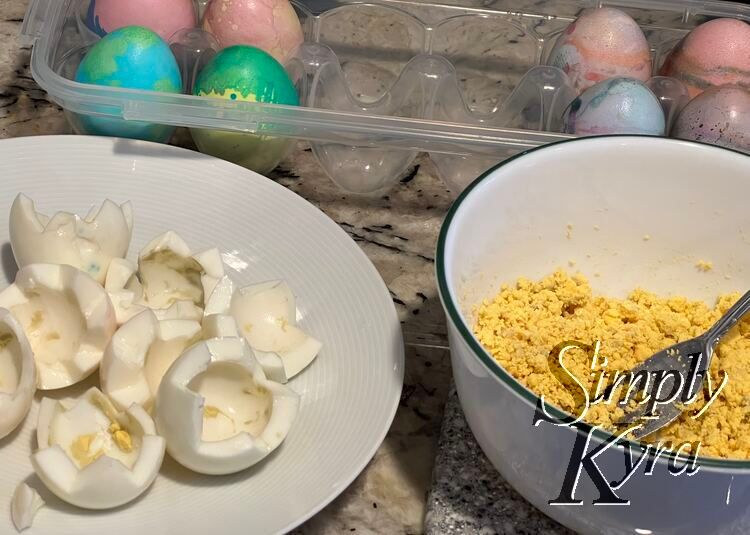
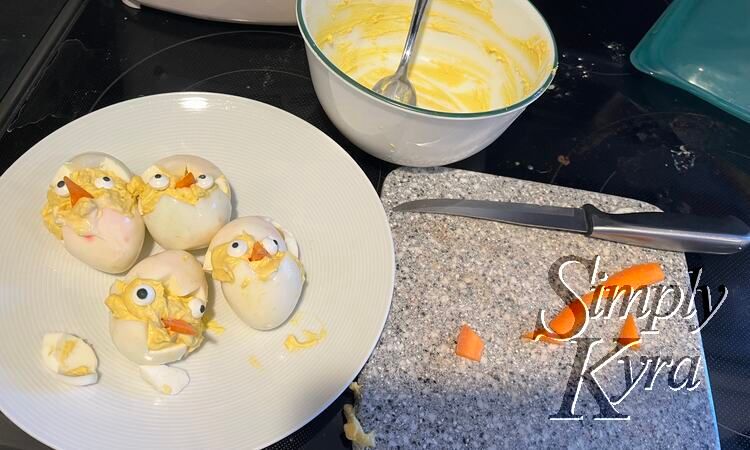
Now it was time to make the deviled egg mixture! I knew the kids were picky and wouldn't want anything too adventurous so I only added mayonnaise with a bit of mustard for color. After mixing the ingredients together I paired up the egg halves and carefully put a quarter of the mix into each of the four bottom shells before closing it up with the top shell. Unfortunately, these didn't stay standing up so I had to lay them back down on the plate.
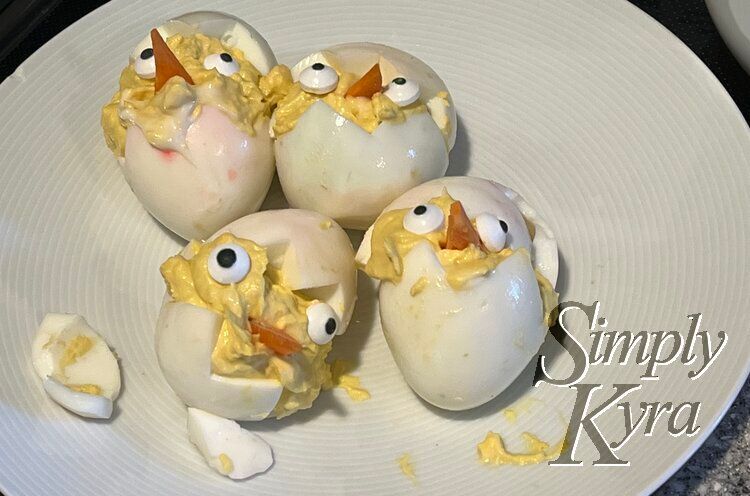
Once the chicks' bodies were made it was time to add the embellishments. I carefully cut one of my carrots into small triangles and gave them chick its own beak. For the eyes I went simple with some leftover eye sprinkles I had saved for special occasions such as these. And with that the devilled egg chicks were done!
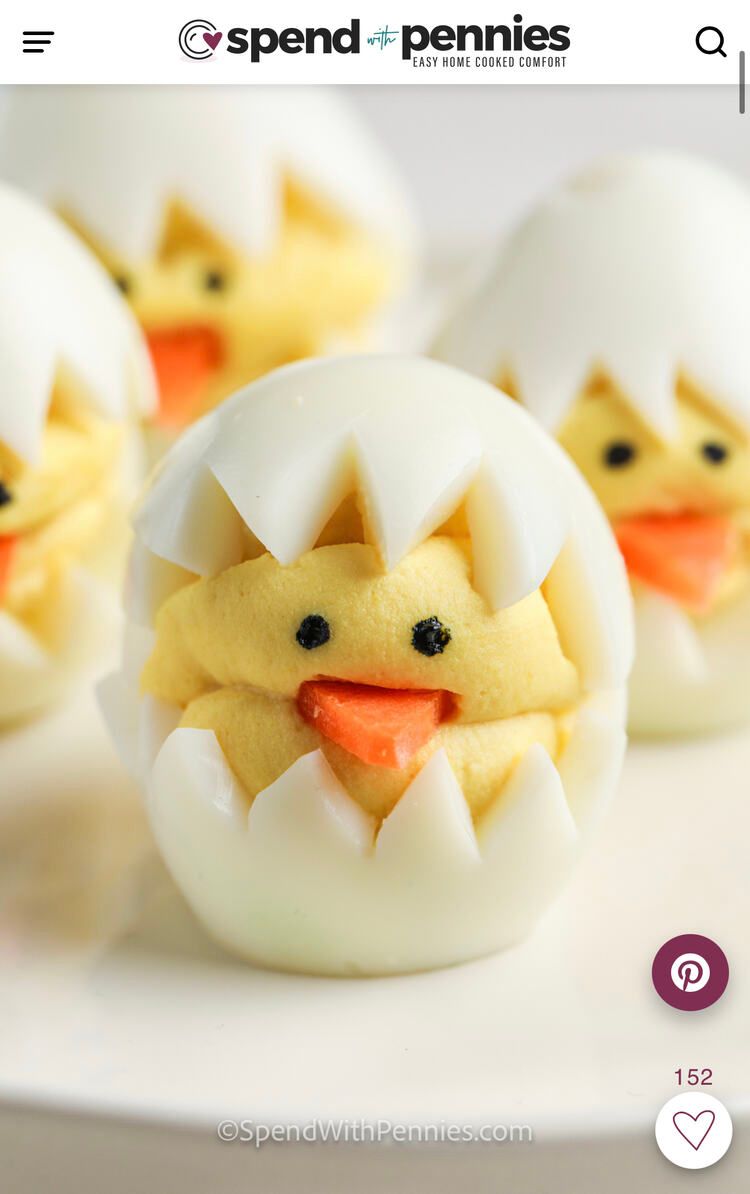
I searched online after the fact to find the original recipe I vaguely remembered. Their photo is so much more adorable than mine and their eyes work so much better for their face. In case you're interested you can find them at Spend with Pennies where she uses hard-boiled eggs, mayonnaise (use less than normal to make it sturdy enough to hold the to shell), mustard (for color), beak (carrot), eyes (chia or hemp seed, bit of black olive, or black food coloring), and lettuce if you want Easter grass to serve.
I'm so glad I came across this chick recipe as it was simple to make and the girls loved it. My kids love dying eggs but don't eat too many of them so this was a perfectly adorable way to use some of them up.
When making these the kids weren't actually in the kitchen so I ended up rushing the process so I could finish and surprise them before they wandered back in. Once I finished I called them over and as they were coming realized I had only made one each... and didn't have anything else for supper. Thus these were paired with a hastily thrown together snack tray and it was a perfect Easter dinner!
Whether this is planned or quickly executed like mine I hope it helps you out. If you do make them I'd love to hear how it goes, what recipe you used, what you used for the eyes, and if you made this for Easter or some other occasion.
I hope your week is going well and you're having a great day.
If you’re interested in getting any of my future blog updates I normally share them to my Facebook page and Instagram account. You’re also more than welcome to join my email list located right under the search bar or underneath this post.
Did this save you time?