
Ada's Epic Wonder Woman Halloween Costume

At some point during kindergarten last year Ada was introduced to super heroes and decided that Wonder Woman was the best out of all of them. Slowly, since then, her love of Wonder Woman has grown until she eventually told me she wanted to be Wonder Woman when she grew up… and for Halloween. I, personally, don’t know what’s going to happen for Halloween this year but I do know that I’d love to have more awesome outfits in our dress up drawer to choose from so I told her yes and immediately started planning on how to make it happen. Luckily, before I started I stumbled across the perfect costume at our local Costco. I wanted to share this costume, along with what we added to it, sooner, rather than later, in case the costumes get bought up quickly.
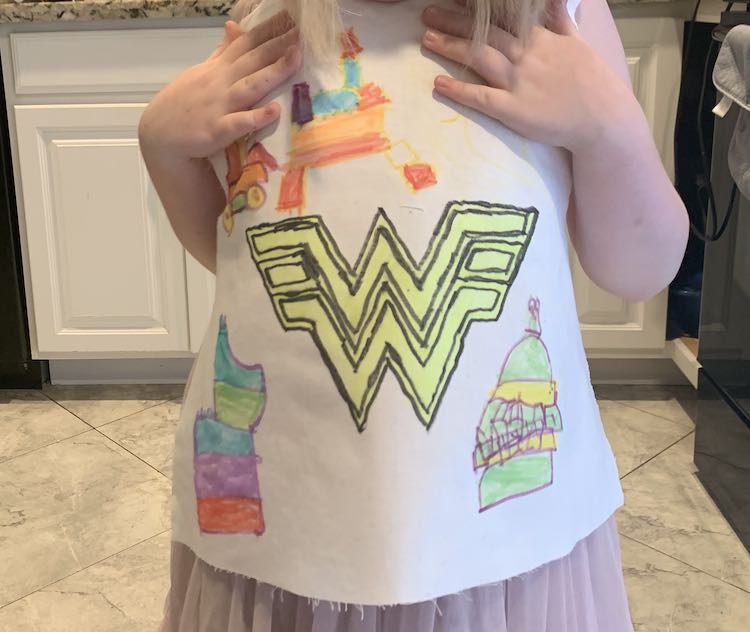
In addition to Halloween this year Ada also wanted to dress up as Wonder Woman for her birthday party so I knew I had to jump on creating her costume early. I started planning out what to do and looked for the iconic blue knit fabric with white stars on it in online fabric stores. The only fabric I could find that I liked was either swim or a cheap costume spandex that I didn’t see being comfortable to wear day in and day out in case this became the new favorite outfit. In addition I was also having difficulties coming up with how to make a detailed top. I considered using white cotton fabric with the Rebecca Page Olivia top so I could design her shirt with all of the needed details using fabric markers. Luckily, at this point, I sat down with Ada and started showing her my plans just to find out her vision of the top was a simple red shirt with the W logo on it. She did love my blue skort (connected skirt and legging) idea and, while looking at Wonder Woman’s photos, we decided to use her red shoes instead of the Wonder Woman boots. Overall way simpler than I had thought and I’m so glad we went over the costume idea together before I got too far in the process.
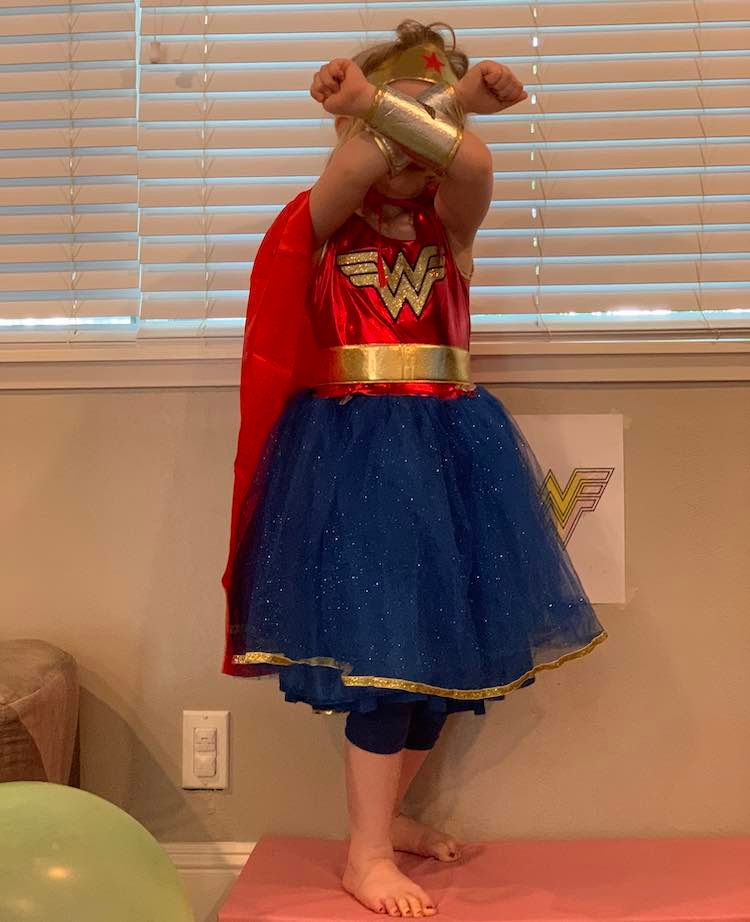
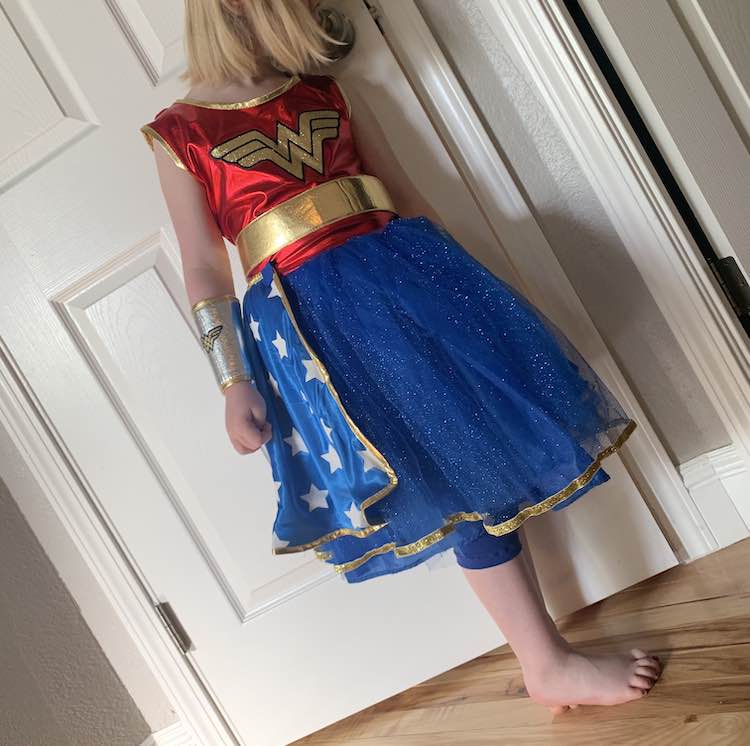
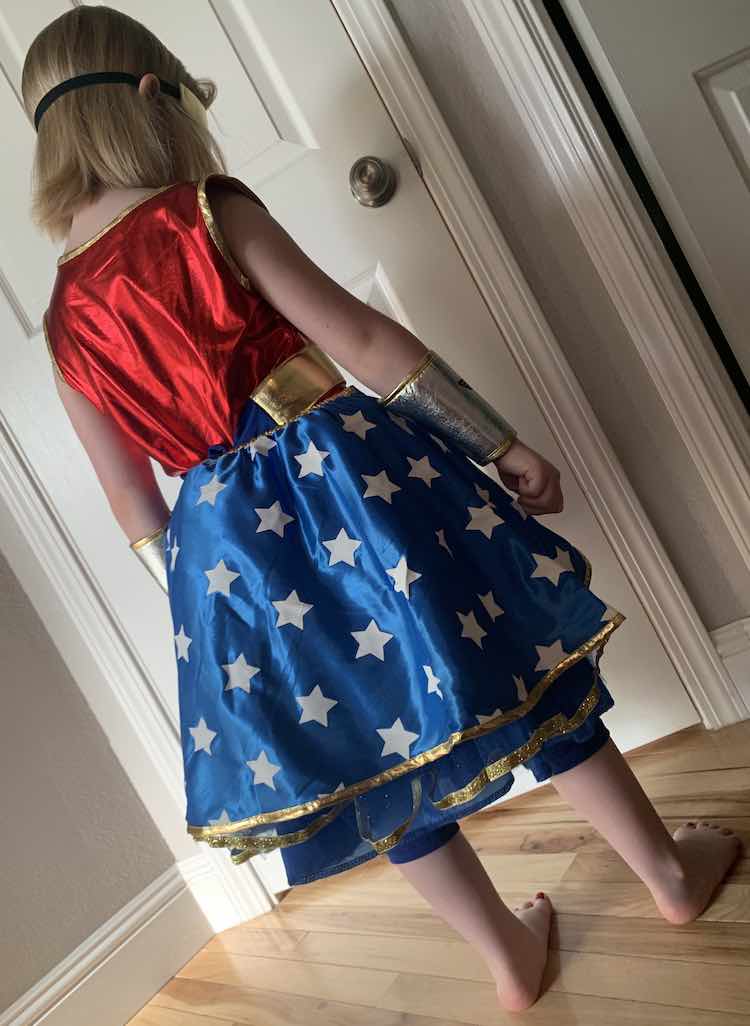
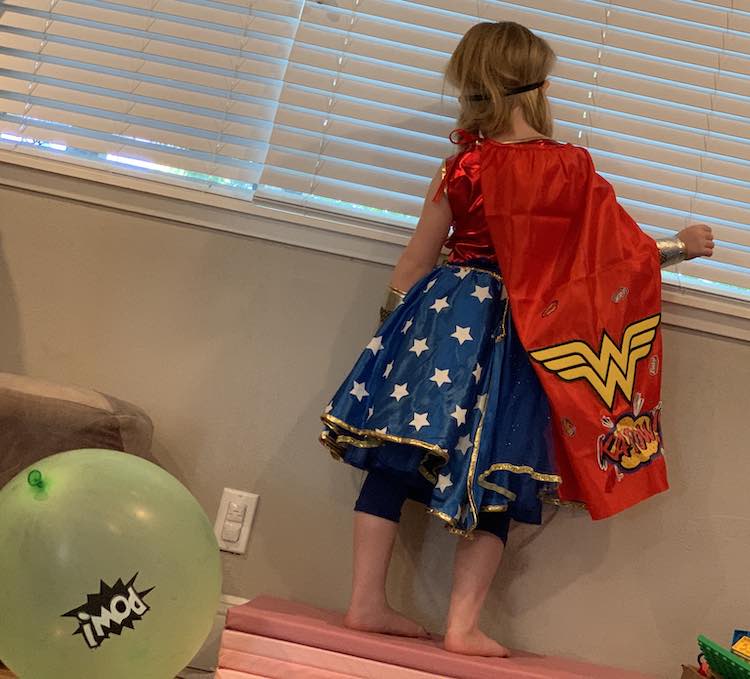
This story then gets even simpler as before I ordered fabric or started working on anything I ended up finding the perfect costume at Costco; about two weeks ago. The one time I was super excited that the Halloween stuff coming in early. I ended up agonizing, off to the side, about which size I should get and even brought up the sizing guide on the Rubie’s Costume Company website before I finally made myself choose. When I got home Ada was ecstatic and I, as I wasn’t sure how best to launder it and I didn’t want to wreck it before her party, then put the costume into a one week quarantine just in case. Ada finally got to try it on a couple days before her party and I was pleasantly surprised to discover that it also contained more accessories than I had realized making it even better.
As the main costume was essentially just a dress I went ahead and made Ada the skort so she could wear it under the costume or with something else in the future (like her first day distance learning). Since the dress was going to be hidden I dug through my fabric stash and found two different blue knit fabric remnants and used them instead of buying new fabric as I didn’t need the skirt to be starred anymore. In the end I used the more structured and darker knit fabric to create the leggings, reaching right below the knees, using the Apostrophe Patterns’ MyFit Leggings. Before sewing the waistband onto the pants I purchased and used the Apostrophe Patterns’ Circle Skirt Generator to create an above the knee skirt, using the lighter fabric, and then serged the three pieces together, sandwiching the skirt between the leggings and waistband, to create a custom fitted blue skort.

At this point we tried on the costume and leggings and discovered all the cool accessories the costume came with. Ada loved how it all fit!
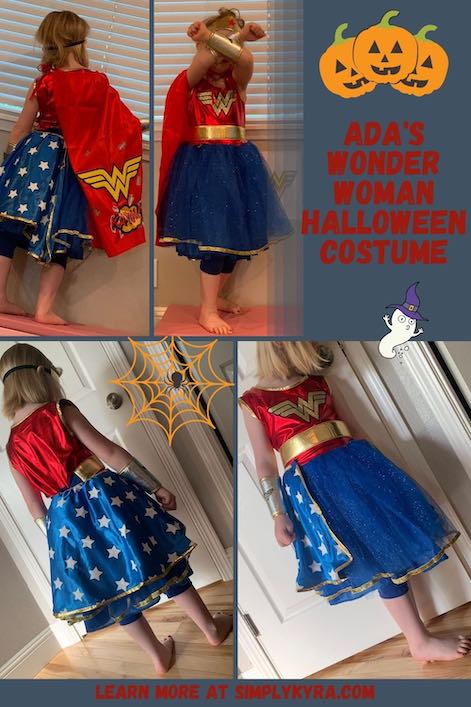
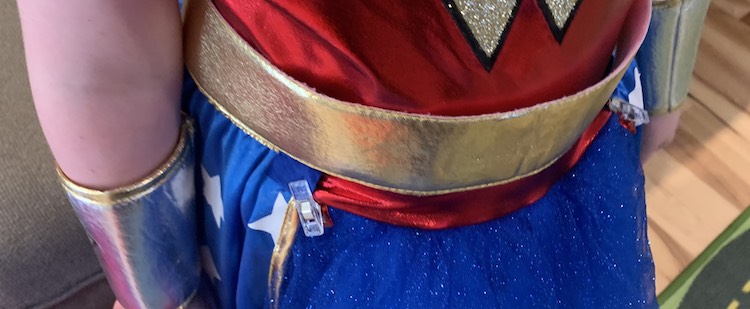
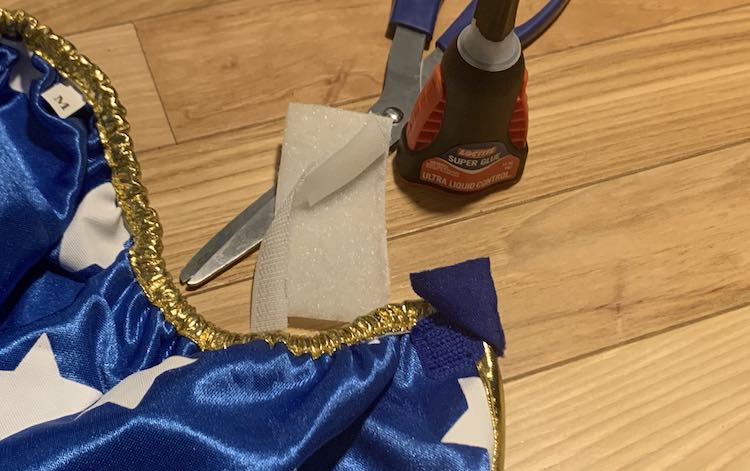
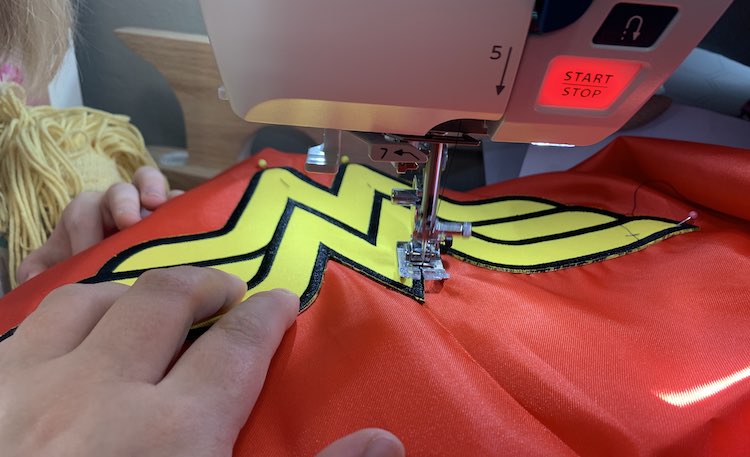
As a quick aside before the party I noticed that the skirt overlay (which can also be flipped over and attached at the shoulders for a cape) kept disconnecting from the dress. I assumed it was the costume’s problem and grabbed some sewing clips, making sure to pick ones matching Wonder Woman’s color scheme, to keep the skirt overlay attached during the party. Afterwards, I hunted down my sew-on hook and loop tape so I could make the skirt more secure and realized that there was fabric covering up the hook part of the skirt’s Velcro. I didn’t have to fix anything and I know that it will be secure for Halloween.
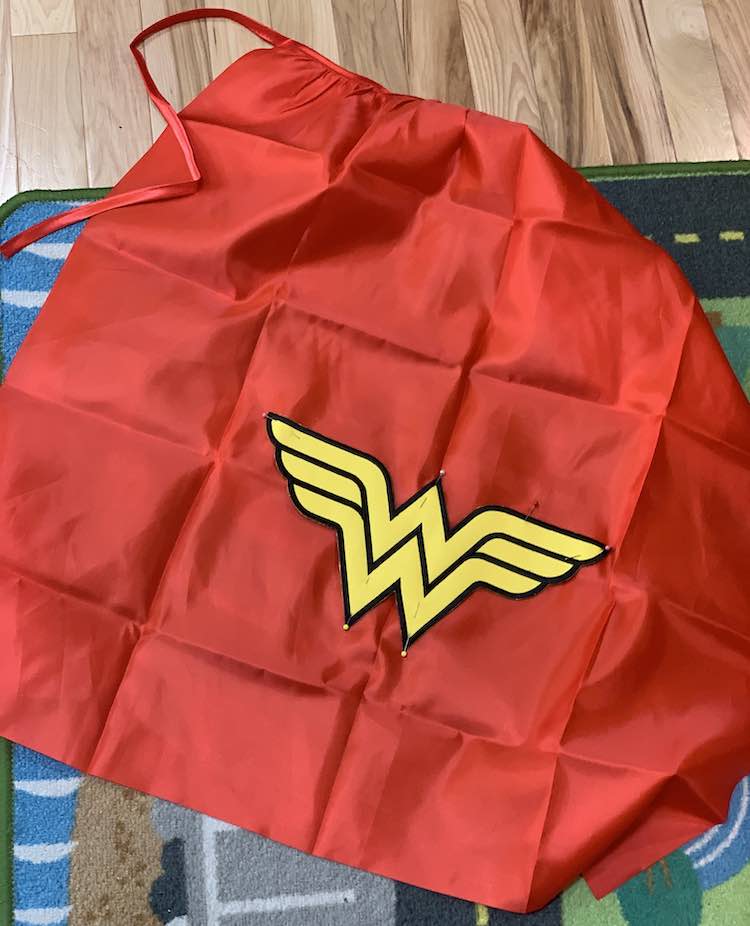
For Ada’s party we had bought a set of capes for all the guests living nearby, before finding the costume, and so we used one of those. I had also purchased an iron-on Wonder Woman logo, through Amazon, and after telling Ada about it and giving her the choice on if she wanted it on the cape or a red shirt, in the future, she chose the cape. Since I didn’t want to melt the cape I used black thread and machine sewed the W on, zigzagging around the outside edge, instead of ironing it to the cape. I guess this way if the cape rips I could, technically, seam rip the logo off and use it again for something else.
And, after Ada added some temporary stickers to the cape, the costume was finished and ready to go!

In case you’re debating heading to Costco to get your own costume I have to admit that I can’t remember how much the Wonder Woman costume was and I can’t find it on their website to check. That said, I ended up buying Zoey a unicorn costume, through a different brand called TeeTot, that came complete with hooves, a horn/ear headband, and wings for $33 U.S. based on the website later on.
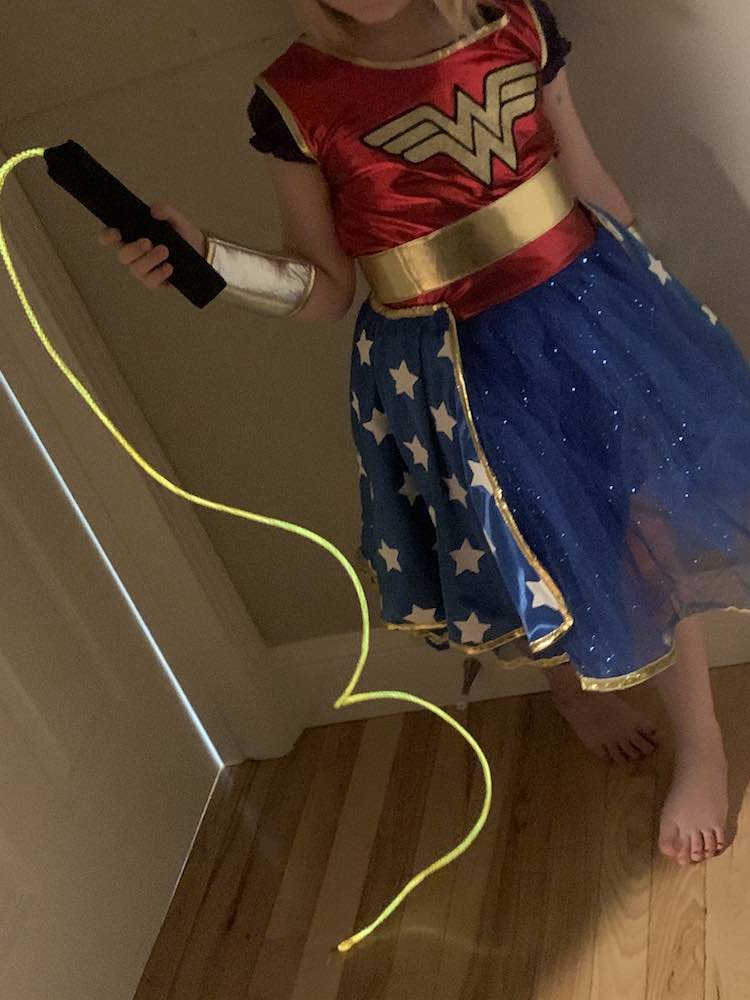
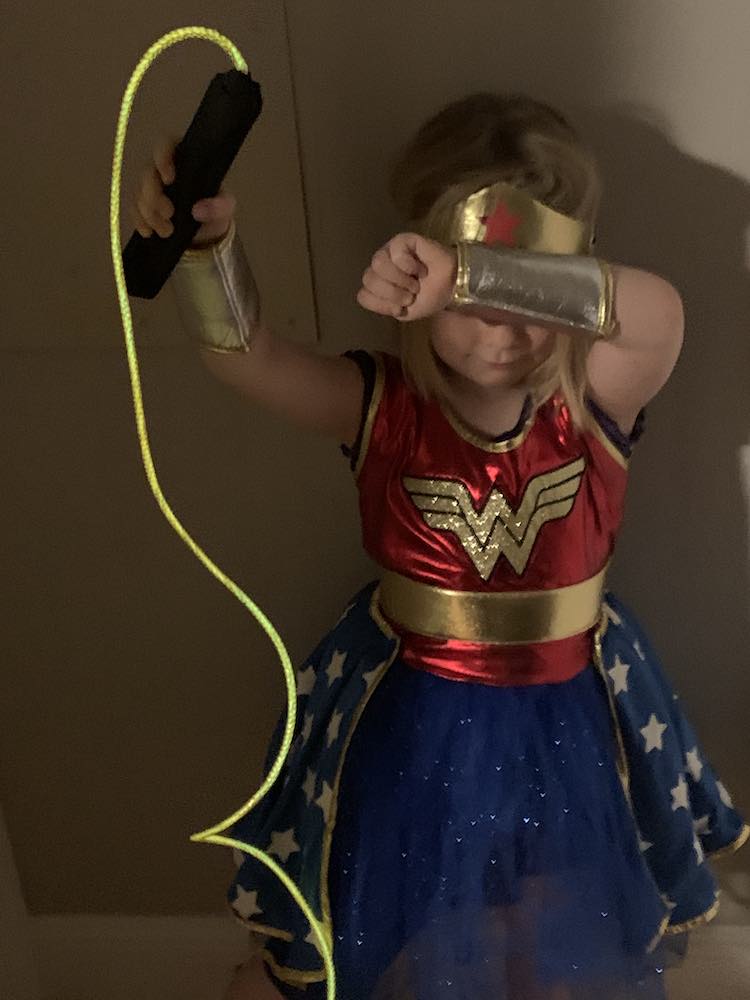
I’m so glad I stumbled across the Wonder Woman costume before I ended up buying fabric and making it myself. I wanted to share with you the costume, in case you want to buy your own, and what I had originally planned to do and add to the costume in case you’re making your own. The only item we’re still missing is Wonder Woman’s lasso of truth. Ada hasn’t asked about it yet but I started wondering if I could purchase gold or yellow yarn and crochet a makeshift belt that could give the look of a lasso around her waist, and be simple to not lose, or crochet a rolled up version to attach at her hip. I started looking up potential solutions online and came across this Glowing Wonder Woman Lasso through Hendo At on YouTube. Matt is planning on surprising Ada with a lasso of truth creation session, once the supplies are delivered, and I can update this section once they’re done so you can know if it’s worth making yourself.
Update: August 22nd – Ada and, mostly, Matt just made the Wonder Woman glowing lasso of truth following Hendo Art’s YouTube video. It turned out amazingly! We deviated from her instructions by using a single of the mesh tube, since it looked golden already, and covering the handle with black foam sheets rather than painted masking tape.

If you want to see a truly amazing Wonder Woman cosplay costume I absolutely love ambrose_cosplay’s one on Instagram along with her finished trenchcoat for her Diana Prince persona.
Have you bought or made a Wonder Woman costume before? If you made it what patterns and fabric did you use? If Ada keeps loving Wonder Woman I could definitely see making different versions over time. I would also love to sew her a simple top that works with the skort I made her so she can feel like Wonder Woman while still seemingly be dressed less costume-y; kind of like the Disneybounding costumes I’ve heard about. I’d love to hear from you in the comments below and I hope your day is going great.
If you’re interested in getting any of my future blog updates I currently come out with a new one every Wednesday and share them to my Facebook page and Instagram account. You’re also more than welcome to join my email list located right under the search bar or underneath this post.
Did this save you time?