

The Strappy Cami

I was able to sew up Rebecca Page’s Strappy Cami last week and loved it. The camisole is such a simple and quick sew and yet offers more choices to change it up. I sewed two versions of the Strappy Cami, both with knit binding. I altered the second camisole to be a halter top instead by finishing the end of my straps. You can also sew up the camisole with a gathered (ruched) front which would be really flattering for day to day wear. If you want to see more versions of this pattern there’s an included gallery on the pattern’s page.

What I Used
- Ladies’ Strappy Cami pattern
- Knit/Stretch fabric – can be two or four way stretch but needs at least 40% stretch with good recovery. The pattern’s listed fabric preferences are jersey, double brushed poly (DBP), cotton lycra (CL), and French Terry.
- Black and white camisole – was from a mystery box identified as double brushed poly from Elevated Fashion Fabrics
- Pew Pew Panda panel (CL) – Whimsy Baby Customs
- Yellow fabric – a thin and soft knit that came from a mystery box (not sure but best guess is it was either from Elevated Fashion Fabrics or Sly Fox Fabrics)
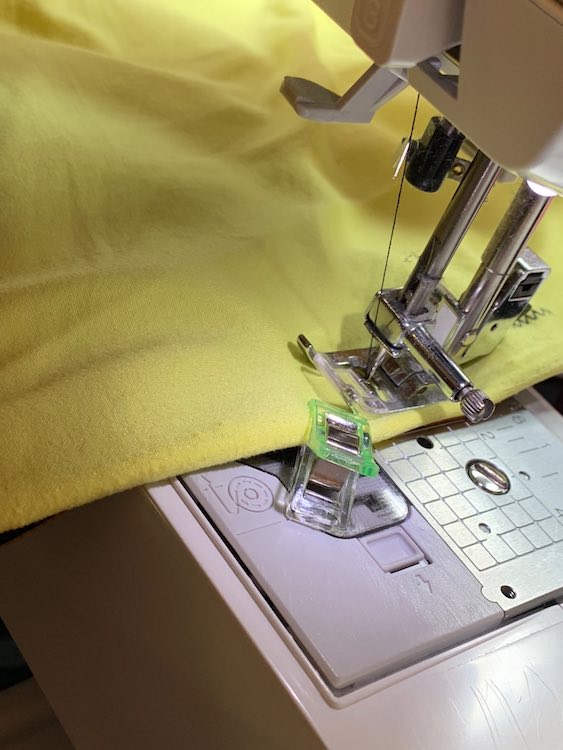
- Complementing or contrasting thread – I used black thread for the first camisole and the first bit of the second camisole. I switched to yellow for the binding and decided to keep it going for the hemline…. I was rushed as Zoey was waking up from her nap but I love how it turned out.
- Tools used – sewing machine with a zigzag stitch, pattern weights, rotary cutter and cutting rulers, disappearing ink pen, tape measure for sizing, clips, and an iron to press the knit binding.
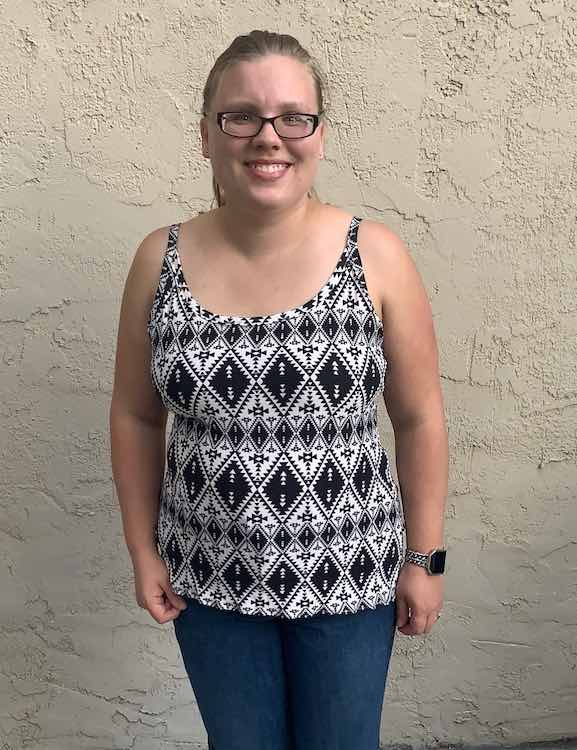
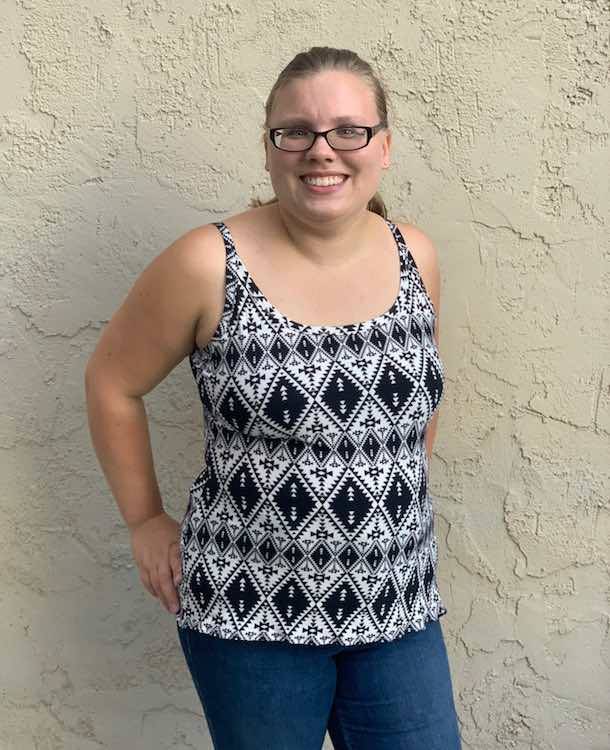
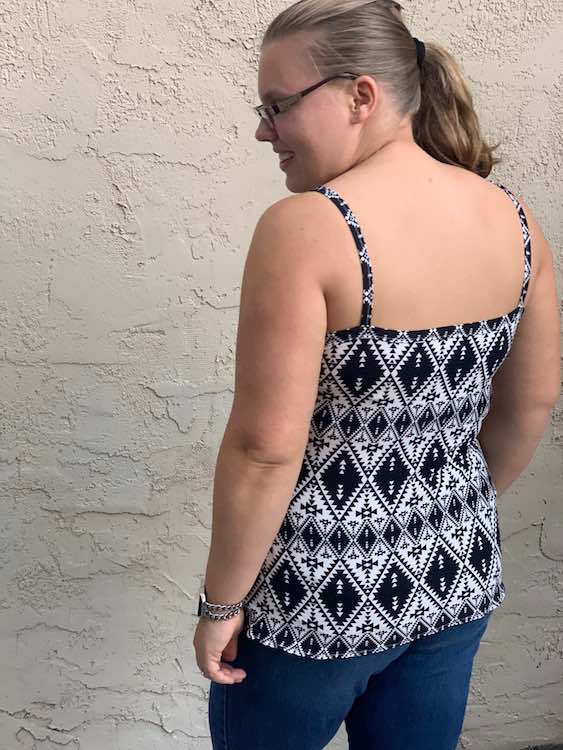
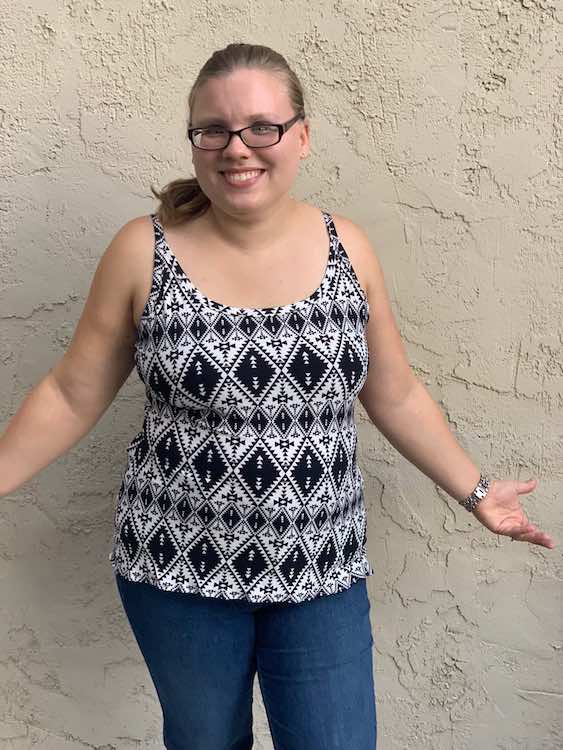
For my first version of the Strappy Cami I decided to grab a knit print (DBP) I had in my stash from an Elevated Fashion Fabric mystery box. I wasn’t sure how I felt about the print and figured it would be perfect for a wearable muslin so I wouldn’t be disappointed if it didn’t work out. I ended up falling in love with the fabric and was happy when the fit turned out. According to my measurements I decided to go with an XL camisole (according to my chest size) and then graded out the pattern pieces to a XXL for my waist. I was going to grade it back in for my hips but decided to leave the hips as the same size as my waist resulting in a looser fit. I used the same fabric for the knit binding at the top of the camisole, being mindful of the pattern where I cut my strips, and used the plain front pattern piece for the front.
This camisole is free when you join the new Rebecca Page subscription service during October 2018! If you want to learn more about the current subscription plans I’ve linked the frequently asked questions here.
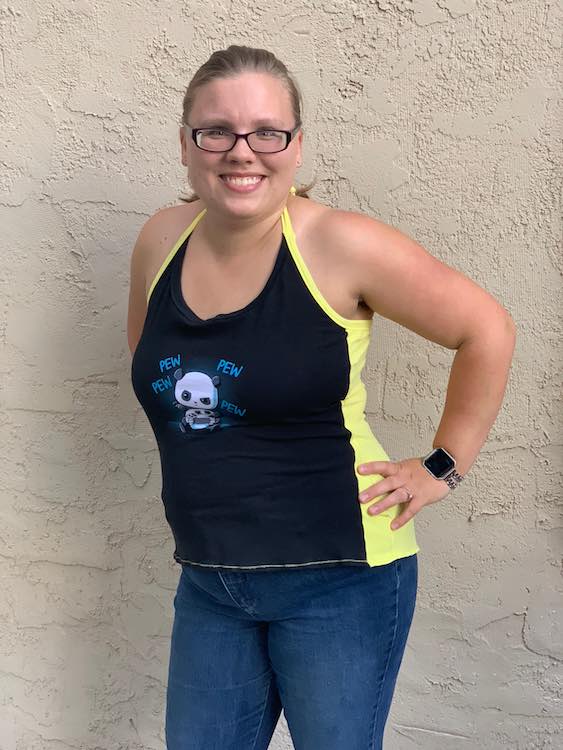
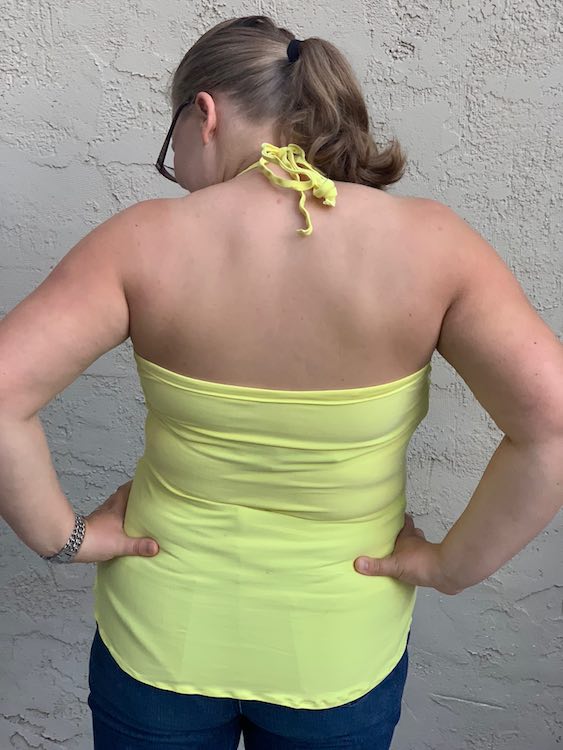
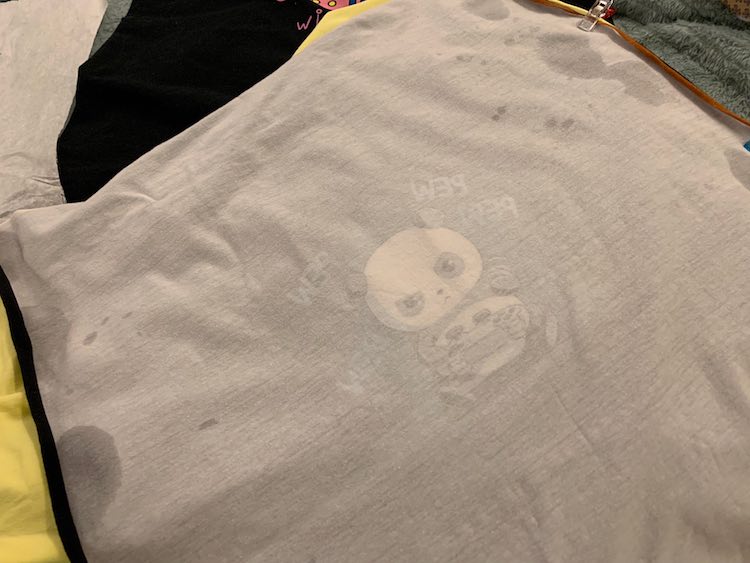
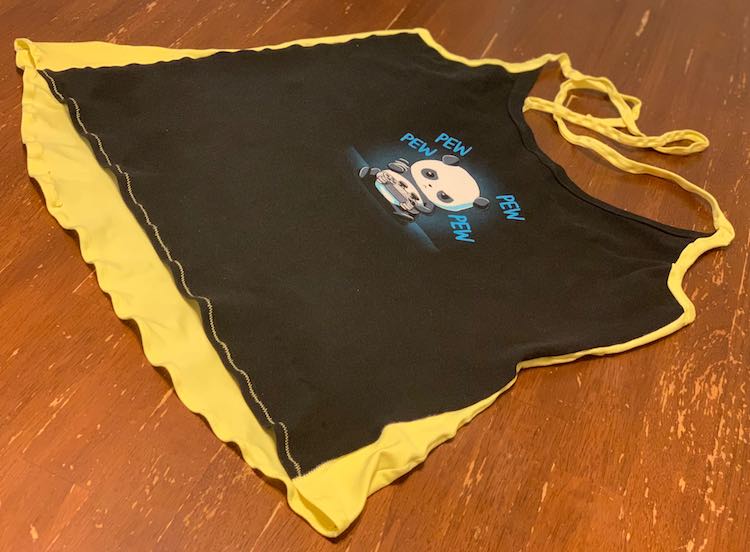
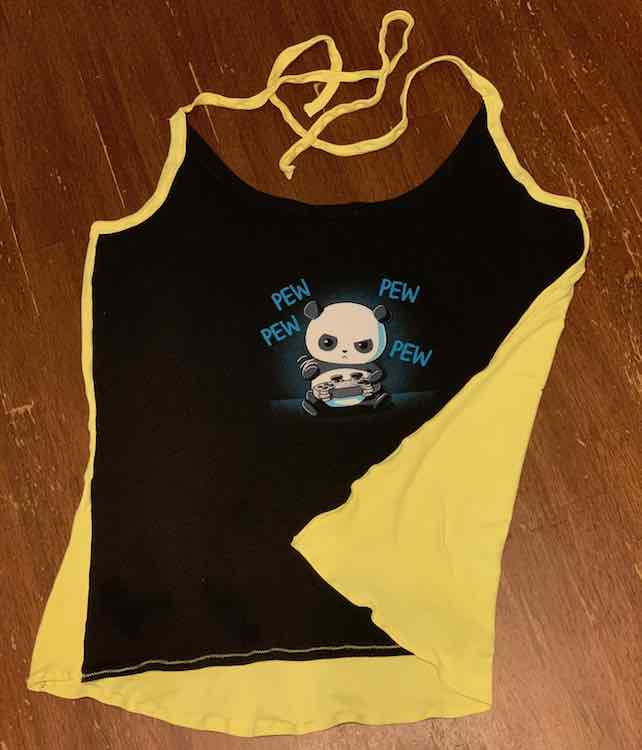
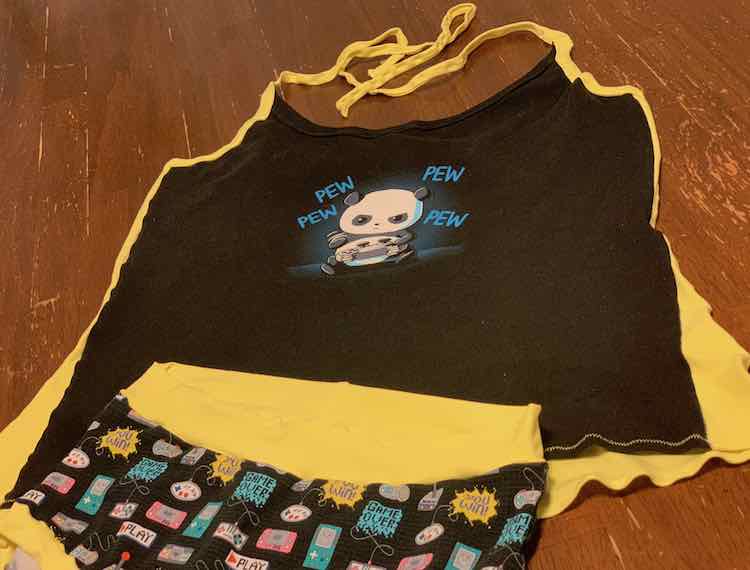
For my second Strappy Cami I decided to base it around a child-sized cotton lycra panel I bought through Whimsy Baby Customs. The yellow fabric I paired it with is a soft and thin mystery box fabric. Because the panel was child sized I ended up extending it on either side so it would fit the front pattern piece. The panel was also shorter than the pattern and instead of extending it to be taller I instead shortened the front of the camisole to the panel’s length and then curved the back to be longer and meet up with the front panel on the sides. Like the previous version I used the plain front pattern piece and knit binding for a perfect fabric match. Unlike before I was running out of time during my youngest’s nap so I turned it into a halter top instead of attaching the straps and ended up loving the result.
This camisole is free when you join the new Rebecca Page subscription service during October 2018! If you want to learn more about the current subscription plans I’ve linked the frequently asked questions here.
In case you also use a child’s panel and need to color block I’m sharing the steps (and how I deviated) when making my second Strappy Cami.
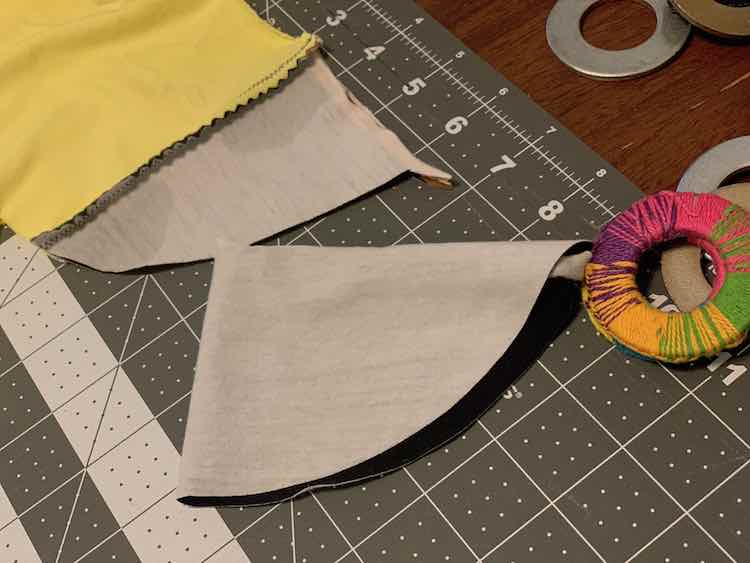
Start by folding your panel in half and checking it against your front pattern piece. I wanted the panda centered on the front of the camisole so I decided to add the extra fabric to both the left and right side of the panel. I lined up the panda panel right sides facing with the yellow fabric. I made sure the top of both lined up and then clipped them together. I then lined up the other side of the panel with the opposite side of my yellow fabric and clipped that side down too. This way I could sew both sides at the same time since it didn’t matter that they were connected.

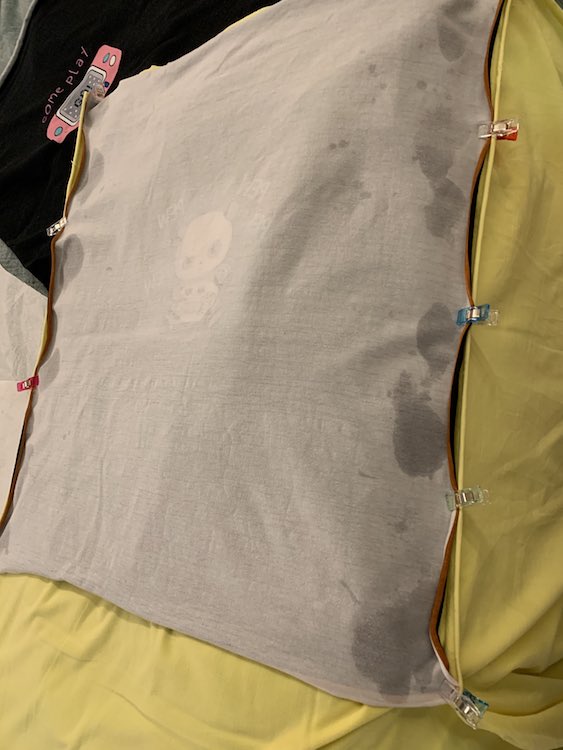
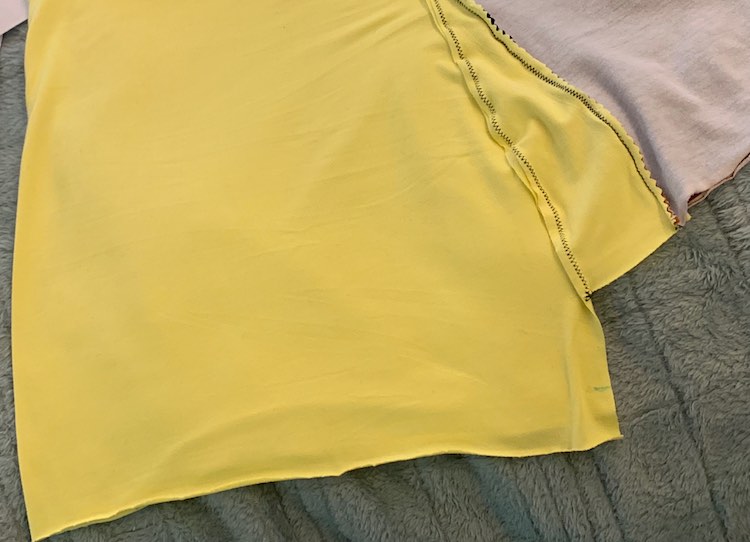
After sewing I trimmed the excess fabric with my pinking shears and ironed the seam down. I folded the panel in half again and checked the pattern piece against it before cutting it out. The panel ended up being shorter than the pattern piece but I decided to turn it into a high-low hem instead of extending the panel down too. I love the hemline of my camisole but if I were to extend it I would add the length to the bottom before adding to the sides as I ended up loving the curve on the sides of my finished garment and that would’ve been disrupted if I extended the bottom after the sides.
Best advice I have right now: decide where you want your panel image to be on the pattern piece and then decide which piece you’d want to add last (the longest seam on the pattern piece) and work your way inward (to the smallest seam) before starting to add the fabric. If you’d rather not do this on the fly you could also cut the pattern piece into the pieces you need. Just remember to trace them out so you can add the seam allowance to the edges you need to sew together. I did something similar on my woven vehicle-themed bubblegum dress if you’re interested though normally I do it on the fly like above.
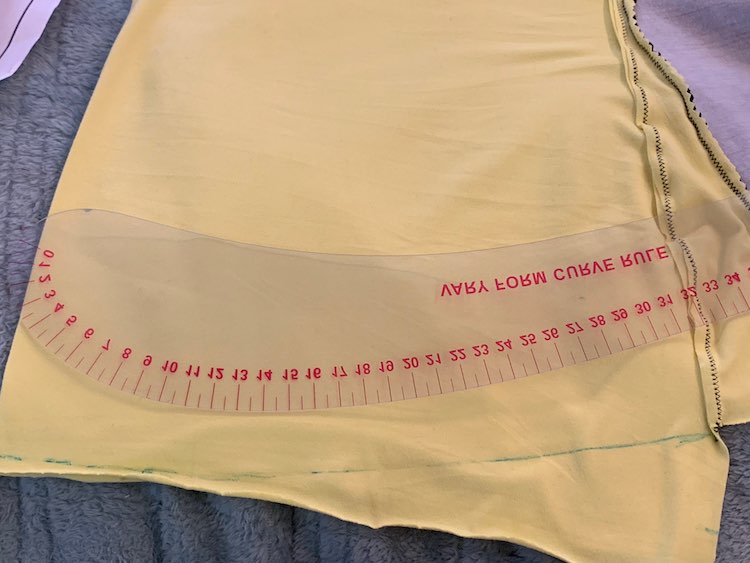
After sewing the back of the camisole to the front I ended up having a giant (and expected) drop in length. The blue mark is where the bottom camisole piece would’ve been cut but as I was close to the edge of the fabric I just left it since I knew it wouldn’t line up either way. To get my back curved hem I folded the camisole in half so the side seams were touching and the center of the back was folded. I then took one of my curved rulers and lined it up to the corner of the seam as best as I could and moved it around until I liked the curve. I marked it with a disappearing ink pen and extended the markings with a straight line to end at the fold. I then cut along the line and hemmed according to the pattern’s directions.
I followed the rest of the directions on the pattern and chose to turn my straps into a halter top.

You could extend your garment by creating matching underwear, sleeping shorts, or pants to have a really comfortable set of pajamas.
If I hadn’t wanted to include the panel for my second camisole I would’ve tried out the ruched front Strappy Cami instead. I’m still debating making it and more. I love how this can be sewn with a solid colored fabric for a simple camisole to go under outfits or can be a standalone shirt too. The fact that you can make it with two different types of binding (fold over elastic or knit binding), go with a plain or ruched front, or even turn it into a halter top makes it a versatile camisole pattern. I love how quick this is to sew up and the directions make it really simple to follow along.
The Strappy Cami only comes in ladies sizes (XXS-5XL) and this month (October 2018) it’s free when you join the new Rebecca Page subscription service! If you want to learn more about the current subscription plans I’ve linked the frequently asked questions here.
I’d love to hear from you in the comments below, on my Facebook page, or through Instagram. Have a great day.
Did this save you time?