
In Depth Guide to Joining Quiet Book Pages - Part One of Three

I came up with the idea of creating a quiet book for both my daughters, Ada and Zoey, after I bought myself a sewing machine several months before Christmas. I wanted to find a project that would give me a finished item I wanted at the end, but also allow me to be able to play around with my machine using the different stitches and feet that came with it. After researching quiet books and page designs online I came up with a plan, made a couple of the pages, went back and made a cover to hold them, and then continued to make pages. I left adding the grommets to the pages until the end but it was easy when I finally got around to it. I found it easier to do all the grommeting after you’ve finished several pages so you can do them all at once. I wanted to share what I did and the mistakes I made to help you in case you’re also researching quiet books or looking for a fun project to sew.
I already posted a four part series on how I created my quiet book cover and posted two sides of one of my finished quiet book pages (Colorful Animals and Applique Animals), but now I want to give you an in-depth look at how I joined my quiet book pages together.
Essentially, I will be joining the quiet book page by taking two sheets of fabric (muslin and, optionally, attach it to fusible fabric), decorating them, sewing them together, flipping them right side out, closing the opening, and adding grommets so they can go into your quiet book cover. To go more in-depth on how I did this I will present the information to you in three separate parts. This post will show you the overall plan, go over the required materials, and prepare both sides of the page. The next post in the series will go over how you can go from two of your prepared pages to having a finished quiet book page. The final post will go over attaching your grommets to the page and some minor issues I came across while joining my pages and how I attempted to fix them. I can’t wait to share it with all of you and see what you create in the comments!
Planning
I made my pre-joined quiet book pages 9 by 12 inches and limited my decorating space on the page to 8.75 by 7.5 inches. I came up with the working height of 7.5 inches as all four sides of the page needed a margin to allow for space to sew the two sides of the page together (a 1/4 inch seam allowance) while also factoring wiggle room in case the page design ended up being a bit larger than planned (an extra 1/2 inch). I wanted to leave a 2 1/2 inch space on the inner side of the page so there would be room for the grommets which resulted in my design having a width maximum of 8.75 inches (12″ page width – 2 1/2″ for grommets – 3/4″ because I couldn’t come up with 1/2″ seam allowance) Originally, I had planned for a three-ring book but decided instead to do two rings and space them the same distance apart as a normal binder as it would make it easier to store any extra pages in a store-bought binder or allow any binder accessories (pencil-case for extra pieces) to be added to the quiet book in the future. Additionally, if you wanted to have your finished pages used right away you could gift it in a standard binder and always have the freedom to make your own cover in the future if desired.
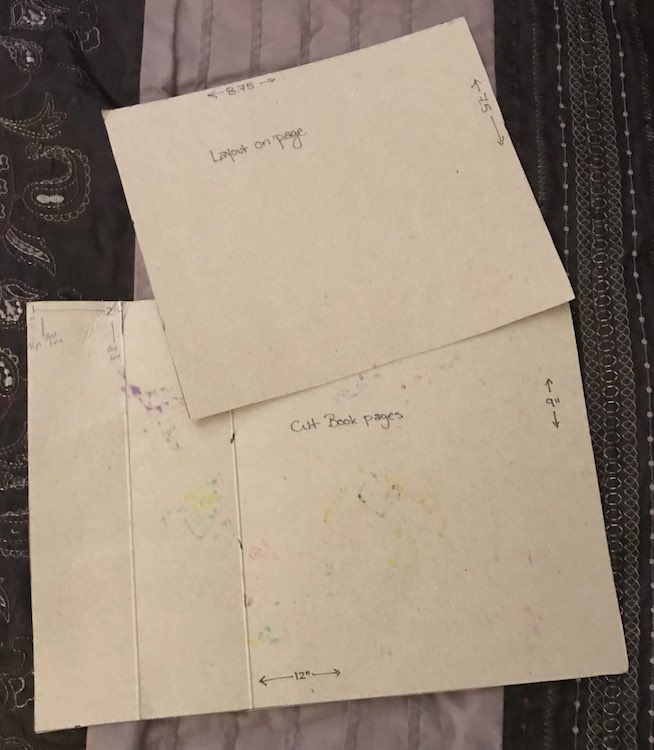
I planned ahead in case I needed templates by cutting a cereal box to 9 by 12 inches (the entire working page size) and marked on it where the working surface area would be. I also cut the other side of the cereal box to 8.75 by 7.5 inches (the allocated working area). This helped me cement in my head what I wanted before starting. The larger template wasn’t required as much as the smaller one; though it was helpful as a quick item to grab to stop the fabric markers from bleeding onto my table (or textbook) when coloring the fabric. The smaller template, however, was used often to confirm sizing by helping me to lay out any design elements for the page. I found overhandling the pages caused the muslin to start unraveling on the edges so this helped.
Materials
- Fabric for the page
- (optional) Interfacing to reinforce the page
- 108″ Unbleached Muslin Natural Fabric by the Yard
- Pellon Fusible Thermolam Plus White Fabric by the Yard
- Dritz Disappearing Ink 2 Pen Pack
- Singer Large 1/4-Inch Eyelet Kit, 12 Eyelet with Tools
- 100pc 1/4″ Grommets Eyelets for Clothes, Leather, Canvas – Self-Backing
- Crop-A-Dile II
- Disappearing ink pen
- Grommets and any required tool
- Any materials required for decorating either side of the page
- Fabric swatches
- Felt
- Embroidery floss
- Fabric markers
- Anything your imagination comes up with
Preparing the Page Sheets
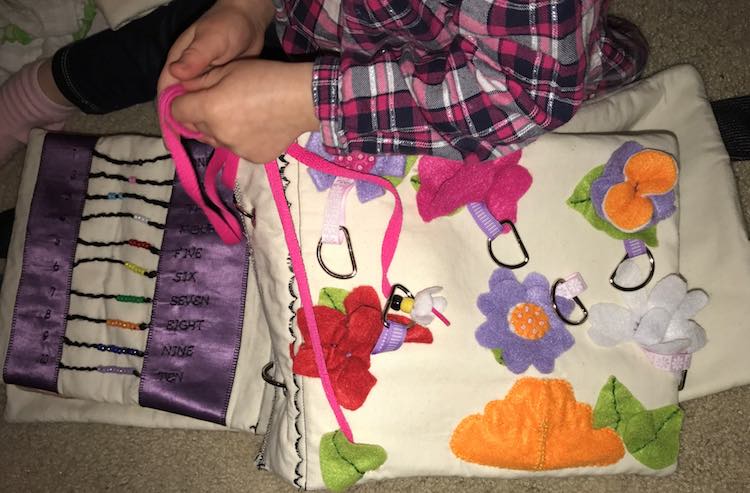
To start making the pages I cut two sheets of muslin and (for most pages) two sheets of fusible fabric a bit larger than required (9″ by 12″). I then ironed the muslin to the fusible fabric (as per its directions) so I’d have two sheets and trimmed both of them so they were 9 by 12 inches. Because of the seam allowance three sides (top, bottom, and one side) will need to have a seam allowance left bare to have room to sew to the other side. The other side of the page (left on one sheet and the right on the other sheet) will need to have a 2 1/2 inch space left blank. While making my pages I kept second guessing this and always double and tripled checked by laying them back to back to confirm that the grommet space is on the same side of the page. The Colorful Animals page wasn’t reinforced with the fusible fabric while the other side of the page, Applique Animals, was.I found some of my more involved quiet book page designed, in particular a flower one with a lot of embroidery, started unraveling the edges of my page so I had to sew a slightly smaller final page so try to not overhandle the page.Now you get the joy of decorating your page before putting it all together!
∞ Current: Introduction, Materials, and Planning ∞
Did this save you time?