
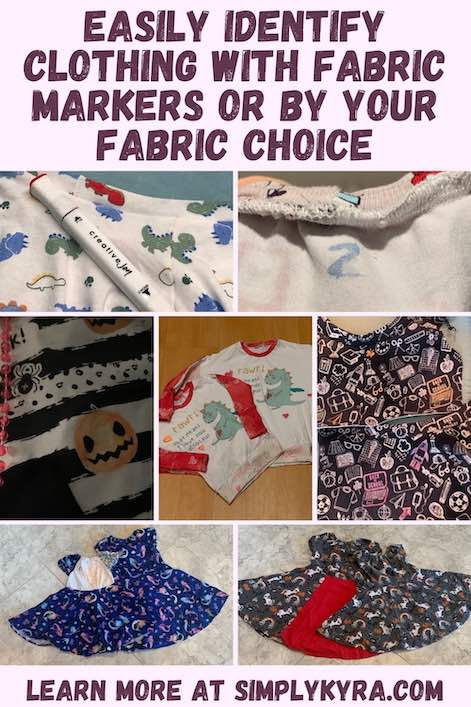
Easily Identify Clothing With Fabric Markers Or By Your Fabric Choice

Do you have trouble telling your kids’ clothing apart? Once I started sewing my daughters’ clothing more regularly I’ve found it sometimes difficult to remember whose shirt is whose right after I washed it since the matching garment isn’t available to compare it to. Over the years I’ve solved this by altering the garments in several small ways making them more unique and easily identifiable. These methods involved altering how the garment was constructed, changing the fabric choices, adding mismatched fasteners, or simply marking them up using fabric markers. This last method can also be easily done to store-bought or already completed garments if you find yourself having trouble identifying them at a later date. A random bonus I found with doing this is that it’s much easier for a kid to be able to identify the front and back of their garment when they go to get dressed.
Construction of Garment
The first way I use to help differentiate Ada’s clothing from Zoey’s wasn’t planned in advance as I simply stumbled upon it. At that time I had gone to make the girls another set of matching dresses with the Magnolia sewing pattern, through Stitch Upon a Time, and realized that although Zoey’s dress could be easily cut from the fabric I had issues with Ada’s since the main panel I wanted to use was skinnier than the front pattern piece of the dress. I ended up solving this by taking the scraps from Zoey’s panel and using them to extend the top of Ada’s panel so it was wide enough to cover the entire pattern piece. If you’re interested in more information about how I extended my fabric to fit a pattern piece I’ve previously posted about it here. At first I thought nothing about the fix but later realized that whenever either garment came out of the dryer I had started looking to see if I could find that little triangle of fabric by either cap sleeve so I’d easily know if it was Ada’s (panel extended so triangle present) or Zoey’s (no extra triangle). I loved how quick I could identify either garment and simply continue on with folding the freshly dried laundry.

Fabric Markers
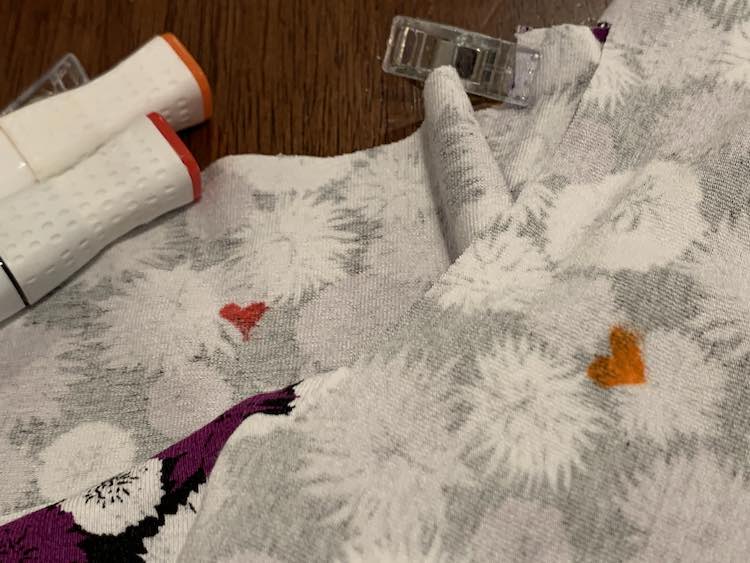
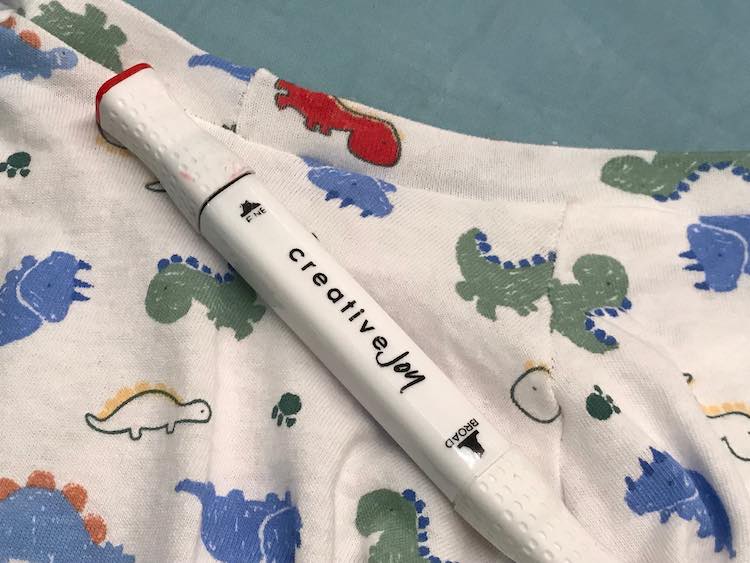
The method I find I most use for telling apart my daughters’ clothing is simply by marking them with fabric markers. The fabric markers are meant to be permanent although I make sure to set the ink with my iron so I don’t have to worry about any ink potentially coming off in the wash. With the small marks I’ve made I haven’t noticed any obvious issues; although, I have noticed fading the one time I used fabric markers to make an entire costume (a Doc McStuffin’s one) and noticed, when testing out some glittery fabric markers, my marks slowly losing their glitter leaving a faded colored mark instead of the bolder glittery one I expected to remain. The best part about using fabric markers is that it can easily be done on a finished garment so this can work on something store-bought too. Just be careful about the transparency of your fabric or if your fabric can withstand the heat needed to set the ink. Over the years I’ve found using fabric markers works great for customizing a shirt to my tastes in addition to helping make garments more identifiable from a similar one.
When marking my kids’ similar garments I started out by simply adding a dot, with their favorite color, on the back of the shirt where a tag would traditionally be. Since I sew the garments myself I found I preferred leaving my mark right before I added the neckband so I could easily set the ink while the fabric lays flat without the neckband’s seam getting in the way. Plus the mark might get a second pressing if I take the time to press the neckband’s seam after sewing it on. This method worked great for about a year or two as the kids’ favorite colors stayed constant. Over time; however, Ada changed her favorite color to blue, then pink, and then finally to all the colors which ended up confusing my system especially once I started passing the odd hand-me-down garment to Zoey.
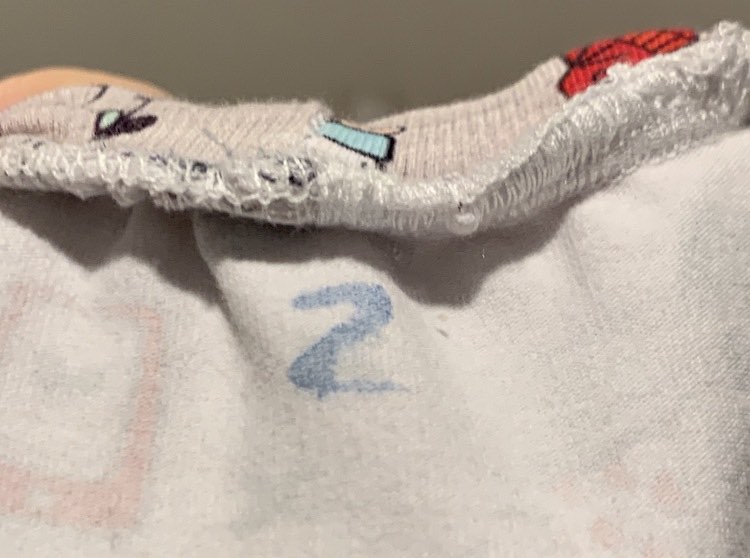

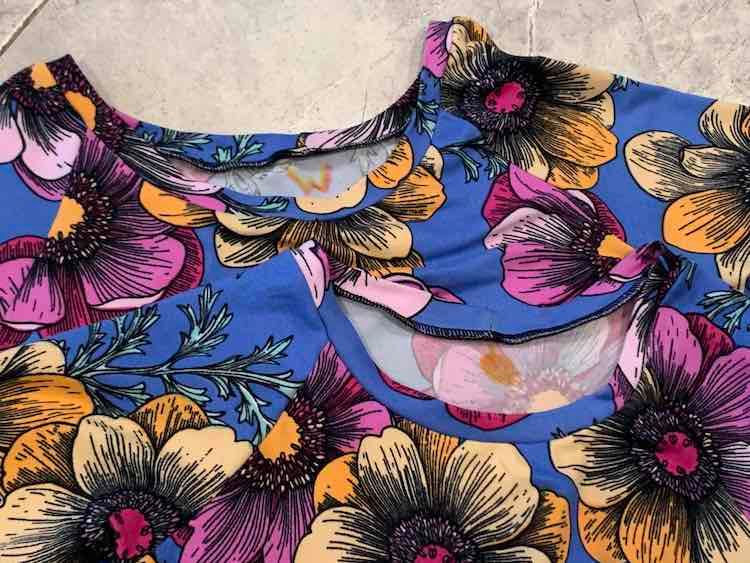
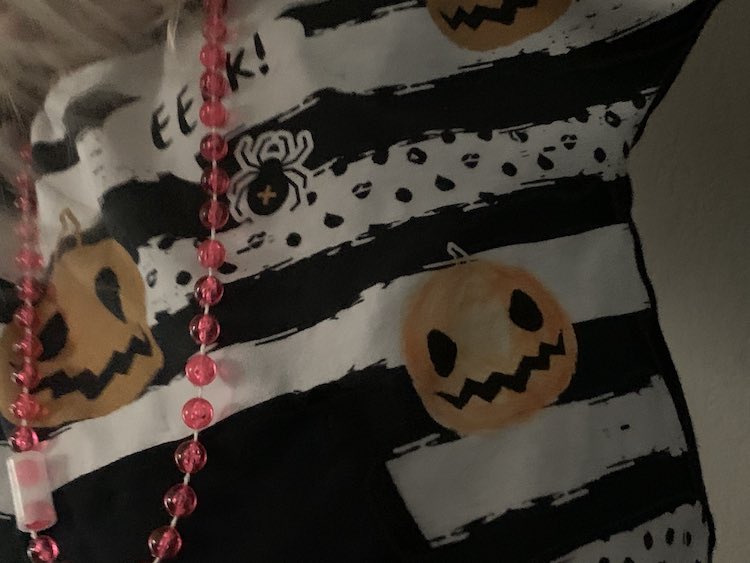
Over time I may have gotten a bit tired of adding small easily ignorable dots to the garments so when the fabric became too dark for the dot to be noticeable I justified marking the garment in a different way. After that first time I started changing up the lighter colored garments too. This worked as the kids were younger and thus liked my additions. At times these changes involved adding a minor detail that might be mostly hidden; whereas, other times this addition was a bit more obvious.

Fabric Choice
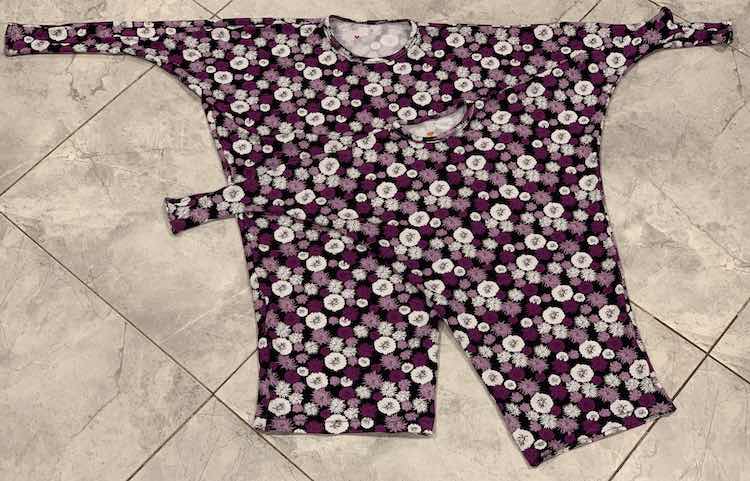
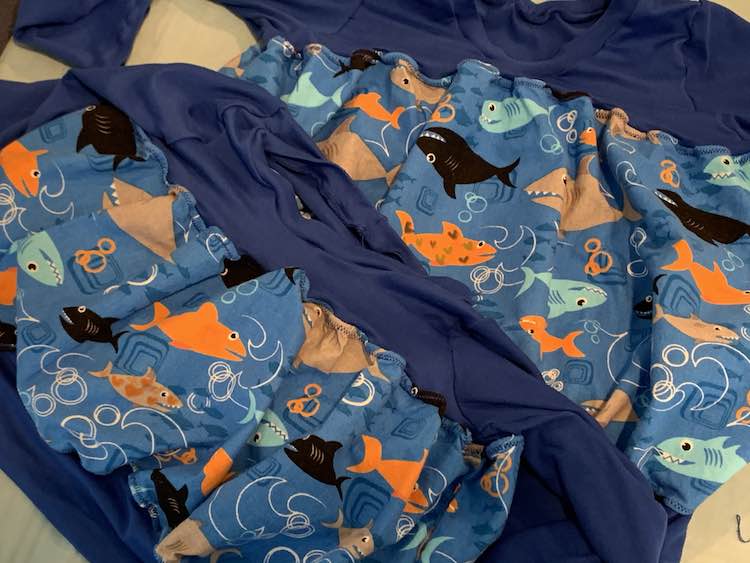
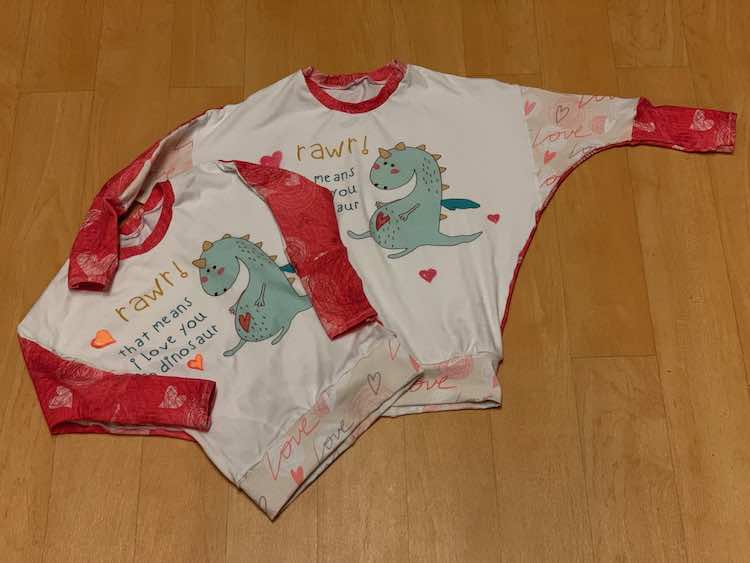
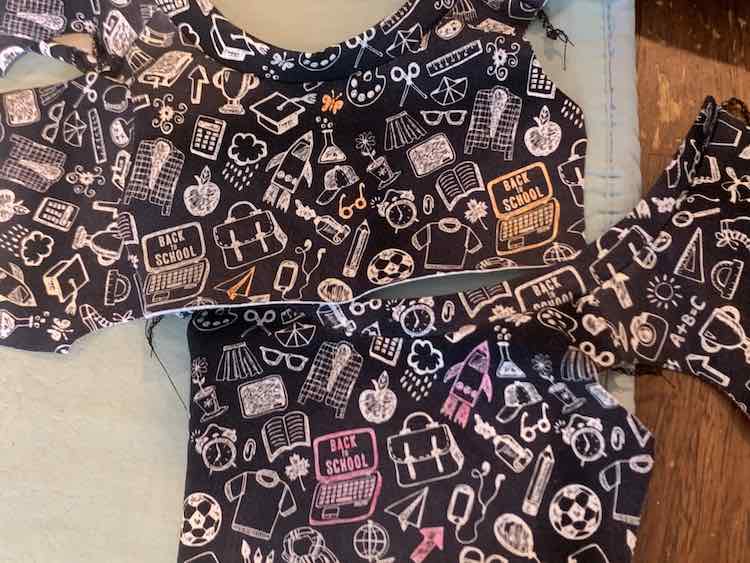
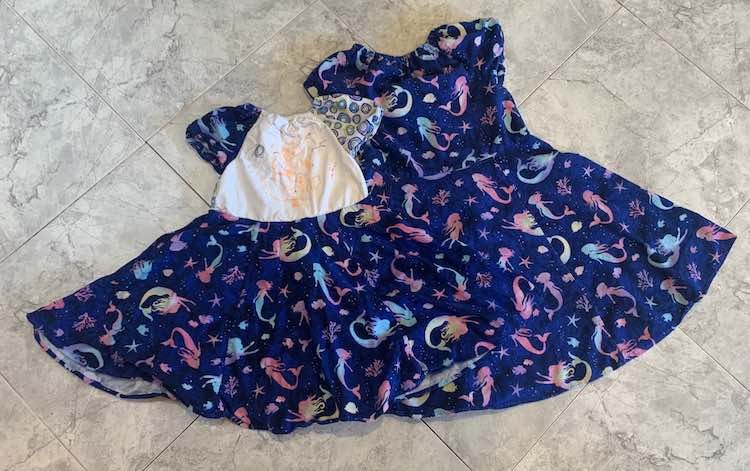
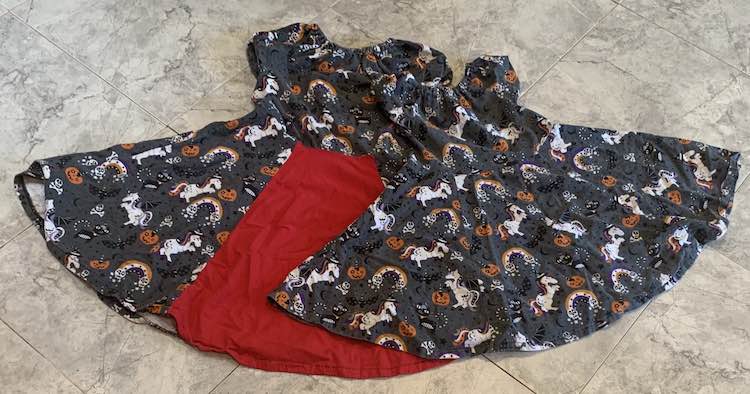
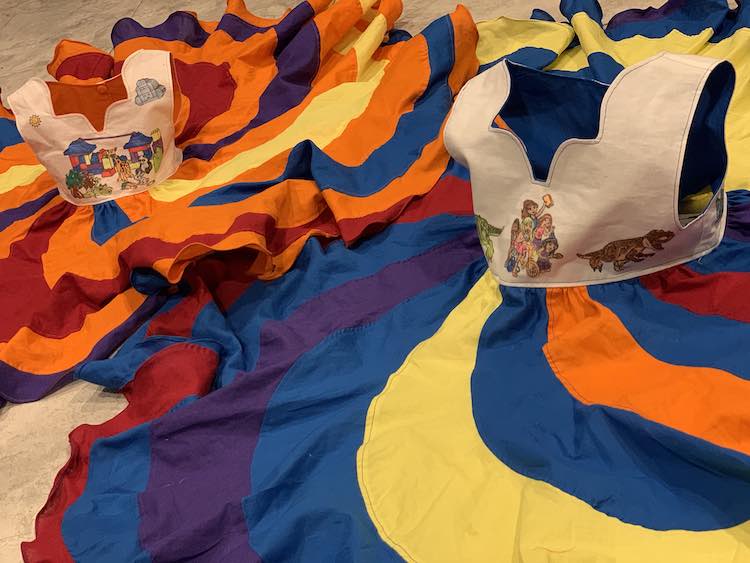
If you’re sewing your garments yourself you could easily identify garments by choosing slightly different fabric for different pieces. This can be a subtle difference between two garments that are otherwise exactly the same or be a big change between the two. I started out planning these when the kids loved different fabric from my fabric stash, but this also sometimes happened when I ran out of fabric while cutting out the pattern pieces and had to quickly substitute the rest with something else. So far this happens the most frequently for me while sewing our Rebecca Page Olivia and Patsy mashup nightgowns as we normally use it as a stash busting outfit and it takes so much fabric for the skirt. The first time I sewed up these nightgowns I shopped within my stash of Joann’s woven fabrics using leftovers from previous fabric purchases and although I made the bodices of the dresses match the skirts ended up being completely different and unique. In the years since I don’t think the girls have had truly matching nightgowns as there is always something unique about each and every dress. One time they got super unique when the girls chose to design their own nightgown using fabric markers, printed coloring sheets to trace, and white woven fabric I already had cut into the bodice’s pattern shape. This past Halloween I attempted to finally make them matching nightgowns but somehow forgot to cut out the front of Ada’s skirt and when I went back to do it I realized there wasn’t enough fabric left. That time they had almost matching dresses as I used red fabric, a Wonder Woman color, on the front of Ada’s dress.
Fastenings
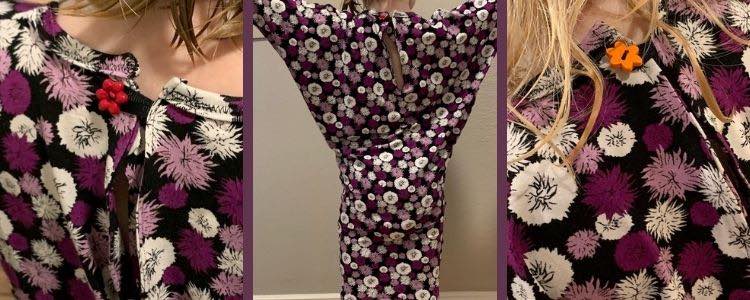
Another way you can more subtlety change up two matching garments are with the fastenings whether it’s purely decorative or a more functional addition. Back when I first made the girls matching Firecracker dresses I realized, once I tried to put them on the girls, that I had used the wrong neck size for their tops and it was impossible to get them on over their heads. I ended up recovering the dresses by cutting down the back of them, adding a facing, using a loop of ribbon, and adding a button in their favorite color. The kids loved how the dresses turned out and I love that I was able to quickly identify their clothing based on the color of the button. These were the garments I had added a simple heart to with my fabric markers but the button was so much simpler to use that the hearts were ignored.
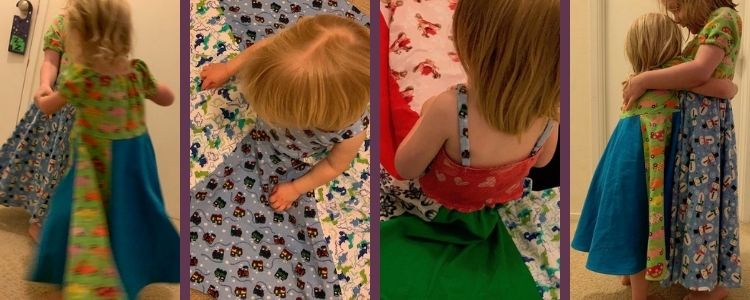
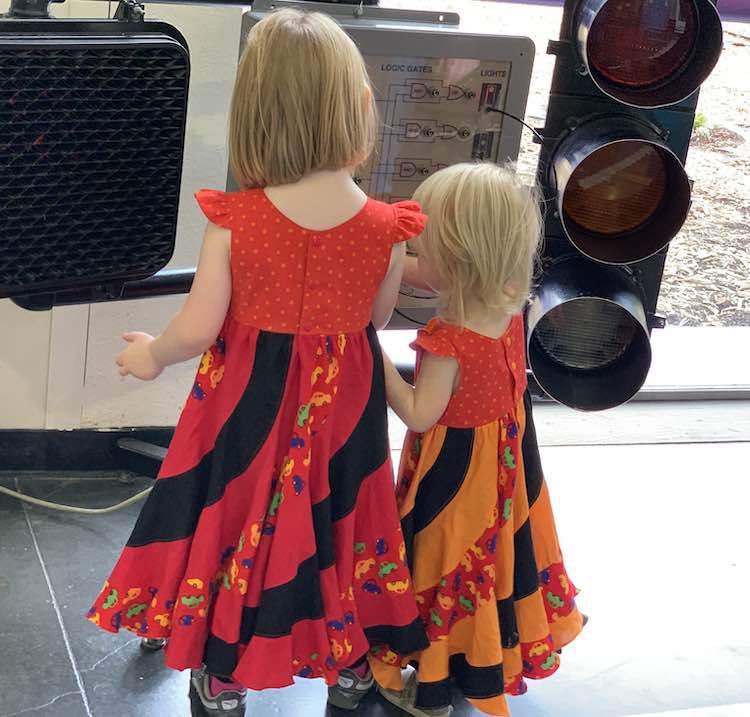
This unique fastening doesn’t have to be the only thing different about a dress. I’ve loved playing around making the kids almost matching dresses by using the same sewing pattern, the same fabric, and a single fabric that’s different based on their current tastes… normally based on their favorite color. I love bringing that color further into the garment by matching it to the thread when topstitching and with the fastenings’ color. As an example I want to share with you the last two times I gifted the kids their mostly matching peppermint swirl dresses, through Candy Castle Patterns, for Christmas. Two years ago I had the girls’ bodice match each other along with half of the skirt. This matching deviated by having a different color for half of the skirt, alternating swirls, and the snap color on the back of the bodice. Last Christmas I again made the girls mostly matching peppermint swirl dresses and this time deviated with the bodice design, color of the lining, altered the number of each color of swirl, and then chose a different color to topstitch with and fasten the bodice back with. I love how I was able to make minor changes that made each dress unique, and easy to identify, without making them too mismatched.
Other Ways
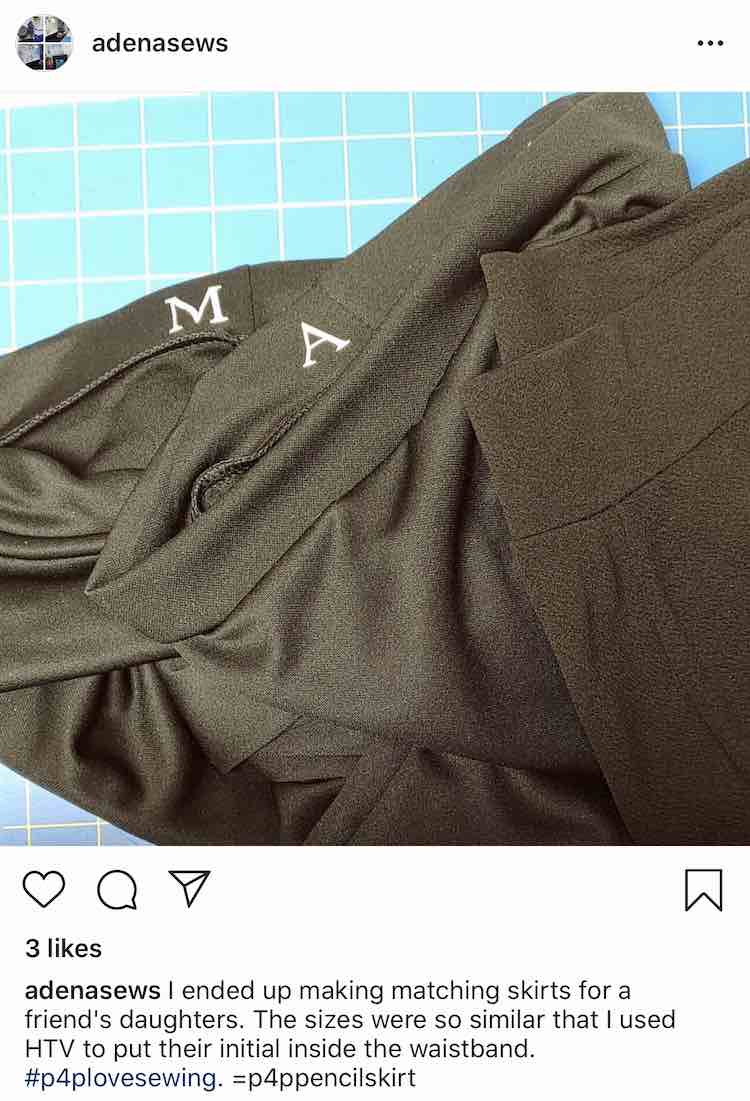
I’ve seen several other ways over the last couple years to differentiate clothing although I haven’t tried to use any of them yet. I’ve seen ads and shared links on Facebook for ways to label clothing so it’s easily identifiable at school, daycare, or at camps. I’ve also seen custom stamps sold pre-filled with textile ink so you can easily stamp your child’s name onto their clothing or use them to stamp your company’s name if you make and sell your own clothing. Again, I haven’t tried any but I did quickly search on Etsy and found a bunch of stamps and labels when searching for clothing label stamp. Also if you you have a vinyl cutter, like Silhouette or Cricut, I came across a post from adenasews, on Instagram, who added an initial to the back of two similar skirts using heat transfer vinyl so her friend’s daughters could easily tell their skirts apart.
Along the way I’ve become more and more obvious in how I tell my daughters’ clothing apart as they’ve loved the big and bold ways I’ve used in the past. Over time, as they grow older, I can see these methods becoming more subtle if they still want to continue matching. Do you sew your children’s clothing? Have you come across this issue before and if so how have you solved it? I’d love to know more tips and tricks so feel free to share them in the comments below if you have any. I really hope your week is going great.
EDIT: March 22nd, 2023:
When I moved my website over I lost my comments but, in case it's helpful, I wanted to share the comment from Nia Hayes - ShunCy
While I was at Jo-Ann Fabric and Craft Store the other day, buying supplies for my projects, I was amused to see how many different methods they use to identify clothing or fabric. I saw tags made of fabric, iron-on labels, woven labels, sewn-in tags, embroidered labels, and printed labels. I suppose without labels, it could be hard to keep track of your clothes.
If you’re interested in getting any of my future blog updates I currently come out with a new one every Wednesday and share them to my Facebook page and Instagram account. You’re also more than welcome to join my email list located right under the search bar or underneath this post.
Did this save you time?