
My Favorite Simple Kids' Knit Sewing Pattern: The Magnolia

I can’t remember when I first came across Stitch Upon A Time, but, checking my order history on their website, shows that my first Stitch Upon a Time sewing pattern was bought back in April of 2018. Three days later I went back and bought all of their free patterns including the Magnolia Top and Dress, now a paid pattern, which I fell absolutely in love with from the first time I sewed it up. The Magnolia is perfect for showing off any custom knit fabric purchase for my kids and is so quick and simple to sew. Both my kids and I absolutely love the kangaroo pocket and it took until the very last time I sewed it up to leave the it off and even then it was only with my kids permission after explaining that the panels were too big to fit otherwise. Over the years I kept recommending this pattern on Facebook and yet never get around to creating a post dedicated specifically to the Magnolia as I always seemed to be waiting until I could sew it up just once more first. I figured now was the time and decided not to put off sharing it anymore.
Over the last couple years I’ve shared the Magnolia while showing you my simple trick to simplify sewing bands onto clothing along with my 52 week sewing challenge recap posts from 2018 and 2019.
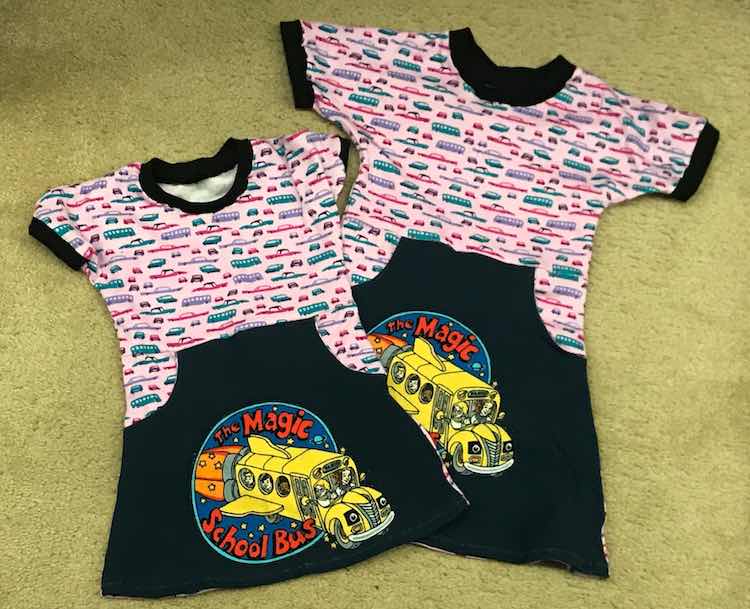
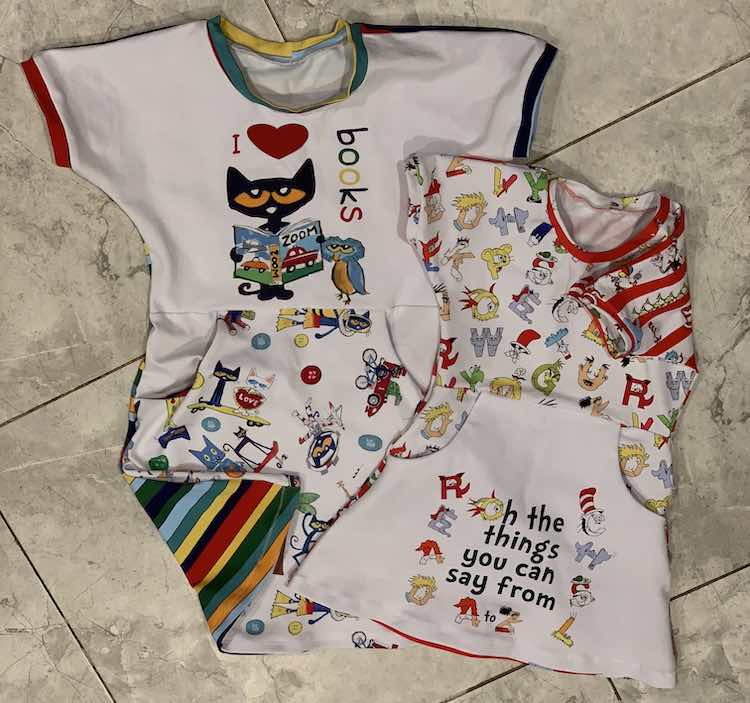
The very first Magnolia I sewed up was back in 2018 and I shared it as part of my kids-specific Me Made May that year. This was back when I was first starting out in garment sewing and wasn’t sure about knit fabrics. I had bought cotton Lycra Magic School Bus panels. for both daughters, through Whimsy Baby Customs and had gotten some cute vehicle fabric through an Elevated Fashion Fabrics knit mystery box I’d bought to increase my fabric stash. I remember that I wasn’t sure what to use for the bands along the neckline and arms of the Magnolia as the vehicle fabric didn’t have enough stretch, or probably recovery, and I didn’t have enough leftover fabric from the front panel to make the bands. I ended looking through my stash and ended up settling on ribbing for the bands which, looking back, wasn’t the most comfortable choice I could’ve made. Yet the girls still loved their new dresses and wore them often over the years. I loved how simple they were to sew together and how great the instructions were while the kids were impressed with the large pocket and loved the vehicles and bus.
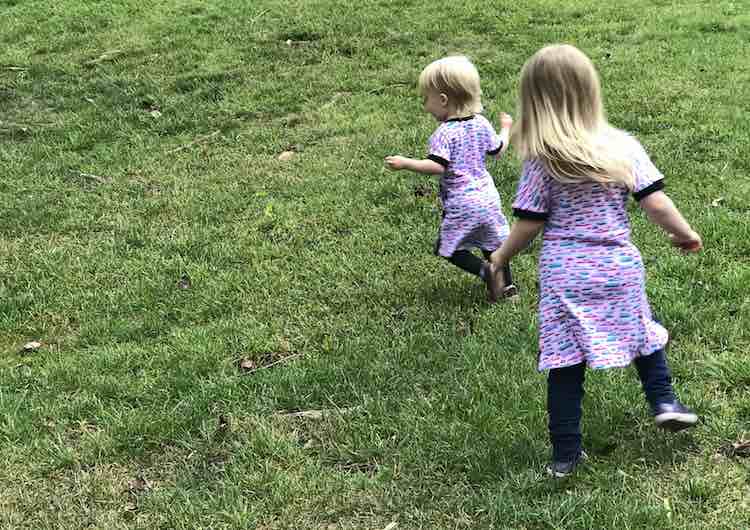
Since then Ada has decided she didn’t want her dress although it’s the only Magnolia, so far, that she’s decided she was done with. About a month or so ago I dug Zoey’s original dress out from her drawer and it surprisingly still fit her. I didn’t get a photo of it but I’m impressed with all the Magnolias as they’ve easily grown with my kids as the dress becomes more shirt-like yet still stretches around their torso.
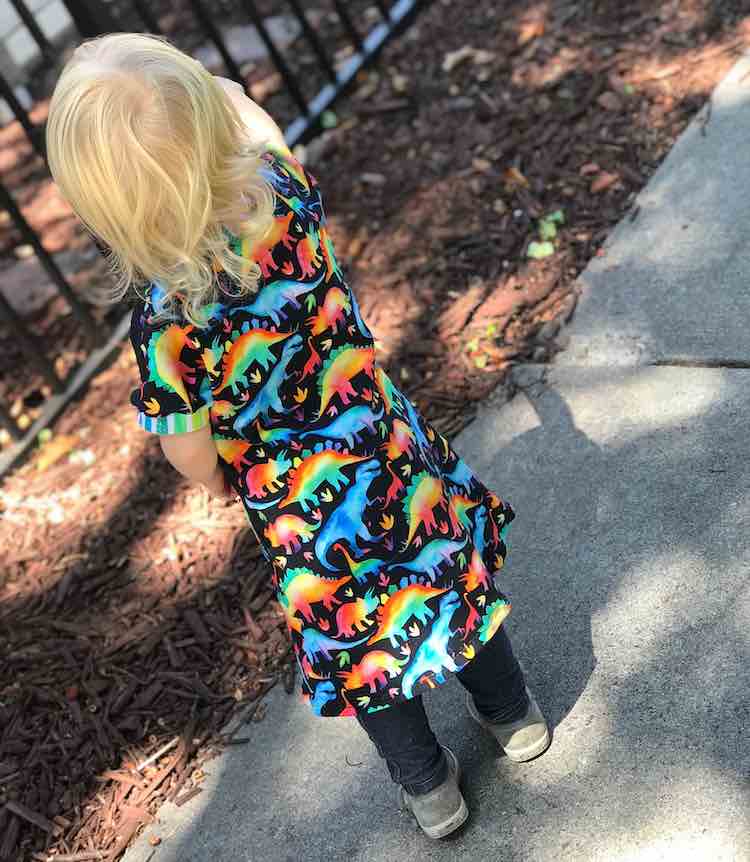
Later that same summer we were planning on visiting the Royal Tyrrell Museum, while visiting family in Canada, and I wanted to surprise the kids with dinosaur dresses for the occasion. I grabbed some adorable dinosaur panels and matching striped fabric, through Whimsy, and another Magnolia was born. The pattern was awesome for an easy quick last minute sew!
Whenever there was fabric I loved at Whimsy Baby Customs the Magnolia pattern was the perfect pattern to show it off and the kids absolutely loved the resulting garment each time.
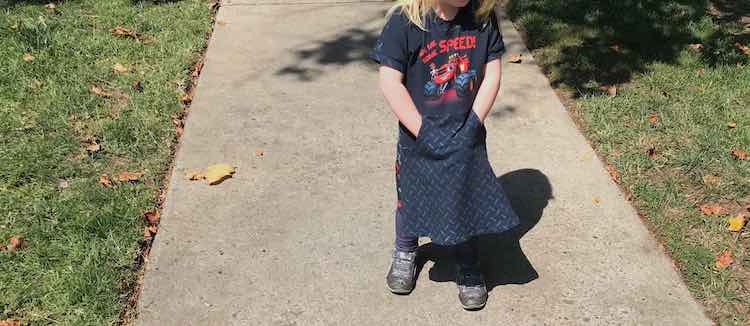
Over time I realized that I could easily remove the horizontal seam on the back of the dress if my fabric was tall enough to cover the height. I did this by overlapping the top and bottom pattern pieces, to account for the seam allowance I didn’t need, and taping them together to create a single paper piece before cutting my fabric out. I absolutely loved the look of the back of the dress once it was all in one continuous piece of fabric whereas my kids were just enjoying that the pocket existed.
Whenever the kids picked a new rapport, through Whimsy’s fabric preorders, the Magnolia was the natural choice to sew it up with.

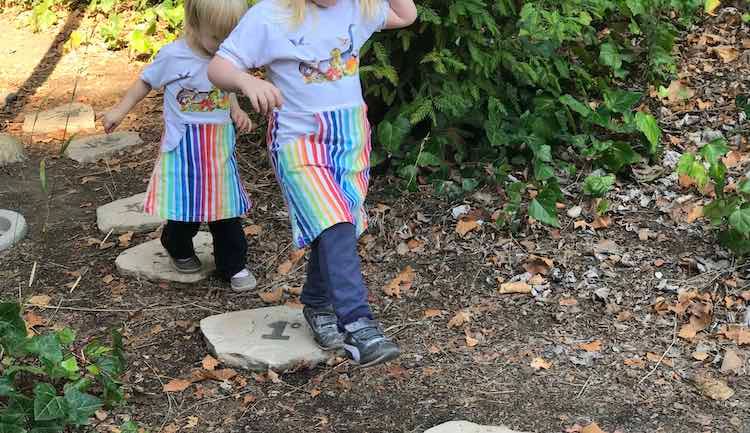
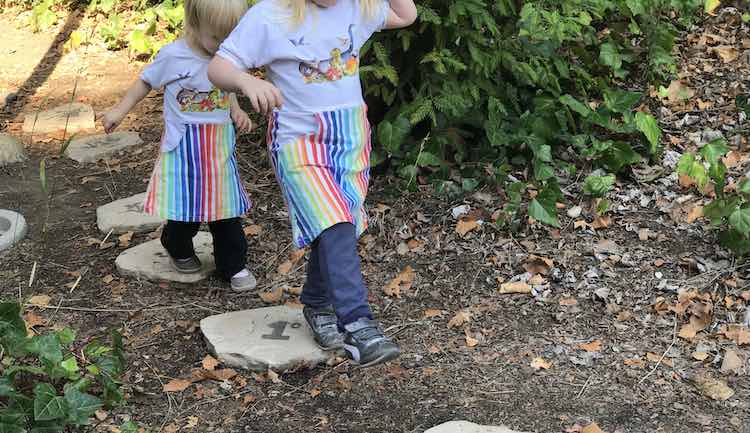
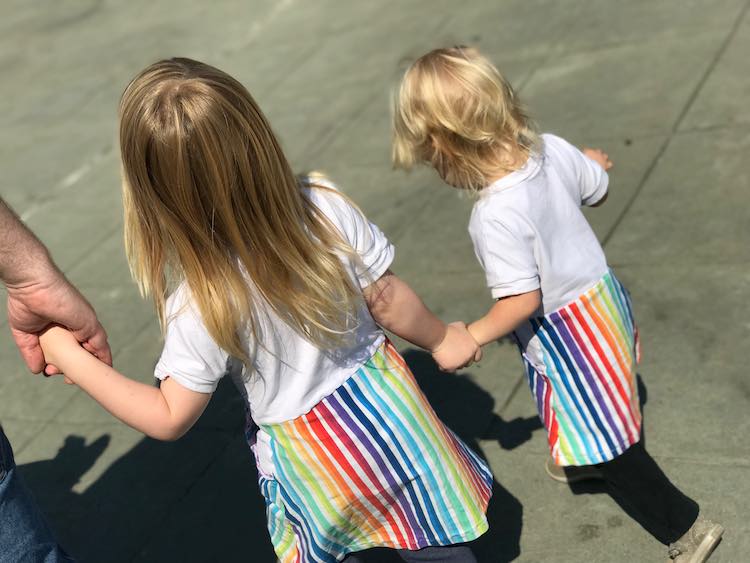
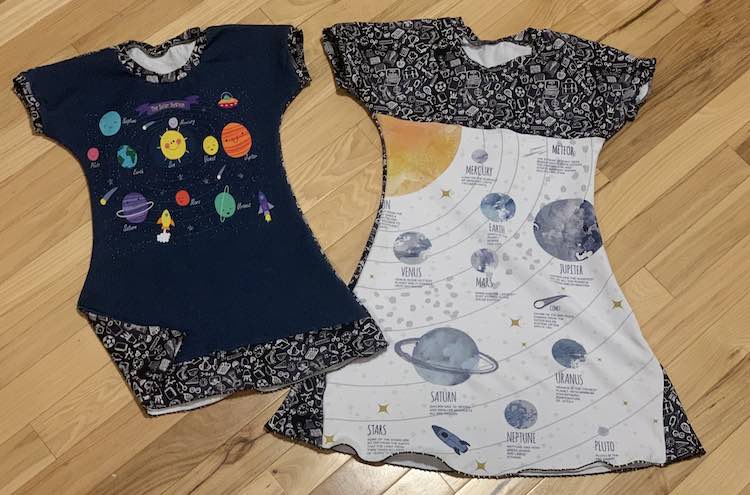
While planning my sews for the 52 week sewing challenge, back at the beginning of the year so pre-Covid, I found two planet panels and two meters of school blackboard doodled fabric that I had bought the girls in the September/October 2019 pre-order at Whimsy. I decided then and there that I’d save them for the August, week 32, sew something for school challenge. As August approached school looked like it would be distance learning again; yet, it was nice to have something normal to sew up and I again went with the simple and awesome Magnolia; although, this time I changed it up. The panels looked too large for the front of the dress if I included the pocket so after printing, taping, and cutting out the pattern I laid the paper pieces over the fabric to confirm they were in fact too large and, after getting the girls permission, I left the pocket off of the dress for the first time ever. Like with the back of the dress I took the top/bodice and bottom/skirt paper pieces, overlapped them to account for the seam allowance, and taped them in place. Since the panels were, now, smaller than the pattern pieces I sewed the coordinating fabric to the panels, wherever the paper overlapped with the fabric edge, before cutting the fabric out. The girls loved their new dresses, even without the pocket, and I think they’re adorable.
I absolutely love the Magnolia Top and Dress and am so glad that I’m finally sharing the pattern with you. The finished garment is amazing letting your fabric pop, the instructions are easy to follow, and the pattern is simple to sew. And there you have it; my favorite go to knit garment for my girls. I hadn’t realized, until I started this post, that I had used Whimsy Baby Customs on every Magnolia so I guess that’s my favorite fabric site for the girls. Have you sewn up the Magnolia yet? If so how did it go and have you made changes to it? I’d love to hear from you in the comments below. I hope your week is going great.
If you’re interested in getting any of my future blog updates I currently come out with a new one every Wednesday and share them to my Facebook page and Instagram account. You’re also more than welcome to join my email list located right under the search bar or underneath this post.
Did this save you time?