

Ragamuffin's Unisex Kaboom Hoodie

I recently had the pleasure of sewing up the kids and adult unisex Kaboom hoodies through Little Ragamuffin Patterns. This pattern was designed for medium to heavy weight knit fabric with four way stretch (minimum 25% either way with good recovery); although, I sewed my version of the Kaboom using light sweater knit (170 grams per square meter). I love the variety offered within this single pattern from the fact you can choose whether you want to add a hood or leave it with a basic t-shirt style neckline to the shirt length, sleeve length, hood options, pockets, sleeve color blocking, and finishing using a banded shirt, sleeve cuffs, or a basic hem for either. I ended up using this to make my kids their Halloween tops and then their Christmas hoodies. I created a comfy slouchy hoodie for myself and love how cozy it feels.
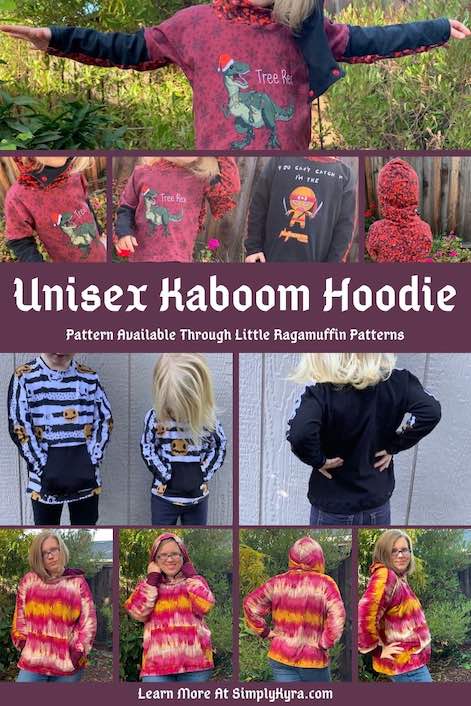
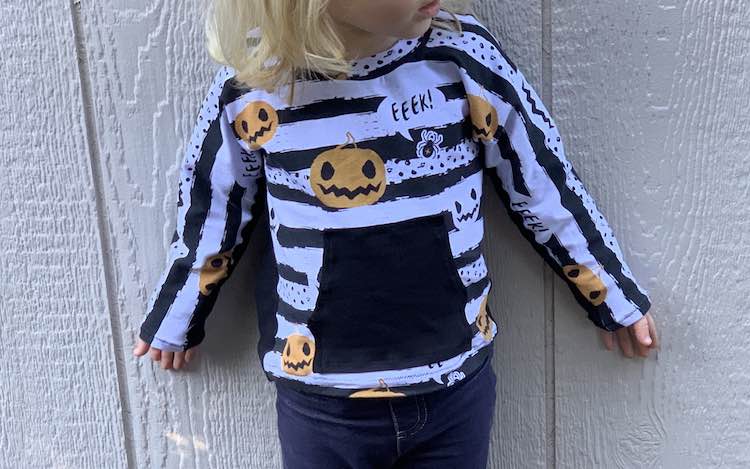
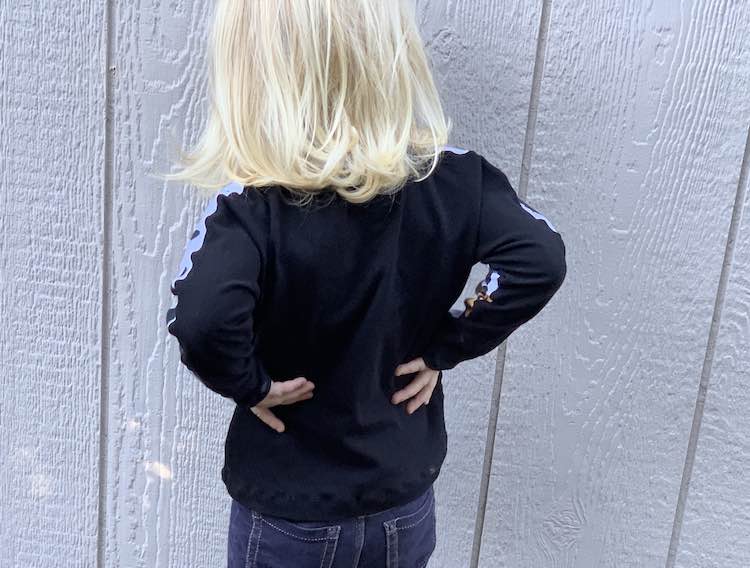
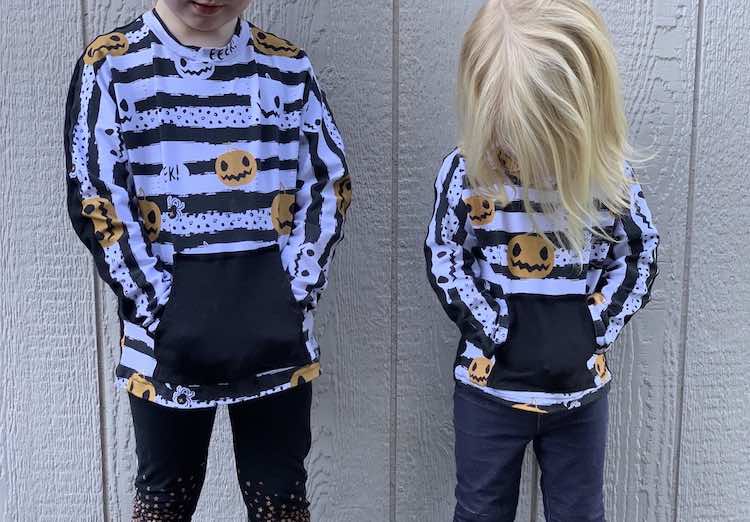
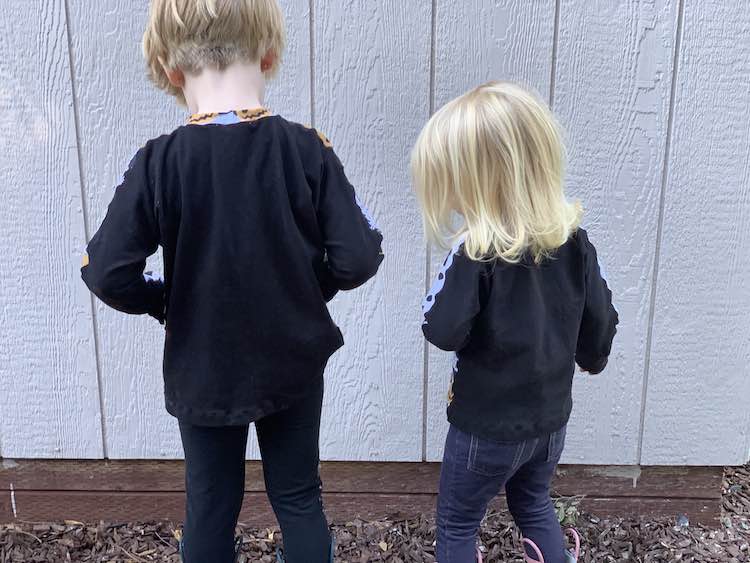
I first had access to this pattern right before Halloween and used the opportunity to sew up some Halloween cotton lycra fabric I bought a while back from Whimsy Baby Customs making the kids a pumpkin-themed top two days before Halloween. I chose to leave the hood off and used the neckband option instead. For both tops I went with the longest sleeve length, hemmed, along with a kangaroo pocket and hemmed the shirt instead of using a band. I cut the neckband and front bodice piece out of the Halloween fabric and then grabbed a thinner black knit I bought earlier that month from Fabric.com for the back of the shirt and kangaroo pocket. I measured the kids and Ada had a straight 5T size while Zoey fit into a 12 month size, but, like the Firecracker dresses before, I used the 3T neckline on the top so it fit over Zoey’s head properly.
I loved how these shirts turned out. The lighter knit on the back of the sleeves and bodice draped nicely and complemented the more structured fabric on the front. The kids absolutely adored the pocket on the front when they discovered it. Zoey was pumpkin-crazy this year and adores her pumpkin shirt while both girls giggled when I told them the spider says “eek” because he’s afraid of the pumpkins.

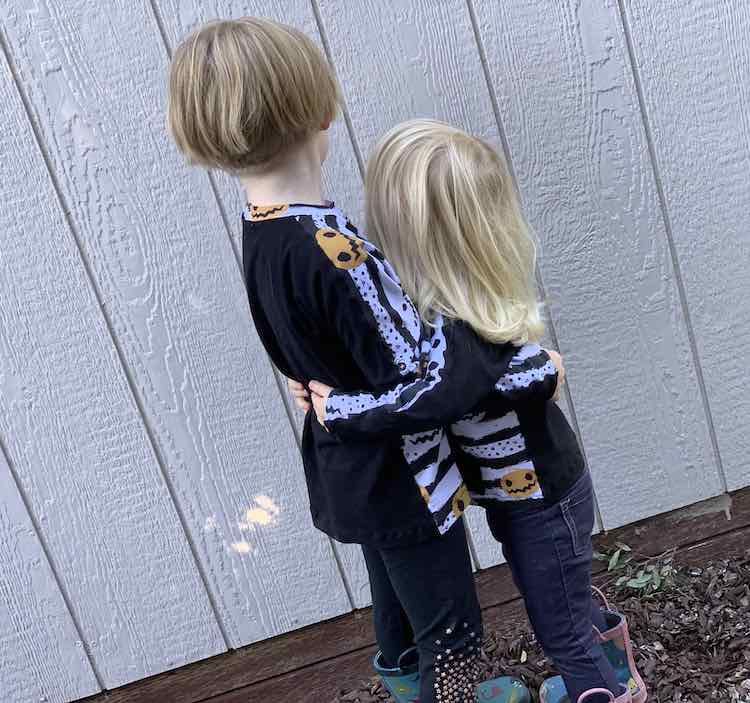
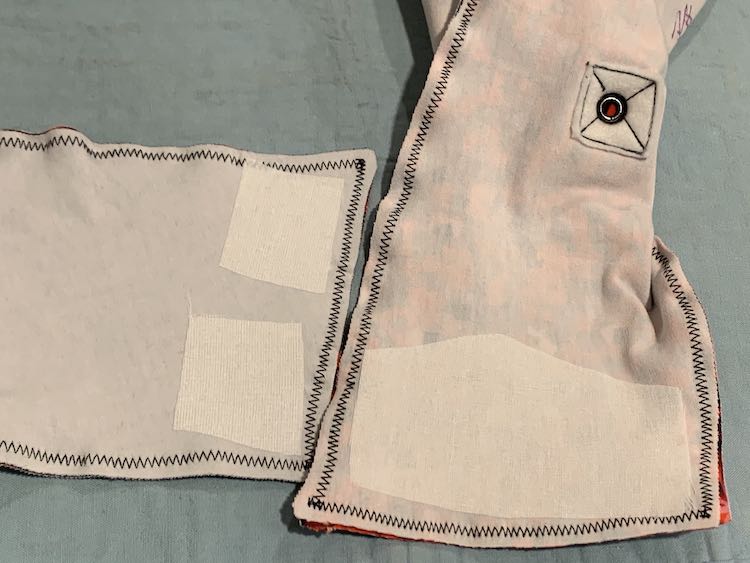
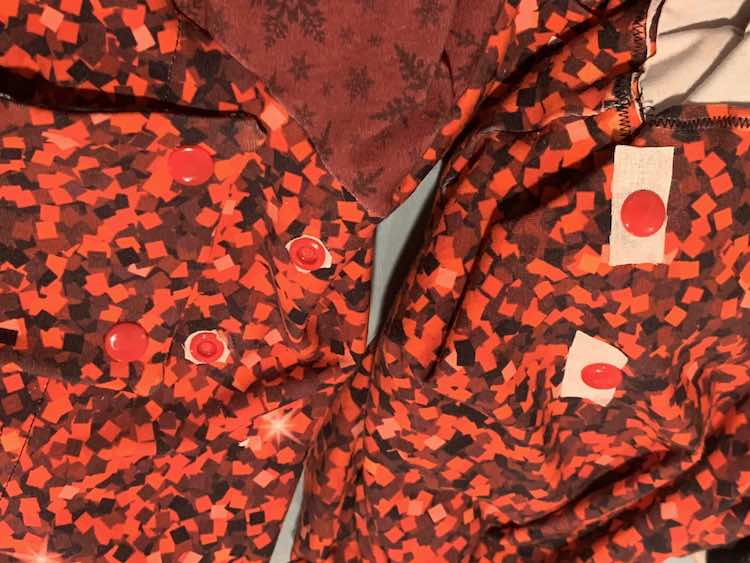
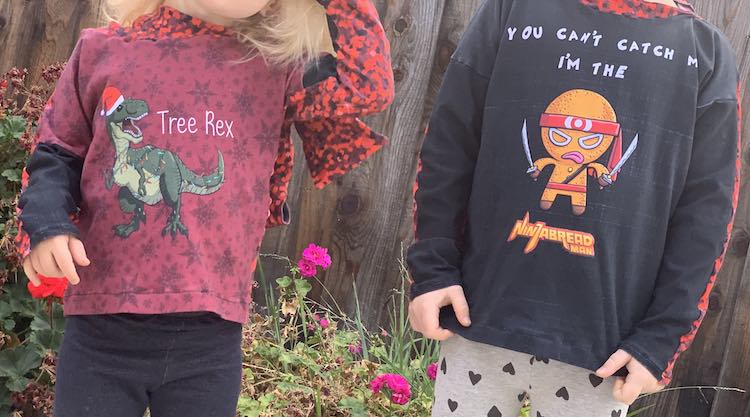
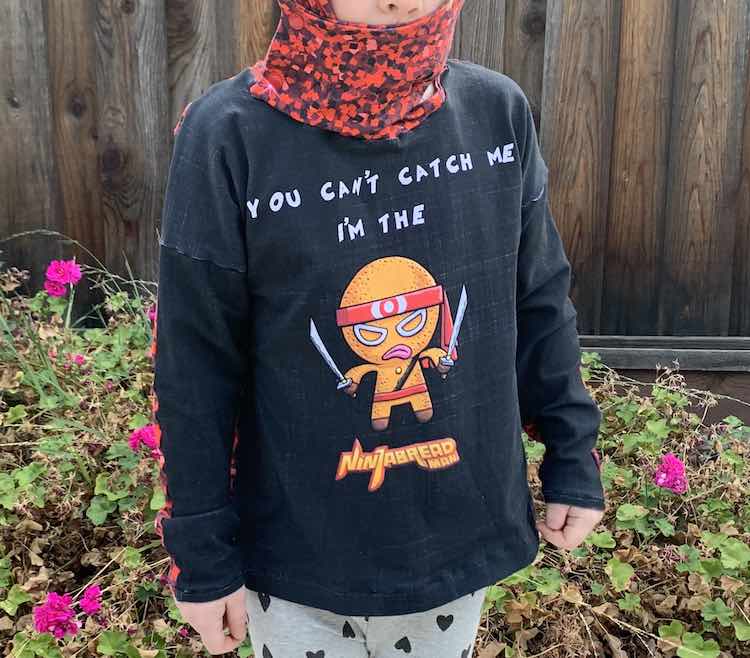
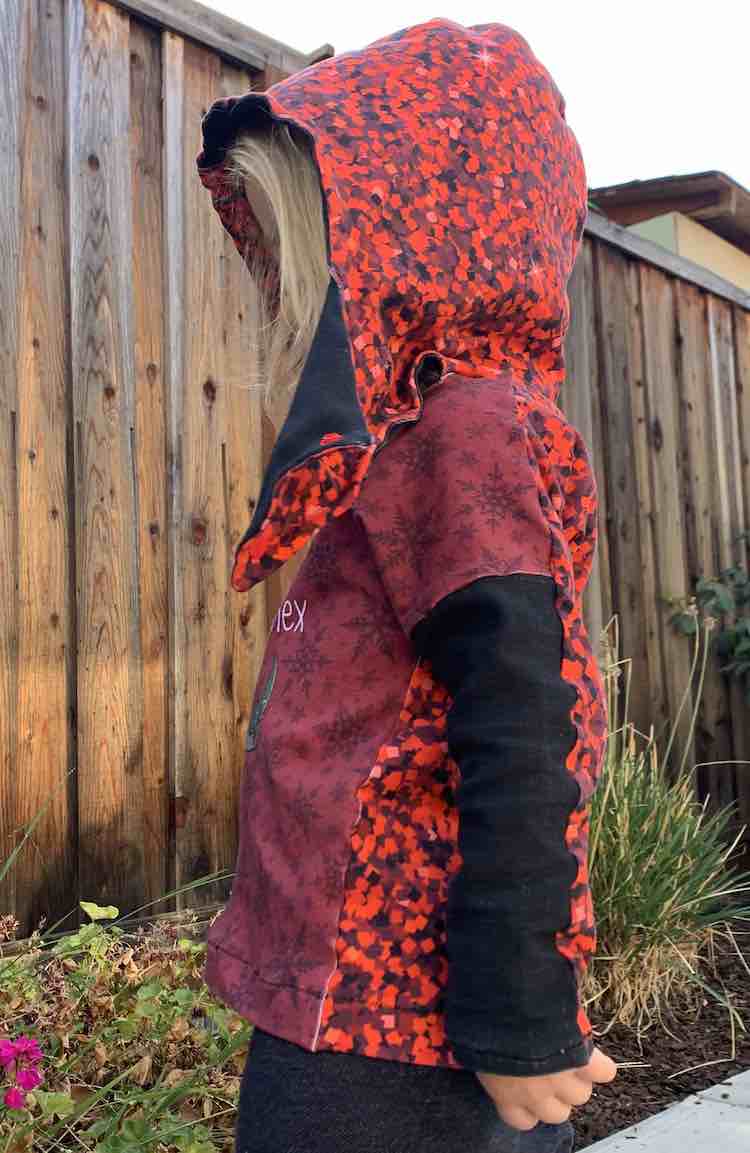
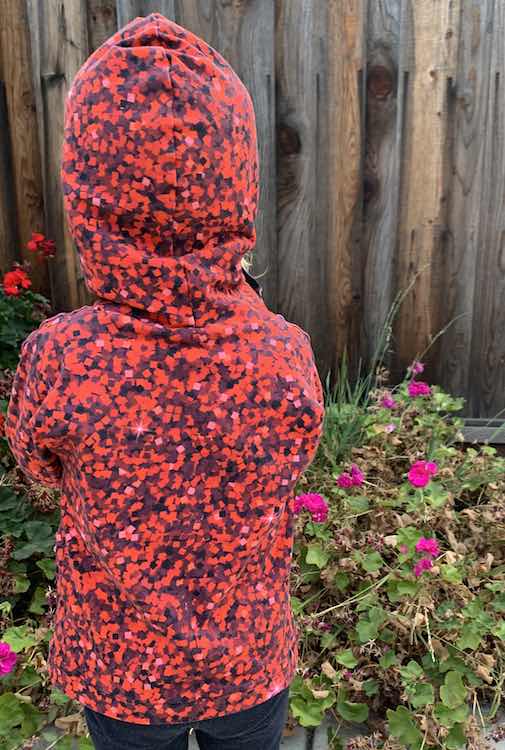
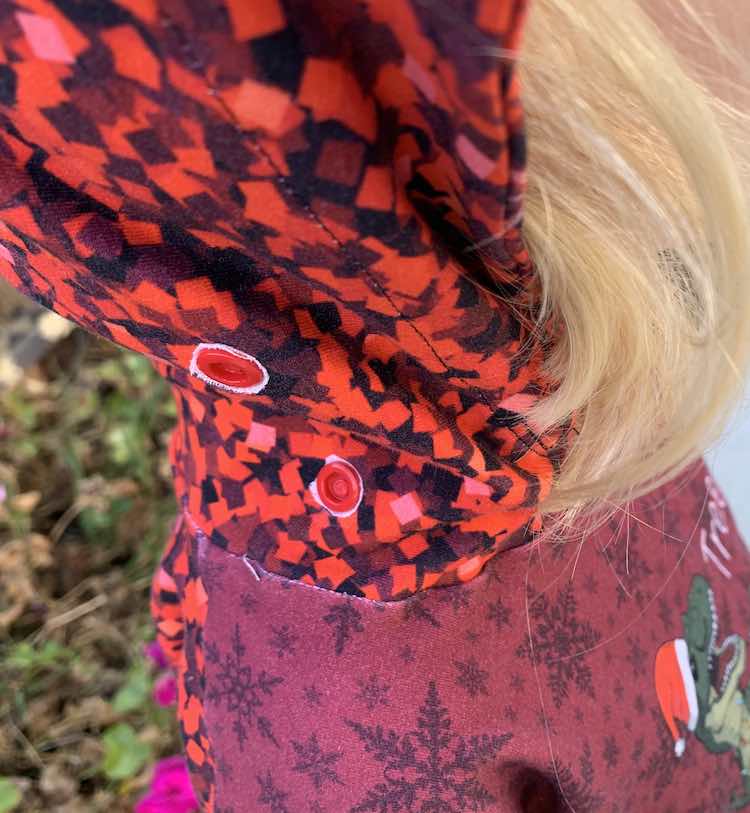
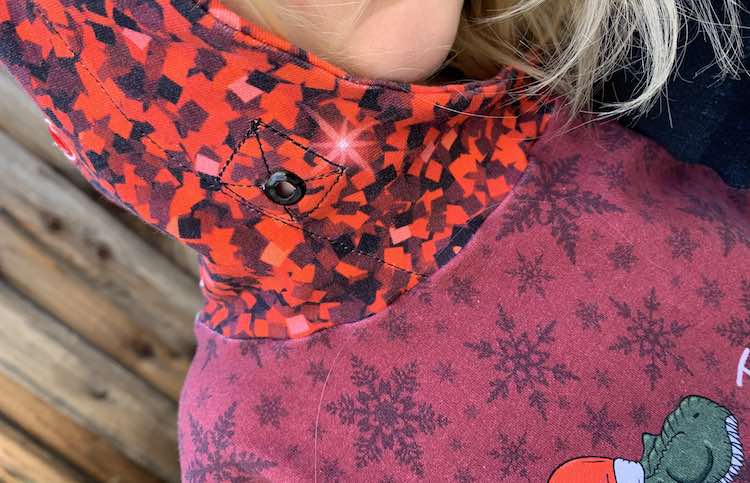
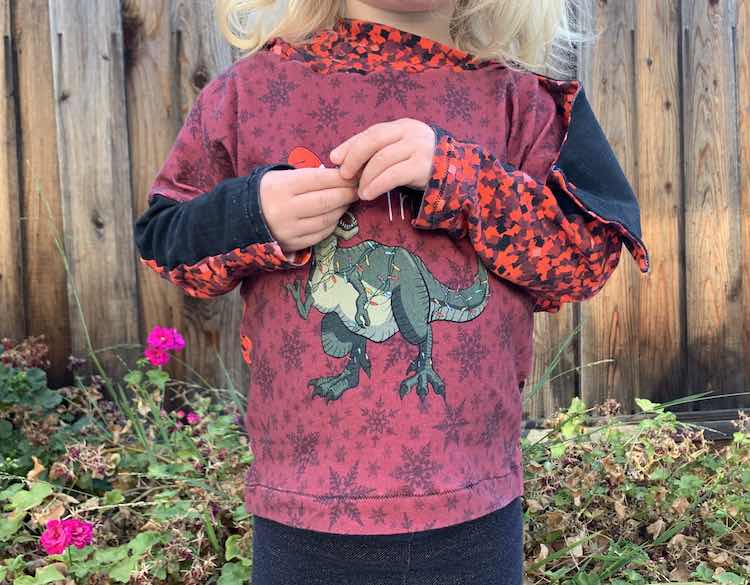
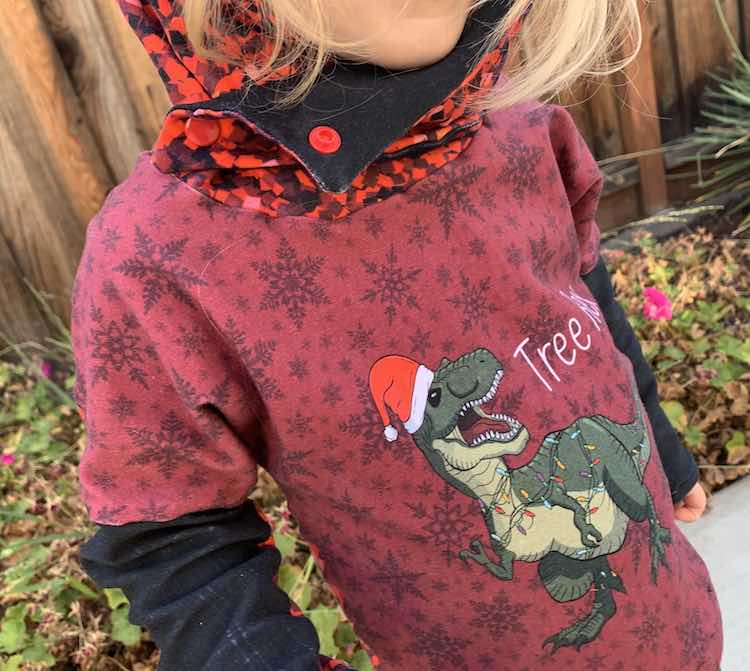
The next time I sewed Ada and Zoey a Lil’ Kaboom hoodie I decided to use the Christmas panels I bought from Whimsy Baby Customs so I left the pocket off so the panel wouldn’t be covered up. I also had to extend the panels so they fit the width of the pattern pieces. I saw that the Kaboom pattern came with sleeve color blocking lines but my panels were too skinny to reach them. I instead grabbed the coordinate I had and sewed it to either side of the panel before cutting the front pattern piece making the fabric, as a whole, wide enough to cover the length of both sleeves. This time around I wanted to take advantage of one of the many hood options offered in the pattern and chose to use the snapped crossover hood for both girls. If you choose to use the snap crossover hood don’t forget to interface the snap locations before finishing off the hood. The interfacing isn’t listed in the pattern and for some reason, after I sewed the outer hood and lining together, I twigged that I had to interface the flap and so I stopped to add the interfacing before turning the hood right side out. I, however, forgot to interface the snaps on the main part of the hood. I ended up finishing the hoodie and was so proud. I laid down the tops for a flat lay photo and snapped the one hood closed for the photo. Afterwards, when trying to unsnap the hood both snaps easily pulled out of the stretched knit while the snaps on the flap held strong. I ended up pulling out the snaps on the other hoodie’s main hood and then interfaced both spots. If I had interfaced these spots earlier I would’ve been done. I then had to attach four more snaps making my stockpile a bit uneven.
Overall, I love how the Christmas tops turned out. Ada loved the hood and didn’t realize it was missing a pocket right away. I discovered Zoey didn’t like the flap covering her mouth when it was snapped closed but she was fine with the lower snap closed if the top was folded down. I do know they’d prefer the hoodie with pockets next time and maybe switch Zoey to a crossover hood instead. Both girls have already worn their sweaters many times.

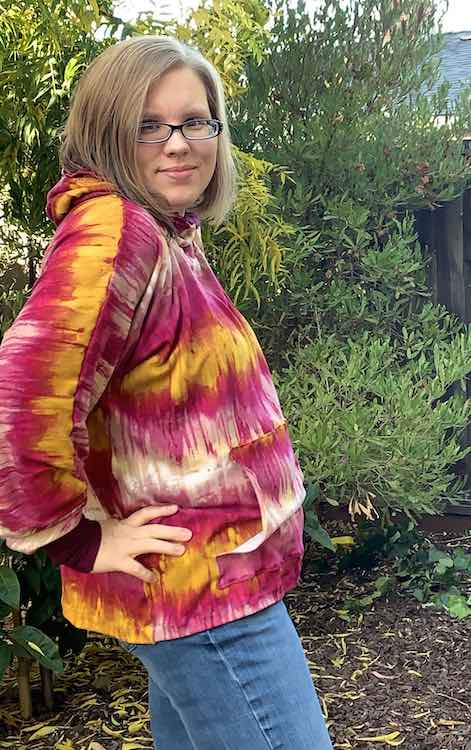
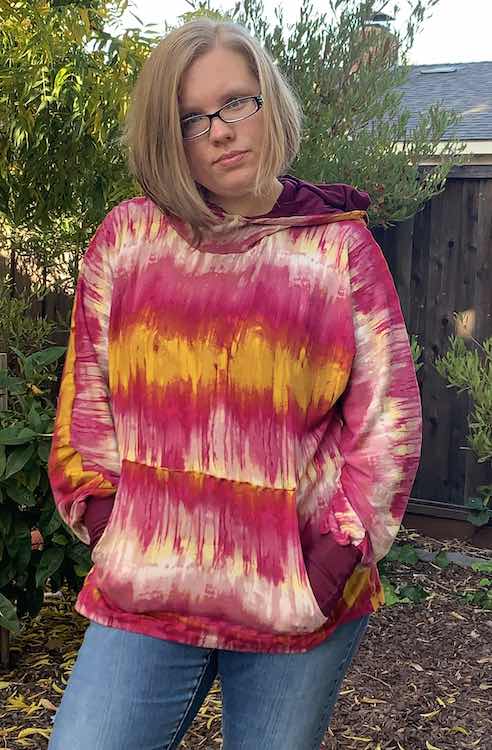
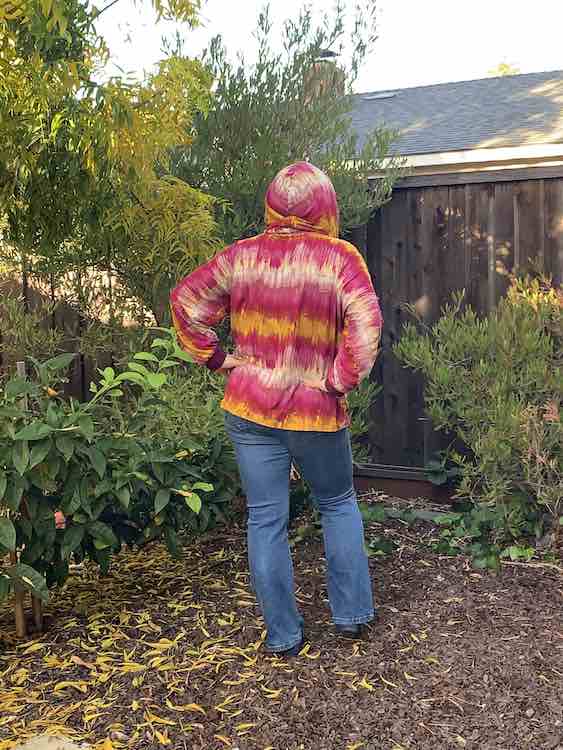
In addition to the kids’ Lil’ Kaboom there’s also a matching adults’ unisex Kaboom that I couldn’t resist sewing up for myself. I chose to use a lightweight sweater knit (stretch 75% horizontal and 40% vertical) paired with a double brushed poly solid (stretch of 100% horizontal and 50% vertical) that I originally bought, from Sly Fox Fabrics, for the kids’ Kaboom but chose to steal for myself. I chose to make the cuffed long sleeved hoodie with a hemmed bottom, kangaroo pocket, and a cowl hoodie. My measurements put me into a large (40) and medium (38) so I ended up sewing a large in my torso and then followed the line from the medium for my sleeves, neckline, and hood. Like the kids Christmas hoodie I chose to add grommets for a drawstring in the hood but didn’t add the drawstring itself yet.
I ended up making a mistake and rotated the cuffs wrong before sewing them up so they ended up tighter and longer than the pattern called for. When I first realized I debated seam ripping them off and reattaching but, after talking it over, decided to keep it as it is for now. Overall, it makes an incredibly cozy sweater that’s perfect for lounging around on a slightly chilly day.

I’m so glad I came across Little Ragamuffin Patterns’ Kaboom hoodie. It’s a quick sew that can be as simple or complicated as you want. I love how one pattern can take you from a shirt to hoodie, from crop top to shirt, from short sleeves to long, and to so many in between choices. Ada absolutely adored the snap crossover hood, I loved the cowl hood, and I can see Zoey enjoying the lowered front crossover hood when I next sew this up for them. You can grab the kids’ Lil’ Kaboom pattern, the adults’ unisex Kaboom, or save some money by grabbing a bundle containing both patterns. This is perfect if you or your child wants to match someone else.
I’d love to hear from you in the comments below, on my Facebook page, or through Instagram. I hope you have a great day.
Did this save you time?