

My Go-To DIY Nightgown After 18+ Makes... and How You Can Make It Too!

I posted about this nightgown mashup years ago after having only made two of them but the post itself was a last minute tacked on add-on to a time-limited themed post and it all felt a bit rushed. Since then I've gone on to make so many more of these nightgowns and my girls absolutely adore them while I love how simple they are to make. This nightgown is our most used pattern hands down and as such I knew there needed to be an updated post... but over time it felt bigger and bigger and I kept putting off. Although the pattern company is no more and Joanns just closed I knew I needed to share it still... and finally here it is!

Backstory
This nightgown came about back in early 2019 when I took part in the Rebecca Page Double Duty Blog Tour (link no longer works) that I posted about with Sleepy Gowns - Patsy Party Dress Hacked or Mashed. All the bloggers that took part in the tour needed to take a Rebecca Page pattern they'd sewn up already but they had to make sure to add a twist to make it unique. At this time I had recently sewn up her Patsy Party dress and while making it thought how much easier the back would be in knit. As such for my entry I decided to try it. I had cheap snuggle flannel on hand so I switched the dress to a nightgown so it would cost less to execute and any mistakes in execution wouldn't matter as much. The directions for this one are at the top of the post though, word of warning, I only made it the one time so no later on updates are available. That said the dress was adorable.
As I made that nightgown I thought of the Rebecca Page Olivia shirt and realized that mashing it together with the skirt part of the Patsy dress would be adorable and easier than what I was currently making. With that this nightgown was born and this, not the first version, became my favorite as it's quicker and way less fussy to make. In fact while compiling my 2023 sewing recap post I realized I'd made this at least fifteen times now and counting! Then, while putting this post off, I made it three more for Christmas in 2024 and if the kids request it again I'll for sure make more!


Plus I have both patterns for kids and ladies so regardless if they keep asking I will keep making.
What You Need
Pattern
This nightgown uses the six panel skirt from the Rebecca Page Patsy Party dress and the shortened pattern pieces from the Rebecca Page Olivia shirt.
I loved Rebecca Page's patterns and was part of her brand ambassador program until I realized I didn't have enough time to devote to it anymore. Her patterns taught me tons about sewing. That said, while compiling and writing this, I realized her brand is no more. While researching it I found Craft Industry Alliance's post: Rebecca Page Rebrands, Then Quietly Shuts Down. Additionally, I haven't joined but found this private Facebook group Rebecca Page? You.Make.? What Page?. Other than stumbling across these after the fact I know nothing about what went down. That said, her patterns still seem to live on under another name on the Etsy page YouMakePatterns if you really need them. That said, you don't need her specific patterns to make this. All you need are two general patterns: a peasant top and a six-paneled (maybe any-paneled?) skirt.
Pattern Alternatives
I use a peasant top with elastic in the neckline and have since stopped adding elastic to the sleeves. I also crop it to be shorter so the horizontal line joining the top and skirt isn't as low. I'm assuming any raglan may work but not sure. If you try please comment below!
Here's the peasant top I used. Normally I crop it to hang higher but last time Ada wanted a to the floor nightgown so I kept the skirt the same and cropped less from the bodice. Personally I don't like how low the joining seam is but she adores it.
For the skirt I use a six paneled pattern but I'd imagine any flared or tiered skirt pattern should also work. Again if you try it please comment below!

I use a six-paneled woven skirt pattern (ignoring anything related to the bodice) though maybe any circle skirt would do?
If you have a good alternative to either pattern you want to share feel free to post a link in the comments or email me and I can add an update.
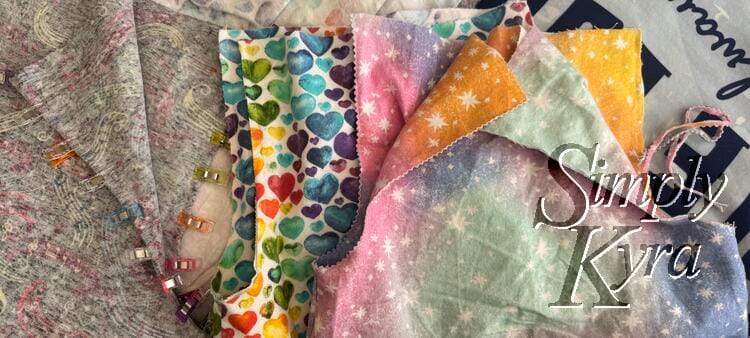
Fabric
Each time I make this I use the Super Snuggle Flannel from Joann's but first make sure it's on sale for $2.99 a yard before having the kids choose whichever design they want. That said, the last few times shipping took awhile and I had some of my non-fabric add-ons randomly cancelled with no warning. Plus, I really need to get this live as I've recently heard that Joann's has filed for bankruptcy... again.... and then I put this off and they're now closed so if you know where to find something similar for cheap please please share in the comments below or email me so you and I can keep making this!

Other Items Needed
I print out my pdf pattern and then used scissors and either, based on what I can find, scotch tape or masking tape to tape the pieces together. To cut the fabric I use pattern weights, two cutting mats placed side by side, and a rotary cutter.
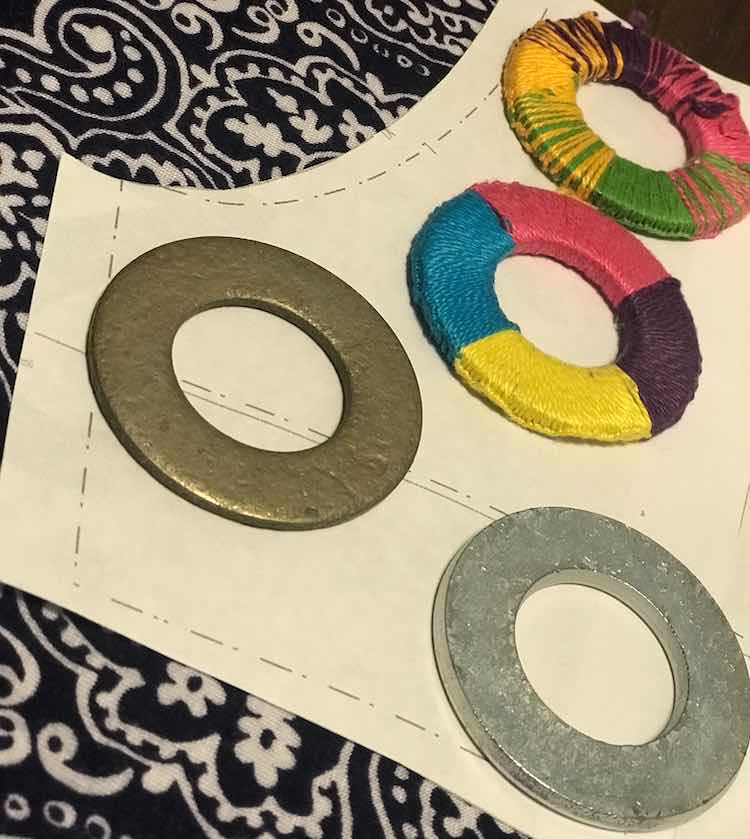
If you're looking for pattern weights I've shared some of mine before.
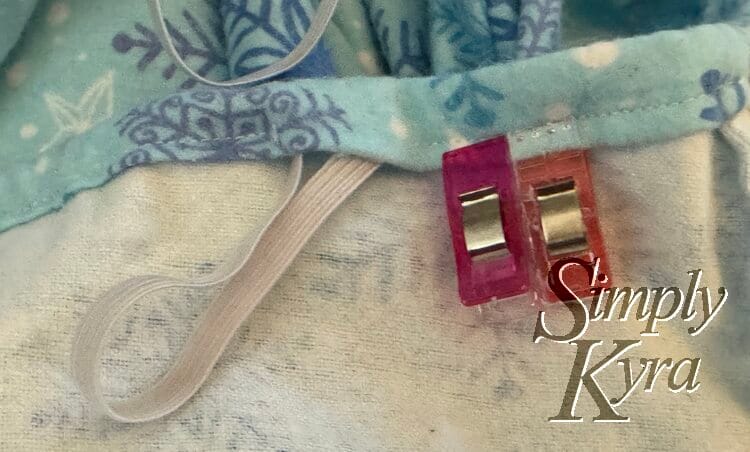
When sewing the nightgowns I use copious amounts of sewing clips as I normally try to make two to four dresses at a time and I like streamlining the clipping and sewing in batches as big as possible. In addition you need fabrics scissors (though I've also used pinking shears) for the optional French seams and elastic for the neckline and maybe for the sleeves. I like having a smaller pair of scissors at the sewing machine along with, potentially, a seam ripper.

TLDR: Quick Directions if You Own the Patterns
If you own the patterns here's a quick overview of my process.
- Olivia: Step 1 - Top Side Seams
- Olivia: Step 2 - Sleeve Side Seams
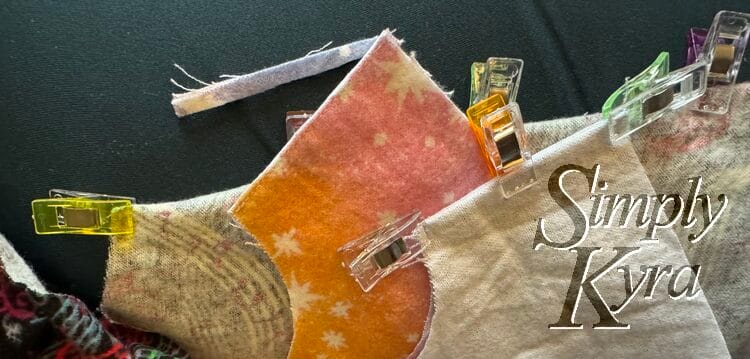
- Patsy: Step 2 - Skirt - Here I combine several steps before sewing. Patsy is a six panel skirt and in the directions you do one side panel, the other panel, repeat for the other half, and then join. Instead I:
- Clip the front side panels to the front piece
- Clip the back side panels to the back piece
- Sew all four seams using French seams.
- Clip the front and back sections together on both sides
- Sew them together making the skirt.
- Olivia: Step 3 - Hem the Sleeves
- Olivia: Step 4 - Attach the Sleeves
- Olivia: Step 5 - Finish the Neckline
- Olivia: Step 6 - Neckline Elastic
- Olivia: Step 9 - Sleeve Elastic (optional) - I hem
- Patsy: Step 8 - Hem - The pattern has you measure, flip, and sew. I streamline the exactitude and instead do a rolled hem on my serger going around twice to cover any spots that weren't fully rolled.
- Patsy: Step 4 - Attaching Main Bodice to Skirt - Follow directions replacing main bodice with the Olivia top. Ensure to clip and quarter so there's no uneven bunching.
Skipped
I'm lazy in my sewing so chose to skip all the optional steps like stay stitching the skirt, skirt overlay, and trimming the shirt. Since the top is sewn to the skirt you can also skip hemming the shirt and all bodice steps including the straps, back elastic, and bodice lining (steps 1, 5, 6, and 7).
Preparing and Planning
Preparing Pattern Pieces
I'm assuming this would be the same regardless what pattern you're using.... so:
Patsy: The skirt part essentially stays the same BUT I ignored the bodice when cutting the skirt pieces out. If using a skirt pattern I'd imagine you simply ignore anything waistband related.
Olivia: I use all the same pattern pieces but make sure to shorten the front and back bodice pieces. Over the years I moved the line down for a longer dress and bodice per the kids' request (personally I prefer the look of shorter) but as long as you make sure you leave enough room under the sleeves for the sleeve and skirt attachment seam allowance you're golden.
Quick Note: Depending on the bodice length this can make it easy to confuse the pieces with the short sleeve pieces. Please mark if worried.


Quick Note: The sleeves themselves can be anything. The Olivia pattern called for regular or elasticized long or short sleeves which I normally made short and elasticized but the sleeves became too tight when the kids grew and I frequently found myself cutting the elastic off. Now I just do a rolled hem with my serger from the beginning as it's less steps overall and preferred.
Quick Note: Going Forward
Once you figured out what size you need I recommend the first time maybe sewing up a muslin with cheaper but similar fabric. This could also just be a muslin of the shirt pattern to size then go with the same size of skirt... or you could muslin the entire thing.... or just jump in and hope for the best... that's what I commonly did.
At the beginning I followed the directions then over time I simplified everything by cutting out what I didn't need and, other than the elastic, sewing every step with just the serger. I found over time many of the seams unraveled and I had to spend time fixing random holes. I've since added more steps by only using my sewing machine (other than the rolled hem) with French seams so now, if a seam starts opening, there's another seam holding it closed and it gives me more time to fix it.
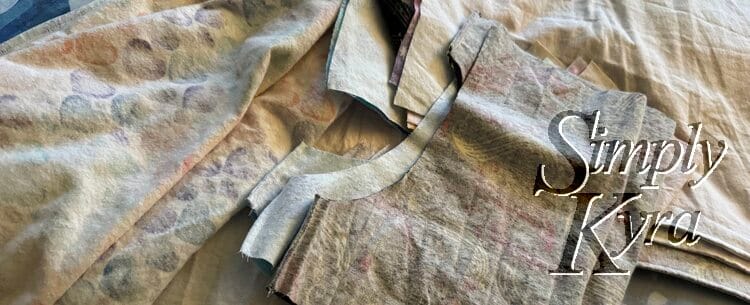
Cutting Fabric
Once you know the plan it's time to cut out the fabric. I find this step, for me, is the most time consuming and put-off-able. The space needs to cleaned off and the feeling of needing to cut all the dresses I'm batching bugs me. That said, it's not too difficult. Just make sure to pay attention with directional fabric and mark any place that would make life easier for you later on like the front and back panels.
Quick Photo Notes


Follow Along as I Make It
Along with sewing several dresses at once I also like to batch the steps together to minimize having to switch between sewing and clipping the fabric together. As such, I start making the bodice and skirt at the same time clipping as much as I can before switching to the sewing machine to sew it up.
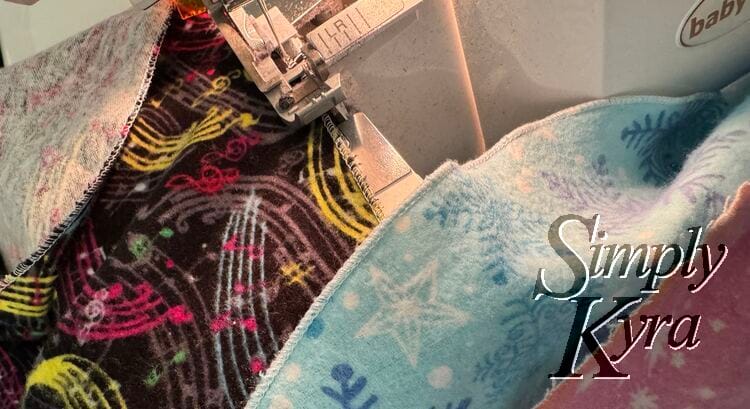
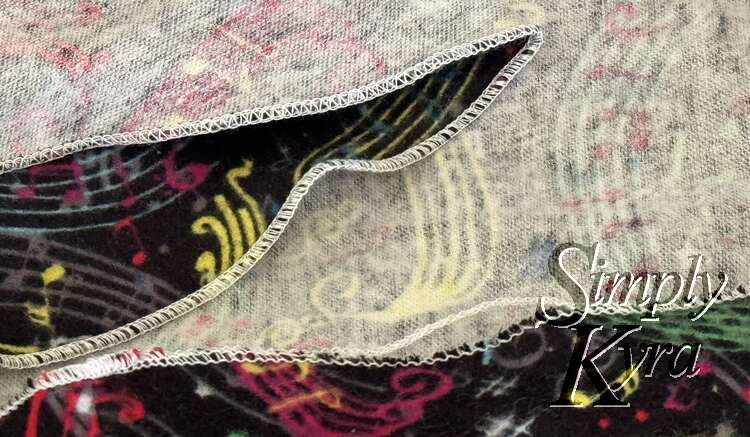
That said, the pattern is essentially making the top, make the skirt, (optionally) hem the sleeves now as easier without the skirt, add neckline, attach together, and hem the skirt. Also I use a French seam so the photos show the wrong sides facing at first but after sewing I flip them wrong sides out, finger press the fold, clip in place, and sew them all hiding the first seam.
Quick Link Notes
Other than the rolled hem I've more recently switched to a sewing machine with a French seam... that said I used to use the serger and if you want to know now I tie off the ends so they don't unravel check this post out!

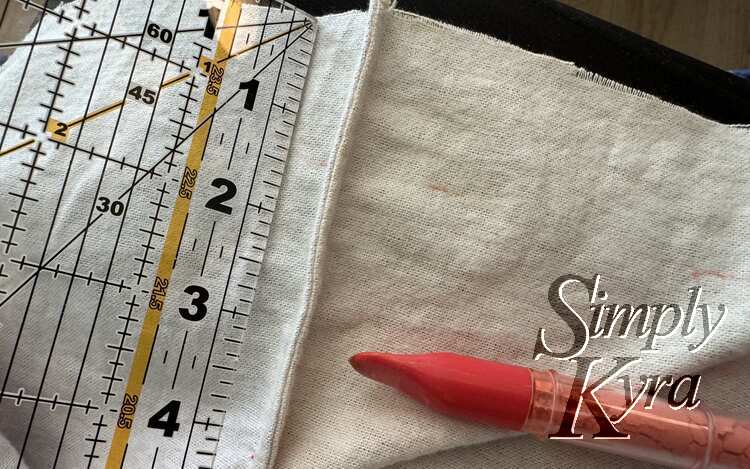
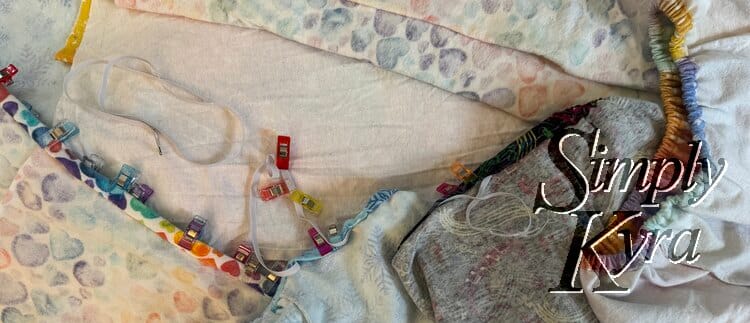
When making matching outfits for my girls they sometimes were hard to tell apart unless I could hold both outfits up together... as such I started marking them to tell them apart more easily.
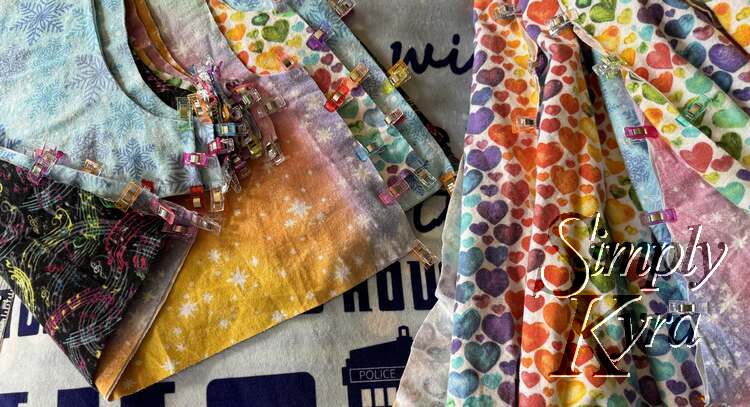
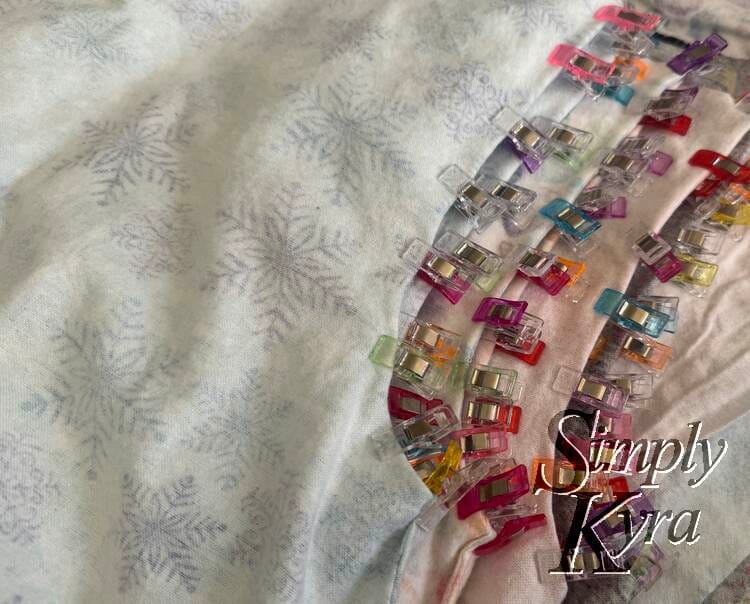
First Batch: Skirt and Bodice Pieces


Sleeve Hemming
With this first batch of sewing done we could technically hem the sleeves now. At first I saved this for later, as the directions said, and combined it with the neckline but now both with my planned rolled hem and knowing that hemming after the skirt is attached it too bulky I decide to get it done now.

Second Batch: Skirt and Bodice Reveal
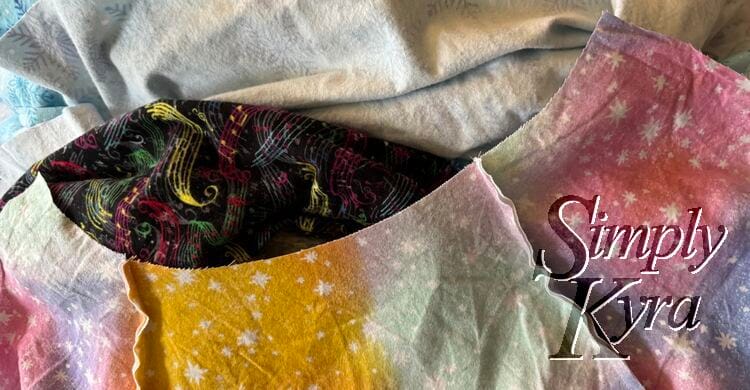
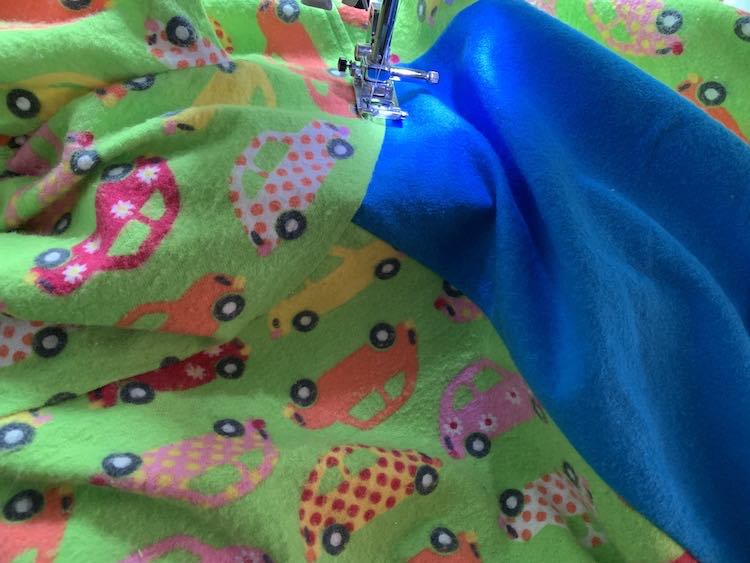
With the sleeves made and bodice tubelike it's now time to attach them together. At the same time I attach the front and back skirt halves into one too. After these are clipped, sewn, trimmed, flipped, clipped, and sewn again we have one bodice and one skirt per each nightgown... with their top and bottom raw edge unfinished.
Pause For Top Neckline
At this point we return to the shirt's instructions to finish the bodice's raw neckline (top edge). Since this is an elasticized peasant top I need to measure from the top, flip the top down, and clip the fabric in place before carefully sewing along the edge making a channel for the elastic. I make sure, while doing this, to leave an opening so once this is made I can thread the pre-measured elastic in, making sure to leave the end sticking out, and thread it all the way through. I then clip the elastic ends together, join with a zigzag stitch, tug to tuck it back in the channel, and sew the channel closed making sure to not sew over the elastic. This is the part I hate the most, although easy, and I love that I only do it for the neck now and not for the smaller sleeves too.
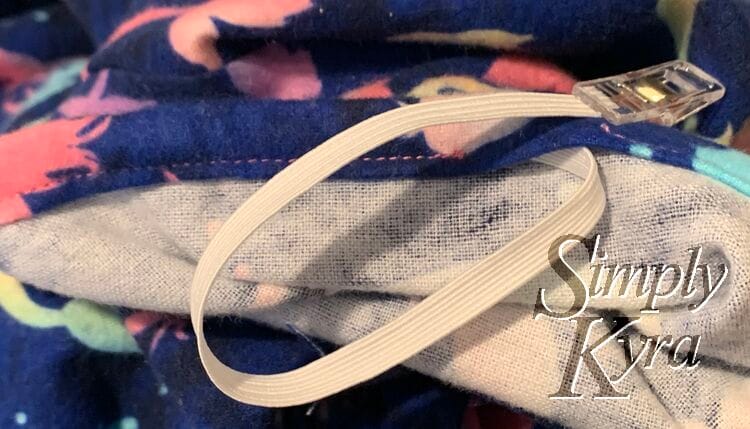

Quick Image Note: Lost Safety Pin
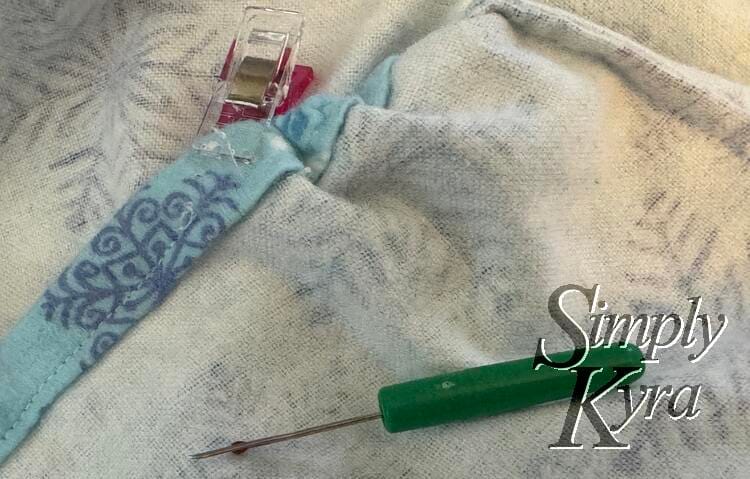

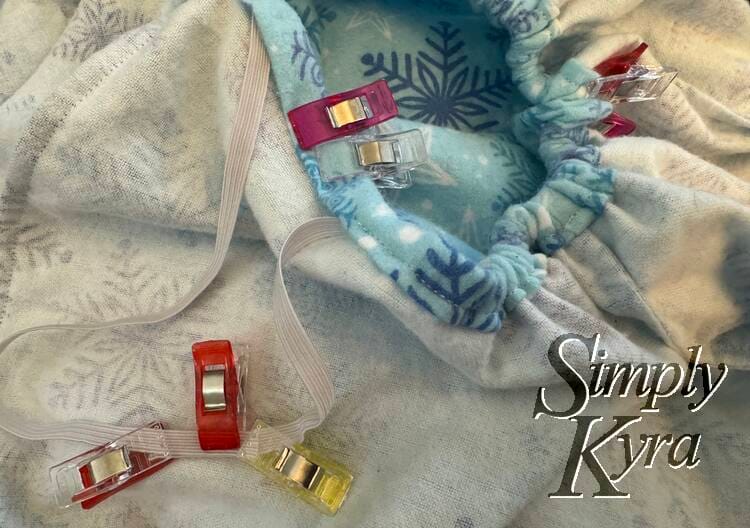
Connect Bodice and Skirt
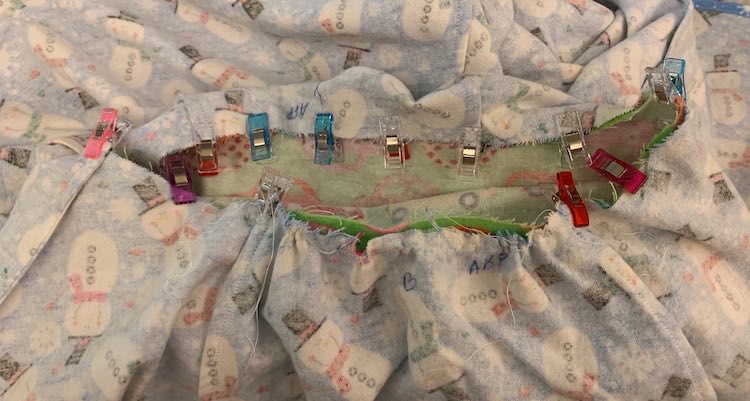
I leave hemming the skirt for last so the next step is connecting the bodice with the skirt. That said you could reorder it if you want to hem first. Either way depending where you crop the bodice and your outfit size the skirt diameter won't fit the bodice bottom. As such I find the four quarter points to both:
- Bodice: the bodice has the sides marked already with the seam but I fold the bodice along the front and back, matching the side seams, to find the center front and back. I mark these points with clips.
- Skirt: here I fold the front and back panels in half to find their center, mark with clips, then hold them together to find and mark the side seams.
With these four center points known I can now put the bodice inside the skirt (wrong sides together because French seams) and clip them together at these quartered points. I then find the center point between each set of clips, match them up, and clip in place. I continue around halving each space, matching, clipping, and repeating until the whole thing is done and all excess is matched in manageable sections. Then I sew it closed, trim the seam allowance, flip the other way, clip, and sew again.

Quick Note: I find the feed dogs help push the fabric through so if one side (skirt or bodice) has more fabric than the other I make sure that side is facing down so the sewing machine's feed dogs can do the work of gathering the fabric while I sew.

Skirt Hemming
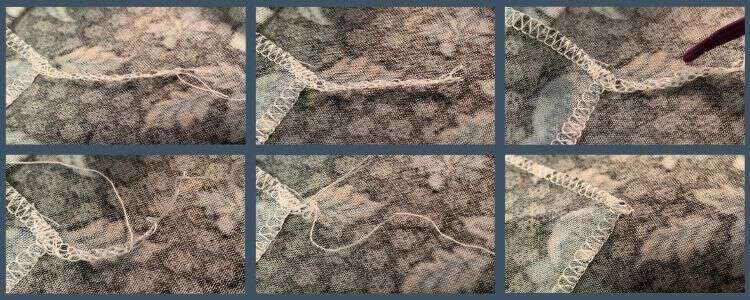
This step feels long but it's also fun and I leave it for last. Technically I could measure where I want the hem when the kids are wearing the dress and the pattern actually has you measure, fold, and hem properly but I got lazy and these started as a gift that had to be hidden. As such, over time, I simply hemmed it and started doing a rolled hem first on my sewing machine but had troubles if there were weird mismatches at the skirt seams and then later discovered I can do a rolled hem on my serger which trims any mismatches for me as we go and it's awesome!
Quick Note: I sometimes miss a spot here and there where the rolled hem isn't exact so I started serging around the skirt twice to cover up these small spots. There's the real possibility of losing your starting spot so, to eliminate infinite hemming, when I finish my first go around I clip that spot so I can find it easily on the next circuit around.
All Done!
These dresses have become a known and requested Christmas present either through fabric I have on hand or that we bought before Halloween.

Quick Note: Alternative Options
Just in case you prefer other methods when making these I wanted to highlight two images from the first post:

To better compare and see more photos this nightgown is halfway down in this post.
Customizations - Fabric Markers
In week 28 of the 2020 52 week sewing challenge the kids had the opportunity to color the front panel of the dress to make their own nightgown. I found the fabric too thin and see through so I ended up cutting two layers and sewing it as if they were one. I also had them shop my stash and they chose what each skirt panel, sleeve, and back bodice piece should be. Quote from the previous post in 2020:
For these I allowed Ada to use the lightbox I had recently bought so she could trace the Wonder Woman logo which lead to Zoey tracing out a flower on her dress. After tracing Ada then copied her DUPLO® creations making it a Wonder Woman DUPLO® dress while Zoey finished hers off more quickly.
Quick Note: Over the years of including the kids in sewing designs I tried to enforce seam allowance awareness. If they draw close to the edge it will be hidden and/or cut off.
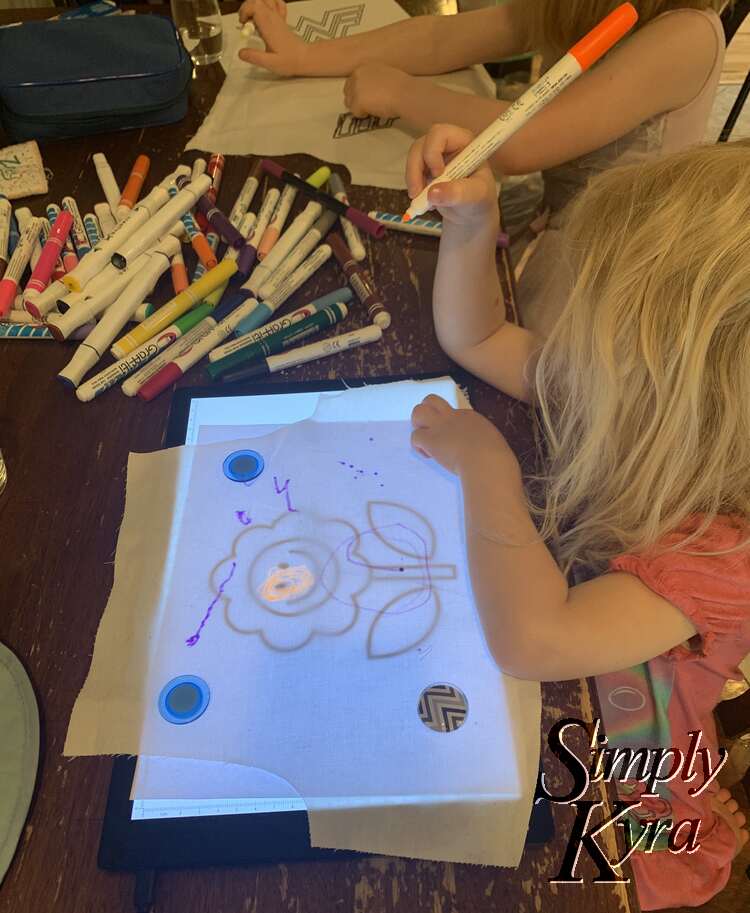


After taking in requests from the kids I also once traced and colored front bodice and straps for the Patsy gown (dress this skirt was taken from) in case you're wanting something similar but different.
Quick Note: If your kids may work on it for a while and dog ear the edges I could see tracing the pattern piece out (so they know the where the edges are) and not cutting it out completely until after it's done.

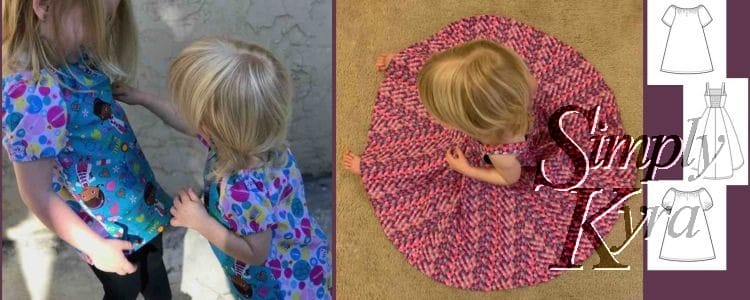
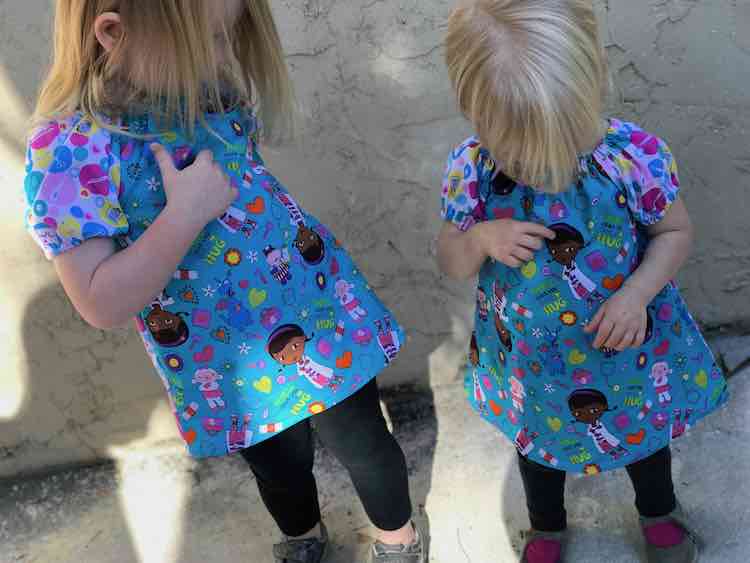
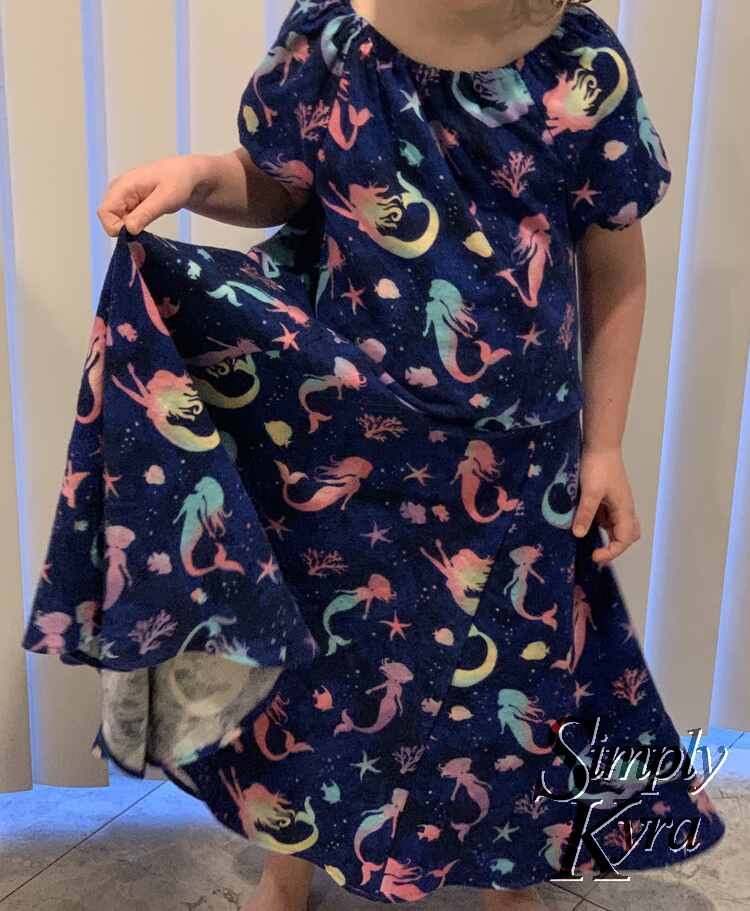
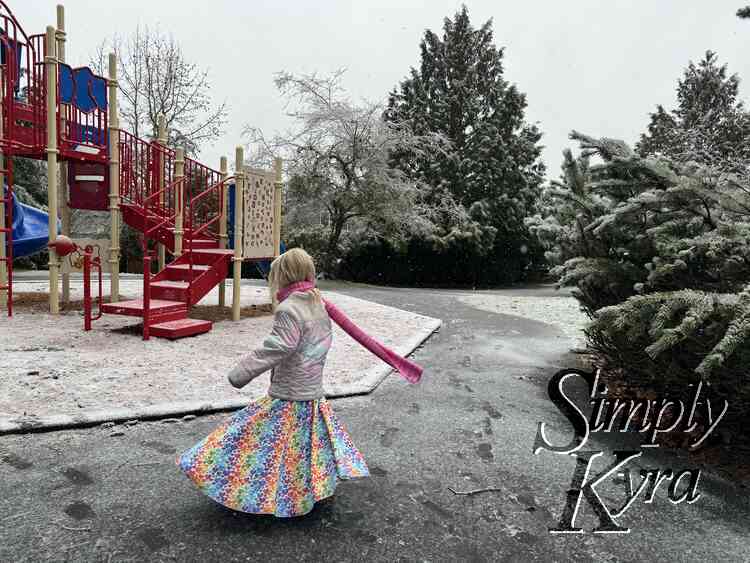
Final Dresses
And without further ado here are many of the dresses with different hems (folded and stitched versus rolled) and different sleeves (cinched with elastic versus rolled hem) over the years.
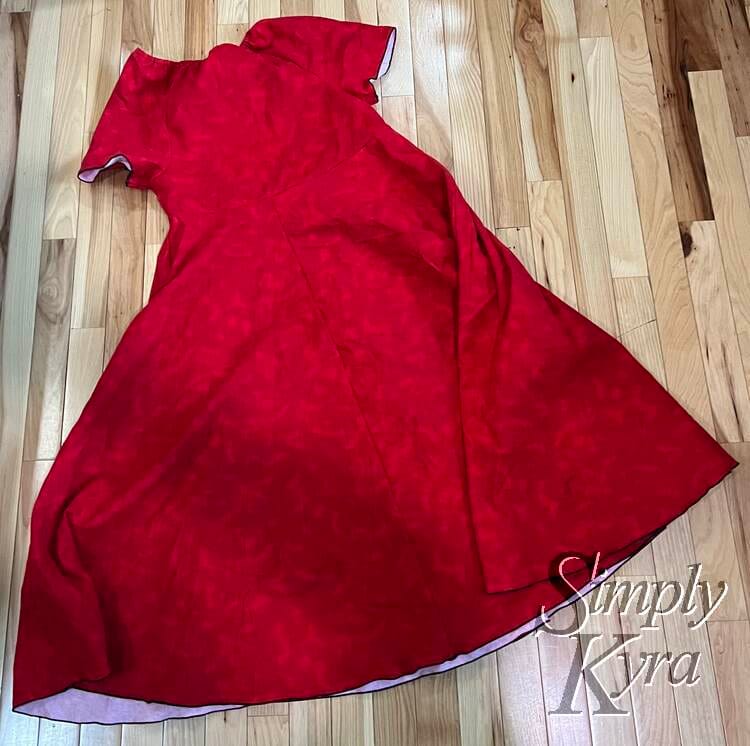
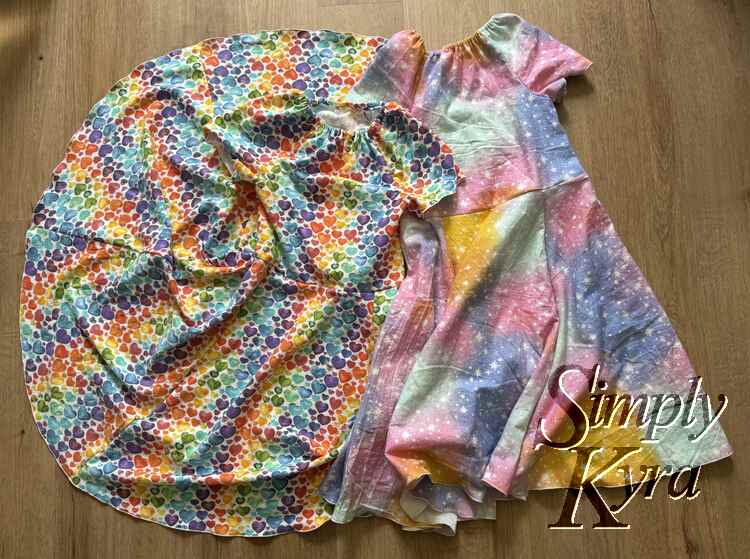
Single Dress: Flat Lay


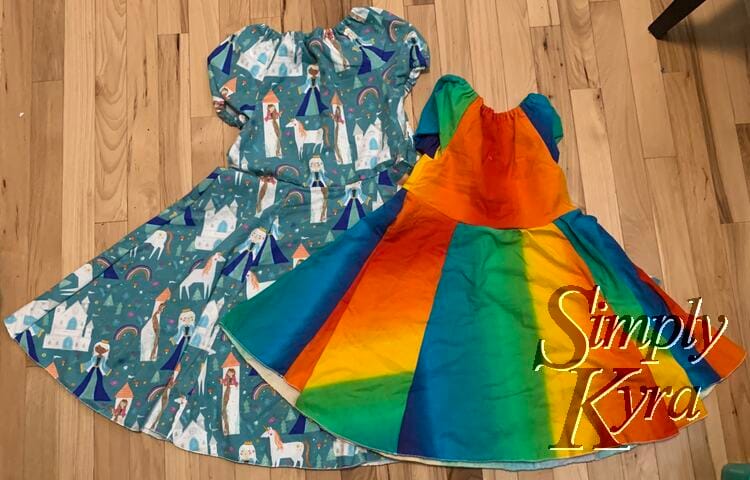
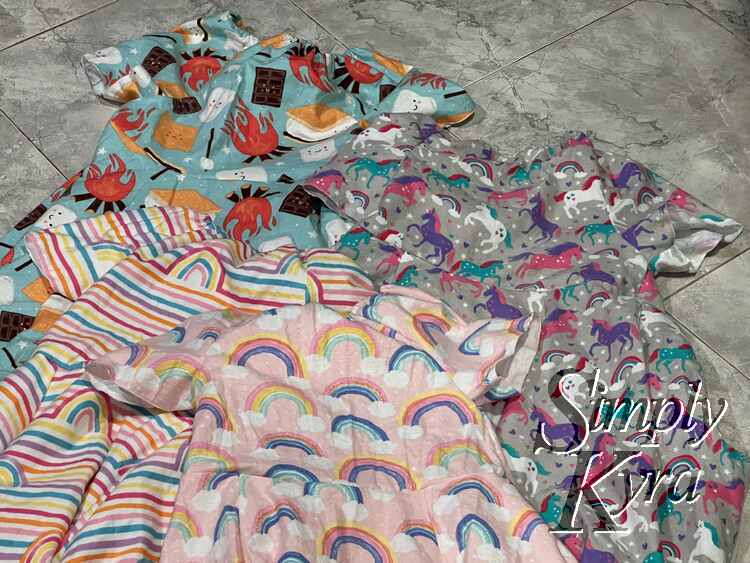
Multi Dresses: Flat Lay

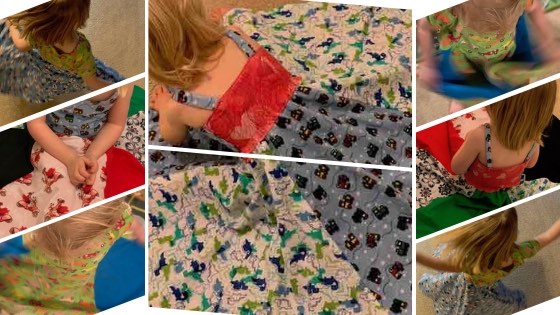
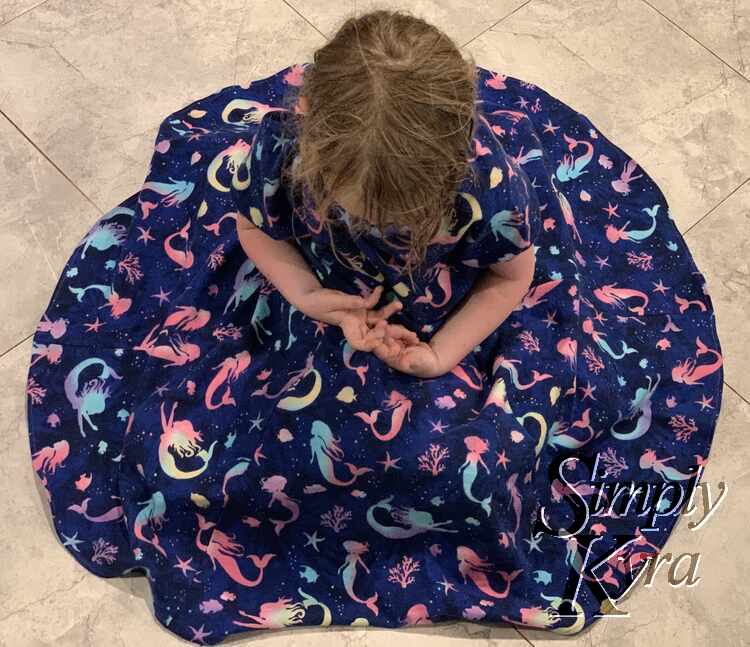
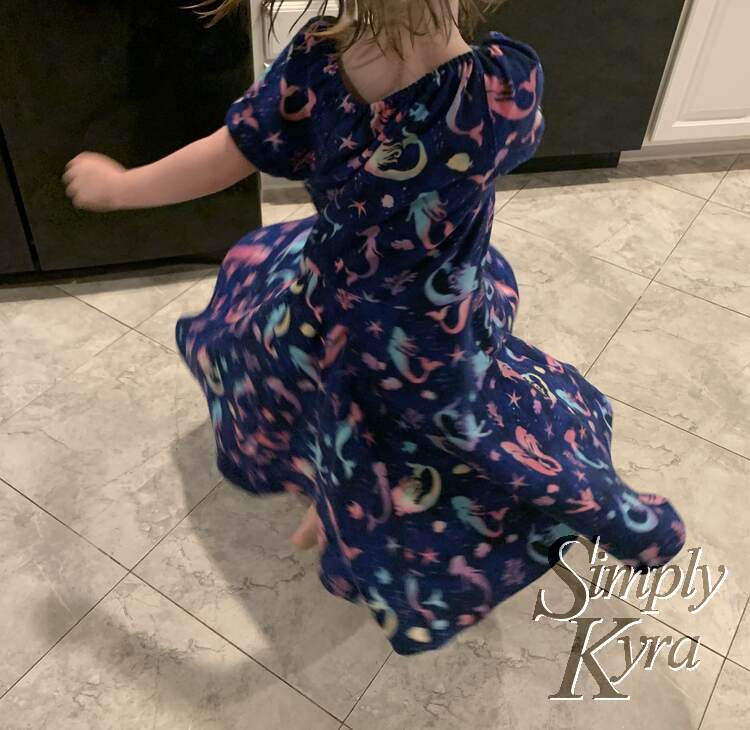
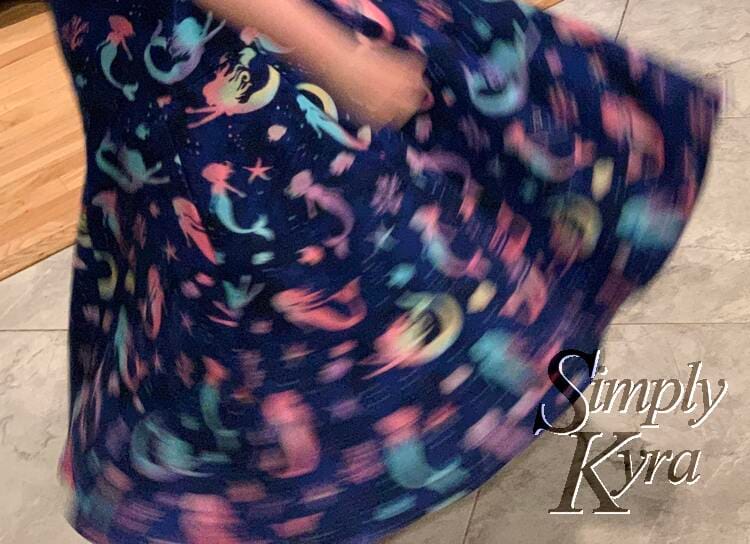
Kid Worn and Action Shots
Have you ever mashed up two patterns together?
Also as this is my most repeated pattern over the years I found I simplified my process by skipping steps but also realized switching to French seams, although longer to do, lasts longer and saves more time. What’s your go-to sewing shortcut? And have you cut corners and regretted it like I did?
Have you tried this nightgown before? Or will you? I'd love to know, see how it turned out, and would love to know how you customize it! Tag me on Instagram, post in the comments, or even email me if you prefer! I'd absolutely love to see your version!
Hope you’re having a great day!
If you’re interested in getting any of my future blog updates I normally share them to my Facebook page and Instagram account. You’re also more than welcome to join my email list located right under the search bar or underneath this post.
Did this save you time?