Ada’s Exciting Eighth Birthday Party at Home

Ada’s Exciting Eighth Birthday Party at Home

As Ada‘s birthday approached this last summer I asked her what she wanted to do. She immediately started describing all the things we did during Zoey’s party earlier this year… so that’s what we did because if it’s not broke why fix it…. and it turned out great!

Pinterest image showing the post's title, main URL,  and a collage of six image also shown below.

Rather than go over the entire party in detail I figured I’d divide it up by topic so it’s easier to find what you may be looking for. And so without further ado here’s the:


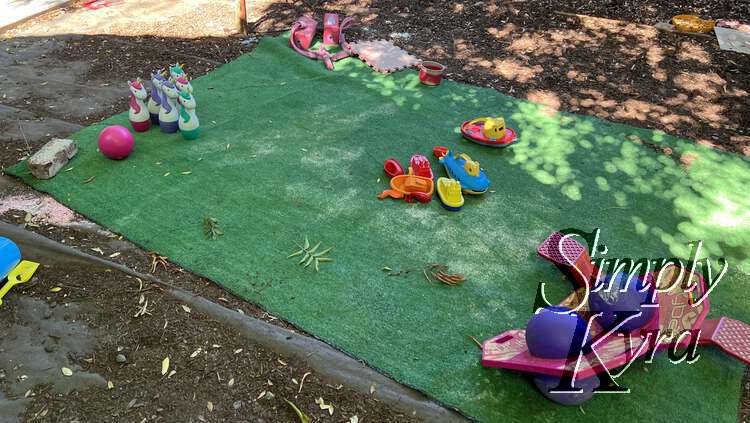
Outdoor Sensory Stations

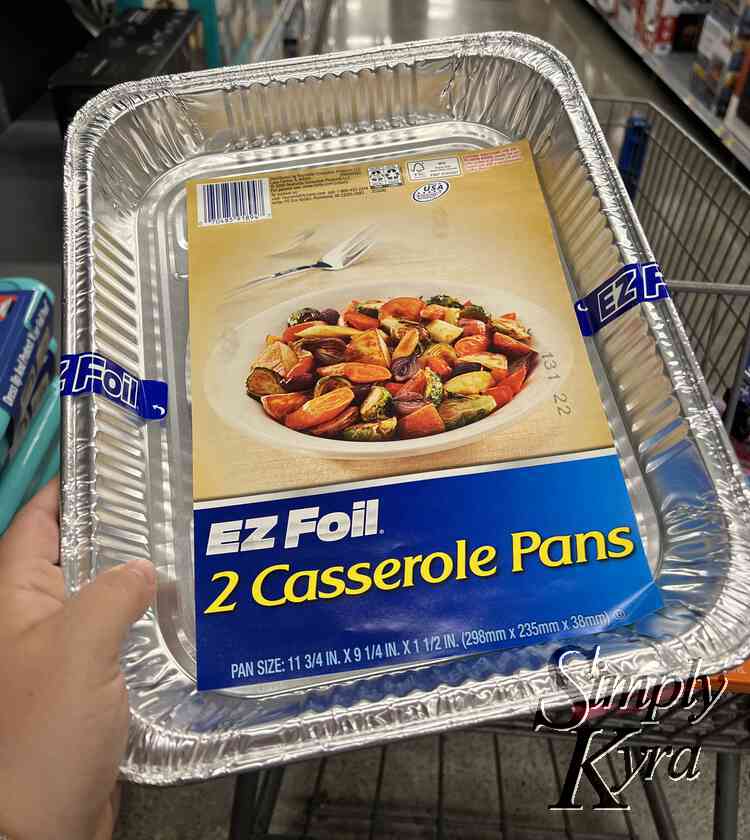
For Zoey’s party our two main stations outside were oobleck and bubbles. For the oobleck I had bought four Tupperware containers but over the next several months lost several parts of them. The bubbles also weren’t easily repeatable as the jug I had used was now missing a lid and was grimy while I couldn’t find any disposable paper cups to hold each kid’s bubbles like last time. I decided in the store to pivot and switch to disposable casserole pans to hold the oobleck and bought some plastic cups I could keep better track of for future parties and let the kids pour their bubble mix themselves from the store-bought bottles. If you want to read more about the method last time you can check out Zoey’s party post here.

Image shows a package of two EZ Foil casserole pans from Walmart with a cart in the background.
I switched from plastic Tupperware containers to foil casserole pans for the oobleck figuring if it was going to break and be lost anyway I might as well use something a bit more disposable this time around.
Image shows the self f plastic tumblers priced at 50 cents each at Walmart.
I couldn’t find a plastic drink dispenser or disposable cups for the bubble mix so I decided to switch to these slightly more pricy cups and let the kids pour it themselves from the bubble mix bottles. This time around I made sure to hunt them down, wash them out, and pack them away after the party so they didn’t get lost.
Image shows an outdoor table with bubble wands and bathtub toys laid out.
I had the girls gather up all the bubble wands in the yard in preparation for the party. Somehow these bath toys also ended up laid out… maybe to hold bubbles?
Image shows red water getting poured onto a pile of white cornstarch on the left. The right container is covered in purple water with the odd bit of red and blue making an appearance.
The morning of the party I dumped some cornstarch in either casserole dish and then reused the jar to add some dyed water making a pink oobleck container and a purple one (by combining blue and red).
Image shows the pink casserole partially mixed in while the marbled purple, blue, and white dish on the right shows a more oobleck-like consistency.
Ada used a metal spoon to carefully mix the water in. I was careful not to add too much water and so instead added a bit at a time, if it looked too dry, until it was the right consistency.
Image shows some foam squares laid out in front of a playhouse with the two (pink and purple) casserole dishes out front and two buckets.
Once it was ready we took it outside to the oobleck area and added two buckets half full of water for easy hand rinsing and fun pretend play.
Image shows the plastic cups, two bottles of bubble mix, and wands laid out on the table with a kitchen set behind to make even more concoctions.
Right before the party I added the cups and bottles of bubble mix making an easy bubble station for everyone to enjoy.
Image shows the pink decoration hanging from our front overhang with the yard in the background.
Ada had decorated a piece of paper saying “Happy Birthday Ada” for the front gate and I put up a pink decoration in front of our door to make the yard a bit more special. I bought it when Ada’s party was more pink themed from Zoey’s rainbow.
Image shows a section of fake grass with bricks holding the corners down and toys laid out carefully showcasing Ada's vision of the party.
The rest of the yard consisted of play areas including this section consisting of unicorn bowling, balance toys, and for some reason boats… actually I think the buckets used to be here before they moved to the oobleck station so maybe it was for floating toys… maybe.
Image shows the boats and fish organized on the freestanding beams supporting our patio.
At some point before, during, or after the party the boats and fish were moved to our previously decorated patio.
Image shows the same table as above with empty bubble mix bottles, cups, wands, kitchen set pot, and a pink oobleck coated pinecone.
While cleaning up after the party I had to laugh at the oobleck coated pinecone I found on the bubble table. It was a mess but showed all the fun everyone had.

Indoor Stations and Decorations

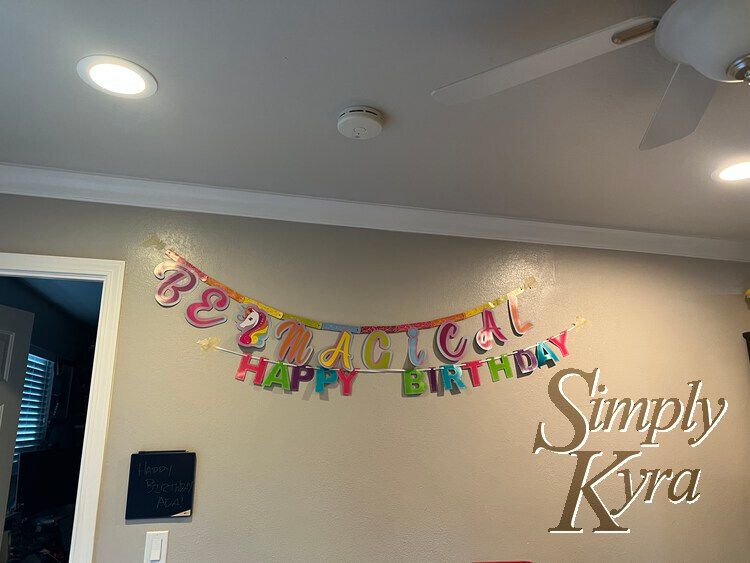
Inside we again turned the kids room into a dance party room. To do this Matt moved the smaller furniture around and used blankets to help block off the closet and beds. We then reused the door streamers from Zoey’s party and bought another multipack of crepe streamers for the ceiling. The party lights and home pod completed the scene!

This is the fourth time we hosted a dance party room so if you want more information on how it was handled before you can check out the previous posts: The Year of Our Small and Simple Birthday Parties or Zoey’s Random but Fun Sixth Birthday.

Image shows the metallic streamers pulled back like a curtain showing up the multicolor crepe streamers hanging from the ceiling and the red and green lights projected everywhere.
I pulled back the door streamers to take a quick photo of the room before the party.
Image shows the metallic streamers pulled back like a curtain showing up the multicolor crepe streamers hanging from the ceiling and the purple, red, green, and blue lights projected everywhere.
I love how different the room can look depending what lights are currently projected.
Image shows the two banners placed above and below each other on the wall.
In the kitchen I put up both the glittery Happy Birthday banner along with the Be Magical unicorn themed one. I use masking tape to hang and carefully take it down so I can use it in the future too.

Goodie/Treat Bags

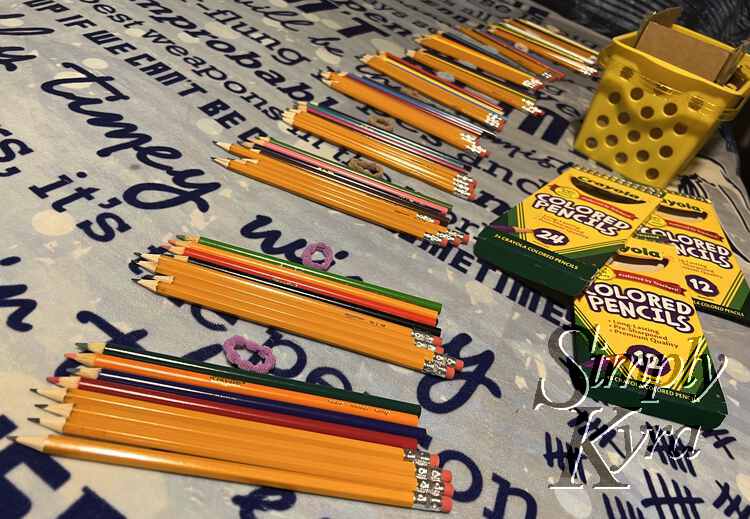
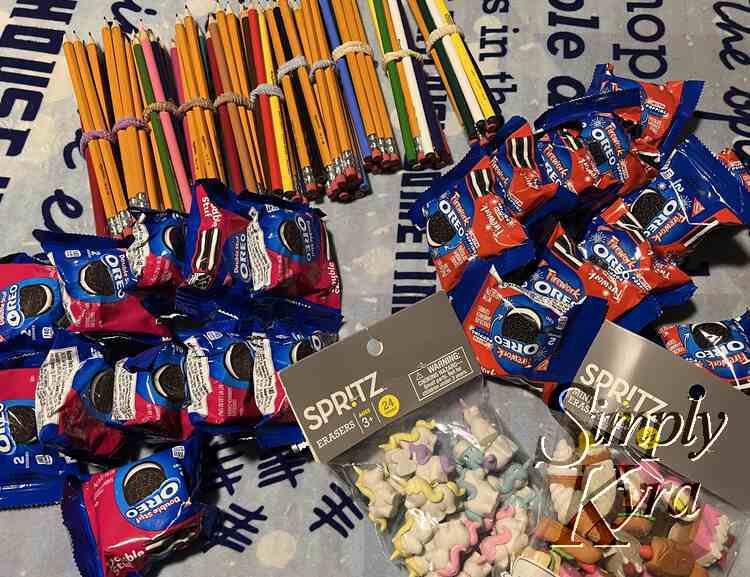
Months and months before Ada had been going completely gaga over eraser toppers and so I had bought, in advance, two bags of erasers for her party. I wasn’t sure what else to put in the bags but closer to the party I decided to make that the theme and shopped through our school supply stash resulting in both new pencils and colored pencils for each kid.  I added a ponytail to hold each set of pencils together, two types of packaged Oreos, and put each into an Ada-decorated paper bag and we were ready to go!

Image shows the yellow basket for the school supply stash, the empty colored pencil boxes, and a row of piles of writing instruments and a small ponytail tie.
Since we had two large packages of erasers perfect for the goodie bag I decided to shop our school supply stash and created a pile of pencil crayons and pencils for each guest. I then grabbed a ponytail tie to keep each kids’ collection together.
Image shows the two bags of erasers (one unicorn and one food related), a pile of fireworks Oreos, a pile of double stuffed, and the packaged writing pencils.
After sectioning out the writing instruments I went through a box of Oreos to lay out a firework popping package and a double stuffed one for each person. I left the bags of erasers aside until Ada finally finished decorating each paper bag and then I divided them up by type before tossing each one directly into a bag as I assigned each one.

Food

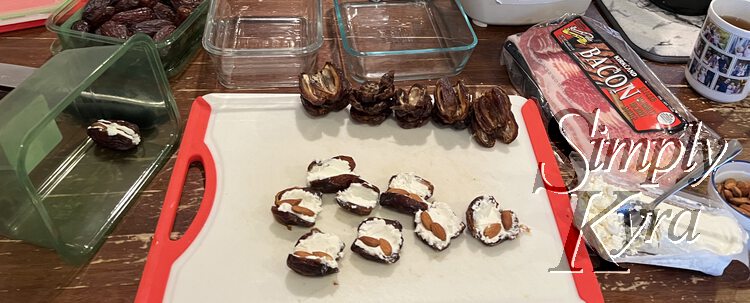
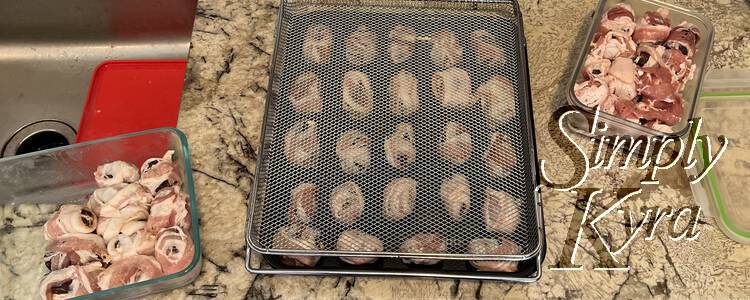
We had decided to keep it simple and order pizza… but as we approached the party I wanted to have a larger selection of food for everyone while the kids played and the parents visited. I decided to come up with some food I could prepare ahead of time, so I could be present, while also being something unique they might not normally have. A that time our current favorite was bacon wrapped dates stuffed with goat cheese and an almond. I figured I could prepare them the day before and, when people start arriving, quickly lay them out and bake them in the air fryer. I wanted something healthy to go with this and thought of the Fruit Salad with Lemon Dressing in the recently reviewed The Secret Ingredient Cookbook that I hadn’t gotten a chance to try yet. Figured it would be both adult and kid friendly and so I added it to the list. Some of the guests were vegetarian and I loved the don’t-tell-anyone-it’s-vegan swiss chard caesar salad with hand-torn croutons from the, also recently reviewed, No-Fuss Family Cookbook. And thus the menu was planned. At the last minute, just to make it more obvious, I grabbed some pink post it notes I had and wrote down the foods so they’d be labelled.

Image shows a plastic cutting board with some goat cheese and almond opened dates in the front, empty and cut open dates in the back, and closed stuffed dates in the container to the left. To the right sits the package of bacon waiting to be used and the empty glass containers waiting in the back for the finished items.
The day before the party I set up the bacon wrapped dates by going through a container of dates and removing their pits, adding goat cheese and a whole almond or two to each one, closing them up, and finally slicing up bacon and wrapping each one securely. I dropped each finished one into a container to put in the fridge for the next day.
Image shows a small black cookie sheet with a grid of wrapped dates laid out. On top lays a basket tray about to be decorated. To either side sits two containers with more dates inside.
Once the first guests arrived I started the air fryer so it would preheat to 425°F, popped open the containers, and started lining the wrapped dates up. They didn’t all fit so some were put back in the fridge for a second round… or for the next day.
Image shows three pink flowered notes lined up on the counter with the name of the recipe, any add ins (croutons and dressing for the salad), and any potentially problematic foods (cheese and almonds on the bacon wrapped dates).
I grabbed three flowered sticky notes and wrote out what each thing was so everyone would know any optional additions or any potential problematic foods.

Dessert

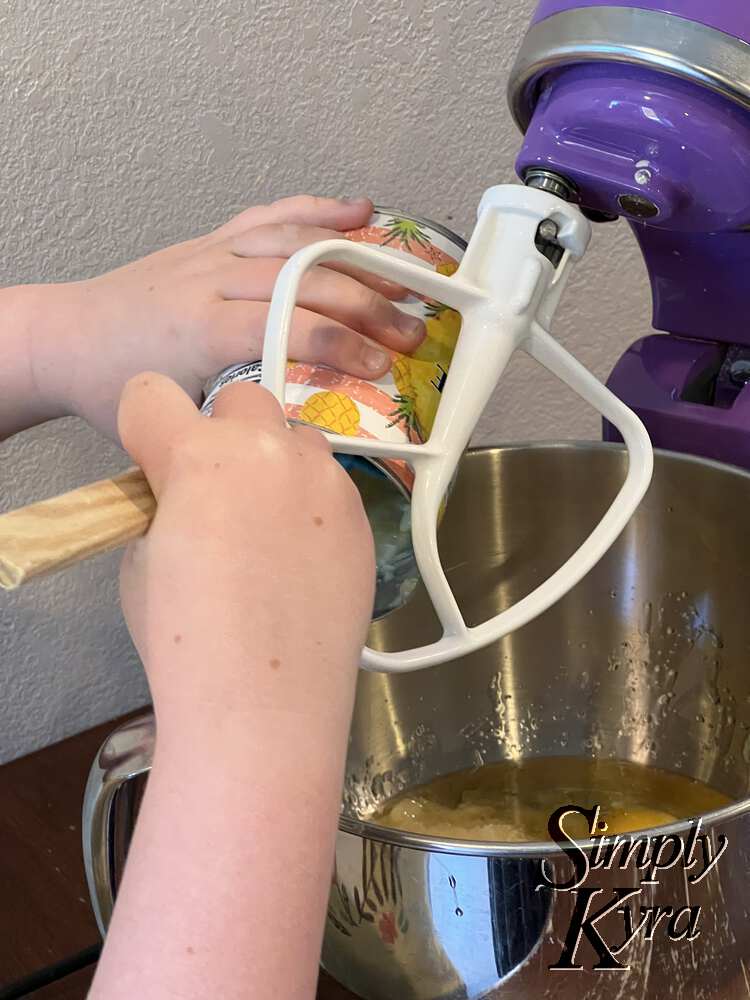
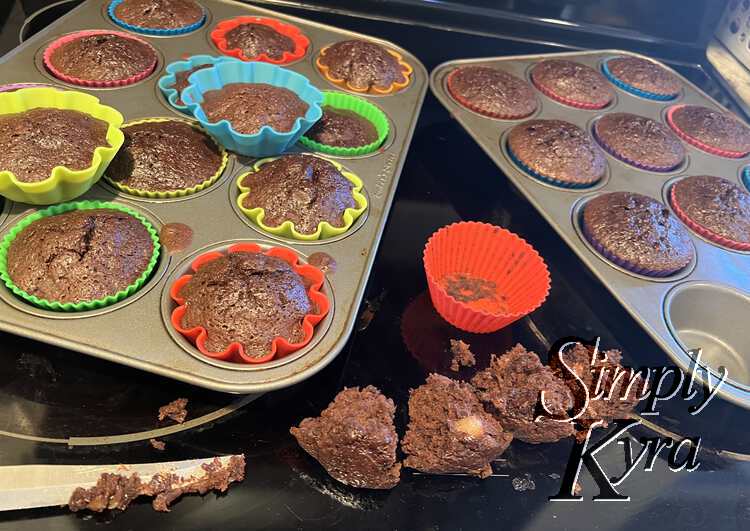
Years ago Ada came up with the idea to mix pineapple with brownie mix resulting in our yearly pineapple brownie cupcakes. If you want to hear more about it you can check out our original pineapple brownie cake or the experiment between using pineapple or coconut and chocolate chips in the mix for our Halloween cupcakes. This time around I used a 565 gram can of crushed pineapple, measured 1/3 cup of pineapple juice from it, and then dumped it all into the brownie mix. Other than skipping the water I otherwise followed the directions from the box. We baked them the day before and, once cooled, packed them away in a large lidded container in our fridge so they’d be ready to pull out and decorate with whip cream and sprinkles during the party.

Image shows Ada using a spatula to scrape the pineapple can contents into a stand mixer bowl. Below you can see an egg sitting there already.
Ada and I followed the directions for the packaged brownie mix BUT we tossed in the can of crushed pineapple along with the egg and skipped the water.
Image shows two trays of brownie in colorful liners in the small oven with two extra ones laid overtop.
We ended up getting two dozen cupcakes along with two extras that I just balanced on top of the tray. Our oven was broken but luckily these muffin trays just barely fit in my air fryer so I used that on its bake function.
Image shows the two cupcake liners with a single empty liner between it and the contents cut into four. You can see a chunk of pineapple in one of them.
The brownies smelled amazing and we had to break into our customary tester brownie to confirm it tasted as good.

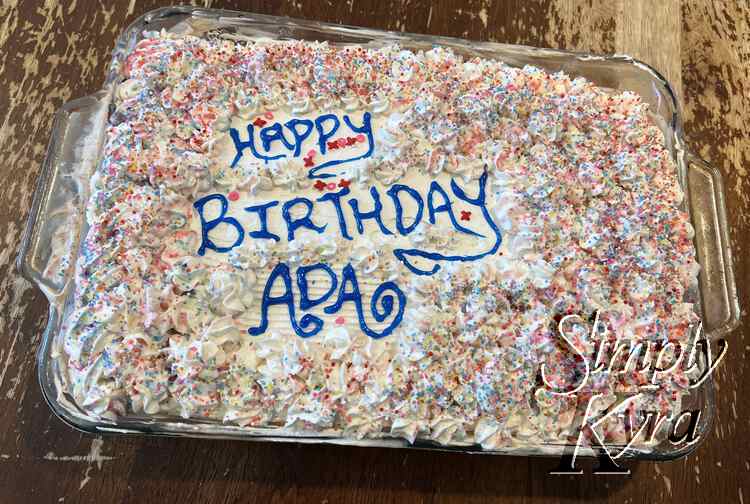
If you’re looking for something else this year we also tried our hand at making our own ice cream cake on Ada’s actual birthday. We loved how it turned out and I shared a post dedicated just to it if you want to hear more.

Image shows the actual final cake coated in pastel colors, pink and red Xs and Os, and the birthday message.
Or you could go for a homemade ice cream cake. I used Princess Pinky Girl’s Copycat Dairy Queen Cake recipe and posted how it went down here.
Image shows a small black outer bowl with ice cream and fruit salad (grapes, strawberries, and pomegranate seeds).
Actually while thawing out the vanilla ice cream for that ice cream cake I realized it would go amazing with the last of the leftover fruit salad. It was incredible and I’m so glad it worked out timing wise.

I absolutely love how Ada’s party turned out and how fun it was to visit with everyone while the kids played. I wanted to share the parties here both for me and for you if something in it can help you plan your own. If it does help I’d love to hear how in the comments below.

Hope you have a great day… and a great event!


If you’re interested in getting any of my future blog updates I currently share them on my Facebook page and Instagram account. You’re also more than welcome to join my email list located right under the search bar or underneath this post.


Related Posts

Latest Posts