

How We Made a Simple and Delicious Ice Cream Cake

Over the last couple years we’ve started buying the girls’ a cake on their birthday in addition to whatever cupcakes they pick for their party. This last summer Ada picked an ice cream cake which eventually led to us making our own. The end result was amazing and I had to share the process with you in case you also wanted to do the same.
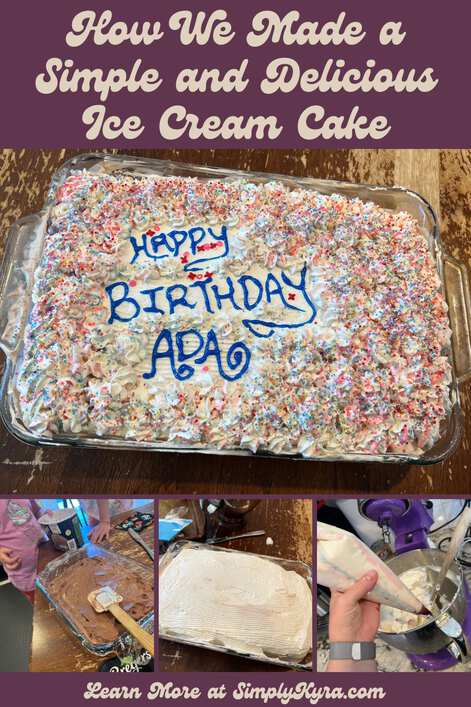
This post goes over my version of someone else’s recipe. If you want to skip my photos and go straight to the recipe itself you’ll want to visit Princess Pinky Girl and their Copycat Dairy Queen Ice Cream Cake.
History
This year I asked Ada what type of cake she wanted on her birthday and after much deliberation she finally decided on a Dairy Queen ice cream cake. I love ice cream cake so I was excited with her choice but, unfortunately, realized that by the time she made her choice it was under 48 hours until her birthday and the website says it needs a minimum of 48 hours to order. I wasn’t sure if that was exact or not but decided to just go visit the local Dairy Queen the next morning and see what was available.
That morning I remembered jokily mentioning previously, with the last cake we bought, that we could always try to make it ourselves so I hopped online and found a Dairy Queen copycat recipe through Princess Pinky Girl that looked amazing. I considered just making it ourselves but I wasn’t sure if Ada would love that idea or be disappointed and I couldn’t ask her as she was in school. After much deliberation I drove to Dairy Queen… just to find that they only had the really big cakes that wouldn’t fit in our freezer… and thus I decided to go back to the recipe, confirmed what it needed, and traveled to Walmart to buy the needed supplies to surprise Ada with making our own cake for the next day.
Of the ingredients listed in Jenn’s recipe I already had butter, powdered sugar, vanilla extract, and sprinkles. The jar of hot fudge topping was super simple once I found it. The other remaining four ingredients were a bit more problematic:
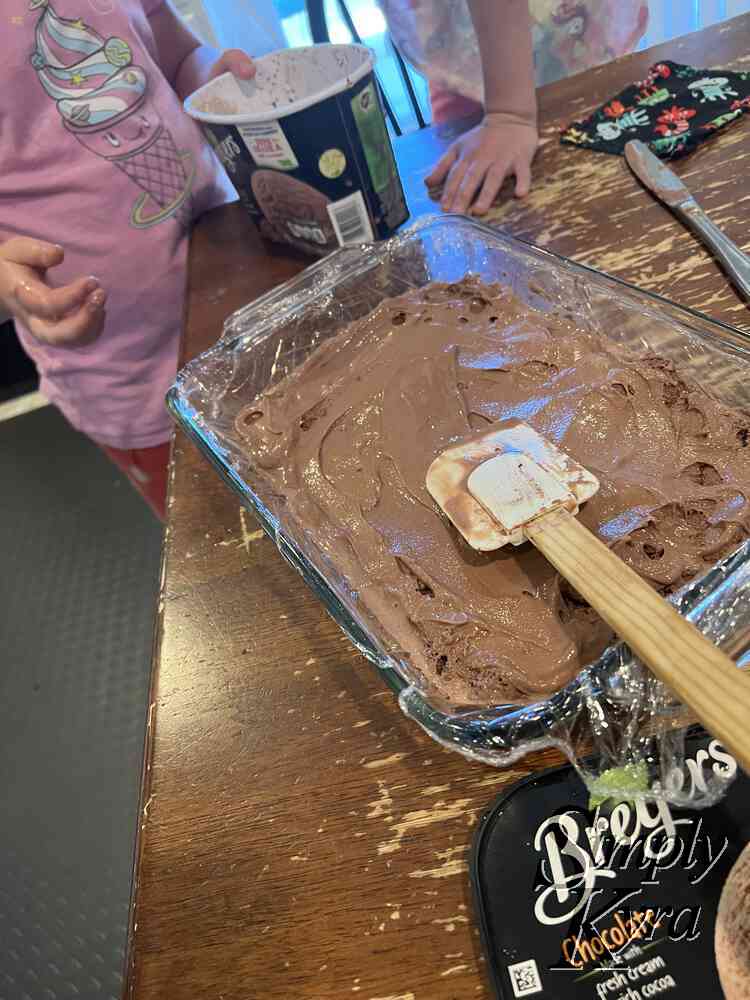
- Ice Cream: This Walmart may have had an issue with their freezer section as many of the sections were iced over… luckily for me the pint-sized ice creams were harder hit than the larger ones. I tried to find the least iced section and carefully chose both a chocolate and a vanilla container. This resulted in my next issue as the recipe called for only a single quart and these were 1.5 quarts. I planned to only use two thirds of each but in the end I just made a larger cake by multiplying the recipe by one and a half.
- Heavy Cream: I only needed two cups of heavy cream but I could only could find the four-cup cartons. I planned, again, to only use half the carton but ended up using it all by doubling the whip cream recipe and had WAY too much whip cream; though no complaints from the kids. Next time not doubling and will measure properly.
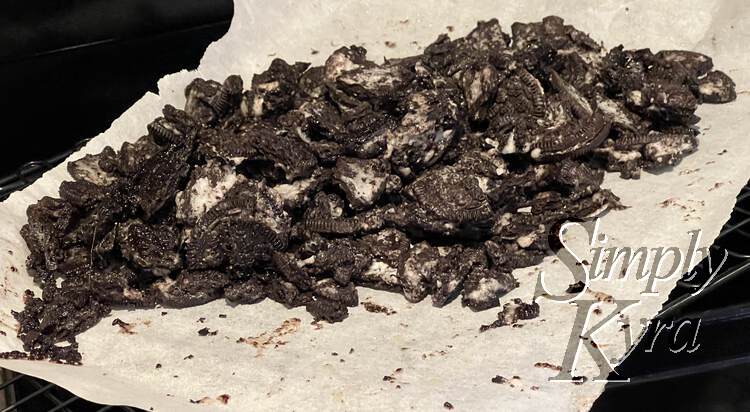
- Sandwich Cookies: Who knew this would be an issue. The name brand Oreos were only available in flavors that wouldn’t go with the cake so I went with the store-brand. Ended up using all of a package (minus a couple for the kids) since I figured why not since we were making a larger batch anyway.
And with that I came home, put them away, and waited on edge for Ada to be off school so she could find out the plan. At first she was disappointed but once she started helping make the main part she was on board and totally excited.
The Cake
Day Before
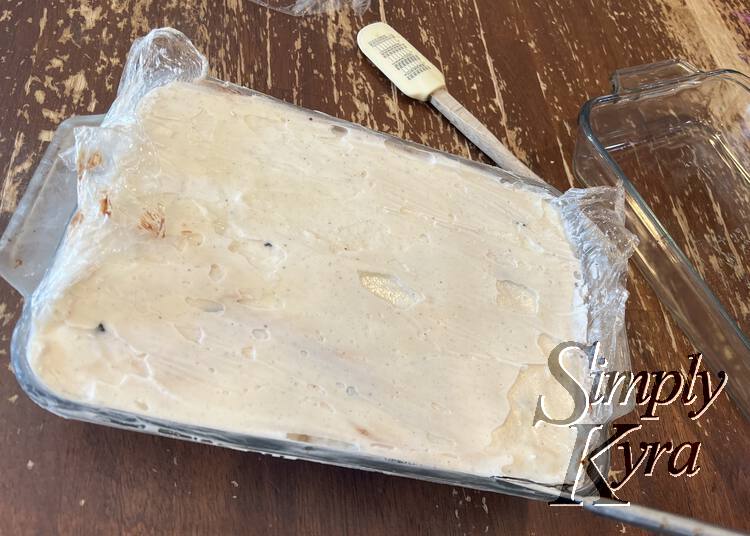
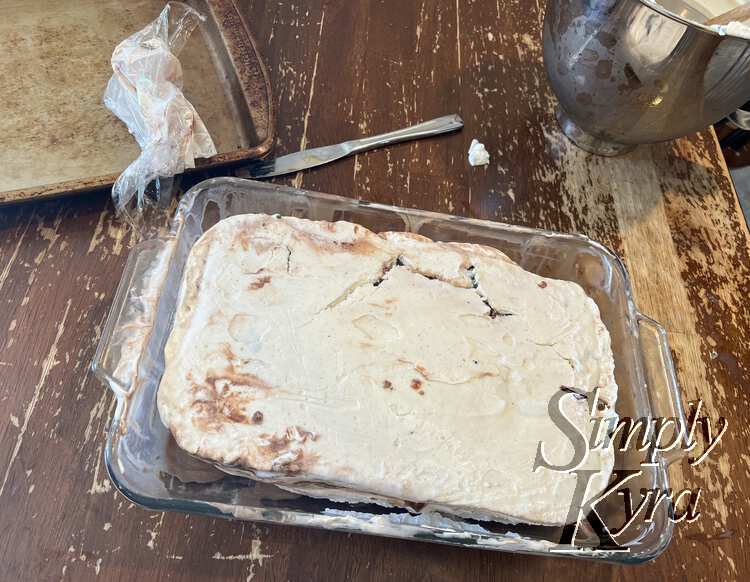
On the way home from school, after breaking the news, Ada was able to chose which flavor of ice cream went where. Once we got home we started thawing the chocolate ice cream, grabbed the supplies, and got started on the cookie crunch layer. After it was done I left it to cool and grabbed my 8 by 11 inch (2 quart) glass casserole dish, as I didn’t have the called for springform pan, and covered it with plastic wrap before the kids spread out the bottom layer of slightly thawed chocolate ice cream. We then followed the recipe directions using the increased amounts of cookie crunch fudge and vanilla ice cream pausing between layers to freeze it. The final cake went back into the freezer overnight so it could freeze properly and I could decorate it the next day when the kids were in school.
Morning Of
Prep
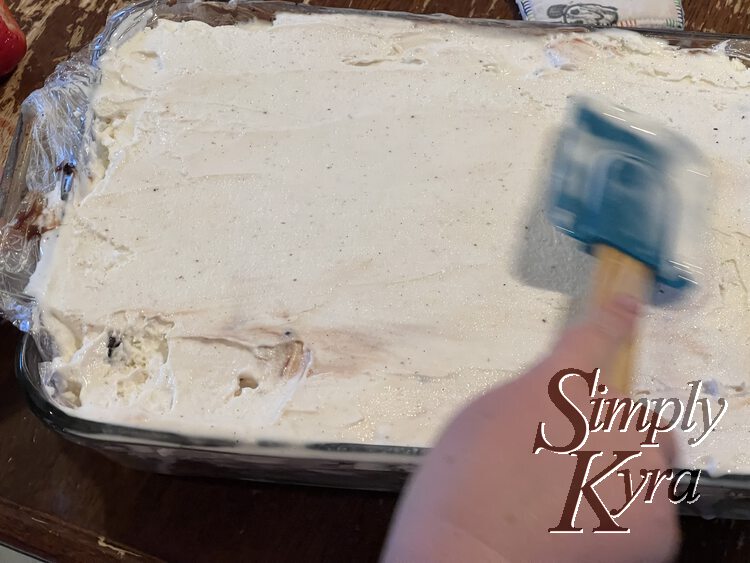
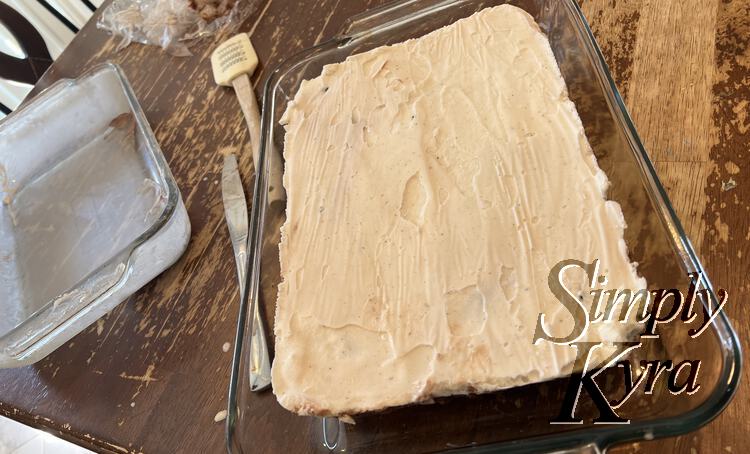
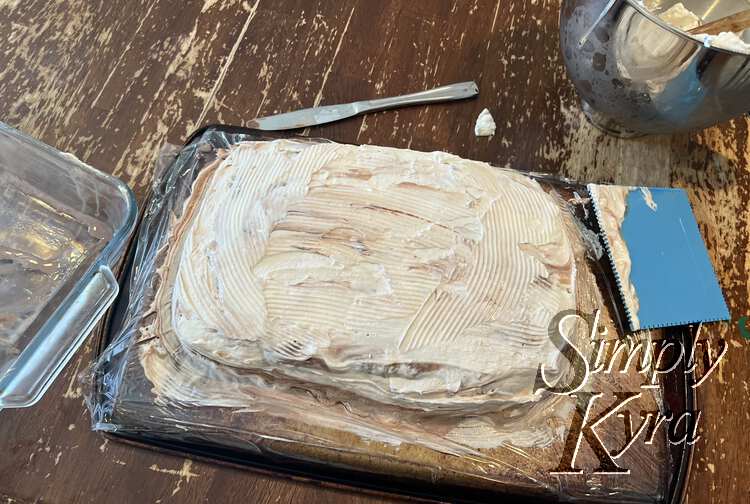
The next morning I wasn’t quite sure how to approach the cake so after making the whip cream I ended up transferring the cake to a larger (9 by 13 inch) casserole dish, then a cookie sheet, and then back to the same casserole dish deciding I could just fill in all of the open spaces on the sides with whip cream. Looking back, next time, I plan to make a few changes such as:
- Using more plastic wrap so I could more easily pull the cake out… or purchase the called for springform pan.
- My casserole plan is slanted so if using it again I plan to assemble the cake upside down so I can decorate the bottom as the top. Unfortunately Ada had asserted chocolate on bottom and I hadn’t planned ahead so the top was larger than the bottom.
- Plan out a sturdy piece of cardboard or something flat to decorate the cake on but still be manageable enough to pack up and put in the freezer.
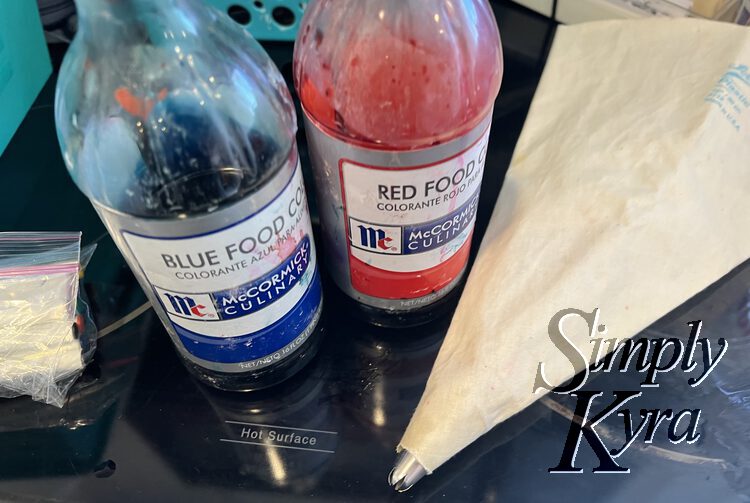
Dying Whip Cream
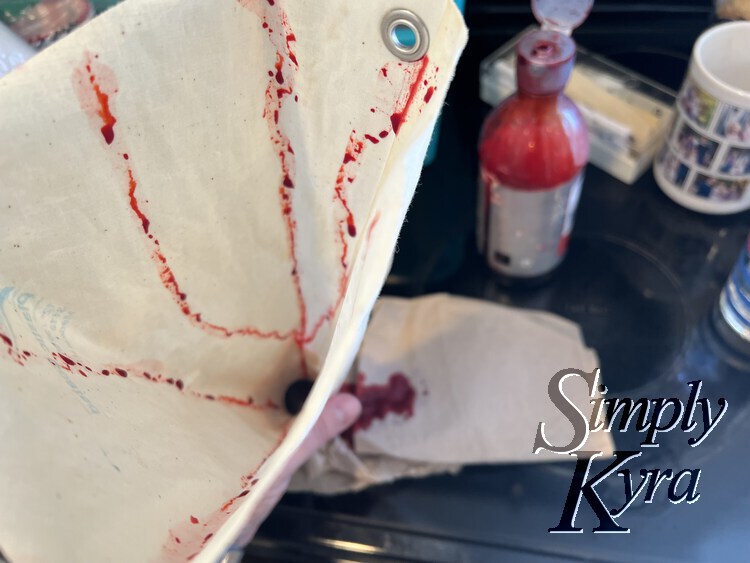
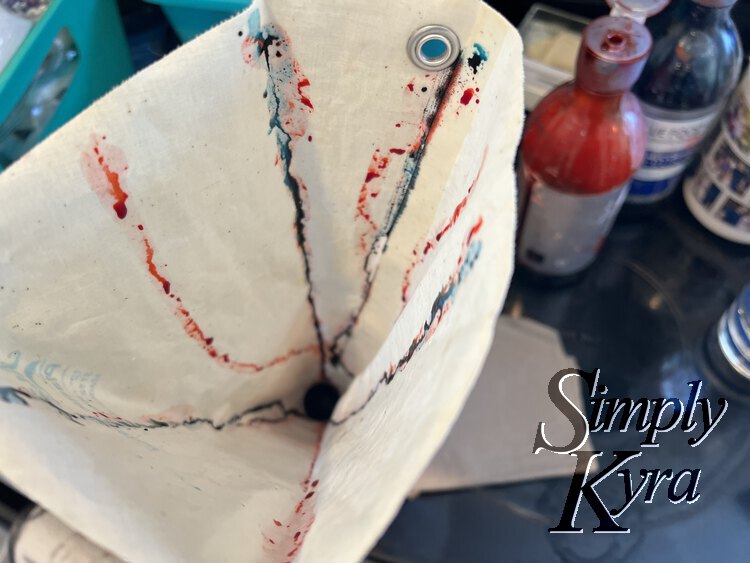
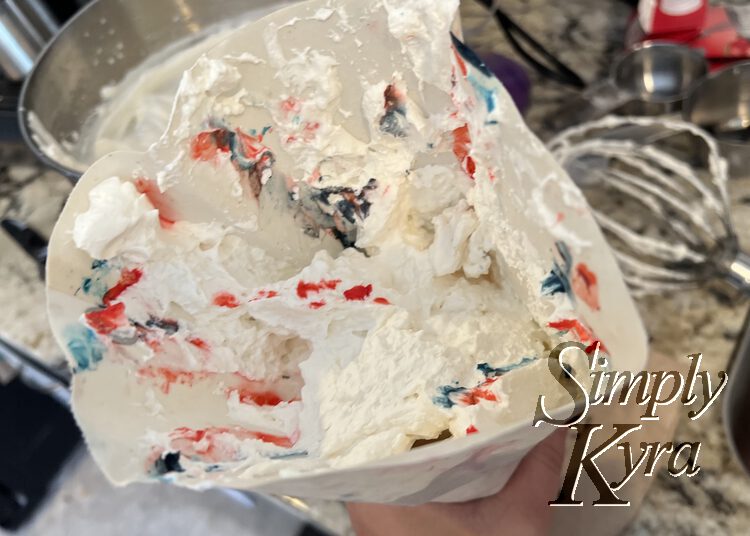
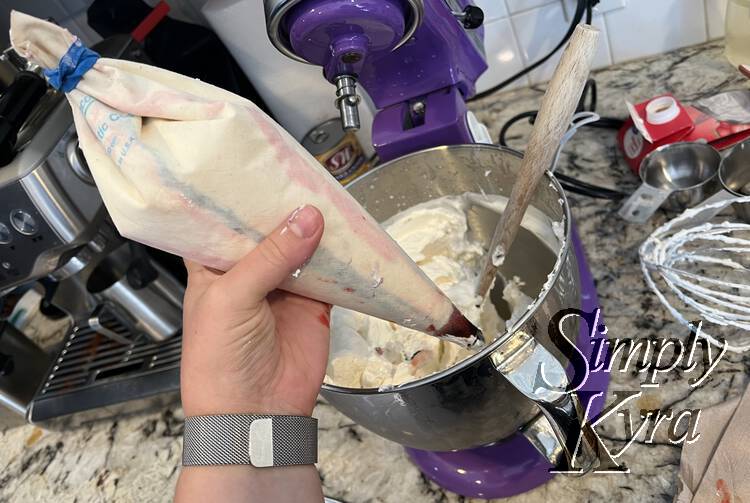
At one point in all of that I paused the cake drama by putting it in the freezer and followed the recipe to make the whip cream. I wanted to make the whip cream special so I decided to add food dye directly to the piping bag so the rosettes would be dyed with streaks of pink (using red) and purple (using red and blue together). This ended up dying my bag so looking back I should’ve used something disposable instead like a ziplock bag. The color also wasn’t crazy apparent so maybe I should have dyed the whip cream itself pink and used blue on the bag to dye sections a more purple-y tint.
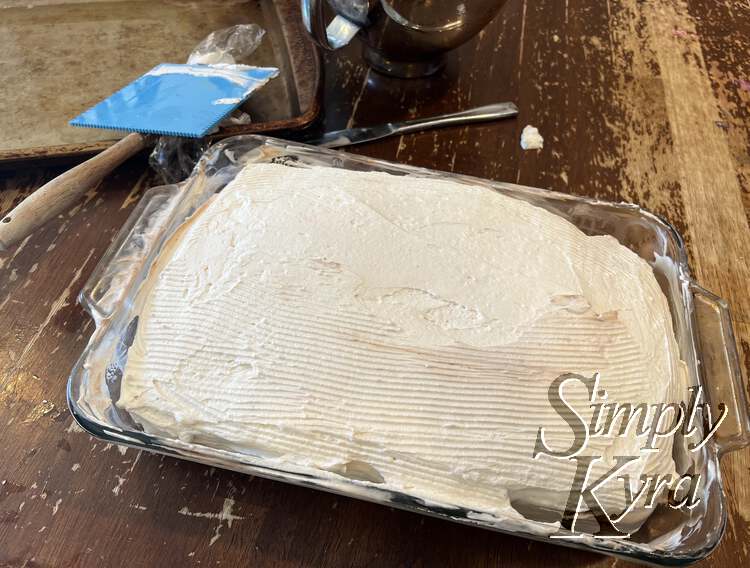
Coating the Cake
With the whip cream piping bag put into the fridge it was time to ready the cake. I had the smart idea to line a cookie sheet with plastic wrap, using the underside so there was no lip on the edge, and flipped the cake onto it thinking it would be easier to decorate there. Ada had told me she wanted lines on the side so I unearthed an old tool I bought years ago and tried to smooth out the whip cream with the tool. I finally realized it wouldn’t work and flipped it back into the casserole dish which cracked the cake as I did. At this point I gave up and just plopped the rest of the whip cream on top and smoothed it out allowing the excess to fill in the sides. Once smoothed I decided this was good enough for the decorating prep and it was time to bring out the piping bag.
Decorating
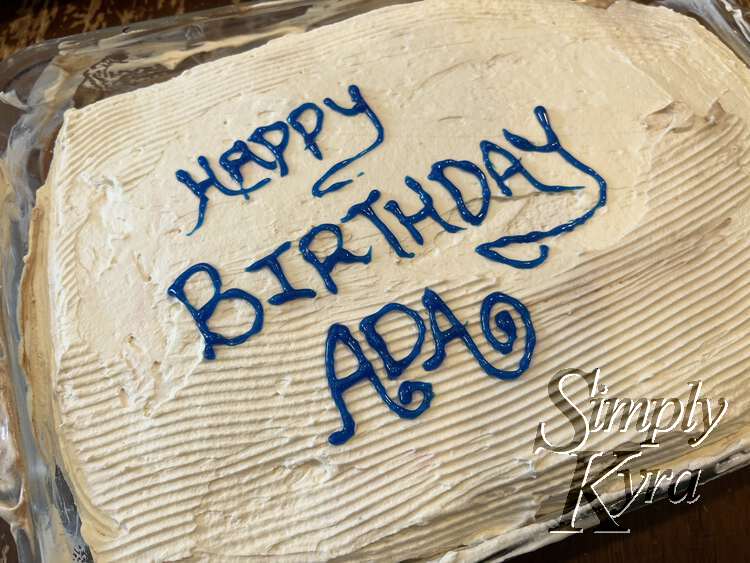
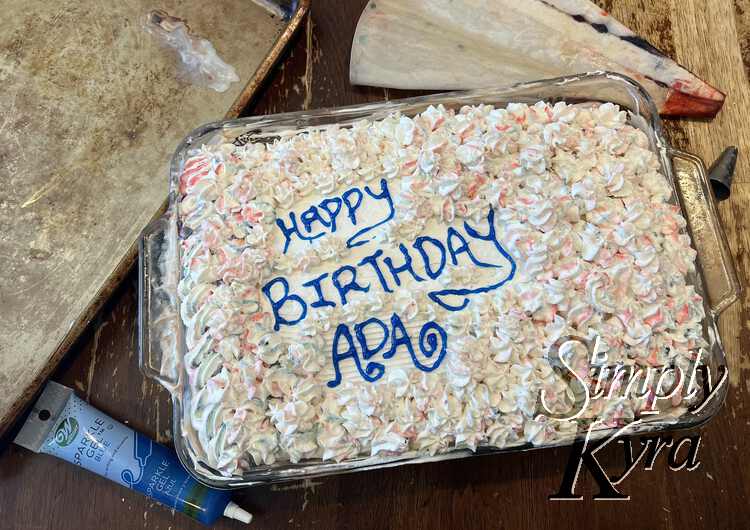
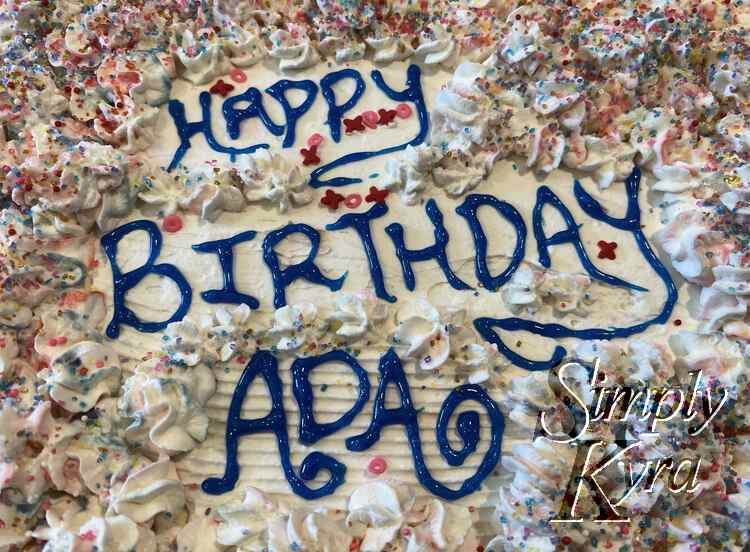
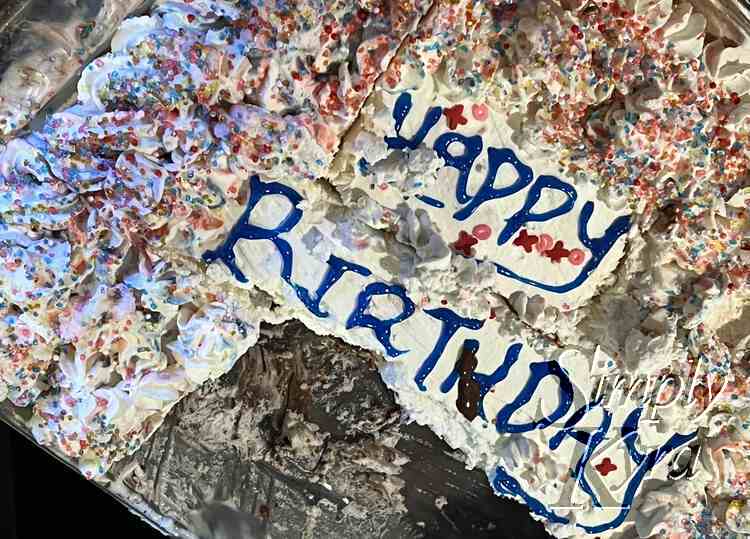
I had bought blue icing with a thin tip as a just in case for Zoey’s party which I hadn’t used yet and Ada remembered. I opened it up and carefully wrote out Happy Birthday Ada over the smoothed top. I then grabbed the piping bag from the fridge and carefully added swirled flowers around the letters being careful not to overdo it. That said, I had more whip cream in the bag than I had realized so I just kept making more and more flowers eventually filling up the cake top until I had to add the last ones on top of other flowers. Finally I grabbed some sprinkles and carefully placed some Xs and O sprinkles around the letters and then shook some unicorn sugar sprinkles over the flowers.
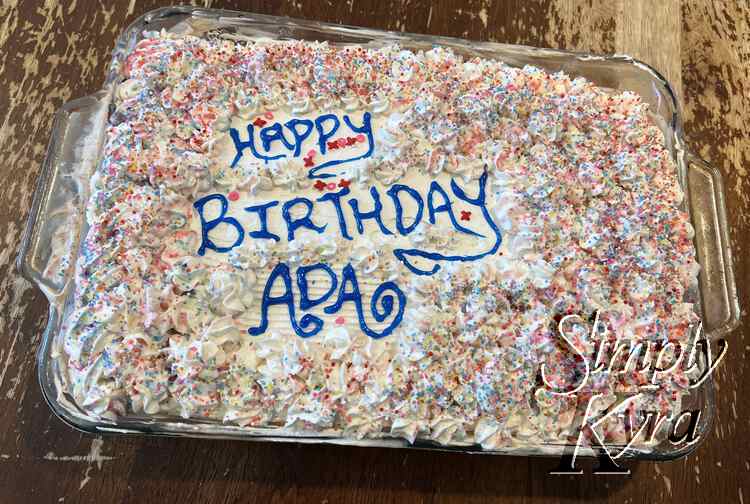
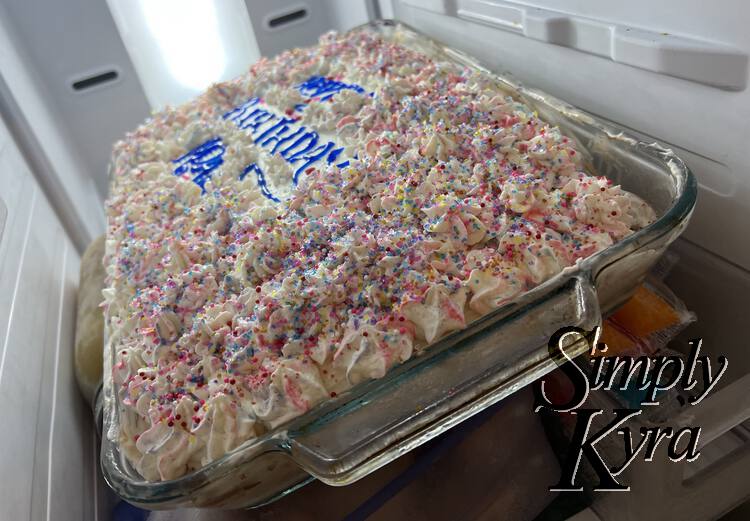
And the cake was finally done! I carefully put it back into the freezer and couldn’t wait to surprise Ada with the final cake after supper.
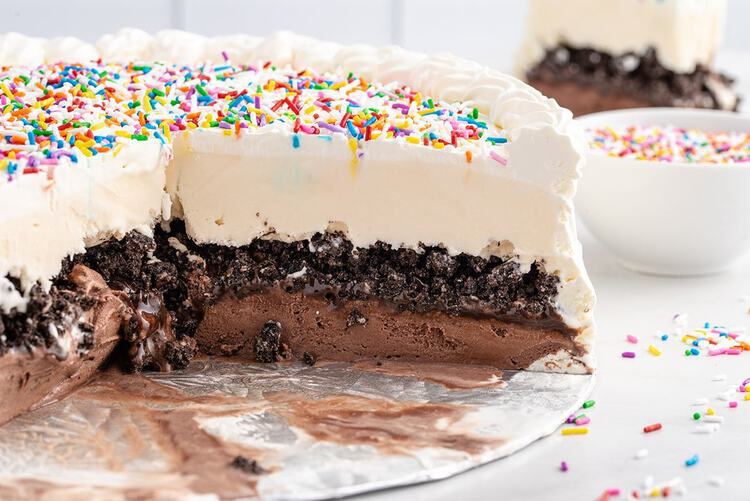
I wanted to pause quickly and share the original recipe I followed to make my cake: Princess Pinky Girl’s Dairy Queen copycat recipe. She made her’s look so much more professional and I had to share an image from it here.
Ada’s Birthday… And Leftovers
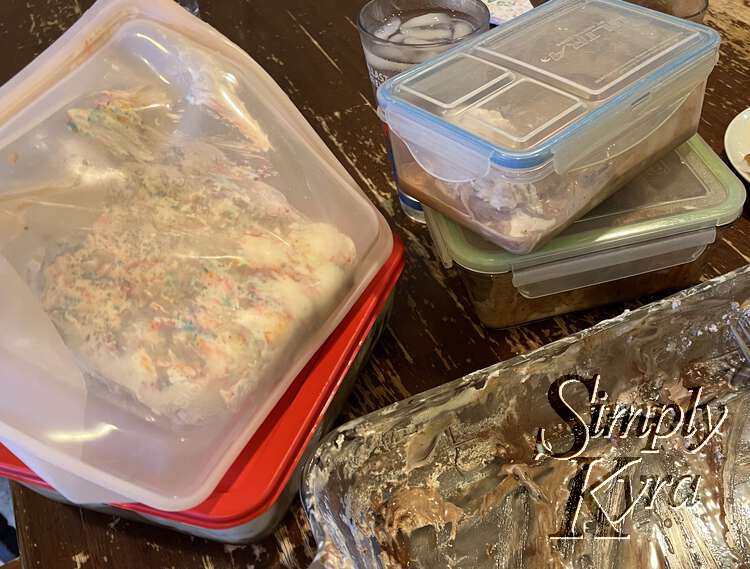
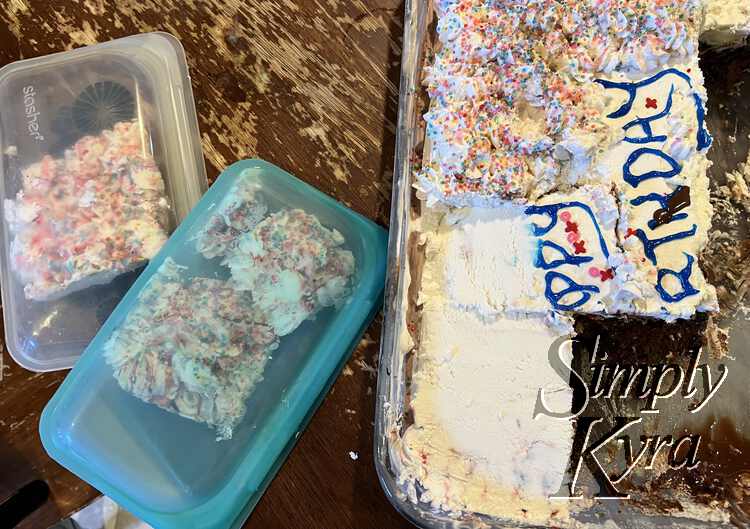
The girls absolutely loved the final cake and Ada immediately asked for her name giving her a larger piece than I had expected. Then Zoey asked for the birthday part and as I started cutting and deliberating over it she changed her mind. In the end both girls couldn’t finish theirs so they packed up their leftovers for dessert the next day in smaller containers while I cut up and packed up the rest of the cake in sealed containers and Stasher bags so the cake could last a long time and take up less room in my freezer.
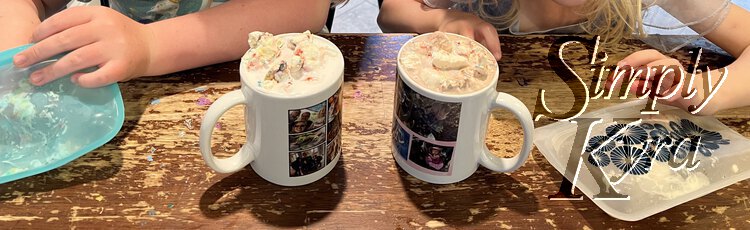
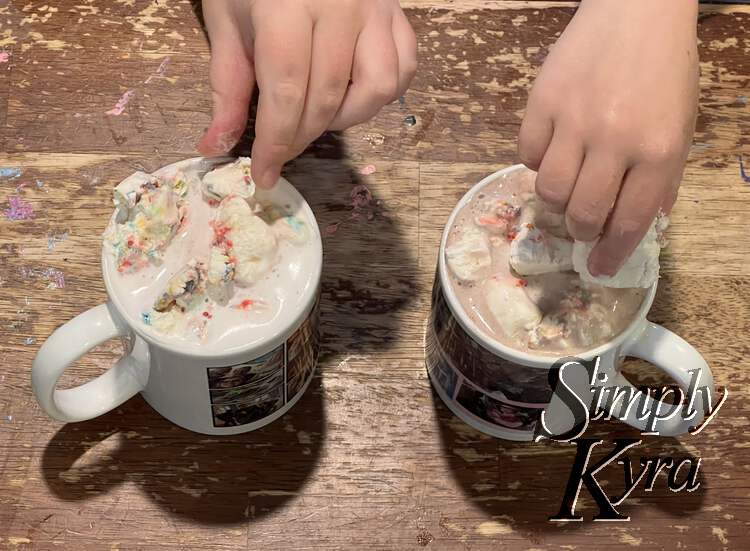
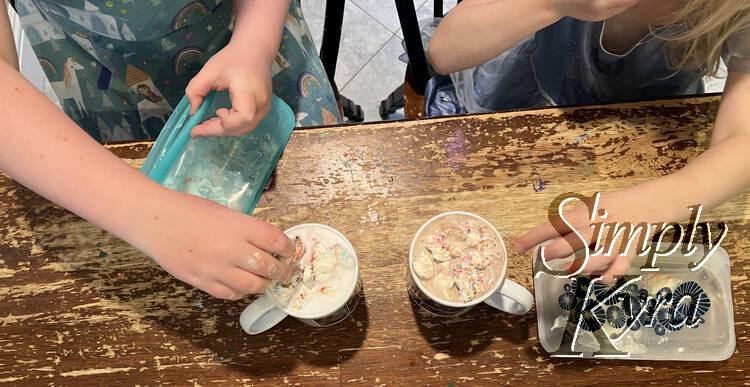
While packing up the cake I had carefully cut off some of the whip cream topping and placed them in smaller Stasher bags as I pictured carefully placing them on top of hot chocolate mugs in the future.
When we finally got around to trying this, on top of steamed milk with added hot chocolate powder, I ended up letting the kids decorate their own mug and so it didn’t quite match my imagined perfect mug image. That said, they had a blast decorating the mug, snaking whip cream snacks, and then drinking the hot chocolate. As they had fun I snapped these three photos:
Overall this was an easy to follow recipe that I’m really glad I came across. It was so much cheaper to make than to buy and tasted so much better. I can see investing in a springform pan just for this recipe and I want to make it exactly the same again. That said, I could also see playing with the flavors with maybe a chocolate and a cherry or strawberry together. Ada likes mint chocolate chip but I’m worried that it’s too random of a combo that we’d be stuck with if Zoey and I don’t like it. Overall though I’d definitely make this recipe again!
If you want to make this recipe check out Princess Pinky Girl. It’s so easy! And if you do I’d love to hear how it went and how you changed it up to fix your holiday! Hope you’re having a great day.
If you’re interested in getting any of my future blog updates I share them to my Facebook page and Instagram account. You’re also more than welcome to join my email list located right under the search bar or underneath this post.
Did this save you time?