

"The No-Fuss Family Cookbook" Review

I came across this book, The No-Fuss Family Cookbook: Simple Recipes for Everyday Life by Ryan Scott, back at the end of January or beginning of February through NetGalley and I immediately loved it’s cover and description. Paging through the advanced digital reader version was amazing. All the food-related photos were severely drool worthy. This is definitely a book to wait to read until after you’ve eaten otherwise your grocery list is going to get huge so quickly! The first time I forced myself to limit my grocery list to only three recipes’ ingredients and when I made them they were all ten out of ten meals. I next let myself choose five more recipes and kept going and going. I’m so glad I came across this incredible cookbook.

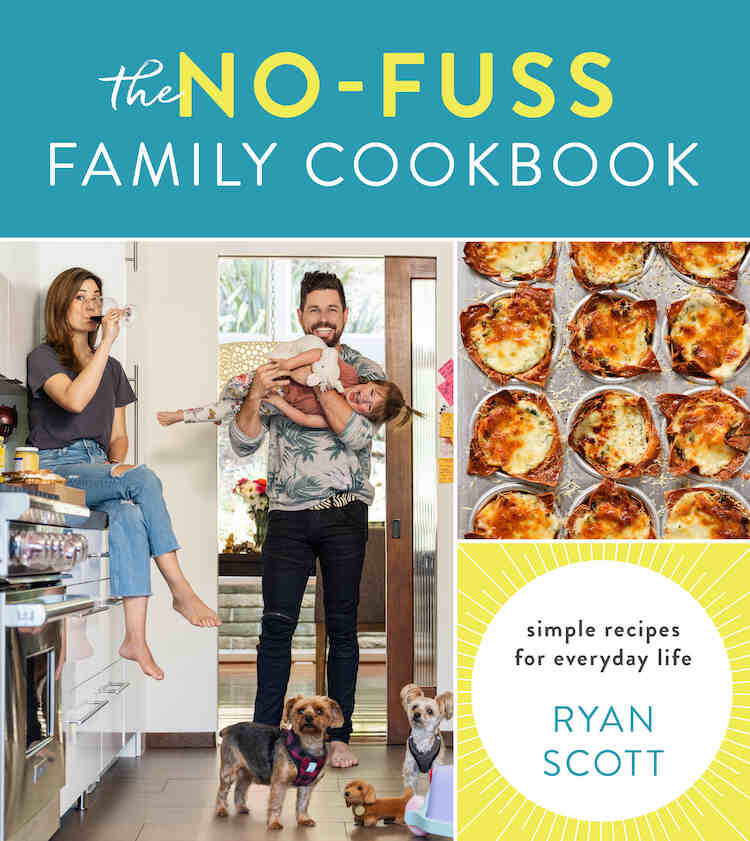
You can find this book, The No-Fuss Family Cookbook: Simple Recipes for Everyday Life by Ryan Scott through the publisher’s website at Houghton Mifflin Harcourt or you can check out his Instagram account @chef_ryan_scott.
When browsing through this cookbook I first noticed that although the subtitle of the book was simple recipes for everyday life most recipes took two or more pages in the book to be explained. At first this was a bit off-putting as it seemed to make the recipes more involved than the mostly one page ones I had been mostly worked with so far. Luckily, I was also struck by all of the gorgeous photos of both the food and the author’s family and was then extremely caught by the description for the old-school spiced pork hash with potatoes, herbs, and worcestershire. From there I couldn’t put the cookbook down and flipped through while salivating over so many of the incredible foods shown. I had recently decided to cook through my freezer but I couldn’t help but wish I could cook through this cookbook instead. I finally settled on just three recipes for my first foray into the cookbook which included a meal (slow cooker creamy tomato soup with cheesy waffle dippers), a salad (don’t-tell-anyone-it’s-vegan swiss chard caesar salad with hand-torn croutons), and a dessert (any-day-ending-in-“y” overnight sticky buns). All three recipes blew me away and I immediately started looking into what else I should make from the book. Before going any further I do want to add that I found several of these recipes rather salty. I’m not sure if that was on me, as I’ve been using sea salt rather than normal table salt, or if those recipes were just truly salty. I also found that many of the recipes I tried seemed rather rich; enough so, that at one point we actually took a short break as the richness was becoming a bit too much. Both issues may just be my personal choice but I felt I should mention it here to you. On that note, without any further ado, here are all the recipes I tried from this cookbook with my honest review attached:
breakfast and baked goods
ryan’s all-in-one savory breakfast bake
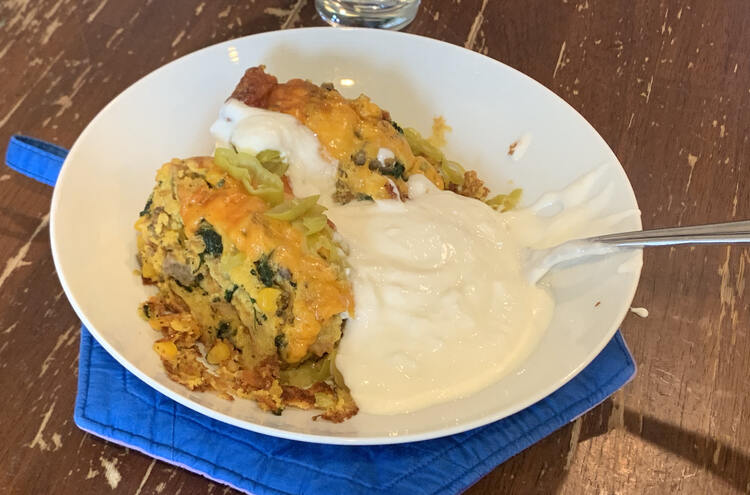
I knew immediately that I was going to have to make adjustments as I wasn’t able to buy the needed King’s Hawaiian sweet rolls. Instead I substituted them for brioche buns and then, while making the dish, stressed when I realized I only had six buns while the recipe called for twelve. I hadn’t used King’s Hawaiian rolls before so I started frantically looking online for their size, gave up, and was then relieved to see that the final mixture barely filled the properly sized casserole dish demonstrating that I probably used the right amount of bread. On top of all that I hadn’t bought scallions, chose to increase the mushrooms and celery a bit, replaced the half-and-half with a mixture of whole milk and heavy cream, and then realized I was out of sage so I did a last minute substitution, after looking online and seeing The Spruce Eats’ post, using an equal amount of poultry seasoning instead. Although I was really worried about the recipe changes it all turned out incredibly in the end. Even though the kids ended up not enjoying it Matt, my husband, and I thought it was the perfect supper.


A couple of days later I used up the leftovers for my lunch and they were incredibly divine. I plopped the leftovers on a plate, added jarred pepperoncini, microwaved it, and then poured some plain yogurt over top of it. The end result was even better than the first time and just thinking about it now makes me want to make the casserole again just so I could eat it with the pepperoncinis and yogurt again. Maybe, when I make this dish again, I should just double it and make two small casseroles so there could be a more kid-friendly option in one dish and a more adult-y one using pepperoncinis in the other dish.
old-school spiced pork hash with potatoes, herbs, and worcestershir
I absolutely loved the description of this meal and knew the second I saw it that I just had to make it. I ended up buying an eight pound piece of meat rather than the five pound the recipe called for so I increased the seasoning, made from the recipe, from a third to a half of a cup. I also realized at the last second I didn’t have allspice so I looked online and, using The Pioneer Woman, replaced it with a mixture of pumpkin pie spice, cinnamon, and black pepper. Once the amazing smelling meat came out of the oven; however, I found it rather salty. I’m not sure if that was on me from increasing the seasoning amount or if the seasoning itself was too salty for my taste. That said, since the meat seemed so salty I then replaced the three teaspoons of Lawry’s seasoning salt, for the hash mixture, with only one teaspoon of no-salt Spike seasoning I had on hand. Still the finished pork hash seemed way too salty for Matt and I and we found it best to eat it with something that cut through the salty taste. I do love how this recipe has you make twice as much as you need and then save half to make the next time even simpler.

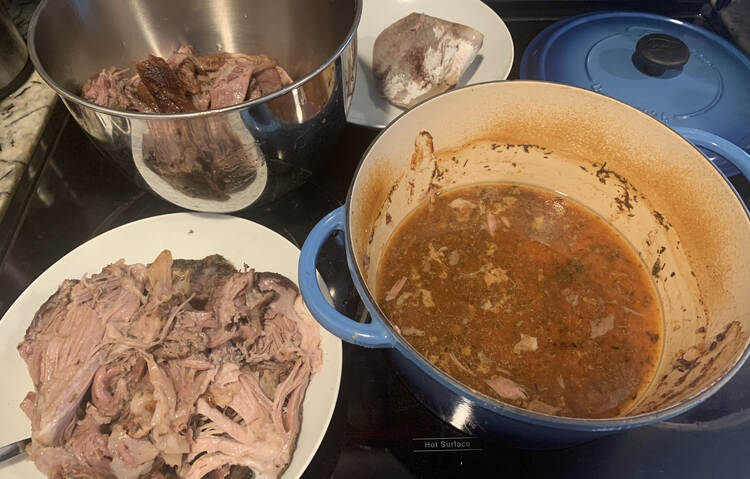

The kids didn’t like it, of course, so we found ourselves with lots of leftovers. The next time we ate the leftover pork hash I cut mine up and heated it with leftover purple rice and corn. Matt topped his hash cakes with cheese before heating them up and tossing them in a bun to make a terrific burger style meal. Once we were done I cut up the last of the hash, threw it in a container with the last of the rice, and froze the mix for another day. I love that the pork hash alone became three separate meals for Matt and I. Plus, other than the salt, all versions tasted good. I can definitely see making this again as long as a I can drastically decrease the salt amount in the spice mix without affecting all of the other flavors.
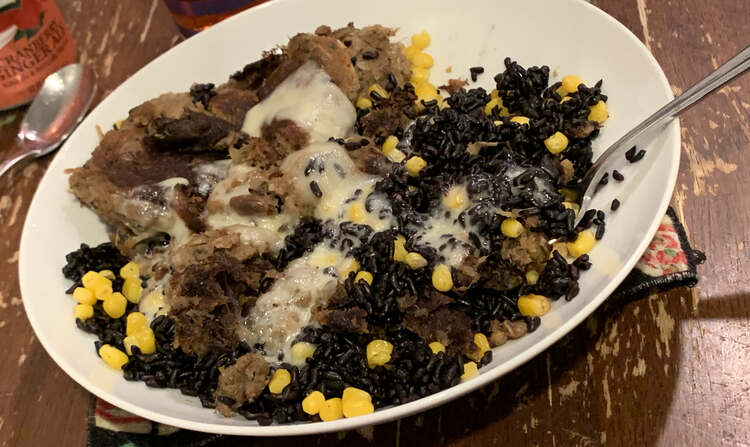
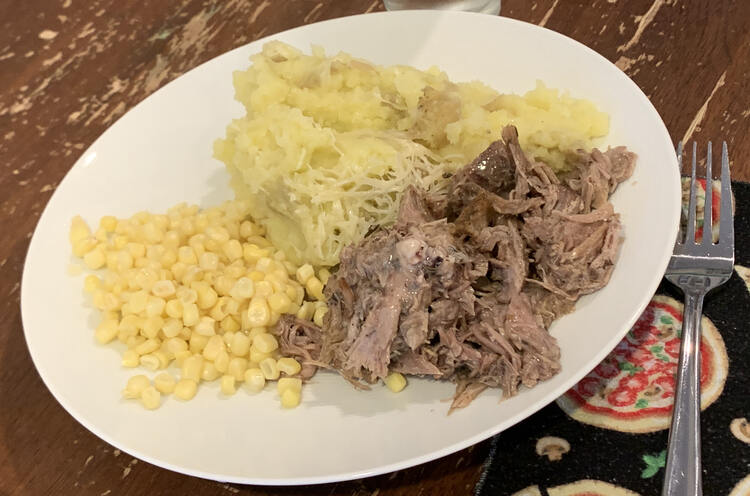
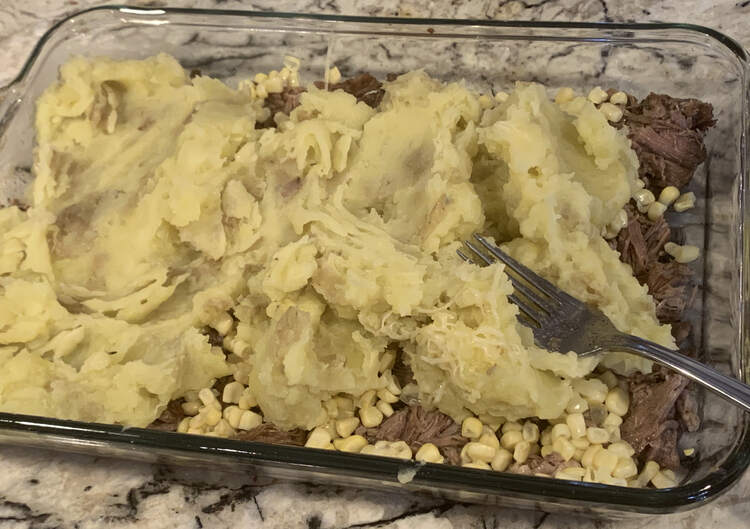
These photos showed what I did with the pork hash yet that was only half of the meat from the recipe. The other half of the pork roast was shredded before being frozen for later. Rather than making hash again I instead saved the shredded meat for awhile, defrosted it, and heated it in the microwave to serve with Ryan’s olive oil yukon gold mashers and some heated frozen corn. The leftovers from that meal were then thrown into a casserole dish and then into the freezer for yet another meal. The photos of this can be found under the olive oil yukon gold mashers review near the bottom.
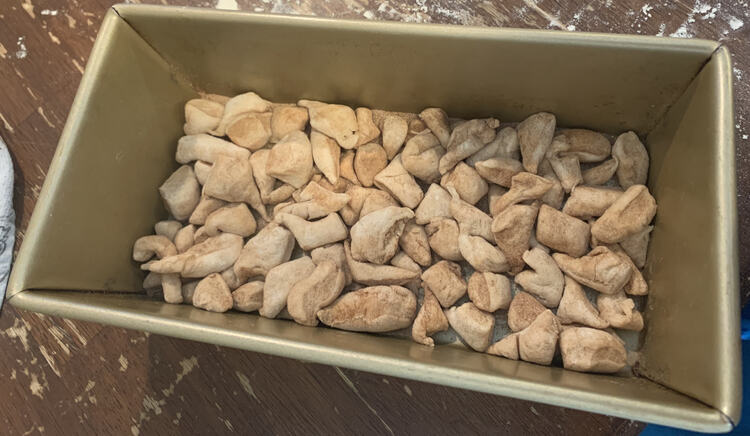
no-knead diy english muffins
I was super excited to see English muffins in the cookbook and knew I needed to try them as the kids hadn’t had English muffins in a very long while. Looking over the recipe I planned to make these for lunch, so I wouldn’t be rushed, as I assumed there would be enough remaining for supper that night with eggs and bacon. I completely miscalculated and although I burned most of these (I hate frying pans) we ended up eating all of them for lunch topped with cream cheese and lemon curd. Although I didn’t end up with large bubbles in the dough and burned them they still tasted great. Matt even told me that they were better than store-bought… although it had been awhile since he’d tried store-bought English muffins. I do want to try to make these again and would love to eventually master this recipe.


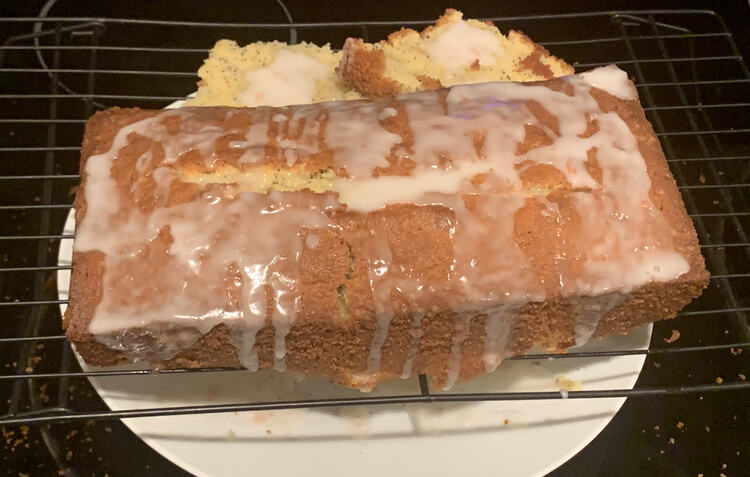
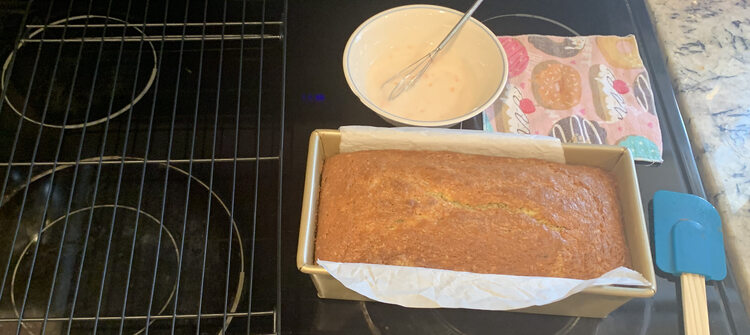
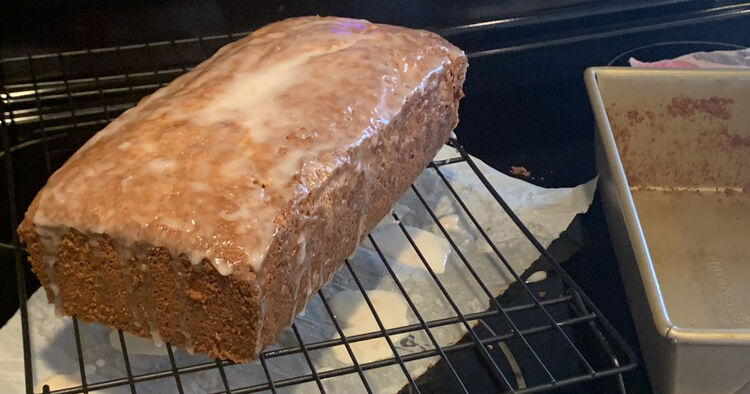
grapefruit poppy seed pound cake
Many months ago I came across a lemon poppy seed loaf recipe online that I really wanted to make, but by the time I finally purchased the needed poppy seeds I had forgotten the recipe and hadn’t yet gotten around to finding a new one. While paging through this cookbook I knew the second I saw this recipe that I HAD to try it. And I wasn’t disappointed at all. The finished loaf was incredible, moist, delicious, and tasty whether it was eaten hot, fresh from the fridge, or at room temperature as recommended. This has become our family’s favorite recipe in the book…. and even Matt loves it although he doesn’t normally like grapefruit at all.
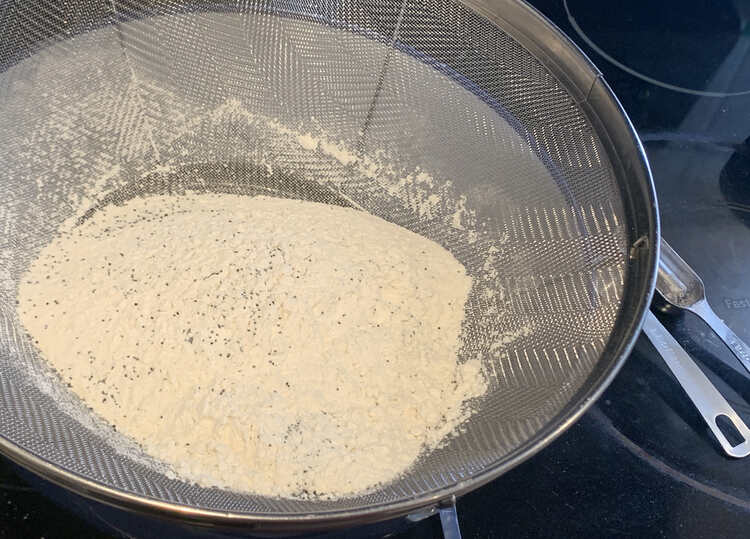
The first time I made this recipe I followed the directions religiously including making sure I had all of the required ingredients, so no substitutions, and actually sifting my dry ingredients using a metal strainer balanced over a plastic bowl. Somehow, after baking, I pulled out the loaf to find the center was obviously not done so I tossed it back in for another twenty minutes. The photo shown in the cookbook seems to be of a longer and skinner loaf pan than my more traditionally sized one so I’m not sure if the issue was my loaf pan itself or something else. Since then I’ve increased the listed bake time by ten minute and all the resulting loaves have turned out amazingly. The second time I made this I realized I was out of sour cream and so I did what I normally do and substituted it with my homemade yogurt instead. The third time around I substituted again with my homemade yogurt but also realized I was out of lemons so I only used grapefruit for the juice and zest rather than a combination of the two like the recipe says. I still loved how it turned out although Matt felt the lack of lemon caused the loaf to lack something. That time around I also added some parchment paper to the base of the loaf pan and solved my missing loaf bottom problem when I later pulled it out.

As an aside I found the recipe needed a whole lemon’s worth of zest but then only used half of the lemon for it’s juice. As such I had a non-zesty and un-squeezed half of a lemon leftover after making the loaf the first time. Rather than waste it I cut the half down into smaller pieces and threw it into the garburator in my kitchen sink. While typing this trick out I quickly looked online to confirm the lemon cleaning trick and came across a list of garbage disposal dos and don’ts that include lemon wedges (do) on Pete the Plumber while also coming across these handy lemon and vinegar cubes through a lifehacker’s post that I can totally see making the next time. When I substituted the lemon so I only used grapefruit, the third time making it, I was left with a whole zested and un-squeezed grapefruit. I ended up taking the pulp out and tossed it into a sealed container in the fridge so I could make a yogurt, grapefruit, and granola parfait the next day. Any leftover juiced citrus, each time I made the loaf, went into a glass of water so I got to have citrus-flavored water after cleaning the mess up.

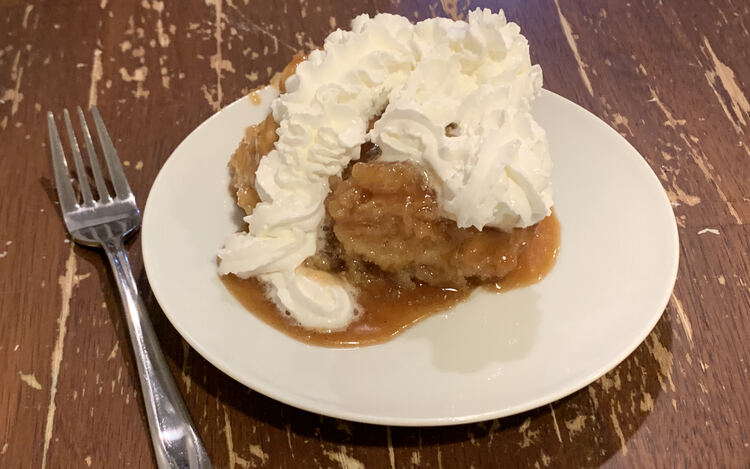
any-day-ending-in-“y” overnight sticky buns
I had recently made some Caramel-Apple Cinnamon Rolls, from a different book, so when I came across these sticky buns I knew I needed to make them soon so the kids, Matt, and I could form an opinion on which style of buns we prefer. Even though a quick glance at this recipe almost frightened me once I looked closer it seemed pretty simple to follow. By default the dough needs to rise for six or more hours which I loved as I was able to make this after supper, wash all my dishes at once, and enjoy the buns with hardly any work the next day. That said if you prefer not to let them rise for so long the recipe says that you can skip the fridge and leave them on the counter for about an hour instead.
The only ingredient I changed from the recipe was the light corn syrup. I didn’t have any and the store I shop through doesn’t carry it. I looked up possible substitutes, using The Spruce Eats, and chose to replace it with an equal amount of rice syrup I had on hand instead. I also used a glass casserole pan for the cinnamon buns when the recipe simply calls for a pan. I’m not sure if it was the pan replacement itself but when I finished baking these and flipped them out of the pan they were severely undercooked. I left them on the cookie sheet, that I had flipped them onto, and threw them back into the oven for about twenty minutes before they came out looking, smelling, and finally tasting great.


The final sticky buns were almost too rich but completely delicious. Both kids repeatedly told me that they “tasted so so good” while Zoey, at one point, added “that’s a gooder dessert than I thought it should be”. I could definitely see making them again although I’d definitely bake them for longer. The recipe mentioned adding nuts which I could see being totally amazing but I decided to skip it this time so the kids wouldn’t complain.

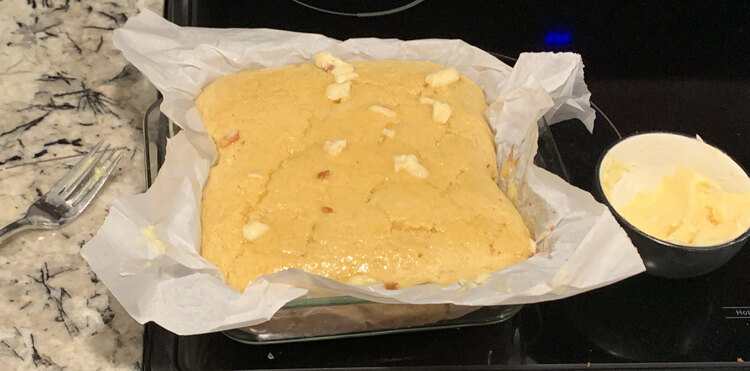
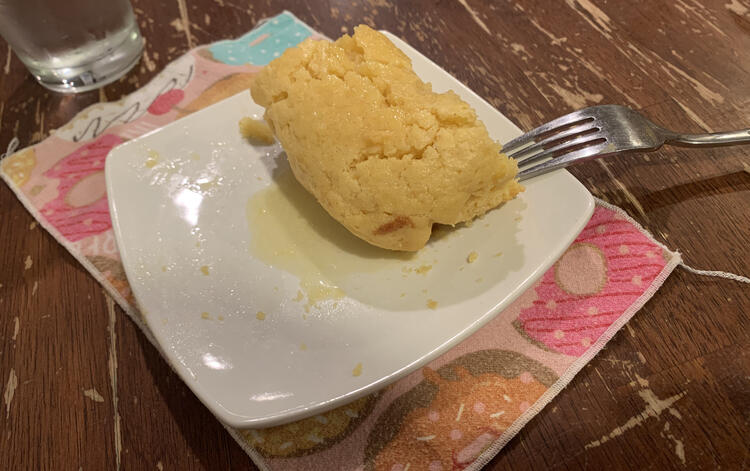
best sweet cornbread ever with honey butter
I normally make my cornbread from my first ever, gifted, cookbook the red checkered Company’s Coming one. That said I was interested to see what this one tasted like so I made it using the lesser amount of white sugar as the recipe has a range depending on the sweetness you want. It turned out delicious although we still have no idea how it would taste after sitting overnight as we ate it all in one go. The girls mainly had this for supper but Matt and I had planned to go for the more traditional chili and cornbread pairing as we had leftover super veggie chili con corny. This didn’t happen as planned as we, once again, had an issue with the bake time not being quite long enough which I didn’t realize until after I had slathered the top with butter so I threw it back into the oven, buttered, baked it longer and then microwaved the slices to be sure they were done. By the time the cornbread was fully ready Matt and I had already finished our chili so we still don’t know how well they go together but found the cornbread a satisfying dessert.
salads, soups, and snacks
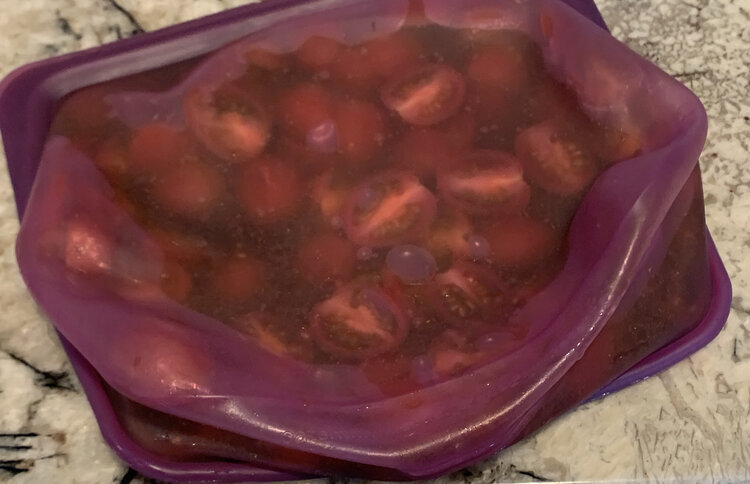
simplest marinated cherry tomato salad with 3/2/1 lemon-soy vinaigrette
I absolutely adored this salad. Technically, the recipe has you make a double batch of the dressing so you have excess for later and then add it to the tomatoes to marinate. I wasn’t sure if I’d use the excess dressing right away so I instead halved the dressing part and added each ingredient directly to a Stasher bag before sealing, shaking to mix, and setting it in the fridge to marinate. I did eat enough that the vinegar in the dressing started being a bit too much but since I definitely probably ate more than a serving amount that doesn’t matter. I served this with leftover rice and the old-school spiced pork hash with potatoes, herbs, and worcestershir and it was awesome together. I left the remaining salad in the fridge for a of couple days, a bit longer than I meant to, so the arugula ended up becoming rather wilted. It still tasted fine served over fresh arugula set beside the every-occasion potato salad with bacon-mustard vinaigrette though.

don’t-tell-anyone-it’s-vegan swiss chard caesar salad with hand-torn croutons
I absolutely loved this recipe and am so glad I made it; although, I hadn’t looked too closely at the serving size and it created a rather large salad especially as only Matt and I ate it. Ada was super excited for the salad and told me that she “liked the salad so much that [she] could eat it all day long” but, in reality, both girls only ate the croutons. This salad was so simple to throw together especially as I had cleaned and cut up my Swiss chard when I first bought it so I only needed to make the croutons, by slicing pre-sliced bread into squares, that morning and mixing the dressing together right before tossing it all in a bowl to serve. When I make this again, if it’s just us again, I’m planning on adding the croutons to each plate individually and thus rate-limit the kids and allow me to pack away any leftover salad separate from the croutons so they don’t get too soggy. I hadn’t realized just how much I truly missed a good Caesar salad until I tasted this and I truly absolutely adored how the salad used Swiss chard rather than a simple lettuce.


In case you’re like me and haven’t used silken tofu (the vegan ingredient for the dressing) before I wanted to share what I did with the tofu I was stuck with after making the dressing. I actually fed it to my kids. I had looked online later that night and came across this amazing looking smoothie recipe, on The Spruce Eats, although I used whole cow’s milk rather than the soy milk it calls for. The girls helped me make it for their lunch and absolutely loved it.
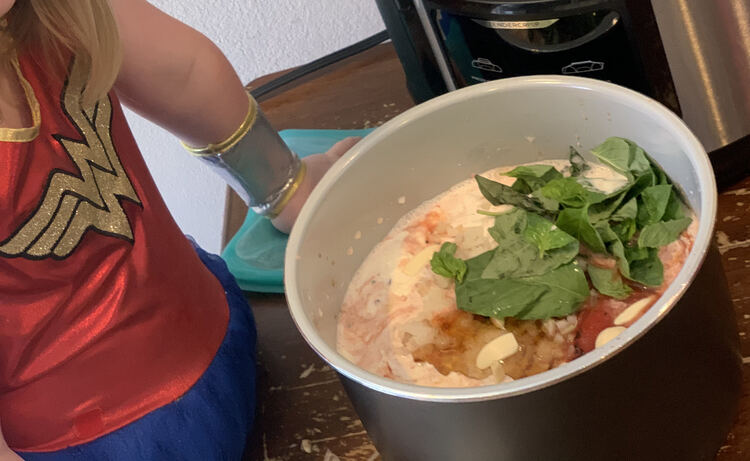
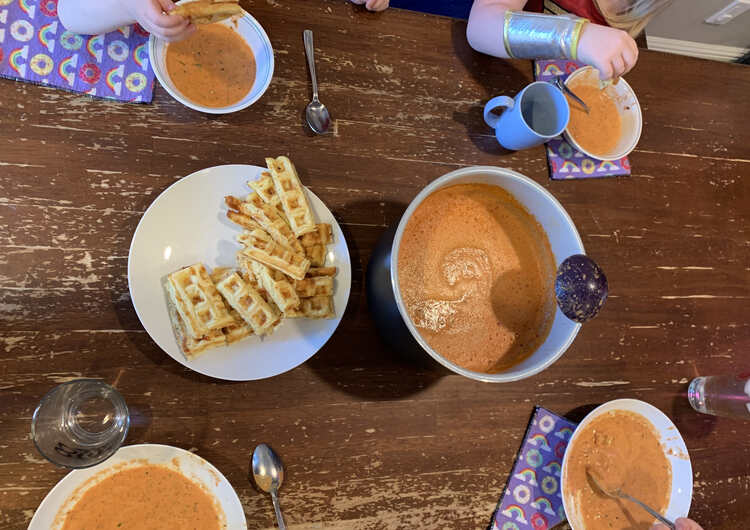
slow cooker creamy tomato soup with cheesy waffle dippers
This was SO fantastic and tasted like a truly gourmet restaurant soup yet it was so simple to make and I normally wouldn’t think to order tomato soup in a restaurant. The first time Matt and I could’ve easily eaten it all alone while the girls didn’t seem to like it as much. Once you add the strips of cheesy waffle the soup becomes just the background to such an amazing waffle. Zoey told me that “the waffles [were] so [much] yummier than the soup” while Ada said that the “waffle dippers are so yummy [that she] could eat them all day long until nighttime and then eat them all nighttime and all over again… The soup is so yummy too”. Needless to say the next time we made this I was sure to double both the soup and the waffles which was awesome since the girls decided that they also LOVED the soup along with the waffles.
Both times I made this I didn’t make any substitutions although the recipe lists provolone or mozzarella and I used provolone both times. The first time I used sliced provolone and made sure to dice it smaller while the second time I grated the provolone from a block. The first time I also followed the directions and turned off the soup so it could cool while making the waffles. I have an immersion blender so I later realized, as the waffles took longer than expected, that I didn’t need to cool the soup as I didn’t need to transfer it to a blender. I then, after using my immersion blender, turned my slow cooker back on to heat while finishing the waffles. The second time Ada helped me toss all the ingredients into the slow cooker for the soup and then we ignored it while it cooked away. Several hours later, once I mixed up the waffles and had the first batch in the waffle iron I went back to the soup, blended it up, and served the meal to my family. I used a timer, set to five and a half minutes, to help me keep track of the waffles and I then kept a fresh supply on the table for all of us to enjoy.


The first time I made we ate it all except for the four remaining cups of soup. I poured the leftover soup into a canning jar, tossed it in the fridge, and, a couple days later, made the best meat sauce I’d ever made by using the leftover tomato soup as a tomato sauce. The next time we made the soup I doubled it and although we ate way more soup than the last time I was still able to pack up just over three canning jars worth of soup. I tossed one in the freezer, once it had cooled, to test out how it tastes when thawed out. The other ones were put in the fridge so the kids could dip the leftover waffles another day along with a plan to recreate that amazing meat sauce again. And re-create the meat sauce we did. I actually cooked up two and a half packages of ground beef, added eight cups of the soup to it, and made an incredible meat sauce that I turned into lasagna by adding a cottage cheese based layer and lasagna noodles. I froze both lasagnas and for supper than night we ate the leftover lasagna noodles with the leftover sauce. A while later we defrosted the smaller lasagna for supper and it was amazing!

super veggie chili con corny
I knew I wanted to try the veggie chili the second I saw it. I love how this recipe was made in a slow cooker which allowed me to find the best time, in my morning, to cut up all of the vegetables allowing more time to do other things during the supper rush. Matt and I both thought this recipe was good but not amazing after having tried so many of the other recipes in this cookbook already. I also found the cheese he paired the chili with a bit too salty especially when also paired with the tortilla chips. I was debating not making the chili again until I had the leftover chili and absolutely adored it. I don’t know if it was just because the chili’s flavors had time to meld or if it was from pairing the chili with shredded cheddar cheese instead but it tasted amazing.


pasta
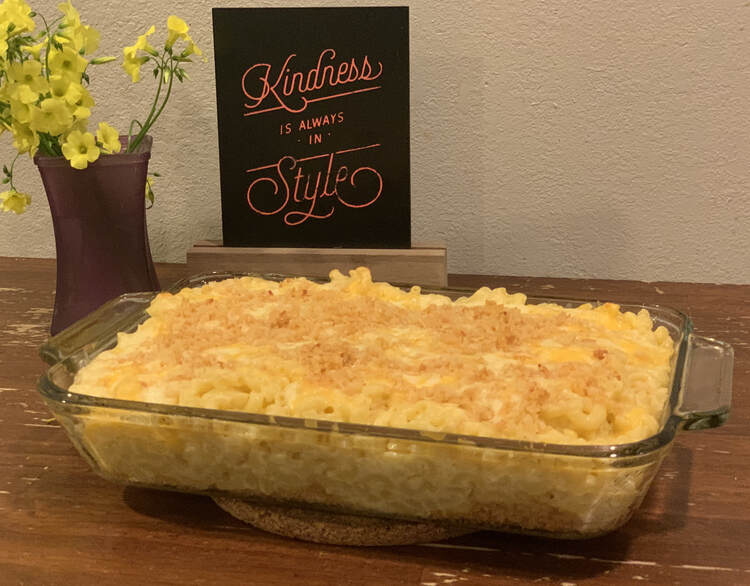
three-cheese mac and cheese muffins
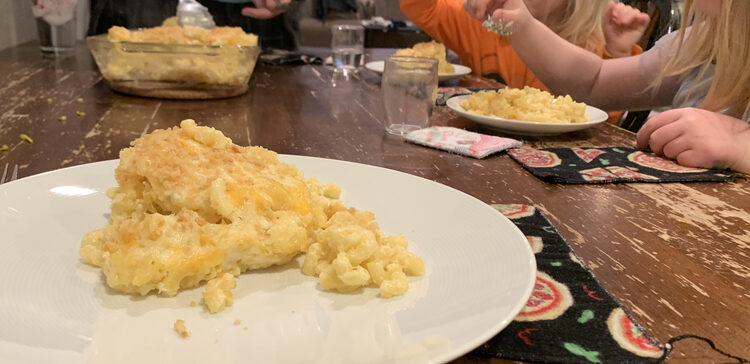
I went to make this as our main meal and, before fully realizing that it made three dozen muffins, started worrying that we’d eat all of the muffins for supper, with all of that work, have nothing left for leftovers. I quickly made the decision to double the recipe and started boiling two pounds of pasta before I could change my mind. I had made sure ahead of time that I had all the ingredients but with the last second change I only had about half of the half-and-half that I needed. I substituted the other half with whole milk and charged ahead extremely happy that I did have enough of all of the other ingredients. I ended up filling the muffin tins, as the recipe dictated, with half of the mix, or one batch, and then grabbed an 8 by 10 inch glass casserole for the other portion. I put the casserole together following the same steps as the muffins but skipped adding divots for the cheese and just spread it all over top. I then doubled the bake time for the casserole while following the instructions for the mac and cheese muffins. This meant I started out with the casserole on the top rack of my oven while the larger muffin tin, with a dozen mac and cheese muffins, baked on the bottom. Once the first set of muffins were done I replaced them with two, smaller, muffin tins and left the casserole alone so the final two dozen baked while the casserole finished. The final casserole turned out incredibly tasty and the kids were ecstatic with it. Zoey told me that I had “made the yummiest thing in the world” while Ada later added that she “wish[ed she] could give this to Wonder Woman because it’s so good”.
After eating our fill we were left with some of the casserole and most of the three dozen mac and cheese muffins as leftovers. I placed the muffins on a cookie sheet in the freezer and once they’d started freezing pulled each one out of their silicon wrapper so I could transfer them into Stasher bags so they’d be protected in the freezer for another time. I had to test them out so I pulled out several of them, only a couple days later, to defrost in the fridge. The kids and I tried them cold, still good but not as great, before microwaving them so they tasted incredible once more.

dinner
cornmeal crust white pizza
I knew the second I saw this pizza that I wanted to surprise Matt with it. The first time I didn’t have fresh basil so I substituted it for dried, using a quarter teaspoon, when making the white sauce and skipped it completely on the toppings. I also needed to replace the bread flour with an equal amount all-purpose white, following The Spruce Eats, and replaced the two lemon wedges at the end with 2 teaspoons of bottled lemon juice according to the Traditional Oven. Since I didn’t have basil I decided to make one of the alterations using the leftover spinach sitting in my fridge. It turned out amazing and I’ve since made the unaltered pizza two more times making sure to use the proper fresh basil, bread flour, and lemons. Each time we loved how the pizza turned out although it was rather rich. In the words of Zoey “yeah, it’s yummier than anything else”.
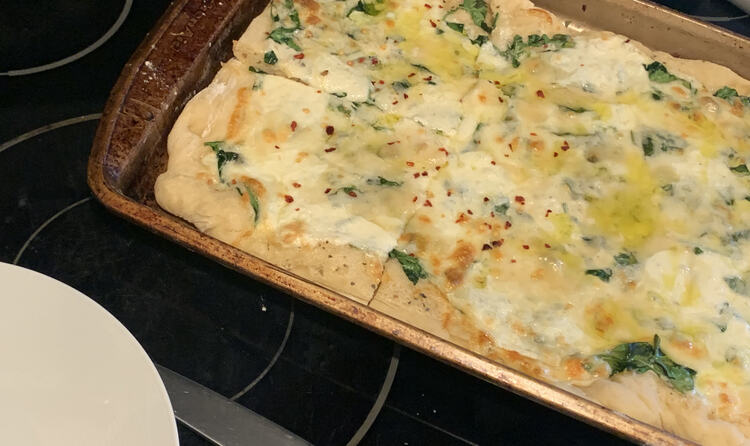

The last time I made pizza I doubled the dough and sauce recipe so I could make two different white sauce pizzas. I knew everyone loved the recipe so I left one pizza as normal. I then looked into my fridge for inspiration on what to put on the other pizza as I truly wanted something unique and a bit less rich. Luckily inspiration, and looking online to confirm flavors profiles, struck and I topped the other pizza with the white sauce, leftover pistachio pistou (from the “perfect” asparagus with pistachio pistou), jarred sliced artichokes, leftover every-occasion potato salad with bacon-mustard vinaigrette, leftover egg whites, and a couple turns of my pepper mill. It was a truly random what’s in my fridge inspired pizza that would be so hard to duplicate and which turned out incredible.


The one complaint I have with this recipes is that the dough is so flopsy. The instructions have you plop it onto the cookie sheet and spread it out rather than rolling it out and transferring it. That said the toppings are incredible and I’ve made the dough three different times now so no major complaints.
one-pot turkey “Scott family helper”
Three out of four of us absolutely loved this spin on the classic hamburger helper. I did end up making changes by using siracha for my hot sauce, halving the hot sauce since I have kids, replacing the cheddar cheese for Monterey jack, and using half a cup of frozen diced white onion rather than a whole fresh one. I also may have forgotten to set the timer or just didn’t hear it go off. Overall though it went well. Zoey’s been calling supper her last meal of the day lately so the compliment that “I made the last best meal” was adorable. I can definitely see making this again although both kids ignored the turkey and only one said they loved it. Matt and I felt like we ate a blast from the past and wished that there was more than there was.

veggies and sides
crispy brussel sprouts with parmesan dressing
I wanted to really love this dish but found it rather salty. That said, it otherwise tasted incredible and even Ada ate some and gave it her approval. I may have doused the Brussel sprouts in too much of the sauce so next time, in addition to decreasing the salt, I could see using less sauce and saving the excess to use on roasted veggies or as a dip for crudités like the recipe mentions. We happened to have leftovers so we had the pleasure of realizing that this tasted so amazing the next day.

the “perfect” asparagus with pistachio pistou
Oh My Goodness! Perfect is SO right! I prepped this ahead of time while the kids were eating breakfast by making the pistachio pistou and cleaning and seasoning the asparagus. This was going to be part of our supper but it smelled so incredible that I couldn’t wait and we ended up having it for lunch with sliced oranges. Matt and I couldn’t get enough of the asparagus and Ada even told me it tasted like candy. I can’t believe we ate until we were overfull with just vegetables.
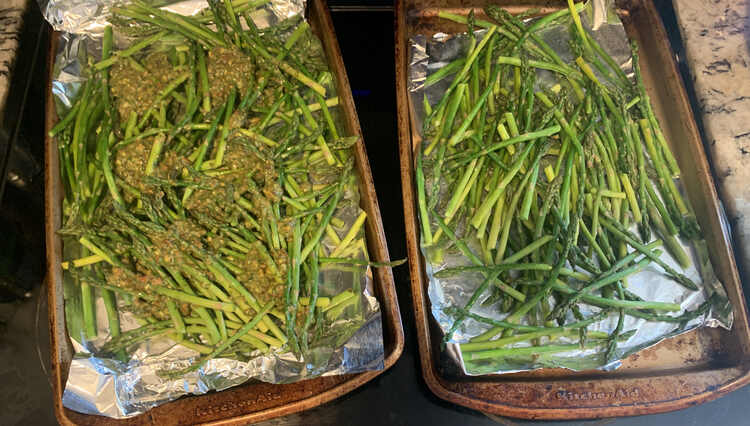
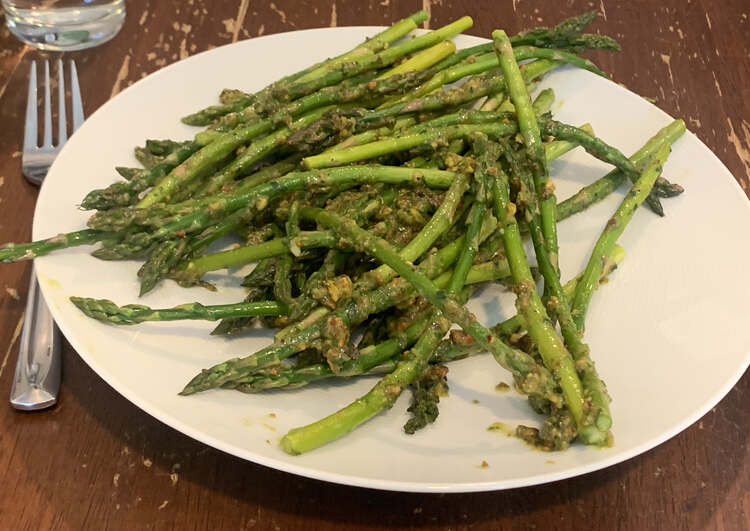
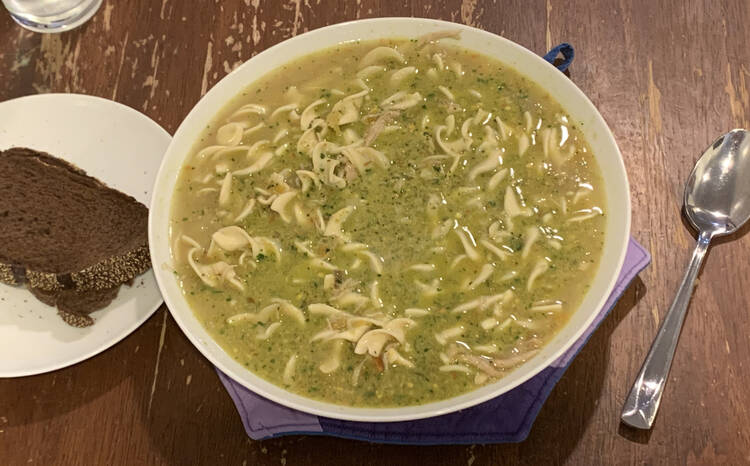
Since making this I’ve gone on to make the pistachio pistou so many more times that, I think, Matt’s started getting tired of it. I’ve used it on pizza (above), coated a buttermilk waffle with it, added it to bottled alfredo sauce, and stirred it into leftover slow cooker chicken noodle soup. I feel like each dish was made so much better with the addition of the pistachio pistou and wonder if I should freeze it in small bits to add to my version of the food… or if that may be going a bit too far.


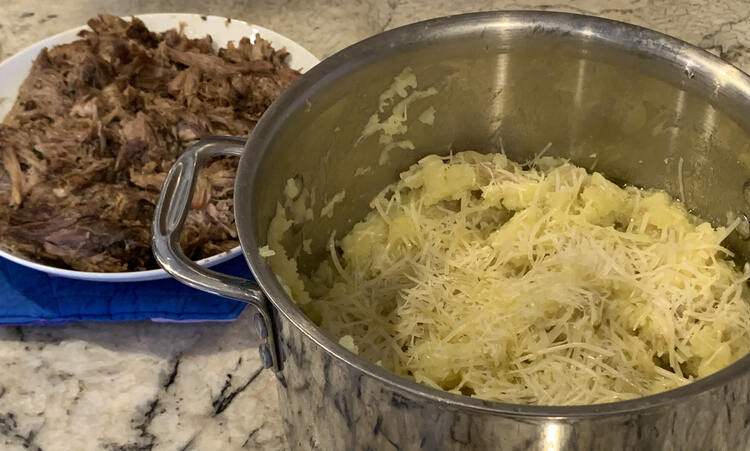
olive oil yukon gold mashers
I grew up eating a lot of potatoes but over time, since moving out, I’ve eaten other things as potatoes never seem to last for too long on my counter and after seeing potatoes seep out from a cupboard at university I figured rice and other shelf-stable items seemed safer. That said, even though my kids have decided they hate potatoes, sometimes I really need my fix. This dish was a really good fix for my potato cravings. That said, it does take a whole stick of butter, olive oil, and parmesan cheese so it’s definitely rich especially compared to my simple version of mashed potatoes with a little bit of butter and a lot of milk.
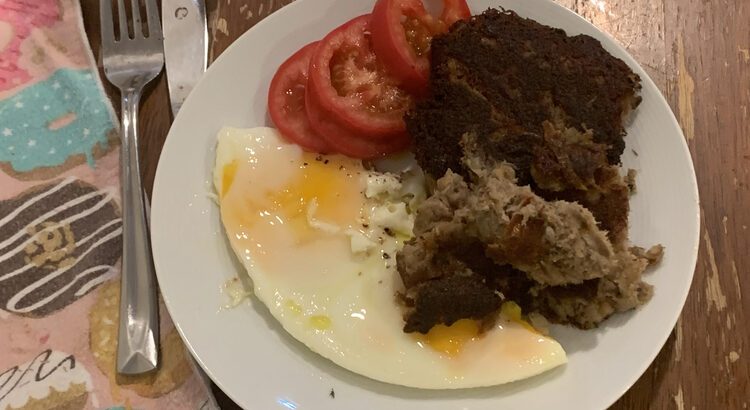
I ended up defrosting the leftover pork roast, from the old-school spiced pork hash with potatoes, herbs, and worcestershir, and left it as it was without turning it into hash (so no smoke detector). The potatoes served with the pork and frozen corn was incredible and so simple to throw together. At the end, once we ate our fill, I grabbed a casserole dish, combined all three parts together, and then froze it so we could save it for another incredible meal later on.
every-occasion potato salad with bacon-mustard vinaigrette
This dish was very simple to make when following the recipe’s instructions. It also blew me away with how incredible it tasted when finished. Since this was the only part of the meal I was making fresh, paired it with a salad and reheated pasta for the girls, it was really easy to pull together too. We happened to have leftovers so a couple days later I pulled it out from the fridge and tried it cold. Even cold it tasted awesome though we did prefer to eat it heated up.


dessert
foolproof gooey brownies
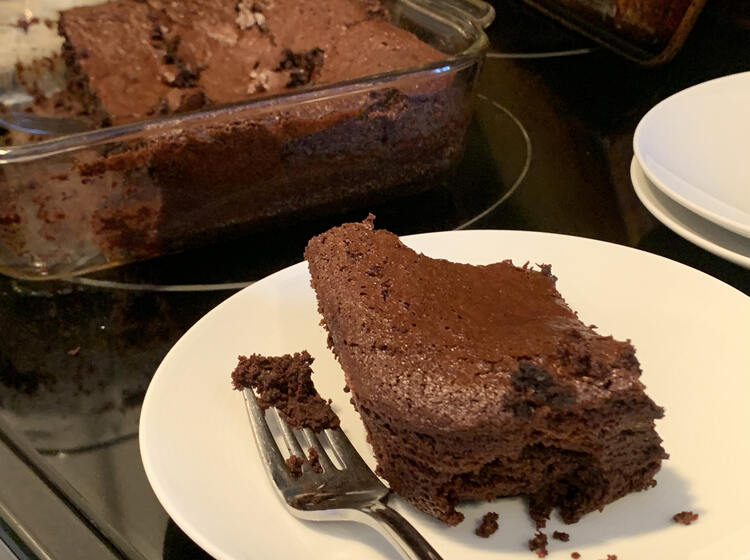
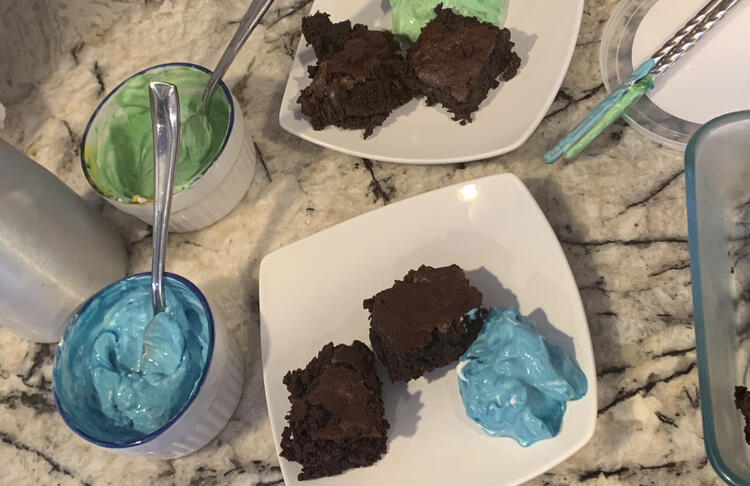
As Earth Day approached this year Ada requested brownies yet other than it being her favorite dessert I’m not sure what logic was there. Before this I had mainly used Ghirardelli Brownie Mix I had bought through Costco, although I had hacked it to include pineapples at Ada’s request one year, and was currently out. I remembered seeing a brownie recipe in this cookbook and decided to make it, with the girls, from scratch this time around. I’m so glad I did. I learned a new way to make brownies and it turned out just as good as the other version. I’m kind of curious how this would do as a base for other add-ins like pineapple, coconut, m&ms, and other types of chocolate chips.
Although several of the recipes seemed rather salty and many of them seemed rich we, overall, loved most of what we tried. Most dishes come with one or more photos so you can see how it should look, under ideal conditions, along with easy to understand directions. I ended up with meals, or parts of meals, that felt restaurant quality and were fresh out of the oven, stove, or fridge (based on cooking directions) without having to drive them home or wait for a delivery to arrive. I loved it and can see returning to this book to make these recipes again and again.
Before coming across this cookbook I don’t think I’d ever heard of Ryan Scott, an Emmy-award winning celebrity chef, but now I’m loving all the food I make with his instructions. Have you heard of him before? Apparently this is his second cookbook he’s written as he already came out One to Five in 2017. Have you tried his first? If so how does it compare to this one? Feel free to share any comments below… and if you, like me, hadn’t heard of him you can check out his new cookbook, through Houghton Mifflin Harcourt, or follow him on Instagram or Twitter.
I hope you’re doing well and this post didn’t make you too hungry. Hope you have a great day!
If you’re interested in getting any of my future blog updates I currently come out with a new one every Wednesday and share them to my Facebook page and Instagram account. You’re also more than welcome to join my email list located right under the search bar or underneath this post.
Did this save you time?