
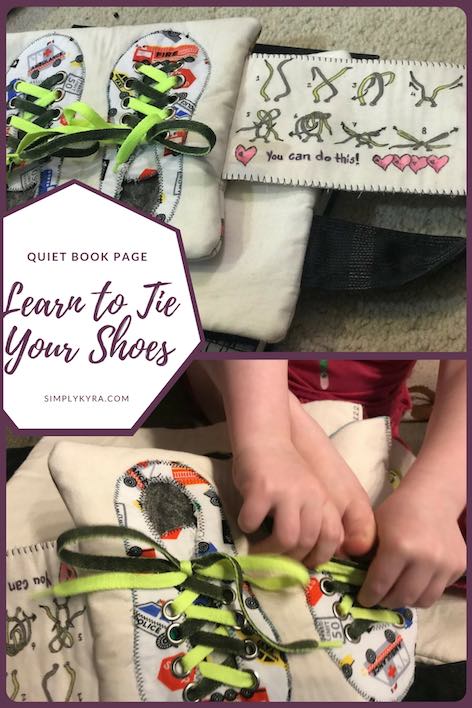
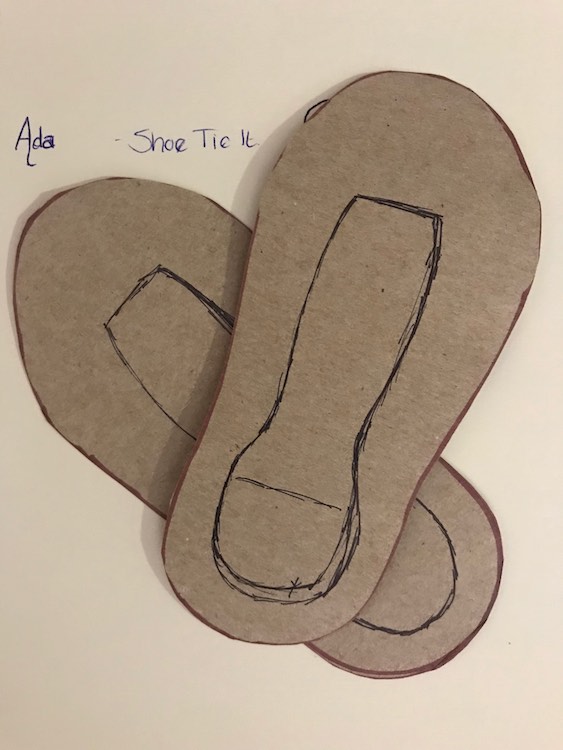
Quiet Book Page - Learn to Tie Your Shoes

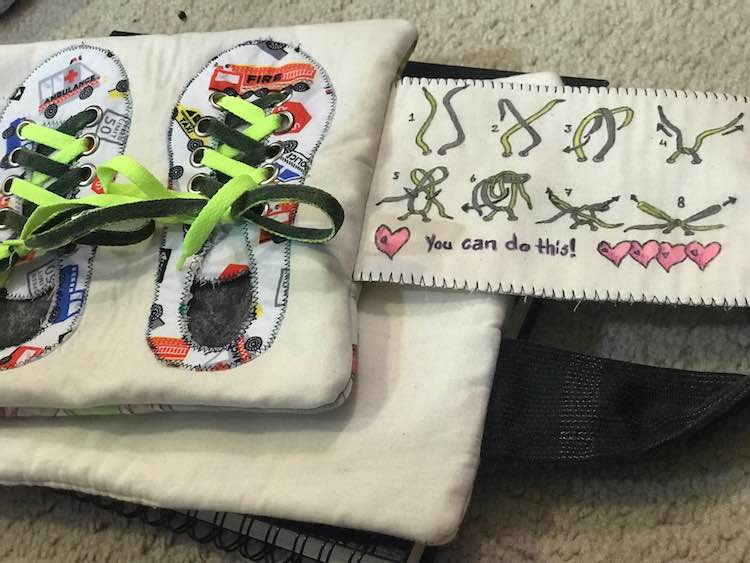
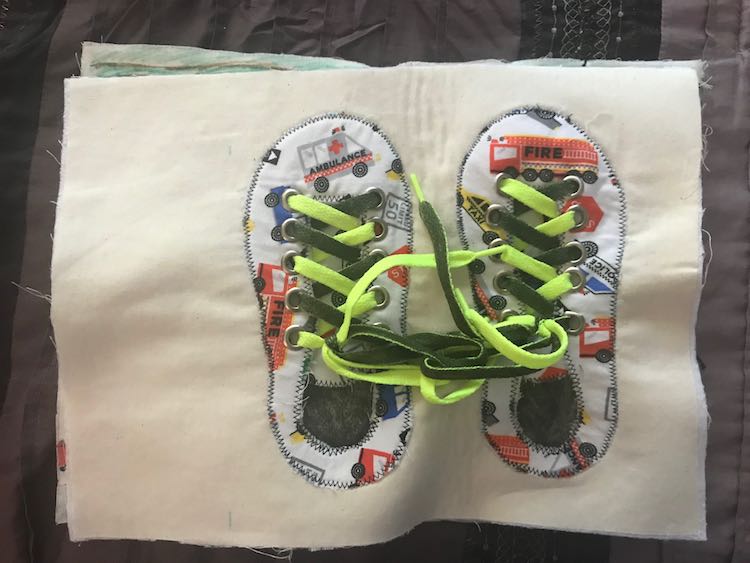
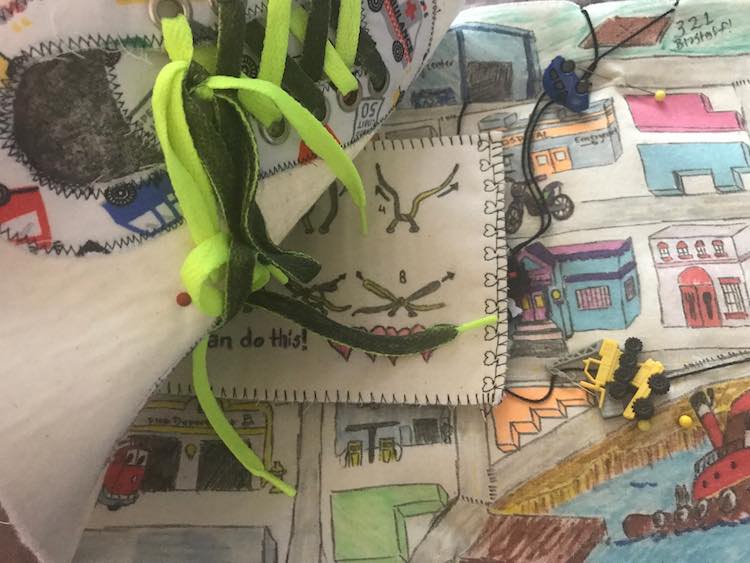
I really wanted to make Ada a quiet book page that would give her an opportunity to learn to tie her own shoes when she’s ready. While working on the shoes and looking at more tutorials online I realized I also wanted to include a diagram so Ada could more easily follow the directions when I wasn’t readily available to remind her about them. To make the diagram easier to follow I also knew I needed to make the shoelaces both in the diagram and shoes different colors for the left and right side. I also sewed the center of the shoelace to the page so the shoelaces couldn’t be pulled out and their colors would stay on their proper sides matching the diagram.
Materials
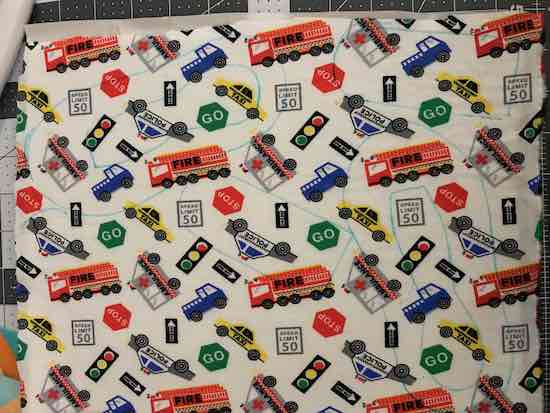
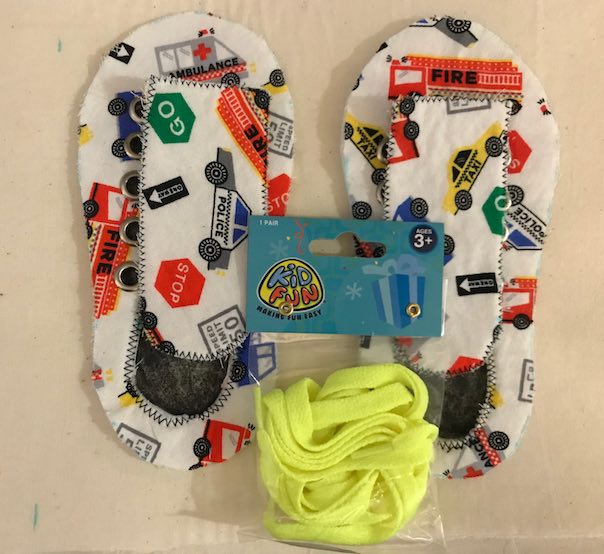
- Fabric for the shoes – I chose some woven emergency vehicle fabric purchased previously from JOANN’s
- White (used unbleached muslin) fabric for the page, directions, and the back of the shoe tongue
- Fusible interfacing (used Pellon Fusible Thermolam) to strengthen and thicken the muslin
- 1/4″ grommets or eyelets as my page will go onto binder rings in my quiet book cover
- Heat’n Bond to glue items together or help apply a muslin backing to the fabric before sewing them together
- Shoelaces
- Fabric Markers – for the diagram and a last minute coloring of half of either shoelace
Making the Shoes
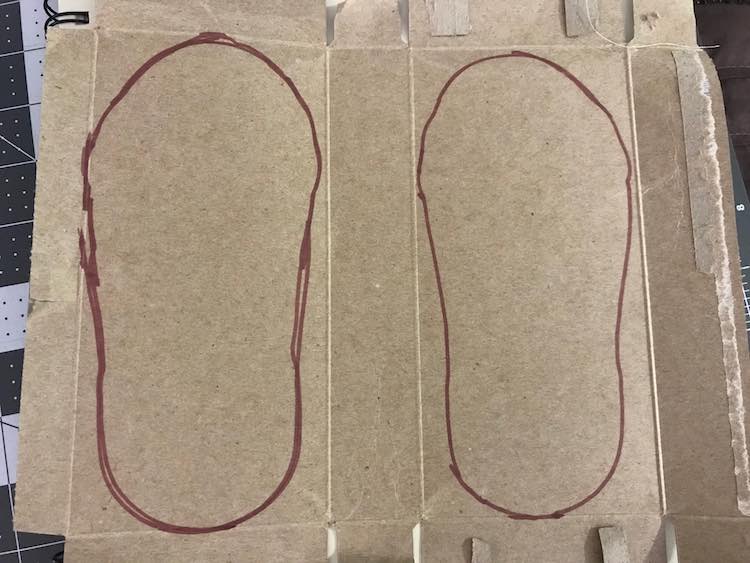
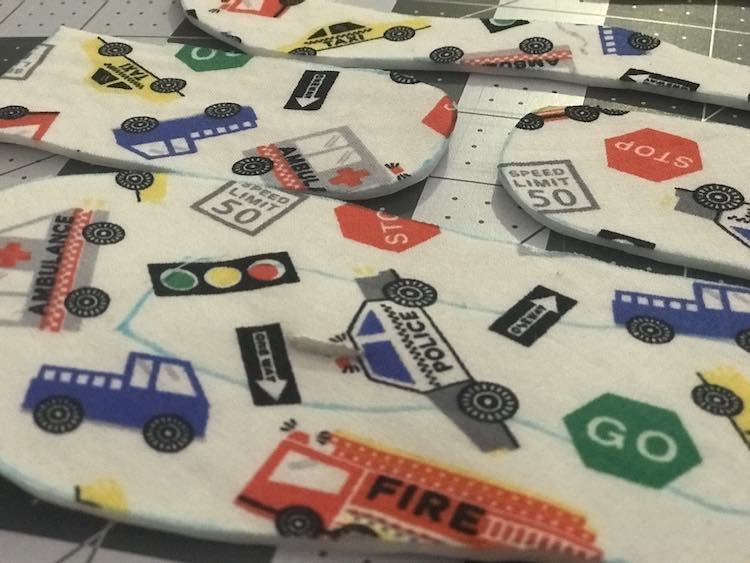
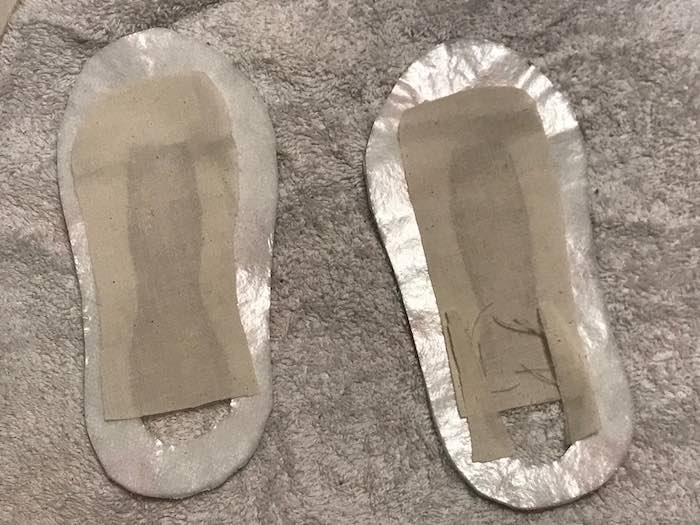
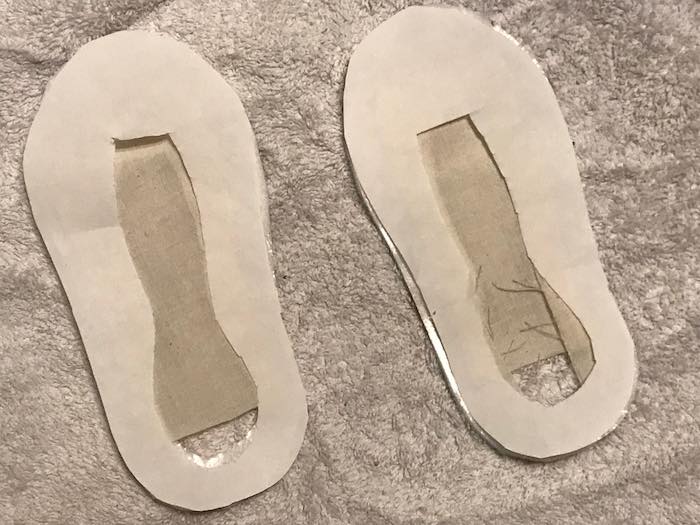
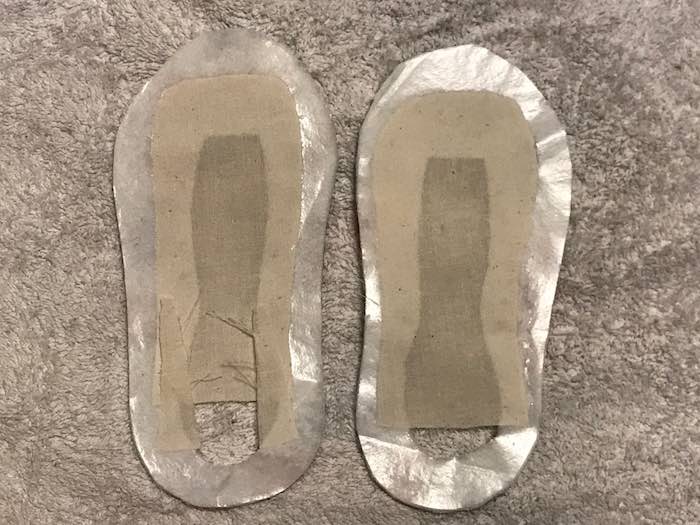
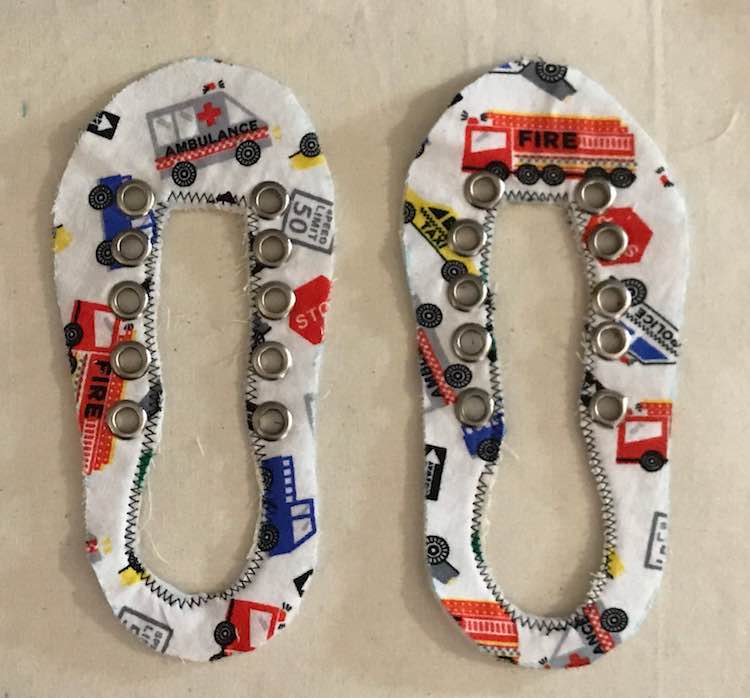
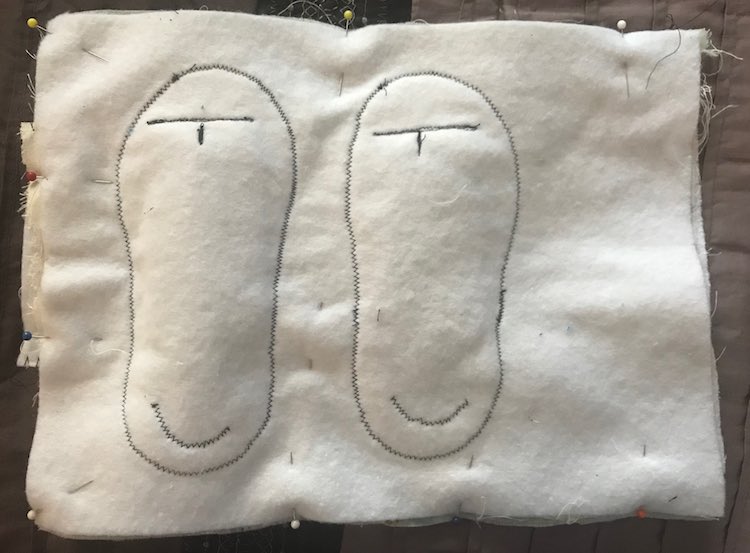
When deciding what size to make your shoes on the page keep in mind how large your quiet book page is, if you want to include one or two shoes on the page, how large your seam allowance is, if you want a margin around your shoes, and if you want to fit anything else on the page. At the time I wasn’t thinking of including the diagram and had room for a pair of shoes. I also went with the ease of using Ada’s shoes to trace out the outline for the page so I didn’t have to freehand the shoes. I used a leftover box of Annie’s Mac & Cheese to trace out both shoes and cut them out for a sturdy template.
I then had to decide where the shoe opening and tongue should be. I wanted an opening in the middle of the shoes with the tongue underneath the shoes edges like a regular pair of shoes so I sketched out my idea on one of the shoe templates to show how it would look from the outside before copying it onto the other template.
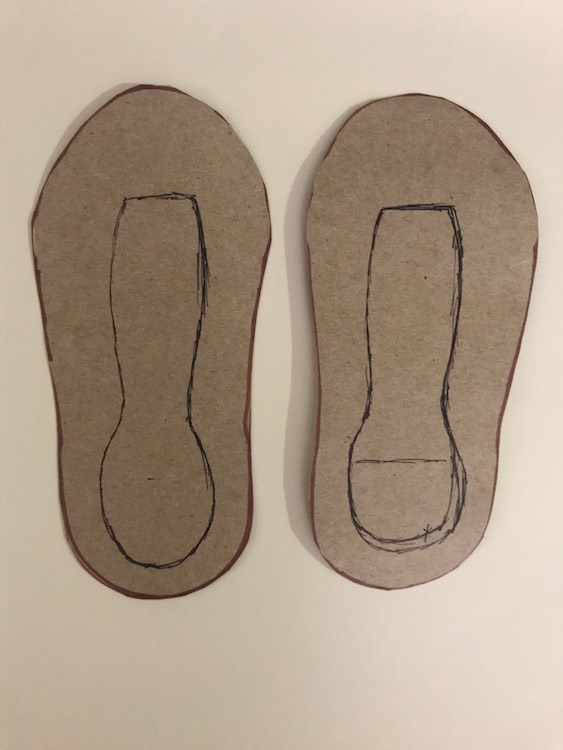
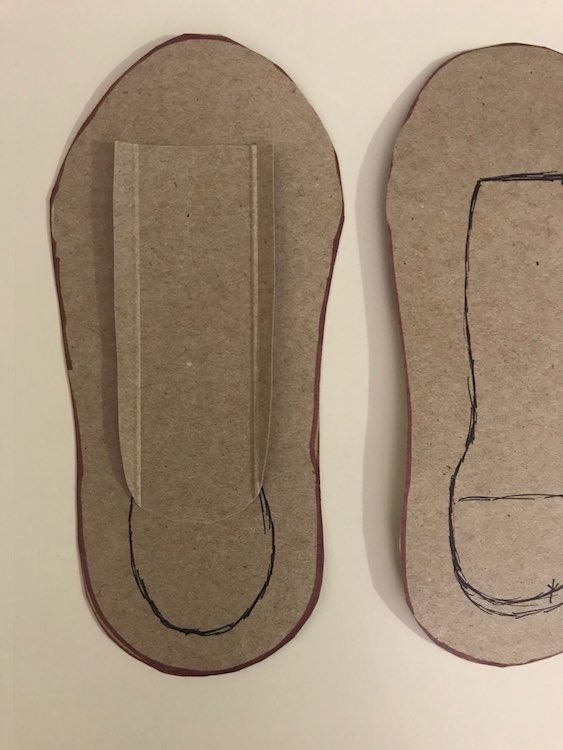
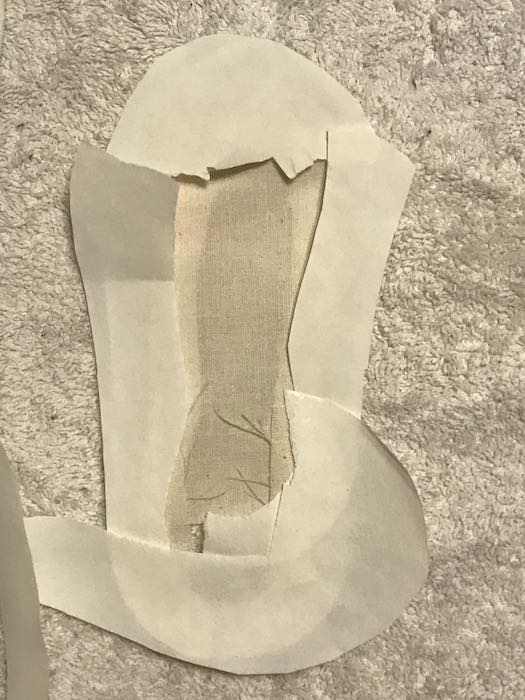
Based on my sketch I then drew out the outline of the shoe tongue and cut it out. I only needed the one template and later used it to cut out both shoe tongues.
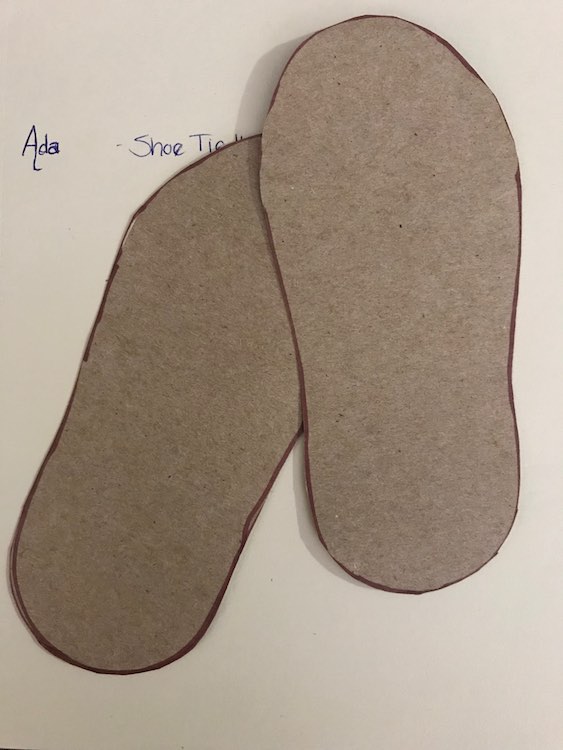
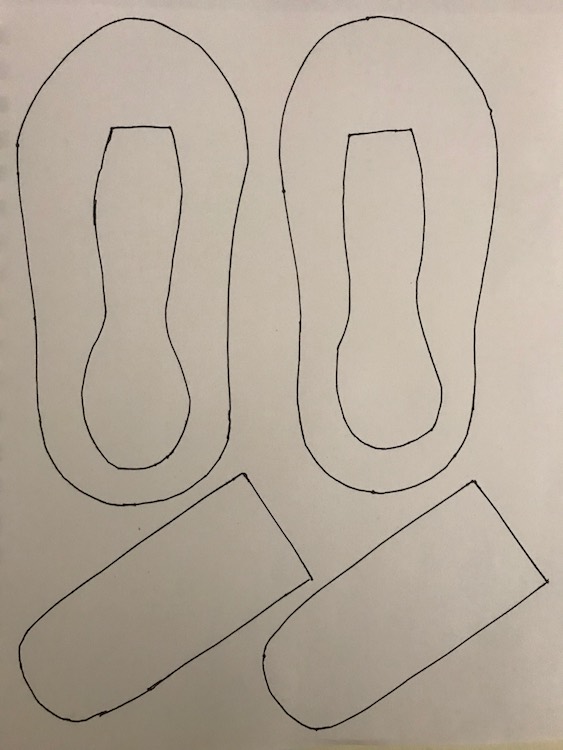
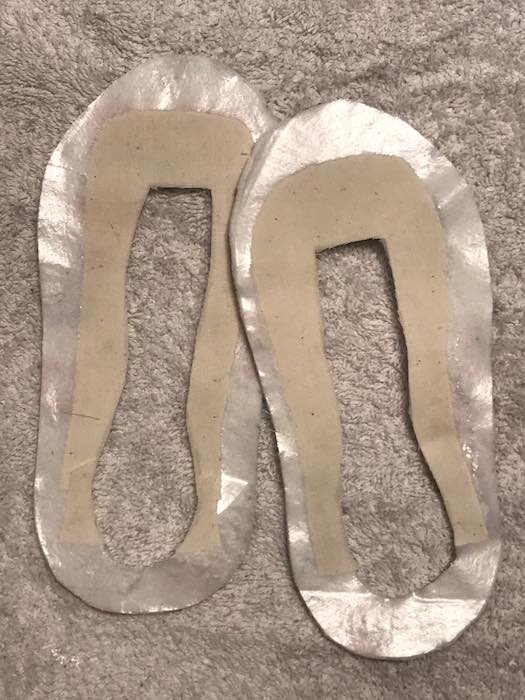
I traced out my pattern pieces so I’d have them if I were to make this again. For your convenience I’ve traced out the resulting template onto paper and scanned it to make a simple one page template for you to download. If you want the shoes to be smaller or larger you can always change the print scale on your computer. The download link is right below this image of the download.
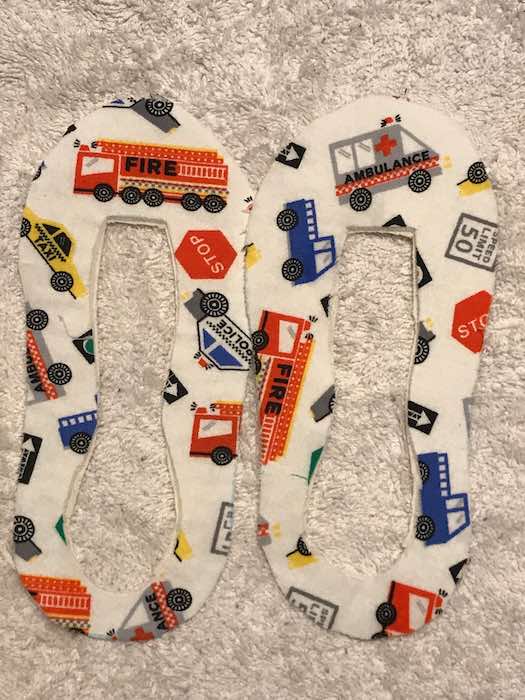
I attached fusible interfacing and then Heat’N Bond to the main fabric before figuring out where the template should be placed on the fabric. Just a heads up I later covered up the Heat’N Bond with fabric on the tongue and part of the shoe so this is optional. And now you can get fussy with the template location. I tried to line it up to maximize the entirety of the vehicles while also varying the type of vehicle on the resulting shoe. Once I was happy with the placement I traced around the template with disappearing ink onto the strengthened fabric. Using the iron can set the ink in the disappearing ink pen if it hasn’t fully disappeared though so I’ve since switched to an iErase friction pen instead as the heat from the iron makes the ink disappear on most fabrics. I finally cut the pieces out and then, after piercing the inside of the shoe to get a hole, cut out the inside of the shoes too. I then confirmed my pattern worked by laying the shoe over the tongue.
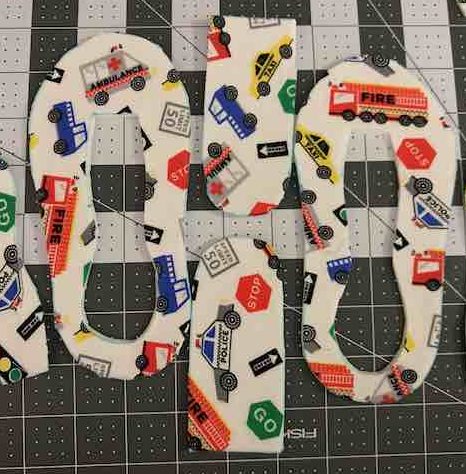
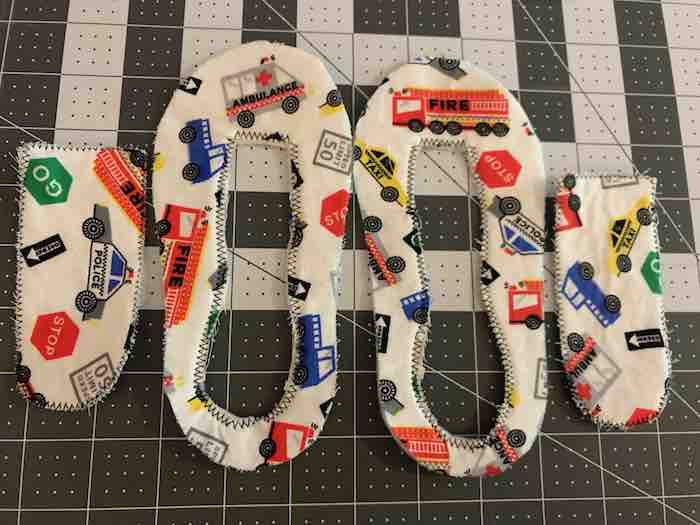
I then realized I didn’t want the shoe to get stuck on the tongue or for the tongue to stick to the quiet book page, since there was now Heat’N Bond attached to the back of both, so I cut out some muslin and attached it to the back of the tongue and the inside back of the shoe. To iron it on I laid the previously removed backing on the Heat’N Bond I didn’t want covered and ironing did cause it to stick a bit when I went to remove it. After attaching the muslin I then trimmed off any excess from the edges.
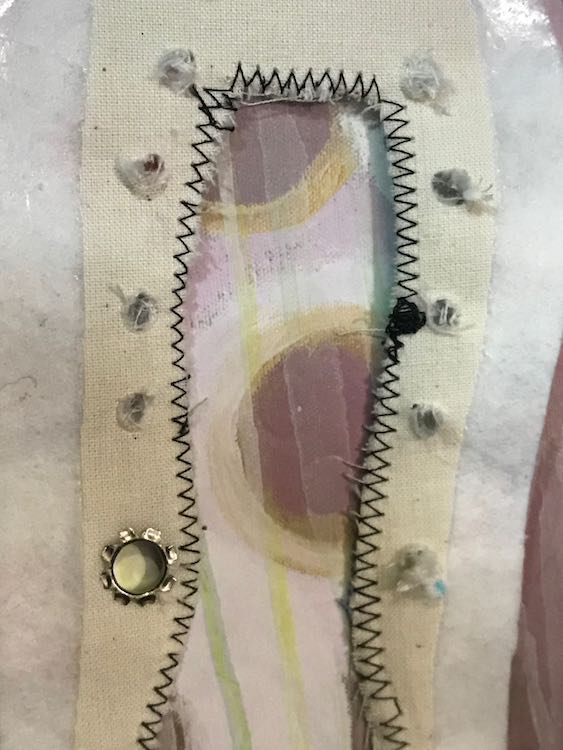
I then sewed along the inside edge of the shoes and along the tongue using a wide zigzag to make sure all the layers wouldn’t separate with play. Looking back I could’ve also used a straight stitch and just had separation within the seam allowance.
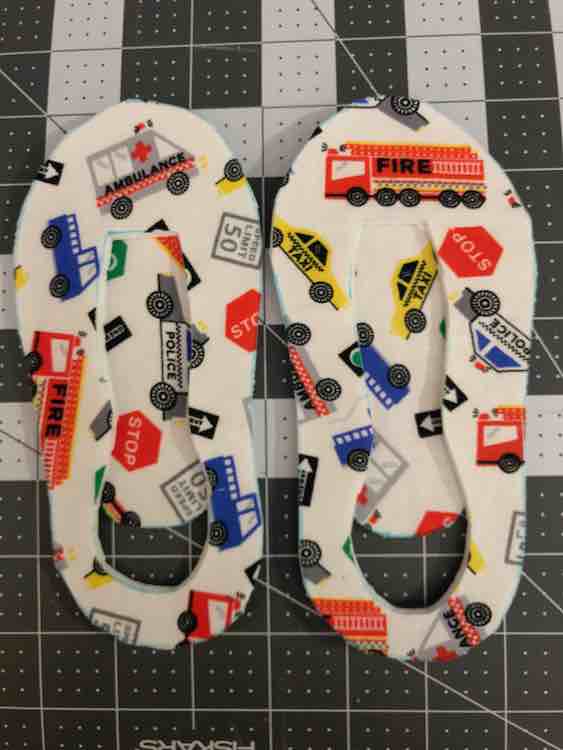
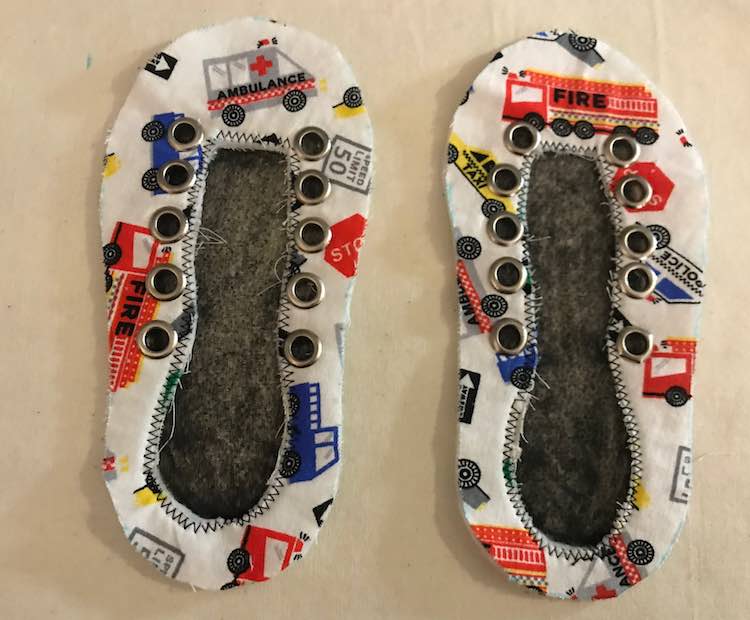
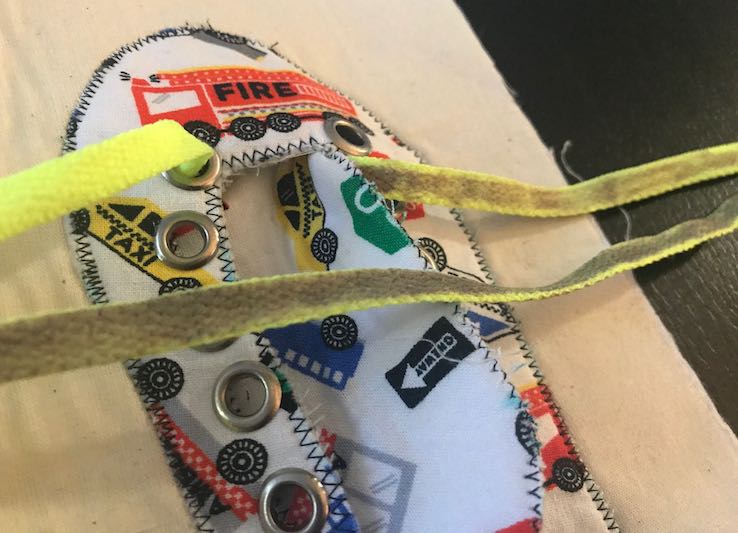
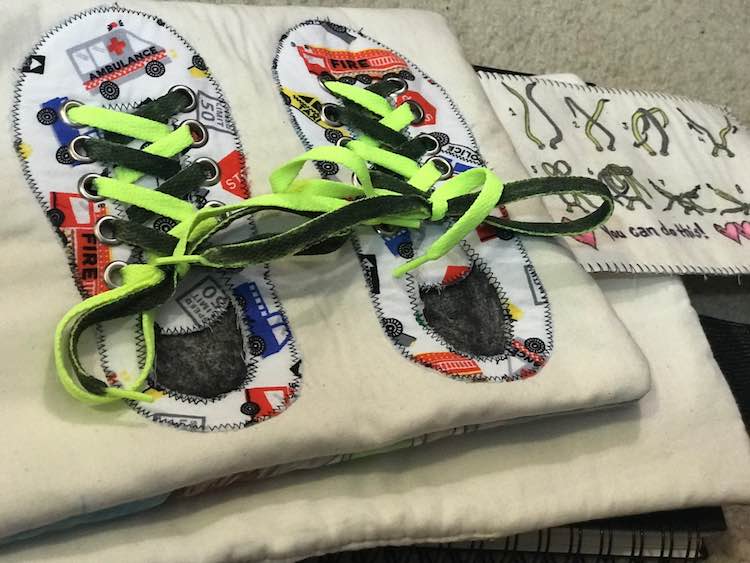
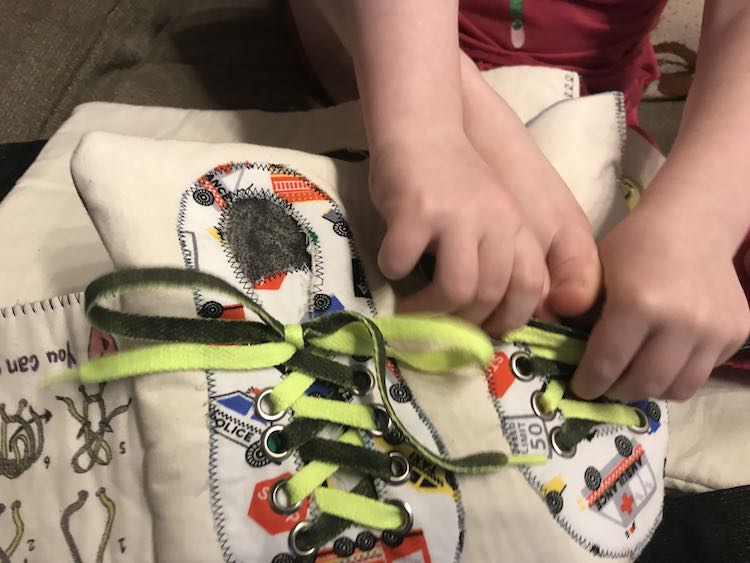
At this point I decided to add grommets to the shoes so I could later thread the shoelaces to the shoes. Grommets are super easy but if you’re worried about them coming off for your little people or are more of a buttonhole-type person you could easily add buttonholes instead. Add as many lace holes as you have room for or as few as you want that will still keep the lace on the shoe properly. I included it so Ada and Zoey could lace the shoe and it would look more like a legit shoe. If you would rather not do buttonholes or grommets and want to focus just on shoe tying I could see having the ends of the laces poking out from a single point or still zigzag the laces but sew them down and have them come out from under the shoe at each point. You could always attach it to the shoe or trace the shoe to the page ahead of time and zigzag the laces to the page before attaching the shoes over top.
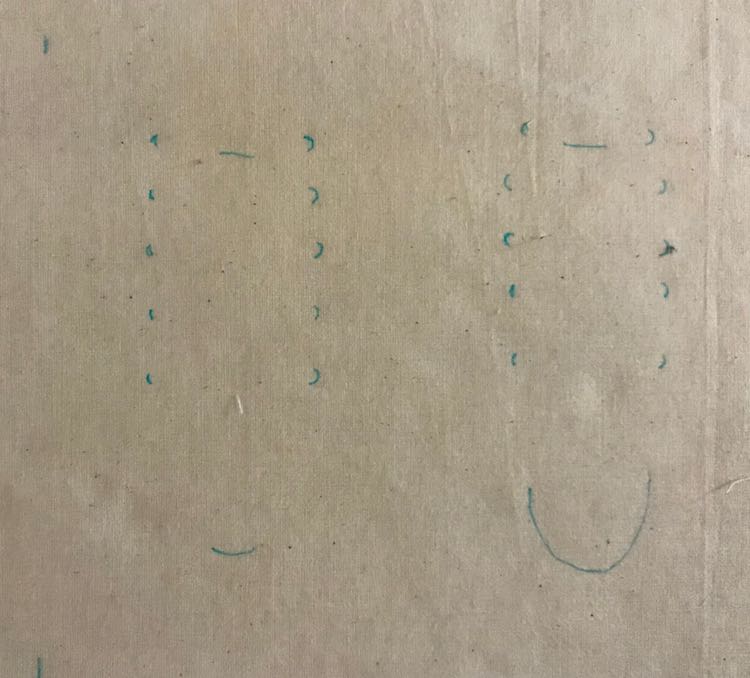
For the grommets themselves I marked where I wanted them to go with my disappearing ink pen, punched the holes with my Crop-A-Dile II Big Bite Punch, and attached my grommets one by one. My grommets were one-piece 1/4″ metal grommets. I inserted the grommets into the hole from the front, flipped the fabric over, pushed any loose fabric away from the prongs, lined up the tool that came with my original kit, and hammered the prongs flat. After removing the tool I hammer it again just to make sure the prongs lie completely flat. If you’re worried about the underside of the grommet scratching your child you could always get the two-piece grommet/eyelets. I used the two-piece ones previously in my quiet book pages, but mistakenly bought a 100 pack of the one-piece grommets when I ran out so I now use the one-piece. If you want more information about using grommets I explained it more in the third part of my in depth guide to joining quiet book pages. If you’re debating buying grommets I’ve also used them for my Duplo storage bag and playmat along with in each of my quiet book pages so they can be added, taken out, or moved around within my quiet book cover (or substitute a regular binder) using binder rings. A list of all my quiet book pages can be found here if you’re interested in making more.
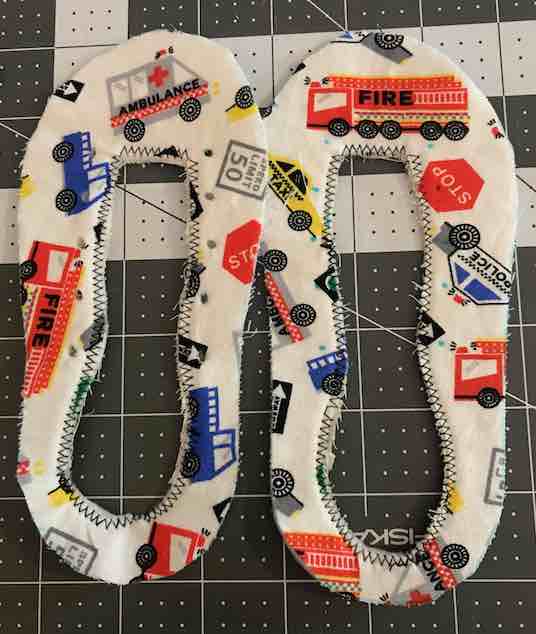

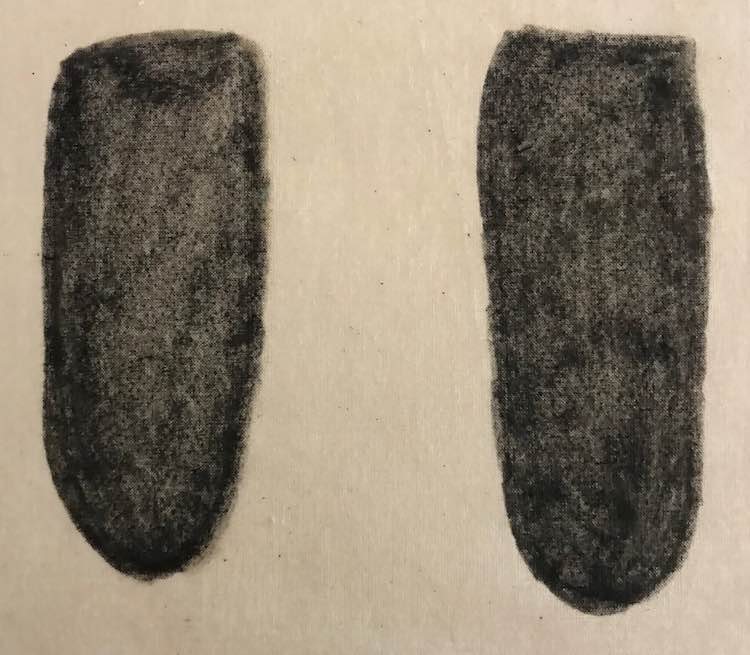
The next step is to attach the tongue and shoes to the quiet book page base. I wanted the inside of the shoes to look dark like an actual shoe so I first laid the shoes on my prepared quiet book page base (muslin backed with fusible interfacing) and once I liked where they were positioned I used my disappearing ink pen to mark the front, back, and sides of the inside edge of the shoes along with each grommet placement. I then used those marks as a guide to color with my black fabric marker. At times I paused to lay my shoes over top for confirmation that I was coloring the right portion of the page and not coloring too far. Once I liked how it looked I let it dry (minimum fifteen minutes based on the instruction with my first set) and then ironed it to set the ink.
I then found shoe laces I had bought for sensory play and marked their center so I’d know where to sew the shoelace down. If I was thinking ahead this is where I would make the right and left side different colors; instead of afterwards when it was finished. When I did color the laces I just used fabric markers to color one half of each and then didn’t iron it as I wasn’t sure if it would melt. Since this page wasn’t going to be, normally, thrown in the wash I wasn’t too worried about the ink coming off. If you want something less intensive I could see taking two different colored shoelaces and sewing and cutting them at the center so you ended up with two laces that are half and half… but I haven’t tried that so I’m not sure if it would unravel over time.
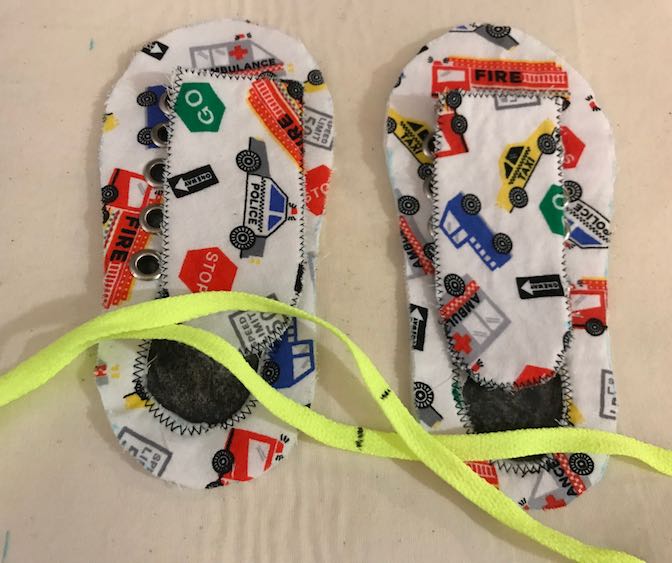
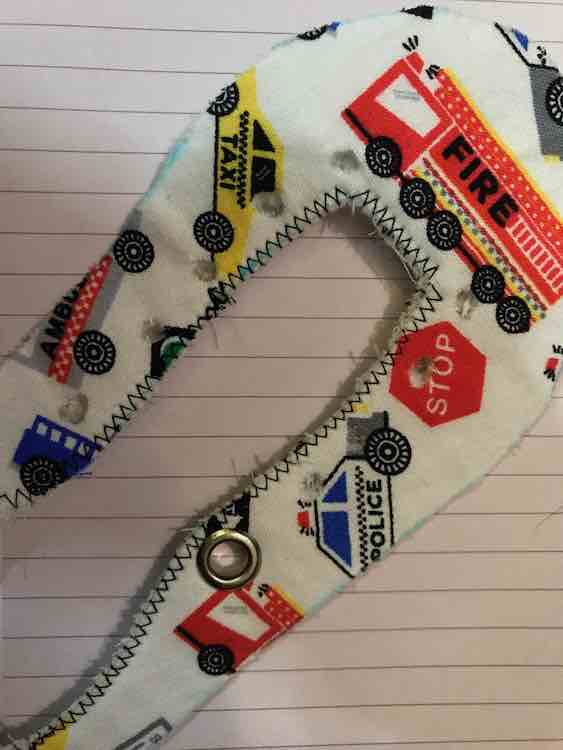
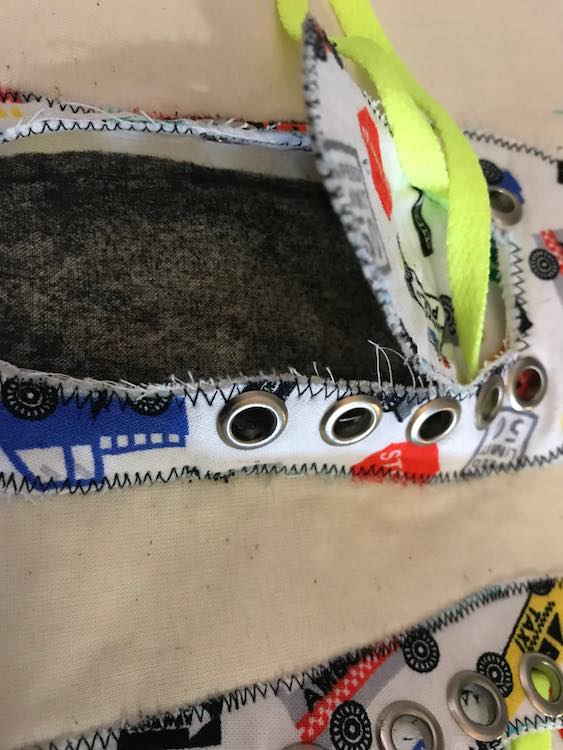
After laying out the shoe pieces I sewed down the shoe lace to the page right beside the blackened space. I then lined up the tongue of the shoe and sewed that down as well.

I then laid the shoes over the laces and tongues. I was careful to bring the shoelaces out the center of the shoe, around the tongue, making sure they weren’t too close to the outer edge of the shoe. I then pinned the shoe in place and sewed along the outside to keep it in place. I then moved to the inside heel of the shoe and sewed there to help keep it in place.
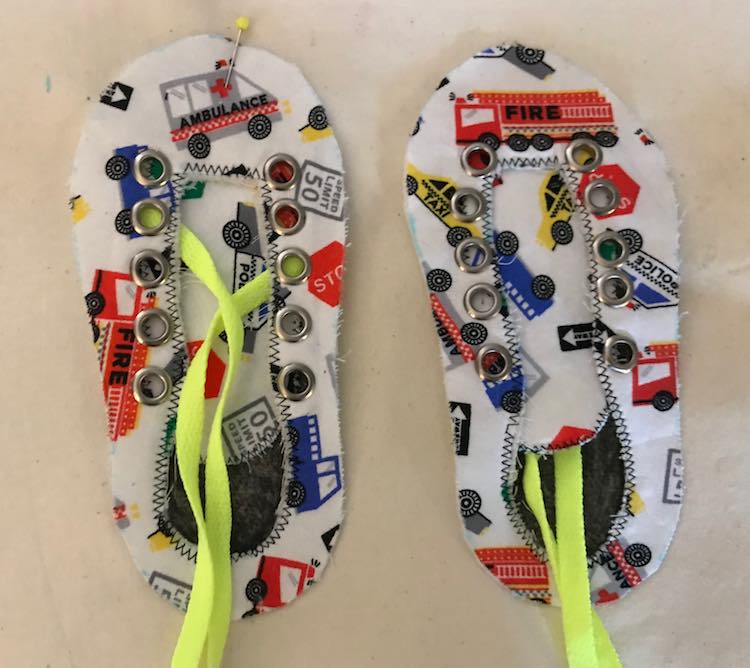
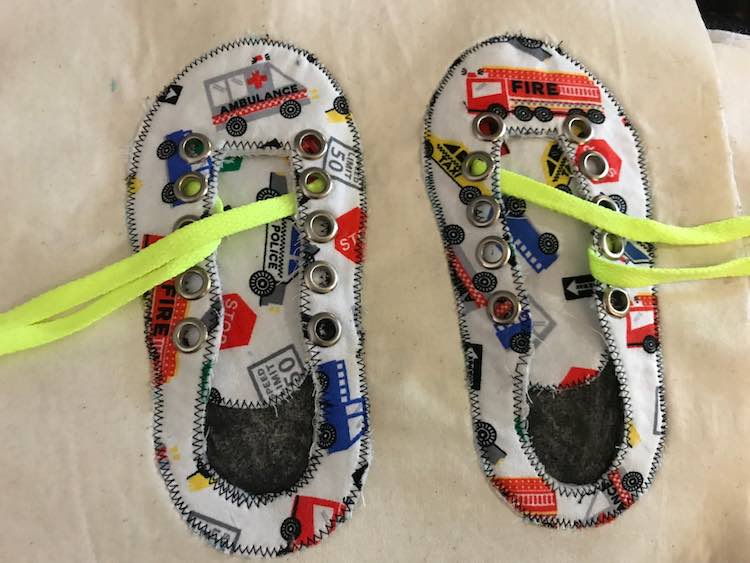
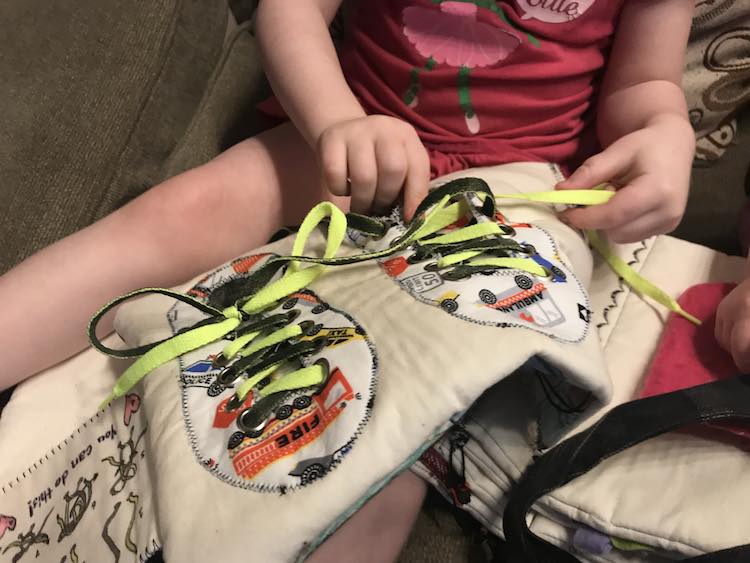
Then l threaded the shoelaces through the grommets and tied them closed. I had to confirm it worked and there was enough slack to learn with.
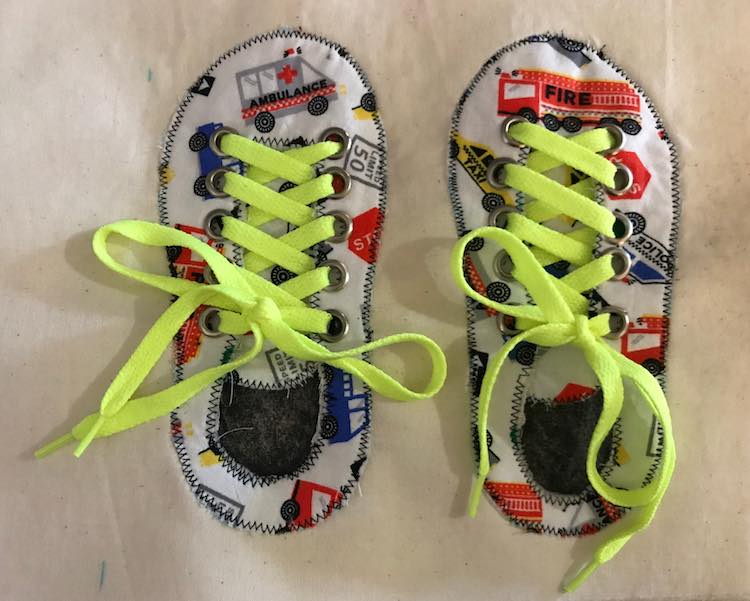
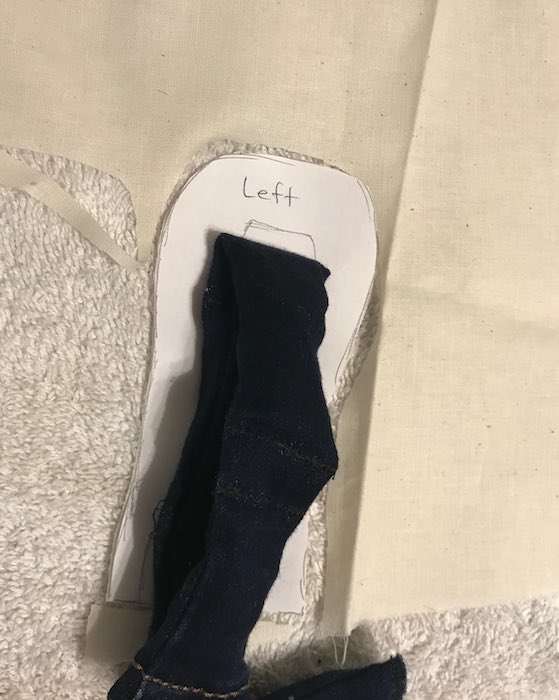
It was at this point I decided to add the diagram for Ada and realized I needed to make the left and right sides of the shoelace different colors so I used my fabric markers to color half (both sides) of either shoelace. If I had planned this ahead of time I would’ve colored it before attaching it to the quiet book page or attached two laces together so they would’ve been completely different colors.
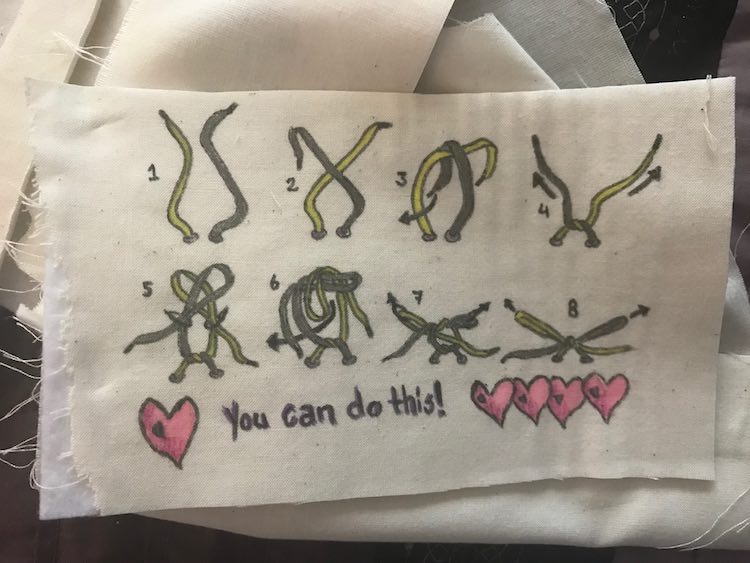
Shoe Tying Diagram
I had decided to include a diagram to make it easier to remember how to tie the shoelaces. If you include it on the main page make sure you have enough room (I needed to leave a space for the seam allowance and grommets). If I had included it at the beginning I would’ve traced it out first before attaching the fusible interfacing or sewing on the shoes. Then you could always decide on having a single shoe instead of a pair if you run out of room.
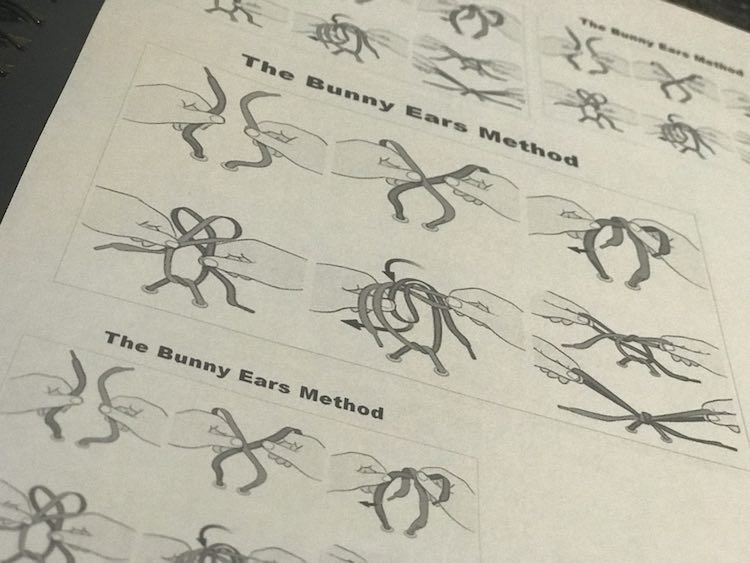
Since this was a last minute addition I decided to include it by creating a fold out flap for the diagram so it would be out of the way when not in use. Before starting I looked online at different shoe tying tutorials. I came across the Ian Knot that boasted to be the fastest way to tie your shoes but figured it may be too complicated for a first time shoe-tier. Instead I went with the tried and true Bunny Ear method and looked up supporting diagrams online. After I found one, through Google images, I liked I copied the image into a word document at several different sizes and printed it off.
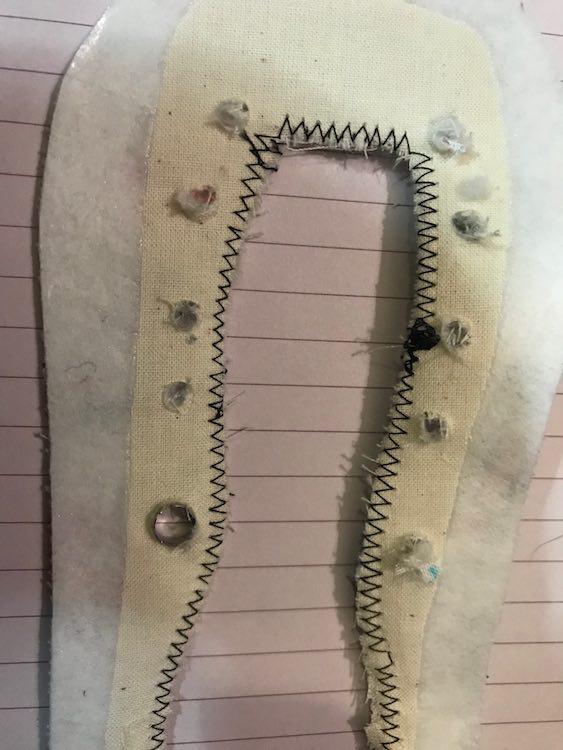
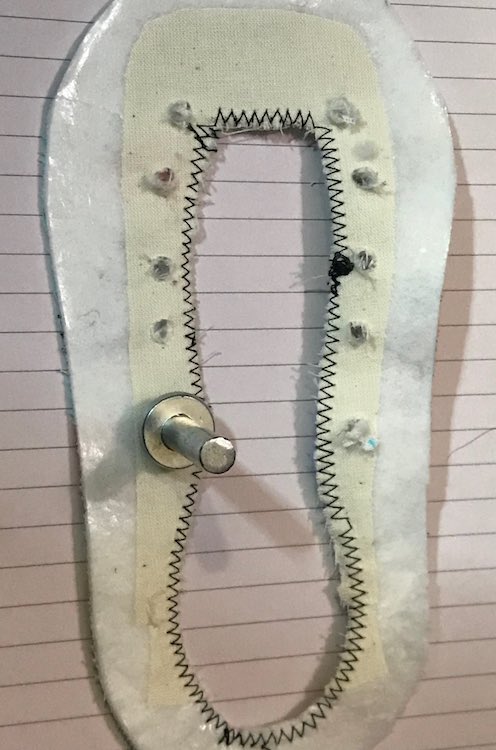
I then decided which printed size worked best and started tracing it onto matching muslin fabric. To make the diagram easier to draw I only traced the laces and left out the hands as I wasn’t sure how accurate I would make them or if that would confuse my diagram. I also moved some of the steps while still keeping the same order so the overall layout would be better. After I traced the laces I filled in any missing details and added numbers for a more obvious ordering. I added a cute message at the bottom for Ada (and later Zoey) and set the ink with my iron before coloring in the laces and setting the ink again. While ironing I also attached the diagram to some fusible interfacing and then backed that with Heat’N Bond and then another piece of muslin.
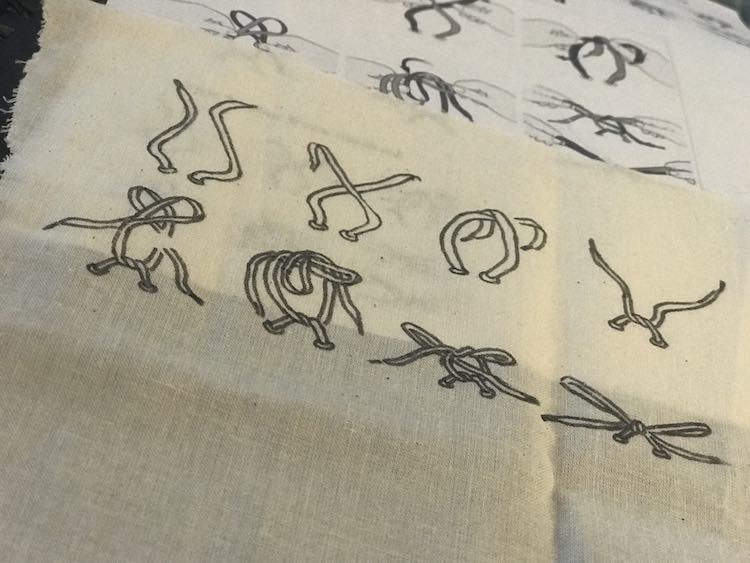
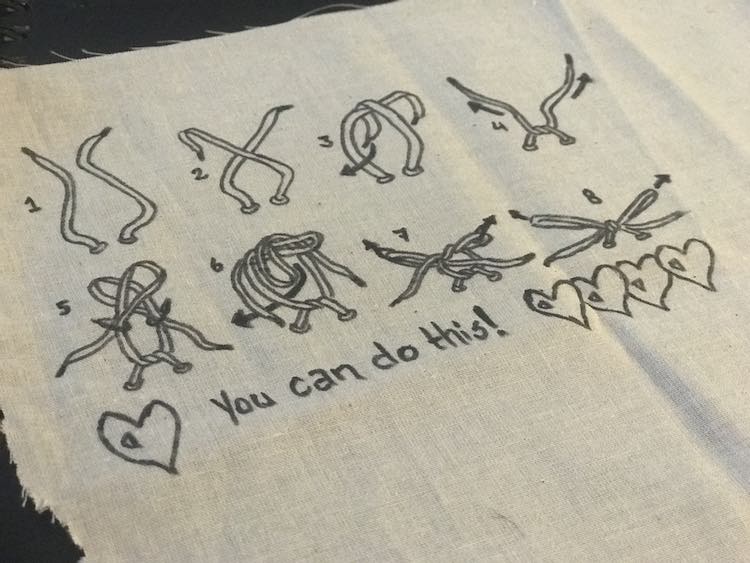

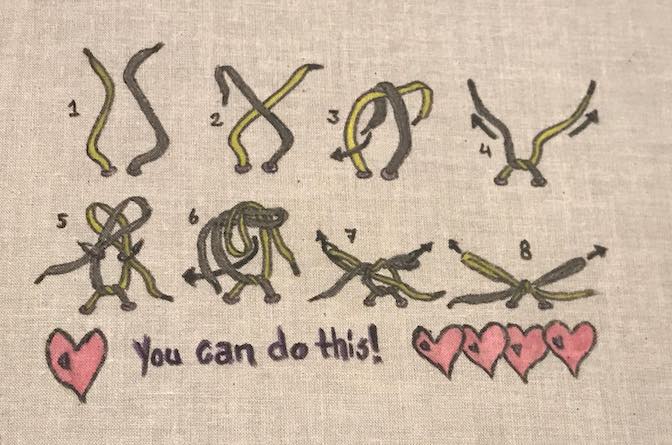
I then sewed along the outer three sides with a blanket stitch to make sure it would stay together and not come apart with use. I couldn’t resist also adding a heart decorative stitch.
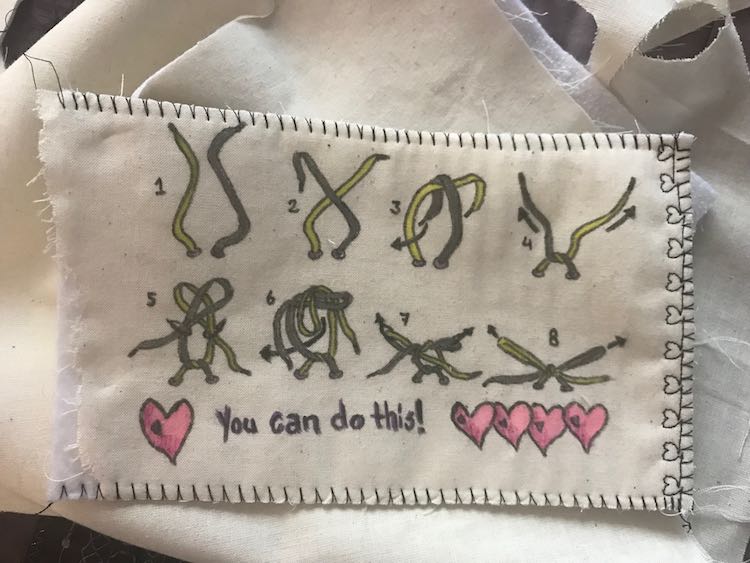
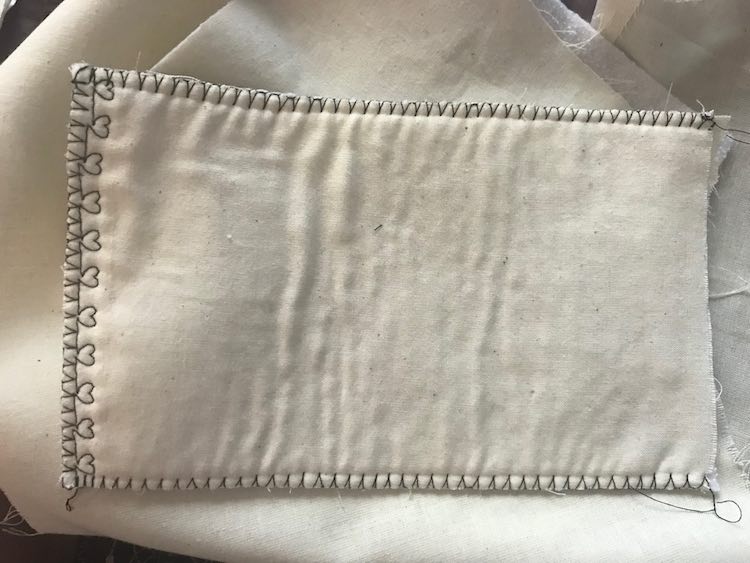
When putting the page together I sandwiched the diagram between the two sides of the page (right sides together) making sure the edge was sticking out so it would be completely caught in the seam allowance. This way when I flipped the page the right side out the diagram would be sticking out of the side of the page. If you wanted to make it easier to fold between the pages I could see top stitching along the edge to create a fold point.
Finished Page
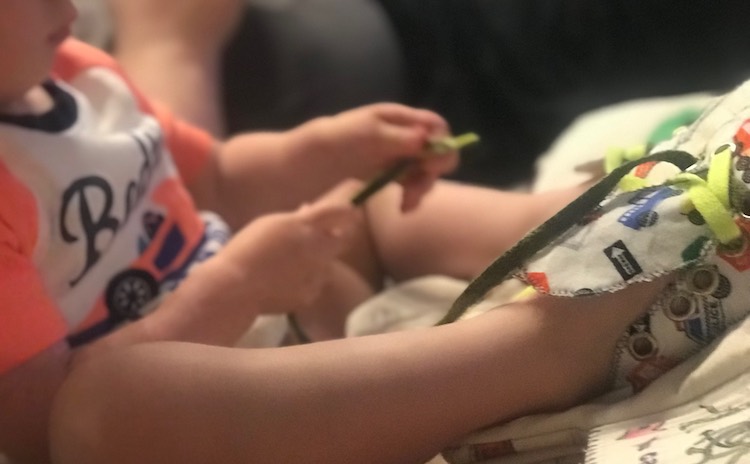
I made these shoes back in February (almost a year ago!) and it hasn’t gotten a lot of shoe-tying use… yet. It has gotten a lot of wear though. I’m still happy I made it though and am glad I have it on hand when Ada (and later Zoey) and I want to tackle this lesson.


If I were to sew this again I would plan to leave a space on the page for the diagram and maybe plan it around the grommets (or beside). This might mean I’d have only one shoe on the page instead of two but that would work. Because of the image on the reverse of the page I had decided to leave out the top stitching I normally did beside the grommets which added more space I could’ve filled.
You can check out my previous posts if you want more information on how I created my quiet book covers, joined my quiet book pages together, or to see all my quiet book page designs. I can’t wait to see what you come up with and would love to hear from you in the comments below, on my Facebook page, or through Instagram. Hope you’re having a great day.