
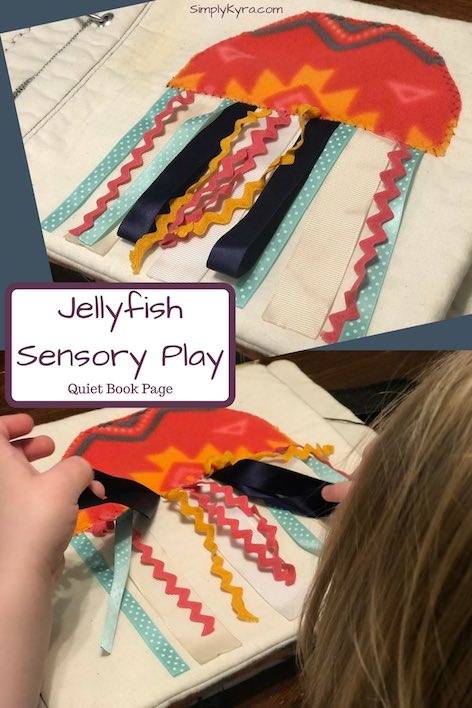
Quiet Book Page - Jellyfish with Dangly Ribbons

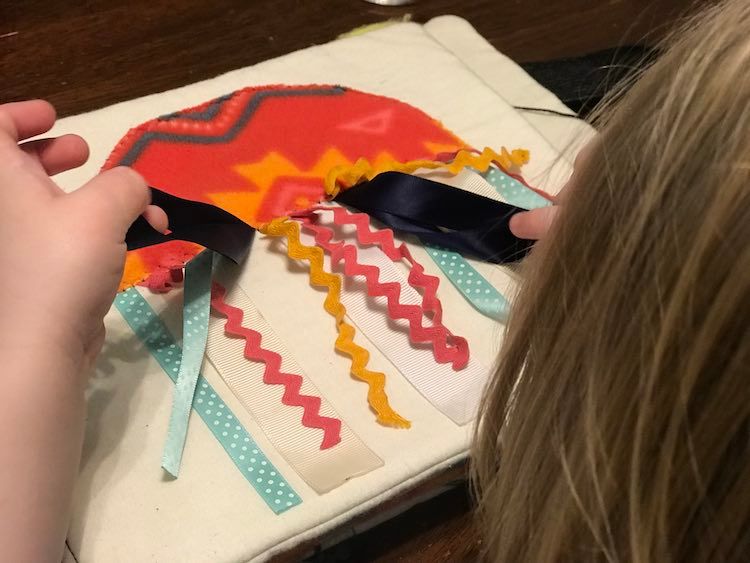
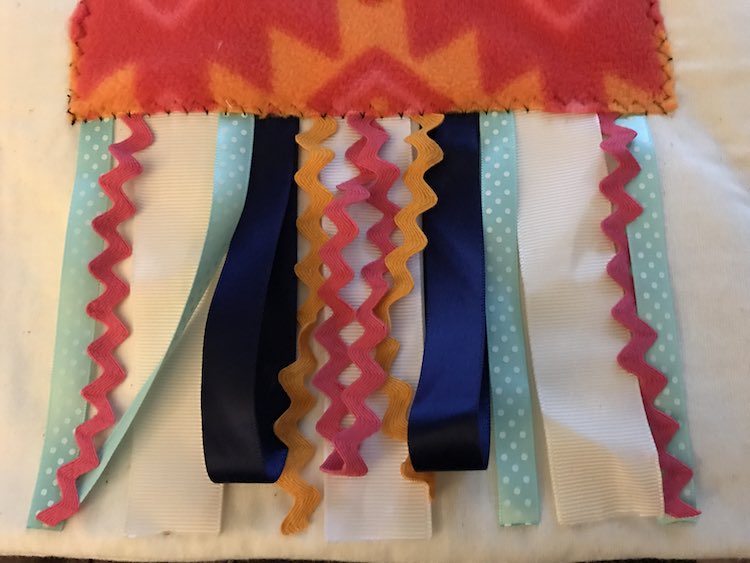
Another quiet book page I ended up designing for Zoey was a fun jellyfish. I kept coming across the image and loved that it offered a more interactive page to play with than some of the more static pages I also created. I was able to include a fuzzy fleece for the jellyfish body to contrast with the simple muslin background. I then went through my ribbons and found an assortment of colors and textures that would work for the jellyfish tentacles and then further expanded it by making some loose with a cut bottom and some looped. This was a simple and fun project that’s interesting enough to distract even your older toddlers.
Materials Used
- 108″ Unbleached Muslin Natural Fabric by the Yard
- Pellon Fusible Thermolam Plus White Fabric by the Yard
- Masking tape
- Flannel or some other fabric for jellyfish body
- Selection of ribbons
- Lighter to burn the ends of the ribbon if they’re meltable and you’re worried about them unraveling
First come up with a plan… I may have overthought the first part.
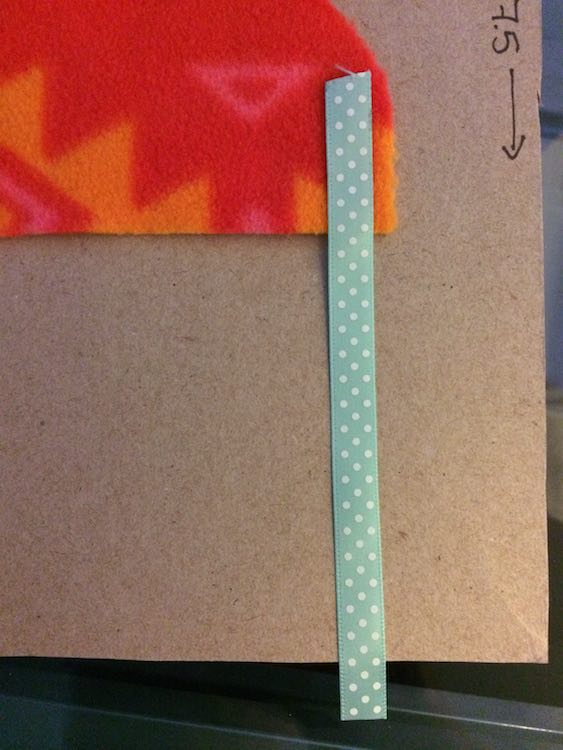
I then cut a half-circle from some fuzzy fleece I had on hand. I tried to keep the bottom sides vertical to better hide the ribbons that will be sewn underneath it. An added benefit of the fleece is that it won’t unravel; though as I later sewed along all the edges that didn’t matter too much.
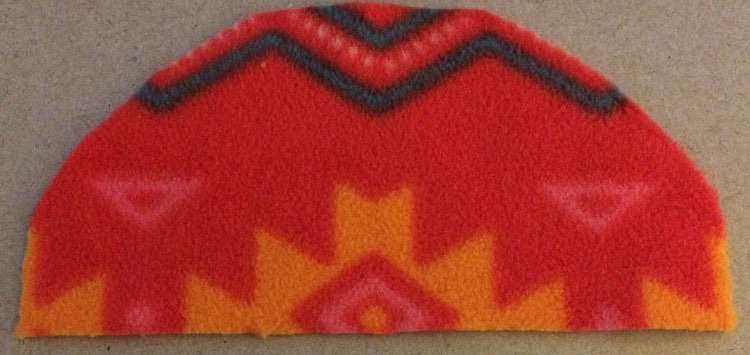
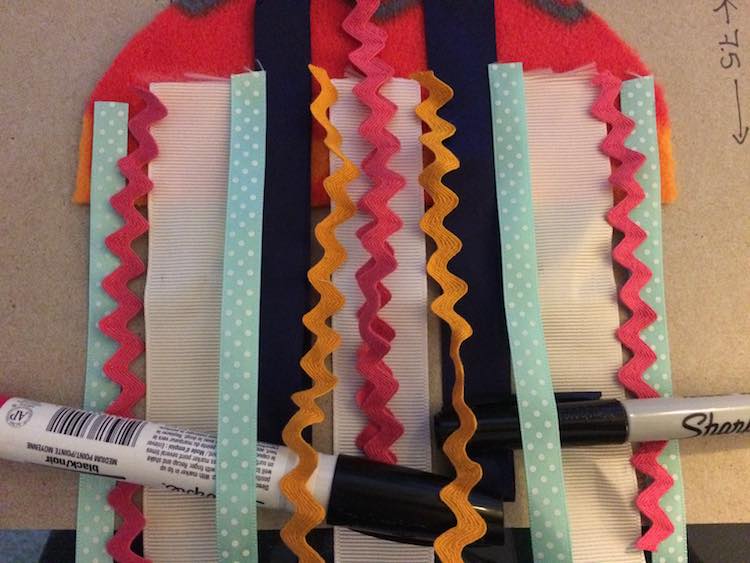
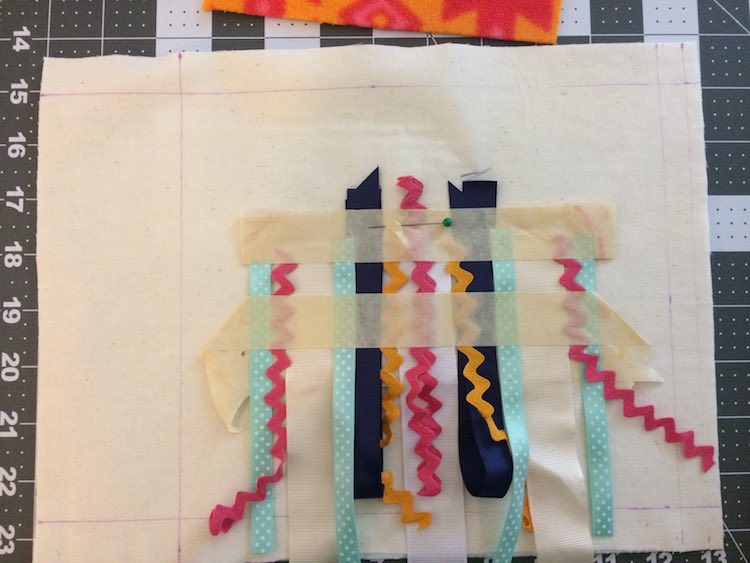
I had cut a cereal box to be the estimated size of the finished quiet book page so I used it to lay out the jellyfish body to confirm I liked the size. I then chose, cut, and placed ribbons along the bottom of the jellyfish overlapping the edge by a good inch. As I placed them I tried to keep the ribbon and colors symmetrical to be more pleasing to the eye so I placed the outer edges first, then the center, and then filled in the spaces as I went. The ribbons that were going to dangle I cut longer than needed as I can always trim them shorter when the page was finished. The folded over ribbons were cut more exact to size as I wouldn’t be able to trim those unless I wanted to cut off the folded part of the ribbon at the bottom. I tried to keep the folded ribbons right above the edge of the cardboard. Don’t be scared to rearrange as you go. If you’re afraid of messing it up you can always take a picture to recreate your previous design if you like it more than a newer arrangement. Nothing is permanent until you go to sew it… and even then you could seam rip it although that would be harder.

Once you like your arrangement keep it in place with masking tape. Before using the tape I decided where on my ribbons I wanted to sew; trying to keep it above the edge of the body enough that it would be hidden. I then applied the tape above and below that point before double checking that the jellyfish body would cover up the ribbons. Once it is safe enough to move you can flip it and add more tape if you want it extra secure.

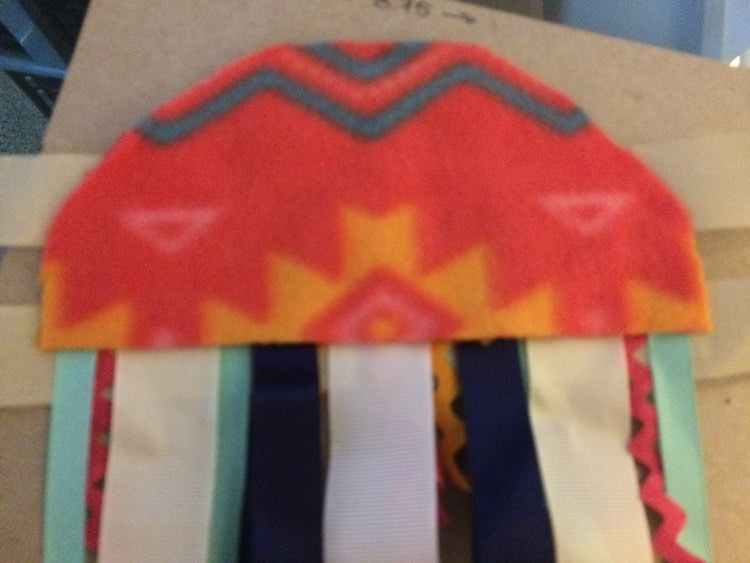
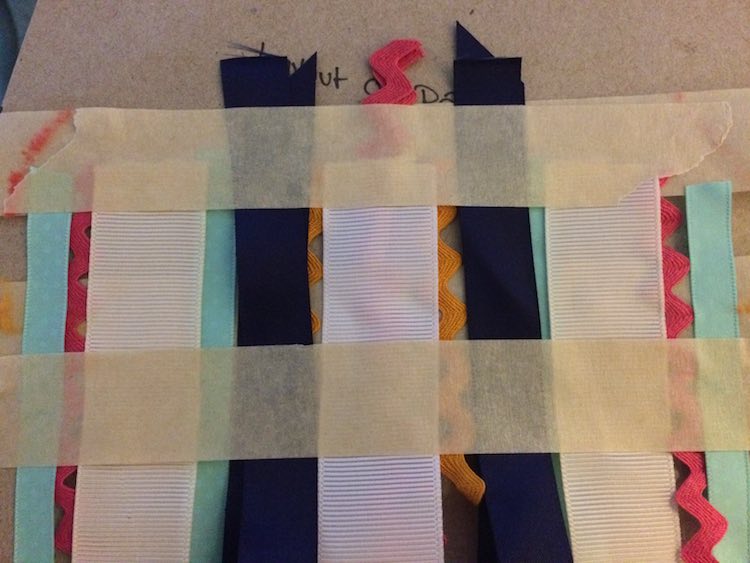
Then I lined it up on the page, making sure the body still fit within the page and far enough away from the seam allowance. Next I pinned the ribbons in place, sewed the ribbons down going over it several times, and then removed the masking tape.
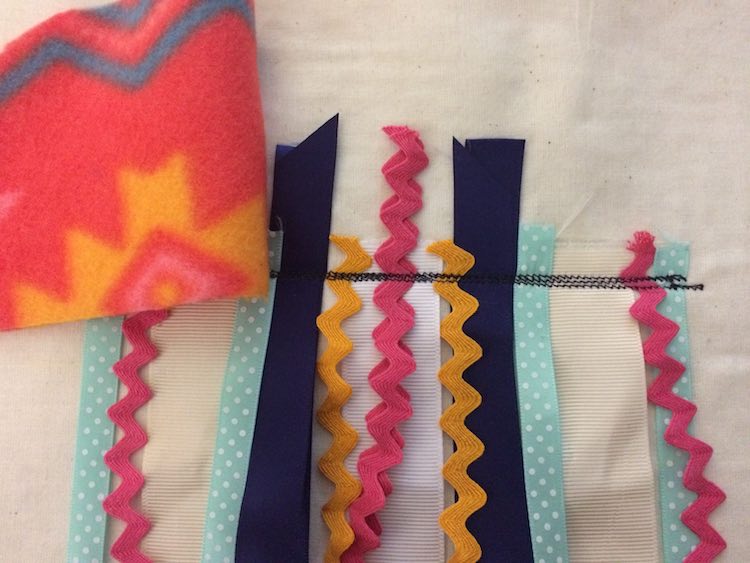
Then pin the jellyfish body down while making sure the top of the ribbons and the stitching is hidden and then sew along the edge. I used a larger zigzag stitch but I can also see using a blanket stitch here. If you’d rather use Heat’n Bond to attach the body before stitching it I’d first confirm you aren’t going to melt any of the ribbons with the iron while heating the Heat’n Bond.

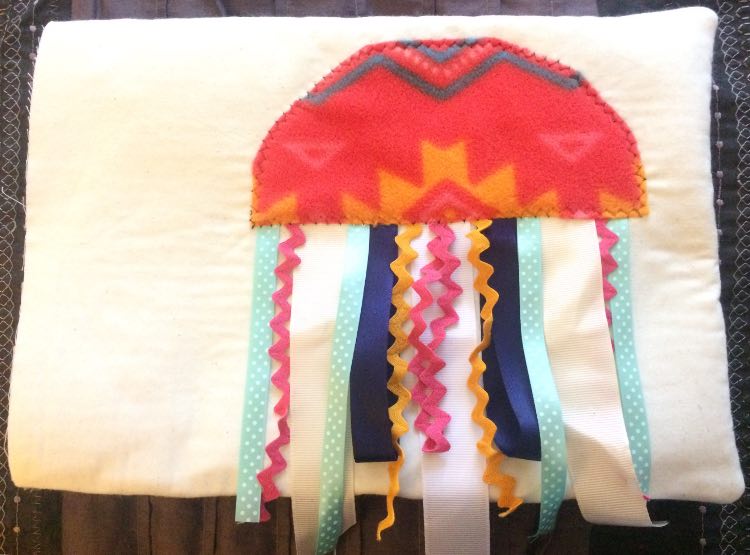
The jellyfish side of the page is done! All you need to do to finish the rest of the page is sew it to its reverse page, put right side out, sew the page closed, add decorative stitching, and add grommets. If you want more information on how to handle these steps you can check out my previous article: In Depth Guide to Joining Quiet Book Pages. I finally trimmed my ribbons after the pages were joined so I’d know what height I was trimming the ribbons to before actually cutting them.

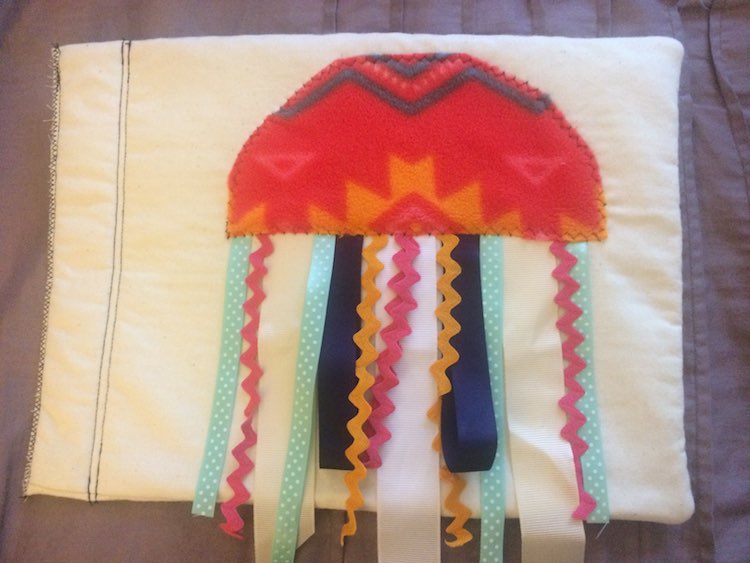
I’m pretty happy with how my jellyfish turned out. The only thing I could see changing is adding a background to the page either through a complementing fabric or by coloring the page with fabric markers. You could also make it look like it’s under the ocean by adding fish and other creatures (maybe more fantastical with mermaids). You might want to simplify the colors on the jellyfish (maybe all in black or some other complementing color) so the page doesn’t get too busy.

You can check out my previous posts if you want more information on how I created my quiet book covers, joined my quiet book pages together, or to see all my quiet book page designs. I can’t wait to see what you come up with! Feel free to reach out at any time in the comments below, through a post on my Facebook page, or tag me through Instagram.
Did this save you time?