
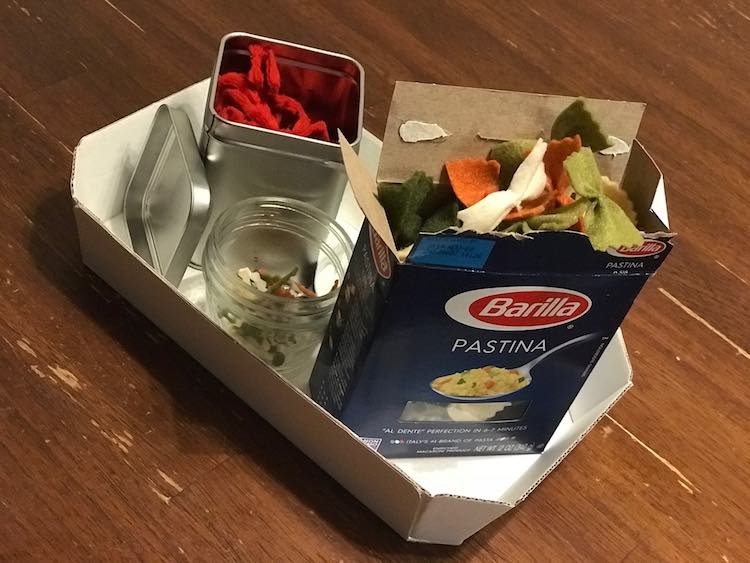
Felt Farfalle (Bow-Tie) Pasta and Diced Tomatoes

This week’s challenge for the 52 Week Sewing Challenge was to sew something with felt. The second I read that I immediately thought of food for the kids’ play kitchen and wanted to start out by making their favorite: pasta. My next step was deciding what type of pasta to make. I figured farfalle (bow-tie) pasta would be easier than others, like penne, and found an amazing tutorial that made my decision easy (Sew Mama Sew: Felt Bowtie Pasta (with a Box!) Tutorial). Since one of the top meals my kids eat is pasta, tomato, and cheese I went on to figure out how to make diced tomatoes to go with the pasta. Ada saw the pasta being made the last couple days, though I finished it after she went to bed, so she knew she’d get to play with it sometime today. When Zoey woke up unhappy today I ended up telling Ada she could have the pasta after lunch once Zoey went down for a nap so she could play with it by herself before she had to share. Since she knew the pasta was coming at lunch, over eggy soup, she remarked that she was really excited to make pasta, tomato, and cheese, but only wished she had tomatoes. I had to try really hard not to ruin the surprise by telling her I had tomatoes already made! If you want to check out SewMamaSew’s blog post she also has a downloadable box. My kitchen set is still in flux so I went the easy way by reusing an empty cardboard pasta box for the farfalle and used an empty tea canister for my canned diced tomatoes.
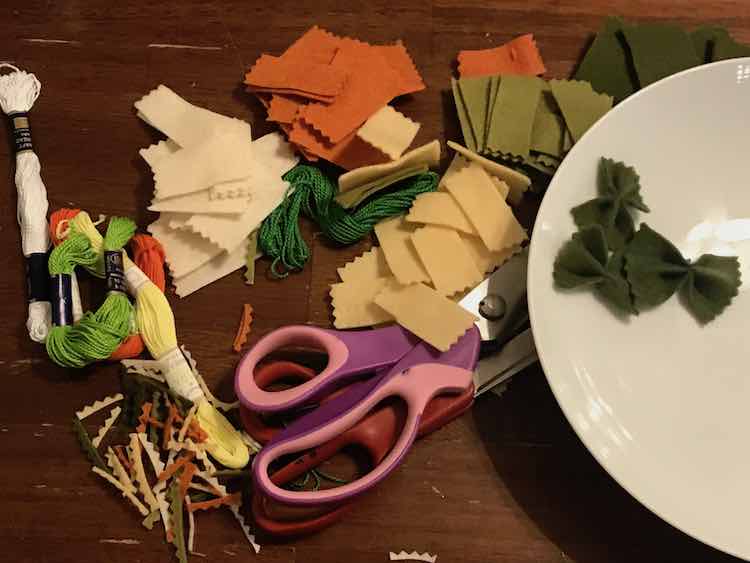
Materials Used
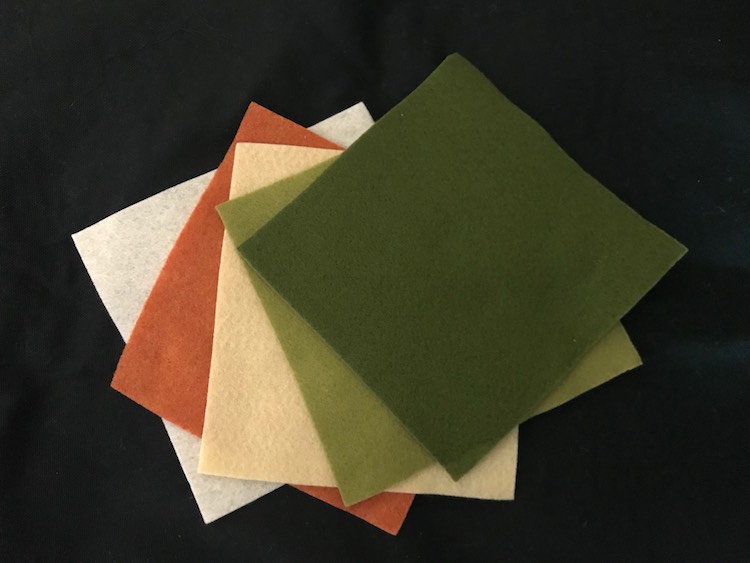
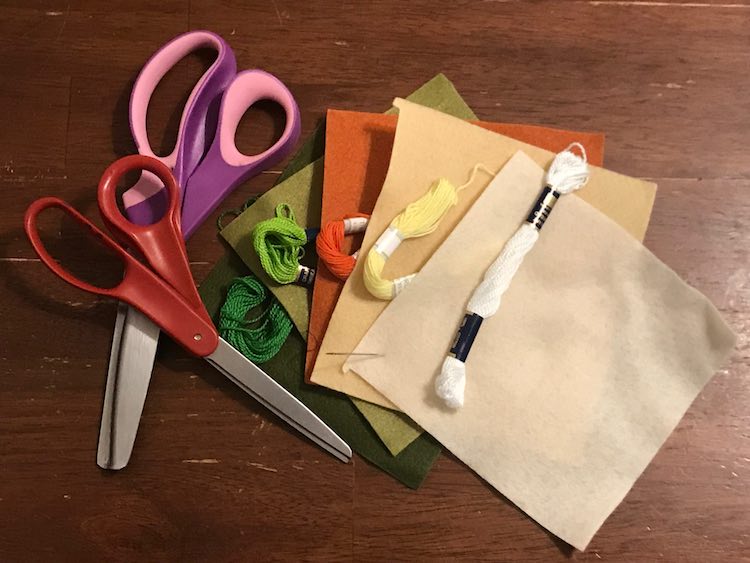
- Felt – red from Dollar Tree and multi-color from Mumcraft on Amazon (a soft polyester non-woven felt)
- Embroidery Floss
- Sewing machine
- Thread – breaks easier than my white/black Aurifil but a nice assortment of colors when you don’t know what you’ll want
- Sewing needle – if hand sewing
- Pinking shears
- Fabric scissors
Farfalle (Bow-Tie) Pasta
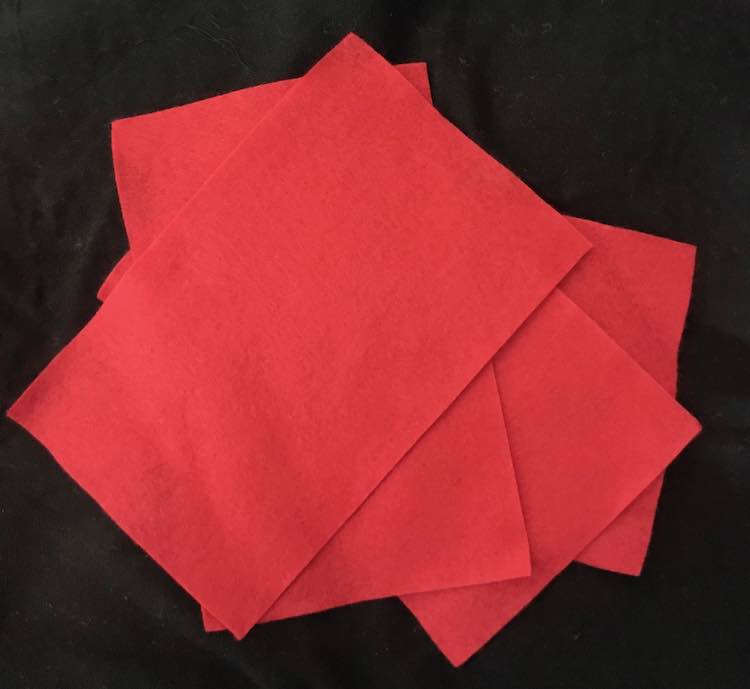
I had already bought a pack of assorted felt off of Amazon and from the Dollar Tree because of my quiet book pages so I decided to choose my pasta-like colors from there. I decided to make tricolor pasta so I could choose from my green and orange felt in addition to the beige more regular pasta-looking felt and have more pasta in the end. I went with white, orange/red-ish, beige, light green, and dark green felt (5.9 inch/15 cm squares).
I also went through my assorted embroidery floss colors to try to find matching colors and pulled out my regular sewing scissors along with my pinking shears to create the jagged edge on the pasta.
I then cut my felt squares into strips with my straight scissors, trimmed the short ends of the strips with my pinking shears, cut my strips into two or three rectangles with my pinking shears, and then hand sewed them into the bow-tie/butterfly shape with the coordinating embroidery floss. As I worked on them I noticed some of my pasta was wider than needed so I cut them in two lengthwise so I could make more. I found it easiest to work on one color until done, switch out my embroidery floss, and then go onto the next color.
I started making the pasta while my kids were awake so I found it easiest to put all the felt pieces in a small box so the colors would stay separated so it would be easy to transport when I needed to set it aside (put it higher up).
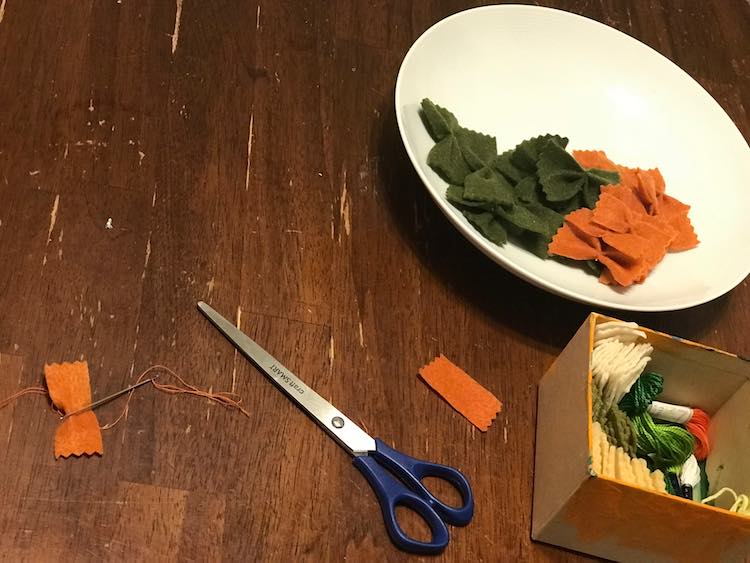
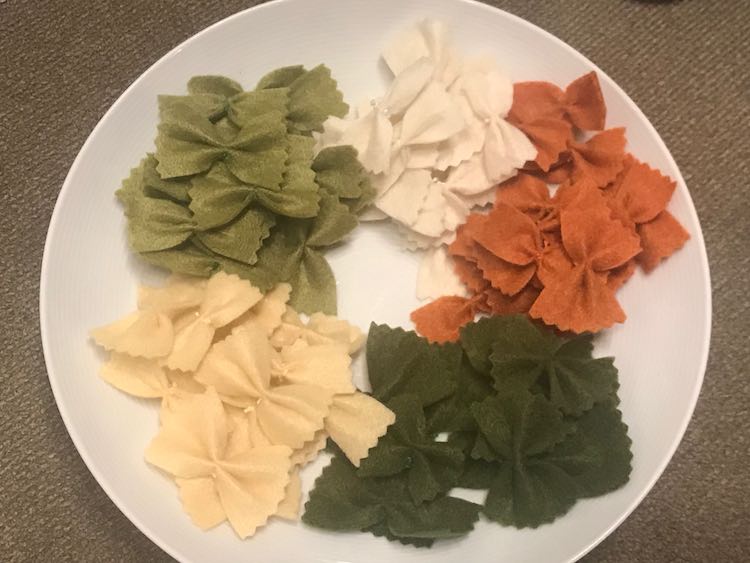
And finally all the farfalle were made!
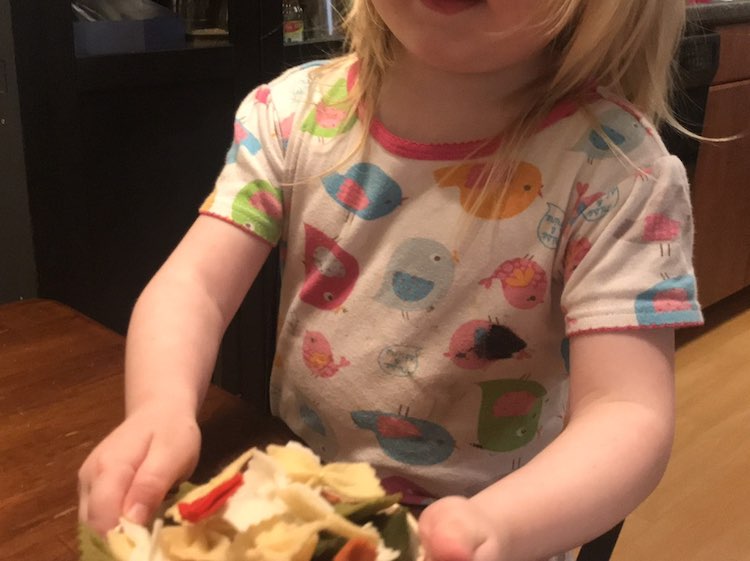
My kid’s absolutely love pasta, tomato, and cheese so I had to make canned tomatoes to go with the pasta.
Canned Diced Tomatoes
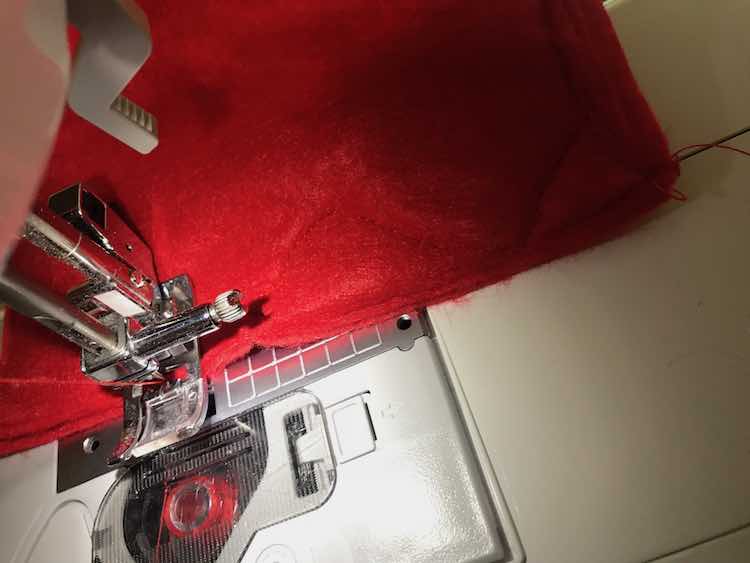
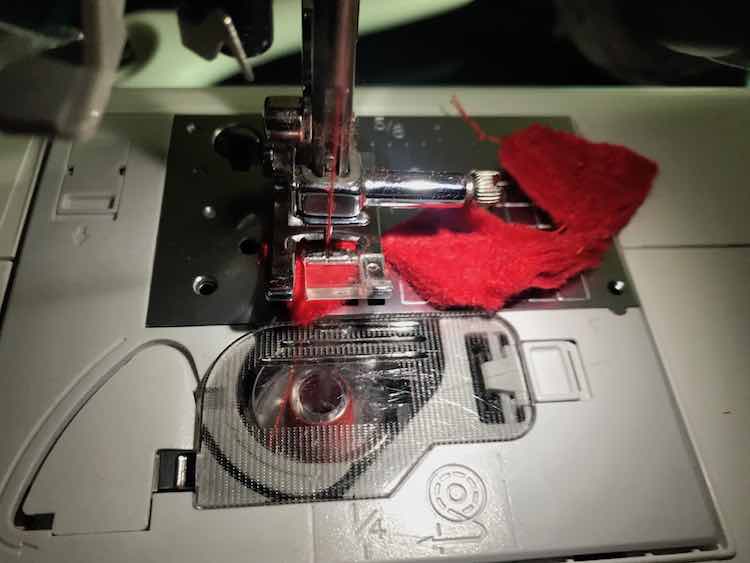
I had some red felt from an assorted package I bought from the local Dollar Tree. I wanted to create a similar image to diced tomatoes so I took all four sheets and stacked them on top of each other. I then switched my thread to red in my sewing machine and stitched along all four edges before going inward and sewing everywhere! It was rather fun. I was going to go more orderly and work the stitches on parallel lines so I could cut between them while also backstitching whenever lines crossed, but I instead ended up sewing randomly around.
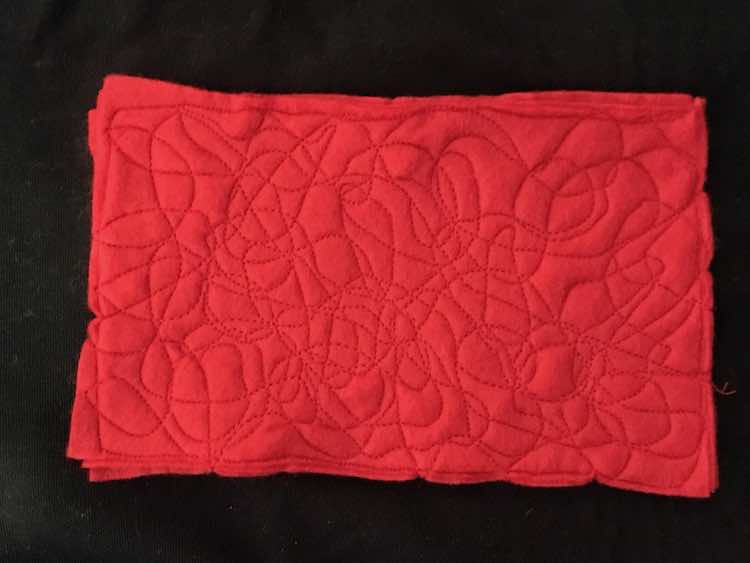
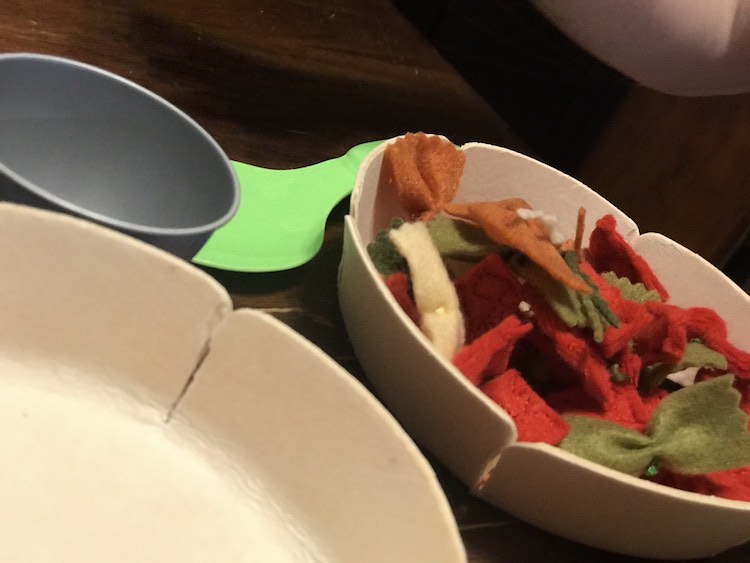
I then cut the felt out in strips before cutting those strips into smaller pieces so they resembled diced tomatoes.
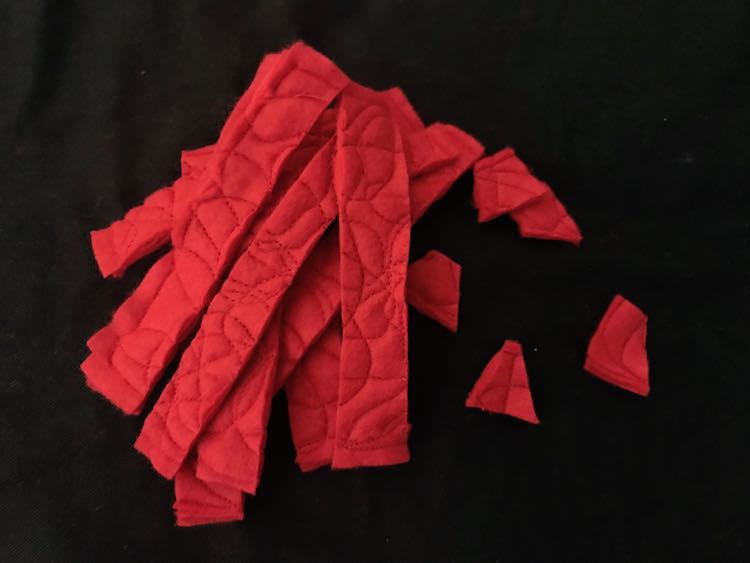
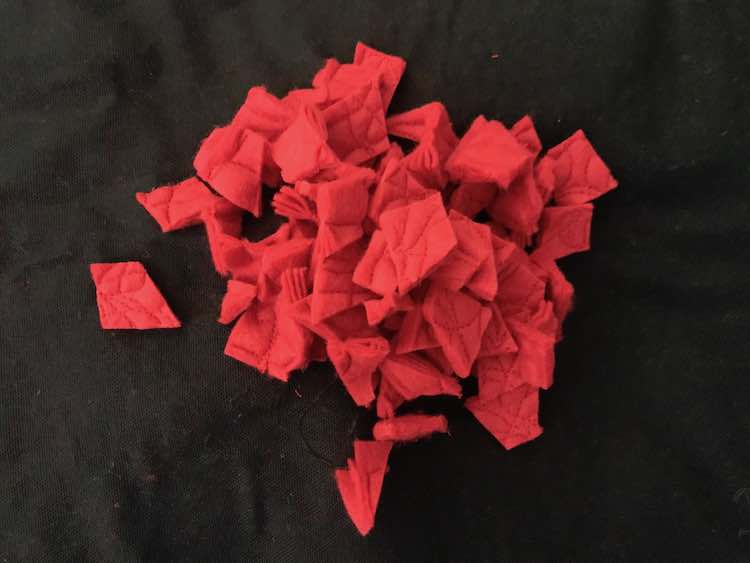
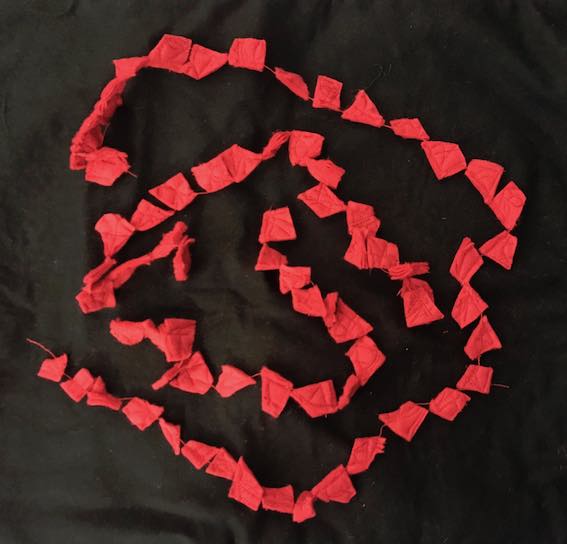
I realized since I didn’t backstitch (as I didn’t know where I’d end up cutting) the felt pieces might come apart so I decided to sew over each piece while backstitching. To make it go easier I lined up each piece to go directly after the other without cutting the thread. I remembered to backstitch every time I started and ended a new tomato piece and one or two lines through each piece. The fact that I pushed a new tomato piece under my sewing machine foot right when the previous piece was coming off the needle meant that there was less of a chance of the sewing machine eating my tomatoes; however, since there was a string of connected tomato pieces coming out of the back of the sewing machine I was able to pull on it to keep it moving whenever I thought there was a chance of it being eaten.
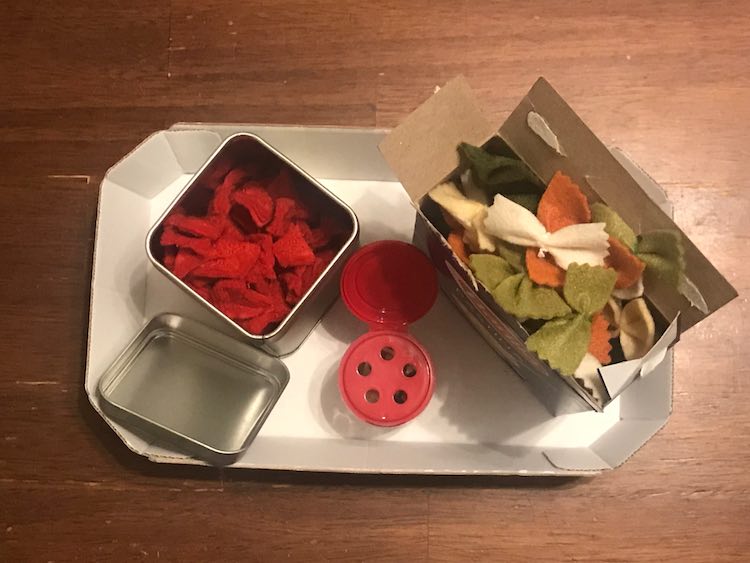
I ended up with three lengths of diced tomatoes. In this form I could see using this technique to make chili peppers on the vine by sewing through chili peppers and the odd leaf with green thread. For these I trimmed the thread going between the pieces so they’d be individual diced tomatoes.
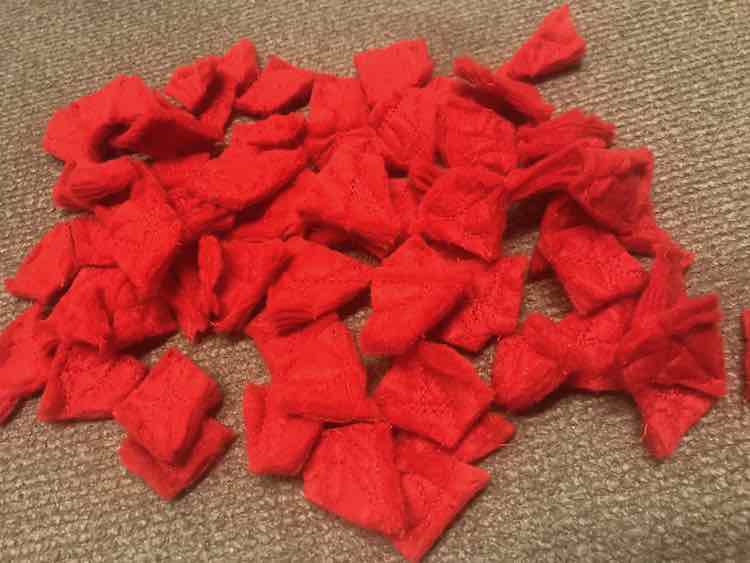
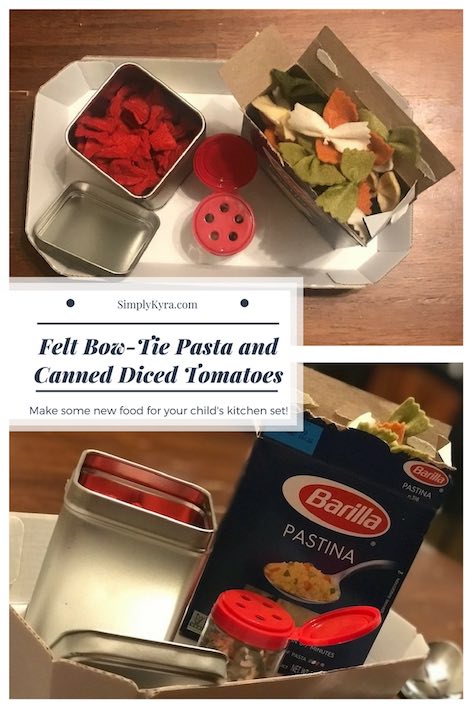
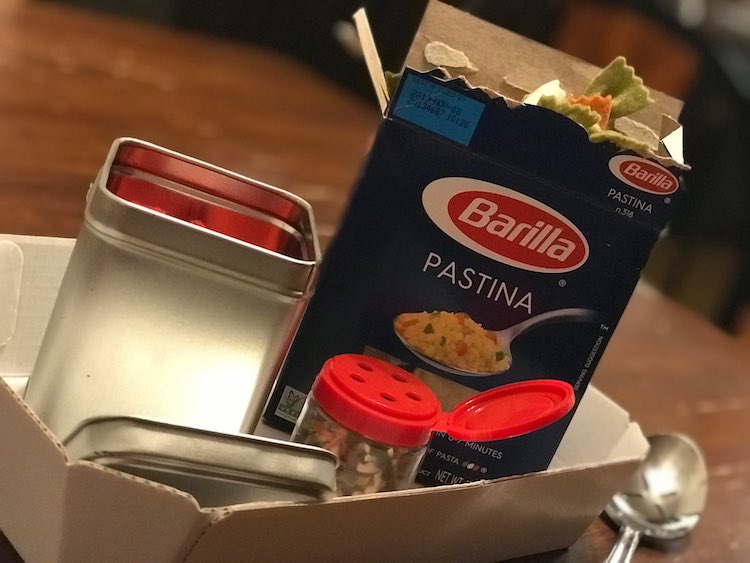
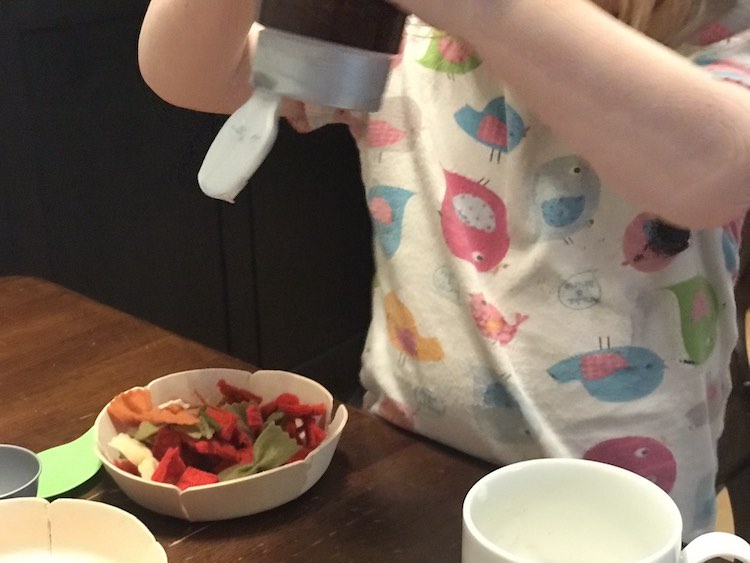
Then since these are technically canned diced tomatoes I put them in an empty tea canister so the kids can easily access them.
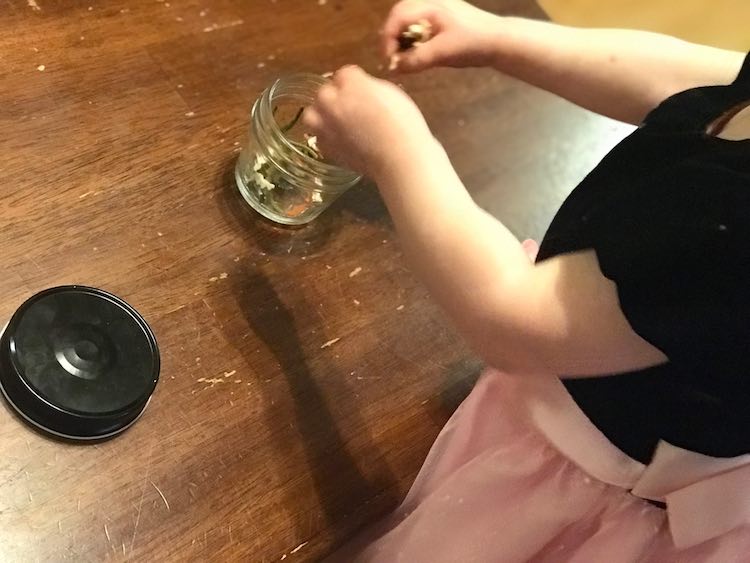
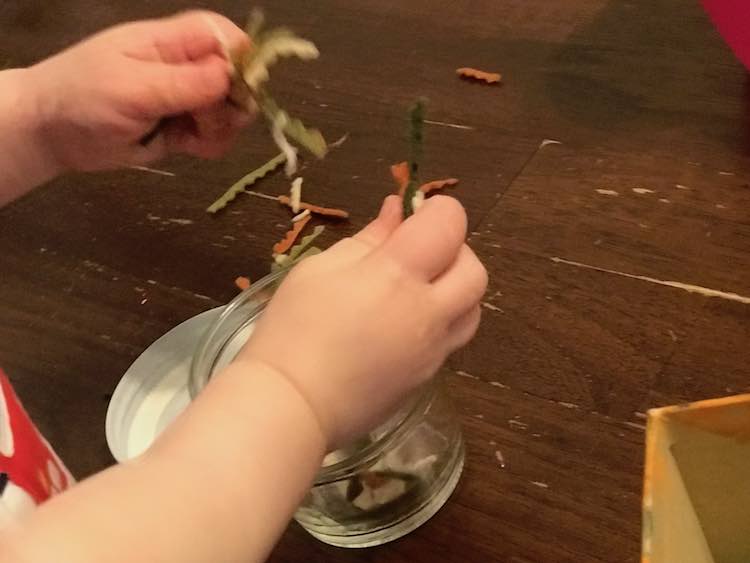
Distracting the Toddler
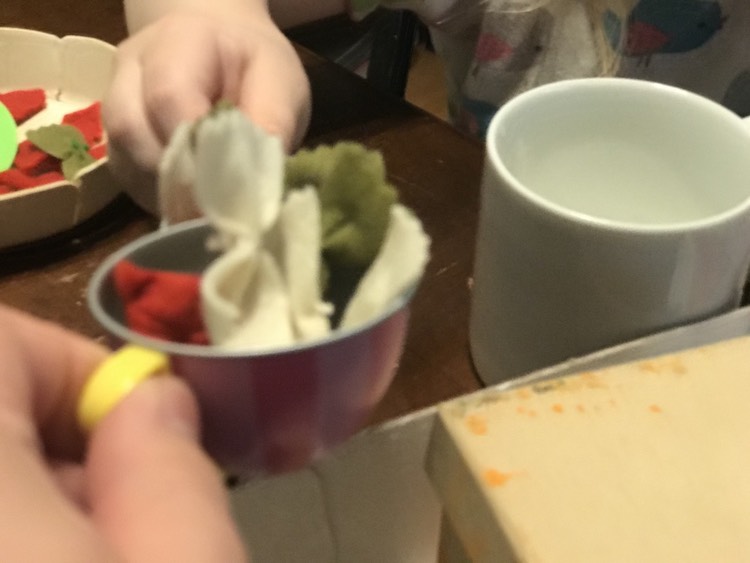
I started making the pasta after making slime with the girls. Zoey didn’t stay as enthralled with the slime as Ada did so I ended up giving her the ends I cut off the pasta strips and an empty jar with a lid. I had to keep opening it whenever she closed it halfway but it bought me some more time to make pasta. I’m glad I thought to do this as I ended up keeping the tips to use as a seasoning (in an empty plastic spice jar)… which turned into cheese when Ada wanted to use all three of the main ingredients in Pasta, Tomato, and Cheese.
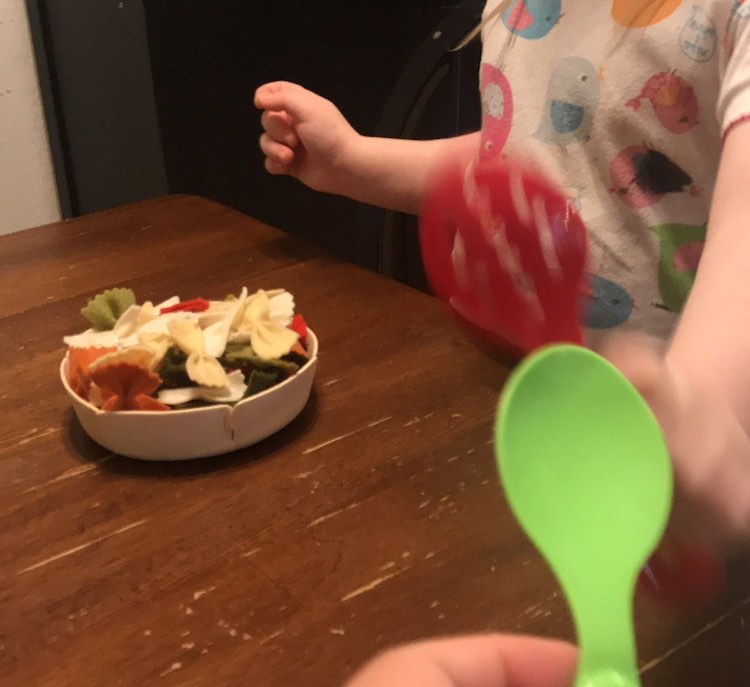
Finished Food
I emptied a box of soup pasta to store the farfalle. It just fits… if you push it in a bit. I also used an empty tea canister to store the diced tomatoes so it would look more like canned tomatoes. Our kitchen set is in flux right now and doesn’t have a lot of storage (I use a Dollar Tree basket to store all the loose pieces) so I didn’t want to spend a lot of time creating containers if they weren’t going to fit in the (eventual) finished kitchen.


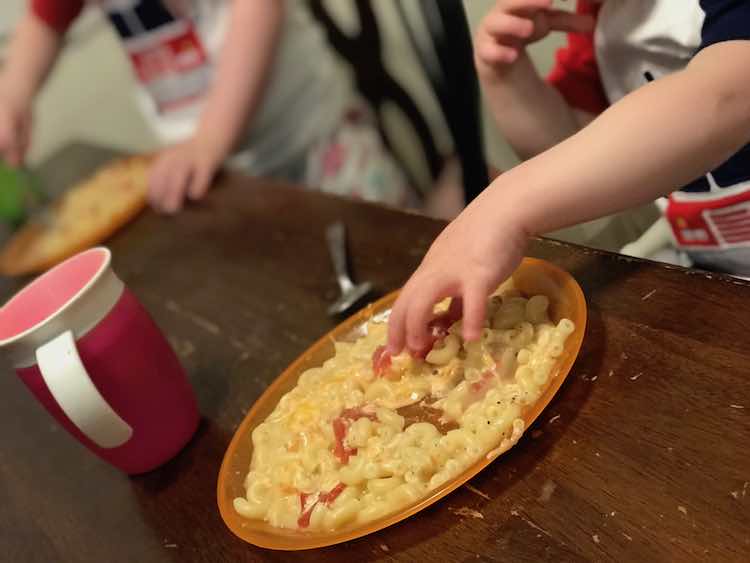
Playing
And all that’s left to do is to play!

I can’t wait to see your pasta and how you package it and how your kids play with it! Feel free to post in the comments below, through a post on my Facebook page, or by tagging me through Instagram.