
Quiet Book Page - Counting with Beads

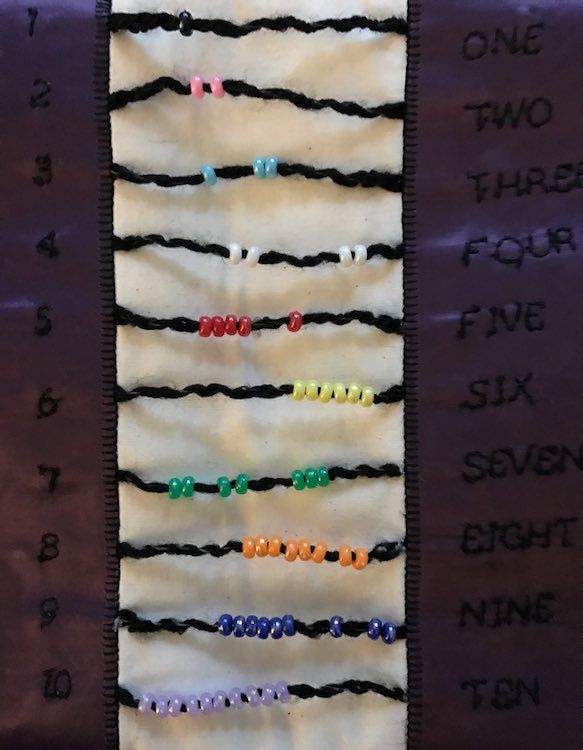
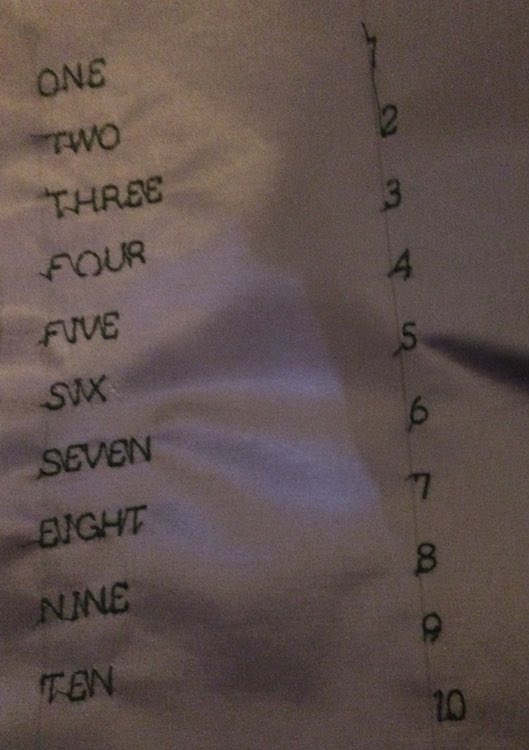
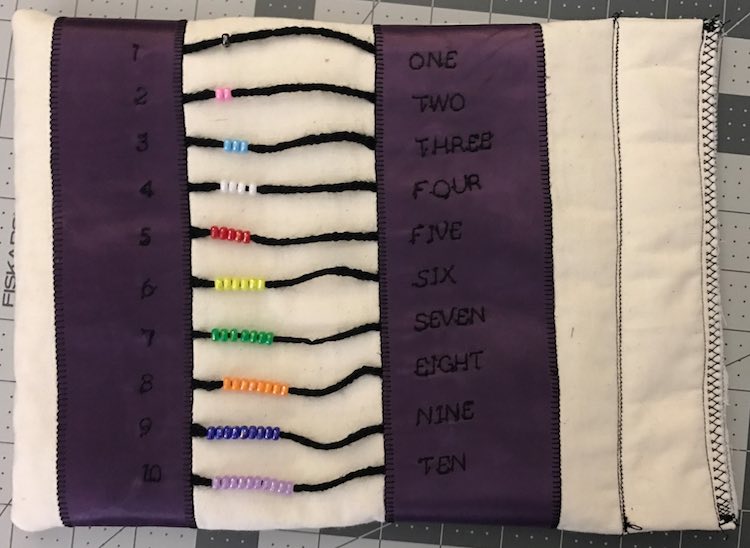
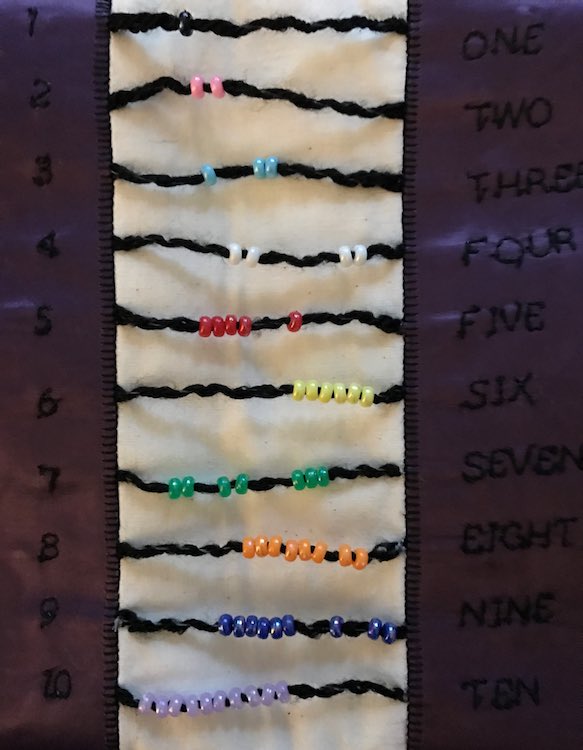
While planning out the quiet book pages I really wanted to add a counting page to Ada’s quiet book. I saw many pages online that had beads strung on a line like an abacus and decided I wanted to create something like that. I decided to string 10 separate lines across the page with an ascending count of beads from one to ten. I wanted to include both written numbers and digits so you could compare how both looked. I also really wanted to try out the built-in monogramming sewing fonts on my sewing machine and jumped at the chance to use it with a legit reason.
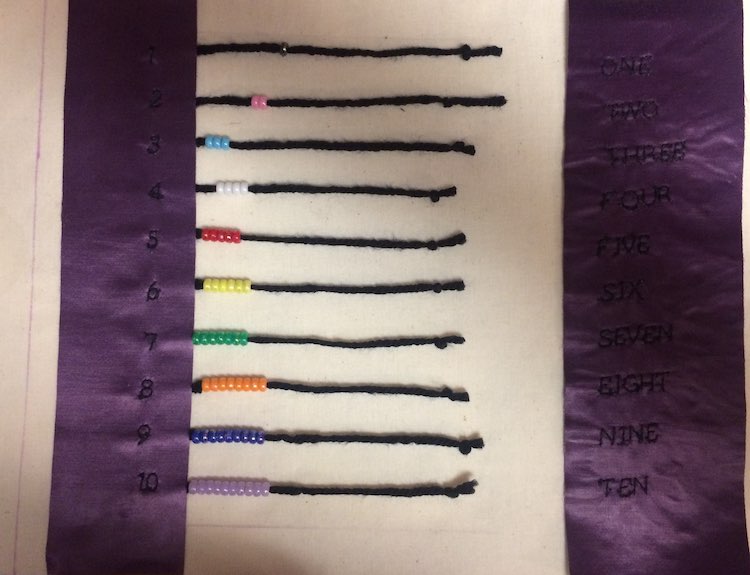
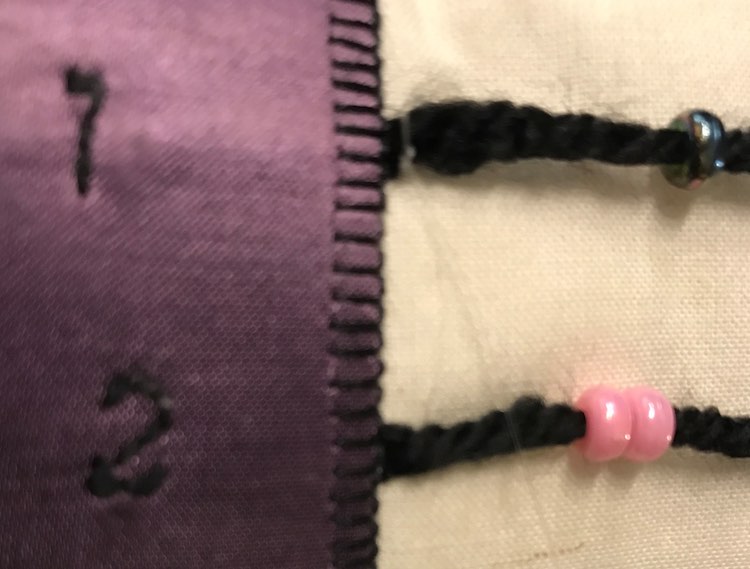
I decided to lay it out with a column of digits on the left side of the page, a column of written numbers on the right side of the page, and beads strung between both sides corresponding to their number. I was hoping that way Ada could count the number of beads on the string and then check what was on the left. As she got older she could compare the digit with the written number and see how to spell it and learn to read it.
Materials
Items I had from before
- Fabric to embroider both the written numbers and the digits on
- Beads – I wanted ten unique colors of beads with one for the first color, two for the next, …, and ten for the last color
- Sturdy cord to string the beads on – I used yarn and needed to use fishing line to reinforce it
Specific items I bought off of Amazon
- 108″ Unbleached Muslin Natural Fabric by the Yard
- Pellon Fusible Thermolam Plus White Fabric by the Yard
- Thermoweb Heat’n Bond Lite Iron-on Adhesive
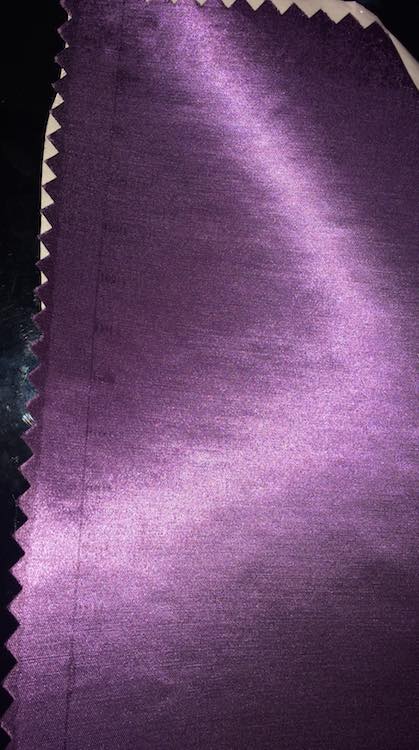
I started by picking a shiny purple fabric swatch I had (from a Fabmo sale) and then ironed some Heat’n Bond Lite onto the back of it so it would stick to the page and make sewing down the edges easier later. I wanted the column of numbers to be straight on the page so I marked a vertical line far enough away from the edge that I’d have room for a margin, space for trimming the edge straight, and room for a seam allowance. I also wanted the there to be enough vertical space on the page to fit all my numbers so I checked how how tall my monogram would be, checked how much space I wanted between the numbers, and then marked with a disappearing ink pen where I wanted to place each digit and written number on the line.
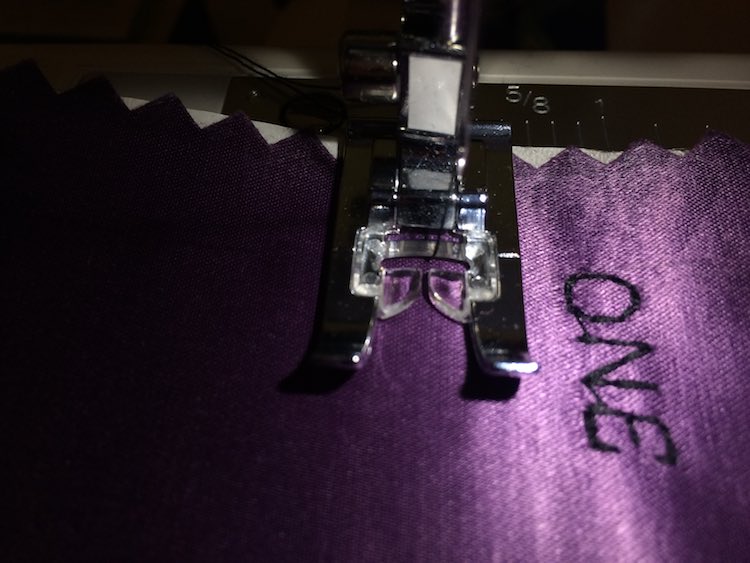
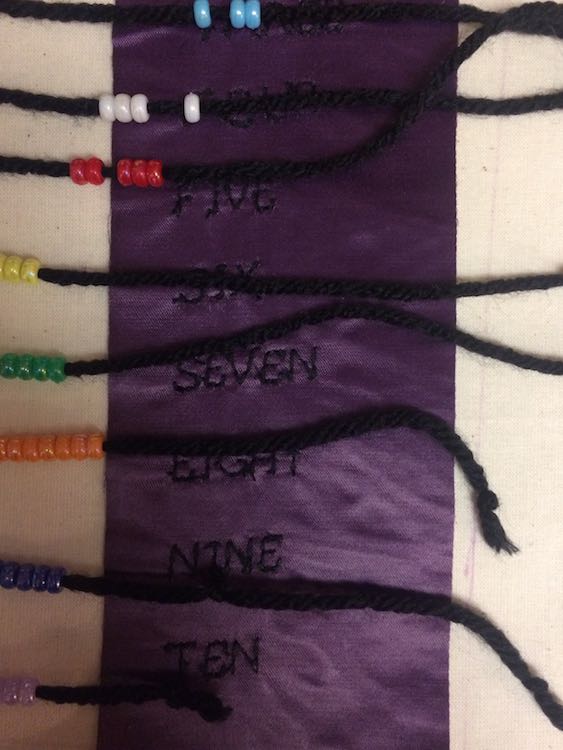
I decided to do the written numbers first as they take up more horizontal space. I looked at the user’s manual for my sewing machine, programmed the ‘ONE’ into it, and sewed my first number. It didn’t cut the thread between each letter, but left the letters secure so at the end I trimmed the thread between each letter. After finishing each one I deleted the entered in word in the sewing machine, entered the new word, double checked it, lined up the fabric, and then sewed the new word.
After I finished my column of written numbers I marked out another vertical line over a ways for my digits; making sure there was enough space on the right side of the numbers for the seam allowance and margins. I then went across and marked where I should start sewing so they would be as far apart from each other as my written numbers. Between the 1 and the 2 I didn’t cut my thread as I figured I could cut it afterwards, but afterwards figured it was quickest to cut as I went and trim the digits later.
After I was done sewing the numbers I trimmed the thread between each character and wet down the fabric so the markings from the disappearing ink pen would go away. I then cut the two columns of numbers out and trimmed the top and bottom so they’d be the same height as my quiet book page (including the seam allowance).
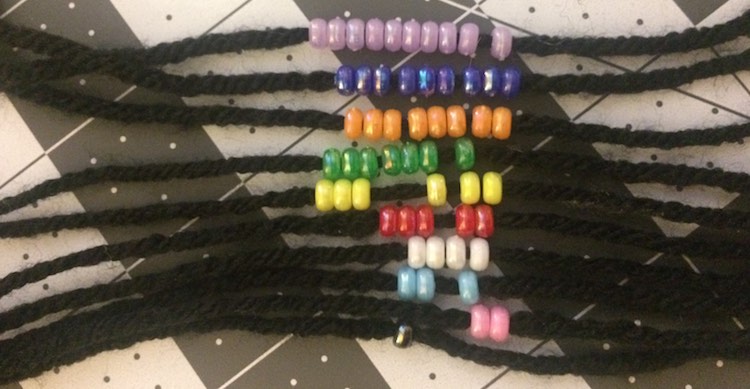
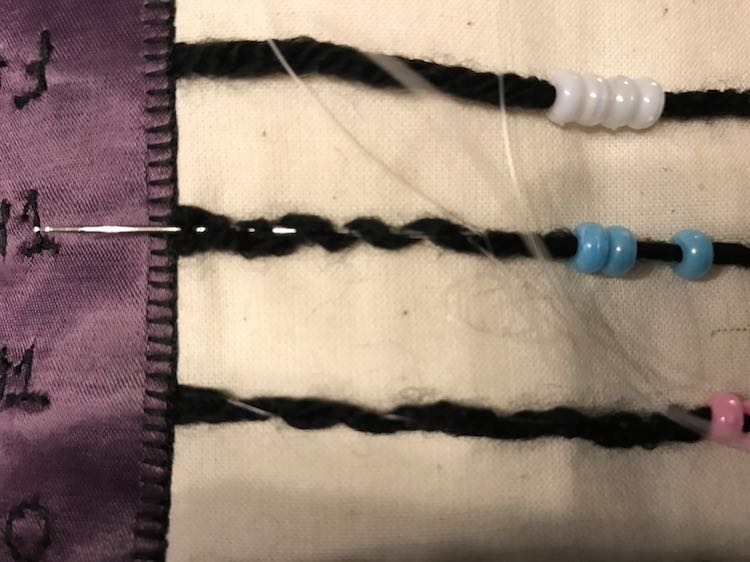
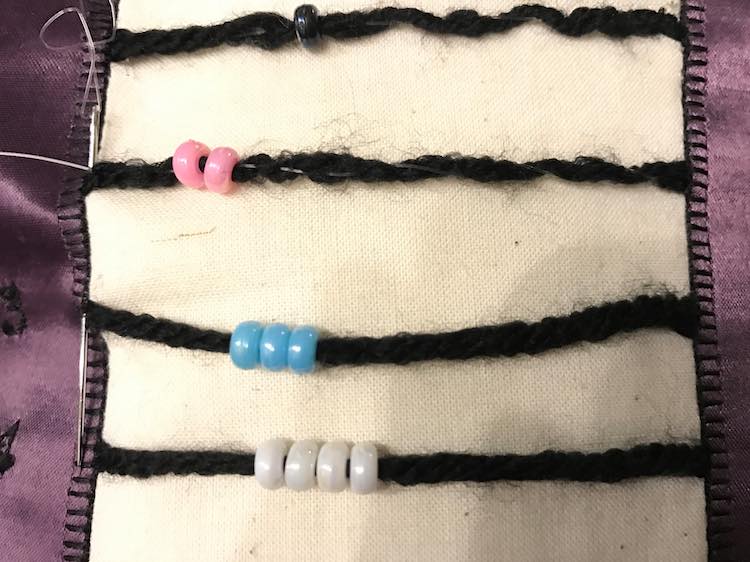
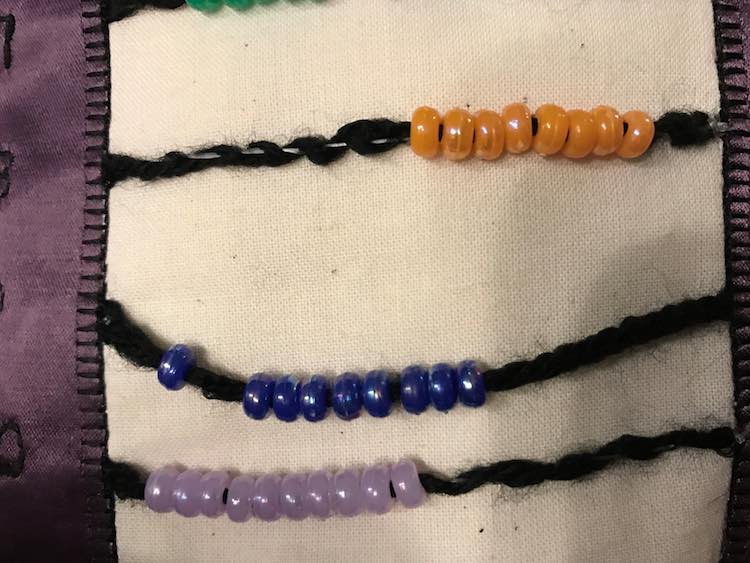
I then worked on the beads. I used black acrylic yarn, though next time I would go with something more indestructible, and cut ten lengths of yarn a bit longer than I needed so I could trim it shorter later. I went through my beads and chose the only style that would thread onto my yarn, came in ten (or more) colors, and had enough of each color to allow me 10, 9, 8, …, 1 beads. I then tied off the one end of the yarn, threaded the required number of beads, and then tied off the other end so it wouldn’t fall off. I tried to make the beads stand out from the set of beads before and after it by spacing out similar colors.
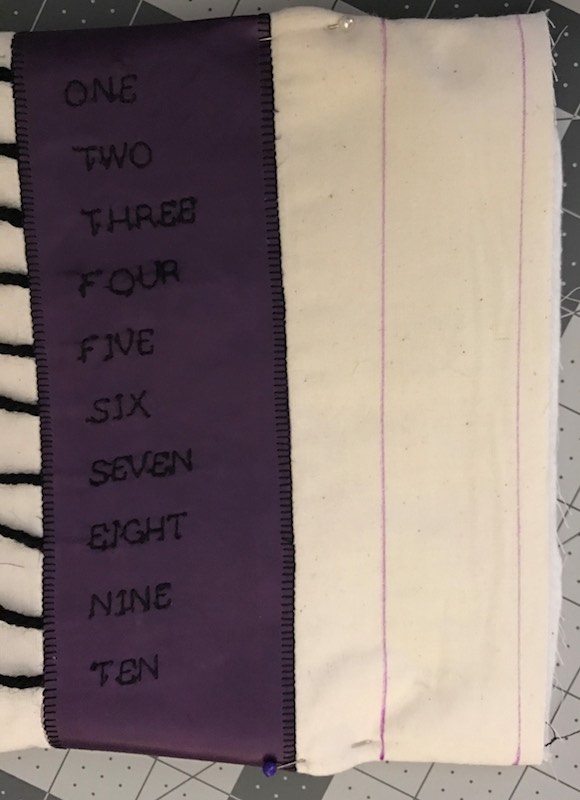
After confirming my fabric and bead placement I then got ready to iron my purple fabric to the page base. I started by moving the fabric with the numerals on it over to the left and lined up the left end of the yarn underneath where I was planning on fixing the fabric. I made sure each yarn end corresponded with the number it was matched under.
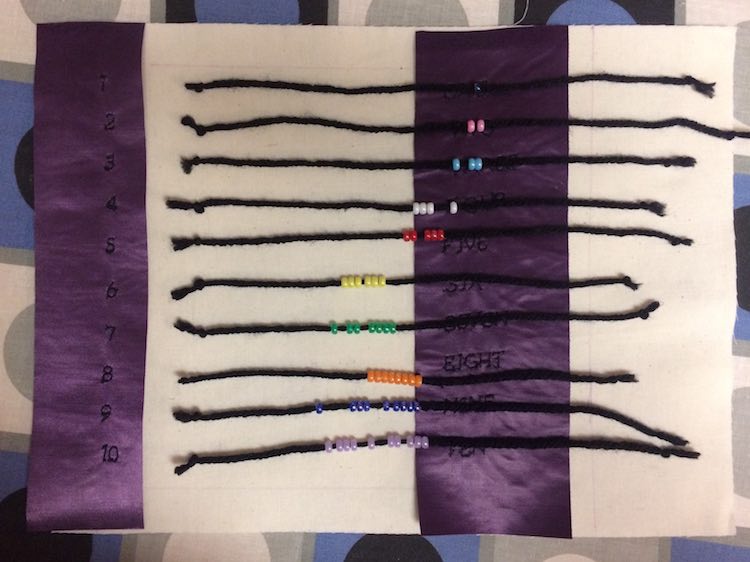
I then peeled off the paper, as best as I could, from the back of the fabric, placed it over the yarn ends, confirmed each knot was underneath enough to be secure, confirmed each knot was directly under it’s number, and then ironed the fabric in place. While ironing it I was careful not to touch the beads with the iron and tried not to stay too long close to the yarn in case they’d melt. I made sure the yarn was secure while not tugging too roughly so it would pop out.
After the left side was secure I placed the right side of the fabric (with the written words) where I wanted it and realized my yarn was uneven and too long. I re-knotted them above where their corresponding number was and cut off the excess.
I then moved the fabric out of the way, lined up the yarn so the knots would be under their corresponding word, made sure the beads were far enough away from where the iron would be, removed the paper from the back of the Heat’N Bond, placed the fabric overtop, double checked how everything lined up, and then ironed it into place.

After everything was ironed into place I sewed down the left and right sides of each strip of fabric. I didn’t sew the top or bottom of the fabric as I knew it would be sewn down when I attached it to the other side of the page later on.

And your page design is done! I then went on to sew the finished page on three sides. As the purple fabric with the Heat’N Bond was rigid and kept folding in I then pinned the seam on the top and bottom before sewing the opening and the space for the grommets so the seam wouldn’t dip in too much and get stuck that way. If you want more information on how I sewed my quiet book pages together you can check out my previous post: In Depth Guide to Joining Quiet Book Pages.
If I were to do this again I would…
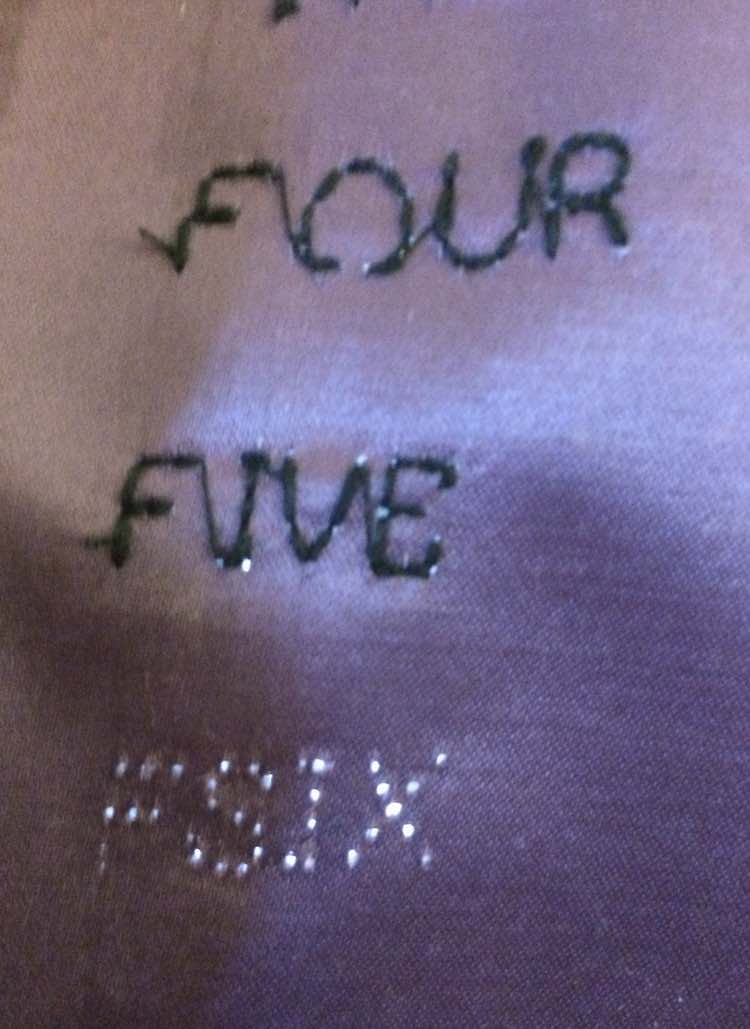
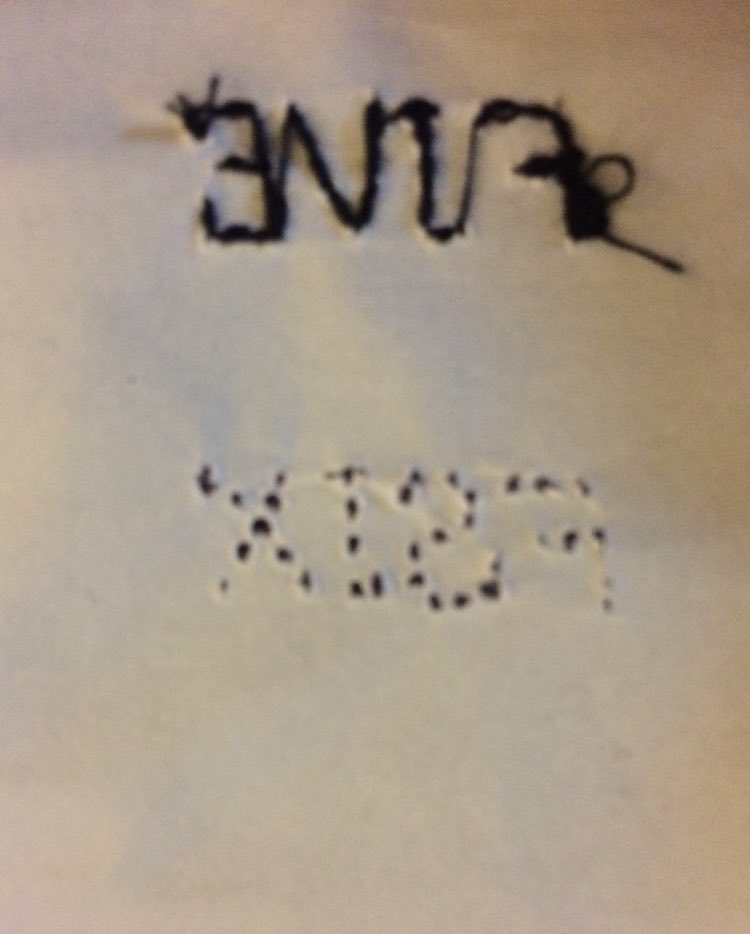
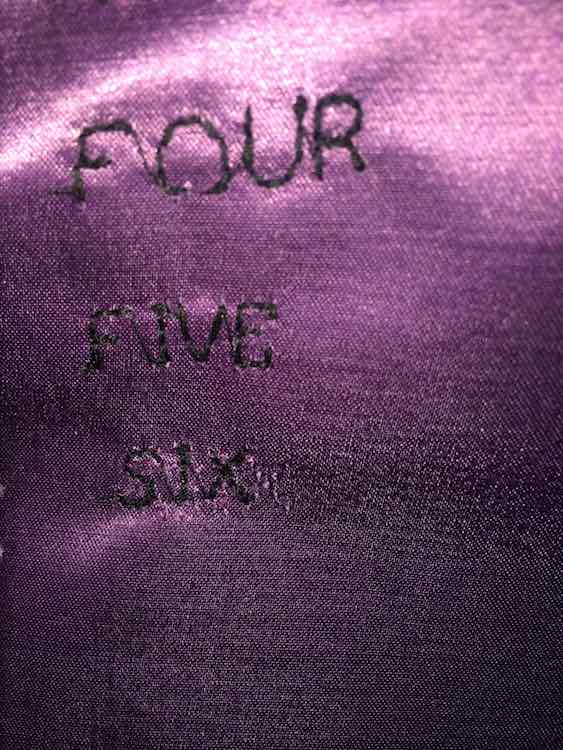
- Be extra careful when programming into my sewing machine which characters I wanted to sew. Each character had to be entered or deleted individually. I was really careful when entering them, but the problem came when I deleted the FIVE. I didn’t notice but I only deleted three of the letters resulting in an F in the system. I then entered in my SIX and ended up sewing a FSIX. Luckily it didn’t look too bad after I seam ripped the threads out and sewed the proper SIX overtop.
- Use something other than yarn to thread the beads onto. By the time I finished sewing it together I noticed the yarn drooping and Ada hadn’t even had a chance to use it yet. I ended up reinforcing the yarn with fishing line, but wish I had started with stronger stuff.
I hope you enjoyed this post. You can check out my previous posts if you want more information on how I created my quiet book covers, joined my quiet book pages together, or to see all my quiet book pages. I can’t wait to see what you come up with! You can connect with me through the comments below, on my Facebook page, or through Instagram.