

Widen Your Shirt's Neckline With A Placket

I previously shared the kids’ Firecracker dolman style shirt and dress I sewed using some amazing bamboo Lycra dinosaur fabric. Those dresses were not the first version of the Firecracker I sewed. For the first version, the wearable muslins, I had sized the pattern according to the measurements chart, but then hadn’t taken into account how small the collar might be. Once I finished sewing the crew neck dresses I realized that my kids’ head didn’t fit through the hole. Other than the size of the neckline the dresses were perfect and I didn’t want to waste them so I decided to add a placket to the dresses… and I’m so glad I did as they’re frequently scooped up and worn by both Ada and Zoey.

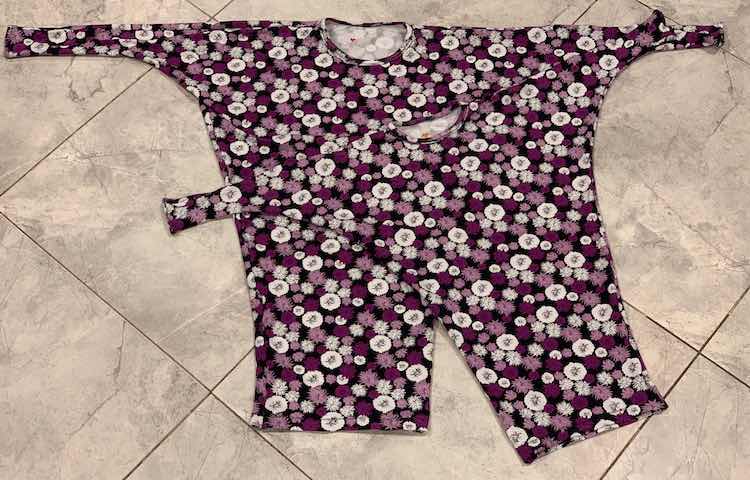
I loved how the dresses turned out once I finished them up and was so excited for the kids to try them on in the morning. I had chosen to sew up the knee length dress with the largest batwing, the extra long sleeves, and a crew neck for both kids. I noticed the crew neck looked a bit small, especially on Zoey’s, but didn’t spend too long analyzing since the kids were in bed and I’d already started sewing them.
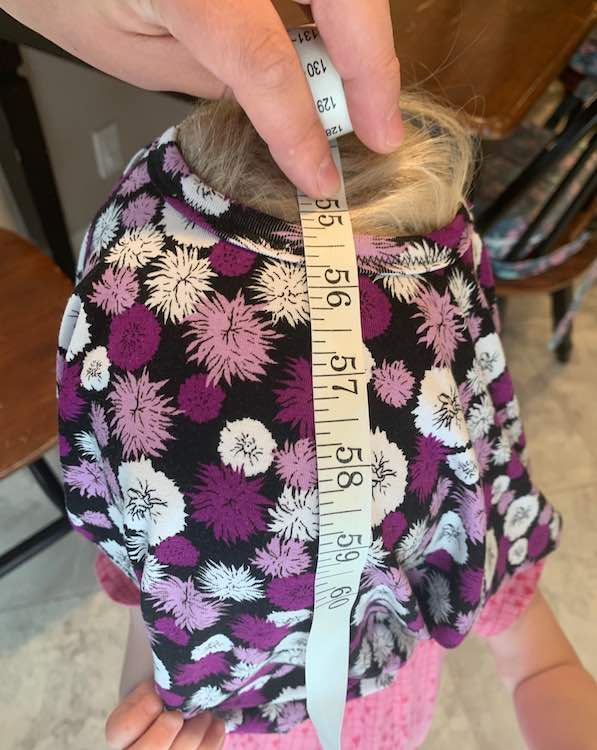
Once I had a chance to try the dresses on the girls I realized quickly they didn’t fit over their heads. I knew I had to do something to save the dresses for the girls. At first I was debating creating a small slit, with added facing, down the front of the shirt’s neckline. After asking advice in the Firecracker’s testing group I, instead, considered adding a snap placket to one of the shoulders seams. I’ve created a snap placket before, with the girls swimming suits, but both times I sewed the placket before the other seams and not afterwards like I would’ve had to here. The snaps popped off of the first swimming suits I sewed, by the end of the summer, so I was concerned the same might happen here. Additionally, Ada is now going to school and I wasn’t sure if her backpack strap would press against the snaps and hurt her shoulder. Before continuing I forced myself to pause and got Zoey to fake putting on the shirt again so I could measure from the edge of the binding down to the bottom area of Zoey’s face. I rounded the measured length to five inches.
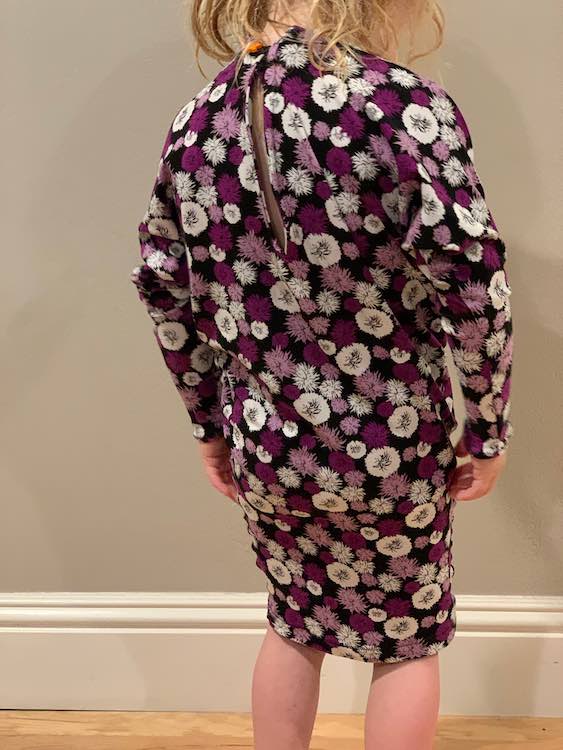
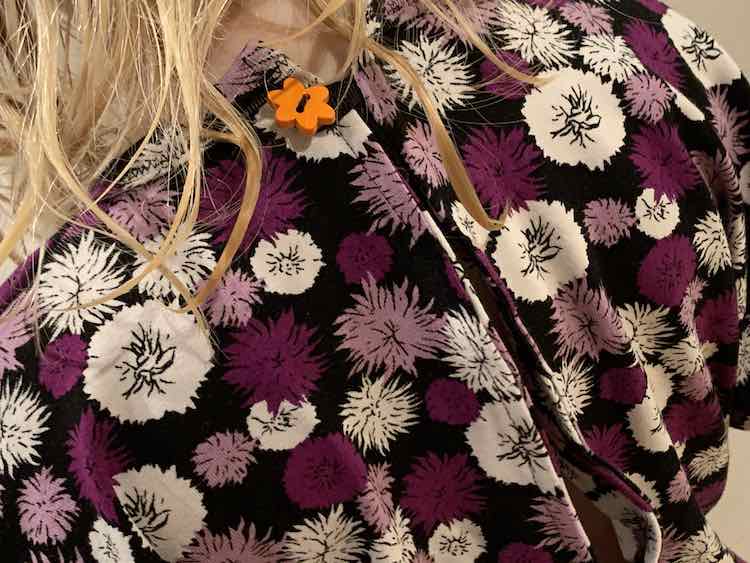
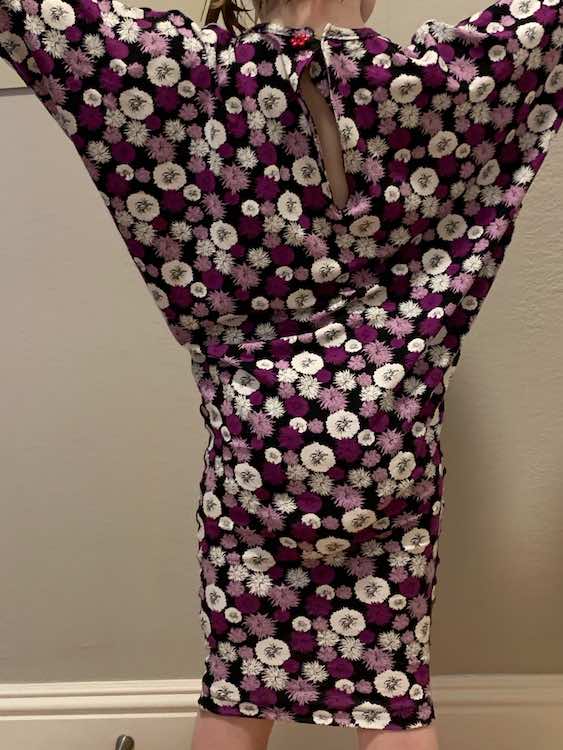
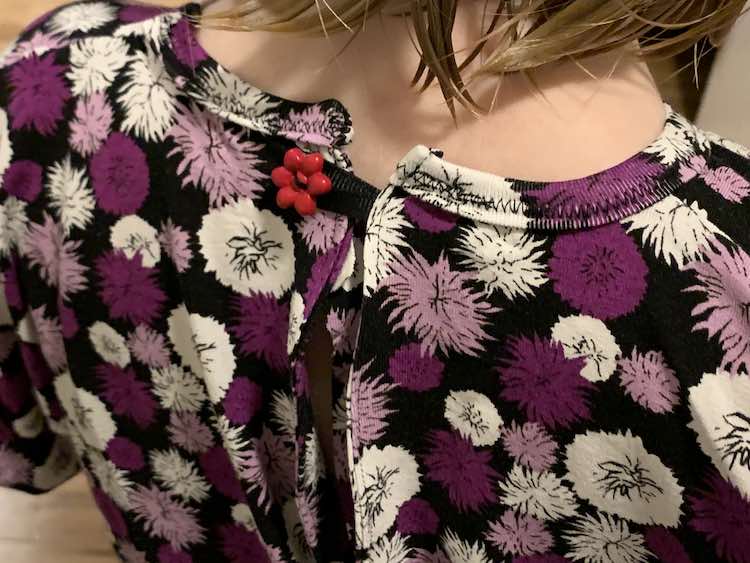
After realizing just how long the slit would have to be to fit over Zoey’s head I knew the placket couldn’t be in the front as then the dress would be too low cut. I, instead, decided to move the open placket to the back of the dress. While sewing I realized the top of the placket would bend over so quickly made the decision to add a ribbon loop at the top of the placket, looped around a button, to help keep it closed. The bottom of the placket still gapes open sometimes so looking back I wish I had added more than just the one loop and button.
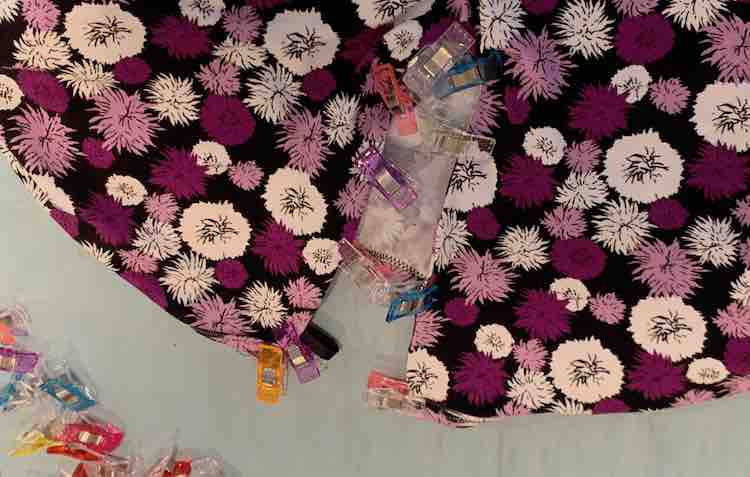
As an aside the flower fabric was bought from Girl Charlee Fabrics back in July. It’s a light to medium weight (8oz) fabric with the content listed as “cotton spandex rayon blend”.
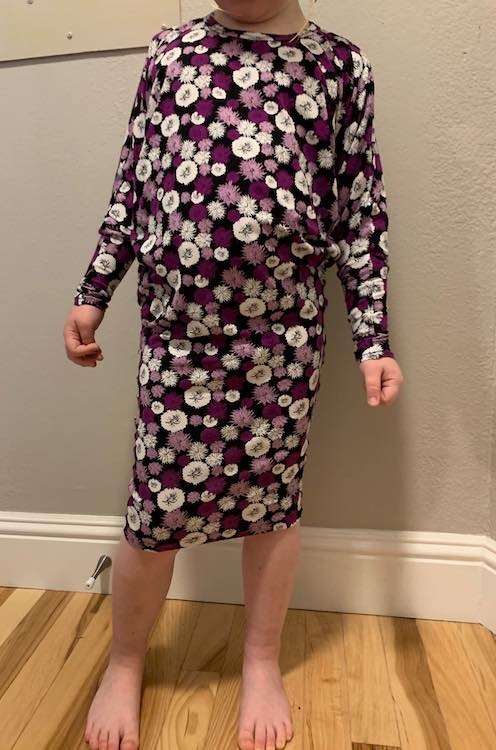
Before showing you how I created the placket I wanted to share how the dresses look with the knit placket added. Other than adding the placket to fix the issue of getting their heads through the neckline there were no other alterations I needed to do on the dress.
My three year old, Zoey, measured into the smallest sized offered at 12 months. I sewed up the crew neck t-shirt style knee length dress using the biggest batwing option and the extra long length sleeves. There was no grading involved. I added the neck placket, at five inches long, to the back with a black ribbon loop at the top and an orange flowered button. The second time around, with the dinosaur dress, I hacked the crew neck to be a 3T size but kept the rest of the dress the 12 month size.

Ada, 5 years old, measured into the 4T sizing. I sewed up the same dress options as Zoey’s with the crew neck, longest sleeved, largest batwing, and knee length dress. Since she was at school when I started the placket I also made hers five inches long. I used a red flowered button from the same pack as Zoey’s once I was done so they could still match while I could also use their favorite colored button to easily tell their dress apart later. The second time I sewed up their dresses I graded her neckline to a 5T size and kept the rest at a straight 4T.
Adding The Placket To The Dress
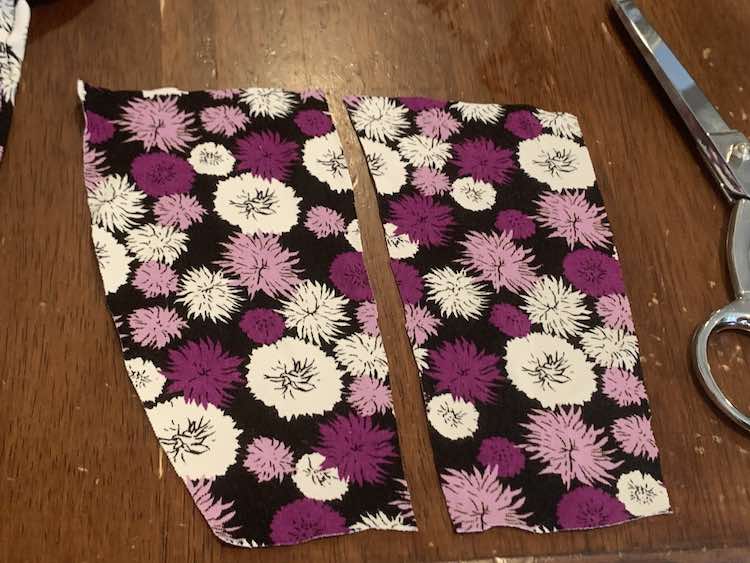
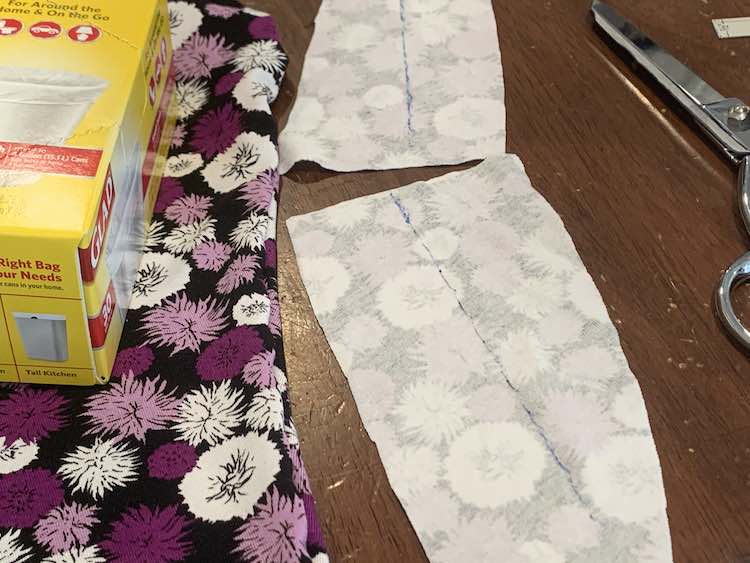
To create the placket I started by grabbing a scrap, leftover from cutting the dresses, and cut two pieces, one for each dress, keeping them a bit bigger than five inches since I wanted excess fabric below the placket. I used my disappearing ink pen to draw a straight line down the center of each scrap thus marking where I should later sew.
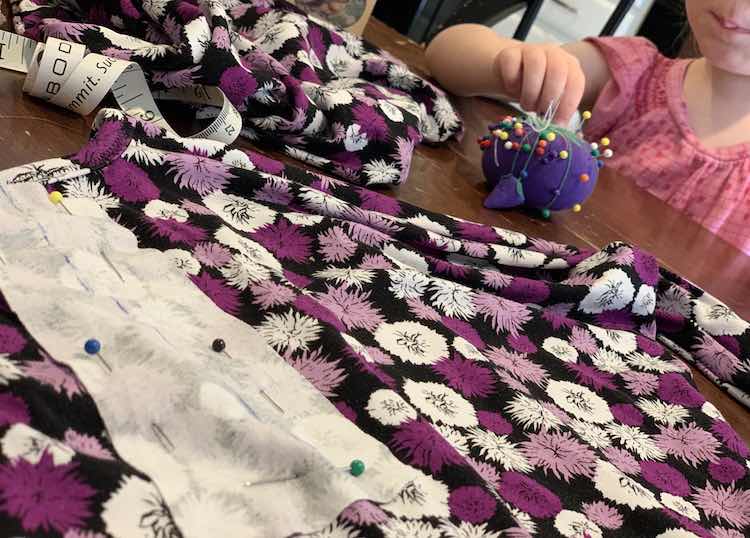
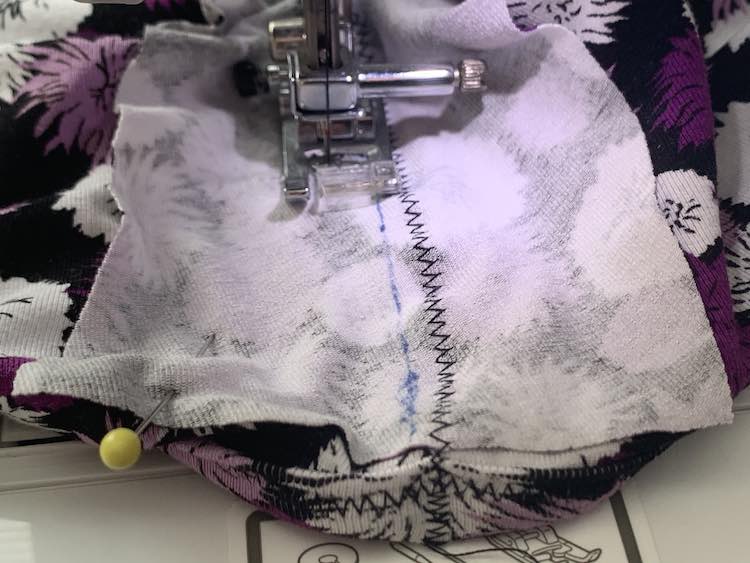
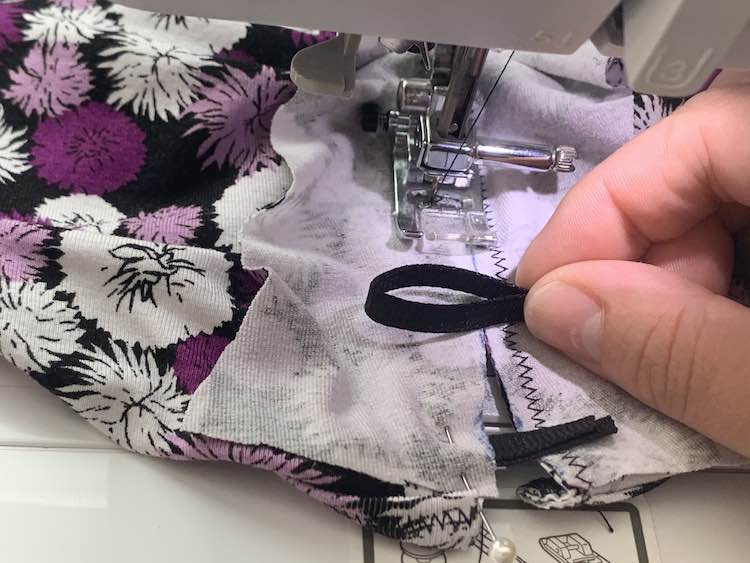
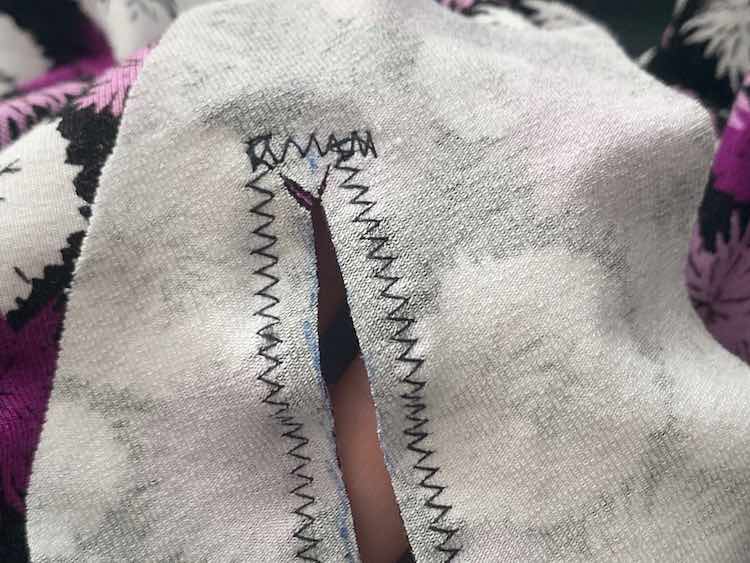
I then placed the fabric scrap, right sides together, on the back of the dress making sure the top of the fabric was flush with the binding. I used my pins to keep it in place before taking the dress over to my sewing machine, sewing beside the line, turning the fabric, sewing a couple stitches across, turning the fabric again, and then sewing back up alongside the other side of the line. I was originally going to finish sewing this before cutting down the center, following the line, to open the placket. While I was sewing; however, I decided to add the ribbon loop on one side of the placket so I could later add a button to the reverse side and be able to keep the placket closed. I realized I needed the center cut before placing the button so as I approached the top of the shirt I stopped sewing, cut along the line until I reached the sewing machine foot, grabbed a small piece of ribbon I had cut (I had already melted either end of the cut ribbon so it doesn’t unravel using a lighter), looped the ribbon, and then placed it between the shirt and placket fabric making sure the looped side is inside the shirt and the ribbon ends are sticking out from where I had just cut. Before placing the ribbon you also have to check the ribbon loop against the button you want to use. You want the final ribbon loop, after the loss in the seam allowance and any excess ends, to be large enough to fit the button but not too large so the button slips out. Once I had the ribbon in place I continued sewing, from where I had stopped, before going over the ribbon and ending at the top of the placket. While sewing over the ribbon I made sure to backstitch to confirm the ribbon was actually locked into place.
Once the placket was sewn I took my scissors and cut along the rest of the marked placket line. At the base I cut two short angled bits into either corner so the bottom of the placket would lie flat once turned right side out. I then flipped the placket facing to the wrong side, used a chopstick to make the edge nicer, pressed the seam, and then used my sewing clips to clip the edge in place before topstitching along the edge.
I left the placket as is at this point but later I might either add a second row of topstitching and/or trim the facing as sometimes the facing pokes out of these plackets. All that’s left to do now is sew on your button. I lined up the placket, saw where the loop rested, and then sewed the button right in the center of where the loop was. With the placket added the dresses were finished.
I now know, from my second time sewing the dress, that you can simply grade the pattern to have a different size neckline and it can work beautifully. If you’re interested in sewing the Firecracker and don’t want to grade your neckline larger you could forgo the basic crew t-shirt style neckline and instead use one of the many other neckline options offered including an asymmetrical off one shoulder, a boat neck, a v-neck front, or a low scoop back. These would all offer you more room in the neck compared to the crew neck.
Looking back on these plackets I realize I don’t like how it gapes open in places and the excess knit fabric sometimes folds back and pokes out. If I were to do this again I would consider using a woven fabric to help it lay better although I would be concerned it wouldn’t stretch enough if you needed just a bit more room. Since my placket was five inches long it sometimes gapes open so if I could magically do this over I would add one or two more ribbon loops and buttons to help hold the placket closed. I could also see using hooks and eyes or maybe even Velcro as a good alternative to buttons. I’d love to hear from you on what the best method to fix this sort of problem is.
I really wanted to share this hack with you because I hadn’t realized that you could simply change your neckline’s size by grading just the neckline out. This knowledge would’ve helped me as I certainly didn’t think about that until I came across this issue and was informed I could in the testing group. Even if you’ve already sewn up your top with too small of a neckline, bought a top where the neckline is too small, or whether your child’s outgrown a favorite shirt’s neckline but the rest still fits I hope you stumble across this post as the knit placket could help you too. If you’ve done this before I’d love to hear your tips and tricks on adding a placket to a shirt so feel free to share in the comments below, on my Facebook page, or through Instagram. I’d also love to hear from you if you’ve fixed a too small neckline on a shirt or dress a different way.
I hope you have an amazing day!