
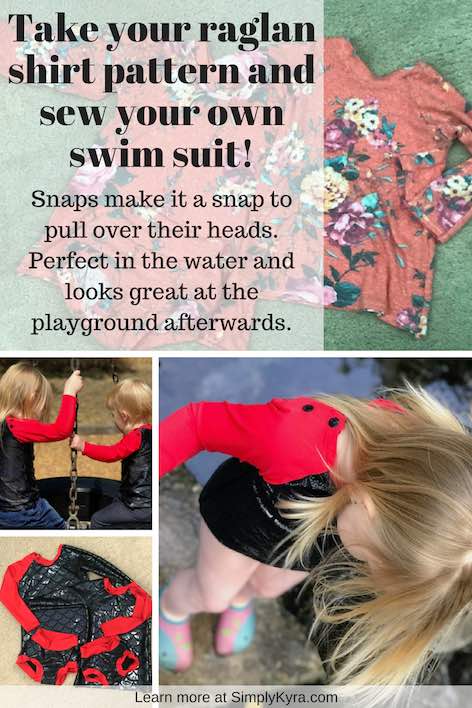
The Lead Up to Sewing My Raglan Swimsuit

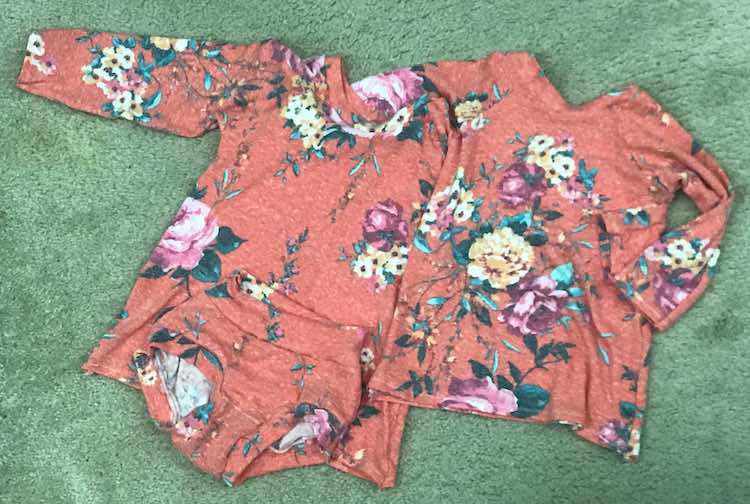
My last post showed the swimsuits I made the girls while mixing up a knit raglan shirt pattern (Ellie and Mac), an underwear pattern (Stitch Upon a Time), and a knit raglan tee snap placket hack (The Crazy Tailor) with some swim fabric (Surge Fabric). I wanted to share some of the steps I took before cutting into my swimsuit fabric in the hopes it helps you when you make your swimsuit.
Choosing fit
I wanted the rash guard to replace the swimsuit top instead of being a second layer overtop of a swimming top as that may get uncomfortable. As the top was going to be for swimming I wanted it to fit snugly. To test out the fit of the raglan shirt pattern I took some of the extra knit material I had on hand and made both girls a wearable muslin. I decided to pick their size based on their length (chest measurement put them one size smaller than their length) as this was the wearable muslin and I didn’t want it to be too short. As I was going to make Ada matching swimsuit bottoms using the scrundlewear pattern (which I had only made once before and were now too small) I also made a point of making a matching underwear to confirm it wouldn’t be too loose for a swimsuit bottom.
For their wearable muslin I ignored the placket as I figured it wouldn’t affect the finished fit too much and went for just the regular shirt. I did however make it an easier and quicker sew by testing out a binding hack that reordered the sewing steps so you can sew the binding on before sewing the last seam so it’s not such a small space. This made it harder to match up the seams (you don’t want your binding or hem lines to be too far off) but simplified the sew and made the binding lay flatter. While sewing the sleeves and bodice pieces together I left the one shoulder seam open, added the neck binding, and then sewed the last shoulder seam closed (similar to the placket instructions). This made the finished neck binding look so much better overall. I also ended up extending the hack idea by hemming the sleeves and bodice pieces before sewing them together as well… this made their small sleeves so much simpler to hem. Like I mentioned in the first post I also simplified the underwear by sewing the leg bands and waistbands on before sewing the area closed.
I loved the finished shirts. The only issue I had with the shirts themselves were Ada’s sleeves were a tad too short. Since this was a test for a swimsuit I decided to size down their shirts to be tighter while also keeping the length of the sleeves and the shirt at the current size. I had planned ahead and had both the current and smaller sized layers checked off when printing the pattern pieces from the PDF so it was a simple thing to leave the end of the sleeves and shirt the same length and trim the rest of the pattern pieces one size smaller. For Ada’s sleeves I wanted them even longer so I taped a piece of paper to the end of the arm pattern piece and made it about an inch longer while extending the side lines at the same angle.
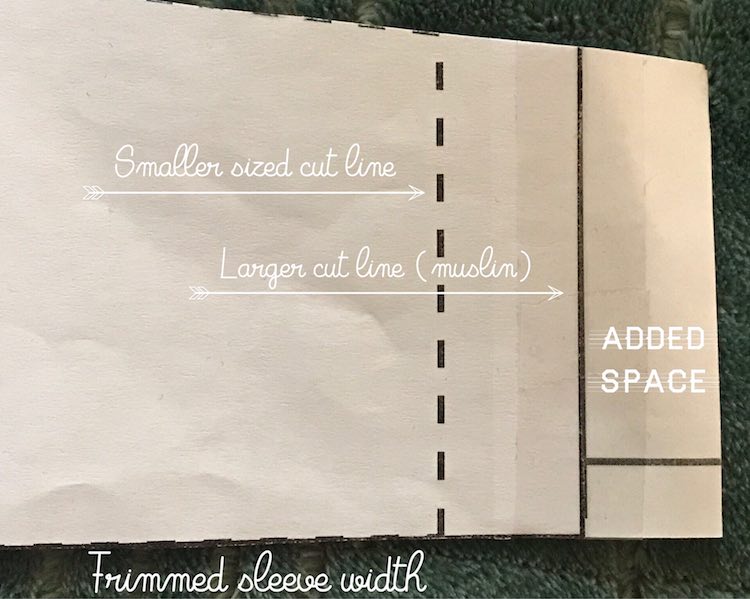
Essentially my swimsuit tops were sewn at the same size as their chest measurements while being the same length as their length measurements if you use the Unisex Raglan’s measurement guide. As I had to extend the length of Ada’s sleeve even longer I’m really glad I went ahead with the muslin. If you want it even tighter you can always sew up a knit shirt at the current chest measurement or one size smaller but remember it might not be a perfect comparison if your swim fabric has a different stretch and drape compared to your knit.
Planning out the colors
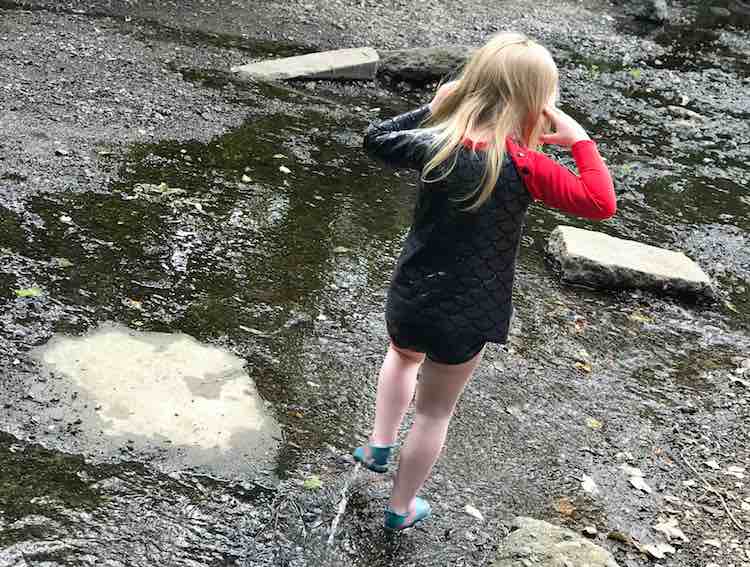
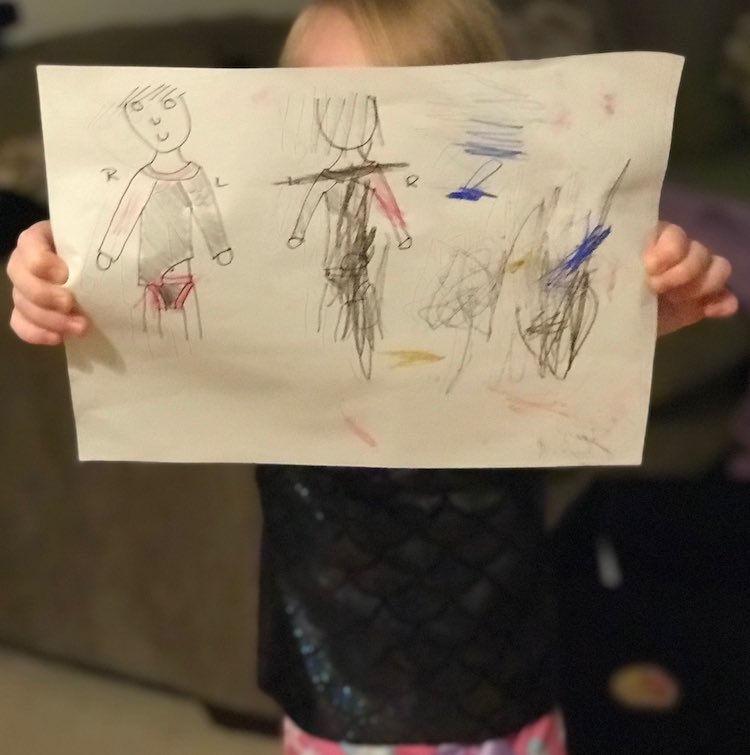
Back when I was debating sewing up a rash guard or a swimsuit (hadn’t decided yet) Ada and I had gone over swimming fabric and finally picked out black scaled (we’re calling it dragon scales) and red swim fabric. It’s no longer available on the Surge Fabric website but it’s technically called Black Mermaid Scale and Guard’s Red. When I was making lunch and the kids were a bit grumpy I had the revelation to have them (mostly Ada at this age) design their own swimsuits as I hadn’t cut the fabric yet. I quickly drew out the front and back of a person wearing a raglan and scrundlewear for them to design and handed them both a red (red fabric) and a black (dragon scales) pencil crayon.
Originally, Ada wanted the swimsuit to be all dragon scale except for one sleeve and the opposing leg band. After lunch she requested another sketch and designed some more (down to no red… then back to one sleeve). I told her she needed a bit more red so it would look like it belonged and we eventually got to a red sleeve, neckband, and all three bands on the underwear. Overall this worked out as my red fabric was a tad thinner and stretchier than the scales so it was perfect for all the bands and it still maximized the amount of dragon scales for the girls.
When having Ada design her suit I made sure to let her know that the bands and arms would be the same between the back and the front while the main part of the shirt and underwear can be different (as they have a front and back panel). When I checked on her once I quickly transferred over the color to help after verifying she was liking her design as is. I love how much fun she had designing her suit and loved listening to her explain the concept to Zoey while they were coloring.
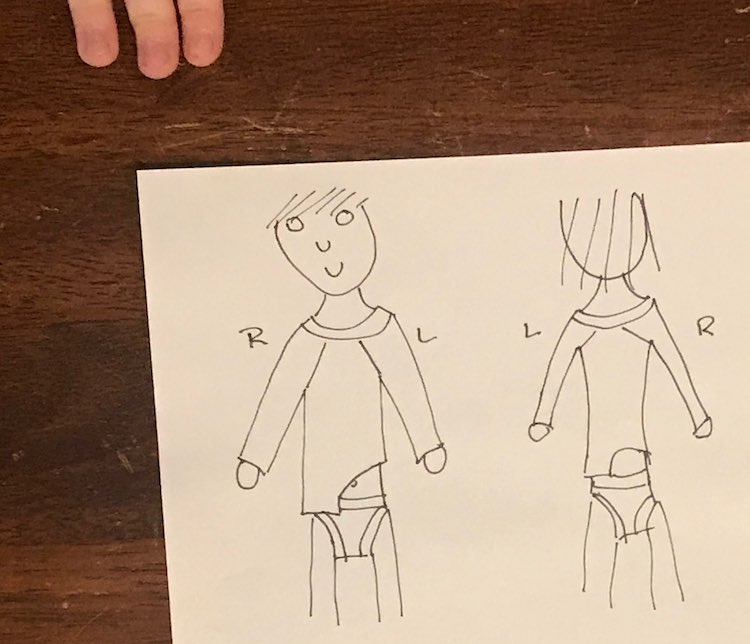
We were in agreement on having Zoey’s final swimsuit match Ada’s… except for reversing which arm was red (I asked Ada which arm to confirm for her and Zoey) which I agreed would look adorable.
If you’re interested in using magnets or seeing how I sewed up my test placket
Originally I was debating using magnets instead of KAMsnaps for the placket on the top. I had already bought some magnets and so decided to test out how they work while also walking through a test run of sewing up the placket before I did it on the swimsuits.
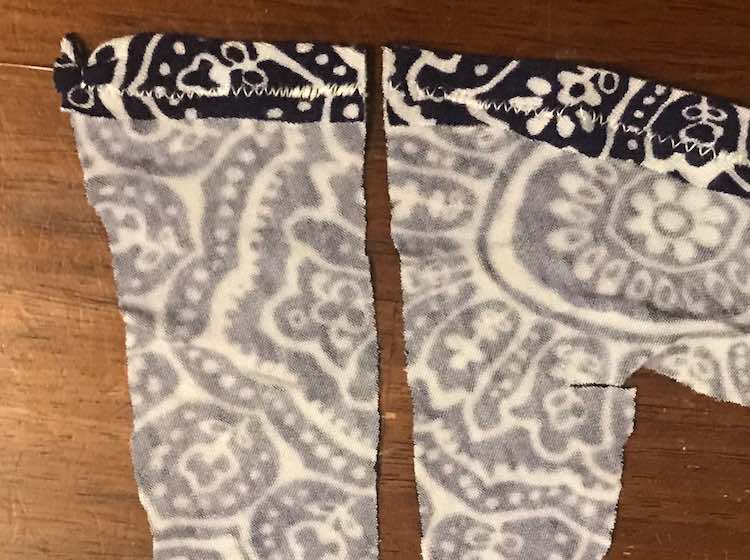
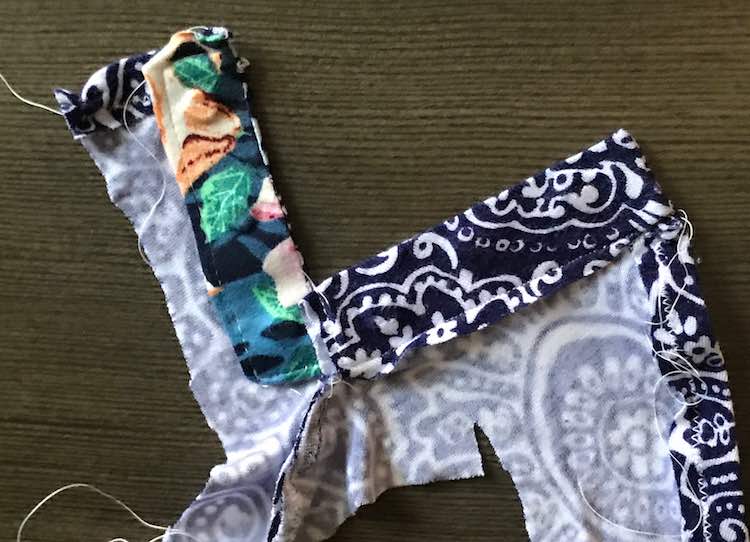
To test out the placket I took a scrap piece of fabric, hemmed one side (to represent the neck binding), and then cut the scrap in half (for the shoulder seam). Since my raglan pattern called for a quarter-inch seam allowance (instead of the half-inch used in the tutorial) I shortened the width of the two rectangles she called for. I then cut out two scraps with the proper dimensions. As I was using magnets I decided to figure out which section of each piece was going to hold the snaps in the tutorial and cut some Heat’N Bond (to hold the magnets to the fabric) and some fuzzy interfacing I had on hand (to seal them in) to the 3/4 inch width I’d need. As the tutorial has you fold over the top and bottom by a quarter-inch I cut each piece a half-inch shorter than the cut fabric. The magnets themselves were small but I grouped them in two and colored on the outside of each pair so I’d be able to put the colored side down (fabric is also right side down) and know that the finished placket would have the magnets facing the proper way to attach together.
While sewing the placket the hardest part was the magnets which kept attaching to my sewing machine (it felt similar to when the stitches get stuck or the sewing machine starts to eat your fabric) so I had to keep an eye on it and keep pulling it along (with hard jerks when the magnet was fully attached). All in all it wasn’t too bad and once done it was pretty cool to watch it being pulled apart and stuck back together.
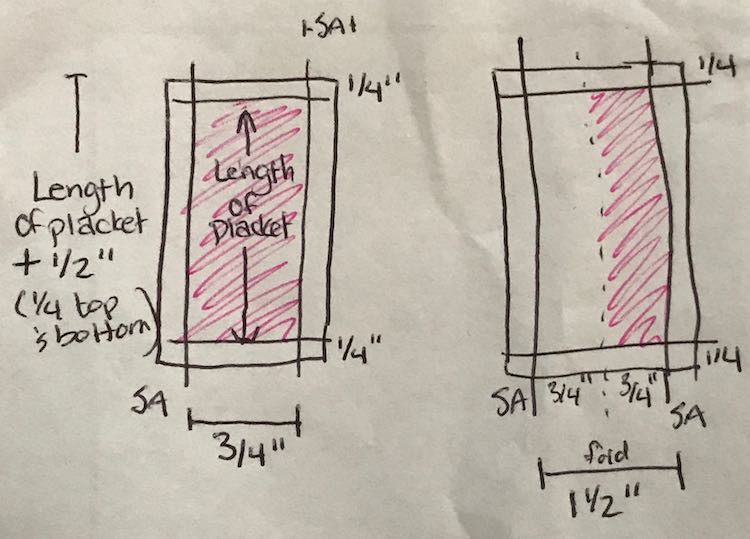
In the end I decided to go with KAMsnaps as I wasn’t sure if the magnets would hold up under constant use… especially on a shoulder seam that will be bearing a lot of weight and movement. I figured I’d show you my finished calculations below in case you’re planning on doing something similar and would find them useful. The sketch isn’t to scale. The pink part is 3/4 inches wide (on both) and the length of your finished placket (full fabric height minus the quarter-inch fold-over on either end). It’s this part where the snaps are attached, where I attached my interfacing on both versions, and where I embedded my magnets. All four edges are 1/4 inches wide. The sides are your seam allowance so you’ll want to change that if you shirt pattern is different from a quarter-inch.
I’m loving our finished swimsuits and Ada’s so proud of having designed it. I love that even though she’s too young to sew it up herself she got to be more involved in the process. I can’t wait to see them use the swimsuits more as the summer continues. Though Ada has already asked for more dragon swimsuits, so we’ll see what happens.
If you want a simple way to get your kid into designing their own clothing I know the Candy Castle Peppermint Swirl Dress’s PDF includes a coloring page. Here’s the direct link to their pattern. Doing a quick search I also found a T-shirt and a polo shirt coloring page on the Paint the world Super Coloring website.
I really hope this simple combination of patterns and a sewing hack helps you come up with your child’s perfect swimsuit. If you want to see details when I sewed up my swimsuits and more finished photos you can see my original post: Sew a Rash Guard Swimsuit Top Using your Favorite Raglan Pattern. I can’t wait to hear from you through the comments below, on my Facebook page, or through Instagram. Hope you have an awesome day!