

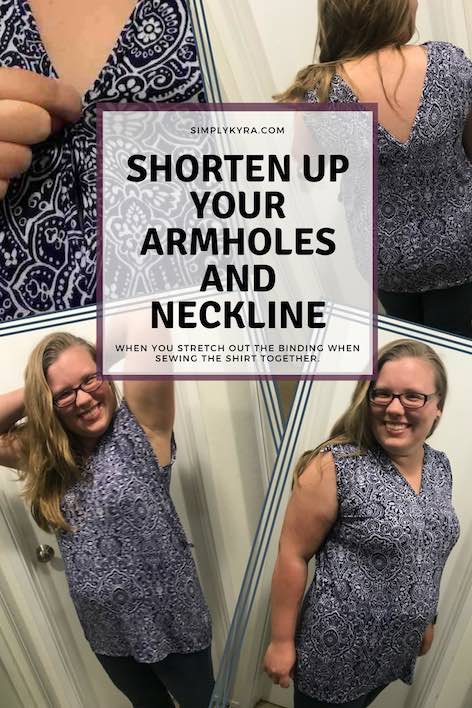
Shorten Up Your Armholes and Neckline

I finally got around to sewing up my V is for Vanilla shirt through Candy Castle Patterns as this week’s sewing challenge was to sew a pattern you own but have never tried. I’d sewn some of their other patterns already for the kids (Peppermint Swirl Dresses, Bubblegum Dresses, and Upcycled Construction Truck Shirt), but hadn’t gotten to me yet. I love how every step in the Candy Castle patterns are broken down into the smallest of steps with easy to follow pictures.
I’d bought a walking foot for my sewing machine that I hadn’t tried yet… but in the excitement of sewing up this pattern I ended up forgetting about it and stretching out the fabric while sewing the band onto my neckline and armhole. I love the way the shirt looks on the Candy Castle website but with the stretched out neckline and armholes they were to warped and revealing to wear comfortably. I would’ve just worn the shirt over a camisole, but knew I wouldn’t end up wearing it if I did that so I decided to alter the shirt as there was nothing to lose.
- Sewing Clips
- Erasable pen
- Sewing gauge
- Sewing machine\ and thread
- V for Vanilla pattern
- Knit fabric – I bought mine from my local Joann’s
How I fixed my armholes
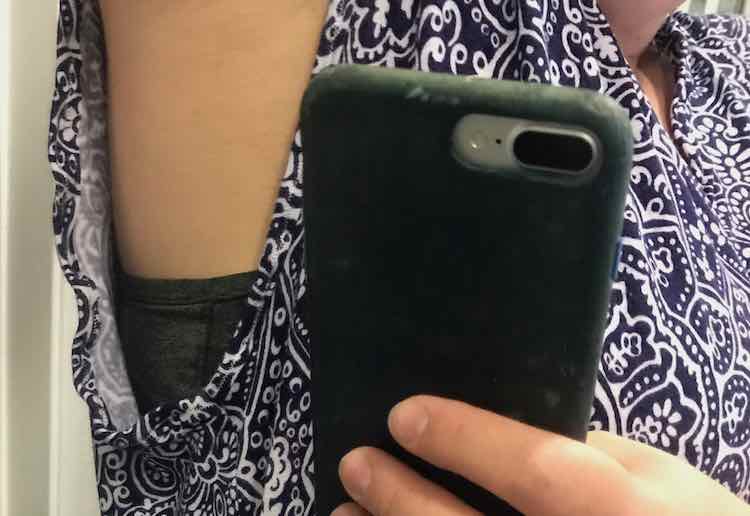
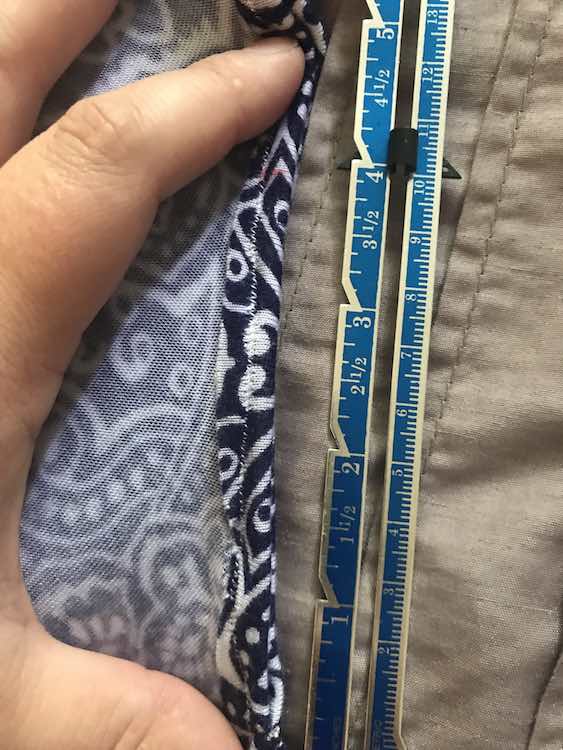
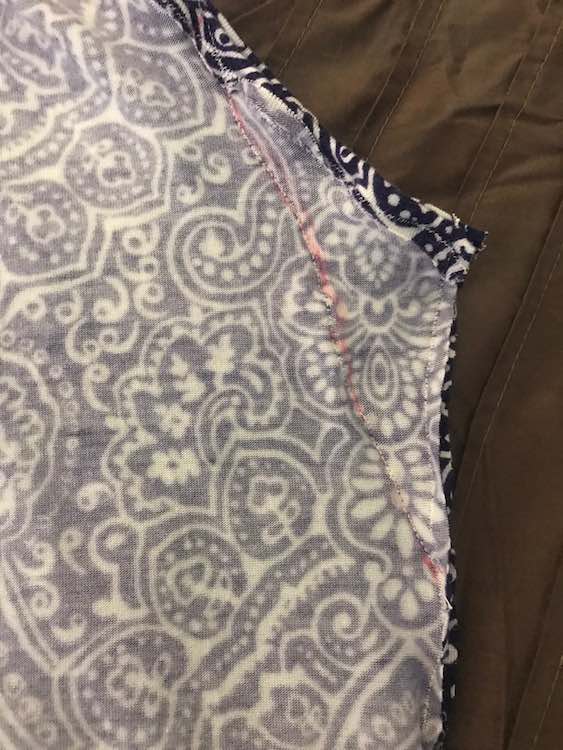
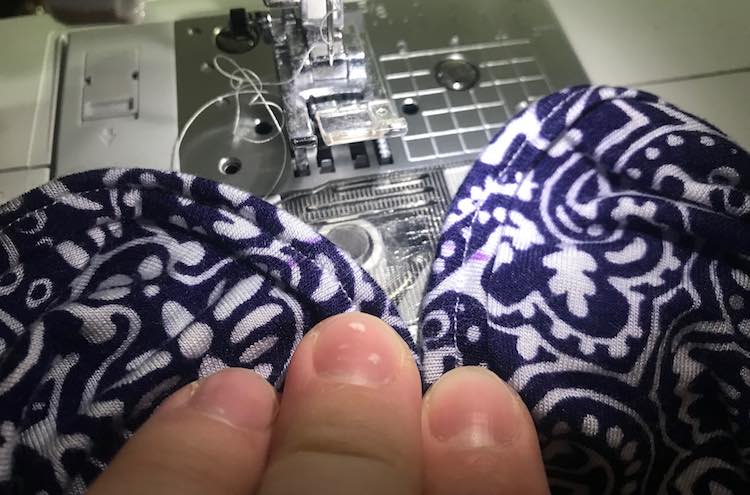
For the armholes I pinched the fabric underneath my arms to find out how low I wanted the armhole to go. I then used my sewing clip to hold the sides of the armhole together where I wanted the bottom of the new armholesleeve to be… it was simpler than using a sewing pin. After I added the clips to either armhole I then took the shirt off, flipped it inside out, and measured from the bottom binding of the armholesleeve up to where the clip was. One side was 4.75 inches while the other side was closer to 5 inches. Since I hadn’t added the shoulder ties to the shoulders, which I figured would cinch up the armholesleeve a bit, I decided to sew the armholes closed by 4 inches. If the shoulders were finished and didn’t need a shoulder tie then I would’ve gone with the smaller measurement or an average of the two. I then removed the clips, measured, and marked the fabric 4 inches up with my erasable ink pen.
I then used my sewing clips to clip the edges together from my mark down to the cuff.

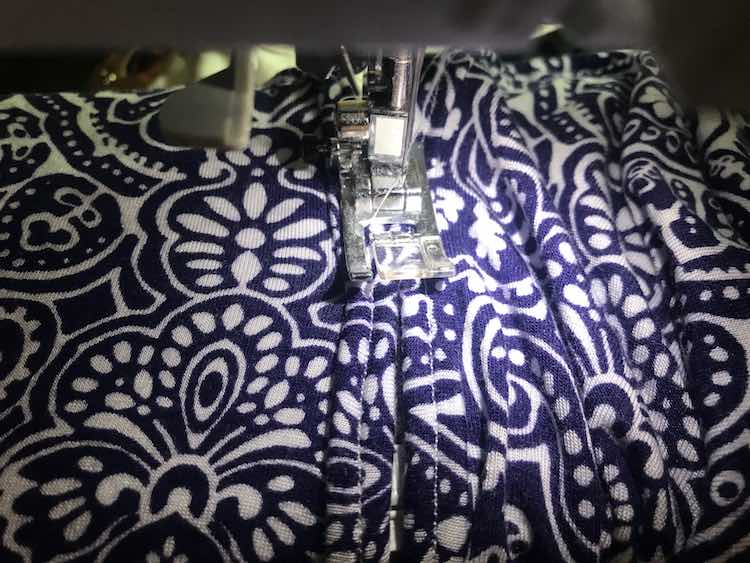
My next step was drawing a line from the top mark going down so the edge of the shirt would look more natural. This line is the route where I was planning to sew along. I then measured from the side edge of the shirt to the line at key points before transferring those measurements to the other side of the shirt and then drawing a matching line on the other side. Then I sewed along both lines to create the new armholes and side seam to my shirt.
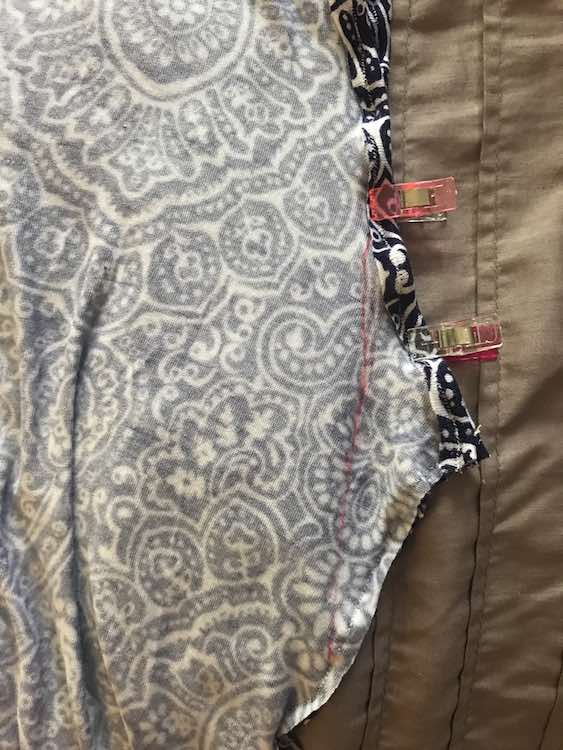
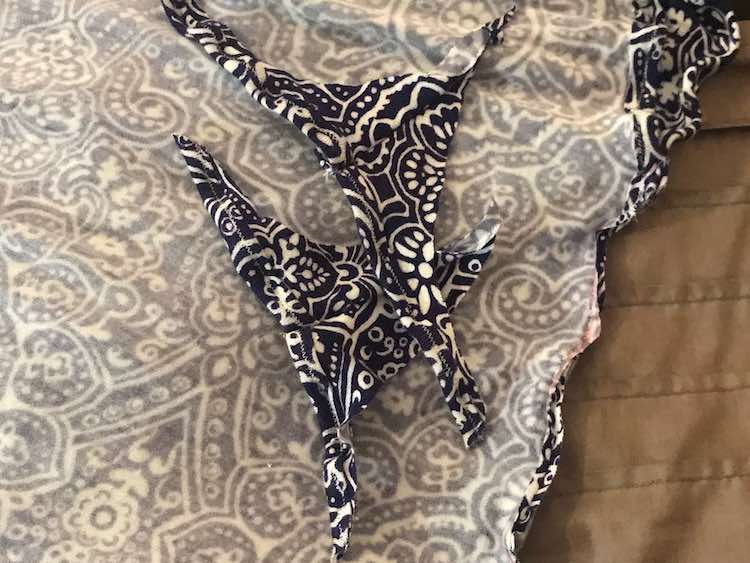
Then I tried on the shirt, confirmed I liked how it looked (so no more seam ripping or further alterations), and then trimed the excess fabric.
And then try it on again!
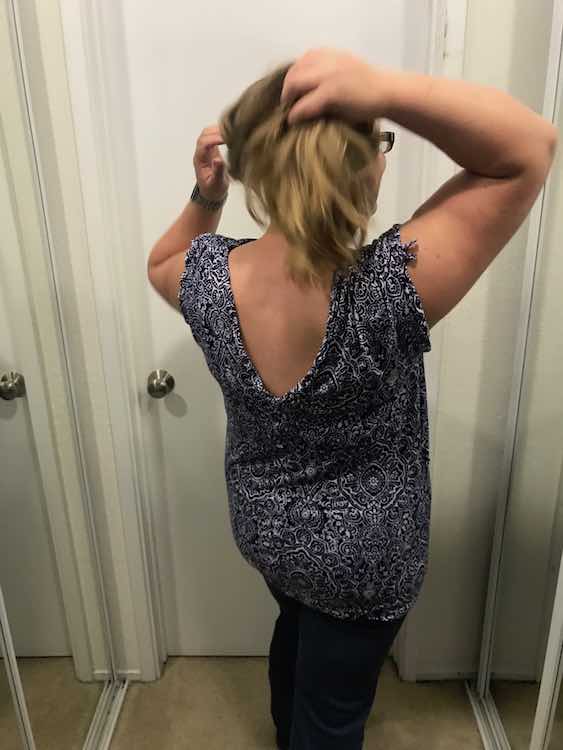
Shortening up the neckline
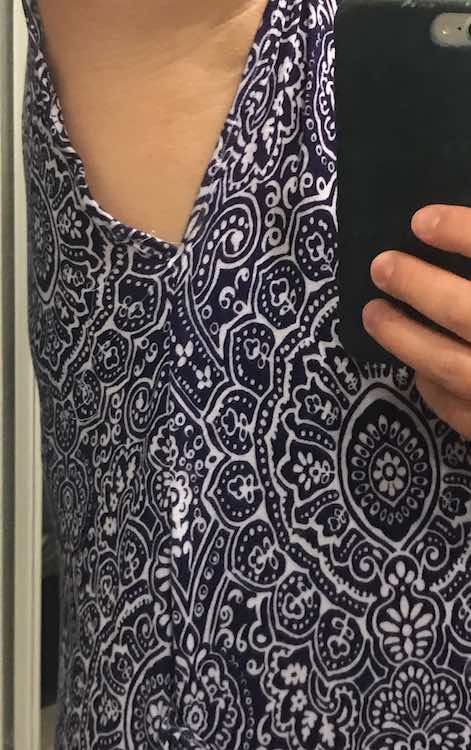
Like when I shortened up the armholes I started by trying on the shirt, I figured out where I wanted my neckline to end and used my sewing clip to keep track of the spot. After I took the shirt off I removed the clip, marked the fabric where the clip was with my pen, and lined up the neckline.
I figured the best way to close the neckline was with a seam where the binding was side-by-side rather than overlapped with a seam allowance. I looked up how to make abutted stitches on Sewaholic and then while holding the neckline binding next to each other I lined up my sewing needle over the marks made by my disappearing ink pen, and sewed the two sides together with a zigzag stitch while make sure to backstitch a couple times before continuing down the neckline. Once I got to the original bottom of the neckline I backstitched a couple times again and then cut my threads.
I decided to leave the back of the shirt the way it was but as the pattern had the same back as the front I could see following the same steps I used in the front if I didn’t want the back as open.
When you’re running out of fabric for your sash
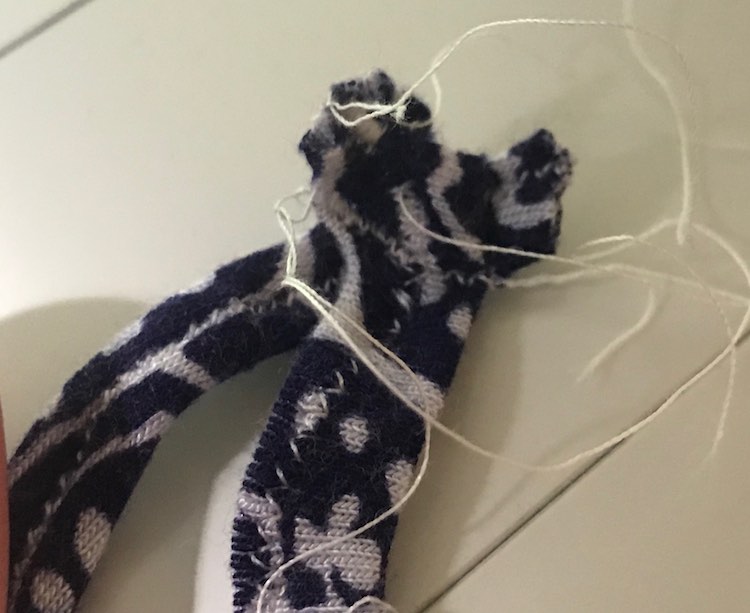
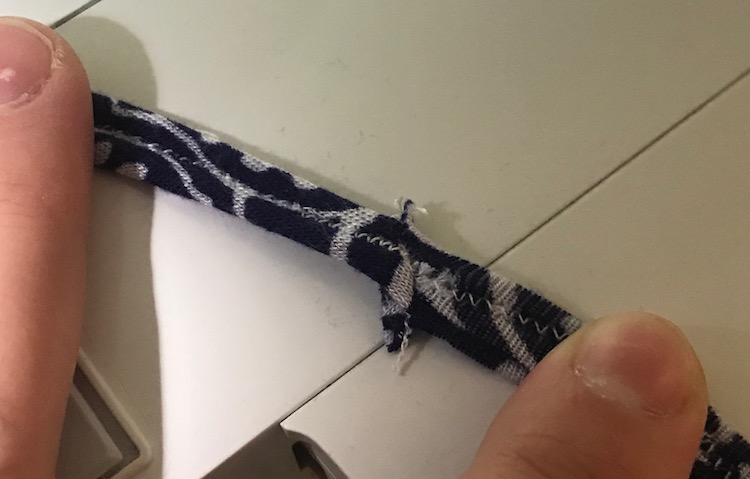
After cutting out the pattern I only had scraps left of my fabric so I didn’t have a continuous strip for the sash. I ended up not liking how the sash looked with my finished shirt, but figured I’d show how I made the sash in case you want to follow similar steps. I used my smaller strips of fabric I had leftover after cutting the pattern out and followed the directions included to make the multiple smaller sashes (shoulder ties and belt loops). I then sewed the sash pieces together in a similar method as when I combined strips to make bias tape. I lined the two sash strips overlapping each other at a 90° angle. I then sewed them together at an angle so the two long ends are on one side of the seam and the two short ends are on the other side. I then trimmed the excess fabric and threads before unfolding it. I repeated this one or more times to create a longer sash.

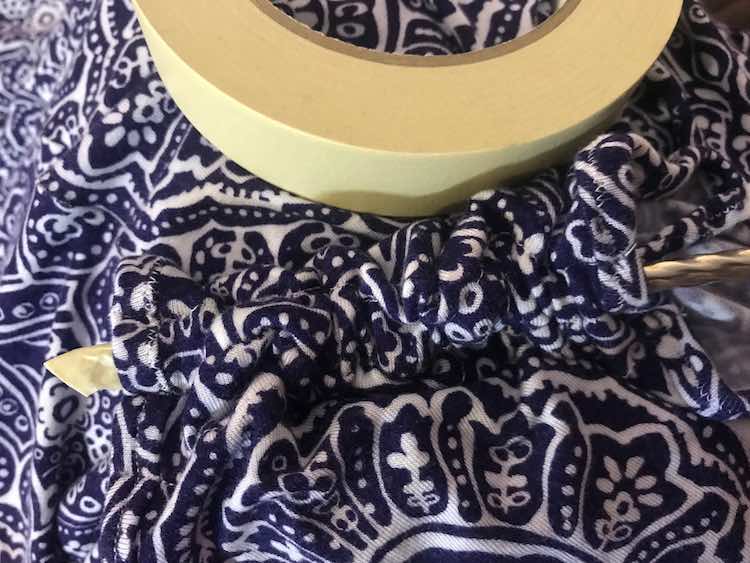
Hack: When you can’t find your safety pin to insert your shoulder ties
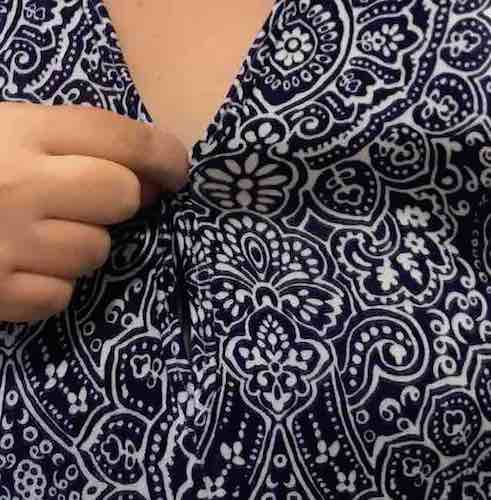
After I altered my shirt the only thing left to do was add the shoulder ties. I wasn’t sure where I put my safety pins and I really wanted to complete my shirt so I ended up grabbing the chopstick I kept by my sewing machine to put tight spaces right side out. I then used masking tape to attach the shoulder tie to the end of the chopstick and carefully brought it through the shoulder space. After the shoulder tie was finished being threaded I was easily able to take off the tape. It worked perfectly!

Finished Shirt!
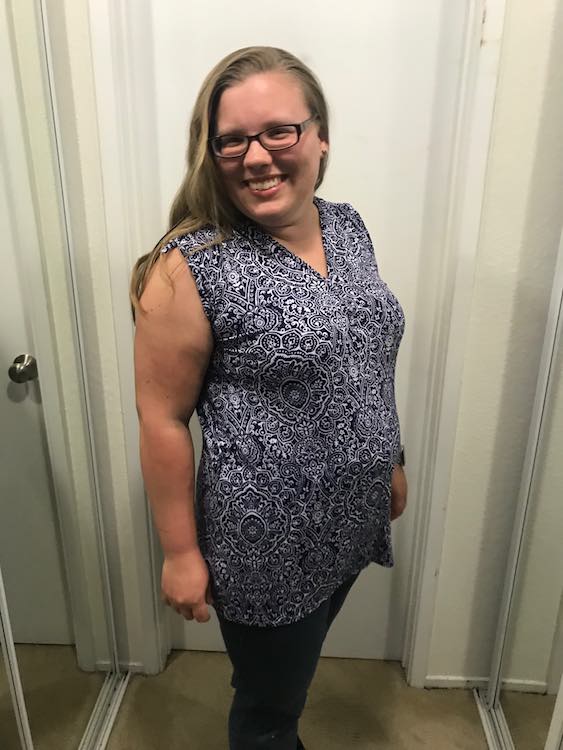
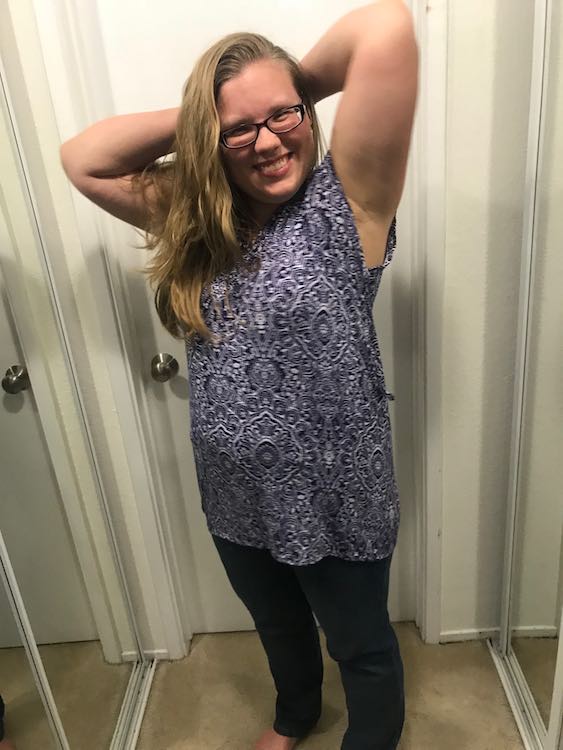
I hope this post helps you in case you also stretched your bindings. I’m glad I made the V for Vanilla shirt and it’s definitely on the make again list. The fabric I used is comfortable and the overall shirt offers the perfect balance between coverage and pizzazz. I can see wearing this (with sunscreen) while taking the kids to the playground or when I have the chance to go out without them.
EDIT: March 22nd, 2023:
I lost my comments when I moved my website over but I wanted to move Janet's question about this working on a shirt they purchased as Selma replied to her comment with
I am an experienced seamstress and I would work on the shoulders FIRST In some cases the only adjustment needed could be the shoulders. I see many 2x ^ 3x tops that are very big in the shoulders and under the arms. this happens when the width is needed in the stomach and hip area but not shoulders. Many times I will remove the sleeves and replace them to make a more narrow shoulder.
Let me know if these tips were useful to you and if there’s something else you want me to try out. You can reach me through the comments below, with a post on my Facebook page, or by tagging me through Instagram.