

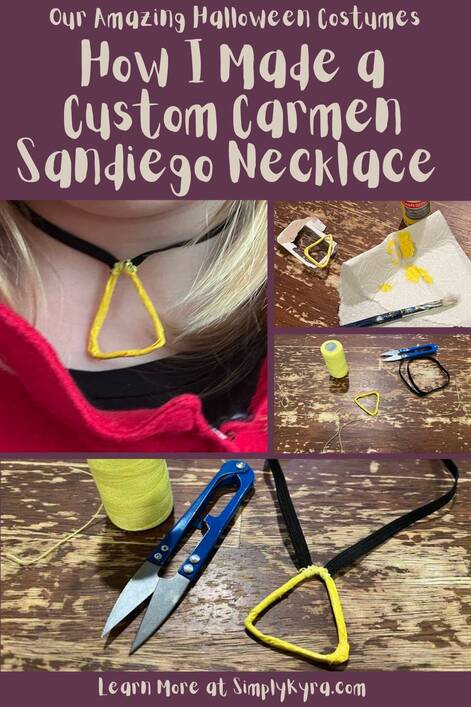
Our Amazing Halloween Costumes: How I Made a Custom Carmen Sandiego Necklace

For last year's Halloween Ada wanted to be Carmen Sandiego and I knew the yellow necklace was just as distinctive as the red jacket and hat and needed to be included to make the costume recognizable. After much back and forth I realized just how I could make the necklace and it was so simple! I absolutely adore how it turned out and needed to share with you in case you wanted to make the same or something including similar steps.
Materials Used
- Copper wire: I could see using floral wire or anything that would generate a skinny profile while holding it's shape. That said, if you're making a solid shape for the pendant a simple piece of cardboard might be even better.
- Elastic: I used a 1/4 inch black elastic I bought for sewing clothing that I realized would match the look of the costume and stretch over Ada's head thus making the project simpler
- Masking Tape: To cover up the wire, make it a bit thicker, and give a surface that's paintable
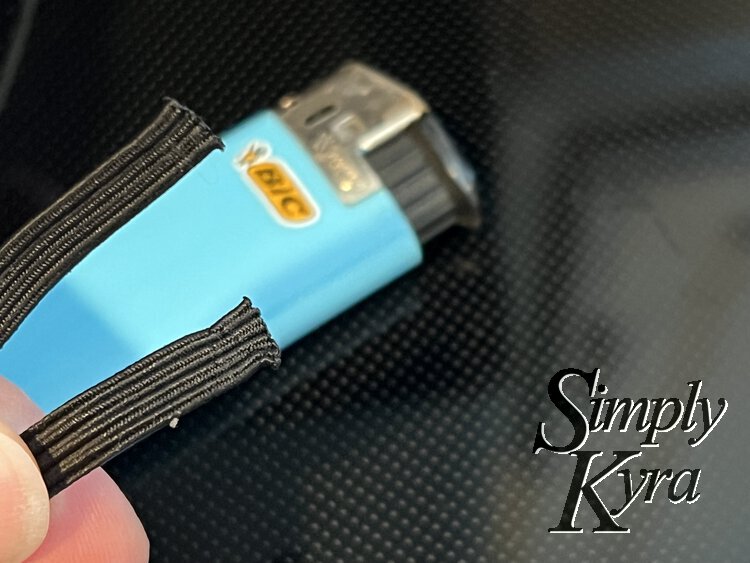
- Lighter: To melt the ends of the elastic so it doesn't unravel.
- Yellow Acrylic Paint: Chose a yellow kids' acrylic paint to make the pendant look closer to gold
- Yellow Thread: Thread used to attach the elastic ends to the pendant while the color was chosen to camouflage the thread by matching the pendant
- Sewing Needle: To hand sew the pendant to the elastic using the thread
How I Made It
While creating Zoey’s black cat tail I realized I could use the same copper wire I used to shape the tail as a base for Ada’s Carmen Sandiego pendant. That thought was the basis of this entire process and I jumped in immediately as the wire was already out.
Pendant
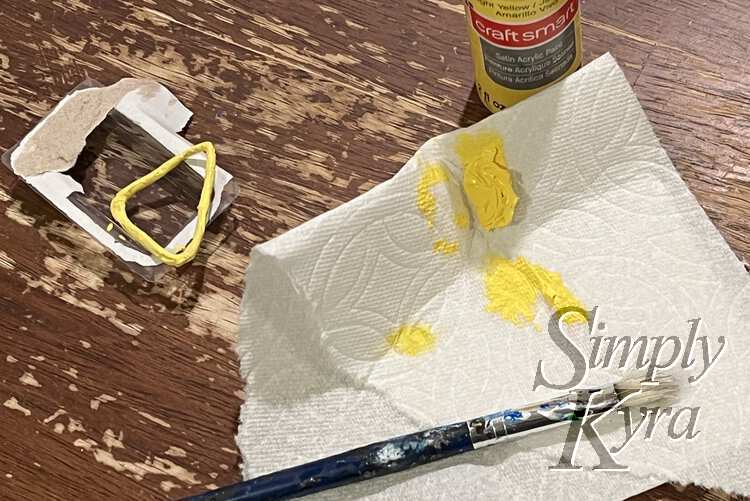
To create the pendant I unrolled some of the wire from it's spool and folded it several times to make a loose triangle. Once I saw exactly how much wire I needed to fashion the triangle I cut it from the spool and fiddled with it's shape a bit to make it better. I was going to leave the pendant like this and count the copper as gold-ish but then realized I wanted the pendant to be both bigger and bolder so I next wrapped the entire thing in masking tape and painted it with bright yellow acrylic paint. I set this aside to dry and later added a second coat of paint making sure to get any part that had come off in the first round.

Chain
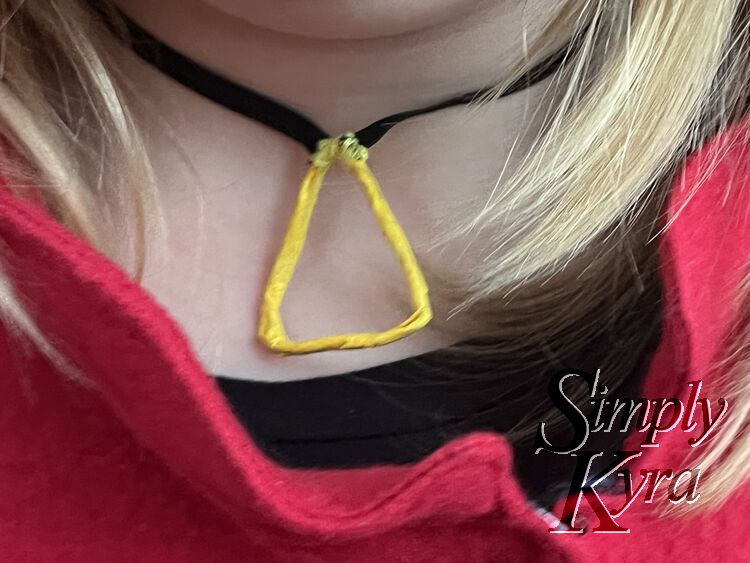
With the pendant finished and drying it was time to figure out how to turn the pendant into a necklace. The image of Carmen Sandiego showed a black chocker so I realized I could simply use black 1/4" sewing elastic. This way it matched the image and could stretch over Ada's head without a chain fastener making the entire project simpler and stronger.
When Ada was next available I measured the elastic around her neck, cut the length from it's spool, and confirmed it worked by holding the ends in place and stretching it over her head. With that figured out it was time to figure out how to close the elastic. At first I was going to thread the elastic through the pendant and then sew the ends closed. One issue that popped up while doing that; however, was the elastic kept unravelling and thus the ends kept coming apart. I knew if I couldn't keep it together while stitching it closed it wouldn't hold up to wear and tear so I had to come up with a solution. I decided to grab a lighter and melted either end so the threads were fused together and wouldn't unravel again.
While melting the ends I realized that the pendant wouldn't lie flat if I proceeded with the current idea. Additionally the sewn seam might rub Ada's neck or rotate until it's visible by the pendant. Instead I realized I could simply stitch either end of the elastic to the pendant itself thus elimating the seam and hiding the hardened ends. I switched my thread to yellow to match the pendant and got to work sewing either end of the elastic to either side of the pendant making sure the elastic wasn't twisted and there was enough thread to cushion the hardened ends and stay secure.


I love how this turned out! Carmen Sandiego herself seemed to have hers more like a chocker (or attached to her top?) but I left Ada’s elastic a bit looser so it wouldn’t be too tight and this way she has room to grow if needed.
The Final Necklace
And with that the necklace was done and looked great. I especially love how it stretches to go over Ada's neck and how I don't have to worry about a chain breaking or the fastener giving her issues.
Ada absolutely loved the necklace and I'm so happy I came up with a simple way to make it. She's worn it a couple times since then but it then disapeared. I guess we'll see if it's still a favored jewelry item in the future when it gets found again. This necklace combined with the classic red jacket and hat truly made the entire costume... which I'll post about closer to Halloween.
Have a great day! And I'd love to hear from you in the comments below if used these instruction to make your own necklace or something else. Have a great day!
If you’re interested in getting any of my future blog updates you can join my email list located right under the search bar or underneath this post.
Did this save you time?