

Learn How to Access Your reMarkable Through the Command Line

Back before Christmas Matt started getting ads for the reMarkable2 which is marketed as the next-generation paper tablet that allows you to replace your notebooks and printed documents with the only tablet that feels like paper. He finally had the opportunity to show me and I immediately fell in love with it. After looking through the website we knew exactly what it was and what it wasn’t. It was a way to have the feel of writing on paper with no glare or backlight to tax your eyes just like with a real paper-based notebook. It also offers the computer side of organizing and saving your files. You can easily export your files by using the reMarkable app on your other devices or by emailing them as a PDF or PNG, but the device itself has no support for applications turning it into a blank notebook allowing you think without any distractions getting in the way. I loved this idea and jumped in to order it. I was part of the fourteenth batch estimated to come out in January; although I assumed it wouldn’t come until the end of the month so I was pleasantly surprised when it arrived within the first week. I immediately loved it.

Overview
Before going further I wanted to mention that on Facebook there’s a user group for the reMarkable that I joined right after I ordered it. Within the group there seems to be hacks to access and alter the reMarkable (which may void the warranty) along with sharing files, and, unfortunately, lots of complaints about the device and/or the company’s service. Although I’ve found several useful tips through the group it also makes for an overall negative experience when scrolling through the group and made me kind of regret buying my reMarkable2 before it had even arrived. Some of the early adopters, who have the first reMarkable, said the service was great before they rolled out the second version creating a backlog in service. I haven’t needed to use reMarkable’s customer service so I can’t personally comment on it. That said I felt the need to mention this group and what was said in it in case you are debating purchasing this device yourself.
Anyway, I’ve been loving my reMarkable2. One of my main reasons I bought it was as a replacement for the Happy Planner I’ve been using over the last couple years. With all the staying at home in 2020 I ended up altering how I used my planner by using each daily slot as a spot to write down all the things I accomplished that day along with it’s previous purpose of recording any future appointments. One of the default templates through the reMarkable gives me almost the same layout so I can easily use it as my planner without making any big adjustments. Additionally, you’re able to change the template for each page so if during the year I change my planner style, for instance to a bullet journal, I can easily adjust the current, and future, pages without having to adjust the past pages and stay within the same notebook. In addition to the planner the reMarkable also allows me to upload and mark any of my PDFs. This means I’ve stopped printing my monthly workout calendars, from The Balanced Life, and instead upload each month’s calendar, as it comes out, onto my device so I can edit it directly on there instead. Plus, surprisingly, the reMarkable has gotten me to start doodling again as there’s no worry about whether I should save the finished drawing or even where to store it. Overall, I’m really happy with my purchase so far. That said I didn’t create this post just to tell you about the reMarkable. Since reMarkable uses a Linux-based operating system you’re also allowed root access, full privilege, to your device’s operating system. This allows you to access your device, via ssh, to change out, delete, or add files to your system. I don’t want to fully hack my device but I wanted to share the minor things I’ve done to my reMarkable in case you’re also interested in doing the same.

Accessing Your reMarkable via the Command Line on Your Mac
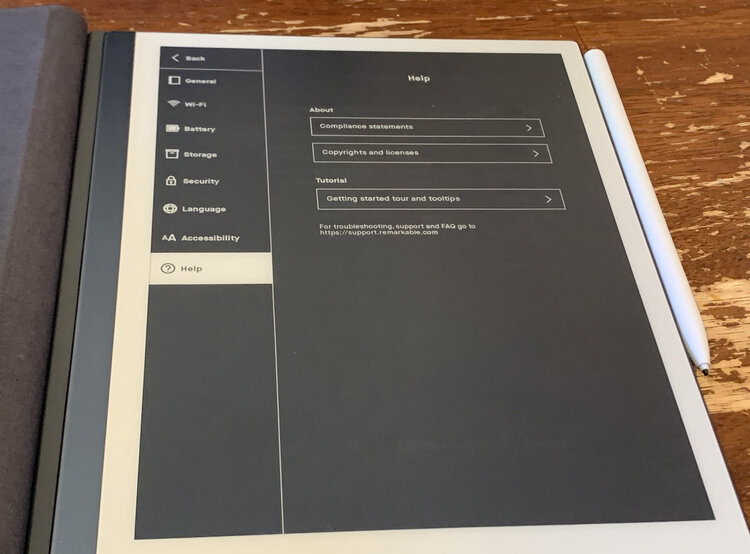
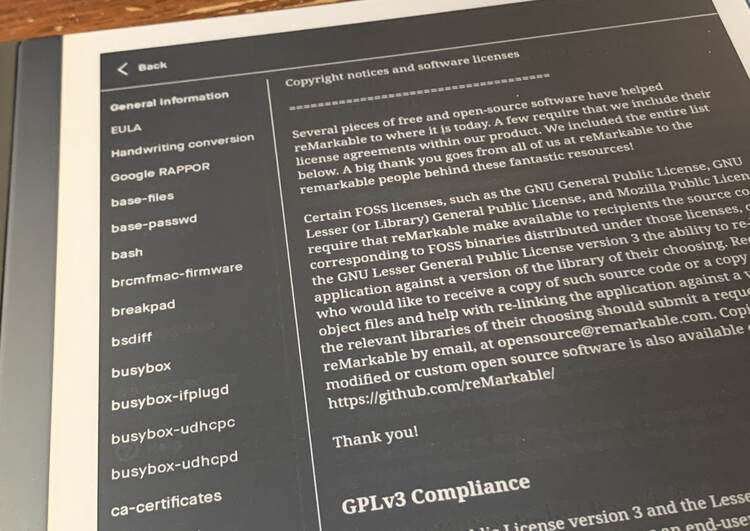
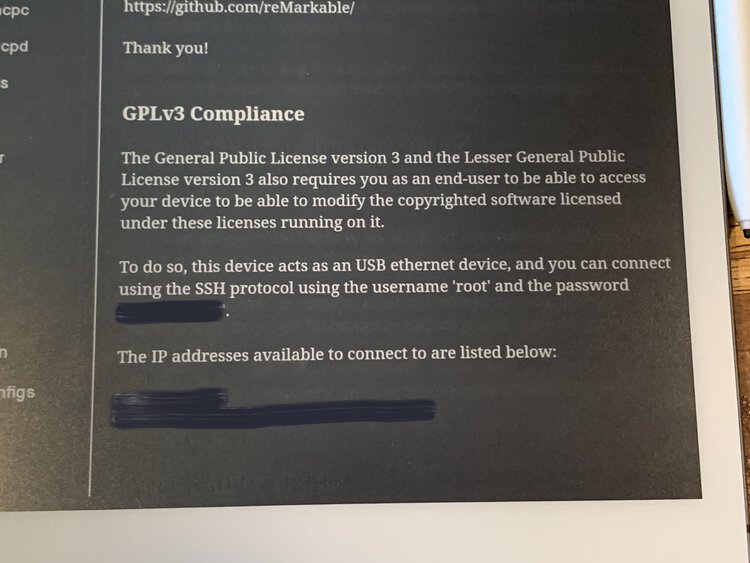
Before beginning you’ll need to check what your device’s username, password, and IP address is. To find it you go into the Settings found at the bottom left side, choose Help from the bottom of the menu that just opened up, click the second field Copyrights and Licenses near the top, then scroll to the bottom section, labeled GPLv3 Compliance, where you’ll see your username, password, and the IP addresses available to connect to. By default, for me, the username was root but the password is unique to you.

Quick aside: I’m not using the default version of my terminal on my Mac. I’ve since installed fish and have played around with it’s appearance a bit. Figured I’d mention in case my terminal looks different from yours.
After finding the information I needed I next went onto my computer, connected the device with the USB charging cord that came with it, and then used ssh to securely log into my reMarkable2 using the username (root) and IP address (renamed below to XXX.XXX.X.XXX) I just found. Technically, since I connected my reMarkable2 to the same WIFI my computer is connected to I don’t need to physically connect the two devices before doing this; although, I do need to unlock my reMarkable2 first. To login to my reMarkable2 I type, within the terminal, this:
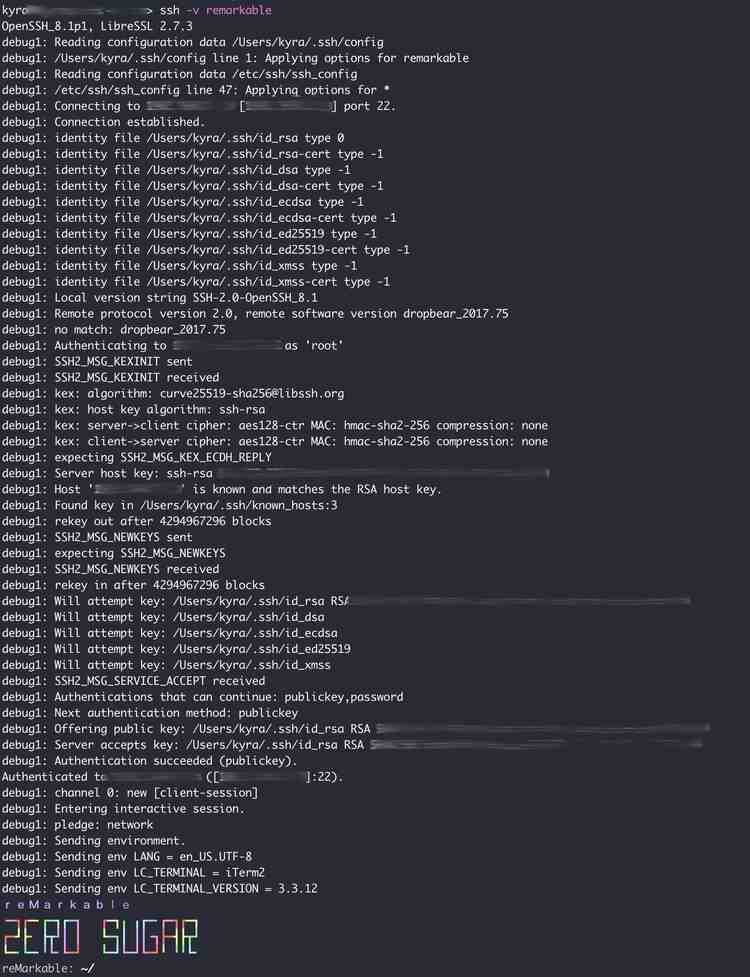
> ssh root@XXX.XXX.X.XXXIf you want to watch how it connects you can add -v, for verbose, to see the debug notes as it connects. To do this it looks more like:
> ssh -v root@XXX.XXX.X.XXXRemember this won’t connect if your device is currently sleeping. You’ll need to unlock it first so the connection can be made.
ssh statement looks different here as I created a shortcut first which I’ll go into below.You could leave it like this and log into your reMarkable this way each and every time or you could take it a step further and streamline the process to make it simpler for you. Both of these methods, below, use the SSH directory, also called a folder, that is created on a computer when the first ssh command is first run. Since you just connected your computer to your reMarkable via ssh it should exist. If not you could always create the needed directories. I found this article on Knowledge Base that explains how to use an SSH config file if you need more help than what I wrote below.
Skip the Password by Using Your Public Key
To make this connection process simpler in the future I shared my computer’s public key to my reMarkable2 device so I wouldn’t need to give it my password each and every time I wanted to log in. I started this by going into my .ssh directory on my computer and copying my public key to the clipboard. Even though your SSH directory may already be created you will still need to generate your own key if you haven’t already. If you need more information about generating keys on your computer you can always check out GitHub’s Generating a new SSH key and adding it to the ssh-agent article. Since I already had my public key I simply did this:
# Move to the right directory
> cd ~/.ssh
# Read and show you your public key from the file (technically not needed)
> cat id_rsa.pub
# Pipes the previous command into your clipboard
> cat id_rsa.pub | pbcopy
I then connected to my reMarkable2 device, navigated into it’s own .ssh directory, used vim (you can use your favorite text editor) to create and open a new file called authorized_keys, pasted my public key inside of it, and then saved and closed the file. This is what I put into the terminal before the file opened:
# Move into the right directory
reMarkable: ~/ cd ~/.ssh/
# Creates and opens the file named authorized_keys
reMarkable: ~/.ssh/ vim authorized_keys
Now when I SSH into my reMarkable2 from this computer in the future I’m not asked for a password as my computer’s public key is now shared with my reMarkable2.
Forget the Username and IP Address by Creating a Shortcut
Another way I made it quicker for me to log into my reMarkable2 device each time was by creating a shortcut that remembered both my username and IP address that I needed to connect with. To do this I returned to the .ssh directory on my computer and edited the config file to include the required information. On my computer I hadn’t added anything to this file before so it was empty. To create this shortcut you need to give it a name, I chose remarkable, along with the hostname (IP address) and the user (username). This is what I added to my config file:
Host remarkable
  HostName XXX.XXX.X.XXX
  User root
This means that I don’t have to remember the IP address and username whenever I log in with my main computer. Instead, now, I just type:
> ssh remarkableWhat if Your Terminal Freezes So You’re Locked Out?
One issue, that I noticed several times, was that when the reMarkable goes to sleep the connection you have becomes unresponsive. You can’t use exit or control + c, like I have in the past, to close the connection so your terminal is completely frozen. The first couple times it happened I closed the whole terminal tab and started a new terminal session to reconnect. Then Matt mentioned what I could consecutively press a couple buttons the next time it happens and it would close the ssh connection and return the terminal to where I was before that connection was made. All you need to press are three little keys: Enter ~ . With, of course, no spaces between them.
This was incredible! And apparently there’s a whole list of supported escape sequences you can use through the terminal. To check them all out all you need to enter are ~? and the list pops up. Apparently, you don’t always need to press Enter first; however, these escape commands can only be recognized right after a newline character so it’s better to always press Enter first just so you know for sure the escape will work. Here’s what I typed while logged onto my reMarkable2 and the resulting list of supported escape sequences I got back:
~?
Supported escape sequences:
 ~.   - terminate connection (and any multiplexed sessions)
 ~B   - send a BREAK to the remote system
 ~C   - open a command line
 ~R   - request rekey
 ~V/v - decrease/increase verbosity (LogLevel)
 ~^Z  - suspend ssh
 ~#   - list forwarded connections
 ~&   - background ssh (when waiting for connections to terminate)
 ~?   - this message
 ~~   - send the escape character by typing it twice
(Note that escapes are only recognized immediately after newline.)
Whether you have a reMarkable device or are debating purchasing one I hope this helped you out. I wanted to record what I did both to help myself in the future, if I forget, and to hopefully help someone else. Let me know if this was helpful to you or if there’s something else you’re curious on how to do in the comments below. I truly hope your week is going well.
Update and Edits
I’ve since come out with a video that combines several posts together including connecting via SSH, uploading the templates manually, and my bash script. You can find it here. If you’d like to simply update your sleep screen image here’s that post.
March 22nd, 2023:
When I moved my website over I lost all my comments. As such I chose to move over the ones that may be helpful to you.
Back in October of 2021 Yunxiao Zhai realized the templates don't show up on the Mac Desktop App and then decided, once learning that reMarkable updates erase the custom templates, that they will
backup the .png and .json into my git repo for easier scp later.
Back in August of 2021 Mavrick tried to SSH into their reMarkable on their PC and received ssh: connect to host xxx.xxx.x.xxx port 22: Permission denied. They never commented again so I don't know if they fixed it but I had replied with
Does it prompt for a password? Have you configured SSH to work with a public key before? It may be a local configuration issue. For me, on Windows, the first time I connect it gives more output before complaining about the authenticity and has me confirm I want to connect and adds it to the list of known hosts before asking for a password.
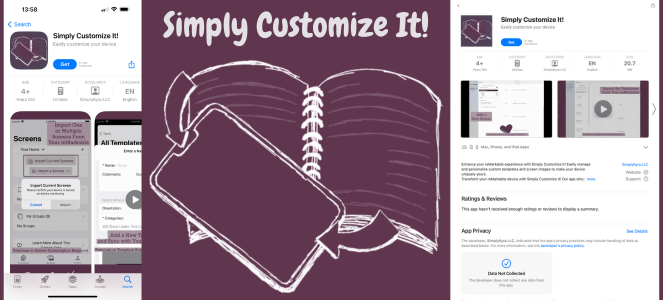
Simpler with an Apple App
Update: I've since come out with an iOS/macOS app that you can use to change out your templates and screens with a simple button press while remembering them for the next update. The first step is simply entering this information and the app connects for you. More information can be found about it here with a direct link to the App Store here.
If you’re interested in getting any of my future blog updates I currently come out with a new one every Wednesday and share them to my Facebook page and Instagram account. You’re also more than welcome to join my email list located right under the search bar or underneath this post.
Did this save you time?