
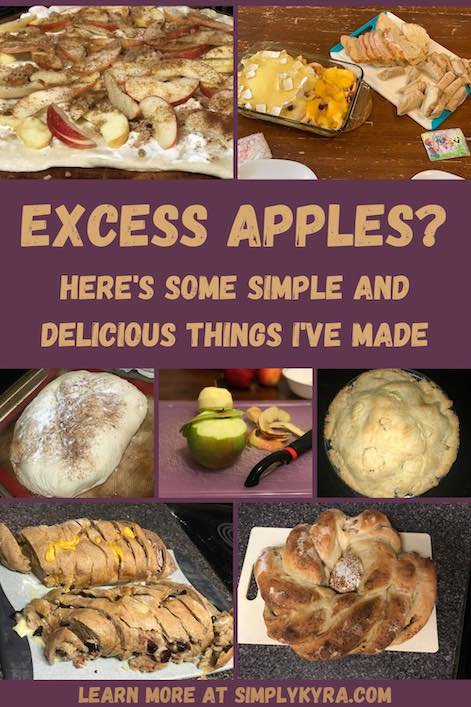
Excess Apples? Here's Some Simple and Delicious Things I've Made

With the smoke covering our area over the last month and the heat wave finally breaking my thoughts have started turning more towards autumn. Last year, and again a couple years before that, we went apple picking and it was amazing! Both times I ended up spending about $65 on apples and once we got home I’d feel like I needed to do something with them right away. I’d then spend the rest of the weekend making applesauce, apple butter, apple pie filling, dehydrated apple rings, and apple leather with the sauce and butter. I also remember, fondly, back in Edmonton buying a case of apples at the farmer’s markets, a smaller amount than my current apple picking adventures, so it was much simpler to buy and not as overwhelming once I got home. Anyway, with Covid-19 around I don’t know if we’ll be apple picking this year but I figured, just in case, now was the time to use up the last bit of the apple butter in my freezer and, more importantly, the frozen apple pie filling. Thinking about apples made me go through all my old apple-related photos and I decided I wanted to share these apple-y ideas with you in case you’re also debating buying apples or might already have too many on hand.
Once I Bring Home Lots of Apples…
Every time I buy a large amount of apples I go through the same process. I start by coring and cutting them up into two large pots to make apple butter and applesauce. Once the pots are simmering away on the stove I next peel, core, and cut up more apples so I can freeze batches of apple pie filling. Then, finally, I try to come up with ways to use the last of the apples as I start to lose steam and stop caring. Sometimes I use them all and sometimes I bring the numbers down enough so the remaining apples can easily fit in the crisper drawer in the fridge for the next couple weeks. I think last year I finally just started freezing plain peeled and sliced apples without doing anything special with them first since my pots were busy and I’d run out of ideas.
Fresh Apples
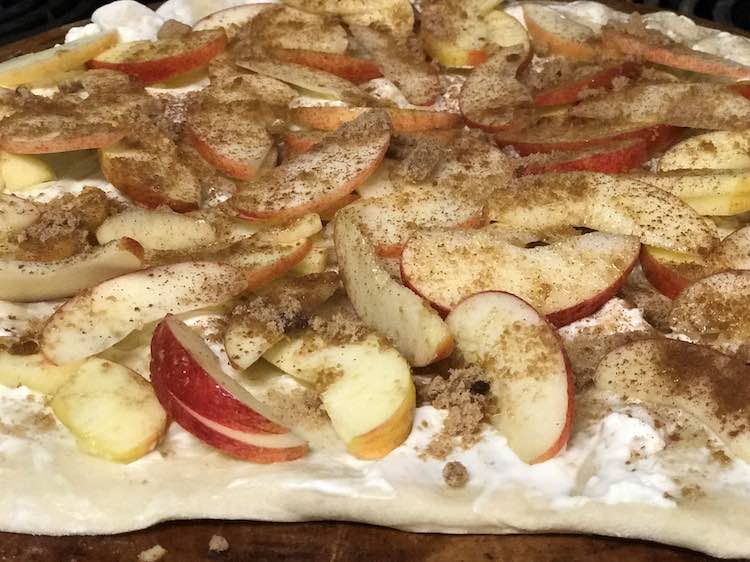
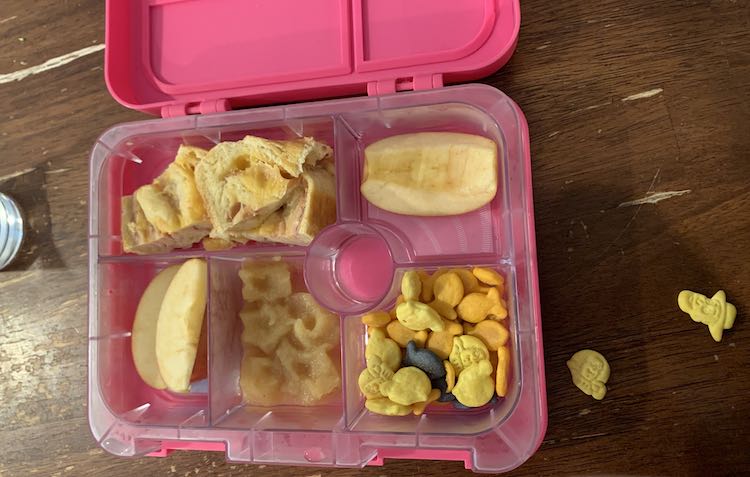
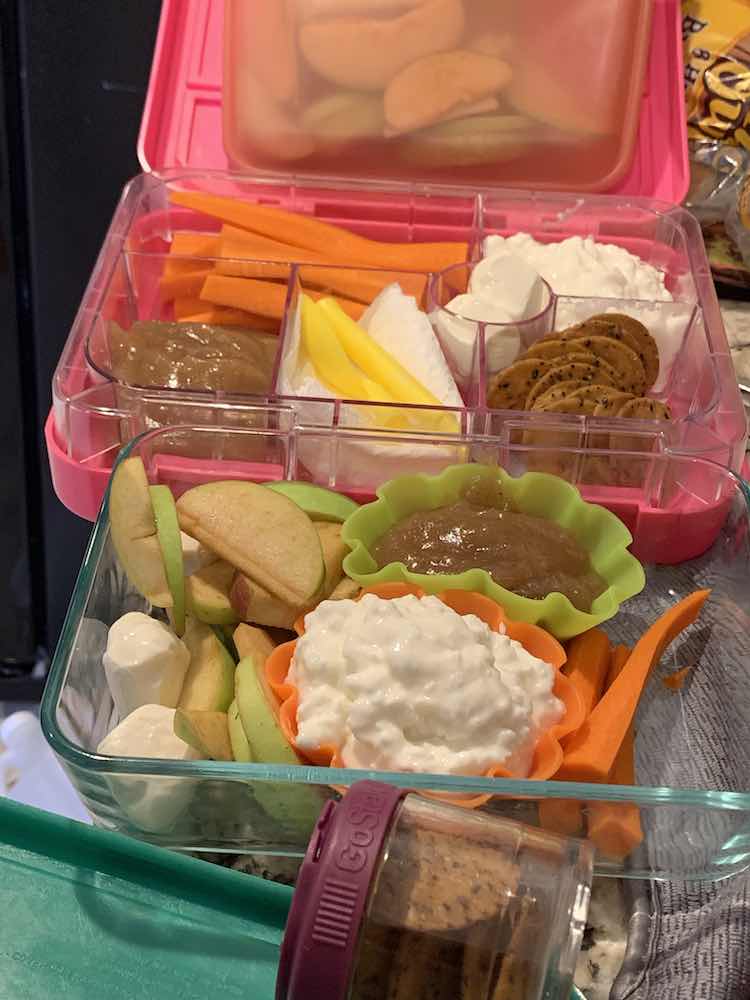
I love apples! They’re great by themselves, they’re awesome sliced up on a saucer with cheese and maybe crackers, and they’re also great dipped in a fruit sauce or nut butter. That said sometimes you may have too many apples to know what to do with and thus I created my apple pie pizza… though typing this is making me want to make it again. To make the apple pie pizza I started by taking a portion, somewhere between a third and a half, of my homemade pizza crust and rolled it out so it was flat. I then baked it at 425° Fahrenheit for five minutes, took it out, smeared cream cheese all over it, spread out sliced apples, and then sprinkled all of it with brown sugar and cinnamon before tossing the pizza back into the oven. The final pizza was amazing!

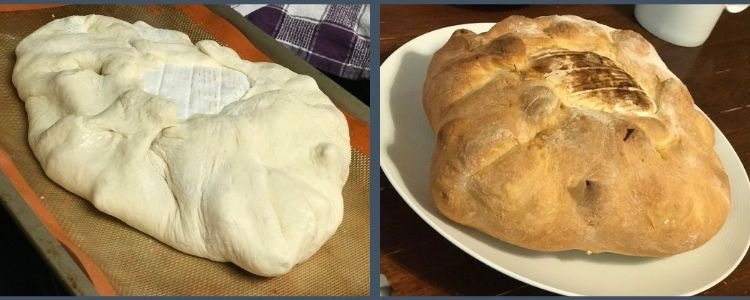
If you prefer bread over pizza you can always roll out some bread dough, here I used my breadin5 dough, and add some apples to it. In this case I took the rolled out dough and started by sprinkling it with bits of butter, then peeled apple slices, and finally cinnamon; kind of like the pizza above. I then grabbed a wheel of brie, placed it in the center, and brought the dough up to the brie’s edge. Once I was sure the dough was firmly in place I put a towel over top of it and let it rest as the oven preheated. I then baked it until the bread was done. It was perfect! You could simply slice it like a pizza, so everyone gets some of the ooey gooey brie, or break open the center, tear off bits of the bread, and dip each bread bit into the center.
Apple Butter and Applesauce
A while back my mom bought me the Better Homes and Gardens New Cookbook, my very first cookbook, although with so many recipes online now I find I use it less and less each year. That said whenever I buy a lot of apples I always default to making the apple butter and, sometimes, apple sauce using that cookbook. For apple sauce you essentially combine cored and chopped apples, water, sugar, and cinnamon in a pot and cook it for under half an hour or so; long enough for the apples to soften and so you can easily mash them up. Apple butter is similar but uses more spices and is boiled for longer so it gets stronger in taste and thicker in consistency. Apple butter is divine when topped with cream cheese on toast. The recipe I use in the cookbook boils the apple butter on the stovetop and calls for apple juice instead of water so the apple taste is more concentrated, although I use water, but I found this simple pressure cooker or slow cooker apple butter recipe, on BHG’s website, that uses water in case you’re interested. Some recipes call for you to peel the apples and then you can use a potato masher or something to break up the softened apples. I’ve heard that most of the apple nutrients are in the skin, although I just googled that and realized that that may have been disproved, and I’m a bit lazy so I normally just core and chop my apple but leave the skin on when making applesauce and apple butter. That way when the apples are softened enough I just use my immersion blender to break it all up for the perfect sauce.
Once the applesauce and apple butter are made you could can it all in mason jars. I did this once or twice but when we moved, about five years ago, I chose to get rid of my canning equipment so I now put it in canning jars, washed out jam jars, or other containers and freeze most of it so it lasts longer. I normally start using the containers I don’t need right away but as I run out I start grabbing my regularly used containers or even ice cube trays. The kids love the cool shapes you get from the silicon ice cube trays and, once frozen, you can pop the shapes into a freezer bag so they last longer and you can use the ice cube trays for something else.
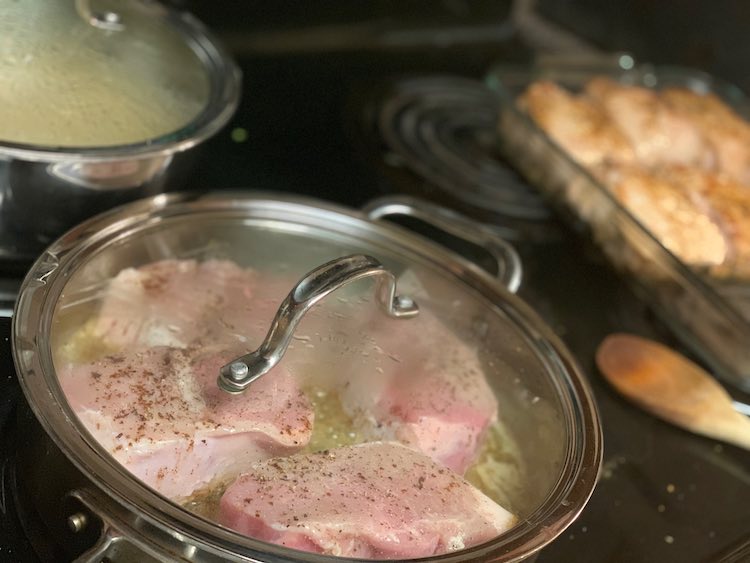
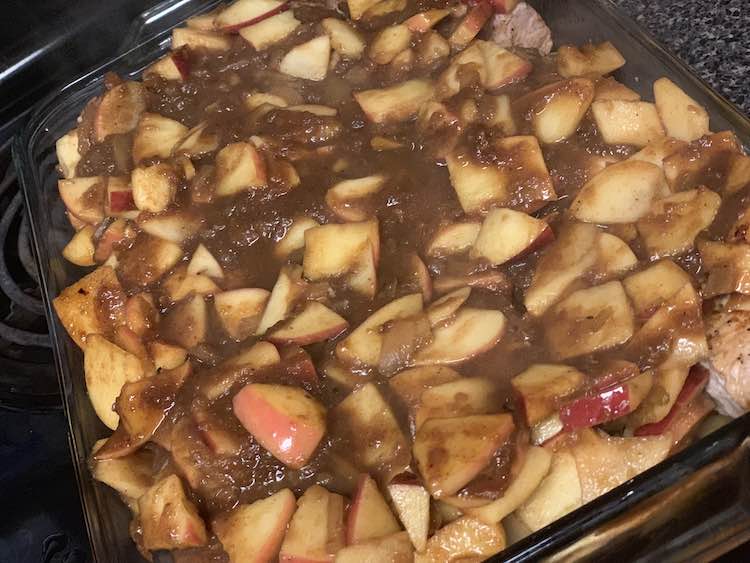
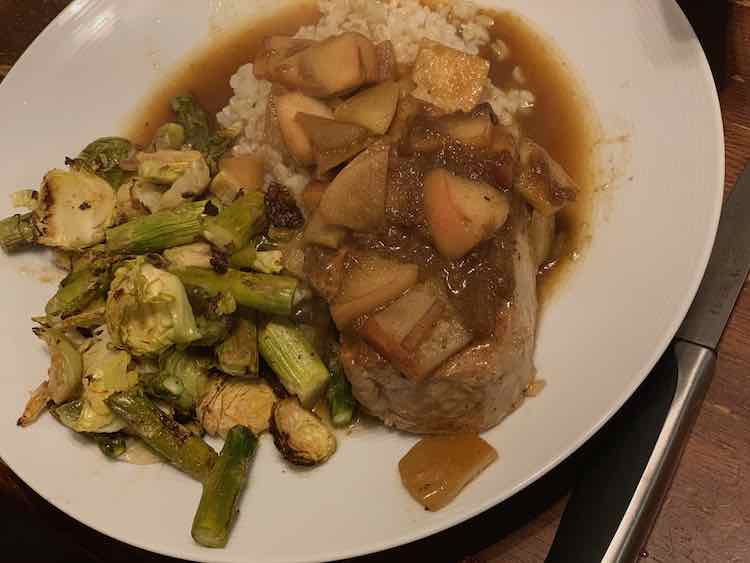
If you have extra apple butter or applesauce on hand that you want to use right away you can easily dehydrate it to make apple leather or fruit roll-ups. I just looked around online and found this recipe by Baked By Rachel but I essentially just pour some apple sauce or apple butter onto a lined cookie sheet and bake it for awhile at a low temperature until it’s tacky and no longer wet… I often over-analyze and bake it for too long though. Additionally, both applesauce and apple butter work great on savory recipes like pork chops. This time, pictured below, I seasoned and seared both sides of some pork chops in my frying pan with seasonings and butter before placing them in a casserole dish. I then topped the pork chops with a mixture of apple butter and diced apples before covering it tinfoil and baking it until the pork chops were done. I kind of looked around online and combined a couple different recipes that I had screenshots of but didn’t record where they were from so I don’t have anything exact to share with you.
Apple Pie Filling
Anyway back to my original batch of apples. Once I fit as many apples as I can into my two biggest pots, for the apple butter and sauce, and have them simmering away it’s time to figure out what else I should do with any of the leftover apples. My earlier default was making apple pie by peeling, coring, and slicing the apples and, once you have enough, mixing all the other ingredients in and throwing it between two pie crusts. I can’t remember where my previous recipes were from but I’m guessing they were from the Better Home and Gardens cookbook so I found a listing of apple pie recipes on their website just in case you are also interested.
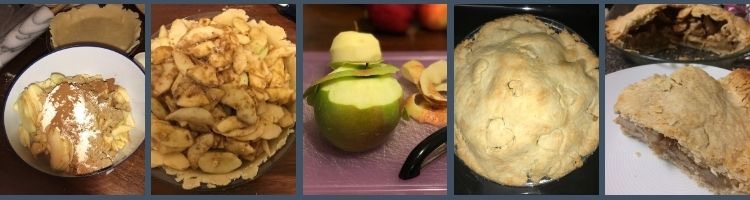
Lately I haven’t made any pies but that hasn’t stopped me from making apple pie filling. Last year I either tripled or quadrupled a batch of the apple pie filling, with added craisins, before splitting the contents into individual freezer bags. And there the pie filling stayed until I was ready to use it… which ended up not being on actual pies.
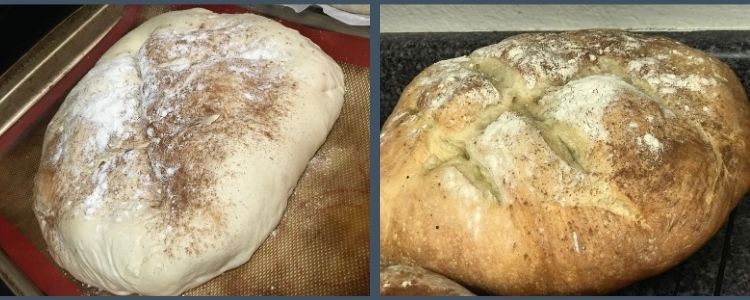
The first thing I did was take the apple pie filling, defrost it, cut up some brie, mix it in, and add it to bread for an amazing dessert-y bread. To do this I used my premade breadin5 dough, previously posted about here, rolled it out into a rectangle, spread the filling over it, rolled it up to make a loaf shape, and tucked the ends under so the filling wouldn’t fall out. I then baked it in a preheated oven until it was done. This would’ve been great without the cheese too.
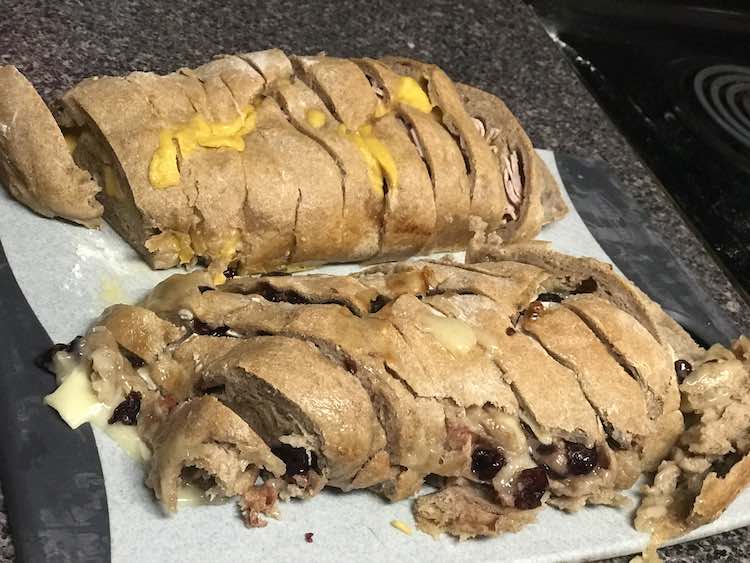
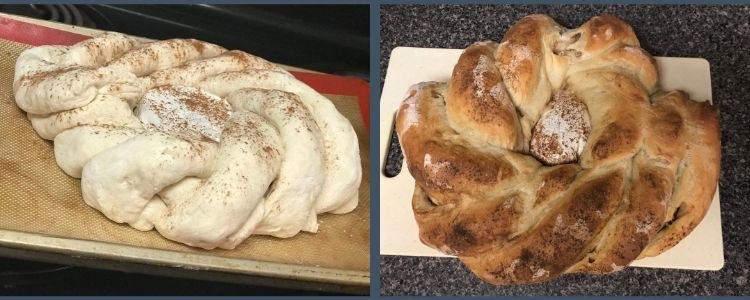
If you’d prefer not to roll the filling with the dough I’ve also created an apple pie bread by rolling the dough out, dumping the pie filling in the center, flipping the sides of the dough up to cover the top, and then flipping the entire loaf over so the edges stay in place. That time, when I made it, I made two different loaves so I could bake the first right then and there while the second loaf was placed back in the emptied plastic container, already on the parchment paper, to wait to be baked the next day.
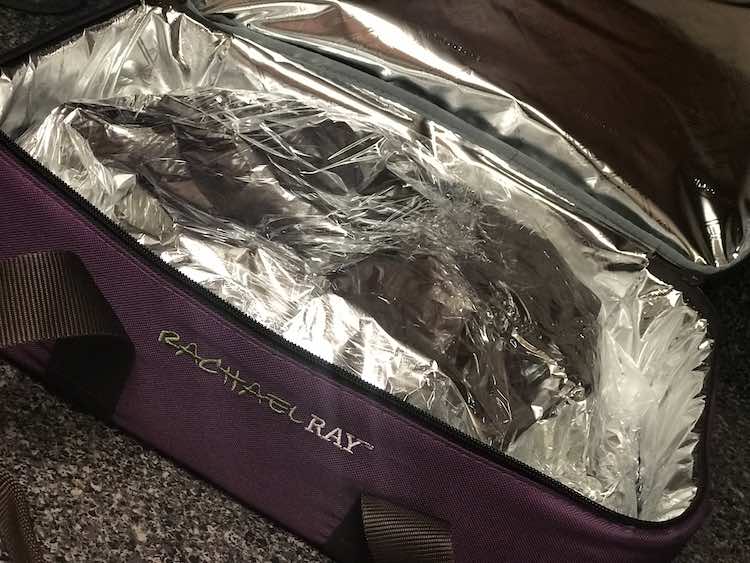
As an aside whenever I wanted to take my freshly baked loaf with me to another location I’d keep it on a cutting board, for stability, and wrap it in tinfoil, as it was still warm, and then plastic wrap over that to keep it sealed. I would then put it into an insulated casserole carrier.
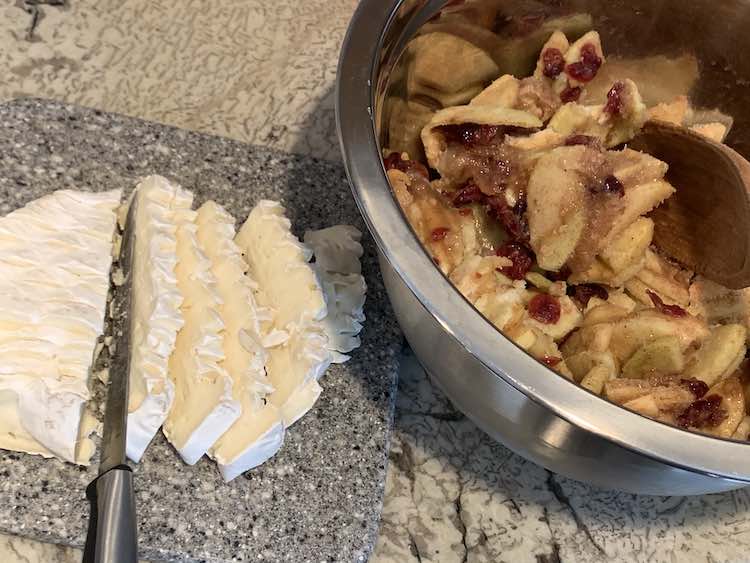
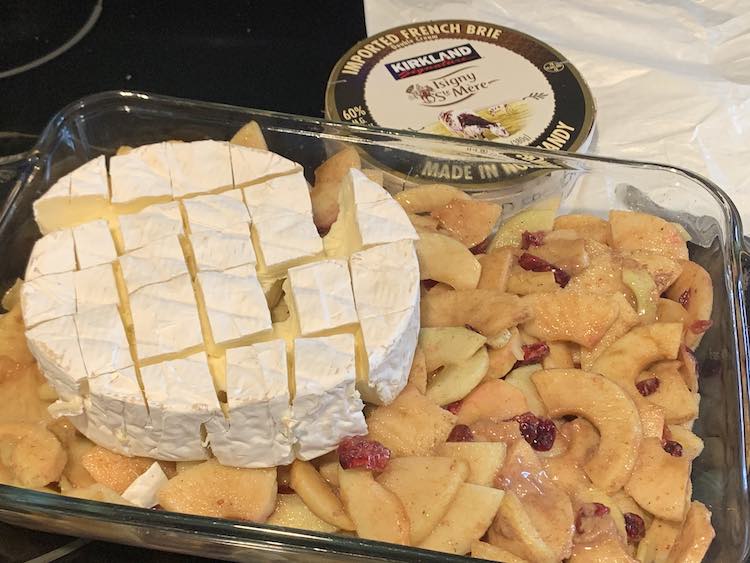
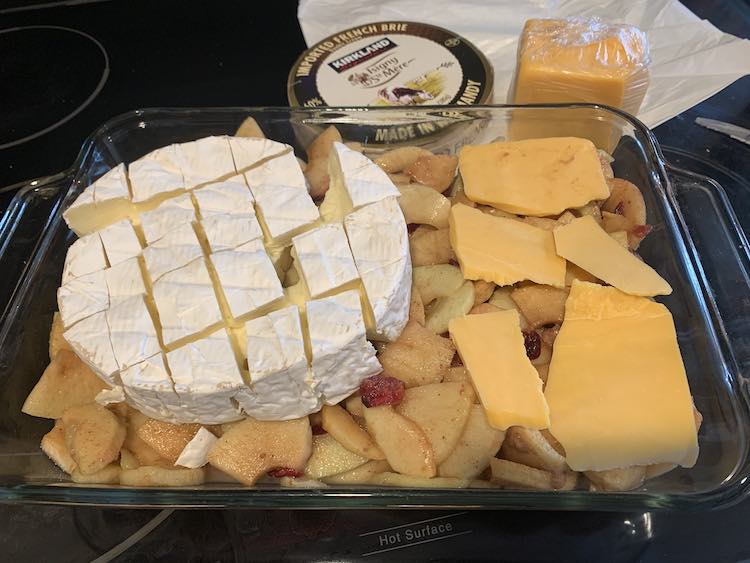
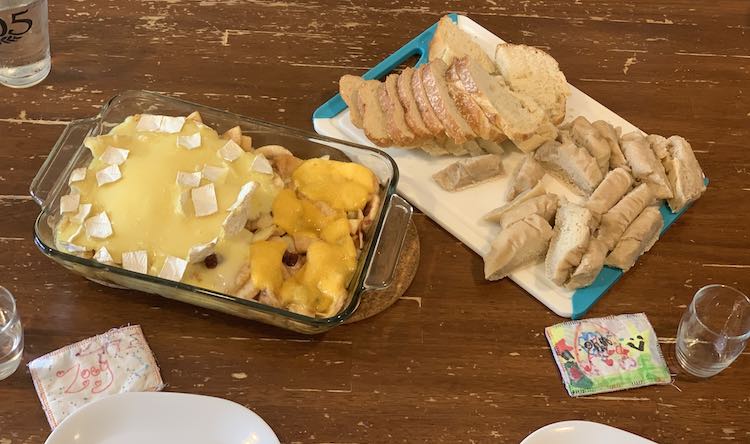
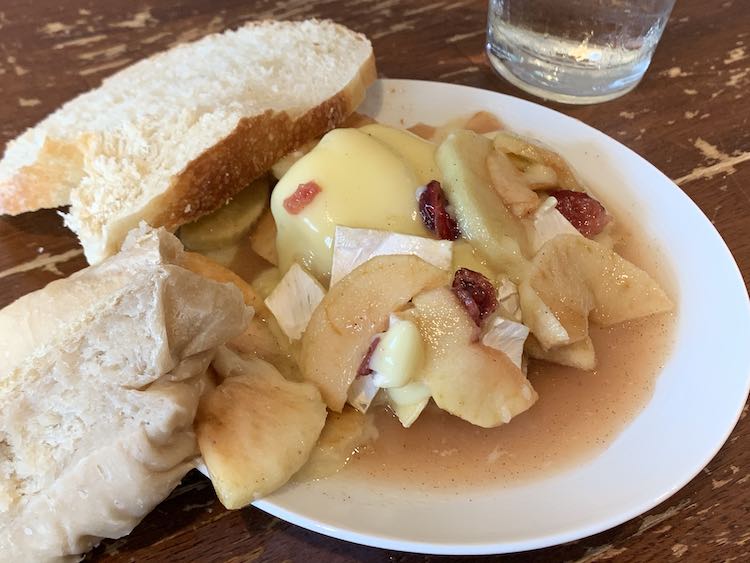
Last week I wanted to use the last of the apple pie filling in the freezer but I didn’t feel like making pies or baking bread. Instead I dumped the pie filling in a 9 by 13 inch glass casserole dish, spread it out, and topped it with cheese. I had a wheel of brie in the fridge so I sliced through the top and bottom, so the cheese could easily melt through the rind and spread through the apples, before placing it on top. I would’ve put the brie wheel in the center but Ada doesn’t like brie so I put it at one end of the casserole dish and sliced cheddar cheese to melt over the other half. I then put it in the oven and waited for the cheese to melt through the warming apples.

I had recently looked up whether I could use my slow cooker to bake my breadin5 dough and wanted to test it out so earlier I slow cooked a pound of breadin5 dough on high for, what ended up being, three and a half hours. Before we ate I grabbed both that and a loaf of bread that was going stale and sliced them so we could choose which bread we preferred and how we wanted to eat it with the cheesy apple pie filling.
And those are the apple-related things that I’ve made over the last couple years and have saved photos from. Whether you have an apple tree that’s producing more than you expected, just went apple picking and ended up with way more than you expected, have extra apples in the fridge, or are just looking for more apple-y ideas I hope this helped you out. There are so many apple-related recipes out there but I wanted to share some of my favorite creations in the hope that it helps. Regardless what you end up making with your apples I’d love to hear from you. What did you make? What’s your favorite apple-related dish? Feel free to share in the comments below and I hope you’re having a good week.
If you’re interested in getting any of my future blog updates I currently come out with a new one every Wednesday and share them to my Facebook page and Instagram account. You’re also more than welcome to join my email list located right under the search bar or underneath this post.