
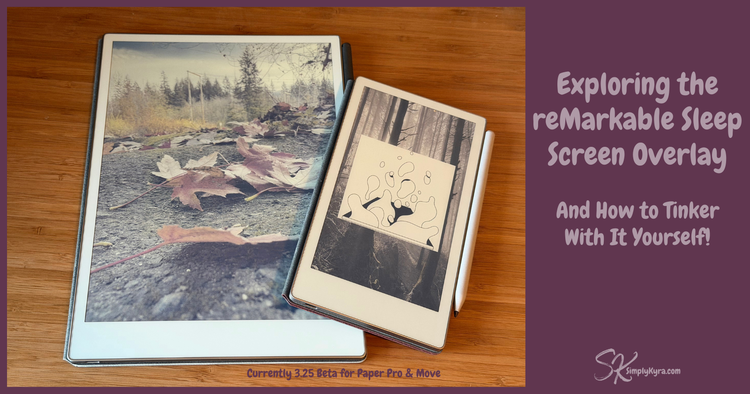
Exploring the reMarkable Sleep Screen Overlay (and How to Tinker with It Yourself!)

When the reMarkable 3.25 beta rolled out I quickly went through my app tests by cleaning up my app, downloading the current set of screens, uploading my favorite sleep screen, and then syncing the templates. I was excited everything was working perfectly and then noticed something new on my reMarkable Paper Pro and Paper Pro Move. This didn't appear on my reMarkable 2.
Note: Right now (3.25 beta), I’m only seeing this overlay on the reMarkable Paper Pro and Paper Pro Move. My reMarkable 2 doesn’t have it. Just in case that changes down the line, the instructions below assume the overlay exists.
The Overlay
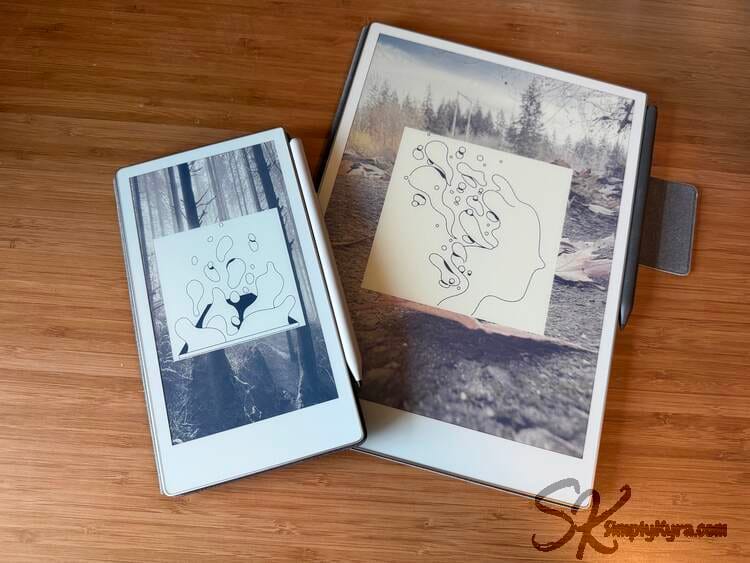
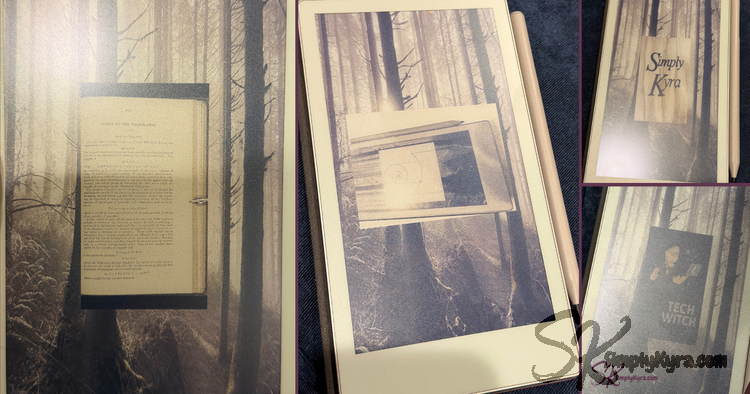
When locking my reMarkable, I started seeing a white square illustration layered on top of my sleep screen image. Each time I unlocked and re-locked the device, that illustration changed.

I shared a quick heads up about this when I first noticed it here.
At the time, I only had about an hour before I had to grab my kid from the bus, but after a quick Reddit check I realized others were running into the same thing. I threw together a short reaction reel and shared it so people wouldn’t be caught off guard.
Once I had more time, I started digging into how this behavior worked. My goal was simple:
- Could I disable it without breaking anything else?
- Could it be undone easily?
- Would it survive without needing a firmware update?
The answer turned out to be yes on all three counts so I next added the fix directly into Simply Customize It so it’s easy to use with a simple button. That said, if you prefer doing it yourself keep reading as this post walks through what I found, how the overlay appears to work under the hood, and how you can experiment with it on your own reMarkable if you’d like.
A Quick Note Before We Start
This guide assumes you’re comfortable using the command line, have Developer Mode enabled on your reMarkable, and understand that reMarkable does not officially support modifying system files.
If SSH, SCP, or hands-on experimenting isn’t your thing and you just want the overlay gone you can check out Simply Customize It.
How to Disable the Overlay
Connect to Your reMarkable
You’ll first need to connect to your reMarkable over SSH. To do this you need to find the username (root), password, and I.P. address.
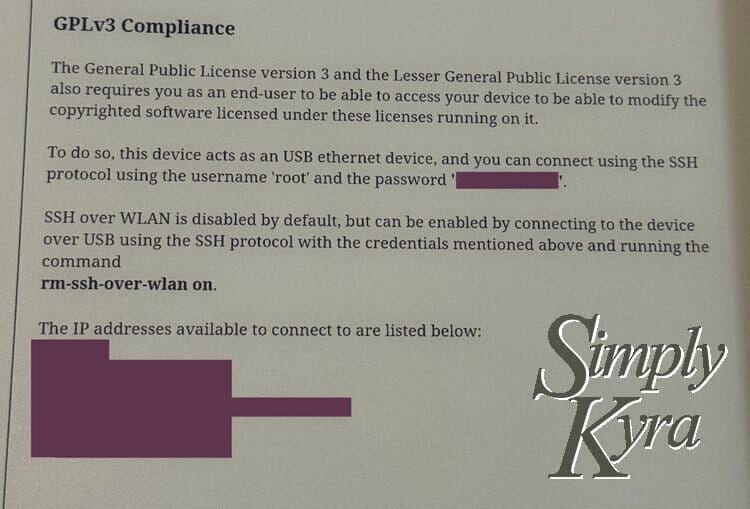
Settings -> ? -> Copyrights and licenses. This will be hidden on the Paper Pro and Move unless you've turned on developer mode.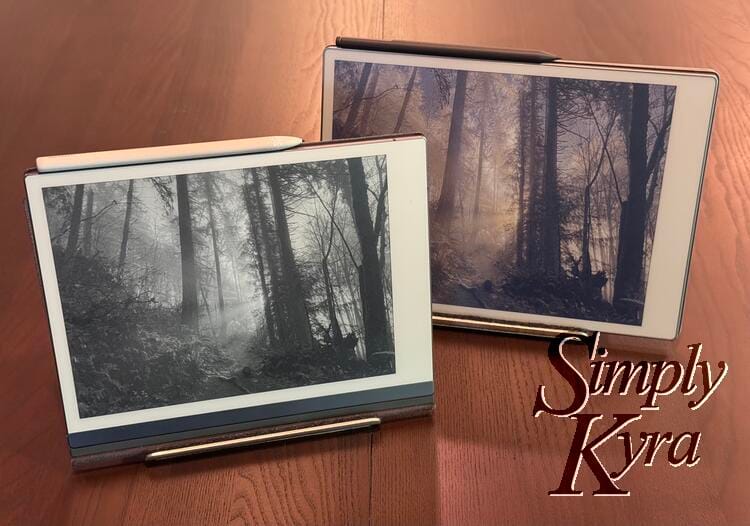
I’ve written a full walkthrough here with added steps for the Paper Pro and Move users.
By default the reMarkable Paper Pro and Move have WLAN turned off and back with the 3.22 Beta I noticed the same with my reMarkable 2. To connect the first time you'll need to use a cable to connect and a new I.P. address will pop up. Once you know which address to use you can connect by typing in ssh [username]@[host/ip address]. Once on, if needed, you can turn on WLAN by typing in rm-ssh-over-wlan on.
Locate the Sleep Overlay Images
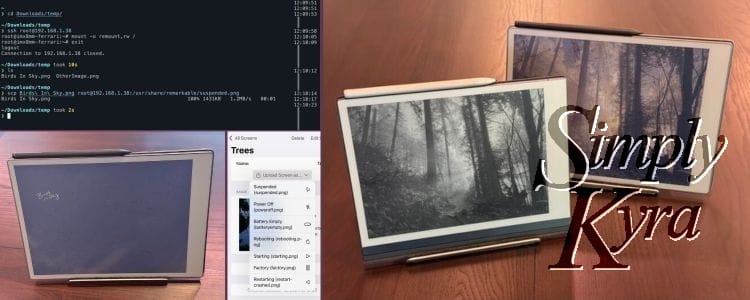
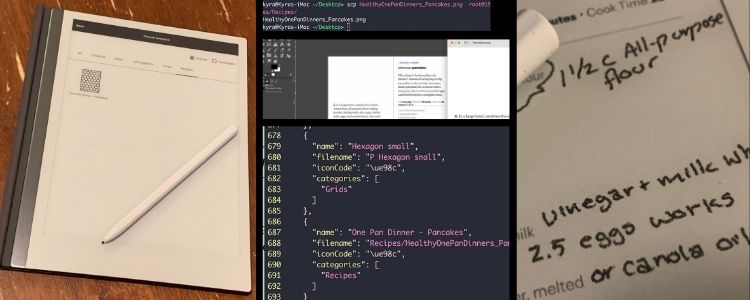
Once connected via SSH you can go to where the images live by typing in:
cd /usr/share/remarkable/carouselThis changes your directory to the new reMarkable carousel one that stores the three rotating images. If you have changed out your default sleep screen before you'd find it up one directory at /usr/share/remarkable/suspended.png.
Check this out for more information about switching out the default sleep screen!
Once there you can list the contents with ls and, at this time, I see three files:
❯ ls
sleep_Illustration_01.png
sleep_Illustration_02.png
sleep_Illustration_03.png
Which, when downloaded from the reMarkable using scp match what I see rotated through when I repeatedly lock and unlock my reMarkable.

If you run file on them you'll see this information:
❯ file *
sleep_Illustration_01.png: PNG image data, 776 x 776, 8-bit/color RGBA, non-interlaced
sleep_Illustration_02.png: PNG image data, 776 x 776, 8-bit/color RGBA, non-interlaced
sleep_Illustration_03.png: PNG image data, 776 x 776, 8-bit/color RGBA, non-interlaced
Readonly
At this time I want to do a quick aside and warn you this directory may be readonly. Back when I first tried to add custom templates and sleep screen images to the Paper Pro I quickly realized making changes didn't work and to get past this, after every update (and maybe restart?) when you SSH in and want to make changes, you will need to first type in:
mount -o remount,rw /Disable the Overlay
In pursuit of disabling the overlay I tried to rename the files and alter their extensions. Neither seemed to work. What did work; however, was creating a new directory in carousel and moving all the images into it. I'm sure deleting them would've worked too but I wanted a method that could easily be undone.
To do this first make sure you're in the carousel directory and create a backup folder (I chose backupIllustrations) by typing:
mkdir backupIllustrationsThen move all the current images within carousel to your newly created subdirectory backupIllustrations with:
mv * /backupIllustrations/With that the images will be hidden the next time you lock the device and so the overlay will no longer appear. Your actual sleep screen image remains unchanged.
If you know you never want the overlay, until maybe the next update, you can instead ignore making the backup directory, make sure you're still in carousel, and delete all the images with:
rm sleep_Illustration_*
Reenable the Overlay
If you used the backup directory and didn't delete the images you can later restore the overlay default behavior by moving the files back into the carousel directory so your reMarkable will once again find them. First go into carousel and type in
mv backupIllustrations/* .Once you use ls to confirm they're there you could next cleanup the empty backup directory by deleting it with
rmdir backupIllustrationsA Simpler Option
I originally shared guides like this years ago for my reMarkable 2 which led me to building Simply Customize It. As such I wanted to let you know that if you’d rather not run commands or dig through system folders I’ve added tools that let you both turn off the overlay and restore it again... all without touching the command line. If that sounds more your speed it might be worth checking out.
Going Further
Playing Around
At first, I only tested a couple of small changes: renaming one of the files and changing the file extension on another. In both cases, the images still appeared when locking the device. One image changed position, but the overall behavior stayed the same and all of the images were still shown.
Once the app update was out, I gave myself permission to play around a bit more.
If this kind of tinkering is your jam and you want to go deeper, here’s what I learned from experimenting further.
Adding Your Own Images
I want to preface this by saying this was only about an hour or so of experimenting before I turned the overlay back off again.
That said, once I noticed the reMarkable overlay images were square, I got curious. I wondered whether I could add my own images and, more specifically, whether a full reMarkable-sized image would fill the screen. I had hoped this might open the door to rotating custom sleep screens.
It didn’t quite work out that way… but the behavior itself was still interesting.
If you want to try this yourself, you can upload images directly into the carousel folder using SCP.
First, open a terminal in the directory on your computer that contains the image(s) you want to upload. Then run:
scp * root@IPaddress:/usr/share/remarkable/carousel/This uploads a copy of all files in your current directory to the carousel folder on your reMarkable.
If instead you want to download a copy of the existing overlay images to your computer you can run:
scp root@IPaddress:/usr/share/remarkable/carousel/* .In both cases, simply replace the * with a specific file name if you only want to upload or download a single file.
If you want more background on working with images and system files, I go into much more detail in my reMarkable 2 template guide here.
What I Learned
After testing different file names, formats, and even invalid files, here’s what seems to be happening behind the scenes.
The reMarkable does not appear to hardcode which images are used. Instead, it attempts to load every file in the carousel directory. Subdirectories are ignored entirely which is why moving the images into a backup folder effectively turns the overlay off.
Files that aren’t valid images (such as text files or empty files) are still iterated over, but they appear as nothing on screen. When watching the logs with journalctl these images cause errors that are logged quietly in the background.
I also learned that file names and extensions don’t seem to matter. The images are not shown alphabetically and the order appears to follow filesystem order instead. Both PNG and JPEG images worked, and orientation metadata EXIF was respected, which is why one of my photos initially appeared sideways.
Finally, the device automatically scaled every image I tested. Each overlay sat on top of my existing sleep screen rather than filling the display, which dashed my hopes of a true full sleep screen rotating system.
One important confirmation: this overlay behavior is completely separate from your actual sleep screen image. Disabling or modifying the overlay does not reset or replace the sleep screen you’ve already chosen.
Where This Might Go Next
Right now, reMarkable doesn’t seem to expose any user-facing settings for this behavior. Everything appears to be driven entirely by what exists in the carousel folder.
When I first noticed the overlay, I briefly considered whether it might be possible to fully customize the images and control their order from within Simply Customize It. In theory, that could be interesting especially if the overlays could be made full-screen.
That said, I’m not convinced this is realistically achievable. Even if I did manage to make it work, there’s a good chance a future reMarkable update would change the underlying behavior and make it no longer applicable.
If you end up experimenting with this yourself and uncover more details, I’d genuinely love to hear about it. Feel free to leave a comment below or email me. And if there’s enough interest, I’d be open to adding this to the roadmap and continuing to explore what’s possible.
And like always, I hope this helped and you’re having a great day! 💕
If you’re interested in getting any of my future blog updates I normally share them to my Facebook and Instagram pages. You’re also more than welcome to join my email list located right under the search bar or underneath this post.
Did this save you time?