
A Calm Guide to iPhone Shortcuts for Preparedness

Recently, I’ve seen posts online about turning off Face ID and other worries. Talking with my husband made me realize there’s a quick way to turn off Face ID... and that some of the other things I’d want in a pinch might be streamlined using Shortcuts.
I’m by no means an expert. I’ve just dabbled on and off over the years, but I wanted to share what I learned in case it helps you feel a little safer or more prepared.
This isn’t a solution. It’s just a set it up ahead of time while you’re calm idea so your phone can help a little faster if you ever need it.
For example, imagine you’re hiking and you spot a bear, or you come across a really icy hill you’re not comfortable going down. If I have signal, I’d love to be able to:
- text one or more people letting them know where I am
- maybe play a loud sound
- open my camera so I can record what I’m seeing more quickly

This post walks through a simple, reliable way to use iPhone Shortcuts to send a quick message, capture context, and understand where iOS helps and where it very intentionally draws boundaries.
It’s written for non-technical iPhone users. You don’t need to know how Shortcuts work under the hood just what’s dependable, what’s optional, and what can fail.
Backstory
Shortcuts can feel overwhelming when you start… then quickly feel easy… then make you feel powerful (and maybe a bit magical).
Over the years, I’ve tried a few shortcuts here and there. Looking back through my messy list, some early ones included:
- turning on lights and playing an intercom message to wake my kids (this broke after a move and system change)
- sending my husband a text with my estimated driving time home and opening Maps with the destination entered (I updated it after we moved 2½ years ago, but stopped using it and now I just use Maps and ETA sharing)
Repeatedly, I've forgotten about Shortcuts… and then an idea pops up and I come back to see if it might work. Some of it feels magical, some is tied to automations (like turning on/off color filters when I’m working out), and some were recently created so I can ask Siri to log something in my app, Simply Remember It.
Heck, after creating the demo shortcut but before typing this out I saw an Instagram post for a shortcut to clean up screenshots when opening Instagram… and that sounds interesting too.
How iPhone Shortcuts Behave
An Apple shortcut:
- runs step by step, in order
- can’t multitask
- can’t recover if it’s interrupted
- stops if the phone locks or the app loses focus
Some actions run instantly and reliably. Others take over the phone and, if stopped, can stop the whole shortcut process. This is how iOS is designed to protect user control and privacy.
Understanding this upfront helps you design something that’s honest and dependable so you know what will actually happen under stress.
Actions: What to Do First, Second, and Last
When I experimented with what I might include in a preparedness shortcut, I realized there are essentially three levels of actions. The first are simple and quick (you can trust they will work). The next level up has more chances to get interrupted, so we order those based on what we most want to succeed.
In short. order matters more than features.
Fast & Reliable
(Do These First)
These actions usually complete immediately and don’t require leaving the Shortcuts app:
- Getting the current date and time
- Creating the message text
Even if everything else fails, these steps can normally still run.
This is the core of the shortcut. The part I want to happen quickly and reliably every time.
Lower Reliability
(Do Only If You Can Complete Them)
These actions often work, but are more dependent on signal, permissions, or user interaction:
- Getting the current location
- Taking a photo
- Sending the message
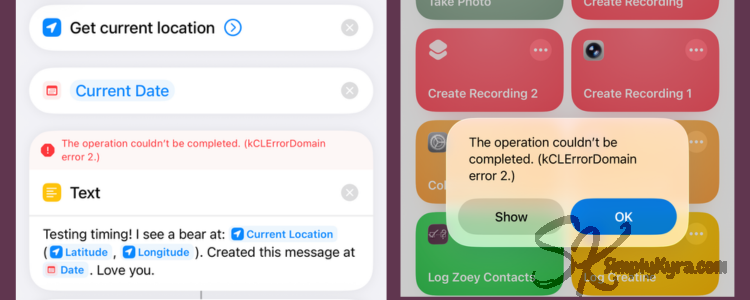
Location almost felt like it belonged in the reliable category… until I tested in Airplane Mode and it failed before even reaching the next step. If location is important to you, consider having a backup plan... or a second, stripped-down shortcut that works without it.
Photos work well once finished, but you need to adjust a toggle. Otherwise, the process can leave the Shortcuts app and be interrupted. Once I realized I needed to explicitly save (and optionally send) photos before moving on, I stopped having issues. After that, photos reliably stayed in my library even if something later failed.
I’ve included sending the message here because it depends on connectivity. I’m also not certain whether a message will quietly wait and send later once signal returns, or fail outright so I treat it as likely, but not guaranteed and, with photos and videos, I saved before attempting.
Blocking / Stoppable
(Always Optional, Always Last)
These actions take over the phone until you end them, but they can be canceled or retaken, meaning they may never save (either by you or someone nearby):
- Recording video
- Recording audio
iOS will always allow these to be stopped or canceled. There’s no way around that, and it’s intentional.
Because of this, I treat recording as a best-effort extra, not a guarantee. Any steps before this are saved and sent so if recording gets stopped, I still have what happened earlier.
Build It: A Simple Preparedness Shortcut
When creating open the Shortcuts app, click all Shortcuts, and click the plus in the top corner to get started. Apple gives it a default name that might update after you add the first thing. That said, at any point, you can rename by tapping the arrow beside its name at the top.
At the bottom of your screen you'll see a sheet and through it you can search for actions you might want to include from any of your installed apps. For this purpose I'll use built-in options but any app can open itself to this process. For instance in Simply Remember It you can create a shortcut to quickly log something either by itself (what I do so I can use Siri) or combine it with more steps and/or automations if you really wanted to.
I will break down each section (and its components) I experimented with showing both what it does well and where I had issues.
Step 1: Getting Needed Values
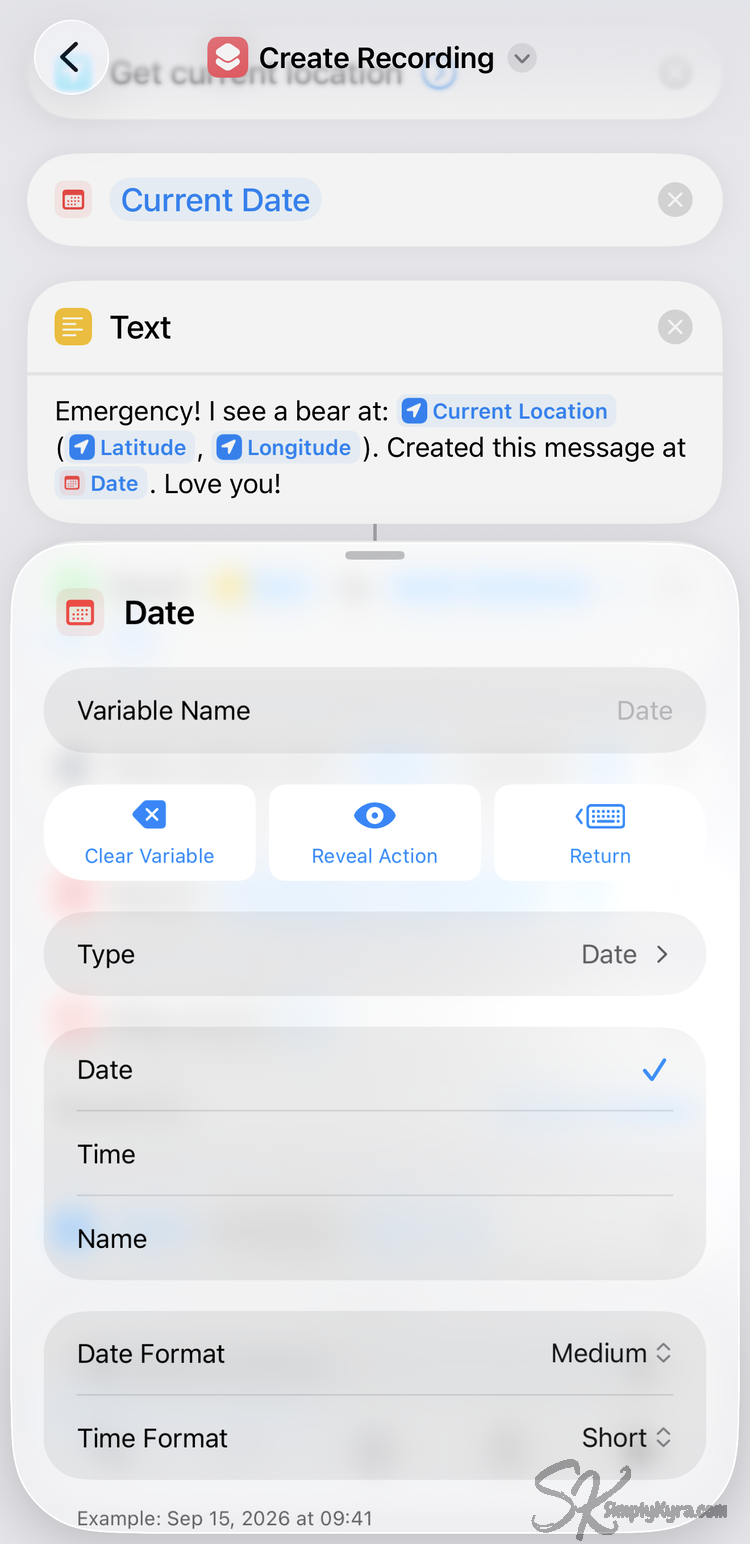
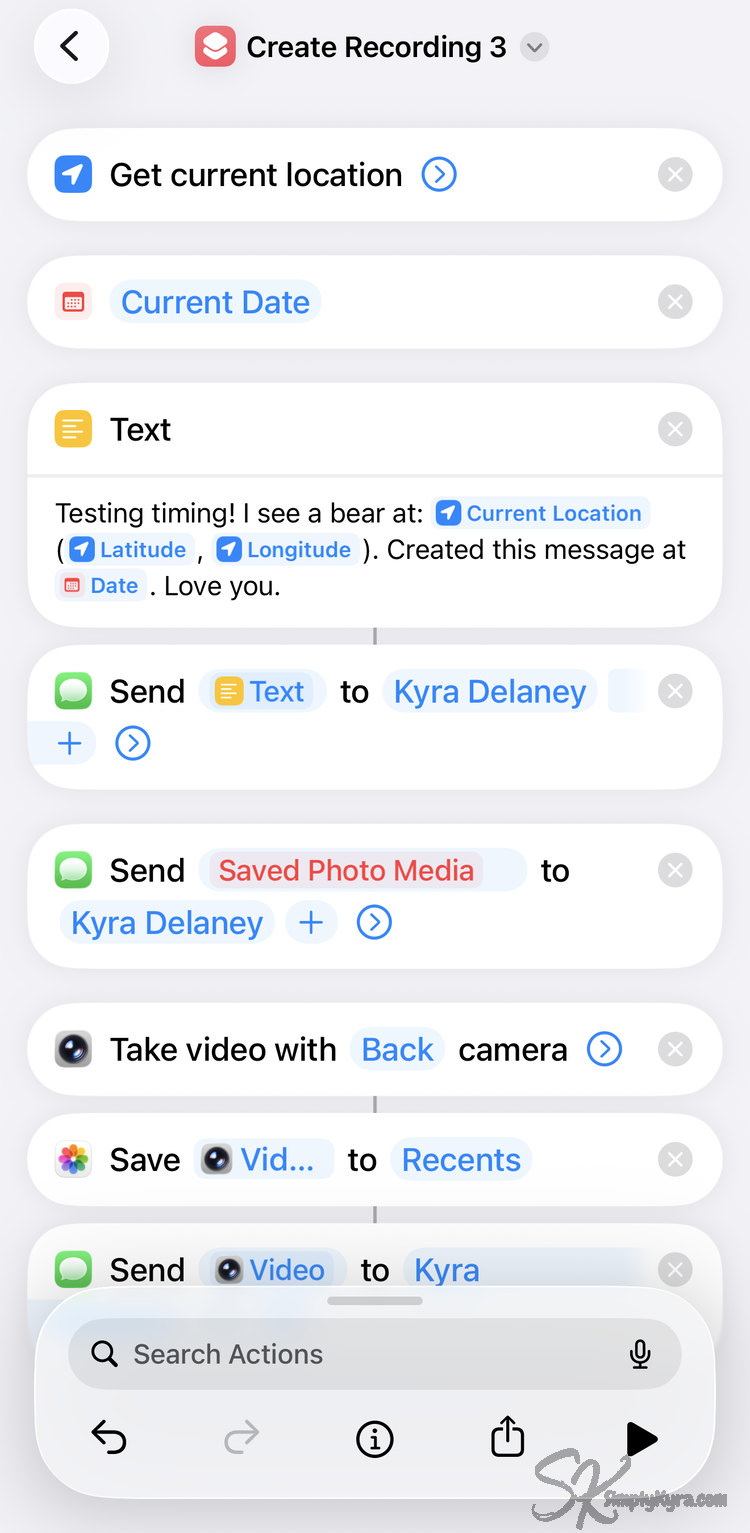
Date and Optional Location
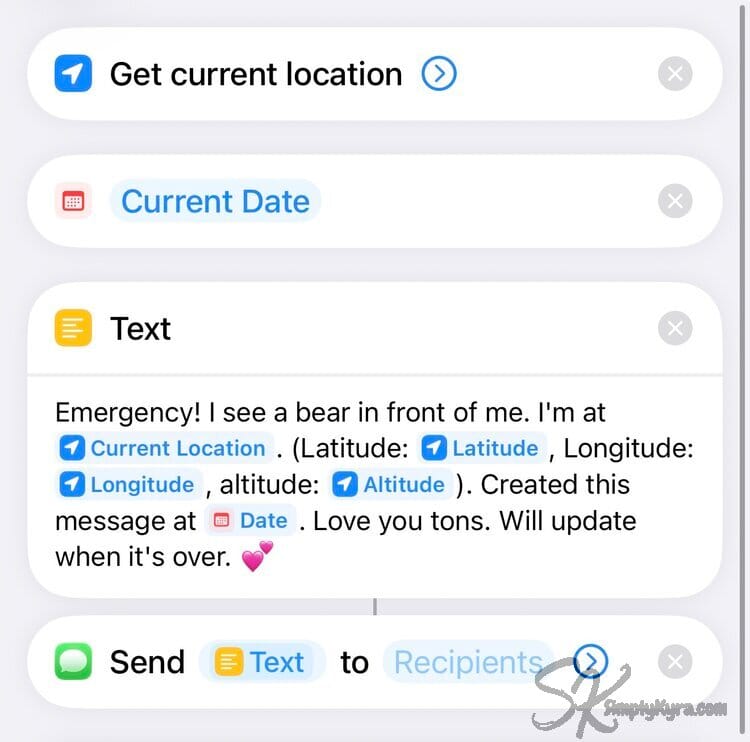
I figured I'd most want to share my location and then realized a timestamp might be handy in case the text message was delayed or something. As such I started by searching for my current location and the current date. These were left as is as that's exactly what I wanted but you can adjust the date and potentially other changes if you'd like.

Step 2: Using Those Values
Create & Send Text Message
Once we have the values we can use all of them or simply parts of them going forward. For this case I wanted to construct a message I can send to someone.
A simple message might include:
- what’s happening (briefly)
- when it was sent (figured if there's a delay or simply peace of mind)
- what to expect next (if you can estimate in this creation stage)
For example:
Quick check-in.
Sending at [time].
My estimated address is [address] but if that didn't work here's my latitude and longitude ([latitude], [longitude]).
I’ll follow up when I can.
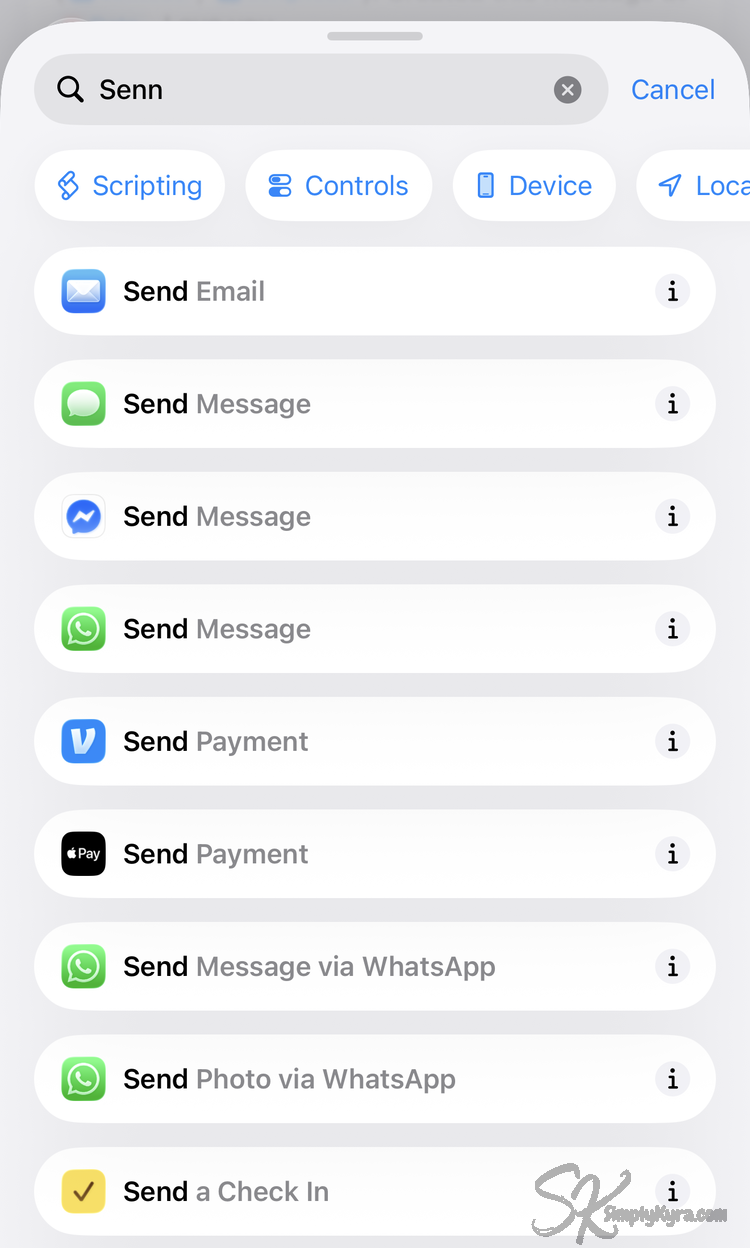
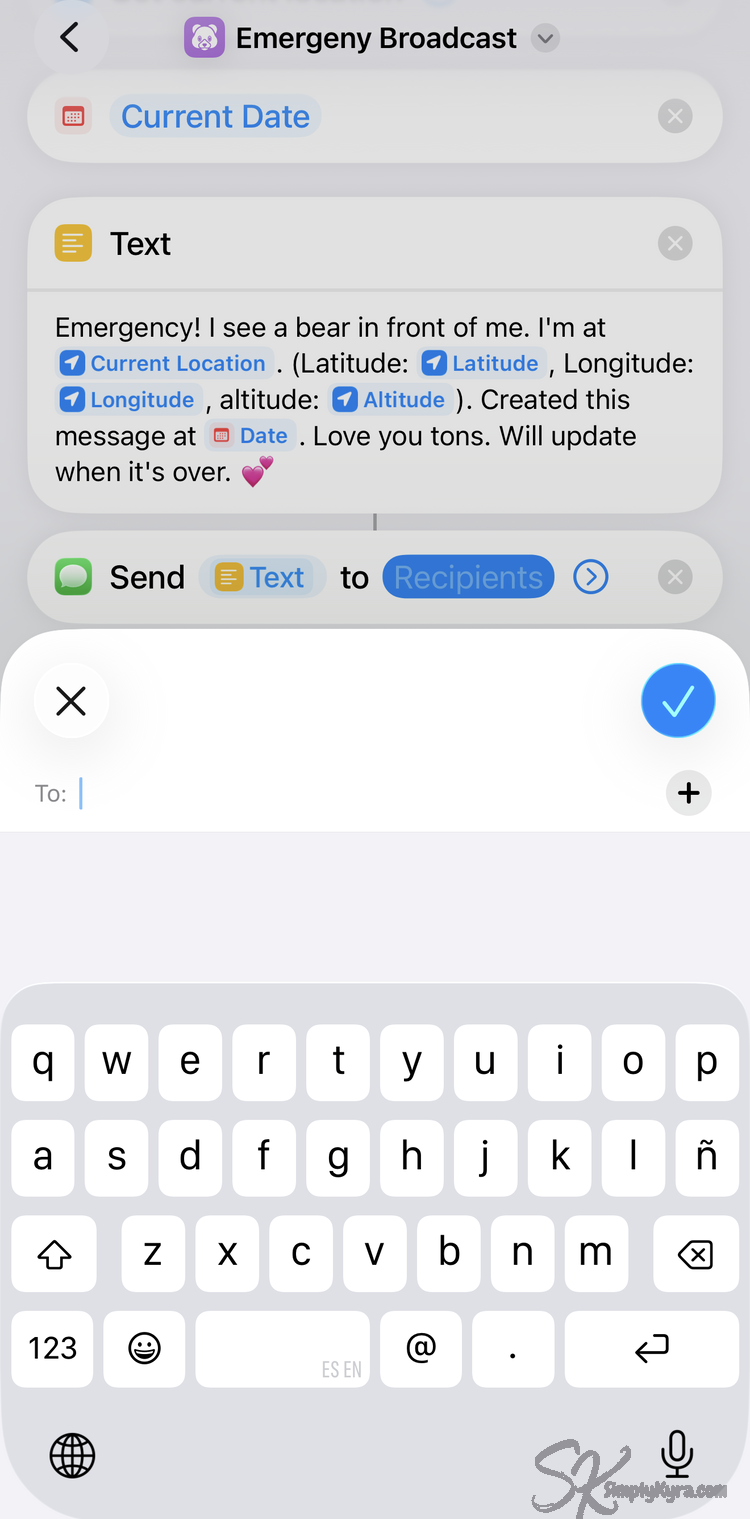
When searching for text messages I saw you can send in other apps too like WhatsApp and Messenger and include more than one recipient for the message. I tried this through text messages and sent it to myself and one other person and saw it used two individual messages (not a group text). Additionally, sometimes it works and other times it asked who I meant to choose (with a selection popup) so I highly recommend you test this out ahead of time to be sure what you get and what it actually knows to do.
Also, if you do message a group of people it’s a good idea to also create a separate “I’m safe” shortcut so you have a fast, low-effort way to let them know you're okay later. If simply sending to one person it's easier to update manually when you're okay.
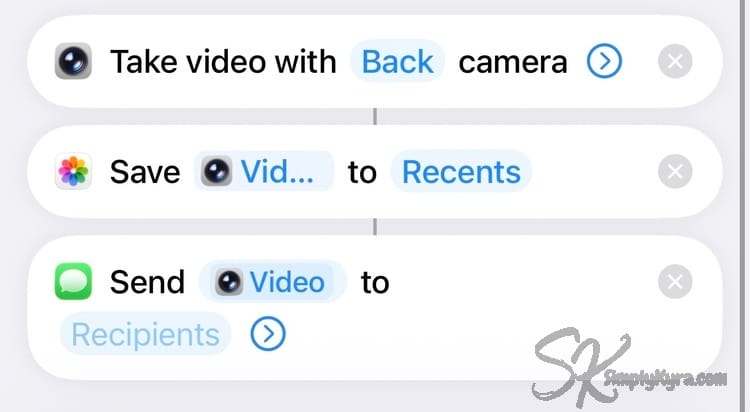
Step 3: Take and Save Photos
Snapshot Documentation
Photos can be useful context especially if taken quickly. Important things to know:
- Be sure to turn off the Show Camera Preview otherwise it will open the camera app.
- Photos must be explicitly saved or used in the shortcut or will be lost
- Saved photos persist even if later steps fail
Photos are more reliable than video in shortcuts. Here I took a simple approach: take a photo (choose front or back camera), made sure to turn off the preview, saved it to my photo library under Recents, optionally texted it to someone, and moved on to the next item.

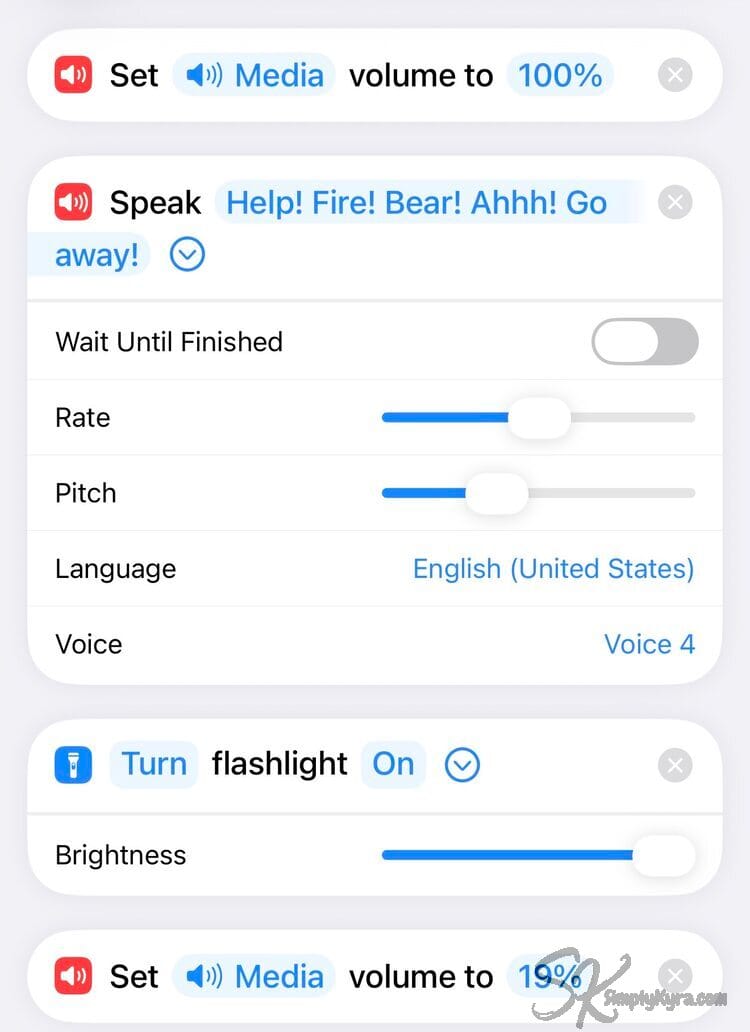
Step 4: Optional Extras
Speech, Volume, and Flashlight
At this point I was curious what else might be helpful before we started the video. I saw there was Play Sound but couldn't see how to choose what to play. I ended up turning up the volume, playing Speak while making it play over whatever I did next, turned on the Flashlight, and then turned the volume back down as the first time it surprised me when I later went on to do something else on my phone.
Step 5: Video and Audio
Best-Effort and Leave for Last
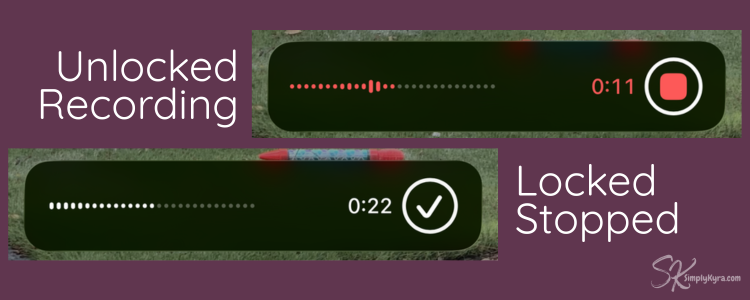
Recording video or a voice memo I left for last as it's:
- ongoing and obvious on the screen
- can always be stopped by you or someone else
- will not save if interrupted
That said you set it up the same way as the photo process above with added settings if you toggle the blue arrow.
These restraints don't make the camera useless... just optional in this process. Think of recording as:
If it works, great. If not, the important part already happened.
In addition to video proof I thought about using voice memo but found it also seemed obvious and I wasn't sure. Maybe with more testing it might work better.
Step 6: Optional Alternative Ending
Quick Access
I edited my lock screen years ago to have the camera available for quick kid photos and landscapes when hiking. My husband uses a button press for his access and I think you can use triple tap too. If you have a quick way that already works for you I could see ending the shortcut with something far simpler.
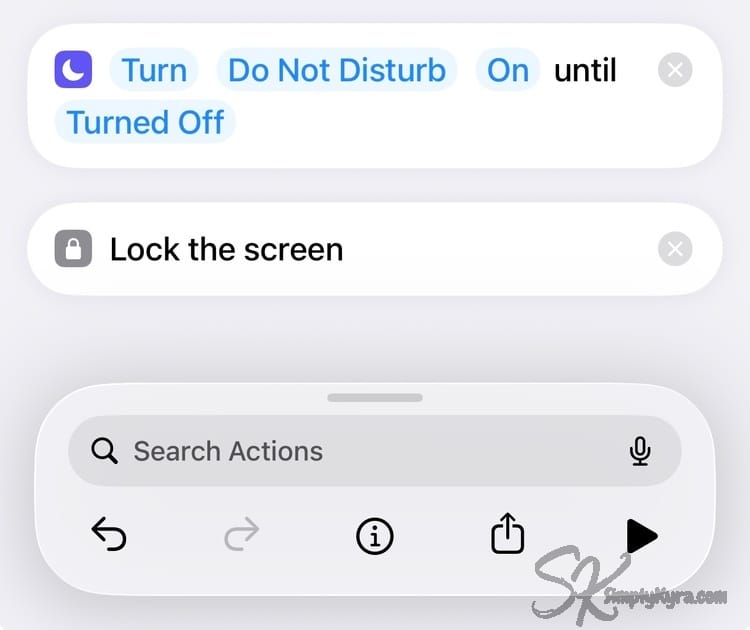
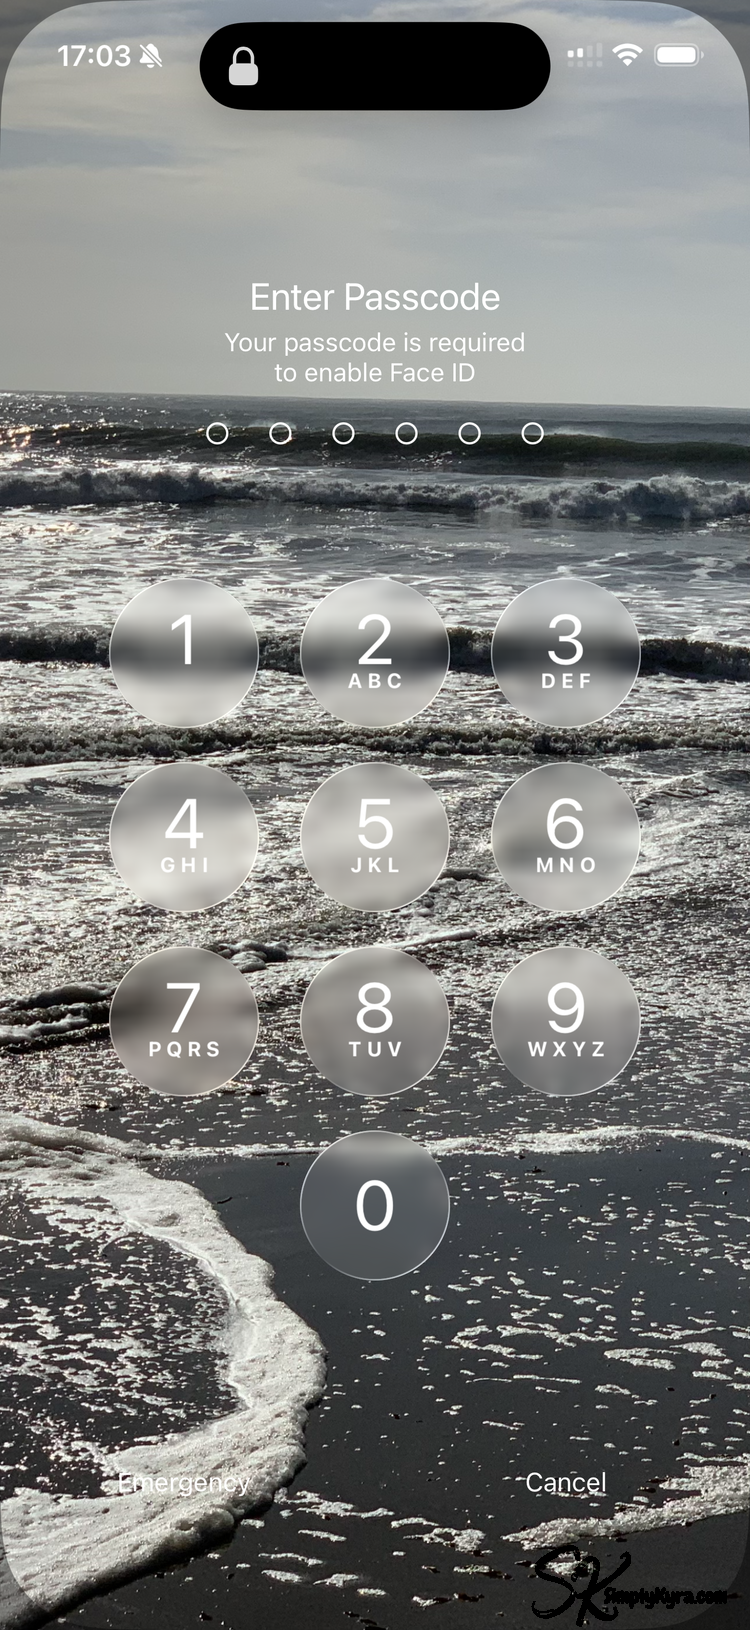
On my walk home from the bus I realized turning Do Not Disturb might be handy if you don't want text message replies to pop up while recording. Additionally if you have it lock the screen you'll know better when the Shortcut has finished executing. This might then be a good time to hold onto the lock and volume button to turn off Face ID and then use your preferred method to start the video.
Common Issues and Limitations
An iPhone shortcut:
- cannot force recording to continue
- cannot run invisibly
- cannot continue once the phone locks
- cannot protect against someone physically stopping it
That’s by design. Preparedness here means speed, clarity, and realistic expectations but not control.
A Simple, Reliable Shortcut Structure
If you want something you can trust, keep it simple:
- Get the current date/time.
- Send the text message.
- Take and save photos (optional).
- Do location now (if worried about cell reception) and send.
- Then attempt video or audio (optional, last) or end it in another way with another way to grab video or audio.
Ask yourself while building:
“If this stops right here, am I okay with what already ran?”
If the answer is yes, you’re on the right track.
Troubleshooting
Feel free to move sections around, watch it break, and fix it again. If you like how it is and want to try something else you can duplicate it first and rest easy knowing there's a working copy regardless if your idea works or not.
While deleting previous steps I noticed the blue working pieces turn red if it's no longer available. Additionally, with back to back sections you can see a vertical grey line showing the previous step is connected to the next one.
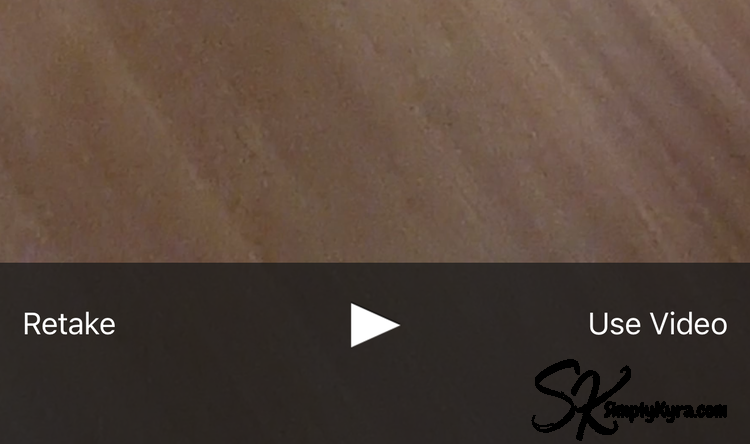
At the bottom hit play to test it out (in the below photo I texted it to myself so it didn't bug anyone) or hit share to send to someone, copy the link, or add to your Home Screen.
If you're wanting to use it with voice command pick a name that's unique and easy to say. I do this with Simply Remember It and just tested this on the "Alls Well" shortcut which doesn't have a recipient set. Here Siri asked me who I wanted to sent it to and then showed me the text I could hit send on. Not sure if it would've auto-worked without input so be sure to test in case in case there's steps you need to be involved with.
Practice Before You Need It
This matters more than people realize.
Before relying on any shortcut:
- warn the people you’re testing it with
- test in Airplane Mode (if worried about cell signal)
- avoid actions that ask for confirmation (if hands-off is required)
- practice until it feels boring
If a shortcut requires pop-ups or decisions it will slow you down later.
Alternatives Worth Knowing About
Shortcuts aren’t the only tools you have.
Depending on your needs, you might also explore (all links here go to Apple):
- Sharing your location. More info from Apple.
- Once with a pin in Messages
- ETA in Maps (replaced my earlier shortcut with this)
- Check In (location not shared unless delayed from expected)
- Share ongoing location in real time with:
- Find My
- Messages
- To stop sharing in any of these way check the bottom of the link I shared above.
- Allow quick access to the camera or other apps you feel safer with:
- Add to the contrls (when locked) on your custom lock screen
- Configure back tap when double or triple tapping
- Set your Action Button
- Disable Face ID temporarily using the hardware buttons by pressing the power button and volume button at the same time. Same method to turn off your phone. This one has a Reddit link with more information.
Years ago I added my camera to the lock screen for quick nature and kid photos. I find I can open it even when locked (even with no Face ID... just checked). Just be aware any photos or videos you just took can be accessed unless you press the lock button again (close camera and go back to lock screen). In this case it's an empty photo library until you take more.
Unlocking your phone will give you access to your photos once more from this way or through your photos.
These can all work alongside a shortcut, not instead of one.
These Shortcuts
It's just a quick attempt and not perfect at all but I wanted to share this base idea with a plug and play starting point you can add/edit/delete from. Use them, update them, make them work for you.
If you do use them and find another way to customize it that works better (I'm sure you will) feel free to share in the comments below. I'm sure it would help others too.
You don’t need a perfect system. There is unfortunately no such thing. But I hope this gives you a simpler, understandable way to help.
Set it up while you’re calm. Keep it boring.
Preparedness isn’t panic... it’s peace of mind.
I hope this helps 💕
I normally share about my apps but if you want to keep up with future posts, I usually share them on my Facebook page and Instagram account. You’re also welcome to join my email list, which you’ll find right under the search bar or beneath this post.
Did this save you time?