
Frequently Asked Questions I’ve Seen Around About the reMarkable

I’m not associated with reMarkable but I bought a reMarkable 2 about two years ago and absolutely love playing around with and customizing it. As such, I joined several reMarkable user groups on Facebook and keep seeing the same type of questions so I figured I’d write a frequently asked questions in the hopes that it can help you if you need it.
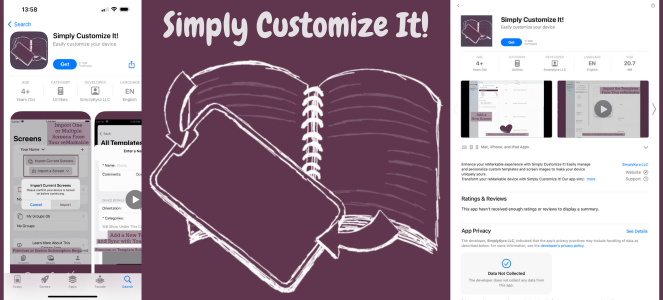
Update: Apple App
That said I've since come out with an iOS/macOS app that you can use to change out your templates and screens with a simple button press while remembering them for the next update. More information can be found about it here with a direct link to the App Store here.
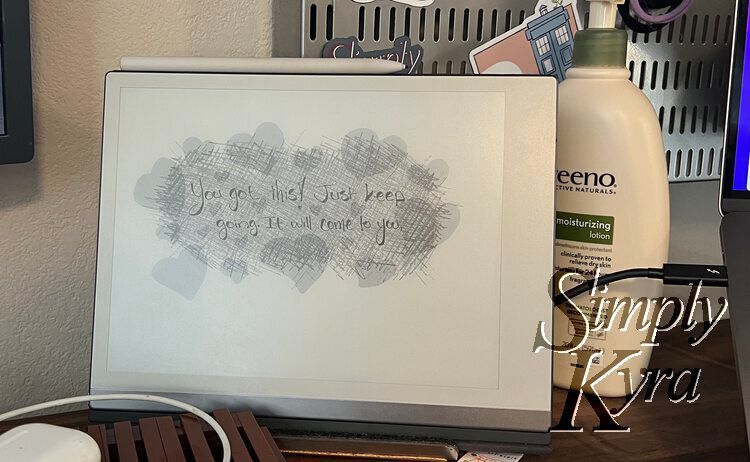
All these photos were taken of my reMarkable while it was running version 2.14.2.1047 on October 3rd, 2022.
Templates
So… is a template the same as a PDF?
Short answer no. For the reMarkable device the template is the background to your page when you’re using a notebook. The template is what you choose when creating a new notebook, it’s what is defaulted when you create a new page, and it’s what you can change so each page has its own background. If you want to upload a new template it’s called a custom template and it isn’t officially supported by reMarkable.
So why are PDFs and templates used interchangeably?
In the Facebook user groups I’ve heard PDF and templates used interchangeably off and on from the time I bought my reMarkable and first joined the groups at the beginning of 2021. This became more frequent once the reMarkable supported internal links within their PDF files and then allowed adding and moving pages within them. As such templates have different meaning depending what you do with your reMarkable and who you talk to. In this post all references to templates will be about the custom ones mentioned in the previous section.
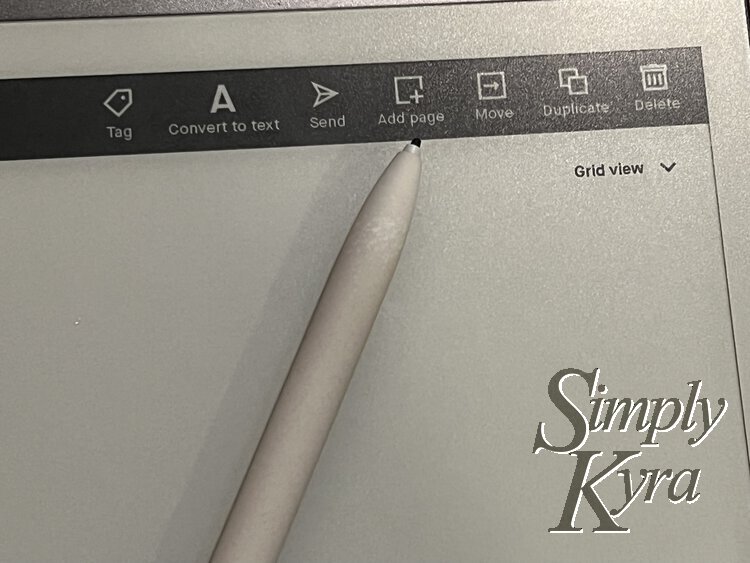
PDF files you can now see the Add Page icon once you click the four squared icon on the left.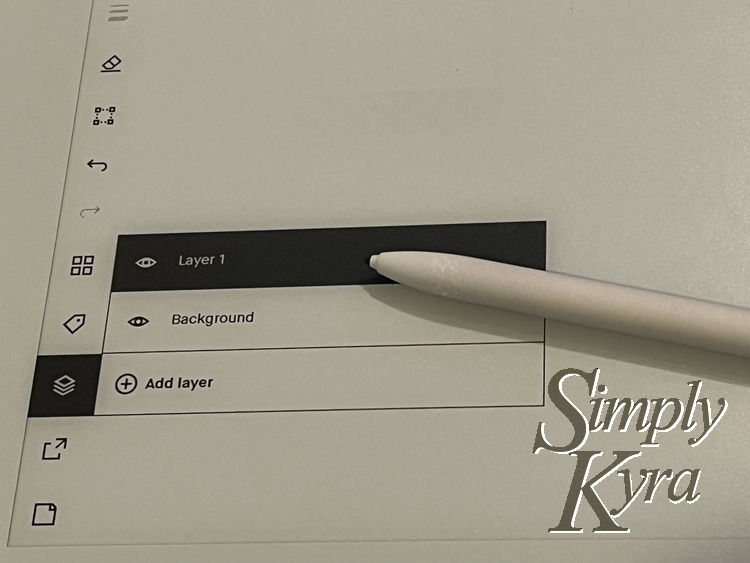
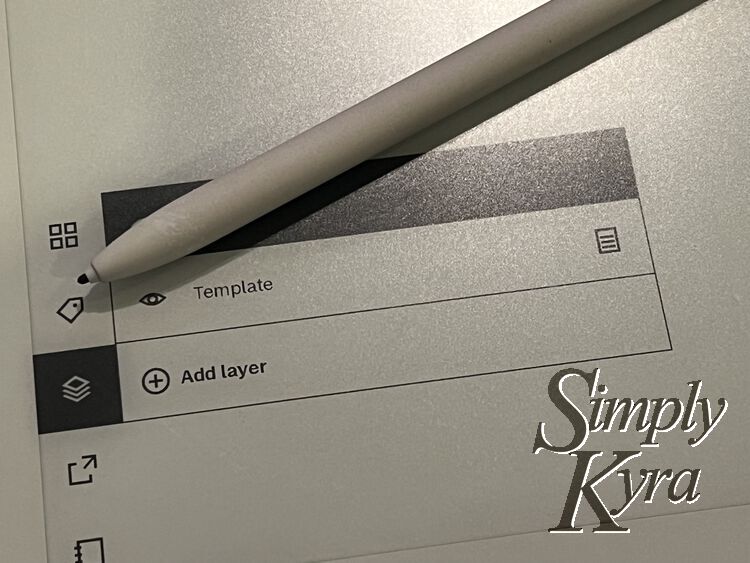
PDF you cannot change its background. When you click the layers button you see the top layer you’re writing on, the background, and the option to add a layer. Clicking on the background option here doesn’t open anything.What exactly is a template on the reMarkable?
A template is essentially just the background to your notebook page. This would be similar to when you’re in a store and debating between buying a blank sketchbook, lined scribbler, graph paper, or something else. As such when you create a notebook one of options you need to choose is which template you want.
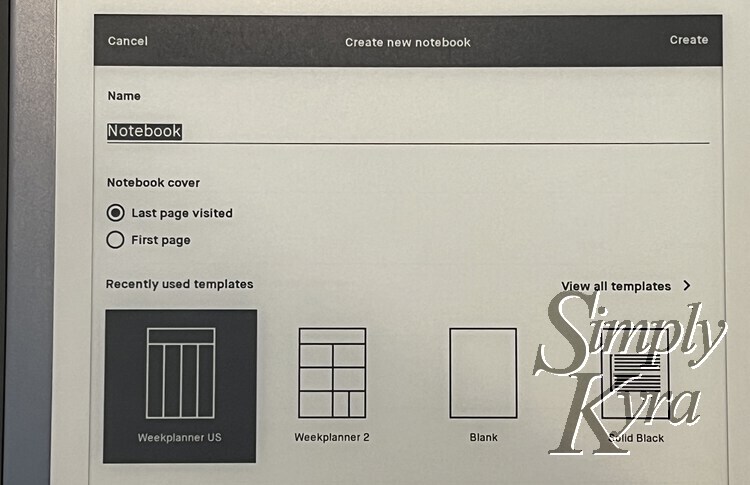
Unlike buying a sketchbook the reMarkable lets you change your mind and switch what paper you’re using in the middle of your notebook. Whatever paper (template) you choose last will be the one selected, on default, when you add more pages to your notebook either by swiping or going through the menu on the left side.
Template, and finally choose a template (shown below).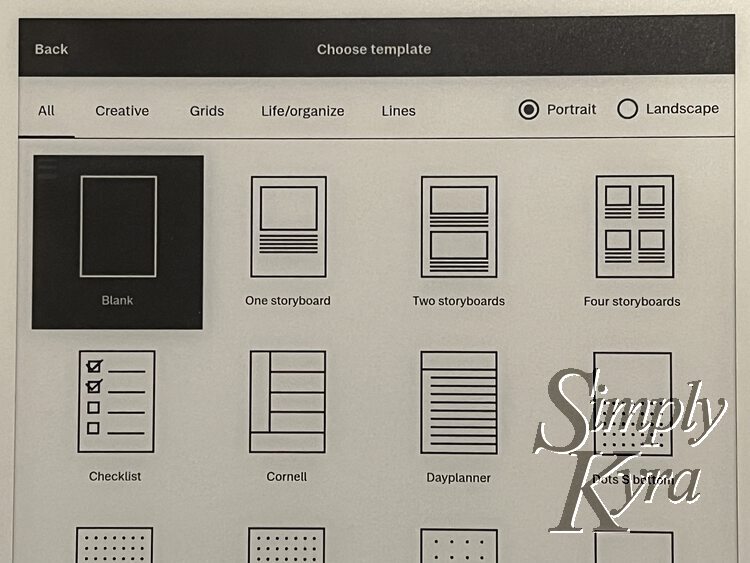
Makes Sense. But how does a template work behind the scenes then?
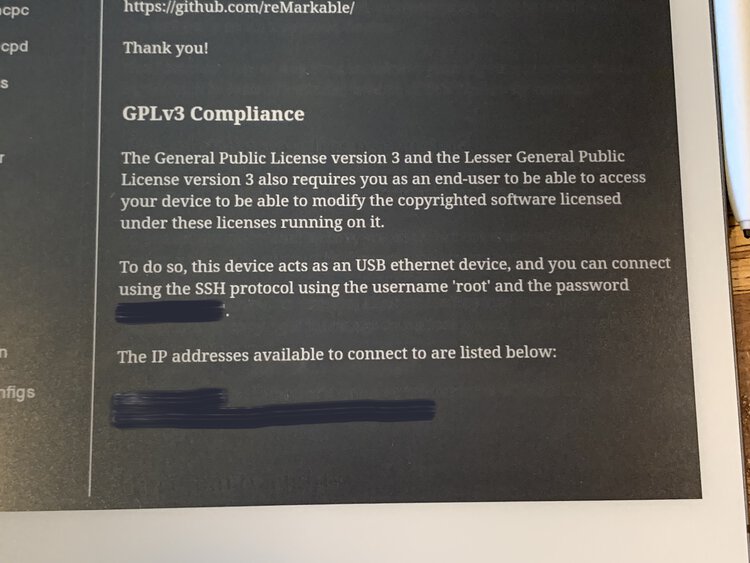
The default templates that come with your reMarkable consist of two image files (one PNG and one SVG) that measure 1404 by 1872 pixels. They are located on your reMarkable within the /usr/share/remarkable/templates/ directory (folder).
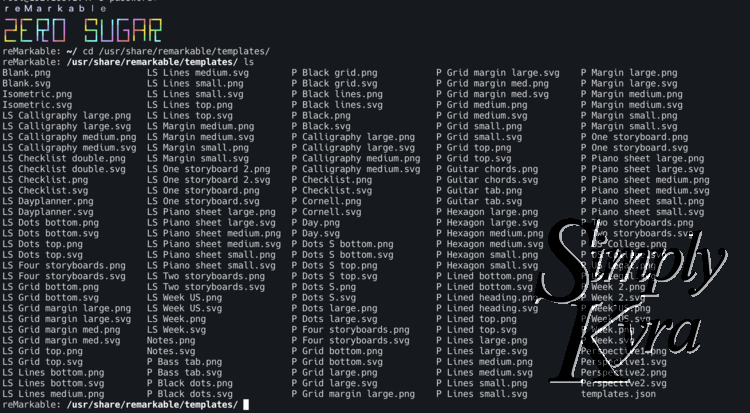
SSH in iterm, and navigate to the templates directory you can see all the default templates each with a PNG and an SVG file with matching names.If you upload an image to that directory your reMarkable won’t see it unless you also add it to the templates.json file also located there (see bottom right in last image). In this file each template has one entry consisting of it’s:
- name: The display name shown to the user when selecting templates
- filename: The file’s name within the
templatesdirectory. This doesn’t include the extension as it’s used to look for both thePNGandSVGfiles… which also means these two files NEED to have the same name. - iconCode: This string matches to one of the pre-defined images they use to represent how the template looks. This means when uploading a custom template you’ll need to use an icon already used before.
- landscape: This value is optional (defaults to false if not included) so it’s not listed on every template. This dictates whether the template is in portrait (vertical/true) mode or landscape (false). Blank is a special template that has a single
PNGandSVGfile BUT is listed twice in theJSONfile as the first time it’s in Portrait mode and second it’s in Landscape. - categories: This is a list (surrounded by square brackets) consisting of one or more text strings (enclosed by quotes) that represent which category the template belongs in. So, for example, the blank template belongs to each category so it has all the categories listed in the below image. Other templates only have one. These strings become the categories listed along the top when choosing a template which means if you spell one wrong a new category will appear. This space on the reMarkable doesn’t expand so I try to only add one unique category when uploading custom templates otherwise it overlaps with the Portrait/Landscape selection.
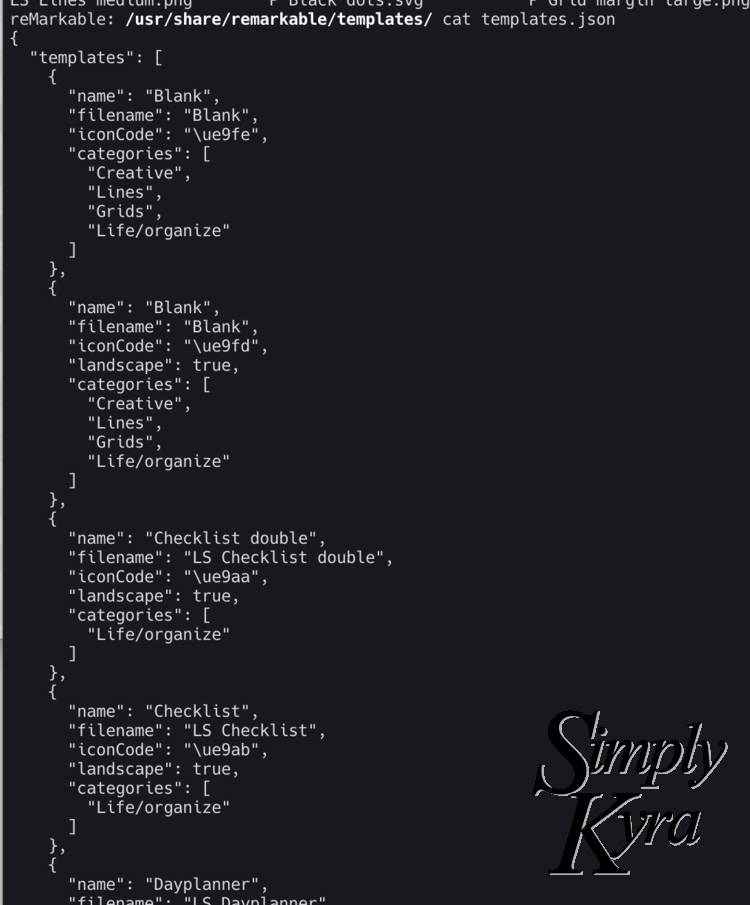
templates.json file you can see each template specified. This is what the reMarkable uses to identify its templates.A JSON file is essentially a lightweight file format that makes it simple for your device or application to take in data which in this case is what templates exist. Here’s a quick explanation of what JSON is through W3 Schools. When working with this templates.json file you will need to restart you reMarkable for your device to see any of the changes. You can restart your reMarkable manually or, if you’re connected to it via the command line you can simply enter: systemctl restart xochitl.
What icon codes can I use with my custom templates?
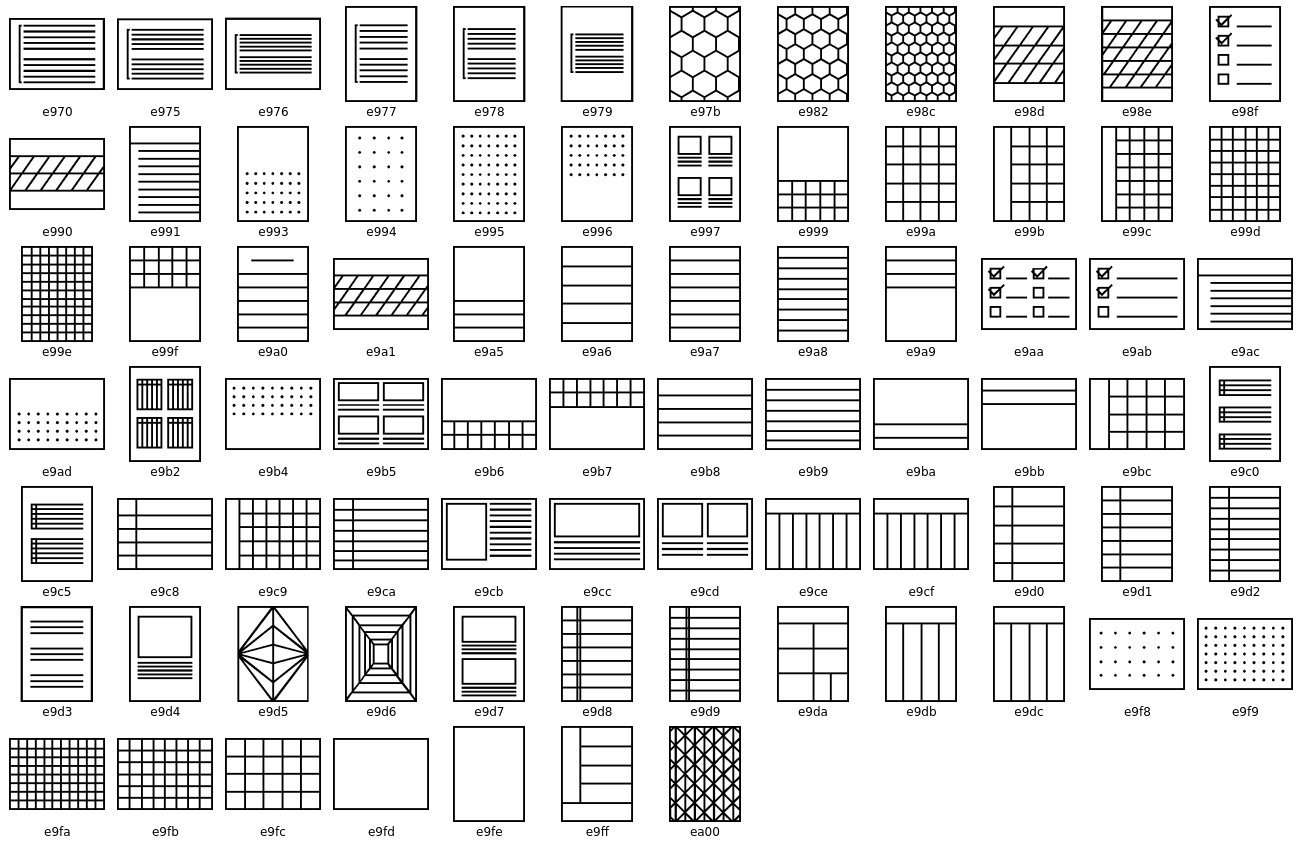
The reMarkable comes with many default templates already included and each one has an associated icon code. This handy image below, taken from reMarkable Wiki, shows which ones were included with version 2.3.0.16. Under each image here you can see the specific string that matches to that image. If making custom templates you will need to pick one to use for each template you add and will need to add the \u to the beginning of the string. If there’s a reMarkable template not listed here (if they’ve added any since this version) then you could always check your templates.json file to see what the icon code string used is.
Update June 2024: Used to have a link to the reMarkable Wiki from October 3rd 2022. In it you see all the iconCodes included in version 2.3.0.16. That is no longer active so sharing the image from rmhack on Reddit.
When creating a custom template do you need both an SVG and a PNG file?
You do not need both types of files when creating your custom templates. You need to upload a PNG file but an SVG isn’t needed. So far I’ve only used PNG files and had no issues. In fact I was curious how each image type was used so I did a test where I created a custom template with two different images and exported them to see which image type was used. I explained my methodology and results my Which Version of the reMarkable’s Templates Are Emailed Out? post.
Update June 2024: The original Which Version of the reMarkable’s Templates Are Emailed Out? post shows results that are no longer accurate. Now it shows an SVG file if available and a PNG if not. Here's the updated post.
How can I create and/or upload a custom template?
So far I’ve mainly created my custom template image files by exporting a PDF I already have so each page becomes a PNG file. I then use these image files as my custom templates. You could also use GIMP, Canva, or other methods to create the images themselves. After connecting to your reMarkable you then upload the images, edit the templates.json file, and restart my device so the changes take effect. For help connecting you can check out my Learn How to Access Your reMarkable Through the Command Line post and for the custom templates themselves you can follow along in my How to Make Template Files for Your reMarkable.
All my templates disappeared!
Have you edited the templates.json file? If so it’s super easy to break the file by using mismatched brackets or quotes. If this happens you won’t get an error but your reMarkable won’t be able to see any of its templates and thus nothing will be listed when you go to select a template. When this happened to me I found it easiest to paste the contents of the file into a JSON formatter (link to JSON formatter dot org) to help figure out what went wrong.
What does “custom templates aren’t officially supported” mean exactly?
If you upload a custom template it is local only to your reMarkable which means you can use it there but when you open other reMarkable apps the template isn’t found so you won’t see the background of those pages but may see your written text. I got around this once with a notebook by exporting it as a PDF and keeping both versions so I could open the PDF version on my phone and see everything while still being able to use the notebook itself on my reMarkable. Of course you’d need to re-export each time you made changes.
The main issue with not being supported comes when the reMarkable updates its software as there’s a chance your custom changes will be removed and/or reset. I don’t see this all the time so I’m assuming it only happens on larger version updates and not the smaller ones. When this happens you’ll need to re-upload your used custom templates with the same names as before otherwise the reMarkable will see them as a new template and you’ll have to manually re-connect each page they were used on. I previously wrote My reMarkable2 Updated! This Is What I Did Next in case you want more information.
That said, some people prefer to turn off their automatic updates so they aren’t surprised by their templates disappearing. Then they can choose to manually update their reMarkable when they’re with their computer and able to restore the templates. If you want to do the same you can find the Automatic updates toggle by going through the menu, tapping General on the left, and then clicking on your version, under Software, on the resulting page.
Can I speed the template restoration process up?
Sure. I sped up my process by creating a bash script that I can run whenever my reMarkable looses my templates. It does mean you’ll need to have access to your computer with your reMarkable turned on to run it AND you will need to take the resulting text and manually add it to your JSON file. That said it uploads your images for you (based on how you saved them to your computer) and creates the JSON snippet in one go. The code itself is on GitHub here but if you want to be walked through the script you can follow my posts:
- Part One: Quickly Generate a JSON Template Code Snippet for Your reMarkable
- Part Two: Quickly and Easily Upload Template Images to Your reMarkable
Can it be easier than that?
Definitely! I came out with an app that keeps track of your templates with a simple button to sync. When an update occurs you can open the app, hit sync, and go back to doing what you enjoy on the reMarkable. Check it out here.

I prefer a video for my tutorial.
Great. I created a video that goes over my process (summarizing all my template-related blog posts at that time) which you can find here (if you want the written transcript) or directly through YouTube here.
Screen Images
Some people are changing their sleep screen image. What is that?
There are a set of PNG images located within your reMarkable’s /use/share/remarkable/ pathway. These images are used by the reMarkable to display messages to you the user. In the case of the sleep screen image itself when your reMarkable is asleep it shows you the suspended.png image. If you overwrite this image with a different one and restart your reMarkable then the new image will be displayed the next time your reMarkable is put to sleep.
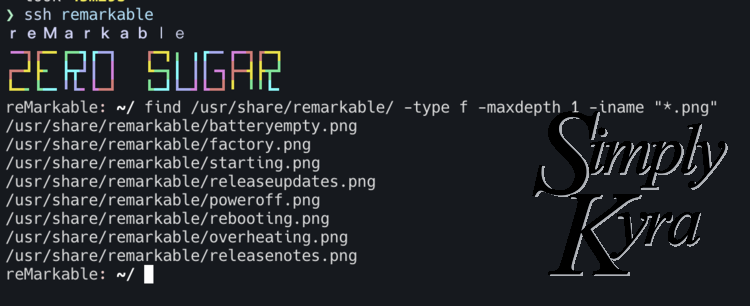
PNG images located within the /usr/share/remarkable/ directory. I’m assuming you can switch out any of the images to update what the reMarkable shows. That said, so far I’ve only switched out the suspended.png image to alter my sleep screen.How exactly do you change the sleep screen image?
This was the first thing I wanted to do even before my reMarkable arrived! First you need to be able to connect to your reMarkable which can be through the terminal (see my Learn How to Access Your reMarkable Through the Command Line post) or through another application like FileZilla or WinSCP. Once connected you can use SCP to upload and overwrite the suspended.png file. The reMarkable won’t see this file change until after it’s restarted which can either be done manually through the settings or by running one more command: systemctl restart xochitl. To get a more in depth explanation on this check out my related post: Switch Out Your reMarkable’s Sleep Screen… Plus Easily Back it Up
As a quick aside there are other images in the directory that I haven’t changed but based on their names and how they look I can assume. For instance when the reMarkable is turned off it uses the poweroff.png. You can follow the same steps as the sleep screen image to replace those too.

What happens on an update?
Like the templates above the default screen images are reset when the reMarkable updates. I keep my default screen images stored on my computer so I can easily choose one and re-upload it after an update. I haven’t created a script to automate this yet but if I always wanted to use the same image I could see adding the scp command to my custom template bash script to make this process quicker (see above under Can I speed the template restoration process up? for more information).
Can you do this for me?
Definitely! I came out with an app that you can use to set your screen images and you can easily pick one, upload a button, and have a new image set on your reMarkable. When an update occurs you can open the app, pick the same or different image, hit upload, and go back to enjoying it on your reMarkable. Check it out here.
Marker/Pen
Can I use other brands?
I have only used my reMarkable Marker and haven’t tried other brands so I can’t personally recommend any. That said, there are many other recommended brands mentioned within Facebook user groups, blog posts, and videos.
What can you tell me about the pen tips?
When receiving your marker make sure to look for your tips as many people toss them away with the packaging!
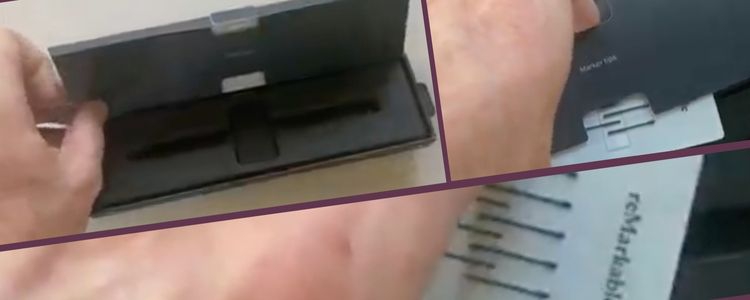
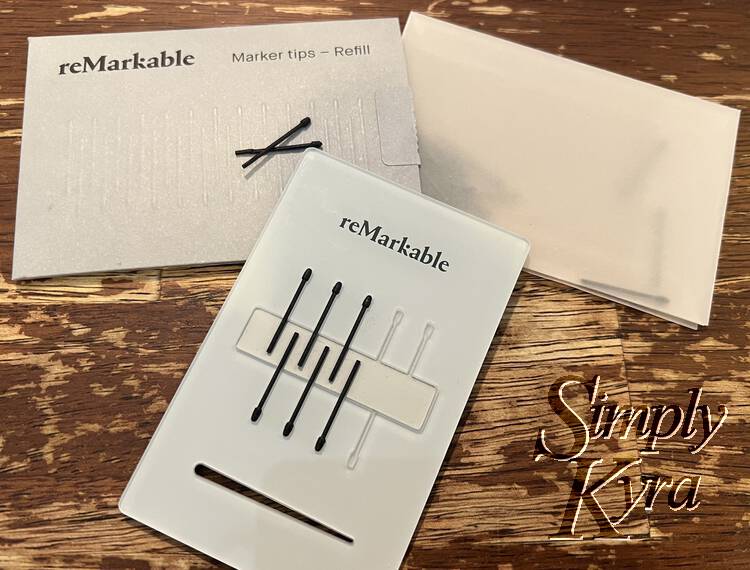
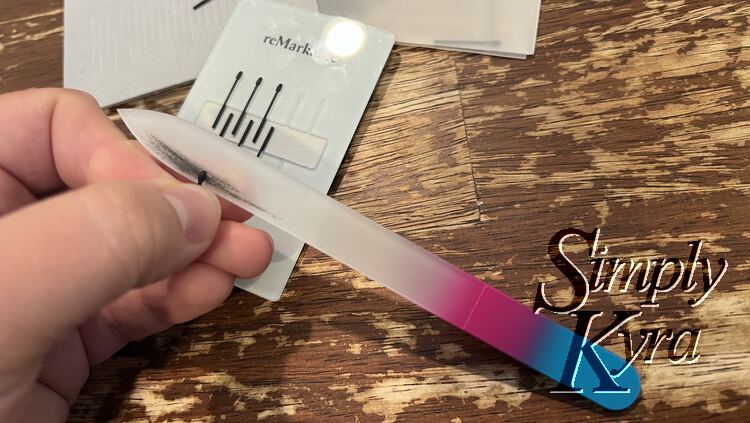
How do I use the marker tip card and swapping tool?
The replacement pen tips that came with the marker also came packed within the marker tip card and swapping tool which I absolutely love. Here’s how I use it:
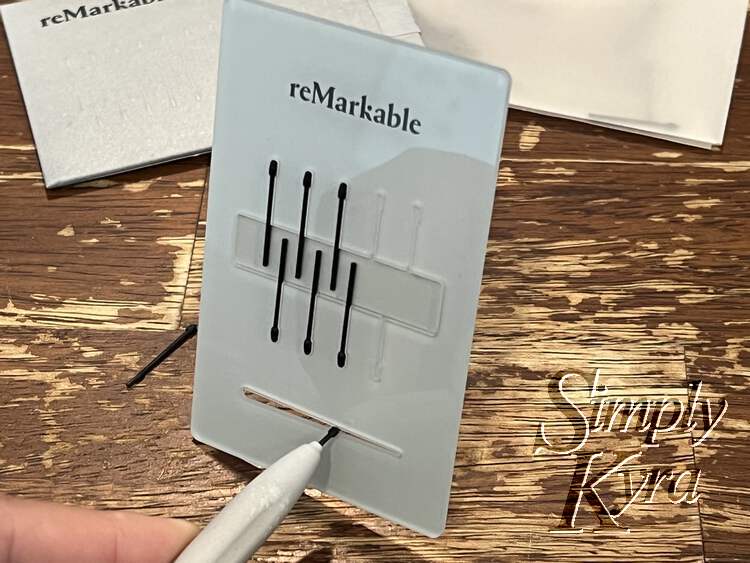
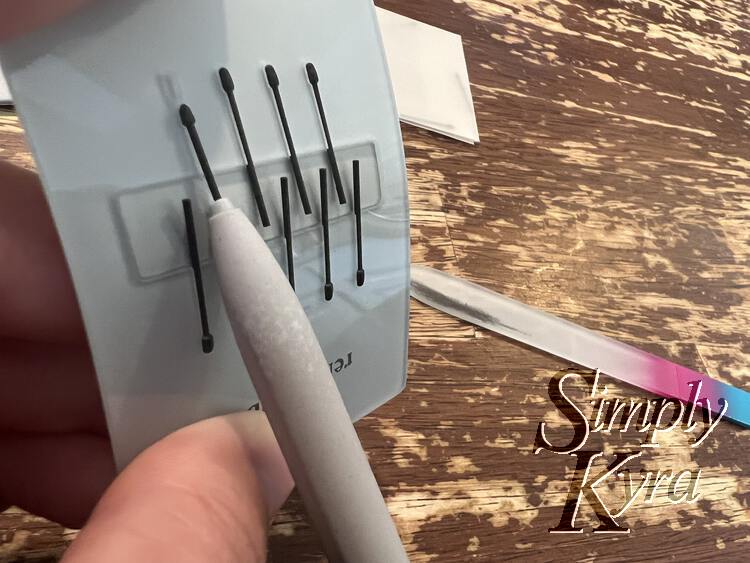
For a more in depth explanation you can check out reMarkable’s Markers and Marker tips for reMarkable 2.
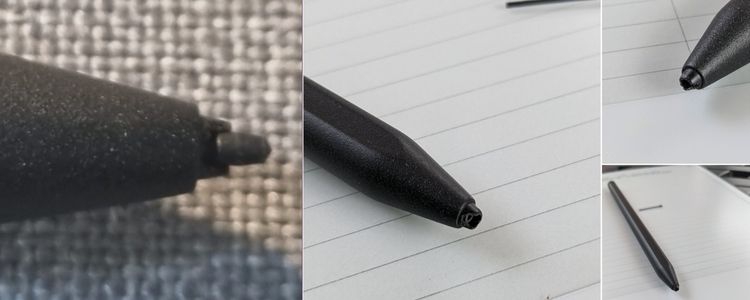
What is “mushrooming”?
As you use your pen more and more the tip will start to bulge out a bit which many users call mushrooming as it looks like a mushroom. This mushrooming will happen quicker if your press harder against the reMarkable while writing or drawing.
To make your tips last longer before they mushroom out you can try to write softer and some people have found switching pen styles on the reMarkable makes this easier to do. Additionally, once the tip mushrooms, another solution is to use a glass nail file to smooth out the tip. Just be sure to remove the tip before you file it down as you don’t want to injure the pen itself.

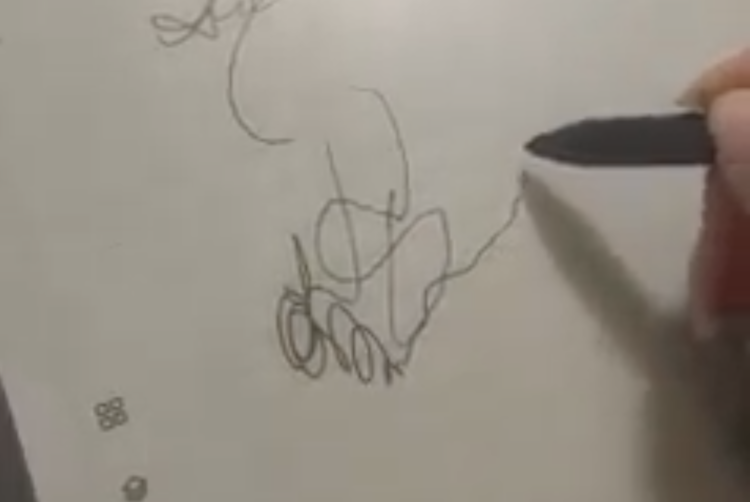
My writing isn’t matching up with the pen tip?
Sometimes you may notice that the writing on your reMarkable doesn’t quite match up with how you’re actually writing. Most often than not this means your tips I unbalanced so you’ll need to fix it by removing and re-inserting the pen tip. If that doesn’t fix the issue restarting your reMarkable might clear it up. In the remote case neither works this could mean that the support around your marker tip is broken causing the irregularity.
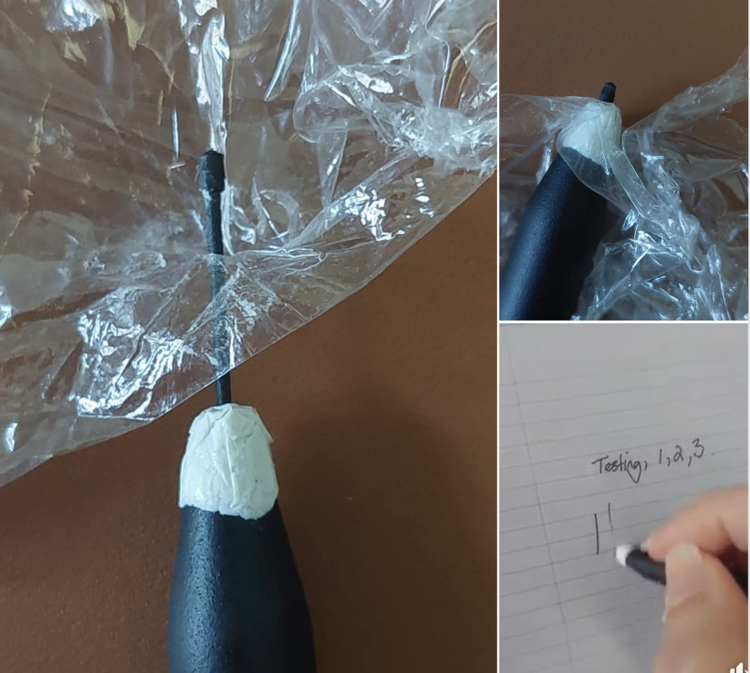
My pen tip is broken!
I’ve seen several people online mention that the end of their pen, holding their tip in place, is broken. Many people online reported it to reMarkable and received replacements. Mine hasn’t broken so I haven’t needed to look into any solutions myself.
As an FYI within the Facebook user groups I’ve seen more cases of the black Marker Plus being broken over the grey Marker. Consensus seems to be because the Marker Plus has an eraser so it’s getting flipped around more often and thus has more chances of being dropped.
While looking for the above examples of a broken tip I came across Erin’s post within the reMarkable user group who fixed their broken pen using Sugru. Had to share it in case it could also help you.
Miscellaneous
The pages won’t swipe anymore! or It takes multiple attempts to turn the pages!
Are you still holding your pen while swiping? To stop mistaken swiping while writing reMarkable sometimes doesn’t swipe as easily when the pen is near the page. That said, sometimes there seems to be updates that make this process more sensitive too and then there’s additional complaints in the user groups of this occurring. If you’re still having trouble this may be the case so look online and see if other people are having the same issue and there may be another update soon that makes it once again simpler to swipe.
Why is the menu on the wrong side of the page?
There are two cases for the menu to move on your reMarkable.
The more common reason your menu moves is based on your template orientation. Each template is set to either portrait (default) or landscape mode. This doesn’t change the PNG image itself (hence why the Blank template image is used for both the JSON listings) but instead moves the menu as the reMarkable assumes you’re holding it differently. Switching to another template using the other orientation will switch the menu back.
The other more user pre-determined reason is whether you’re left or right handed. This option moves the menu from the left to the right side or vis versus. It can be changed by going into Accessibility under Settings.
Do the images NEED to be 1404 by 1872 pixels?
UPDATE: On the last update I noticed my screen images no longer squished to fit. Instead it showed a section of the image (as mine was larger). I've had to start resizing it to fit.
The default templates and screen images measure 1404 by 1872 pixels. I’ve heard online that they need to be that size and have never tested custom templates that were another size. That said, I have used several sleep screen images, saved under suspended.png, that weren’t 1404 by 1872 pixels. In those cases I find the reMarkable simple squishes the image to fit. If you were using an image more sensitive to its aspect ratio being altered this could be a problem but for simple photos and the like I didn’t notice any obvious issues.
Can I delete Quick Sheets?
In short you can’t but you can remove the individual pages. At first glance the quick sheets option seems to be the same as the notebooks but they aren’t. Think of quick sheets as a pile of scrap paper or post it notes. When you have a random thought that you don’t want to lose you can simply tap the handy + Quick Sheets button at the top for a new page which create an empty page within Quick Sheets where you can jot down your idea before you forget it. Once done you can leave it to file later or move it into whichever notebook it truly belongs in.
I personally also find Quick Sheets handy when testing if a custom template was uploaded, fixed, or something else without having to use one of my more favorite notebooks.
How do I connect to my reMarkable?
If you’re on an Apple or Linux computer you can use my previous post Learn How to Access Your reMarkable Through the Command Line that walks you through how I used my terminal to connect to my computer; while on Windows you can follow along with Bash but I’m not sure if the commands will be slightly different or not. I’ve only ever connected this way but I’ve also heard of people connecting via other applications like FileZilla or WinSCP.
Can’t connect! Getting a “no matching host key type found” error.
This happened to me between running the beta macOS Ventura operating system and my reMarkable updating to version 2.15.0.1067. With the last update the reMarkable now accepts different host key algorithms so this fix is no longer needed. I’m keeping this question here in case something similar comes up and, if it does, you can check out my related post: How I Solved My SSH Connection Error: No Matching Host Key Type Found
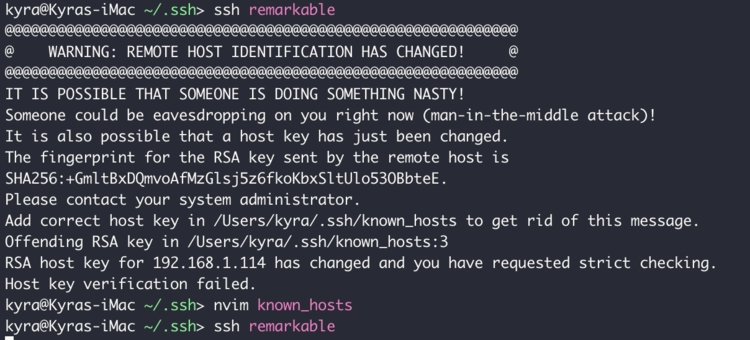
Can’t Connect! Getting “WARNING: REMOTE HOST IDENTIFICATION HAS CHANGED!“
When the reMarkable runs a large update the host identification changes so this warning, seen in the below photo, pops up when attempting to SSH in. To fix it you look at where the offending RSA key is (in this case line 3 of my .ssh/known_hosts file) before opening the file, deleting the line, saving the file, and attempting to SSH in again. At this point it thinks it’s a new connection and asks you to confirm before adding the fresh identification back into the file and proceeding. For more information about this you can check out My reMarkable2 Updated! This Is What I Did Next post under Hit an Issue.
SSH into my reMarkable after it’s updated. Here you can see I need to go into the known_hosts file, remove the third line, and save before attempting to SSH again. I know this from: /.ssh/known_hosts:3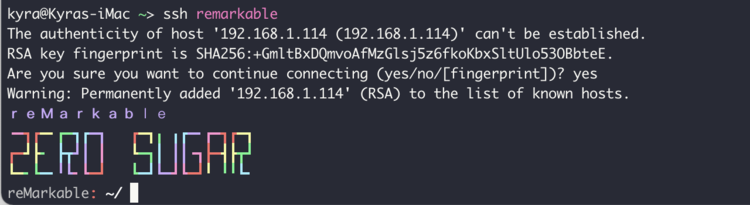
Is there any file location that isn’t reset on a reMarkable update?
I’ve heard of people getting around their sleep screen image getting removed by uniquely named a copy and saving it alongside the other default screen images within the /usr/share/remarkable/ directory. The reMarkable image gets reset but the uniquely named one doesn’t so they can run a simple cp command to restore it rather than an scp and needing to remember where the image is on their computer. Thus the remarkable directory doesn’t seem to be fully reset on an update. Additionally, I’ve also kept a couple directories with files inside them within the /home/root/ directory and they remained the same after updates too. Other than that I haven’t done much experimentation.
How do I go about backing up my reMarkable?
I haven’t had to restore my reMarkable so this is untested. That said, I’ve written a script that, when executed, creates a dated directory and backs up my reMarkable into it. You can find my Bash script on GitHub or follow along with the how and why in my post Simple Script to Help Backup Your reMarkable. At the bottom of that post I also go over how I sometimes manually backup my notebooks by exporting them from the reMarkable app; however, the custom templates won’t be visible that way so with those notebooks I need to email them to myself. When the notebook gets too large it fails to email so I then need to sent it in parts and, using Preview, combine them together on my computer.
I want to go WAY beyond this… what have you come across?
Just a warning most of this stuff I’ve just glanced at and haven’t looked into it too much. I figured I’d include it in case it interests you and in case I have trouble finding it in the future.
- A GitHub organization called reHackable containing many reMarkable-related repositories.
- Through Hacker News I came across How I bricked then recovered my reMarkable 2
Official reMarkable Support
If you need help with your reMarkable here are the official reMarkable troubleshooting questions and FAQs. If you have issues you can start a support ticket through their website’s Contact Support. Their social media accounts are: Instagram, Twitter, and Facebook.
I hope these questions and answers helped you out with whatever you’re trying to do or solve. If you have another question feel free to post it in the comments below. If you’re a new user don’t forget to grab your extra reMarkable pen tips from the packaging! If you’ve been a user awhile is there something, looking back, that you wished you had known? If so you can also share that below.
Hope you’re having a good week and a great day!
If you’re interested in getting any of my future blog updates I currently come out with a new one every second Wednesday and share them to my Facebook page and Instagram account. You’re also more than welcome to join my email list located right under the search bar or underneath this post.