
How I Easily Used My Custom Color in My SwiftUI Project

The other day I decided to put off my coding conundrum by distracting myself with how I could bring in one of my favorite colors to my SwiftUI project using the SwiftUI.Color struct. This was super simple to do once I figured it out so I knew I needed to share it in case it can help you with your own project.
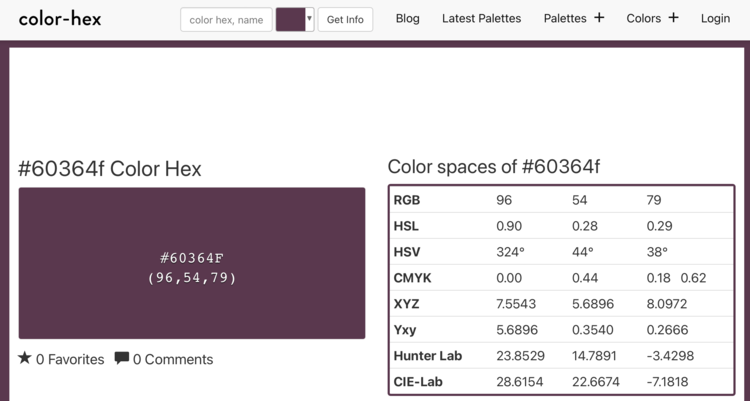
TLDR: Take your color and find it on Color Hex. Scroll down to find the RGB Percentages of your color and use that in the SwiftUI.Color struct to create the color in your code. In the below example the color #60364f becomes Color(red: 0.4192, green: 0.2358, blue: 0.3450).
The other day I was playing around with a small project in XCode and I wanted to easily tell where each View was. To see this better I decided to change the background color of the views in question. At first I considered something simple like using the default colors (example: Color.black) but then I decided to procrastinate fixing the rest of my code and instead figured out how to use one of the colors I love from my website.
For this example we’ll go with the purple color you can see around this post, specifically #60364f, but I also followed the same steps for my blue-ish one, #405161, too.
As you often do, I started out by typing in Color( within my XCode window and looked through the auto-complete recommendations within the resulting popup that appeared.
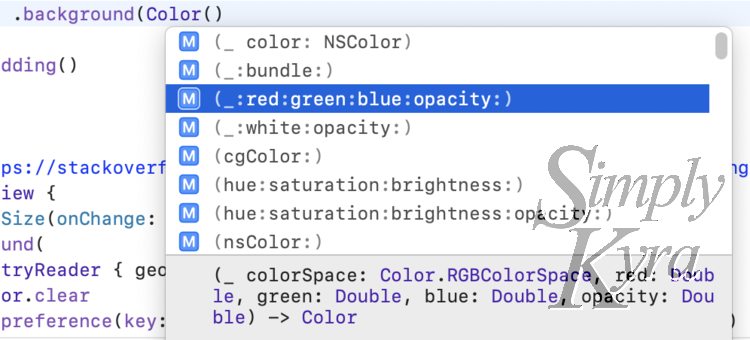
Color( I was able to see what I could use to set the color.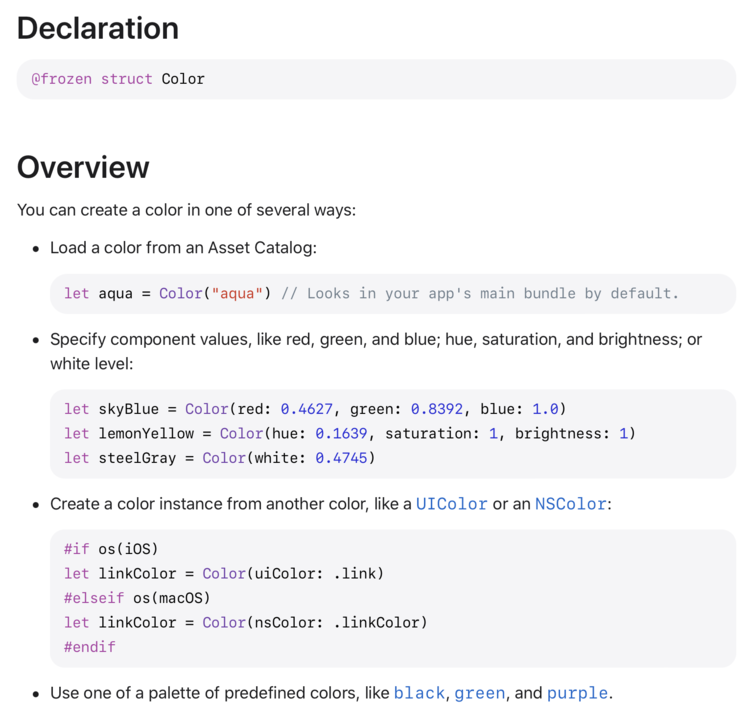
SwiftUI.Color struct on the Apple website. This screenshot of the Declaration and the top portion of the Overview was taken on February 3rd, 2022.After taking a quick glance around I next looked online and found CodeWithChris’ SwiftUI Color page that went over, amongst other things, custom colors by using the RGB (red, green, and blue) values to display the color. Their example was for the color cyan and showed Color(red: 0.0, green: 1.0, blue: 1.0). As a quick aside, they also recommend, at the bottom, adding color sets to the Assets.xcassets of your project. I haven’t looked into this yet but I’m writing it here so I don’t forget that’s an option when using custom colors in the future.
With that read I checked what my RGB values were, as I had it written it down along with its hex number, and quickly jumped into some failed experiments. This purple color (#60364f) had an RGB value of 96,54,79 so I used the SwiftUI.Color struct and attempted Color(red: 96.0, green: 54.0, blue: 79.0) which gave me the color white and then Color(red: 0.96, green: 0.54, blue: 0.79) which gave me the color pink. I then realized that I should stop experimenting and figure this out another way so I searched online using the hex number and found Color Hex. I love how this website looks although I’ve mainly just used it to convert any colors to another format. While scrolling down the page I found a section, right after shades and tints and before triadic and analogous colors, that showed the RGB Percentages.
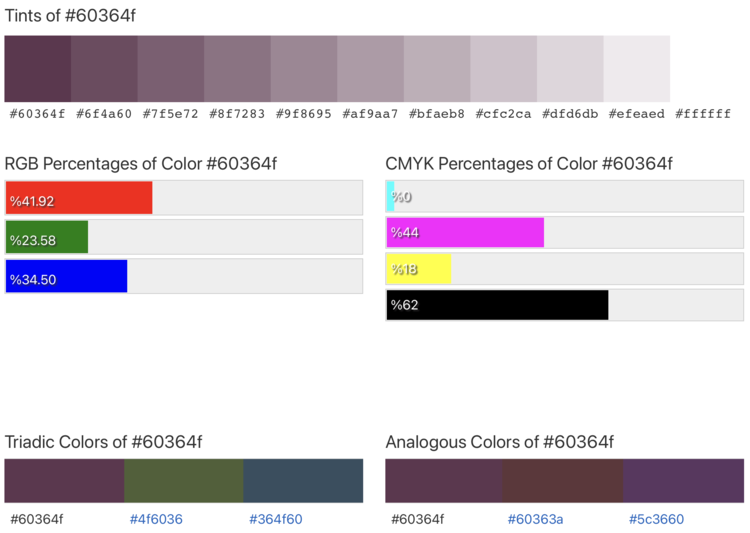
RGB Percentages of Color #60364f. Here I can see the percentage of red, green, and blue used together to make this color. This screenshot was taken of Color-Hex on February 3rd, 2022.I knew immediately that the RGB Percentages was what I had to use and so I quickly returned to my code, converted each of the three percentages into a decimal number, typed them in. Voila it created the perfect shade of purple!
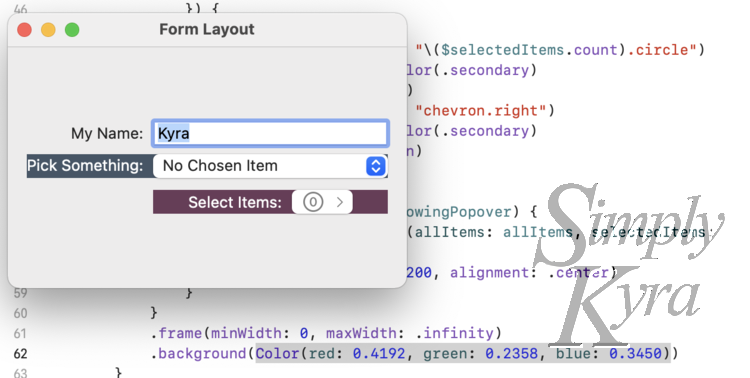
Color(red: 0.4192, green: 0.2358, blue: 0.3450) and it turned out perfectly! In the Form Layout window the My Name was left alone, the Pick Something was set to my blue-ish color (#405161), and the last one, Select Items was set to this purple (#60364f).And with that I brought my custom color into my code. Going forward, if using these colors in a project, I could see creating an asset, setting a shared variable, or something else. Either way I’d want the color set in one place and accessed throughout the project making it easier if I were to change the color to something else later down the road.
Hope this helps you out and, if so, I’d love to hear how in the comments below! Have a great day.
If you’re interested in getting any of my future blog updates I currently come out with a new one every Wednesday and share them to my Facebook page and Instagram account. You’re also more than welcome to join my email list located right under the search bar or underneath this post.