

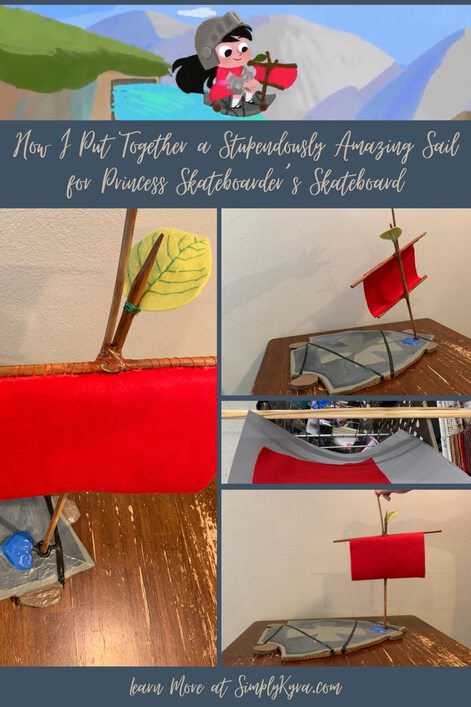
How I Put Together a Stupendously Amazing Sail for Princess Skateboarder’s Skateboard

I absolutely love the skateboard and helmet I made for Zoey’s costume but what I truly love, looking back, is this sail I made to turn the skateboard into a boat. Plus it was incredibly simple. I bought most of the supplies ahead of time, gathered the rest from my stash, and was able to easily make it in one day while the kids were in school. Here’s how I did it in case you want to do the same too!
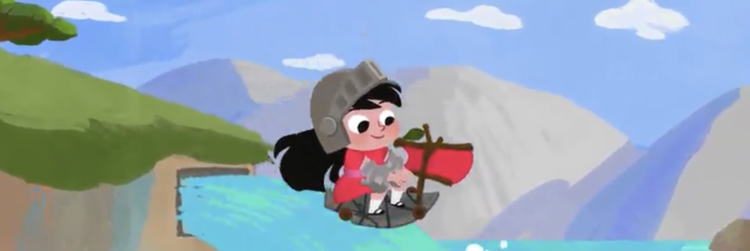
In the Princess Skateboarder video, found through Homer, the Princess creates a skateboard to escape from the tower that the dragon trapped her in. While first trying out the skateboard she had fallen and ripped her dress. Although the dress never appears ripped she does hold up the piece of cloth that ripped off when it happened. Anyway, once she made the safety gear she escapes down the tower and is then blocked by the moat. That’s no problem for Princess Skateboarder as she simply flips her skateboard over, making the shield concave to float, and uses broken branches and the ripped part of her dress to make a boat to cross. She then travels across the moat, reminding me of a windsurfer, and then, once reaching land, quickly reverts back to the skateboard by flipping it back over. Although Zoey didn’t truly need to turn her skateboard into a sailboat I knew I needed to do it for her as it’s awesome!
As a quick aside, in case you’re also making a Princess Skateboarder costume, I wanted to share all my Princess Skateboarder related posts in one easy to find location for you. My final overview post hasn’t gone live yet but I’ll link to it here once it does.
Planning the Sail
Early on in the planning I knew I’d need dowels to make the mast and attach the sail. Thus while shopping at Michael’s Arts and Crafts, while planning all the costume parts, I picked up three dowels and a piece of red felt for the sail.

I had originally planned to add a recessed hole, matching the mast size, to the underside of the skateboard so Zoey could simply flip the skateboard over, stick the mast in the hole, and pretend she was sailing. As I made the skateboard; however, I started doubting that plan as I didn’t want the top of the skateboard damaged while she sailed away. I decided instead to take creative license on the story and instead have the mast rest on the top of the skateboard so I didn’t need to worry about the top of the skateboard being pressed to the dirty ground.
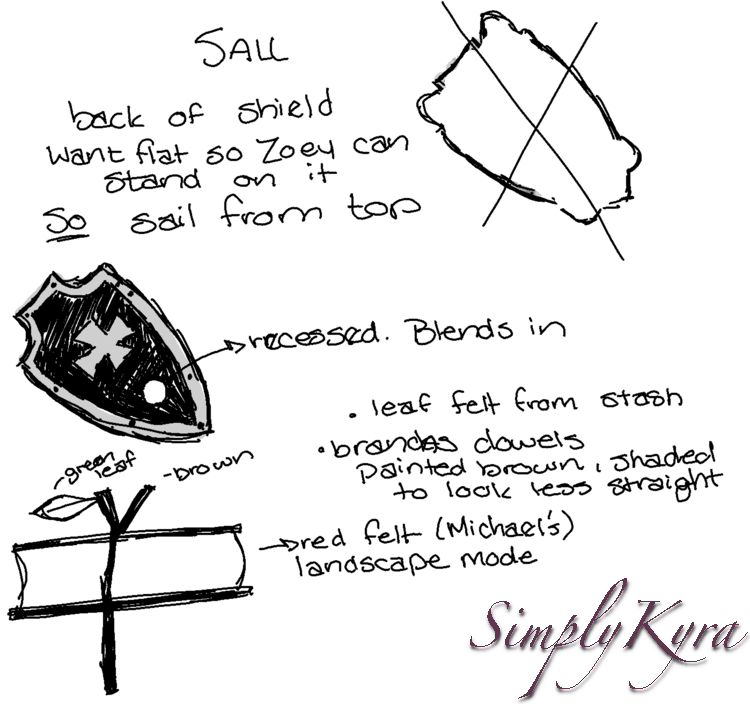
Because I had the general idea from the beginning and had bought the dowels ahead of time I was able to alter my skateboard plan on the go so that the mast had somewhere to rest securely while Zoey windsurfed without a gaping hole in the top of the shield.

Cutting the Dowels
With the idea having sat in the back of my mind for so long I was excited to make it truly become a reality. I started out by triple checking that the larger dowel still fit within the skateboard’s necklace spot before making the mast.

With the dowel resting on the skateboard I compared it to the image of the Princess Skateboarder’s sailboat and marked how high I wanted the mast to be. I then grabbed my X-Acto knife and held it in place against the dowel with one hand as I rotated the dowel continuously with the other. As I rotated the pressure from the knife cut a groove into the dowel and kept going deeper and deeper. When I thought it was deep enough I attempted to bend the dowel in two so it would break at that point. I hadn’t cut deep enough; however, as the two pieces broke at an angle. This was emulating a tree branch so I figured it was perfect and quickly used my knife to whittle the end so it was smoother and wouldn’t hurt Zoey later on.


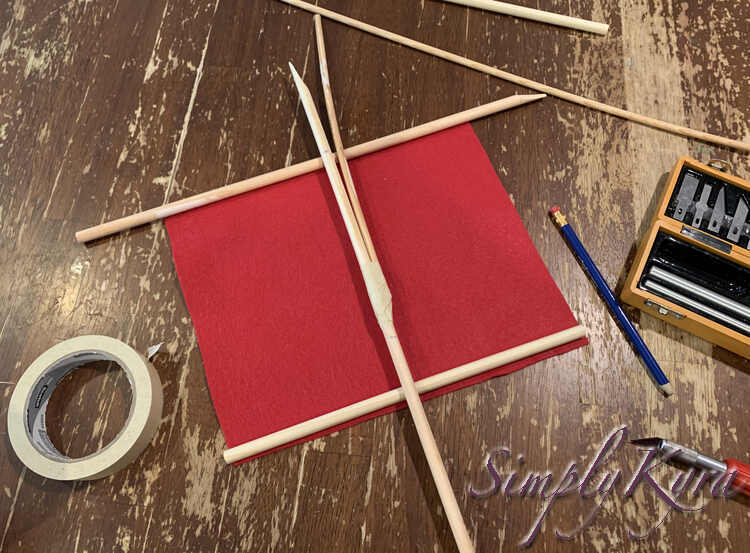
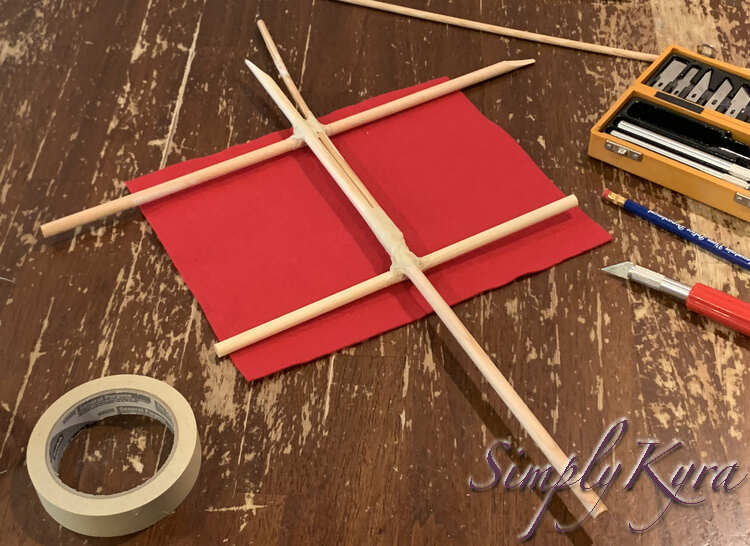
With the mast cut it was now time to measure and cut the two horizontal pieces that would hold the sail in place. I bought two matching dowels as I had planned to use the same size piece for the horizontal parts too. I started by grabbing the piece I had just cut off the mast and laid it overtop of the horizontal felt. It was a bit longer than the felt was but that was perfect compared to the video’s screenshot I had open next to me. I then grabbed my second dowel, laid it over the felt so the end was flush with felt’s short end, and marked where the felt lined up with. I then followed the same steps as above with my X-Acto knife against the dowel and made sure to cut a deeper groove before breaking it in two. It made a clean cut this time around and I now had three perfectly sized pieces of dowel to make my mast out of.


With the three main mast pieces cut out all I needed now was the final decorative part for the branching twig seen at the top Princess Skateboarder’s mast. First; however, I laid out the pieces so I could get a look at how I wanted it to be and then grabbed the skinnier curved dowel to cut a piece that would curve out from the main dowel. At Michael’s that day this dowel was the only skinny one left and at first I was disappointed that it was already bent a bit but looking back I’m so glad it was the way it was as I was able to cut the curved part off and the branch now natural curves away from the mast without any extra effort.


Assembling the Mast
Finally it was time to connect the doweling together to form the mast. I had briefly considered using crazy glue or something to join the pieces together but as I was planning on painting it I decided to instead use masking tape to connect the pieces. I was worried paint wouldn’t attach the same way over the glue or other tapes compared to masking tape. I started out by choosing where on the main mast I wanted the branch to come out of and then connected the two with masking tape. Once it was attached I kept wrapping the two together with my tape so the branch would appear to slowly jut out from the mast rather than just appearing. I wanted it to look more natural. With the branch added it was now time to add the horizontal beams. To do this I started, again, by laying out all the pieces on my felt. Once I was happy with how it looked I marked where the top horizontal beam was with my pencil and then marked about an inch above where the bottom beam was laid. I moved the bottom one up an inch so that these two points would be closer together and the sturdy felt sail would naturally look liked it was billowing out from a wind. With these two points marked I grabbed my masking tape again and wrapped the two together making sure to cross the tape back and fourth so it would be secured in the 90 degree cross shape.
With all the wooden dowel pieces cut to size and taped together the mast itself is now done! I wanted the mast to be a darker brown to match the brown branches Princess Skateboarder used so the next step was now to paint it.
Painting the Mast
I grabbed my only two brown acrylic craft paints, a paintbrush, and then one of my kids sensory bin kitchen set bowls so I could rest the mast down without getting paint on the table. With all the supplies ready I opened the dark brown paint and squirted it directly onto my paintbrush before smearing it over the mast. At one point during this process I ripped off some paper towel to help protect the rim of the kids’ toy bowl so it wouldn’t get painted. Once the entire mast had been painted dark brown I was going to leave it to dry but I had noticed that some of my paints had been dried out so I quickly checked my light brown one, noticed dried paint blocking the opening, and so quickly popped the top off so I could unblock it for later. I ended up getting the paint on my paintbrush handle and brush in the process so added the light brown highlights to my mast right now rather than wasting the paint and waiting to add them later.


Later, once the paint had dried, I went back with the dark brown paint to tone down the lighter brown highlights and made sure to dollop a lot more of the brown paint on the taped sections to better hide that there’s tape under the paint. I also noticed a bit of paper towel stuck to the mast when I lifted from the bowl so I also made sure to paint over that bit too.


Once the paint had dried again it was finally time to add the felt decorations. I had planned to add the red felt as a sail but I also needed to create a green leaf for the top of the mast.
Creating the Single Leaf
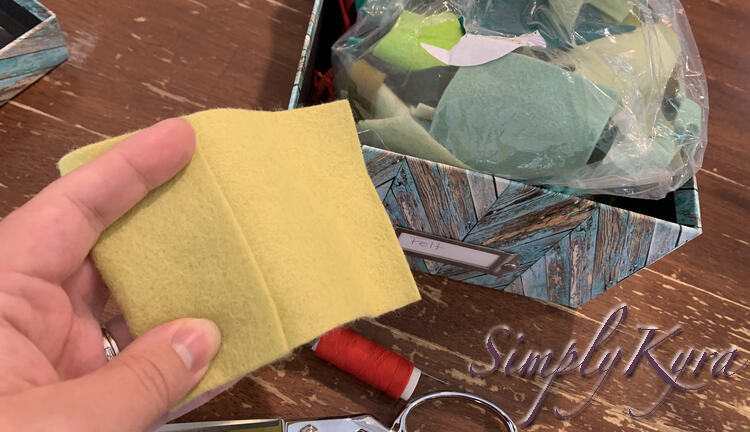
Once the mast was constructed and painted it was time to make the leaf for the very top. I hadn’t bought any green felt as I remembered I had some in my stash. As such I went and grabbed my container of felt along with two shades of green thread. After looking through my felt stash I settled on a good quality light green felt and, after looking over the screenshot and my mast, determined the width I wanted the leaf to be before folding the end over and free cutting a symmetrical leaf.

I liked how the leaf looked but I wanted it to look better. As such I decided I wanted to add the leaf’s stem and veins so it looked more detailed. I compared both the green threads I had with the felt and settled on the darker shade. I then gathered up my dark green thread, the leaf, a sewing needle, and scissors before settling on the couch to watch a show and stitch.
After threading my needle and tying the two loose ends together it was time to decide how I wanted to decorate the leaf. As the leaf is double sided I knew I’d needed to make my knots small and hidden so that both sides of the leaf looked good. I decided to start at the bottom center and work my way up the center of the leaf to make the main vein. While stitching I used a mix of straight and back stitches making sure to overlap at points so the center vein is thicker rather than leaving the odd gap. Halfway up I realized I should start making the veins branching out from the center and so started making them then. Since the main vein was composed of double sets of stitches I made sure the branching ones was composed of only single stiches rather than overlapping them too. That means as I worked my way up the vein I left gaps on both the front and back of the leaf. On the way back down to the center vein I alternated how I sewed so those gaps were closed up making a solid but skinny line. Once I made my way back to the center I continued up making the center vein until I reached the top and then went back down adding any needed branching veins as I went.

While decorating the leaf I ran out of thread several times making me have to knot, trim, and rethread the needle with a new length of thread. As such when I finished embroidering the veins on the leaf I was left with a length of thread coming from the base of the leaf. This was perfect as I realized I could use it, combined with super glue, to attach the leaf to the branch.
Gluing and Sewing the Parts Together
With the leaf completed it was now time to attach the leaf and sail to the painted and dried mast. To do this I decided to use the thread, hence why you saw red thread in some of the previous photos, along with Loctite super glue to help keep it together for way longer.
Attaching the Leaf
I had some extra thread extending from the leaf’s base once I finished embroidering it. As such it made sense to keep using that thread so, after lining up the leaf and determined which branch I wanted it to grow on and at what point it should be on the branch, I glued the leaf down, held it in place, took the thread, and wrapped it around the branch. Once I returned to the leaf, after the first loop, I used the needle on the end to bring the thread through on the one side of the stem and out on the other side. I then continued to wrap it around and thread it through the leaf stem repeatedly until I was out of thread. I then tied a knot and used the super glue to keep it secured at that point on the branch.


Attaching the Sail
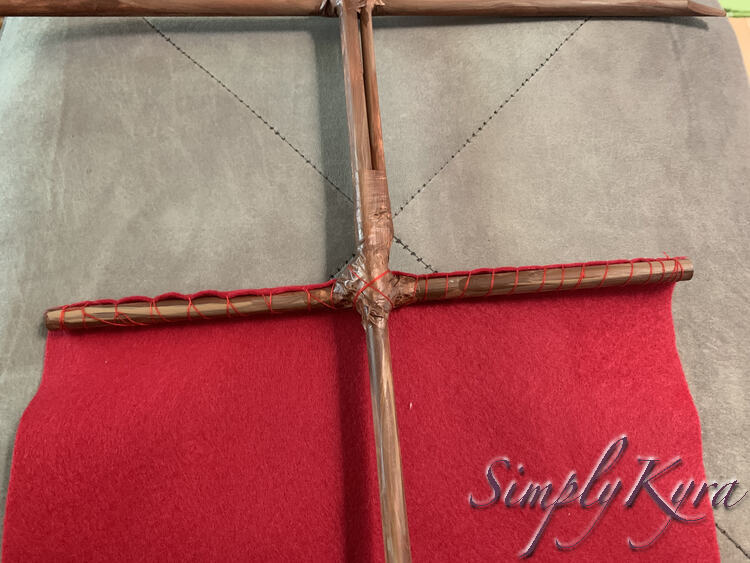
With the leaf adorably attached to the branch it was time to switch to red thread and tie the sail onto the mast. I played around for a few minutes lining parts of the sail up with the mast before deciding, since I want the sail to look like it’s billowing, to attach the sail facing the opposite way. This means, if I started with the base of the sail, that I wanted to lay the top of my felt over the bottom beam with the rest of the felt below the beam. Then, once it was glued and sewn down, I would flip the sail up, curl the top down, and do the same at the top but this time with it essentially facing above rather than below.
With that decided I threaded a length of red thread in my needle, ran the super glue along the bottom horizontal wooden beam, lined up the top edge of the felt with the glued wooden dowel, and pressed it firmly down. I then tried to quickly sew the two together, with the glue still wet and sticking to my fingers, by threading the needle through the felt and wrapping it around the dowel. I repeated the steps of sewing through the felt and wrapping the thread around the dowel multiple times as I worked my way along the beam. Around the mid-point I ran out of thread so I quickly tied it off, threaded some new thread on, and finished it before the glue could make the felt too hard to sew through.

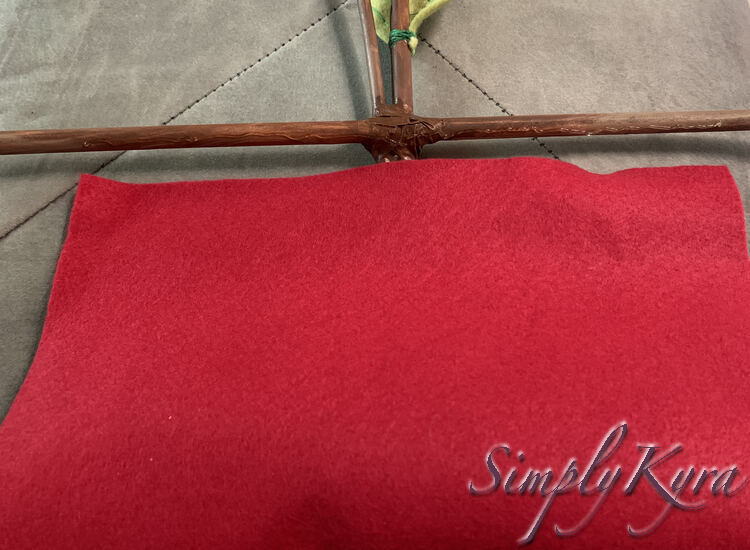
Once I finished the bottom I folded the sail up and then folded the top part over again so it could reach the top dowel but be pointed upward. Like before I made sure my needle was threaded first with some new red thread, checked where on the dowel the sail lined up with, ran the super glue along the length of that space, pressed the felt sail down, and quickly sewed it on securely. Again I had to rethread my needle halfway through as I also didn’t want to use too much thread and get unneeded knots that would take longer to fix than it was worth.
The Final Sail
And with that the sail was finished! I love how it turned out so much!

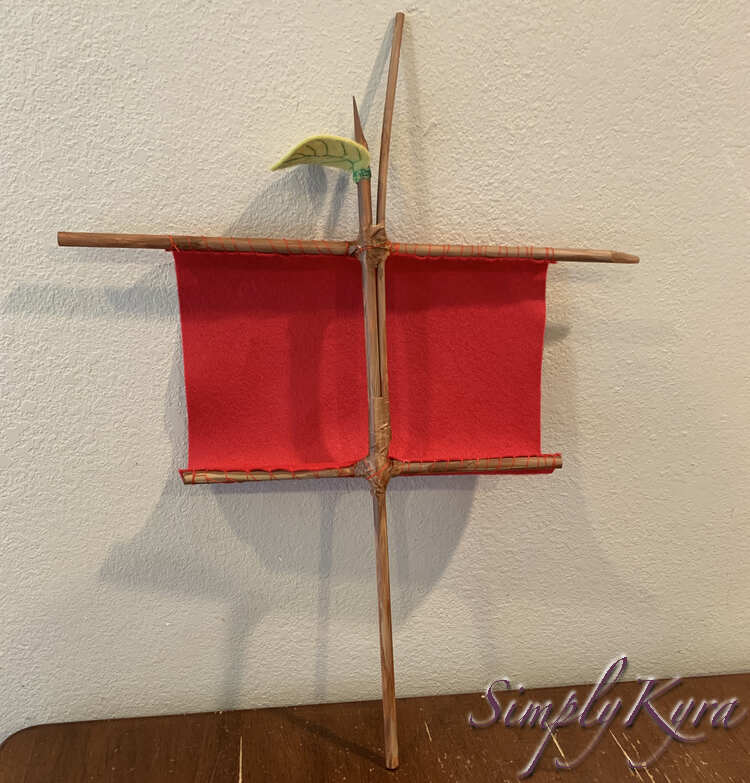
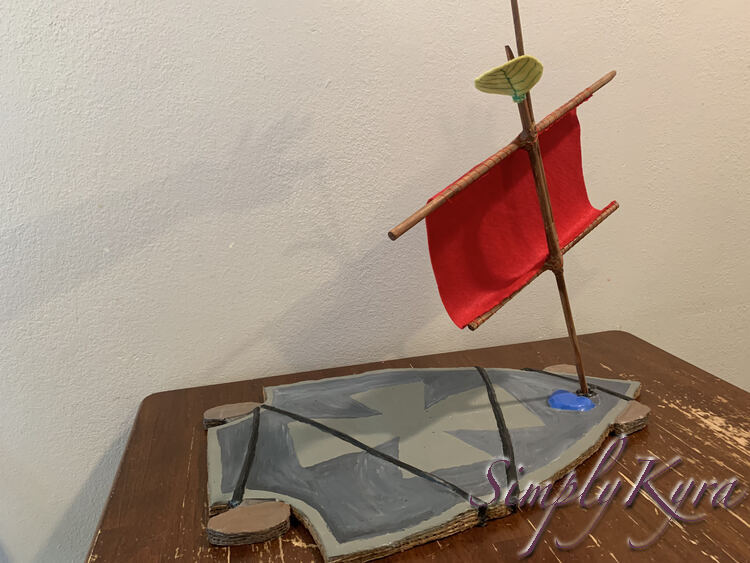
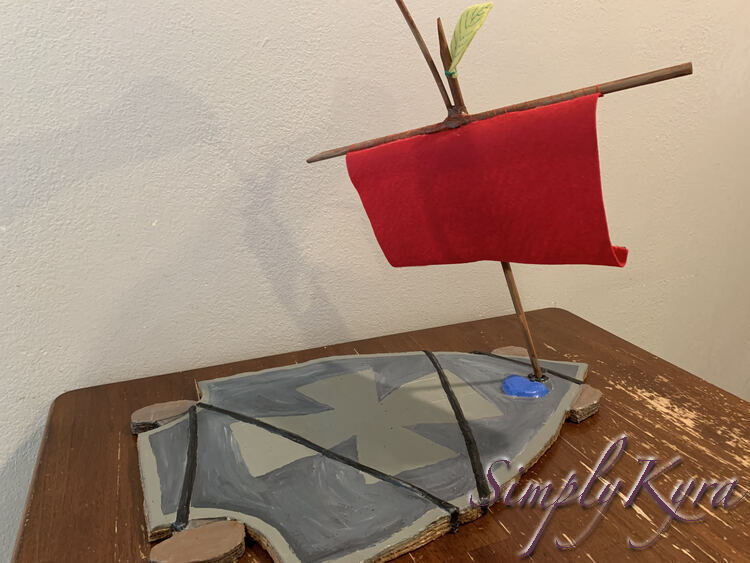
Although made from completely different materials and colors I love how the sail looks against the skateboard. It would look so much better if it was actually used to sail across the water (and floated and was water proof).


And with that all the parts of the Princess Skateboarder costume are done…. unless we come up with something new before Halloween. Thanks for coming along on the ride and I can’t wait to share how the final costume looks if I can get some awesome photos over Halloween. I’ll share the final post once I write it and will add the link to each of these posts.
I’d love to hear if you made, or will make, your own Princess Skateboarder boat. If so feel free to share with us in the comments below. I hope this post helps make your week brighter.
If you’re interested in getting any of my future blog updates I currently come out with a new one every Wednesday and share them to my Facebook page and Instagram account. You’re also more than welcome to join my email list located right under the search bar or underneath this post.
Did this save you time?