
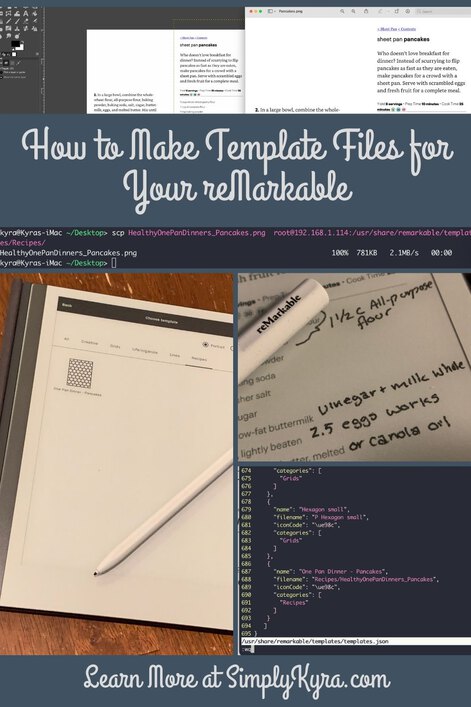
How to Make Template Files for Your reMarkable

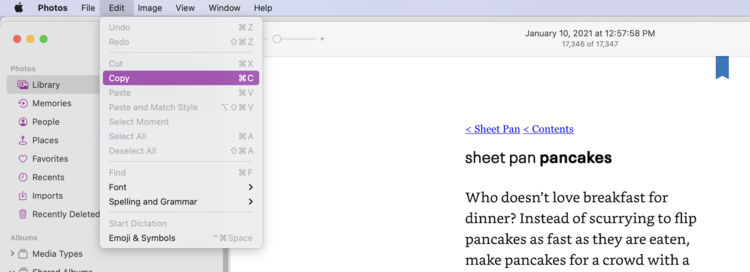
I previously posted about how you can access your reMarkable through the terminal on your Mac along with changing out it’s default sleep screen image. Now I want to share how I’ve taken a PDF, or a PNG image file, and converted it into a template that I can use with my reMarkable2.
For future reference I’m writing this while using my reMarkable2 running version 2.5.0.27 of the software.
Introduction
The templates for the reMarkable needs to be in a PNG format. This means if you want to use a PDF as a template you need to first convert each individual page into a PNG image file and then use each of those images as a stand alone template. This also means you can create your own templates by creating an image file. Just remember that the screen is 1872 by 1404 pixels so you’ll want to keep your template the same dimension. Also, if you’re planning on using this template with the writing tools open, for the tool selection, you may want to leave a blank space on the left hand side so it doesn’t hide anything when it’s open. Once you’ve created your image file, uploaded it to your reMarkable, and edited the JSON file you’ll be able to use your custom image in any notebook page you want.
I’m going to start out by going over the reMarkable’s notebooks, pages, and layers in case you don’t know what their template is and how it’s used. I’ll then go over how I access the reMarkable template directory (also called folder) quickly by adding a symbolic link to my home directory and then follow that up by explaining the two methods I used to create a template image (via a PDF or GIMP). I’ll then share how I uploaded my image to my reMarkable2 and then finally how I edited the JSON file so the reMarkable is capable of seeing the new template file.
Also one quick warning. I haven’t had my reMarkable2 long enough to bring it through a software update, but I’ve heard that when it updates templates you’ve uploaded in the past may be removed. Again, I haven’t had it happen to myself but just in case I’m planning on keeping the PNG images I uploaded also on my computer and will, going forward, keep track of any JSON updates so I can easily fix anything after an update.
Overview on the reMarkable: Notebooks, Pages, PDFs, Templates, and Layers
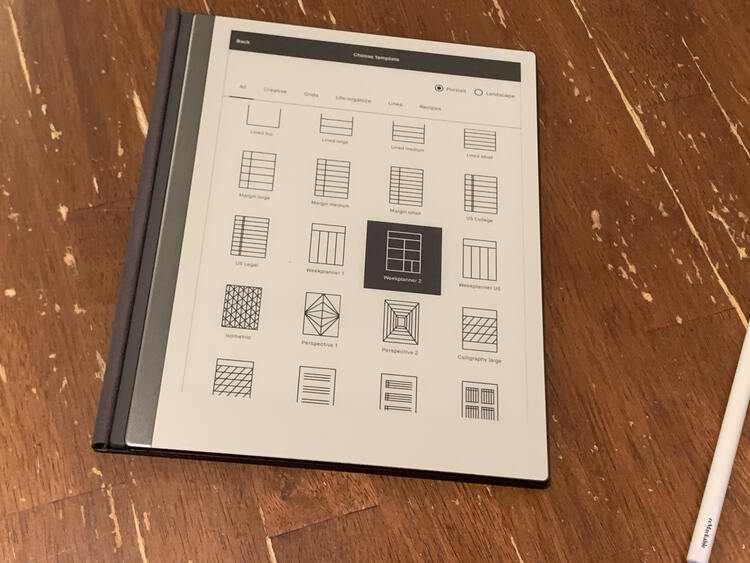
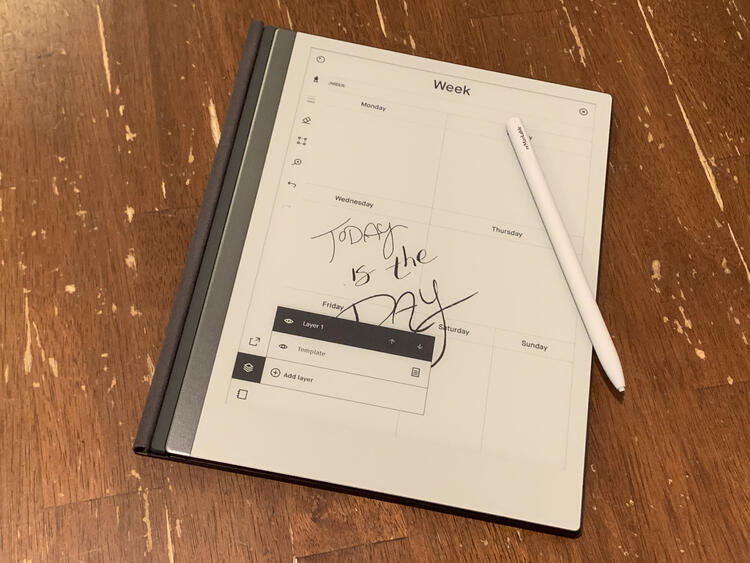
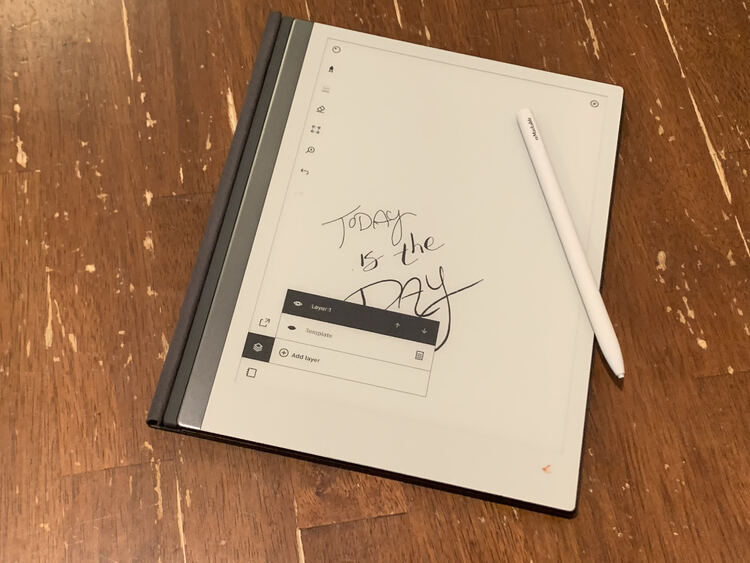
The reMarkable device lets you create numerous notebooks with many pages within. For each page you can check out the layers, by going through the writing tools menu that pops up on the left side of the screen, and change out what the background template is. By default, when created, each page will have two layers that consist of the template, bottom layer, and a blank layer over top allowing you to write over the template. If you want to switch out the template all you need to do is click on that layer and, once the options open, choose which template you want that page to show instead. Then when you swipe to create a new page it will, by default, have that last chosen template as it’s own template. This means you can have a notebook with each page having the same template or change out each page making them all different. An example of this might be a journal where the pages can include a monthly calendar, a weekly calendar, a grid to design on, or blank pages to draw on. This also means you can switch out a page halfway through a drawing, say if you wanted to start out with a grid to help draw something, and then switch out the template to something else; say perspective lines to help draw the background around the object. These templates can also be used in other notebooks which means, if you want, you could use the same template in each notebook you create.
In addition to the notepads with the pages and templates the reMarkable also allows you to upload a PDF. This PDF can kind of feel similar to a template as you can still add layers over top of each page and mark it up however you’d like. Templates are not the same as PDFs; however, as you cannot add or remove pages, since it’s static, or change the background as it isn’t editable. You also can’t use any of the pages in a notebook and the only way you’d have more than one copy is if you duplicate the entire PDF.
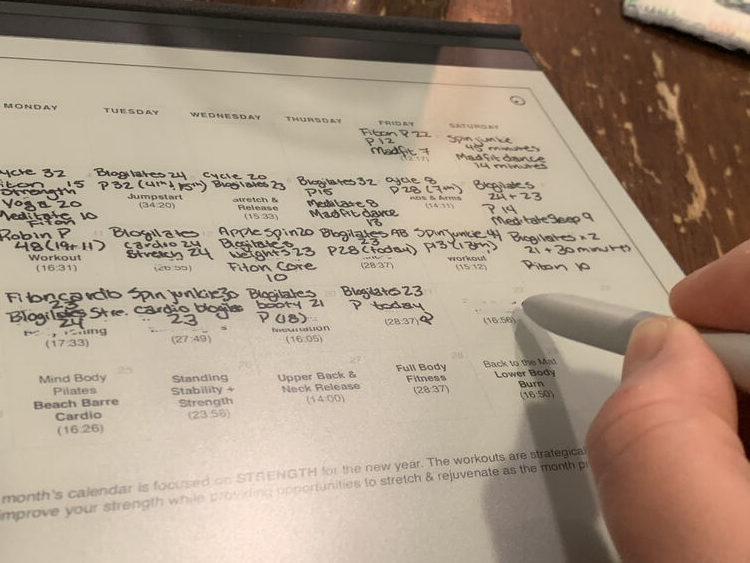
PDF for my Balanced Life Pilates Sisterhood membership on my reMarkable2 so I can keep track of my daily workouts. As I can’t edit the PDF itself I’ve switched to a pen option that allows me to choose my ink color, in grayscale, so I can use white ink to essentially erase the text when I want more room to write what I did.Update: Apple App
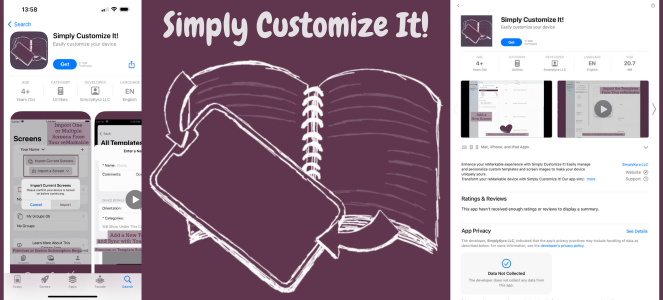
Before going into the below information wanted to mention that I've since come out with an iOS/macOS app that you can use to change out your templates and screens with a simple button press while remembering them for the next update. More information can be found about it here with a direct link to the App Store here.
Simplify the Process With a Symbolic Link
When I was first starting to look into how I could create my own templates I came across the reMarkableWiki’s article on Customizing the Templates that was perfect for telling me what to do. In it I discovered that the templates are stored nested within several directories so rather than memorizing the pathway, which I kind of still did, I chose to create a symbolic link in the reMarkable2’s home directory so I could get there more easily. In case you’re curious the pathway is: /usr/share/remarkable/templates/.
To create the symbolic link I called on the link command, ln, and specified that I wanted it to be a symbolic link using the -s parameter. I then followed the parameter with the target pathway, where you want the link to target, and then followed that with the name I wanted to use for that link. So in this case I’d go to my reMarkable2’s home directory and create a symbolic link to the nested directory and label it templates by typing in:
ln -s /usr/share/remarkable/templates templatesThis means I now have, what feels like, a directory named templates located in my home directory. When I cd, change directory, into it I’m actually now in /usr/share/remarkable/templates.
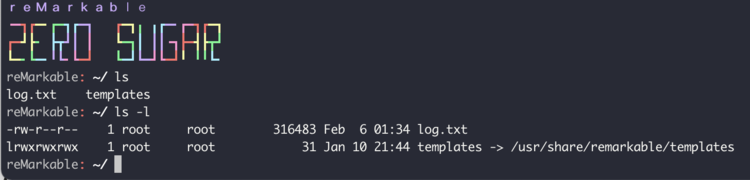
templates directory was created properly by running an ls, list directory, command using the long listing parameter, -l, on your home directory as it will show you what the templates directory you made points to. You can see the difference in the results if you do a common ls command rather than the fuller ls -l command.Creating Your Template Image
Templates for the reMarkable needs to be in PNG format, but there are so many different ways you can use to create the PNG file. If you look online you can find some free PDFs and PNGs, like in the How to get the best of my reMarkable? group on Facebook, or many templates sold on Etsy. I haven’t tried any of those yet but I have created my own PNG image from a PDF that I already had along with using the free GNU Image Manipulation Program (GIMP) to create a single image by combining two smaller ones together. I figured I’d share both of these ways with you. If you are looking for a different way to create an image you can check out rM User’s Customize Your reMarkable Screens as it touches on making the sleep screen image using several different image editors.
From a PDF
With your reMarkable it’s really simple to convert your PDF into a single or multiple PNG image files. First I added my PDF to my reMarkable2 through the app on my Mac computer; although, if you don’t want to install their app you could always transfer the files using a USB cable instead. Once the PDF is synced to your reMarkable you can simply tap on it to open and then, through the bottom of the left side menu, email the PDF to yourself as one or multiple PNG files. And with that you now have a PNG file for each page in the PDF that you chose to send to yourself.
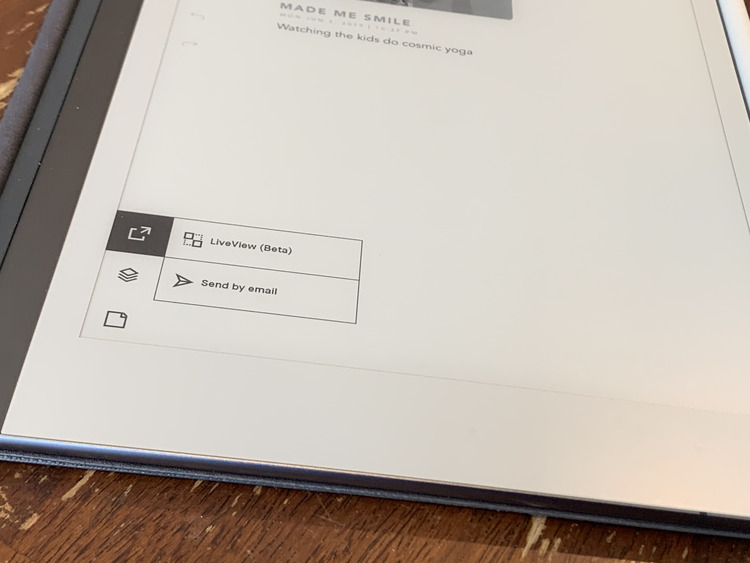
PDF to my reMarkable2 I was able to open it up and choose to sent it back to myself via email.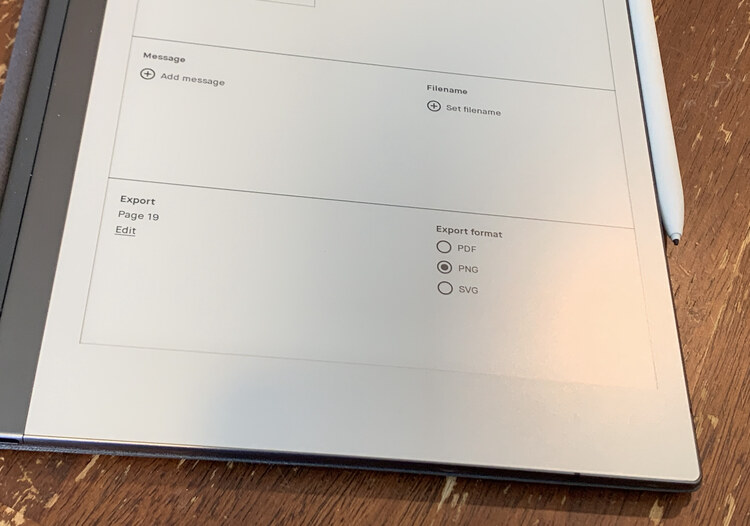
PNG for my Export format and then tap on Edit since I want to email more than one of the pages to me. By default this is set to the single page you were on when you chose to email it out.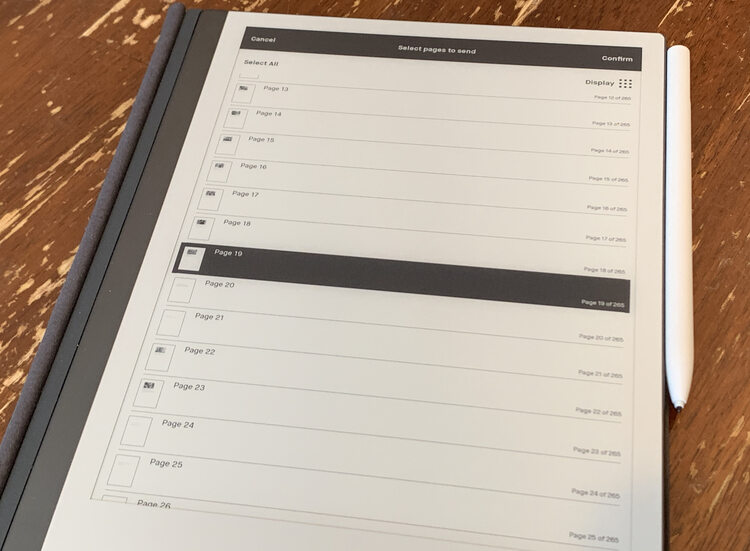
PDF. Here you select all the pages that you want sent to your provided email account as a PNG file.From Scratch
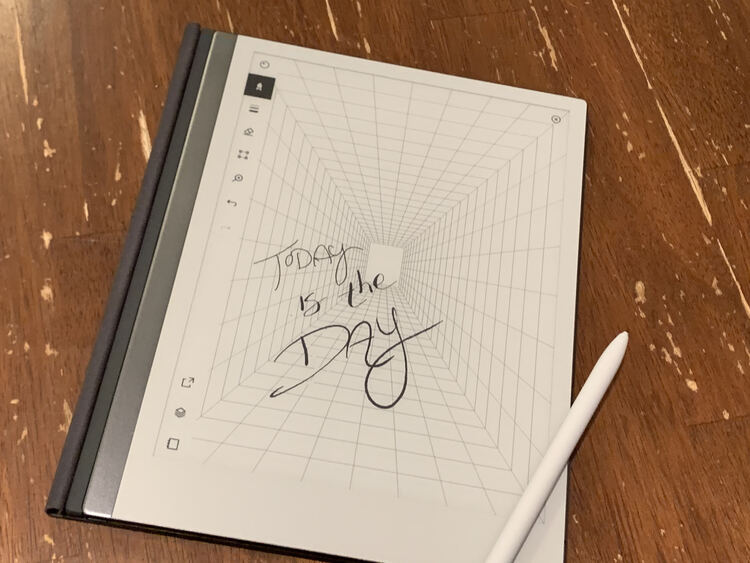
You could also create an image to use as a template yourself. I’ve previously used both my reMarkable2 and the website Canva to create two different sleep screen images for when I suspend my device. Just remember any image you use needs to be in a PNG format so it can be seen as a template.
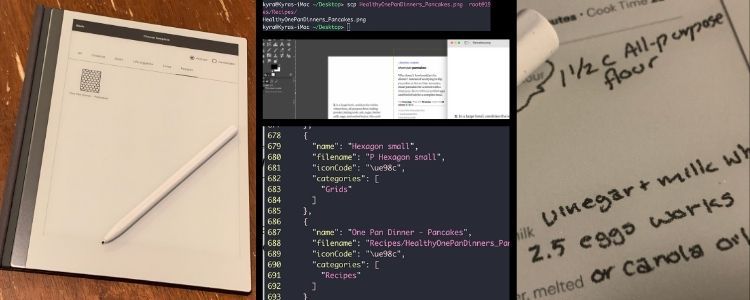
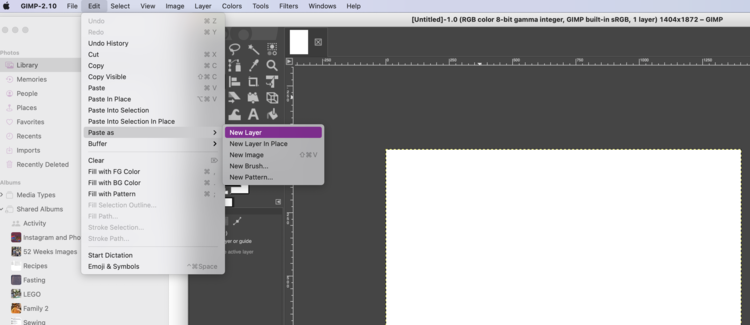
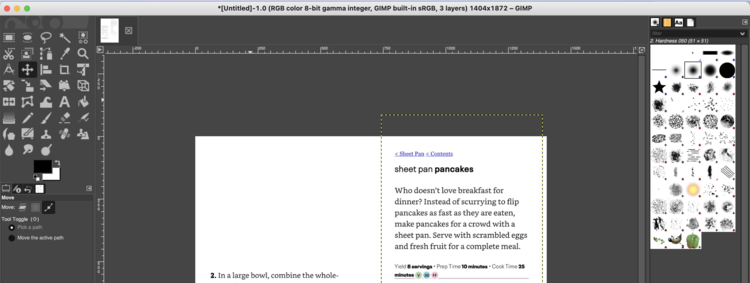
A couple of weeks ago I was making my girls pancakes from a recipe, taken from Healthy One Pan Dinners I reviewed a bit ago, that I’ve been making minor changes to over time as I ran out of ingredients or simplified the process. I realized if I ever take a long break from making this I might just forget what I’ve changed. This lead me to realize that I should maybe make a cookbook-related notebook on my reMarkable but as I wanted to add to it over time I needed it to be a notebook rather than figure out how to create a PDF. I realized I should make my recipe a template, even though I only want it to exist on a single page in a single notebook, so I opened up the free GIMP I had installed, set the blank canvas to the proper size (1872 by 1404 pixels), and copied the two screenshot images I used for my recipe onto the canvas. After rearranging the layers they were on and liking my final layout I exported the newly created image as a PNG so I could use it on my reMarkable2. It was really simple and quick to make.
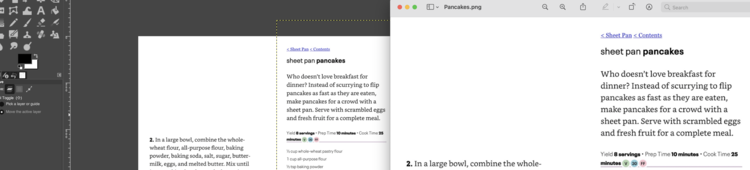
PNG so I could go on to upload it to my reMarkable2.As an aside if you’re making an image for your template don’t create it with a transparent background. I’ve only made mine with white backgrounds so I haven’t tested anything although I’ve heard it can cause weird issues when you erase over such a transparent template.
Upload the Template Image
Once you have your PNG image chosen it’s time to upload the image onto your reMarkable. Since the files you upload to the reMarkable, through their app, goes in a different location I needed to connect through my terminal instead. To connect you’ll first need to go into your settings to find your username, password, and IP address which I shared how to do in my first reMarkable post. In addition to that I also included how to use your computer’s public key instead of your password and how to create a shortcut in your ssh config file to skip typing in the username and IP address each time you connect.
I wanted to keep this newly created template image separate from all of the default ones already on my device so once I connected to my reMarkable and navigated to the templates directory the first thing I did was create a new directory I titled Recipes. I love how it seems that you can create any directory structure, within the templates directory, to organize your template images. The commands I used to do this were:
cd /usr/share/remarkable/templates
mkdir Recipes
I next opened up another terminal window, on my computer, and made sure the working directory was set to the same one where my new template image was saved. This means, when uploading the file, I only need to type in the name of my image file rather than the whole pathway leading up to my image. To upload the image I used the scp command which securely copies files between two hosts on a network. Specifically, I typed in:
scp imageName.png root@XXX.XXX.XXX.XXX:/usr/share/remarkable/templates/Recipes/where:
scpis the program I used which you can read more about through Duke University’sSCPUnix man page.imageName.pngis the file I was to transfer. This can also be written with the relative or absolute pathway before the image name if you aren’t located in the same directory as your image. GeeksforGeeks wrote Absolute and Relative Pathnames in UNIX if you’re interested in learning more about them.root@XXX.XXX.XXX.XXXis the username and IP address listed on your reMarkable under Copyright and licenses. It’s format is the same as an email address where you put your name at (@) email service.:is used to separate the previous username and IP address from the pathway that follows./usr/share/remarkable/templates/Recipes/is the pathway, on your reMarkable, where you want your template image to go. All of the other template images go into thetemplatesdirectory but I had made aRecipesdirectory inside of it to keep any recipe-related templates I may make in the future separate. NOTE: If you set up a symbolic link, as shown above, you can use that here too.
The image uploaded really fast so there wasn’t a lot of time to be able to marvel at the progress indicators that the terminal showed before it reached 100% and finished. Once the image was uploaded I connected to my reMarkable2 and navigated to the proper directory (/usr/share/remarkable/templates/Recipes/) and used the ls command to list the directory’s contents and confirm that my image was actually there.

scp command to upload my PNG to the proper directory on my reMarkable2.
ssh to connect to my reMarkable device, navigated to my newly created Recipes directory, and used the ls command to confirm the image was truly there.Edit the JSON File
Uploading the PNG image to the proper directory doesn’t make the reMarkable suddenly see the new template. To be able to use this image as a template you need to first enter it in the templates’ JSON file located in with the other template images and called templates.json. To see an example of this and learn more about Customizing the Templates you can check out reMarkableWiki’s post.
As I’m interacting with my reMarkable2 through my terminal window I’m confined to staying within the command line interface so to edit the templates.json file I chose to use vim; although, you could use whatever text editor you prefer here. The biggest thing to know about this JSON file is that you don’t want to mismatch any of the brackets and you should pay attention to the indentation of each line as further indents means a different sub-item. The templates.json file just lists each and every template that the reMarkable has so once I opened the file I immediately scrolled down to the bottom, copied the example in the reMarkableWiki’s post, pasted it underneath the last listed template item, and edited the text to fit my image’s information. When pasting it in I made sure to select the spot between the previous entry’s closing curly bracket yet still stay above the square brackets closing the JSON file. As each of these curly bracket enclosed entries are separated by a comma I also made sure to add another comma between my entry and the previous one. I added:
,
{
  "name": "One Pan Dinner - Pancakes",
  "filename": "Recipes/HealthyOnePanDinners_Pancakes",
  "iconCode": "\ue98c",
  "categories": [
    "Recipes"
  ]
}
where the lines mean:
- The comma separating this entry from the previous one.
- The opening curly bracket to show my entry is starting.
- This is where you specify the name you want the template to be called. In my case I wanted to be able to identify this template among many, potentially, other recipe templates so I started out defining it with a variation of the cookbook’s name, titled Healthy One Pan Dinners, and then added on what the recipe was for. Technically, the real recipe name is longer but I wanted to keep my template name as short and to the point as I could.
- This is the filename of your template
PNGimage without the extension included. If I had added my image in with all of the other templates then this would only be my filename,HealthyOnePanDinners_Pancakes, but as I put my image in a sub-directory,Recipes, I needed to include that as my path to my filename so my reMarkable2 could find it. - This is the image that will be shown when browsing through all of the templates. The Customizing the Templates post lists all of the possible images you can set this to and I chose the largest hexagon one.
- The
categoriesvalue uses a list to set the specific category your template is categorized under which makes me wonder if you could have a multi-item list here that would place a single template under multiple categories. Anyway, here we’re opening the list by using a square bracket before… - … setting the category name we want our template to be organized under. In my case I decided to create a new category named
Recipesalthough you could check out the othertemplates.jsonentries to see what the predefined categories are if you want your template to be added to one of those. With the category defined…. - … we now close the categories list using the opposing square bracket.
- Finally we close the entry we created using the other facing curly bracket. This means our entry is now fully caught within the curly brackets. If you wanted to add a second template image you’d follow this with a comma, to separate the entries, and then continue up at number 2.
The items in the entry are indented to show the section you’re in. This means we use two spaces within the curly brackets, so lines three to eight, to show we’re in the entry. Then we use another two spaces to further indent the categories list. Some programming languages, and personal formatting, uses tabs to indent while others use a pre-defined number of spaces… in this case two. Essentially every time you create a subsection it’s indented and every time you leave a subsection you stop indenting it to that degree. You can learn more about JSON on your own through the w3schools.com tutorials or through Omar Elgabry’s Medium article JSON In a Nutshell.
Additionally, within the information about your template image you can also include whether the image is in landscape or portrait mode by whether the parameter landscape is set to true or false. As my image was in portrait mode, a value of false, which is the default value I left it off so if you feel differently and/or your image is a landscape one you’ll want to include that line. Again more information can be found in the Customizing the Templates reMarkableWiki post.
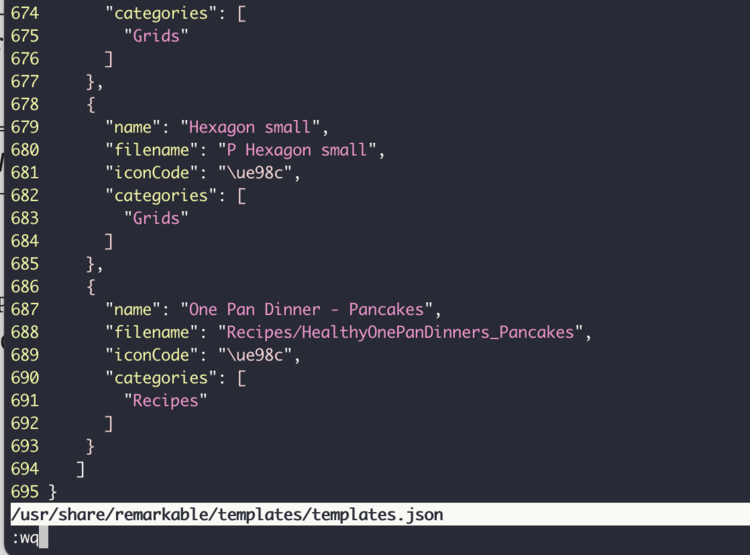
templates.json file after I added my newly created image file to the JSON. If you’re also in vim you can enter edit mode by typing i, specifically for insert mode, and once done use esc to escape insert mode. Then type :wq, seen at the bottom of the image, and Enter to save (w) and quit (q) the file. It saves and you’re back at the previous spot you were in before opening the file.Does It Work?
And with that the new template image file is uploaded and should work on your reMarkable device. If you follow the reMarkableWiki post it says that after modifying the templates.json file you’ll “need to restart xochitl for it to be reloaded: systemctl restart xochitl“. I, however, ignored that bit and may have instead restarted my device, by going through settings, and forcing it to re-sync that way. Looking back I’m not 100% sure which I did the first time although I plan to re-sync it, in the future, by restarting xochitl.
Once your reMarkable connects to your new template file you’ll be able to see it when switching out the template on one of your notebook pages.

Recipes shows up at the end of the list of category headers and my new template shows up when I click on it. I chose the icon that displays hexagons and the title, One Pan Dinner - Pancakes, shows me it worked before I even needed to open it.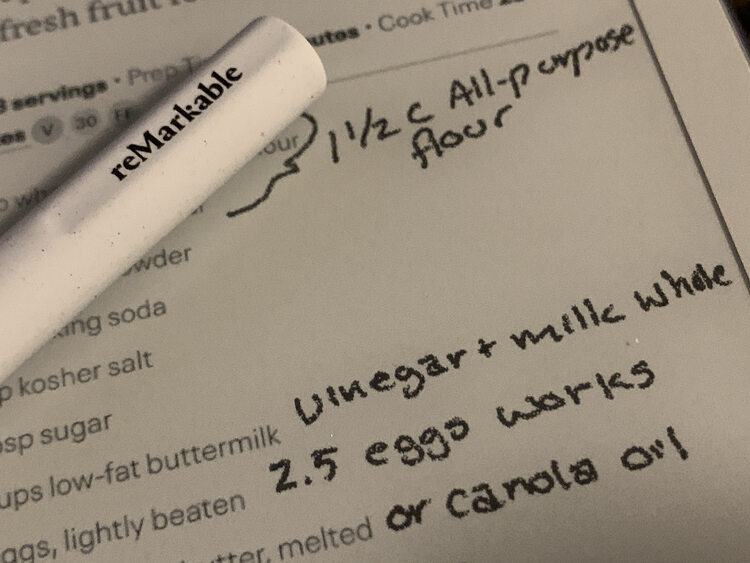
If Using reMarkable Apps on Other Devices
A couple weeks after making this template I went to make pancakes for the girls and figured I’d open the document through the reMarkable app on my mobile phone. I was met with a document that showed the text I had added but the background, with the recipe, was just an error message saying it was unable to load. I figured it was because I used a custom template and, after asking in the Facebook group How to get the best of my reMarkable?, that was confirmed. Just something to keep in mind if you use the desktop or mobile applications a lot. Going forward, since I’m not planning on adding recipes very often, I’m planning on exporting the notebook as a PDF, re-uploading it, and then I’ll have a copy accessible from all my devices.
![The top of the image says "Recipes". Below it is a rectangle, cut off, showing the document page. In the center, lower in the image, it says "Unable to load document background[. ]Try restarting your application or contact support if the problem persists." To the side you can see the changes I made, in a different layer, over top.](https://www.simplykyra.com/content/images/wordpress/2021/02/compressed_IMG_0982.png?resize=750%2C623&ssl=1)
This was the first template I created and uploaded to my reMarkable2 and it was a rather specific one as I’m not planning on using it in more than the one spot. I decided to create the Recipes directory and category because then it’s really simple if I ever want to stop using the recipe notebook idea. If that ever happens I can easily convert the notebook to a PDF, by emailing it to myself, and then remove my recipe-related changes from the device. I can easily delete the entire Recipes directory, with the rmdir command, and then delete all of the additions I made to the JSON by searching for the category Recipes and manually removing the matching entries.
I could see this idea, with the easy addition and removal, working for any year, or month, specific templates you may only want to use. For instance any 2021-specific templates could be added to a new directory within the templates one along with the JSON category being labelled 2021 which makes it easier to find and remove. This could work perfectly for any calendars, like my Pilates monthly workout calendar, that you may want to combine in a single notebook instead of having over many different PDFs. Then at the end of the year you could easily export each notebook you used with those templates, so you could have them as they are in a PDF format, and then remove all the 2021-specific templates from the templates directory and related JSON file.
In the future I plan to make a script that takes multiple directories and contained PNG image files and easily curate them into the text needed to update the JSON file. Even though the files would still need to be uploaded and the JSON file edited manually this could still help towards batch adding template files quicker.
Update: I’ve now written that script, uploaded it to GitHub, added it to the readme, and wrote two posts (part one and part two) that go over it if you’re interested in speeding up your process.
Update 2: I’ve since come out with a video that combines several posts together including connecting via SSH, uploading the templates manually, and my bash script. You can find it here.
Update 3: I conducted an experiment to see which file type (PNG or SVG) would be used when exporting a notebook page from the reMarkable. Here are the results if you’re also interested!
Have you uploaded a template to your reMarkable device yet? If so how did it go? If not are you going to? Let me know if you have any questions by dropping them in the comments below. I hope your day is going truly great.
EDIT: March 22nd, 2023
When I moved my website over I lost my previous comments. For your convience I moved over the ones that may be helpful to you.
Back in December of 2022 I had several comments. One was from Laura whose custom template showed up but stayed blank. Laura realized that
I managed to put the file in my new directory but didn’t manage to update the file path. When I put a copy in with ALL the templates, it worked without issue.
Looking back if she had changed the path in the templates.json file to reflect that directory so, if the directory was named Custom she switched that template's info to "filename" : "Custom/filename" then it would've also worked.
If you don't like using the command line Devon Godfrey shared this tip:
A quick tip: You can use Filezilla for the files part. I just used filezilla and dropping the files onto the remarkable and editing the json file. The best part is the filezilla can save your creds and you can log on anytime:
Protocole: SFTP – SSH File Transfer Protocol
Host: 10.11.99.1
User: root
Password: [Your Password]
He then realized he didn't need to use the command to reboot the reMarkable system if he just turned it off and then back on again. He shared this FileZilla tutorial video which I see is unavailable as the account is now closed (including just in case it comes back).
Back in November of 2021 Lucas shared the following helpful tip:
I had some difficulty converting a single page US letter sized PDF to a template on my Remarkable 1, so for reference, here are commands that worked for me using ghostscript and imagemagick (convert):
gs -sDEVICE=pnggray -o ./output-600.png -r600 ./input.pdf
convert output-600.png -density 226 -units pixelsperinch output.png
convert output.png -resize 1404×1872\! output.png
I tried using ghostscript to encode it at 226dpi, but it looked a bit blocky. For some reason, just resizing it without changing the DPI caused the device to reject the files. Also of note: when I flipped the width/height dimensions, it still worked as a template, but was highly distorted.
Hopefully some collection of those commands are useful for others.
In August 2021 kitty visser asked about custom icons. I shared that I didn't know how to make them but shared this Reddit thread that mentioned needing to decompile Xochitl in case it might help.
In June of 2021 Debra Deppeler used Inkscape to create a matching SVG version of their template but was disappointed to realize that it wouldn't be viewable in the companion app. Our conversation led to me experimenting to see which version (SVG or PNG) of the template was emailed out which I shared here.
If you’re interested in getting any of my future blog updates I currently come out with a new one every Wednesday and share them to my Facebook page and Instagram account. You’re also more than welcome to join my email list located right under the search bar or underneath this post.
Did this save you time?