
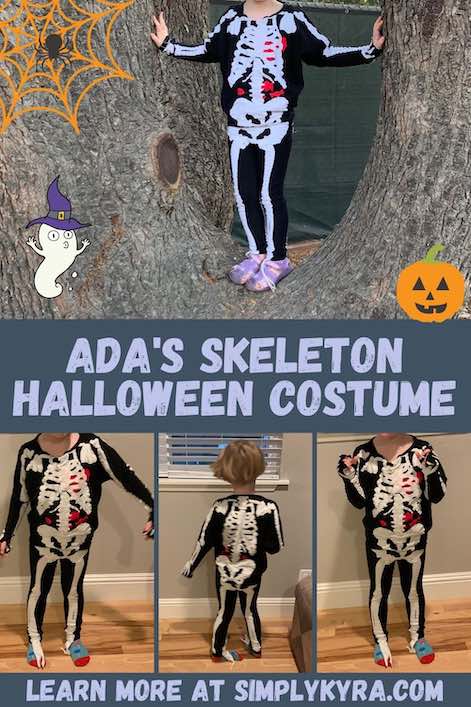
How I Planned and Sewed Ada's Simple Skeleton Costume

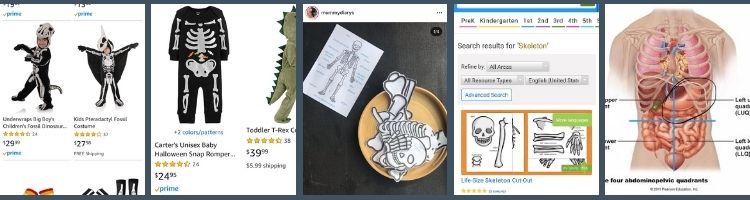
Last year Ada started kindergarten and I wanted to be sure she had her own version of a perfect costume for when she’d get to wear it to school for Halloween. As September progressed she decided on being a skeleton and was quite firm in that decision. At first I considered keeping the costume simple and buying one but when I looked around online the only ones I saw seemed to be too expensive, constructed poorly, or both. I even went to Walmart and Michael’s Arts and Crafts for inspiration but found nothing other than a little dangly skeleton that had been constructed with one leg backwards. I finally just decided to make my own skeleton costume for her and this outfit was born!
When Ada chose to be a skeleton for Halloween I quickly realized that I wasn’t sure how I should start the project. I did realize; however, that I needed to start out with a black outfit to hold the bones so I temporarily ignored the issue of how to construct the skeleton itself and instead focused on figuring out the perfect base for the costume. At this point in time I had recently pattern tested the Firecracker dress and top through Ragamuffin Patterns and, since the girls loved it, figured that would work perfectly for this outfit. I had also bought the incredible MyFit Leggings, through Apostrophe Patterns, a couple months before so choosing the looser fitting version of the pants made this even simpler. With the top and bottom figured out the next step was the fabric. For the black outfit base I chose a lightweight black cotton Lycra fabric, that may have been from Girl Charlee, with a 40% four way stretch and then found some lightweight white knit, with a bit of stretch, in my fabric stash for the bones. Sometime during all of that I came across a post by mummydiarysx on Instagram that showed her life-sized skeleton puzzle. I loved it and immediately asked her where she got it which lead to me creating an account on twinkl, where you occasionally get a free item, and thus I had my life-sized skeleton paper pattern pieces for the costume’s bones.
While planning the skeleton costume I considered taking it a step further by adding black mittens and a hat. For the mittens I considered using this free mitten pattern, on Fleece Fun, where I was then going to attach the skeleton’s hand bones to the top and bottom side of the mitten. I ended up skipping the mittens, still haven’t even tried the pattern, as we live in California and I worried Ada would get too warm with them on. I instead chose to make the sleeves of the Firecracker top longer and add a thumbhole so Ada could choose when she wanted to cover up her hands with the sleeves, showing off the bones, or push the sleeves up when she needed to use her hands. This way there were also no extra pieces that she might lose. For the hat I had planned to use the Brighton Beanie, through Peek-a-Boo patterns, but right when I was about to start making it for Ada, just after trying on the finished shirt and pants, she mentioned wanting to be a firefighter skeleton, by wearing a firefighter hat from the previous year’s costume, so I put off making the beanie and then ended up skipping it. I was planning to make the beanie in black, like the shirt and pants, and attach the skull piece to it somehow.
I started out by cutting my black fabric as it was the easiest as I just needed to cut out the pattern pieces for the Firecracker top and the MyFit Leggings. I did; however, first extend the sleeves on the top along with extending the bodice’s length so it would overlap over the pelvic bone crotch of the leggings. I then, later, forgot about that logic, overthought the shirt’s length, and ended up trimming the top shorter which I now regret.
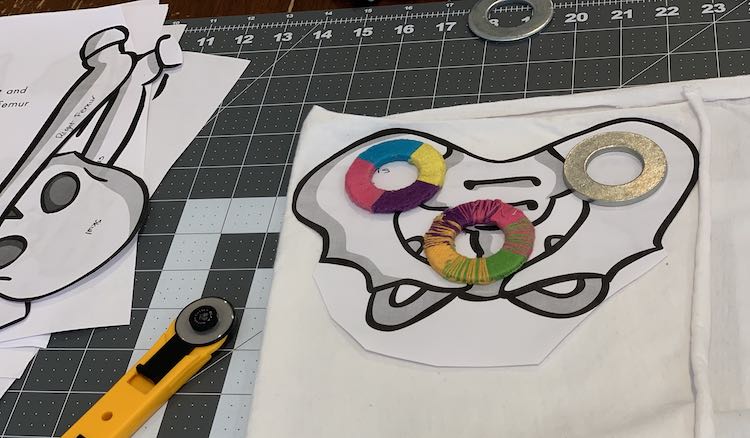
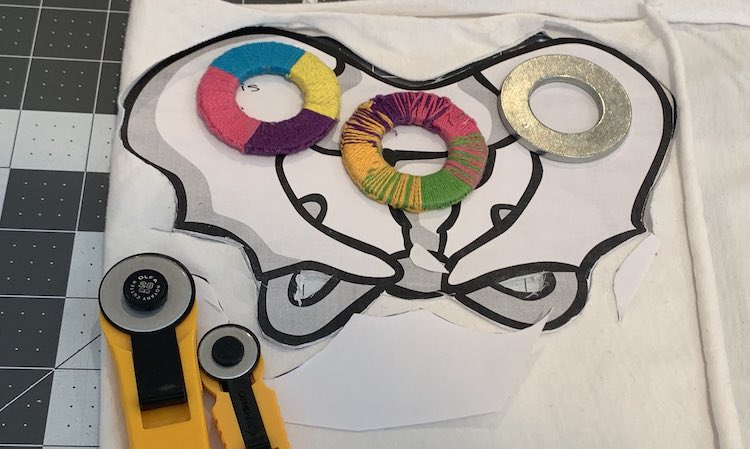
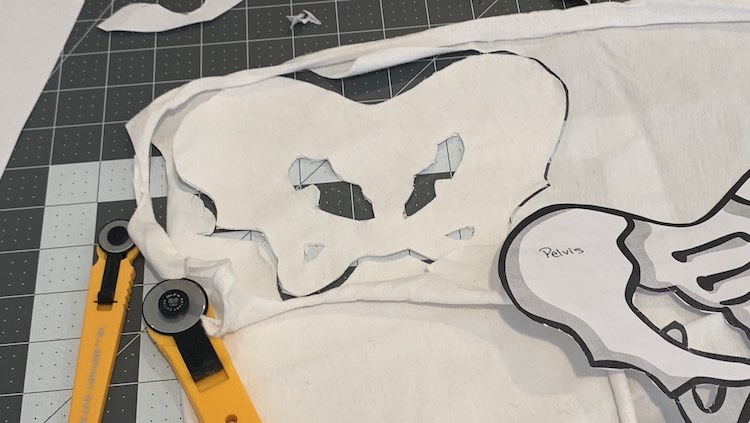
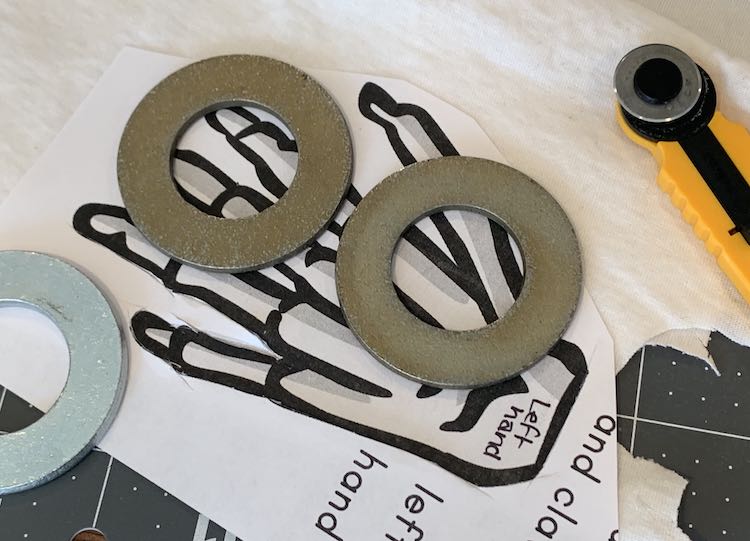
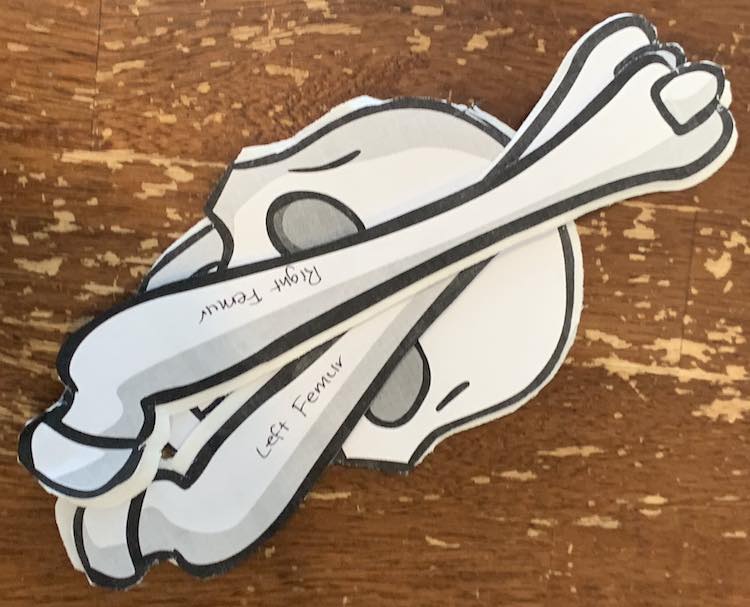
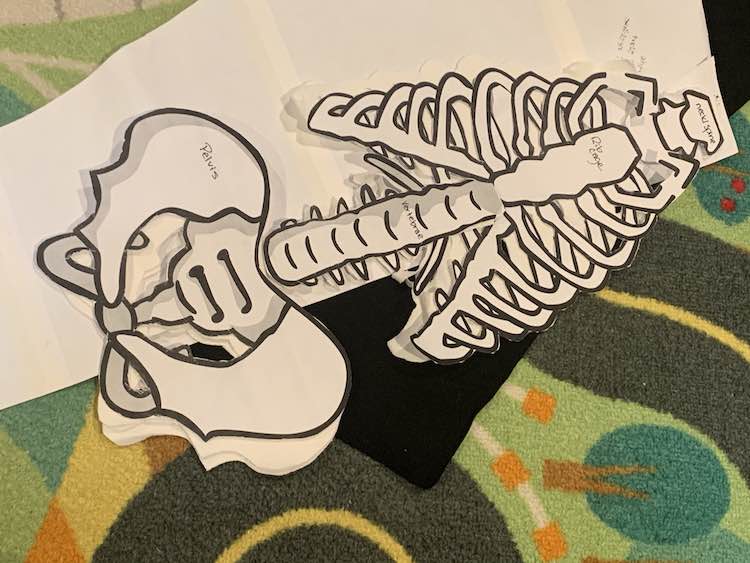
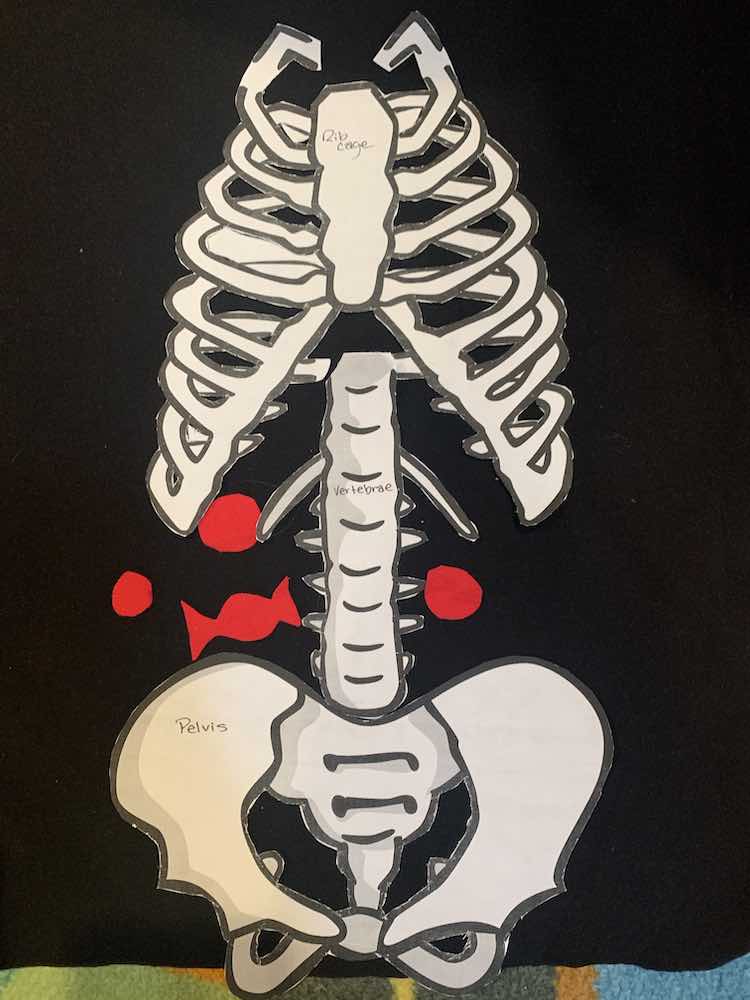
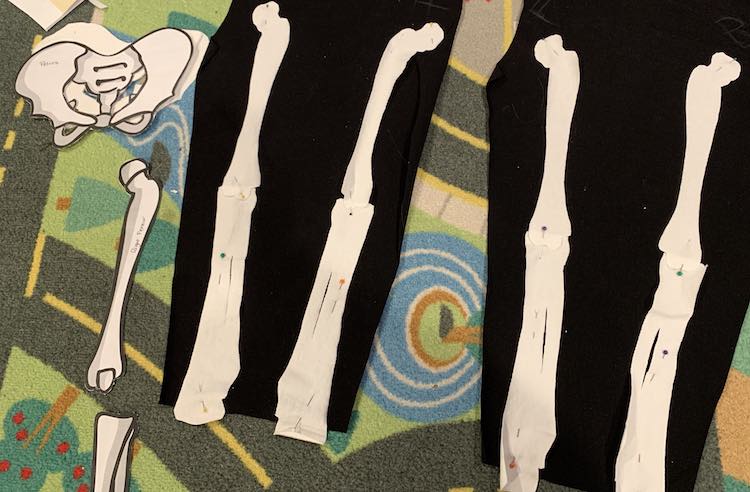
The white skeletal bones were more difficult than the base; yet, since I had gotten the life-sized skeleton cut-out through Twinkl it was so much easier than I had feared it would be. I started out by printing the skeleton and then, after writing what each bone section was on the bones themselves, I started cutting them out. I quickly realized that cutting them out individually was taking a lot of time and decided to just cut the paper at the same time as the white knit fabric using my rotary cutter. I pulled out my fabric, cutting mat, pattern weights, and rotary cutter before getting to work cutting out two, mirrored, pieces for each bone piece. Since I wanted the pelvic bone to sit on the front and back of the shirt and the leggings I made sure to cut four of them out instead of just the two I did for all the other bones.
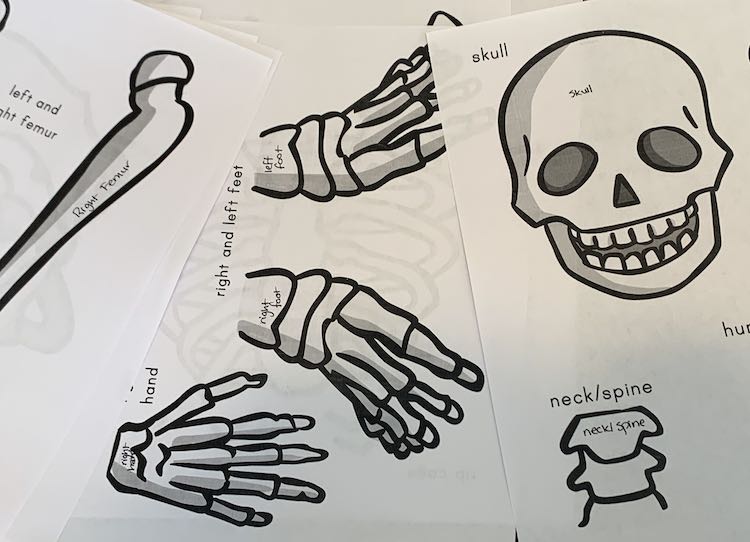

For each paper pattern piece I folded over the edge of my white knit fabric so there would be a doubled layer of the fabric that was just as wide as the bone itself so I wouldn’t waste too much fabric. I then laid the paper pattern over top and added spaced out pattern weights so the paper would stay down and not move while cutting. I then took my rotary cutter along the outer section of each bone cutting through the paper and the fabric. I found switching to my smaller, 18 mm, rotary cutter made the smaller sections even easier. If there was a small hard to reach section I left it uncut and then later, after lifting the paper up, took my fabric scissors that area. Once the outside was, mostly, cut out I worked on cutting any details within the bone before lifting the paper up. Each set of bones were stacked, with the matching paper piece, so they wouldn’t get lost. For the pelvic bone I repeated this process a second time, so I ended up with two mirrored sets or four fabric pieces, rather than just the two pieces.
For the bones I was originally debating using a grey fabric marker to shade them so they appeared more 3D-like and the areas where the bones crisscrossed, liked the rib cage, would be more obvious. I then started second guessing whether I should color them since I didn’t want the white thread, when sewing the bones to the black base, to stand out against the grey colored fabric. I also remembered how Zoey’s Doc McStuffins costume was pressed, to set the ink, when it was just one layer of fabric and it still faded in the first wash. I ended up deciding to make the plan simpler and chose to leave the bones as they were: solid white.
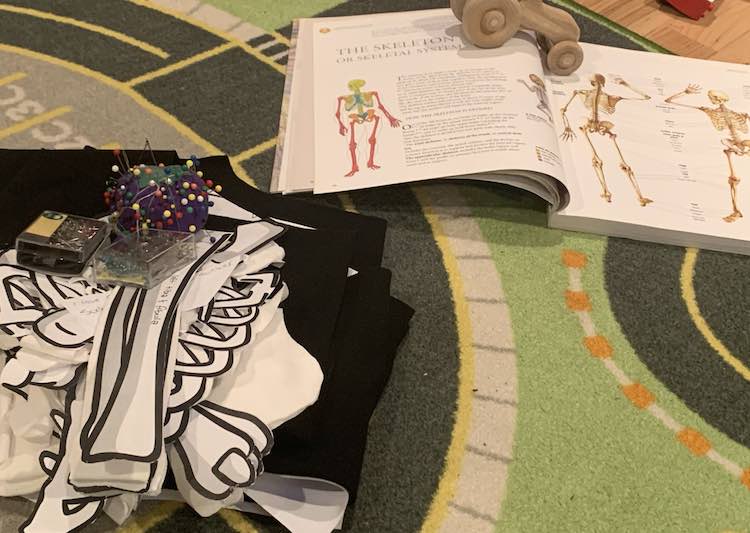
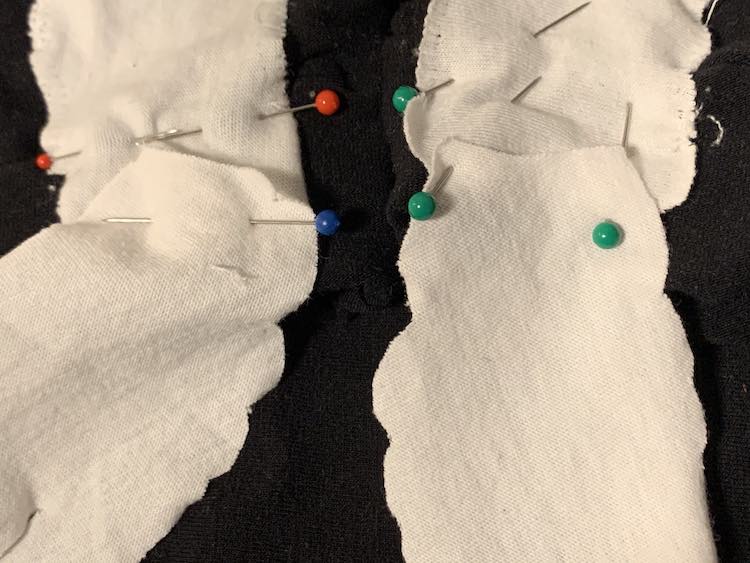
Once all the fabric was cut and I decided not color the bones the next step was to attach them all together. I wanted to add the white bones to the black fabric before I sewed the garment pieces together as it would be simpler to sew while the fabric lays flat and then I wouldn’t have to worry about the fabric layers getting in the way. The first step would be laying out the bones on the fabric and, as I wanted to be one hundred percent sure they were laid out correctly, I found one of our encyclopedias and opened it to the skeleton page so I’d have a reference while I worked. I then grabbed the cut out black garment pieces, my white knit bones, and lots of pins to stick them together and I was ready to go.
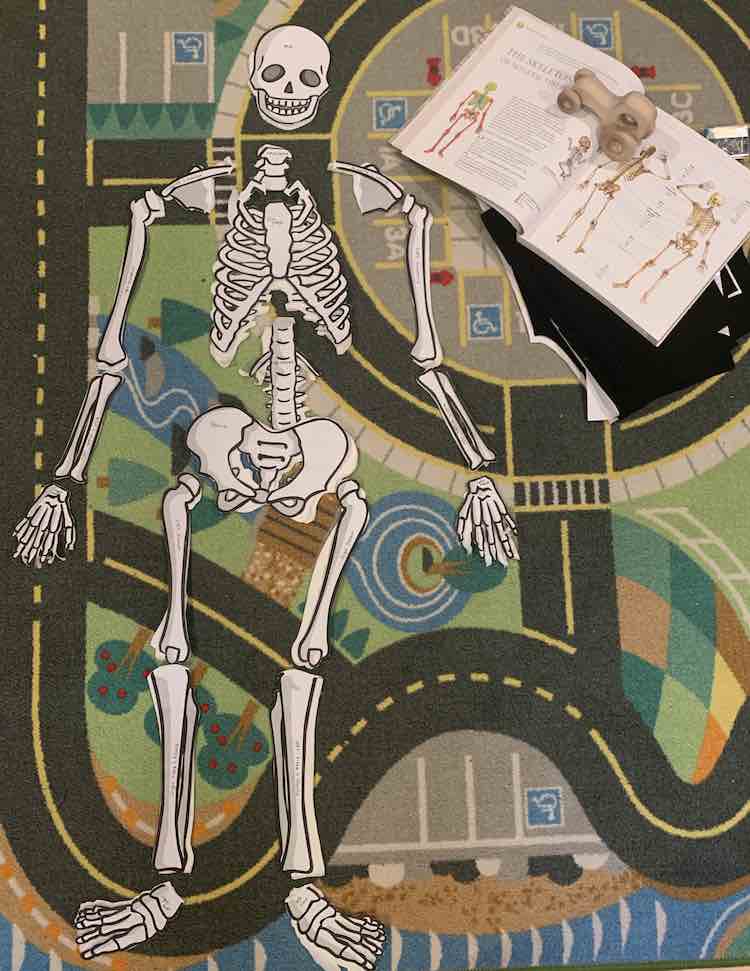
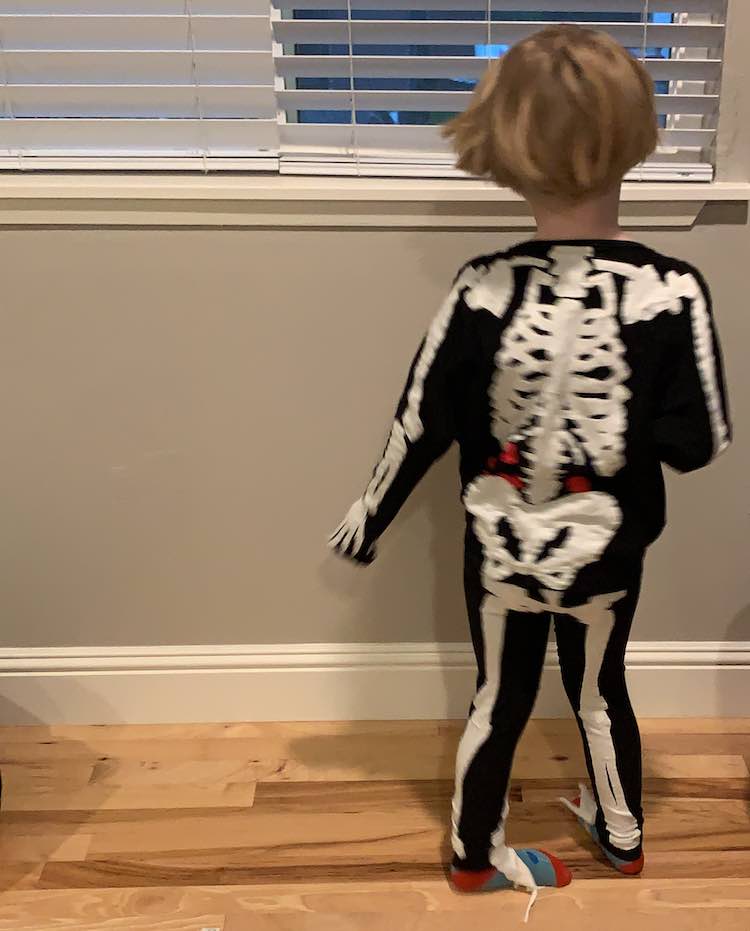
I was going to start adding the bones to the shirt willy-nilly but first decided to build the skeleton, while referring to the book, so I’d have a good place to start and wouldn’t need to analyze as much. I then laid the white bone pieces onto the front, and then back, shirt pieces. While laying out the bones I started analyzing how far apart the bones had to be to reach the whole way and decided to shorten my shirt so they’d be able to fit closer together; however, now looking back I wish I hadn’t as the pelvic bone on the shirt would’ve covered the pelvic bone on the pants rather than ending above like it now does.
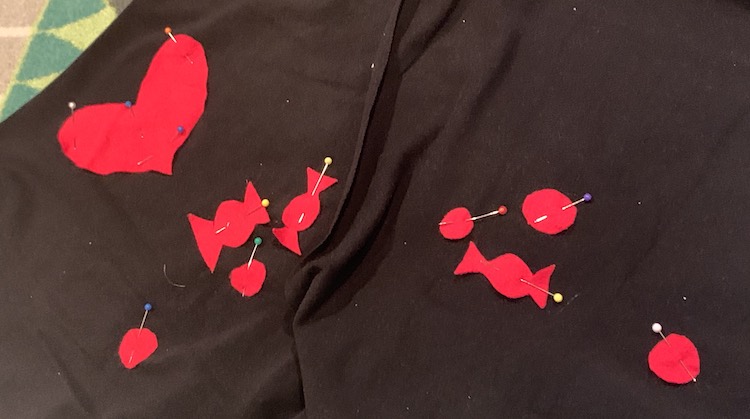
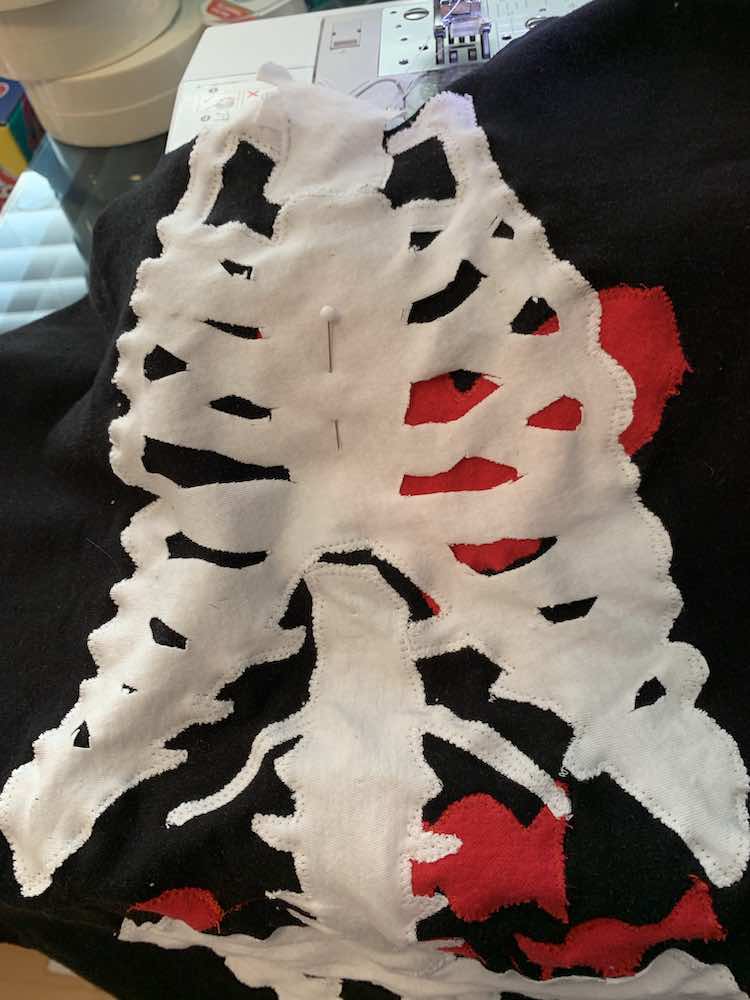
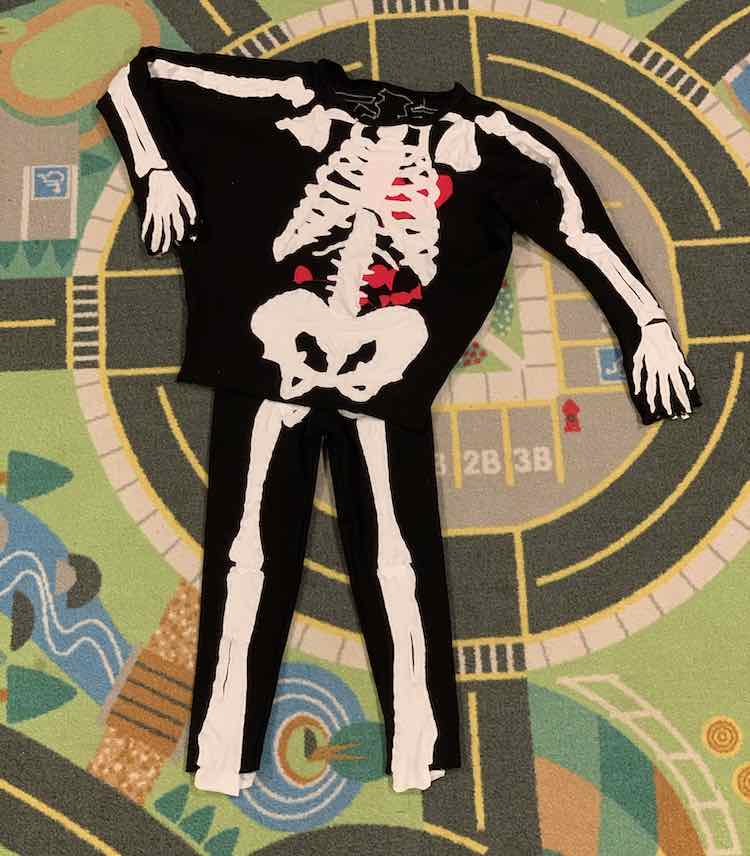
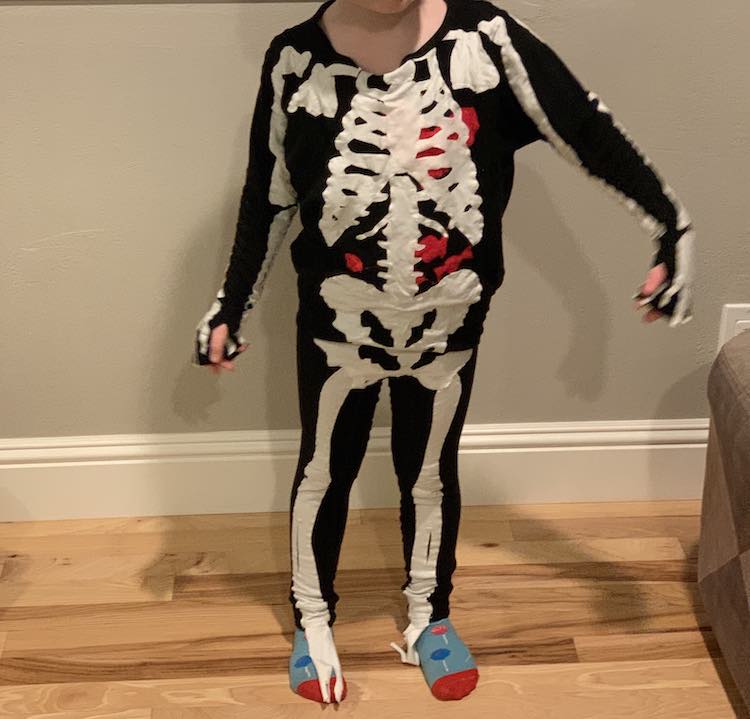
As I started laying out the bones on the front of the shirt I realized I wanted to add a heart under the rib cage. I quickly went to my fabric stash and could only find some red woven fabric which I was worried about at first, as it wouldn’t stretch with the shirt, but then decided it wouldn’t matter since it would cover such a small area. After cutting out the heart I remembered the Halloween onesie I saw on Amazon that had some candy in the skeleton’s stomach. Since I already had the red out I decided to quickly cut some candy-looking pieces with the red fabric and I made sure there was enough for both the front and back of the shirt. Looking back, if I were to do this again, I would choose to use another color for the candy as Ada told me, after school the day she wore it, that some of her classmates thought it looked like blood.
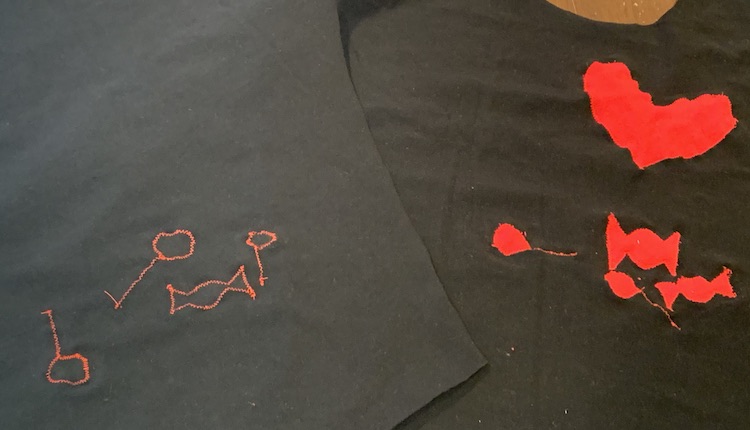
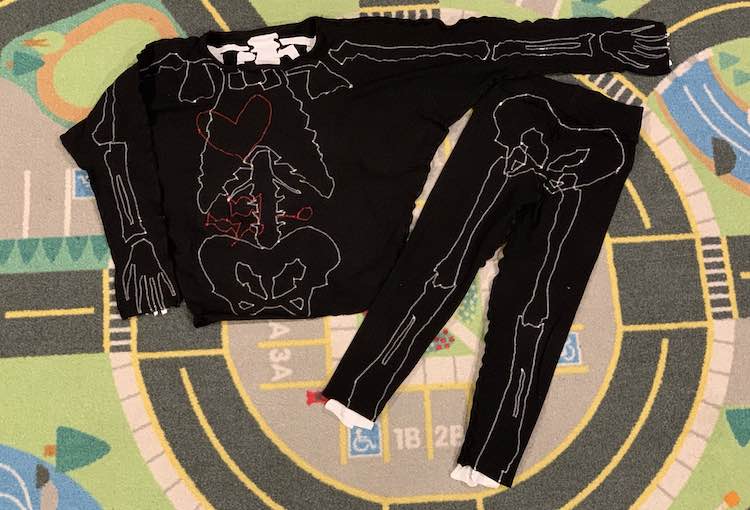
With the red heart and candy pieces cut out it was time to figure out where they should go. Since I was going to sew the red fabric on first, to go under the bones, I decided to lay out the bones using the paper pattern pieces since they were easier to place and move around compared to the white fabric ones. Once I was happy with how the bones were placed I confirmed where the stomach was and then carefully laid the cut pieces of red fabric, underneath the paper pieces, until I was happy with how it all looked. I then removed the paper pattern pieces, pinned the red fabric in place, and used red thread to sew them all on. I was a bit concerned with the fabric unraveling so I tried to sew close to the edge, with a zigzag stitch, and hoped the stitching would hold it in place well enough that if it did start unraveling it would just look raggedy.

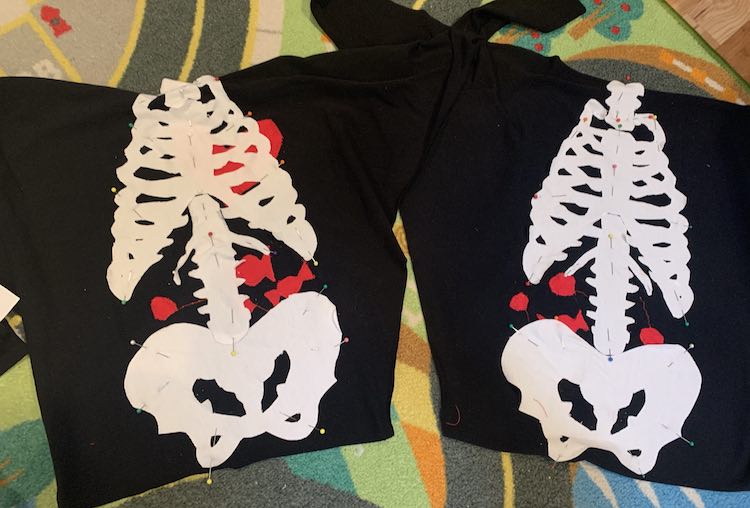
Once the red heart and candy were sewn on I brought all the pieces back to the living room and laid the white fabric bones back on the shirt pieces. I played with how they were laid out and once happy I pinned them in place so they couldn’t budge. While laying them out I did realize I’d have to add binding to the neckline so I left the very top of the neck unsewn but, other than that, I sewed around the outside of each and every bone so they’d stay secure. Once I got to the pelvic bone I made sure to sew along the inside of each of the holes, but, once I got to the ribs, I chose to leave the smaller holes unsewn and justified this choice as you could then see the heart underneath the rib, by pulling slightly on the fabric, and by how much work sewing each hole would’ve been. I gambled on the fact that Ada wouldn’t stretch the ribs out too much after the fact and knew, if so, I could always sew more later on.
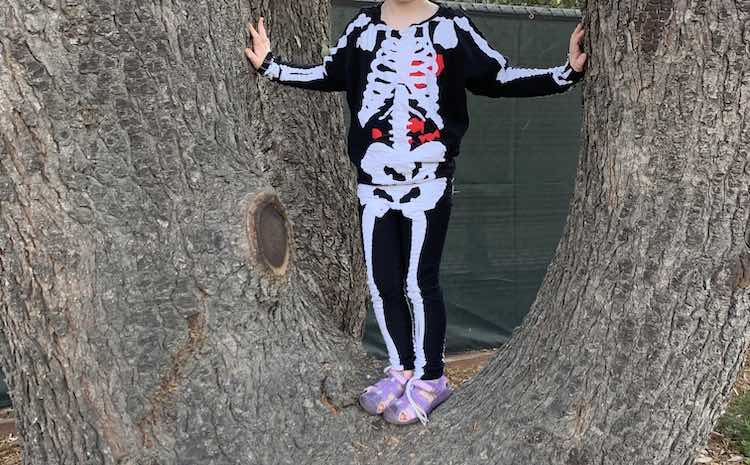
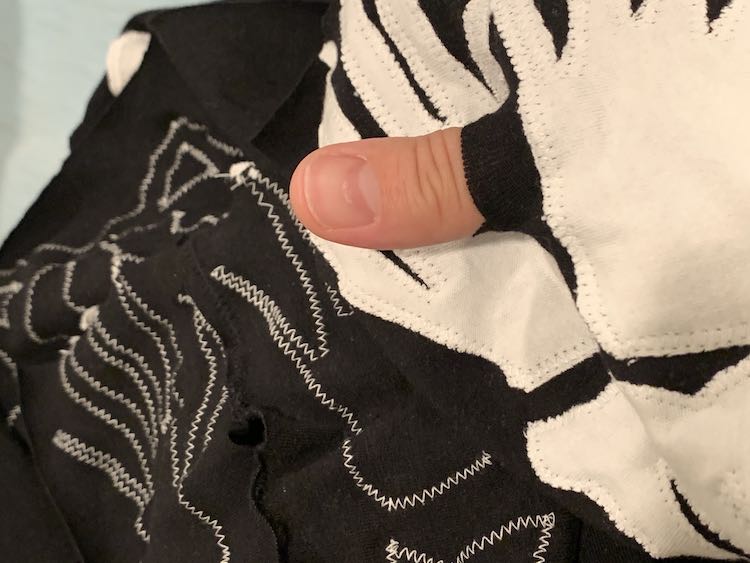
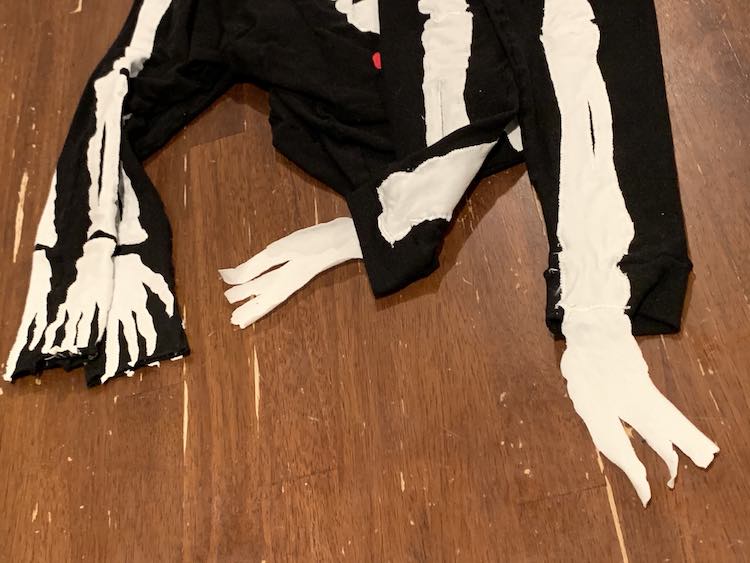
Once I was done sewing the bones from the torso on it was time to do the arms. Originally, I had planned to make mittens or gloves for the skeleton hands but instead decided to make the sleeves longer and add a thumbhole so Ada could pull them down to cover her hands whenever she wanted ‘skeleton hands’, but also easily push up her sleeves if she needed to use her actual hands to do something. After choosing that I also chose to leave the sleeves unhemmed, easier and also longer, and thus was able to have the finger tips reach all the way to the end of the sleeve without being concerned about a hem or band covering the fingertips up in the future. Anyway once I was done sewing the torso on, I next lined up the shoulder, arm, and hand bones on the sleeves and pinned them in place.
After sewing the arm, and related, bones onto the front and back of the shirt all the required bones were secured and it was time to sew the shirt together. I sewed it up according to the pattern’s directions while being wary to not stitch over any bones. While sewing up the sleeve I was careful to add a simple thumbhole, near the skeleton’s thumb, by leaving a spacing in the seam. I; however, had messed up the first sleeve by sewing the hand bone on facing the opposite direction from how Ada would probably naturally hold her hand. Because of that I ended up creating two thumbholes, on both the top and bottom of each sleeve, so Ada could easily put her thumb in no matter how twisted the sleeve might get. Additionally, with the neckline, I had originally decided to fold the top of the neck bone down while I sewed the neckband on and then fold it back up so I could sew around the bone as it laid over top of the neckband and it’s seam. Once I got to this step I remembered that I had chosen to create a binding instead so I sewed over the neck bone, trim the excess bone down, flipped the binding down over the last seam, and topstitched the binding in place.

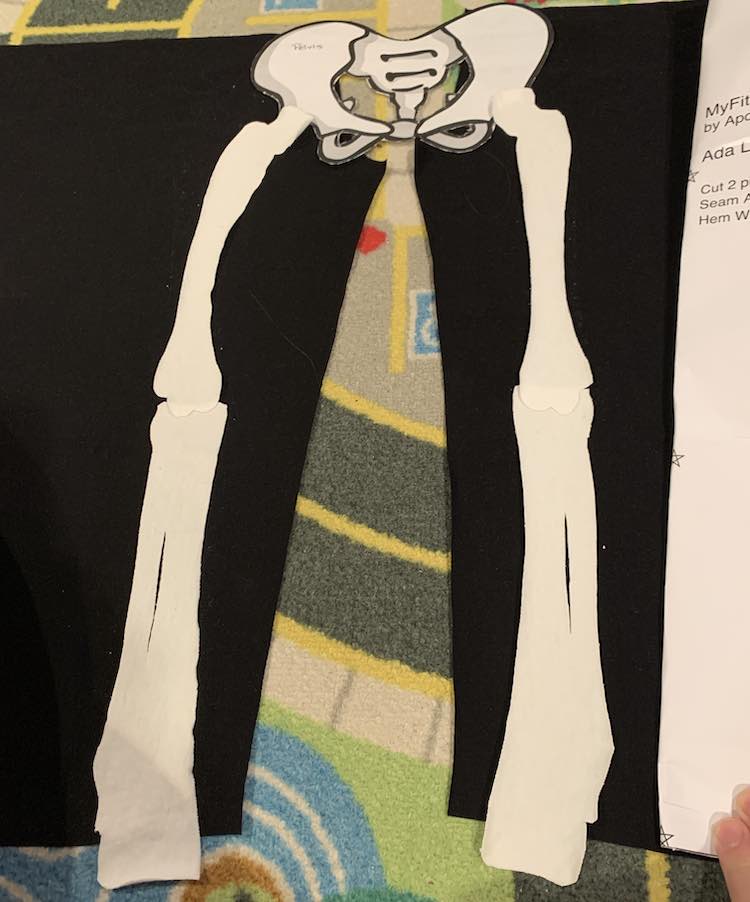
As I pinned and sewed the bones onto the shirt I also pinned and sewed them onto the MyFit Leggings fabric pattern pieces but I decided to wait until now to show you what I did for the pants. Unlike the shirt, where I sewed the bones onto flat pattern pieces and then sewed the pieces together, for the pants I, instead, had to wrap my head around where the bones would go since I had a pattern piece that would include both the front and back side of the body as it stretched around the leg. I considered starting with the pelvis but then decided it would be easier to start with one set of leg bones and then work my way to the rest. To do this I folded my paper pattern piece in half lengthwise and laid it over top of the fabric pattern piece so I could better visual where the front of the leg was and differentiate from the back of the leg. I also knew I shouldn’t add any of the bones too close to the edge of the fabric or too close to the center as they’d then wrap around the leg instead of staying on the front, or back, of the leg. As I chose a section to start on and played around with different positionings of the bones I realized that my pants seemed a bit too short for the bones and I had to add the paper pelvic bone on so I could better understand how it might look once finished. Looking back I wish the top of the leg bones had been a bit further away from the pelvic bone but overall I’m happy with how it turned out.
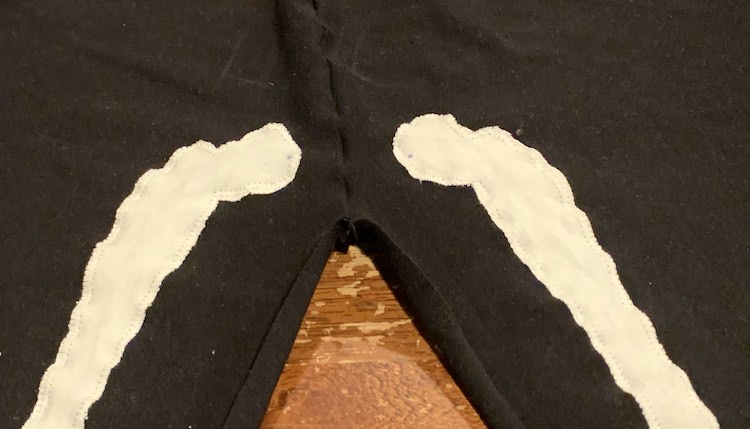
After pinning the leg bones onto the pants and sewing them in place it was time to sew the crotch seam so the left and right pant legs would be sewn together. I started by sewing just the front crotch curve so I could lay the front of the pants down flat and it would be easier to position the pelvic bone over the seam, pin it into place, and sew it on. While doing that I made sure to leave the very top of the pelvic bone unsewn so I could fold it out of the way to make room to sew the waistband on afterwards. After sewing the front of the pants it was time to repeat that process on the back by sewing the back crotch curve, position the pelvic bone, pin it in place, and sew it, mostly, on.
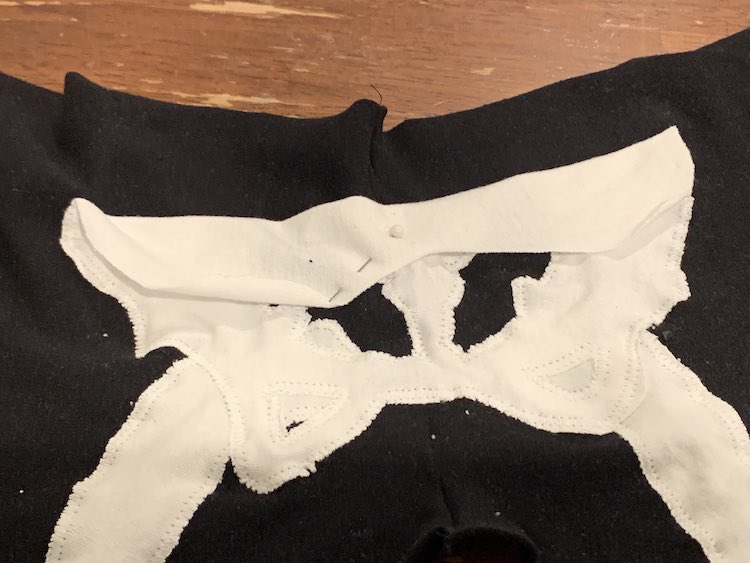
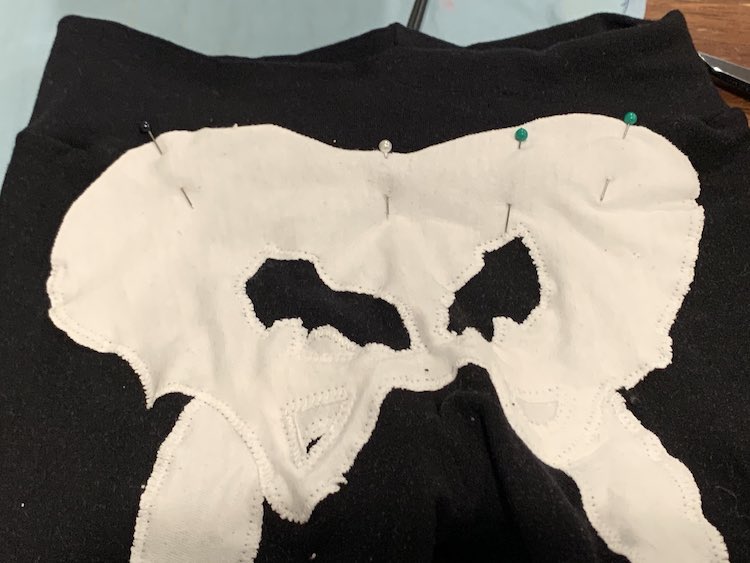
Finally it was time to add the waistband. While sewing it on I was careful not to sew through the white bones. Once finished, I unfolded the top of the pelvis, on the front and back of the pants, and carefully pinned the pelvic bone into place. I then took it back to my sewing machine and carefully sewed it on going over the waistband and it’s seam.
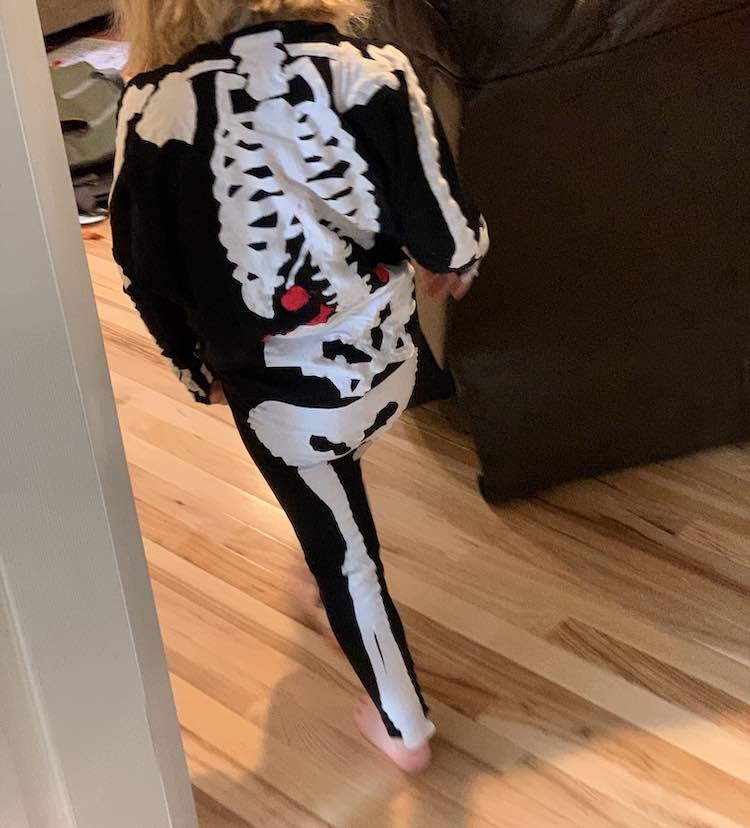
At this point I hadn’t sewn the bands on the bottom of the leggings but figured I should try it on Ada before I went ahead in case it was long enough as it was already. All in all I was already happy with how it turned out.
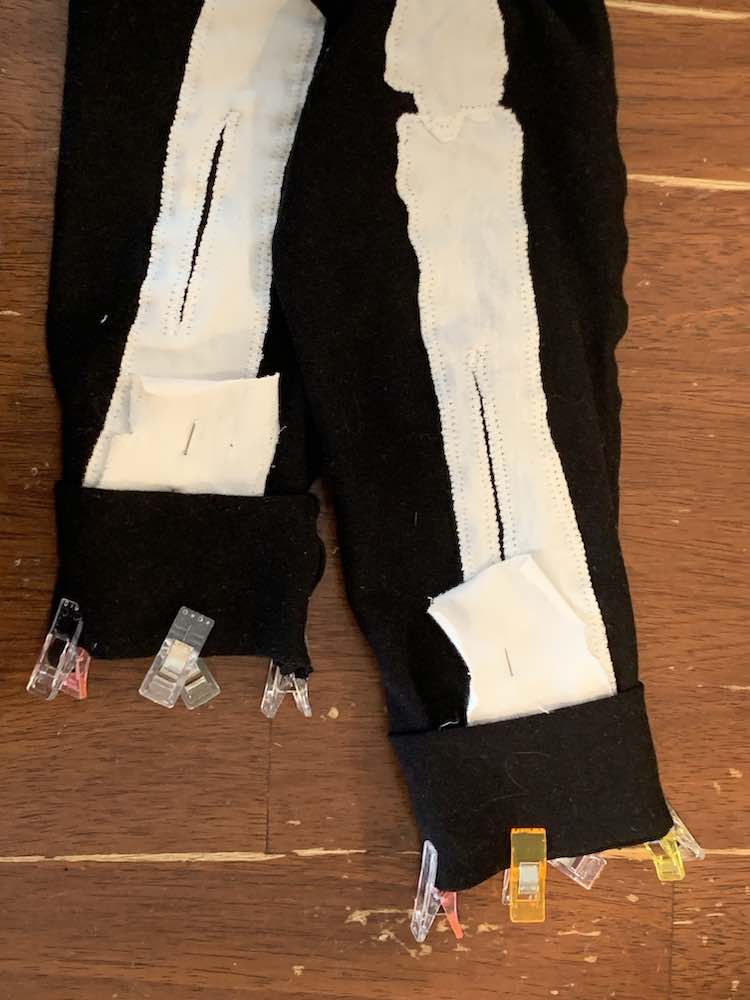
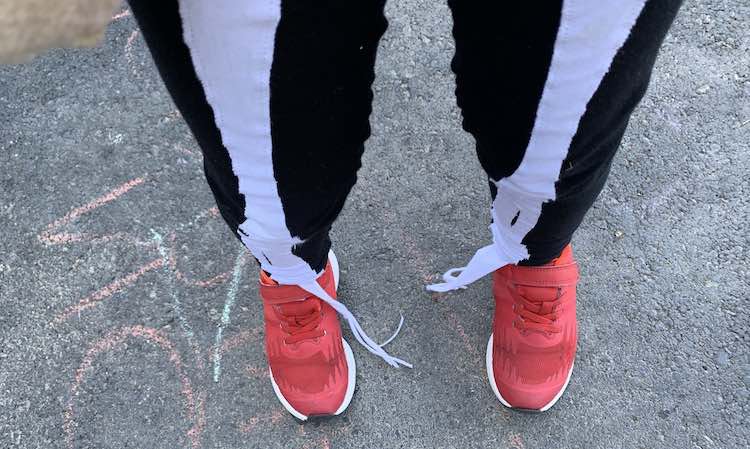
After trying the outfit on it was time to sew the cuffs onto the bottom of the pant legs. Like with the neck binding I had left the bottom of the bone unsewn so I was able to simply fold up the bottom bone so it was out of the way and pin it into place. I next sewed on the cuffs and then unfolded the bone so it would overlap with part of the finished cuff. Before sewing the bone in place I grabbed the foot pieces and pinned them so they draped below the pant leg. I pictured them laid out over Ada’s shoe giving them the appearance of a skeleton’s foot. This appearance didn’t happen and after wearing the costume out the white knit feet got browned, curled, and stretched. After getting home I cut them off and, since the fabric was knit, I didn’t have to worry about the cut lines unraveling.

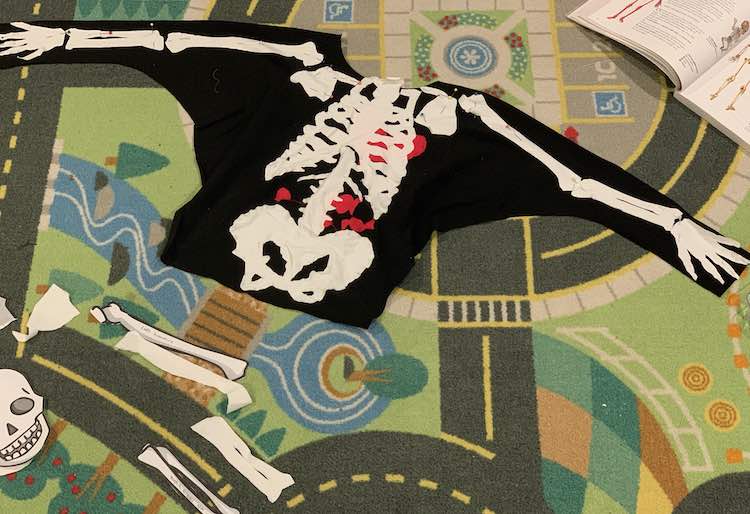
And the skeleton outfit was officially finished and even test driven! Ada loved it. In fact when she first saw the finished outfit she rushed to get her candy-decorated socks so her feet could match the costume’s stomach. I ended up having to make sure the socks were in the wash alongside the costume so she could wear them together. I’m so glad it worked out and she loved her costume.
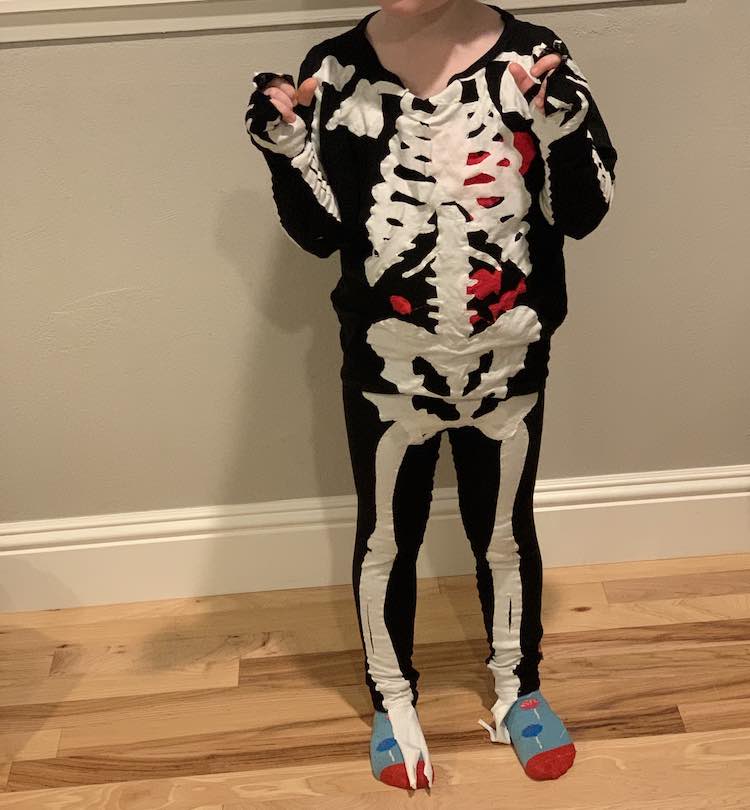

And with that Ada’s skeleton was done. I had debated adding a (Brighton) beanie to the outfit so I could, somehow, attach the fabric skull to the costume, but while I was debating Ada mentioned being a firefighter skeleton so I put off deciding on the beanie and then didn’t end up making it. I figured she might end up wearing her fire hat from the previous year’s costume or some other dress up hat we had, but she left her head unadorned instead. Even though the outfit was a lot of work and mostly sat in her dress up drawer all this year I’m still glad I made it as she loved it over Halloween. It worked great with the Ada-approved patterns (Firecracker top and MyFit Leggings) that I had already made and recently sized her for but I’m sure, if you were interested in making this, your favorite top and pants pattern could work too.
If I were to sew this skeleton again I would leave the black top longer and stretch out the bones in the torso to fit. I originally planned to have the shirt longer so it overlapped the pant’s pelvic bone but I had second guessed how much they’d overlap and unfortunately removed the extra length. I wanted the pelvic bone on the shirt to cover the pelvic bone on the pants so there appeared to be only one pelvic bone while looking at the costume without any of Ada’s skin showing if she lifted her arms up.
I know we’re in a pandemic but what are you doing for Halloween this year (or future years if you’re reading this later on)? Are you including costumes in your plan? If so are you buying a costume, making one, or doing a combination of both choices? I made this skeleton for Ada’s costume last year, but this year I went for a simple Costco-bought one since Ada wanted to be Wonder Woman for her birthday party, back in August, and I stumbled upon it in time. She’s now planning on wearing it for whatever we end up doing for Halloween. I’m kind of hoping her class will show off their costumes to each other, through Zoom, at some point around Halloween. Whatever you’re doing, whether you celebrate or not, I hope you have a good October.
If you’re interested in getting any of my future blog updates I currently come out with a new one every Wednesday and share them to my Facebook page and Instagram account. You’re also more than welcome to join my email list located right under the search bar or underneath this post.