

Patch Your Lightweight Fabric With Embroidery

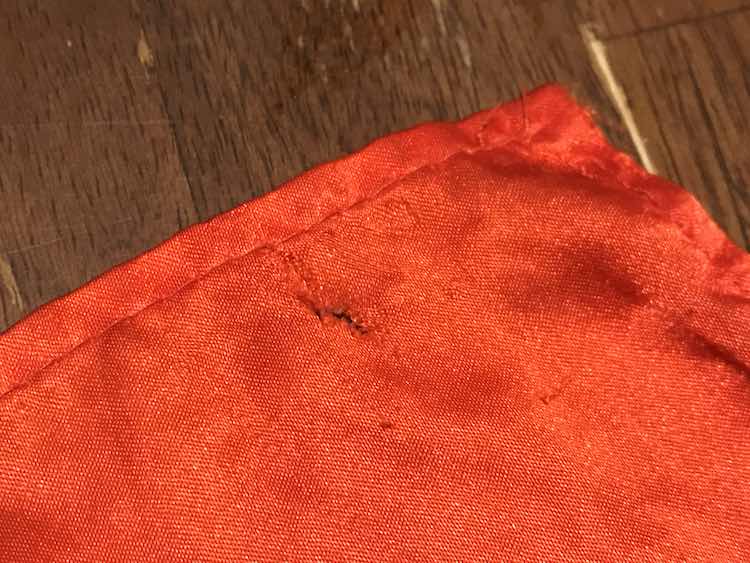
When Ada was little she received a lightweight cape from the Bay Area Discovery Museum. She loved carrying the cape around and, a year or so ago, it finally had it’s first hole. She was crushed. I had previously created a quiet book page for Zoey and had “The encyclopedia of stitches” by Karen Hemingway in my bookshelf waiting to be used again so I asked Ada if she wanted me to patch the hole with a flower. Originally, I pictured this epic field of flowers in the corner of her cape but instead we ended the patch job with two little flowers… and she loved it! She couldn’t wait to show her daddy the flowers mommy added to her cape and the hole became a positive fix.

I started by reinforcing the hole by using a regular kid’s glue stick to glue the piece of ribbon to the back of the cape. This was the perfect, and temporary, way to keep the ribbon stuck to the cape long enough for me to embroider through it.

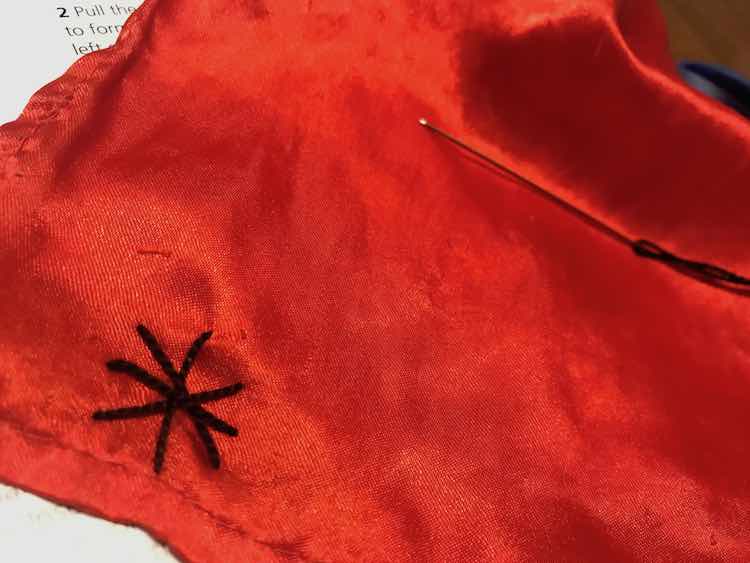
I looked through my book for ideas on what to embroider and finally settled on the whipped spider stitch and a lazy daisy flower. After completing the first flower I ended up making the lazy daisy flower a half circle (view from the side) and used french knots in the center.


If you’re looking to patch something there are so many online tutorials you could follow. Mollie Makes has a library of embroidery stitches starting at the simpler stitches and going to the more in depth designs while The Spruce Crafts has ‘How To Stitch Tiny Flowers’ and Sew Guide has 25 beautiful ways to stitch embroidery flowers.
I made the fix over a year ago and even after all this time and several runs in the washing machine and dryer the patch is still holding.


This was a simple patch job that Ada loved. I wanted to share it in case you were looking for a simple and decorative way to patch one of your child’s items. I love how since the cape doesn’t leave the house I had no pressure to make it look a certain way as all I wanted was for Ada to enjoy it and think it was great.
If your child has a hole in their pants instead of a cape I’ve also opened up Ada’s pants once to patch and extend the pants length. I created patches for the pants with some remnants of from Ada’s favorite fabrics at the time which might have also worked on the cape.
Have you ever had to patch your child’s item? What was it? How did you patch it? And how did it turn out? I’d love to hear about it in the comments below, on my Facebook page, or through Instagram. I hope your day is going great!
Did this save you time?