
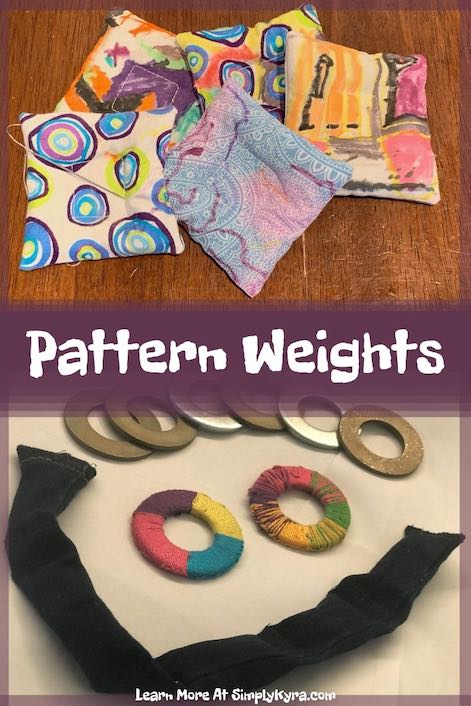
Pattern Weights

When I first started sewing I used fabric scissors to cut out my fabric. As time went on I upgraded to a rotary cutter with a mat and started grabbing canned food from my pantry to hold the fabric down while I was cutting the fabric. The cans were simple to grab as I cut my fabric on the kitchen table although I did come to learn not to use glass jars as I once had a swath of fabric start tumbling off the table pulling the glass jar perilously close to falling before I grabbed it. Later on I heard about others using washers so the next time I visited a hardware shop I asked them for their heaviest washers and loved that they had such a low profile while trimming around them. Even with the washers I still found with larger garments I still needed to supplement my weights with canned foods.
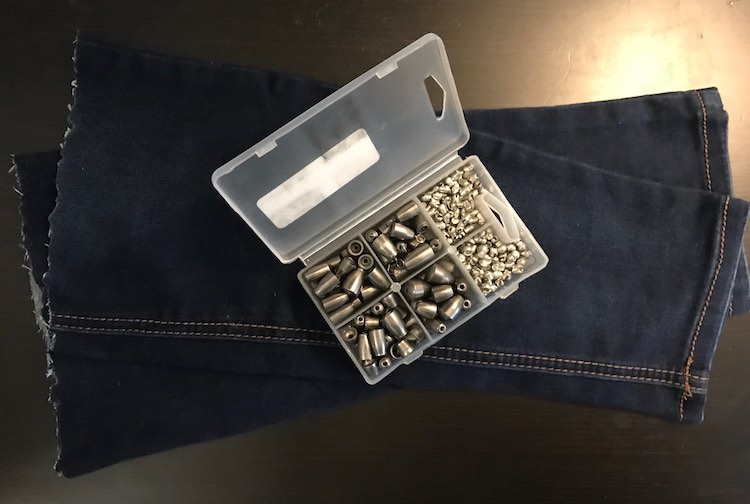
The third week of the 2018 52 Week Sewing Challenge was to sew something to make sewing easier. At first I was stumped and wasn’t sure what to make but as the week progressed I loved seeing what everyone else in the group made. I loved so many ideas but finally decided to make a pattern weight. While looking for ideas on what to sew I came across a forum post on Pattern Review that asked about wiggle weights which lead me to a how to on Sew Maris. I decided to make this my sewing challenge project and jumped on Amazon to buy an assorted case of fishing sinkers to stuff my weight with. Looking back I wish I bought something heavier as the smaller pieces in the kit didn’t weigh much and the larger sinkers were too big to use in my skinnier pattern weight, but I’m still glad I made it my project.
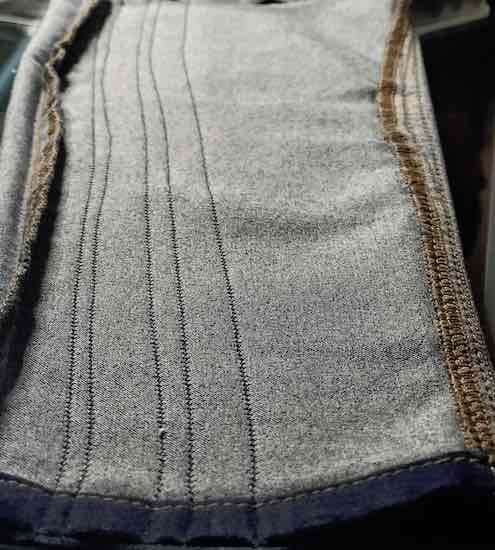
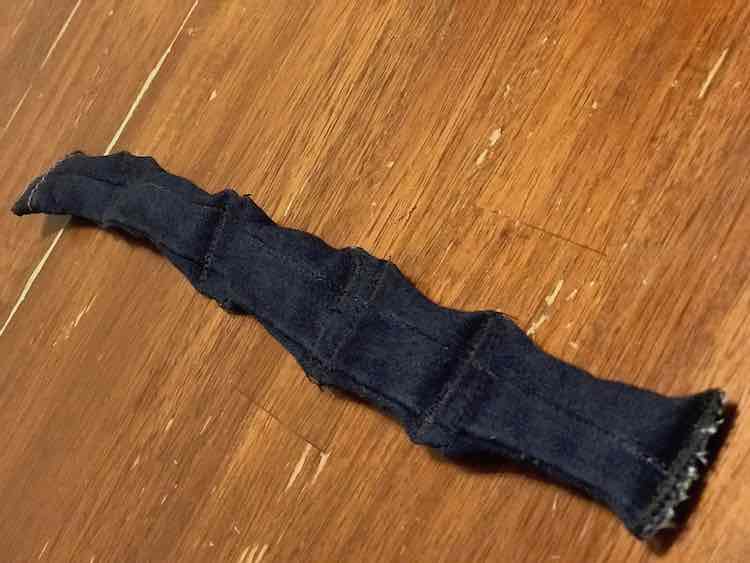
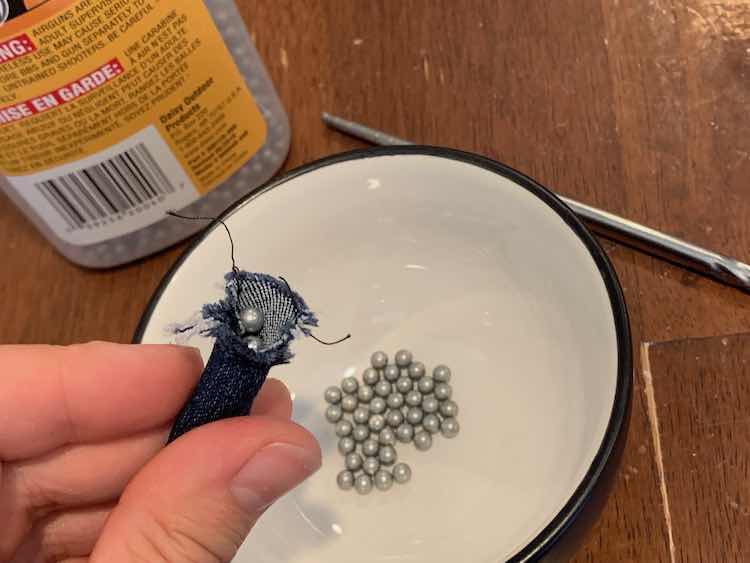
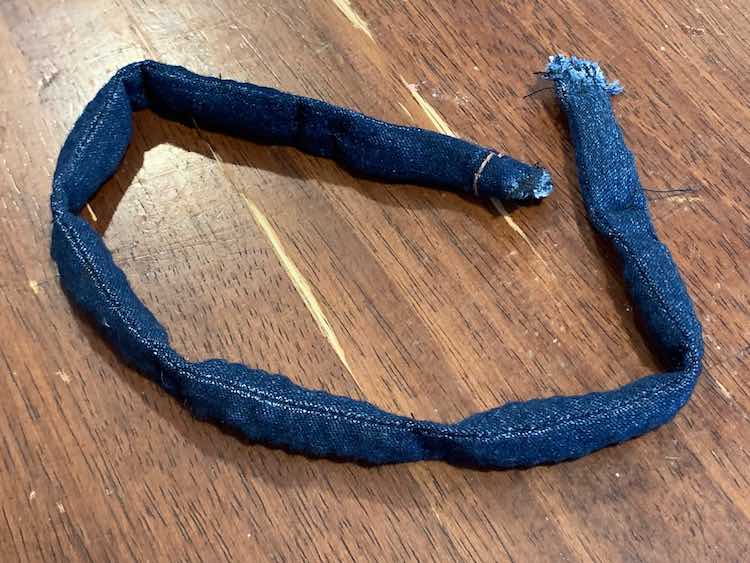
I wanted a long skinny pattern weight that could be easily bent to hug any curves on my pattern since at this time I was only using washers and cans of food as my weights. I decided to grab some excess jean fabric I had from converting some pants to shorts, turned then wrong side out, and then sewed channels along the edge of the pant leg. I made sure to create different widths of channels with a small space between them just large enough to let my pinking shears cut each one apart.
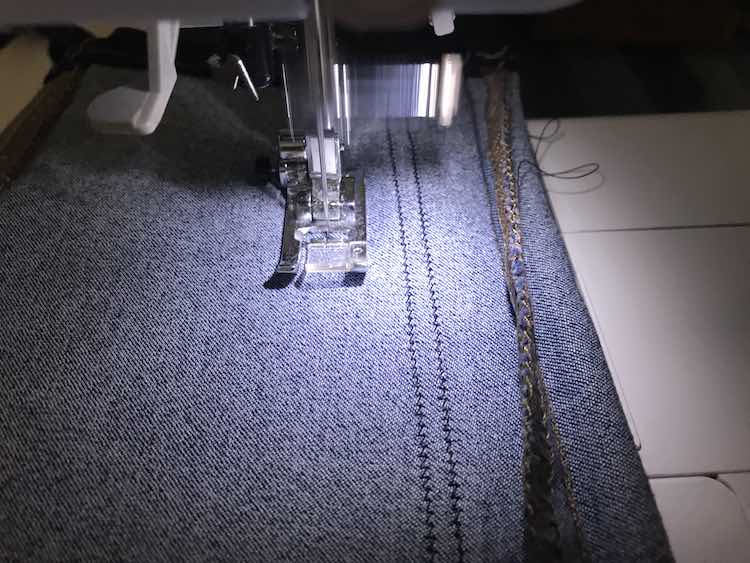
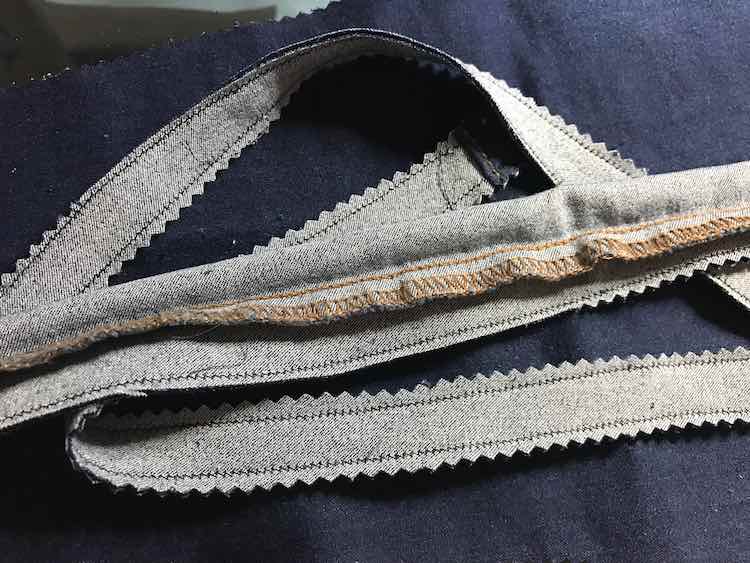
I next had to turn my channels inside out. The widest one was no problem to turn right side out. The middle one was difficult though I eventually managed to turn it right side out while the smallest channel was close to impossible and I eventually gave up. So out of the three channels I sewed I ended up with two right side out strips.
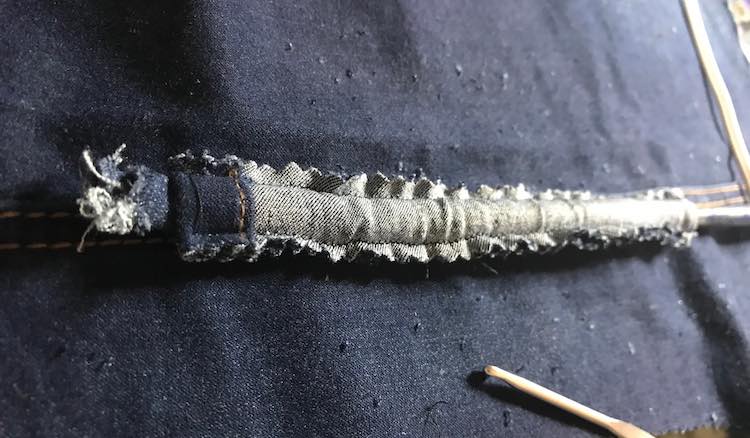
I wanted the wiggle weight to be able to bend easily so I decided to leave some of the tube unstuffed. To do this I sewed, perpendicular, through the tube about two and a half inches from the end. I then sewed another line about a quarter inch over from the first. I stuffed the short end with the fishing sinkers leaving just enough room to sew the end closed. I then stuffed some of the fishing sinkers in the long side, pushed it down to meet the stitching, and then sewed two more lines. I continued filling the tube with fishing sinkers and then sewing two lines until I got to the end where I just stuffed and sewed the end closed leaving the last stuffed space about two and a half inches long.
After finishing my first pattern weight I tried to follow the same steps on the smaller tube I pulled right side out. It was much smaller than the first and I was only able to stuff it a little bit before I gave up. Looking back I could see making it again and using BB pellets, like the last pattern weights I made, but at that point I figured one was good enough to accept the sewing challenge.
Over the last year and a half since making this I love using the wiggle weight but at the edges of the patterns I prefer using the washers as they’re shorter and easier to place close to the edge without getting in the way of the rotary blade. I find myself using the stuffed wiggle weight mostly along any foldlines to keep the pattern flat against the fabric and not have to worry about the weight being too tall or overlapping the edge. Looking back I still like the concept and can see using a smaller wiggle weight stuffed with a heavier filler in the future.
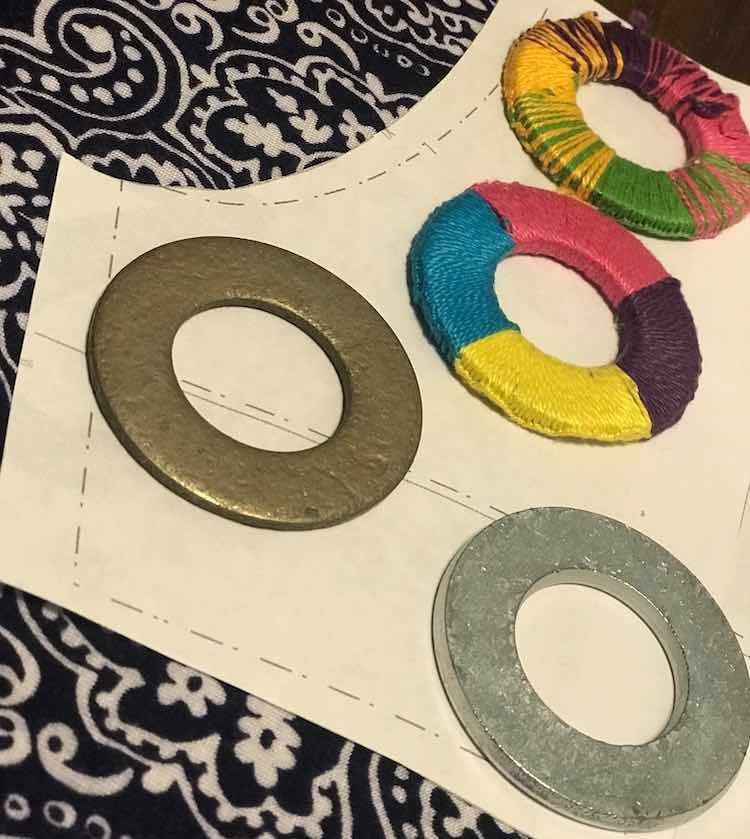
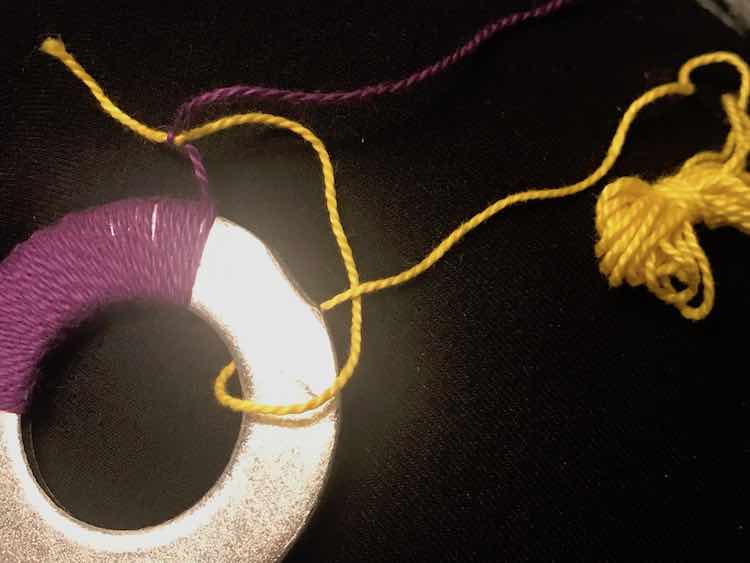
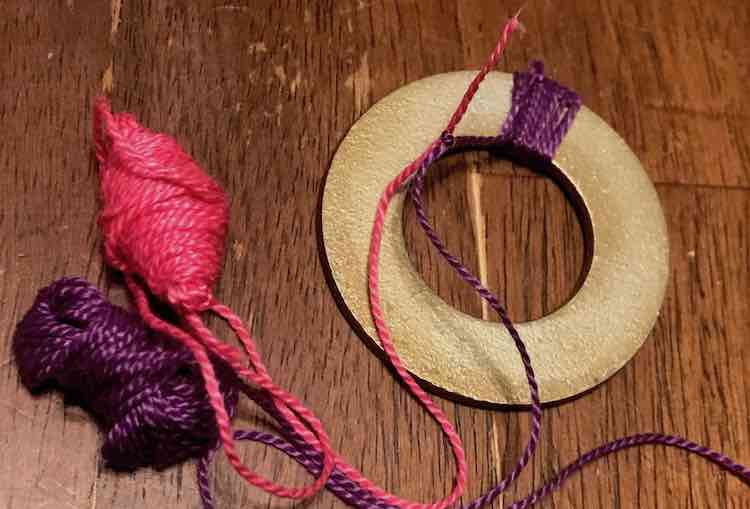
After seeing everyone’s pattern weights posted to the 52 week sewing challenge I started wanting to do something with my washers to make them more decorative. I had a stack of about eleven washers that were two inches in diameter with a one inch diameter hole in the center. After looking at many ideas online I finally decided to do something simple and grabbed some of my embroidery floss to wrap around my washers. I started with a single color, tied it to the washer, and then wrapped the long end around leaving the resulting loop loose. Once the embroidery floss looped around I brought it through the loop and pulled it taunt to create a knot right next to the first. I then kept wrapping the embroidery floss around, pulling it through and taunt creating knots along the outer edge of the washer. After making several knots I pushed them towards each other making sure there isn’t any open spaces between the wrapped embroidery floss. This is the same style as a simple spiral friendship bracelet (link to instructions on Claireabellamakes) but I kept the knots on the outside of the washer instead of spiraling around.
I originally considered wrapping a washer with a single color but I got bored as I was wrapping it and decided to change the color. To change the color I knotted the new color together with the old color and cut the old color leaving a small tail. I then brought the new color around the washer and through the loop to create a new knot. As I pulled the knot tight I made sure the excess floss was pointed towards the blank part of the washer. As I made more knots with the new color I made sure to cover up the ends of the embroidery floss making the color change look more abrupt.
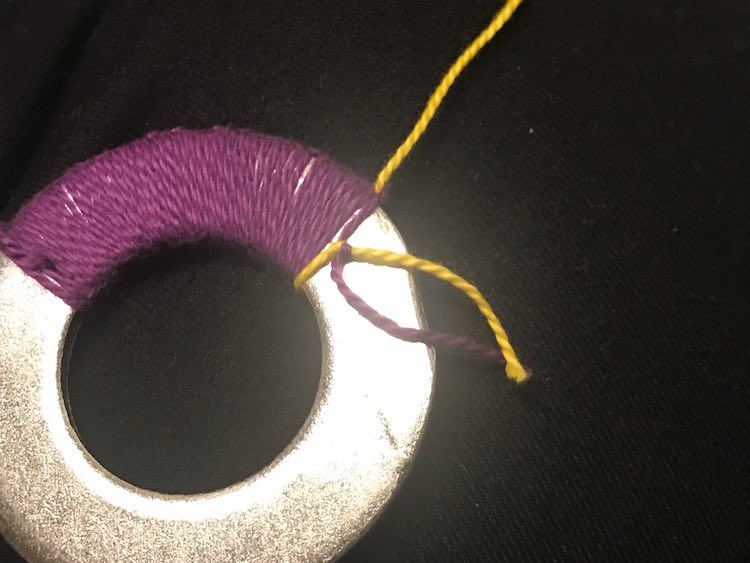
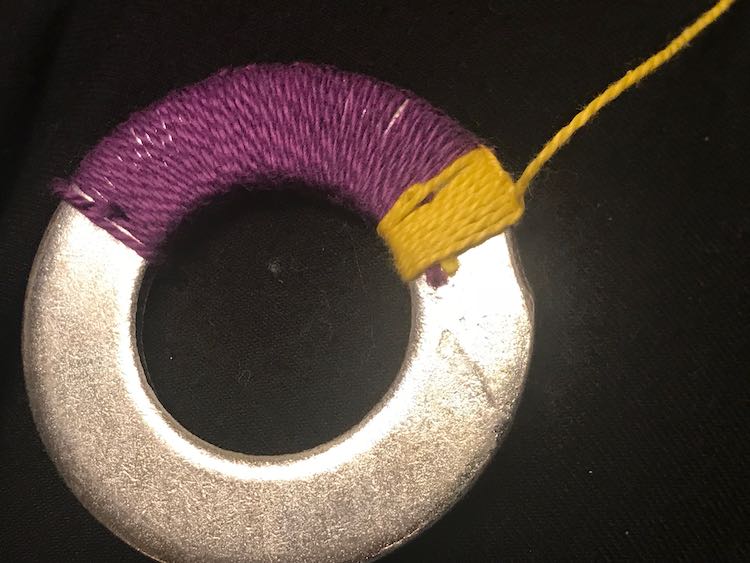
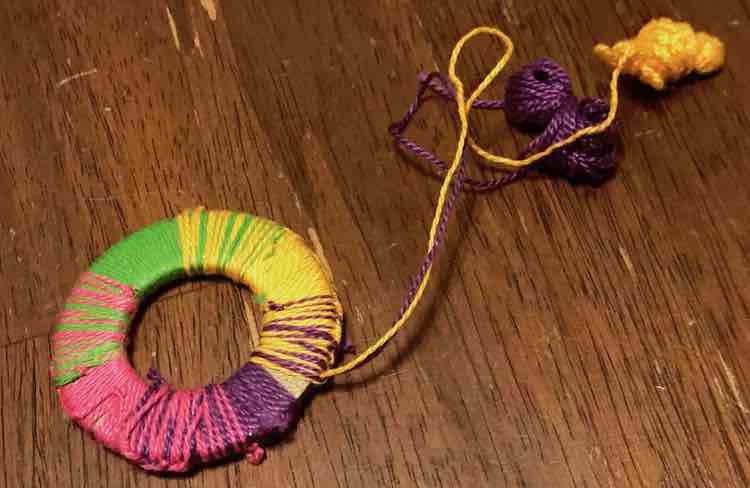
With the next washer I decided I wanted a more gradual color change so once I finished my first color I tied the second color to the embroidery floss but did not cut it off this time. I continued wrapping and knotting the floss making sure to hide the excess thread from tying on the second color. Once I had a big enough multicolored swatch I tied the two colors together again so the first color wouldn’t unravel and then cut off the excess. I then continued with the second color making sure the first color’s end was hidden. Once I had enough of the second color I added a third color to the mix. I continued like this making sure to add the first color back at the end so the colors would merge back to the first color creating a cohesive loop on the washer.

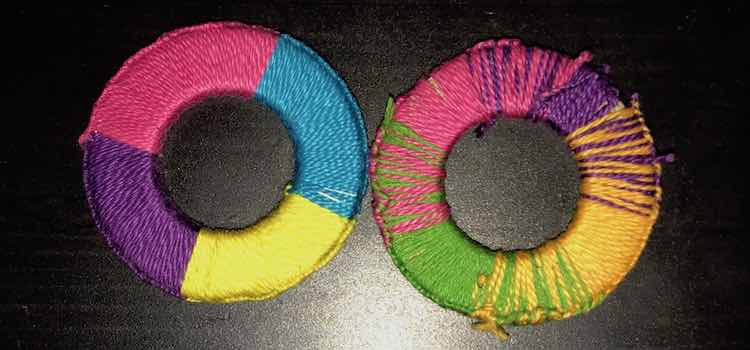
I loved the two complete pattern weights. I love how uniform the washer looks with the abrupt color changes but also love the gradual change on the other washer too although it looks a bit messier.
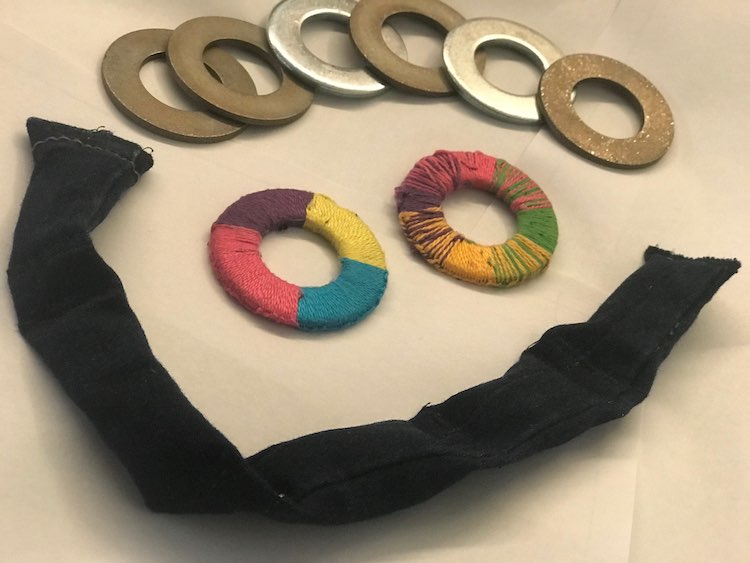
I’ve only tried the embroidery floss on two of my washers and kept the rest of the washers unwrapped. I’ve noticed I prefer the unwrapped washers as they slide easier when getting moved around my pattern; however, the wrapped washers make me smile more.

If you also prefer using washers but want them more decorative there are many blog posts online telling you want they did. I quickly did a search and found a post a BurdaStyle that uses regular nuts and washers. Apple Tree Sewing posted several ways she decked out her washers including nail polish, adding a printed template and sealing it with mod podge, wrapping skinny fabric strips around the washer and using a hot glue gun to keep it place, along with a previous post where instead of using washers she wrapped pennies in clay. Peek-a-Boo Pages used mod podge to stick cardstock to her washers before sealing them with resin. I love the little pattern weight stand she made and could see eventually making something similar for mine. I also love how different wrapped washers can look when you use skinny ribbon instead of embroidery floss like Sew Fearless made. If you have extra scrap fabric and want to use it to wrap your washers bluprint created adorable DIY YOYO pattern weights. Even with all those options out there right now I’m going to keep the rest of my washers plain but I can see changing them up in the future as the mood strikes.
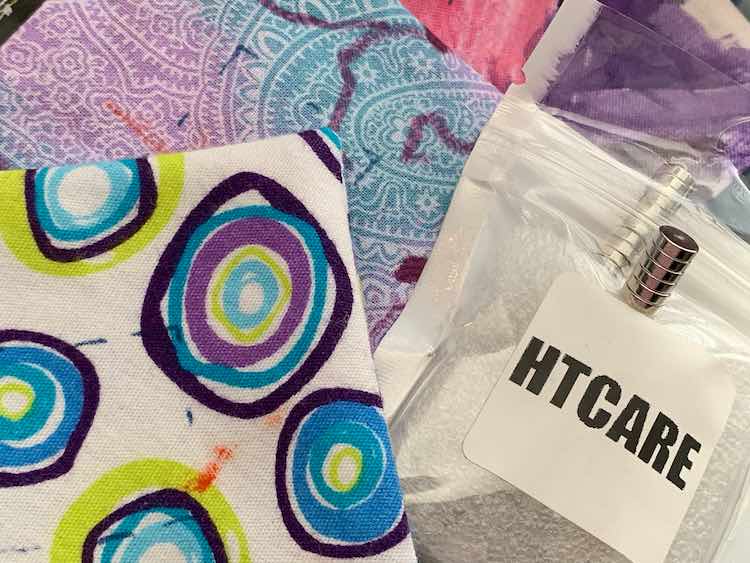
If you want something different than washers and wiggle weights Rebecca Page recently came out with a free sewing pattern that, once sewn, creates 2.5 inch square pattern weights. When the pattern first came out I considered making them but the realized I already had the above pattern weights and didn’t truly need more right now. I then came across a blog post by The Sewing Unicorn who made the pattern weights and tested them with four different types of filler before coming to the conclusion that BB pellets were the way to go. I considered making them again and then remembered the girls’ placket on their swimming suits I just made. I had wanted to create something that showcased their current art skills and realized pattern weights might be the perfect thing. The pattern weights couldn’t be grown out of like their clothing, would be used and enjoyed by me, and other than slight wear and tear the pattern weights should last a good while. I decided to go for it and jumped on Amazon to buy my first BB pellets for filler.
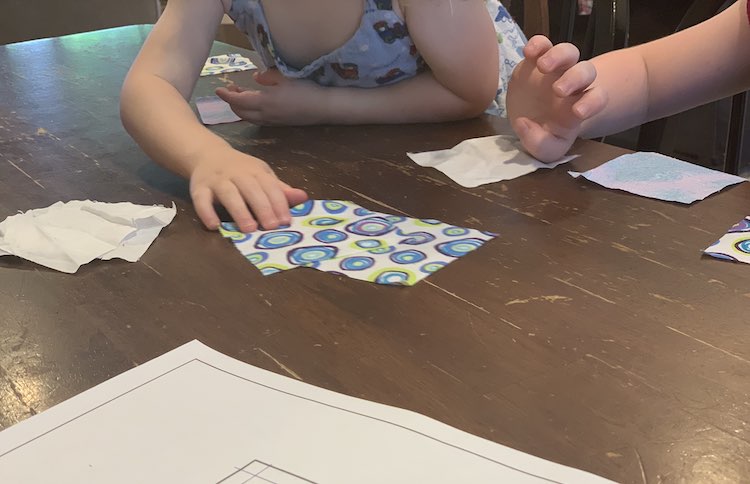
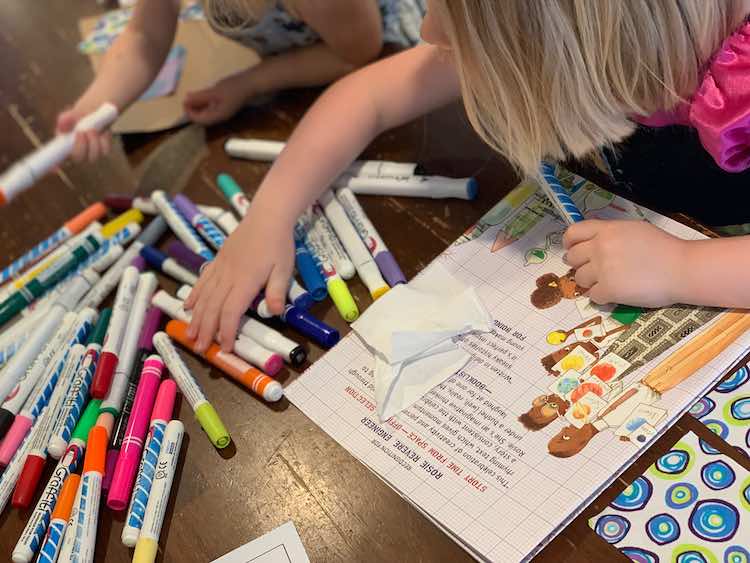
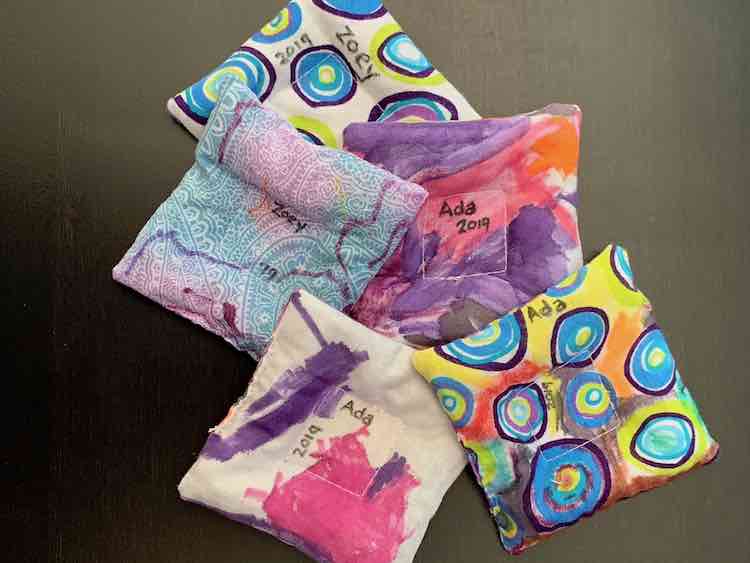
I was going to cut out white woven fabric so the girls’ drawings would show up the best but I had some other scraps laying around so I ended up cutting out a couple patterned pieces along with the white fabric. I used the printed pattern and marked off the seam allowance on the paper along with a marked center square to explain to the girls what part of the fabric would disappear when it comes time for me to sew it. I then released the kids to the coloring fun. My birthday was about a half year away when we were doing this but I was told by Ada that she was “making these for [my] very early birthday present. But [she]’ll get [me] something else on [my] real birthday.”
While the kids were coloring I saw a post on the Rebecca Page Sewing Facebook group where Suzanne shared her idea of adding magnets to the middle of the pattern weights to hold pins for the next time she sews hers up. I mostly used sewing clips rather than pins but loved that idea especially since I already had some small magnets from when I was debating making a magnetic placket for the girls’ swimming suits last year.
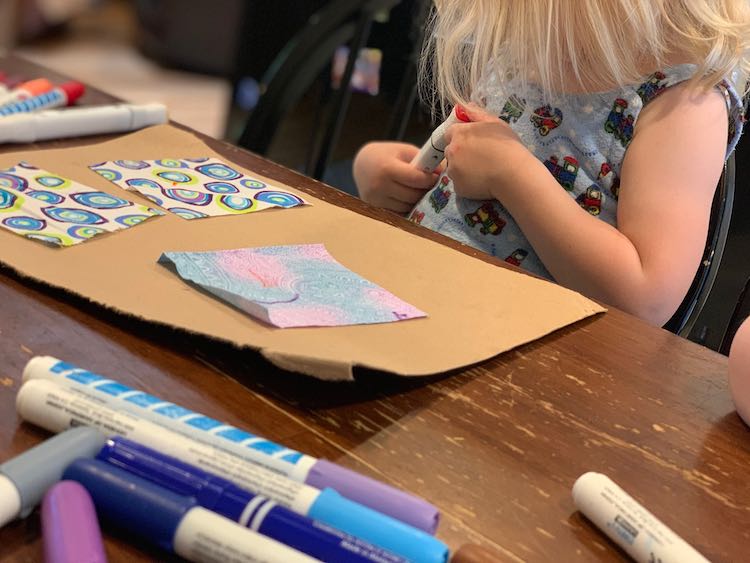
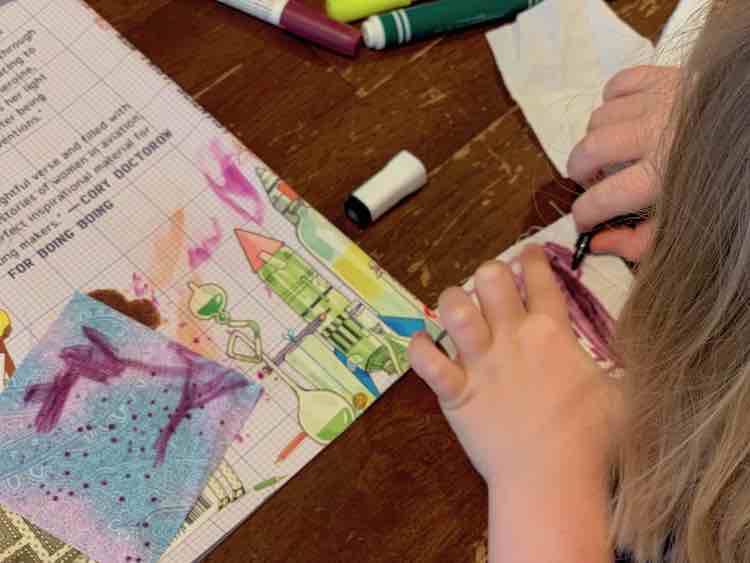
Once the kids were done coloring I ironed the squares to set the ink and then had the kids help decide which squares should be matched up to make the pattern weights. I then chose a set of squares and sewed it up following the instructions that came with the pattern but made sure to add a magnet to the center of the weight as I went.

After finishing the first pattern weight I tested out how well the magnet worked with some sewing pins. I love the idea of the magnet but figured I don’t truly need one in the other pattern weights so left them without.

A couple of days later I thought to add a name and date to all the pattern weights so I could remember who colored each and when they were made. The paisley pattern weight was made by both girls so I put Ada’s name on the Ada side and Zoey’s name on her side. The rest of the pattern weights were made by only one person (coloring both sides) so I only marked the one side of each of them. I used a black fabric marker and I’m hoping the name and date stay even though I didn’t set the ink with an iron. I could see making some more pattern weights every year or so and in the future I’d have a usable snapshot of what their art was like at each point in time.
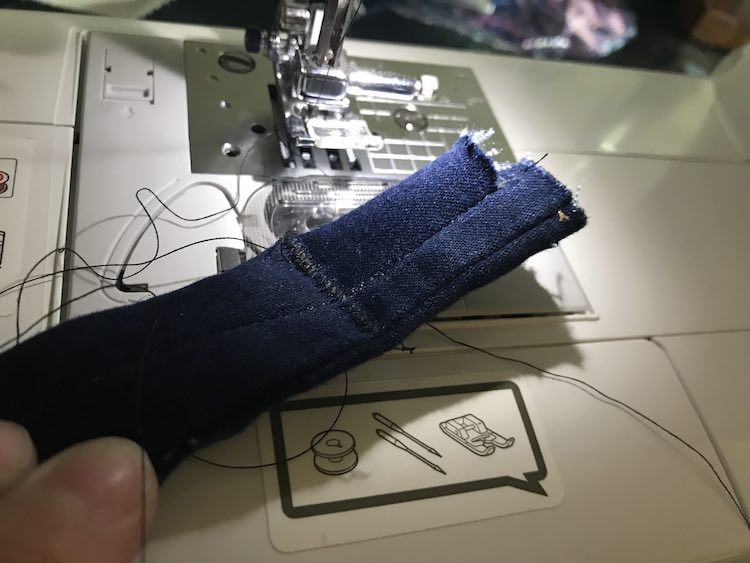
After writing this blog post I started wondering more about that extra wiggle weight I had started stuffing over a year ago before setting it aside. I found it and continued stuffing it using the BB pellets I bought instead of the original fishing sinkers I used before. Every inch or so I filled I stopped and stitched the pellets in place leaving an empty space before the next section so the wiggle weight would bend easier. It took longer to stuff as the opening was so tiny that I could only fit in a couple pellets before I’d have to take my chopstick to push it down. I also broke a sewing needle when one of the pellets slipped out and got under my needle as I was stitching the area closed. I did finally finish the pattern weight after all this time and can’t wait to use it.
I love my pattern weights and am so glad I bought or made each one. My favorite pattern weights are the Rebecca Page ones because I love the size and heft of them… although the fact that Ada and Zoey colored them doesn’t hurt either. I love the washers as they’re shorter so it’s easier to cut around them while being easier to move around when compared to the patter weights. The embroidered washers are adorable and functional though they’re slightly harder to move around than the plain ones but have no other negatives. I love my wiggle weight as it’s a simple weight to set down that covers a large space perfect for along the foldline of the pattern.
Have you made your own pattern weights? If so what have you made? Do you love them? If not are you planning on making any? What else might you use pattern weights for than their intended purpose? I’d love to hear from you in the comments below, on my Facebook page, or through Instagram. Hope you’re having a fantastic day!
Did this save you time?