

Creating Your Own Woven Panels With Fabric Markers

Over the past three-ish years I’ve kept turning to fabric markers when I need to customize an item that I can’t readily find to buy. My first pack of fabric markers was bought while pregnant with Zoey when I was trying to come up with a cute photo to announce the pregnancy to family and friends. At that time I bought thick markers, realized I needed to buy an iron, and grabbed one of the two plain shirts Ada owned so once I had the tools it was super simple and quick to get done. Needless to say this shirt was one of the few that didn’t get passed down to Zoey. Over time I’ve since repeatedly pulled out my markers and finally bought thinner tipped ones along with another pack of regular ones when I needed peach for my quilt. This time around I had an idea of what I wanted on my kids’ garments and wasn’t able to find it in stores or online so I once again turned to my handy fabric markers. I knew the markers would work best on woven fabric so I kept that in mind while picking what pattern I was going to sew up and finally chose two patterns to sew up so I can show you four main designed pattern pieces here.

I’ve since posted the finished garments using these woven patterns.
Previous projects using fabric markers include:
- Clothing
- Customize Ada’s shirt to announce a pregnancy
- Making Zoey’s onesie into a Chuggington Koko outfit to match Ada’s
- Firetruck Halloween shirt to go under the rest of the costume
- Accessories
- Colored black and white fabric used in my DUPLO® storage bag and playmat
- Quilt squares
- Personalized a passport wallet
- Labels on Christmas stockings
- Duplo storage bag and playmat
- Quilt squares
- Quiet Book Pages
- Inside of the pie before weaving the crust on
- Counting to five using your hands
- Colorful animals
Back Story
With this being the last year with Ada at home before starting school we wanted to take advantage of one last off-season vacation. Last year we visited Solvang, California (Danish Village) overnight (while the Christmas decorations were still up) before spending the rest of the week overlooking the ocean in Pismo. This year we couldn’t stop thinking about LEGOLAND®. After moving here three years ago we’ve joked several times that the first time going to South California we’d probably go straight past Disney to visit LEGOLAND® instead. The girls have always been enjoying our DUPLO®, but this year Ada has been getting into LEGO® more and more (starting with LEGO® Juniors and then including older LEGO® kits since our Christmas advent calendar). We’ve hemmed and hawed about heading to LEGOLAND® until we finally decided to just go for it.
After booking LEGOLAND® I did what any sewer would do and quickly tried to come up with LEGO®-centric clothing for the girls. I started hunting for LEGO® fabric and found some LEGO® bricks fabric (Peek-a-Boo Pattern Shop) that would be perfect as a coordinate but I couldn’t find anything online for the main fabric. The hunt was on! I took some extra time before heading home the next time I was out alone to stop at WalMart to look for LEGO® shirts… and found nothing. I even went through the adult and bigger kid sections as I knew I could cut any clothing and sew it my daughters’ size if I had to. Next, with the girls, I looked at Costco but again couldn’t find any clothing that were LEGO®-related. I finally checked online and although I found adorable DUPLO® pajamas on Amazon I decided not to get them as I preferred being about to touch the garments and know if it would look to pajama-esque or be too thin for hacking. This is around the time I gave up on hacking a store-bought garment and instead started thinking about using my fabric markers.
Figuring Out Your Design
I next looked online for LEGO® coloring pages with Ada during Zoey’s quiet time and printed two copies of each of the ones that caught our attention. I mainly found coloring pages through True North Bricks along with the LEGO® website. On the LEGO® website each theme’s coloring pages are separated out so with Ada watching it was easiest to go through Google to quickly jump right to (or close enough) to each list of coloring pages. I mainly used the coloring pages found through Jurassic World and Juniors although I also found a pdf for a DUPLO® dinosaur birthday kit poster that I printed the first page overview of.
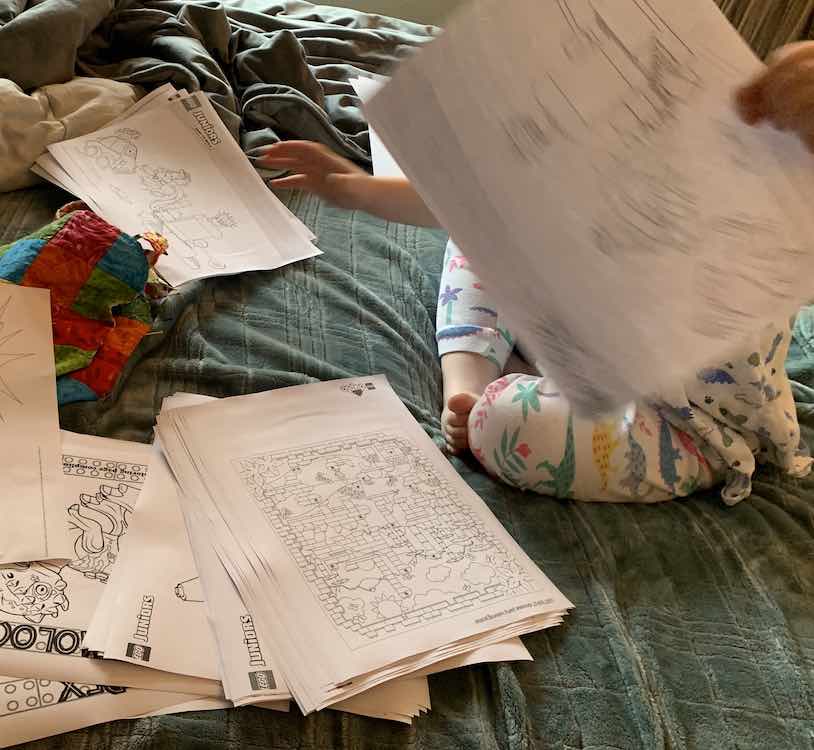
After releasing Zoey from nap time I let the kids color their new pages while I repeatedly got them to list their favorite pages or characters.

If the kids had been more into coloring a single page I would be able to copy their coloring onto their clothing. If they were older they could even trace it out themselves and, if the clothing I was making wasn’t a surprise, Ada may have loved coloring it herself either before or after I made the outfit.
Once you know what coloring pages you want to use you’ll have to print them out, check their size against the sewing pattern, and potentially resize and print again. If you need to resize something found in a PDF document I found it simpler to take a screenshot of the image and add it to a word program to easily resize and print again.
Getting Your Design Down
I’ve used my fabric markers on knit fabric once or twice. The first time the garment faded drastically after going through the laundry the first time and I haven’t attempted it again so I don’t know if it would fade anymore. In this case I decided it was safer to draw the designs on white woven fabric so I went looking for sewing patterns that worked with partial or full-on woven fabric. I ended up not looking far before choosing Rebecca Page’s Patsy Party dress along with her Olivia top since I knew the kids loved their finished garments and I had the pattern pieces traced and already prepped to go. I didn’t want the whole garment to be white so I cut out the front bodice pieces with the white woven fabric (and straps for the Patsy) and then cut the rest of the pattern pieces out with another fabric. Word of caution: I found while making my quilt that the edges of the pieces unravel really easy. If you know that you’re going to be handling the fabric a lot you could always trace the pattern piece onto the fabric to be cut out later.
Patsy – Unikitty™
Before starting Zoey’s Unikitty™ I went along the edge of the cut pattern piece and marked the seam allowance with my measuring gauge. I’ve noticed sometimes you can still see a remnant of the disappearing ink after you iron it away, especially on white, so I marked slightly within the seam allowance so it wouldn’t be visible when sewn in case it didn’t disappear.
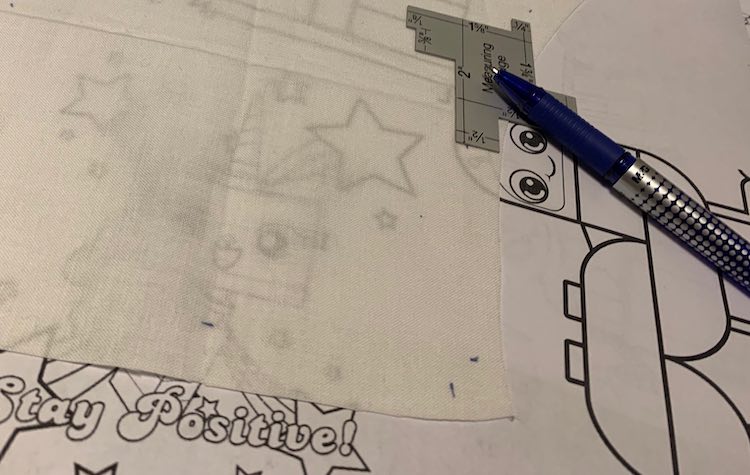
I then laid out the fabric pattern piece over the coloring page making sure it fit and I wouldn’t have to print a different size of the coloring page.

After I verified I liked the angle and placement I used a black fabric marker to trace as much of the design as possible. Overtime I’ve realized when you’re unsure about an area it’s better to make dots since the actual line might be off compared to what you draw in and it’s easier to correct dots than it is lines. I’ve also found eyes are easier to make more realistic if you fill them in afterwards rather than when you’re tracing. After you get all the details you can remove the coloring page and, while consulting the page, flesh out the details on your fabric. This is why it’s best to use dots when you aren’t sure as having those dots help you drawer in the area later since they offer more guidance than a blank space would.


After I was done with the main image I decorated the background to help blend in the Unikitty™ and it my own. I also decorated the straps to match the design; however, I knew they were going to be folded in half and then sewed (losing seam allowance) so I kept the image mostly located on one side and knew some would be lost. To mitigate any lose of the image I chose to use stars and bricks as they’re simple to understand when only showing partial bits while still matching the Unikitty™ and LEGO® theme. To make it cohesive I traced the stars from the background of the first coloring page and traced the bricks from another coloring page (wrecking ball against wall) so they’d match each other.


My first set of fabric markers had you wait fifteen minutes (to dry) and then set the ink with an iron. I had more designs to create so this time I set it aside for several days before ironing all the images at once before going on to coloring them one at a time. Either way I recommend setting the ink before coloring in the design so the black doesn’t run into your colors.

After setting the ink you’re ready to color in your design, set the ink again, and then sew your pattern according to it’s directions. I brought up an image of the Unikitty™ on my phone to better match colors and then found a rainbow image to better color that in too. I used orange for the text and some of the bricks because it’s Zoey’s favorite color. I tried to use a variety of yellows for the stars so they all differ from each other yet made sure I used each color in at least three spots so it wouldn’t stand out too much. I also tried to tie the Unikitty™ into the background better by using matching pink and blues for the bricks.

Patsy – DUPLO® Dinosaurs
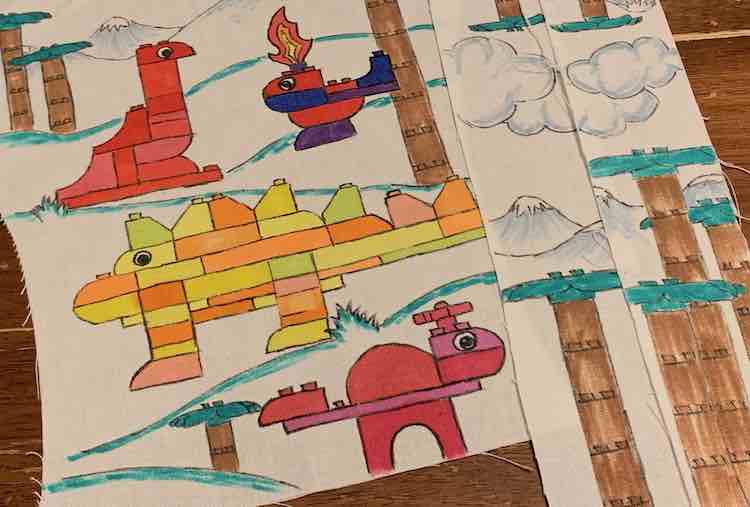
The DUPLO® dinosaur coloring page was a bit more complicated. For the dinosaurs I wanted to trace a couple of them from the main design but didn’t want to trace the entire page. Since I wanted to pick some out I wanted the dinosaurs to be larger than the first page of the PDF but I needed them to also be smaller than the larger pages so I could fit more on the fabric pattern piece. I ended up taking a screenshot of the first PDF page so I had an image, importing it into Numbers (on a Mac), resized the image, and then printed it out over four pages (after choosing which pages should be printed in the page setup). After it was printed I cut the edges and taped it together.

I realized all the dinosaurs I picked to trace were facing the same direction as each other and I wanted at least one of them to be looking the opposite way. I took one of the pattern pieces (slightly transparent medical pattern paper for tracing the pattern pieces out) and traced the last dinosaur onto it so I could then flip it over and trace the reversed image on the fabric instead.

Similar to the poster I added in the odd bit of grass, hills, palm trees, and mountains to the design after getting all the dinosaurs in. Ada keeps saying her favorite tree is a palm tree so on the straps I traced out the palm trees hoping that once I sew the straps it will still be obvious what they are. I added mountains and clouds in the middle so the straps look upright no matter if you look at the dress from the back or front later Once done I again let the ink dry before ironing to set the color

When coloring I started with the most identifiable dinosaur and colored it in red since that’s Ada’s favorite color. I tried to use a variety of reds so the bricks would still stand out from each other. For the other dinosaurs I wanted to use a variety of colors but didn’t want them to be too varied either.

Olivia – Rescue/Construction Scene
When I started tracing out the Olivia fronts I had trouble seeing the more complicated coloring pages before remembering I still had a kid’s light box in my craft area. I pulled this out before for a quilt I made and it makes the tracing so much easier both then and now.

Again after tracing out as many details as I could, and making dots where I could see the drawing but wasn’t sure why it was there, I pulled out the coloring page and added in the details while checking the coloring page.

After finishing the first one I continued by tracing out two more coloring pages, added details, let it dry, ironed it, colored it, and then ironed again to set the ink.


Olivia – Cars
For Ada’s Olivia I used the Cars coloring pages I found through the LEGO® Juniors section of the website. Like before I traced as much as I could before going over it again in greater detail. I saw the roll away tire in the one coloring page and decided to trace it out an additional two times to add more details to the scene. After adding in as many details as I could I then set the black ink and, while consulting LEGO® Cars images online, colored them in. I did notice some of the coloring pages were mislabeled on the website so I wasn’t sure if the page labelled Cruz Ramirez was actually Cruz as some of the details didn’t match while looking up colored images but decided to go ahead assuming it was Cruz (the matching page also had a Lightening but I left him off as I was using another page for him).


I’m kind of glad I wasn’t able to find LEGO® or DUPLO® fabric or shirts online or in stores. I love how these turned out and love how they’re customized to what my kids currently love. Since starting the panels Zoey has found a unicorn headband leftover from a summer birthday party we went to and has been calling herself a unicorn so I’m hoping she’ll be super excited about Unikitty™ when she sees the finished dress.

The one downside to this method is the white fabric is a bit see through looking. This makes it perfect for tracing but in garments I want to make sure it’s more opaque. For the Patsy Party dress I had ended up cutting out my pattern pieces with an off-white fabric before realizing and cutting a second version with my whiter fabric for the fabric markers. The Patsy bodice is fully lined so I’m not sure if I’m going to sew the outer layer with just the designed fabric or stack the two pieces on top of each other to sew. For the Olivia top I’ve already started to sew it and have decided to line the front with some blue cotton I had on hand. I just stacked the two pattern pieces on top of each other and then treated them as one piece. Next time I might try basting the two layers together before sewing the top in case the layers shift while sewing.
Have you you created your own fabric panels? What did you use? How did it hold up in the wash? I’d love to hear from you in the comments below, on my Facebook page, or through Instagram. Hope you’re having a great day!
Did this save you time?