

Simple and Adorable Snow People Sensory Kit

Two years ago I was trying to come up with a fun gift idea for two other girls and came up with this play dough sensory kit. After coming up with the idea I browsed Michael’s Arts and Crafts to help flesh out the plan. This is what I came up with… making sure to make extra for my kids while also mindfully packaging the gift to make it a bit better.
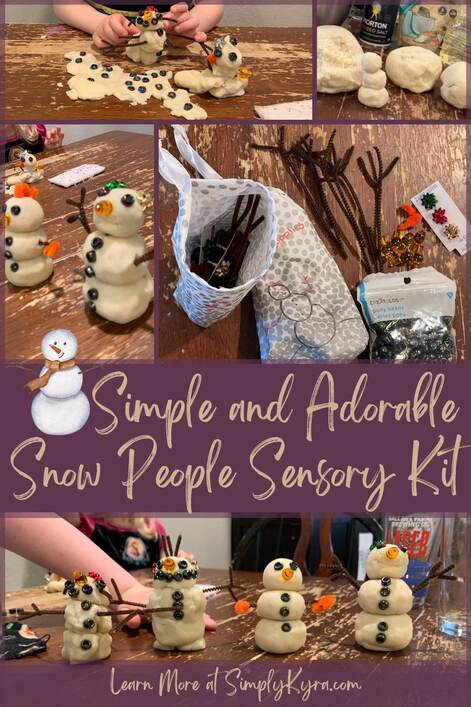
While coming up with the gift I knew I wanted a simple sensory play idea that didn’t require too much clean up and would keep the kids happy for hours. As such I knew my play dough recipe would be a good basis to start out with but I wanted some way to make it unique from previous times we played together and or gifted them items. I then thought of making snow people and realized it was perfect. I could keep the play dough simple, as I wouldn’t need to dye it, while also including extra parts thus gifting the kids hours of unique play.
Expanding the Idea – Accessories
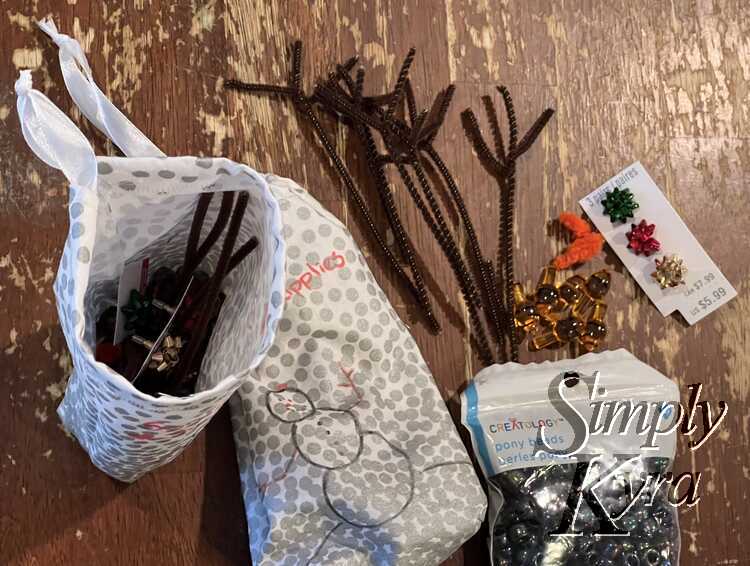
To expand on the idea I started by shopping in my sensory cupboard and found some brown and orange pipe cleaners (also called chenille stems) that I already owned. I knew the brown ones would make perfect branches for the arms and the orange would make the perfect carrot (which I later replaced) so I grabbed them all and sat down to plan.
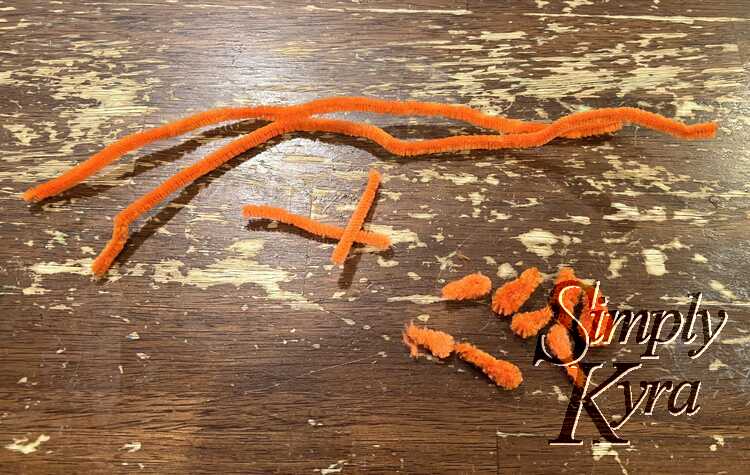
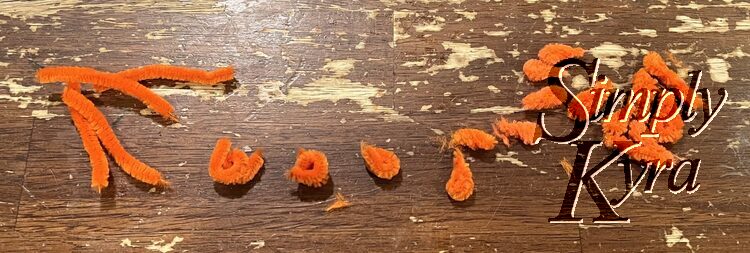
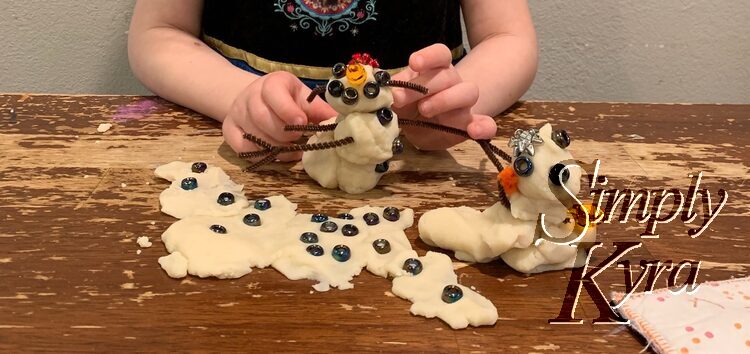
For the carrot I took the orange pipe cleaners and cut them down a bit smaller. I attempted my first one by simply folding it in half but then realized that the carrot came out too skinny so I changed my method and instead rolled each piece into a spiral before squishing them down, to make the triangular shape, and then twisting it a bit to keep its shape.
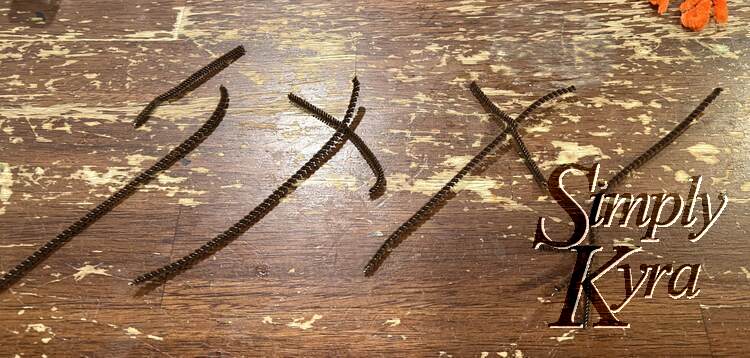
The brown pipe cleaners I had on hand were less fuzzy than the orange ones which worked for the branch idea. To make the main piece of the pipe cleaner branches I cut the pipe cleaners in half while the smaller offshoots were made by cutting them into thirds. I then took one long and one short pipe cleaner and crossed them near the end of the long one resulting in an X shape with one leg longer than the other three, equally sized, ends. I finally twisted them together and angled the three ends in one direction resulting in one long branch, or arm, with three pieces extending at the end, making three fingers. Thus each branch was made from just under one pipe cleaner; combining a half and a third. I repeated this process with all of the brown pipe cleaners I had.
With my sensory cupboard not turning up any other ideas I decided to head to Michael’s Arts and Crafts to see what I could see. I knew going in that I didn’t truly love my carrot nose idea so I hoped to find some carrot-shaped beads or something to replace them with… which I couldn’t find even when typing carrot into their app. That said, I ‘m still glad I went as I found other items that would work for the kit. These included:
- Earrings shaped in a bow like you’d put on a gift. They were cheap enough that I wouldn’t want my kids to wear them but I figured they’d be perfect for the play dough kit. Once home I removed the earring backings and split them up so the snow people could have bows on their head… or anywhere else the kids decided. The metal posts in the back were perfect for sticking into play dough and holding them in place.
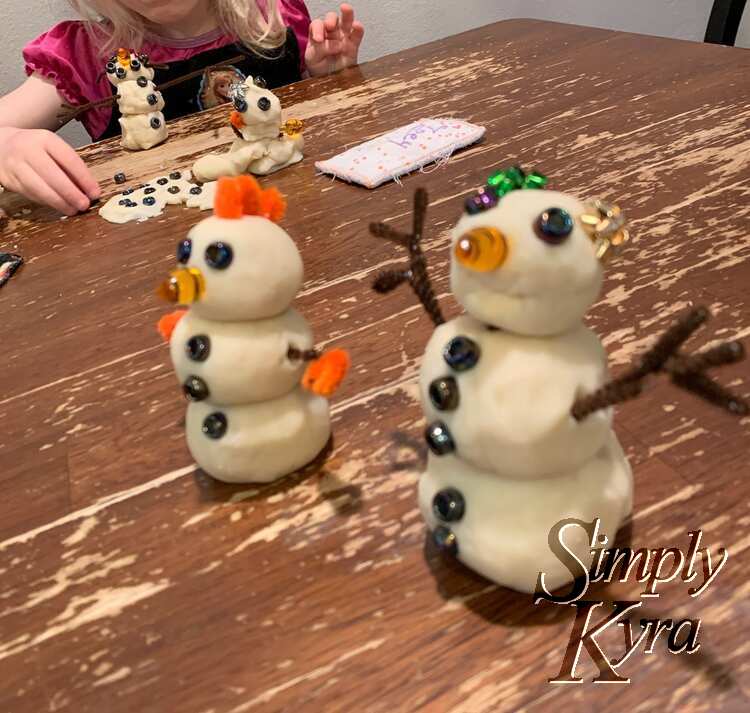
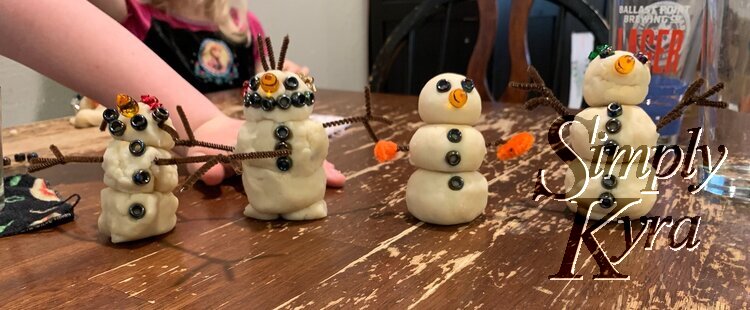
- Shimmery black pony beads that I decided would be a perfect replacement for coal. I pictured them going on the face (eyes and mouth) and on the body (buttons).
- Discounted, 70% off, solid plastic Halloween lights that became perfect carrot noses with the addition of some black paint pen lines. Thus my pipe cleaner noses were replaced (kept them for my kids so they weren’t just tossed).
And with that all the accessories for my snow people were decided!
In case your store still sells the Mr. Halloween traditional bulbs, or something similar, I wanted to go over how I converted the plastic bulbs to simple noses. I started by separating them out by color as I was only interested in the orange bulbs and not the purple ones. I then grabbed a fine tipped black paint pen and carefully and repeatedly sketched partial circles around each bulb several times. Since I didn’t know which angle each carrot would be looked at I wanted all sides to have enough lines to look like a carrot yet as I was copying nature I didn’t want the lines to go all the way around and look fake. Once all bulbs were marked the carrots 2.0 were finished.
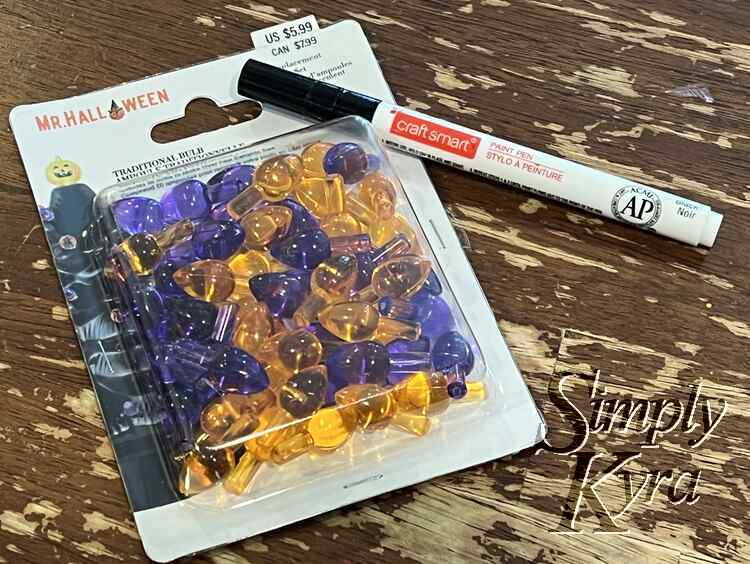

Quick aside I may still have the purple ones somewhere, not sure where, so if you have an ideas on how to use them that would be great.
Make It Look Pretty – Packaging
I wanted to wait until the night before to make the play dough so it would be fresh. In the meantime I wanted some way to package the gift up prettily yet still be functional enough for daily use. For a different sensory present, in the past, I had used an Ikea lidded container to hold all the materials but this time around I worried it would be too large and too divided for this particular gift. Instead I remembered the reusable fabric gift bags I made for Christmas presents and decided to do something similar for these. This way all the accessories could go in the bag and would take up less room than a plastic container.
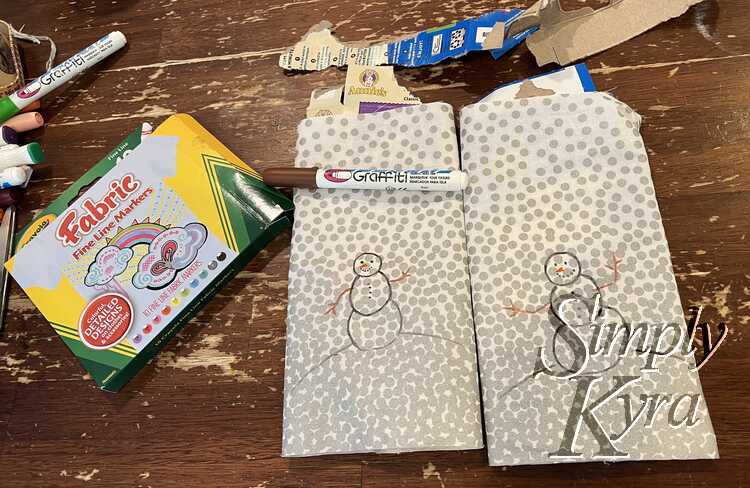
Before I could start I needed to look through my fabric to find some Christmas themed woven fabric. Rather than that I found one even one better! I had a remnant from Joann’s perfect for two bags that emulated falling silver snow on a white background with the one end completely white while the other end was mainly silver. I cut it in half planning to make the top of the bag the whiter side in the hopes that it would appear to have falling snow piling up on a silver snowbank. With the pieces cut I quickly made two little sachets by:
- Folding over the top to make a channel for the drawstring and sewing it in place.
- Using a French seam to sew up the sides of the bag.
- Paused to decorate the bags since it was simple enough to press flat now. I inserted cardboard so the fabric markers wouldn’t bleed through and then drew a simple snow person making sure to include the items I included in the kit in the design.
- Added their name and the words Snow Supplies.
- Pressed the fabric to set the ink.
- Quick aside: I’ve heard of using the dryer heat if you don’t have an iron to help set the ink. I did that myself later when I had to add the bow to the snow people’s hair.
- Sewed the bottom closed using French seams again.
- Added box corners to the bottom so it would be larger.
- Finished the open edge of the channel.
- Threaded a white ribbon from my collection through the channel so I could cinch the bag closed.
And with that I was done! I had recently edited my reusable fabric gift bags post so the process was fresh in my head and the construction of the bags went quickly.

The Main Event – Playdough!
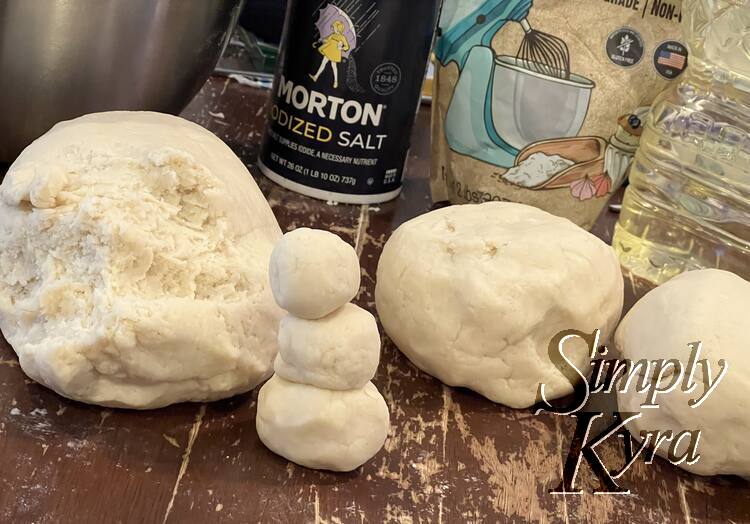
You can’t have a play dough sensory kit without the play dough! Years ago I tested several types of homemade play dough and settled on this favorite recipe. It’s the favorite that has been changed up over the years with food dye, flavor extracts for scents, markers, and accessories. I have so many other ways I’ve changed up my play dough over the years so if you want more ideas you can check out the play dough tag here.
This time I didn’t need to add anything special to the play dough, since snow is white, and just made a plain double batch so we’d get a full batch for ourselves and gift the other full batch. I could see adding silver glitter but I didn’t want that to get all over my friend’s home. Once made I bagged it in a freezer zip lock bag, for easy storage, and used a paint pen to mark it as SNOW.
Last Minute Additions – Felt Pens
Right before wrapping the gift I felt it was lacking something so I grabbed a pack of felt pens and used my paint pen to label it with to decorate them. I figured this way the kids would have more freedom and opportunity to decorate the snow people however they wanted beyond the provided accessories or expand to further horizons! When my kids were younger they spent hours making food with their play dough and decorating it with markers so I knew it was possible and so much fun.
The Final Look
The gifts were a success and my kids appreciated their version of the kit with just the play dough and accessories. I pulled it out when we had family over and used a simple Dollar Tree tray to separate out all the accessories that could be used. That said, looking back I’m not sure where the pieces have since gone.
I’d love to hear if this helped you make your own snow people kit. Feel free to share in the comments below! I’d especially love to hear how you made it your own.
Hope you’re having an incredible day!
If you’re interested in getting any of my future blog updates I normally share them to my Facebook page and Instagram account. You’re also more than welcome to join my email list located right under the search bar or underneath this post.