
Make a Simple, Tasty, and Healthy Cookie Sheet Meal

I came across a recipe similar to this with one of the programs I bought through The Balanced Life and it’s become one of my favorite go to meals. It’s super simple and so easy to throw together with whatever vegetables you happen to have in your fridge. I’ve started keeping a pack of sausages and a couple yams handy so I can easily throw this together whenever I have vegetables I need to use up or when I just don’t know what else to make. Another great thing about this dish is that it can be prepared ahead of time which I loved pre-COVID-19, when prepping before going out on a playdate, and I still love now. This means whenever I have time in the morning I can jam out to some fun music with Zoey, while she plays with a sensory bin, or use headphones to listen to an audiobook or podcast while cutting up all of the ingredients before tossing them in the fridge for later. Also if something last minute comes up (like last time when Matt and I thought to spontaneously order pizza) I can always leave it for tomorrow’s supper. It’s perfect!
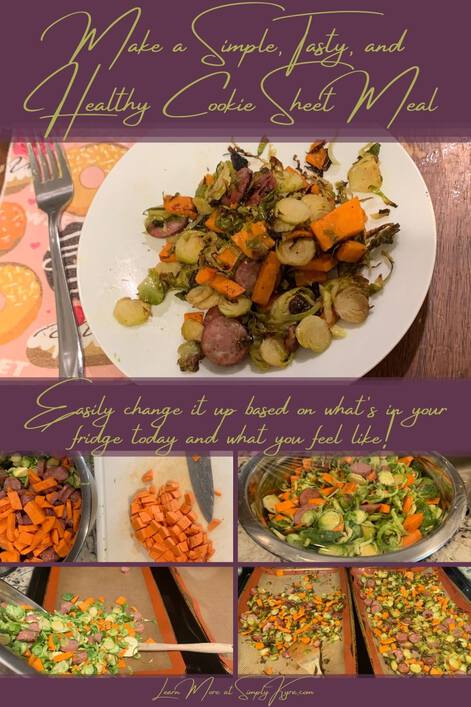
I’m going to start this post off by going over how I make this, with accompanying images, before following it up with the actual recipe. After the recipe I’ll show how I quickly pack up my leftovers and then show all the variations I’ve made with delicious results.
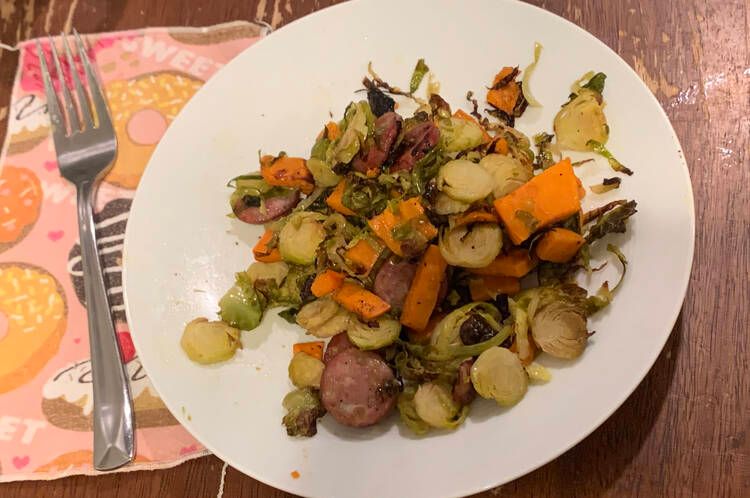
Basically this recipe consists of vegetables, a meat, a bit of oil, and some seasonings. You can easily change this up based on what you like or have on hand as long as all of the ingredients can bake at the same temperature over the span of time.
For my meat I absolutely adore Aidells’ Chicken & Apple sausages which I normally buy through Costco in a three pack. If I stock up and know we can’t possibly eat all of it before the best before date, which is always at least a month in advance, I know I can toss the extra packages in the freezer so it’s available whenever I need it. I’ve even started cutting up the sausage, the morning I’m going to make this, frozen just out of the freezer and it still cuts up great and can easily defrost already mixed in with the vegetables.
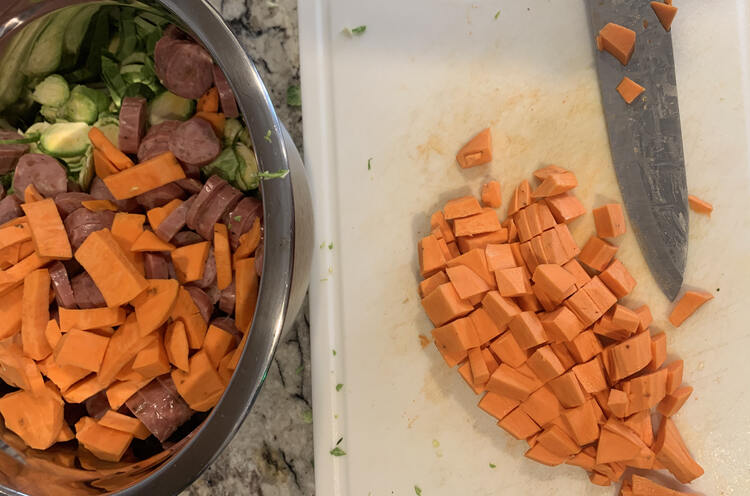
For the vegetables themselves I normally default to a couple of yams (the orange ones… as depending where you live yams and sweet potatoes seem to be swapped) and sliced Brussel sprouts. It takes longer to cut up the Brussel sprouts but I love how they brown and crisp up when cut smaller. Other times I’ve changed this up by switching out these vegetables for other ones or by adding variety.
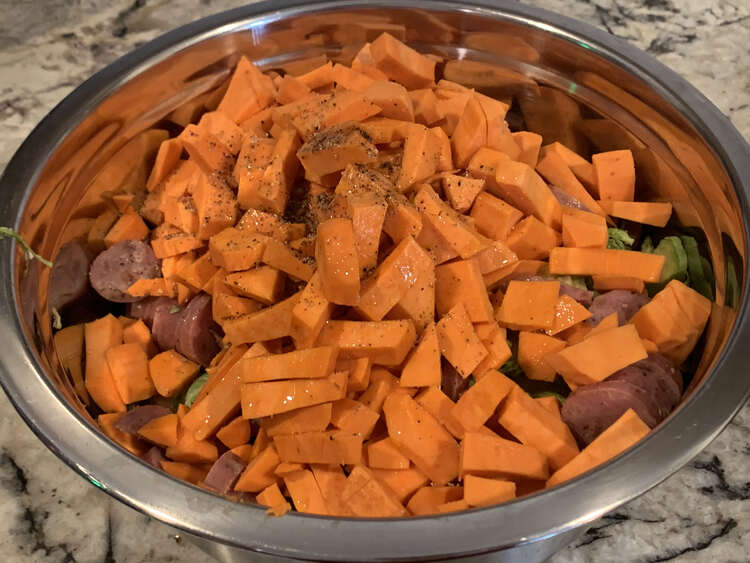
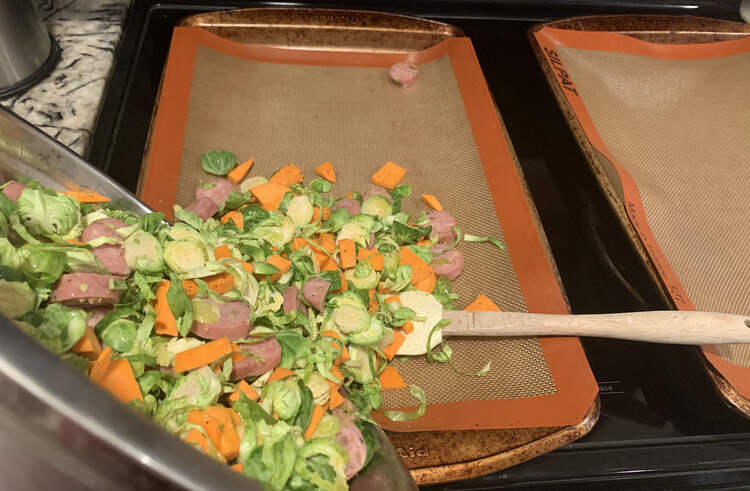
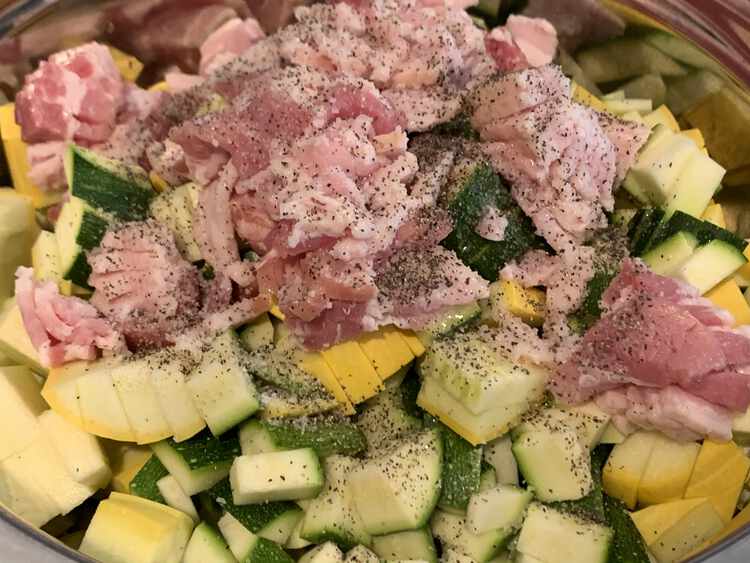
Since I prepare this the morning I’m planning on having it for supper I normally decide how much to make based on my available ingredients or, if there’s a lot of ingredients, based on my bowl size so I don’t make too much. You basically can’t go wrong with this; although, if your cookie sheet is too crowded it will take longer to bake and will be less crispy. Anyway, since I make this in advance, as each ingredient is chopped up it’s added to a bowl so once I’m done all I need to do is add in several tablespoons of oil, most commonly avocado oil, and season it with salt and pepper. If I knew the kids wouldn’t try it I would probably also add some crushed red pepper flakes or chili powder. I’m sure I’ve done that in the past with a small amount. I’ve also sometimes changed this up by adding some garlic powder, paprika, and/or taco seasoning too. I then stir it all up, stretch some plastic wrap over the top, and toss it in the fridge until I’m ready to bake it.


Normally the mixed food sits in my fridge until supper, somewhat under eight hours; although, once or twice it ended up sitting in the fridge for over 24 hours when an alternative supper idea came up. Either way the food tasted amazing once baked.
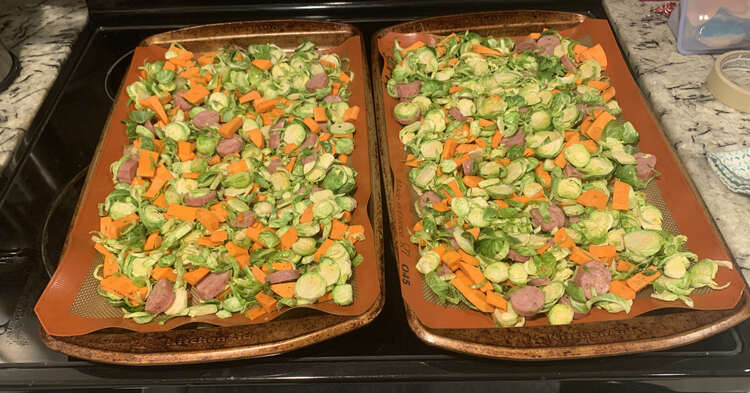
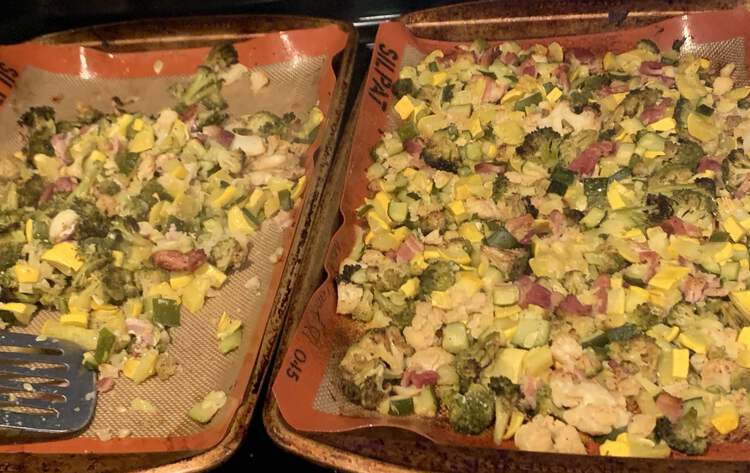
About 45 minutes to an hour before my planned supper time I start the oven and set it to 425° Fahrenheit. As the oven preheats I grab two cookie sheets, so there’s more room for the food, and cover each one with a Silpat® making for an easy cleanup. I then grab the bowl from the fridge, remove the plastic wrap, and pour it out over the two pans. After making sure it’s equally divided I spread it out and wait for the oven to fully come to the proper temperature and toss them in. Later, about 20 to 25 minutes later, I pull them out, stir up the contents, and, if they need to be baked longer, I put them back after switching their spots so they cook more evenly. If one sheet ever bakes quicker than the other I can pull it out, start supper, and pull out the second when it’s ready. Although, normally if they aren’t equally baked it’s more like one is fully cooked but a little soggy while the other one has been fully crisped.

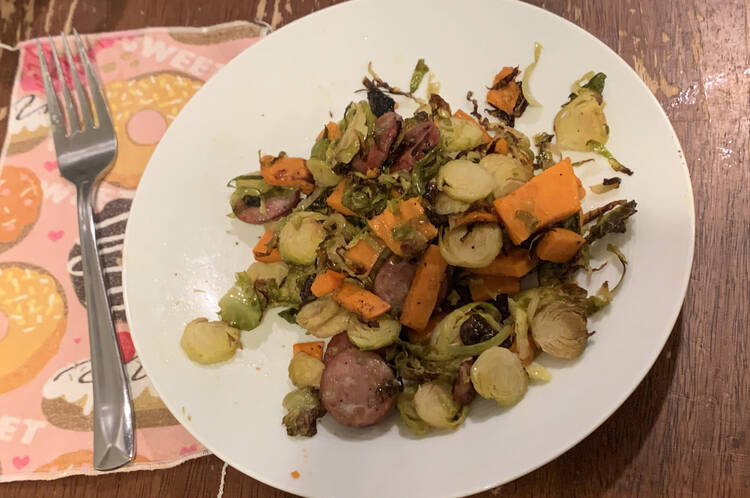
And this tastes amazing! When I first started making this we always served it as a complete meal like this and it was more than enough to fill us up. The kids started out really picky but, over time, they started getting excited when I serve this although they mostly only eat the chicken apple sausages.

Below is the recipe if you want it laid out more point blank and/or if you’d like to print it out. Afterwards I’ll go over how I quickly pack up any leftovers and then some amazing variations I’ve made that turned out amazing.
Cookie Sheet Meal
Easily use up any vegetables you have laying around and make a simple and tasty meal! Perfect when you're craving something yummy and easy.
Main Course, Oven, Sausage, Vegetables
Prep Time: 20 Minutes
Cook Time: 30 minutes
Total Time: 50 minutes
Servings: 4 people
Ingredients
Meat (Optional)
- 1 pkg Chicken Apple Sausages; sliced 4-6 sausages or replace with diced bacon
Roasted Vegetables
- 1 lb Brussel Sprouts love it sliced
- 2 medium Yams; Cubed or sweet potatoes... whichever ones are the orange ones where you live
Oil and Seasonings
- 3 tbsp Avocado Oil or some other oil like olive oil
- 1/2 tsp Salt to taste
- 1/2 tsp Pepper to taste
Change It Up!
- Apple cored and diced
- Add or switch up the vegetables with bell peppers, squash, broccoli, cauliflower, asparagus, or green beans to name a few choices.
- Switch out the spices by using your favorites. Some I've used are paprika, garlic powder, onion powder, dried oregano, and/or taco seasoning.
Instructions
When Making Ahead
- NOTE: This meal can be prepped the morning or day before depending on which ingredients you used. If you're making this at the same time as a casserole you could bake it at a lower temperature but then it would take longer and might not crisp up as much.
- Prepare all the ingredients and toss them into a large bowl along with the seasonings and oil.
- Mix well.
- Seal the top with plastic wrap and place it in the fridge until it's closer to supper time.
- About 45 minutes to an hour before supper set your oven to 425° Fahrenheit.
- Line one or two cookies sheets with a Silpat or with tinfoil for easier cleanup.
When Baking Now
- NOTE: If you're making this at the same time as a casserole you could bake it at a lower temperature but then it would take longer and might not crisp up as much.
- Preheat oven to 425° Fahrenheit.
- Dice the meat and veggies and spread it out over one or two lined cookie sheets.
- Drizzle the vegetables with the oil and sprinkle with the seasonings.
- Toss gently to coat.
Baking!
- When the oven is fully preheated put the cookie sheet(s) in. Check on the food after 20 minutes. At this point take out the cookie sheets, toss the contents, and put them back swapped so they bake evenly.
- Keep an eye on the food and pull it out once the vegetables are perfectly browned. If the food was crowded on the cookie sheets they may not brown.
- Serve as is or enjoy it over top of quinoa, farro, or a pasta dish. The possibilities are endless!
Cleaning Up
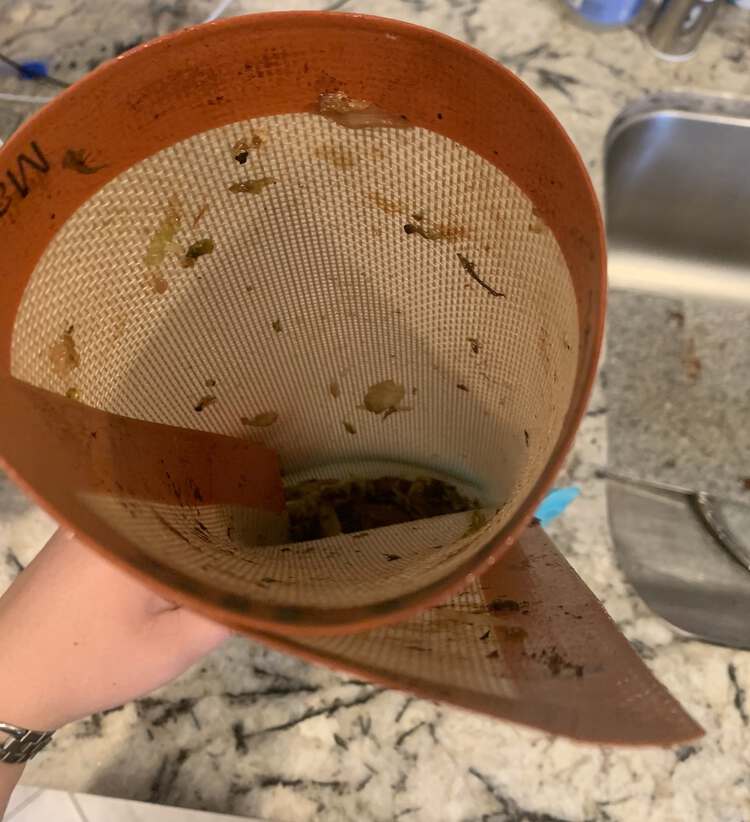
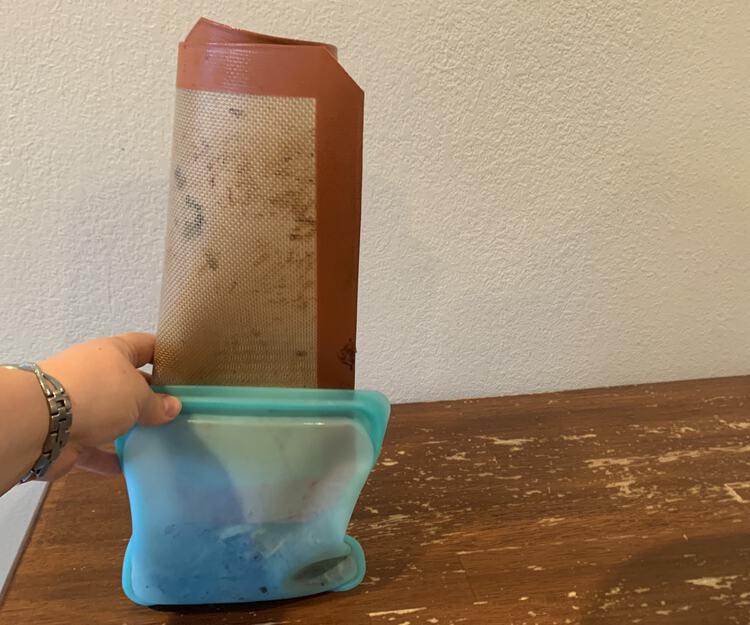
Cleaning up is super easy with the Silpat® liners. When we’re done eating, if there’s something left, I just scrape the food around so it doesn’t stick to the liner using a wooden utensil or spatula, roll the liner up thus trapping the food inside, and then stick an end into a Stasher® bag which turns the liner into a kind of funnel. Most of the food falls right into the bag with no fuss. Then, since the liner covered the cookie sheet, there’s hardly any difficulty cleaning those up too.
Variations to This Recipe
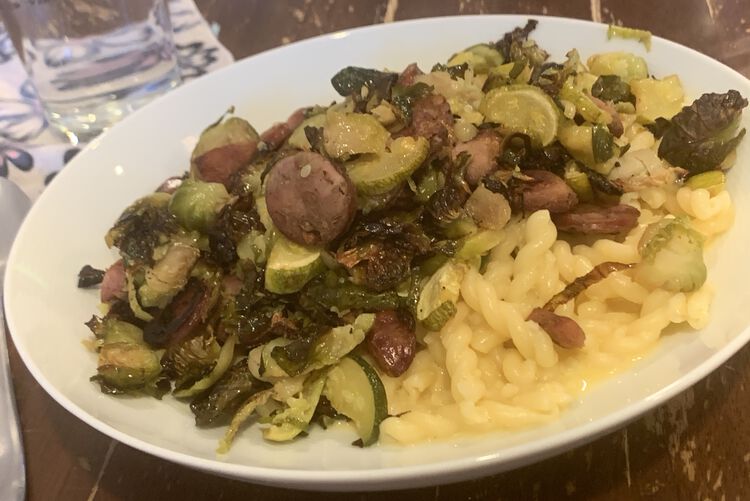
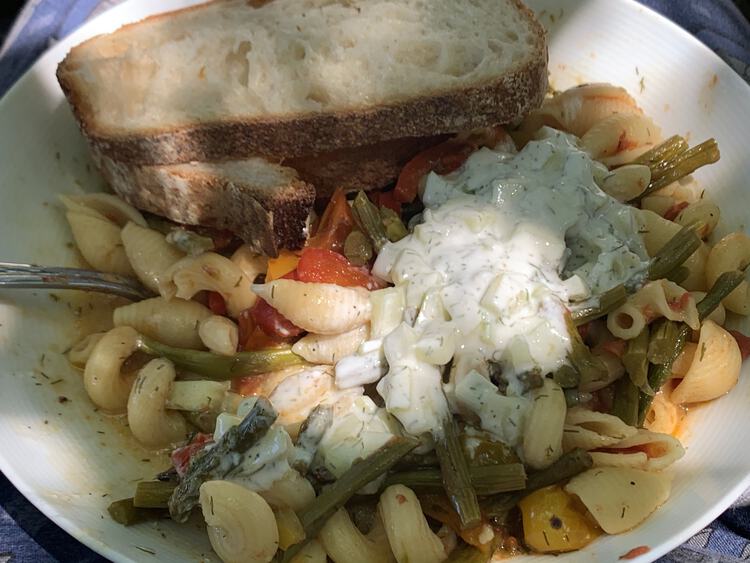
As I said before my kids were picky. When I first started making this they complained bitterly; although, over time they grew excited whenever I made this dish despite mostly only eating the chicken apple sausages. This meant, some of the time, I started making this on days where we were also making something else so they could focus on the other food while Matt and I ate more of this recipe. Additionally, we sometimes had leftovers so when the kids requested Macaroni, Tomato, and Cheese, which I LOVE, I would sometimes make it healthier for me by combining the pasta dish with the leftover cookie sheet meal. Between the two cases I quickly started loving the taste of this combined with pasta.
Over time I started changing up this recipe starting with very minor changes, like replacing yams with zucchini above, and increasingly becoming more confident and making things that didn’t even seem similar to the original recipe anymore.
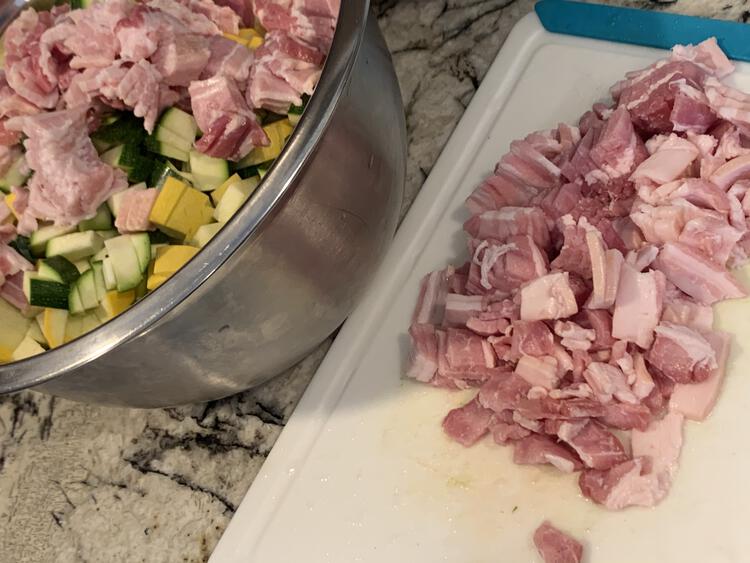
After knowing that I could use zucchini I came across a day when I realized that not only did I not have Brussel sprouts and yams but I also didn’t have my favorite sausages. This lead to me taking the premise of the recipe and changing the ingredients completely. I ended up dicing up a whole lot of squash and some raw bacon before mixing it up with the customary salt, and pepper seasonings. Since I knew the bacon would generate it’s own oil as it cooked I skipped adding my normal oil at this time. Like previously; however, I let it sit in the fridge until suppertime and then tossed it onto cookie sheets and roasted it until it all crisped up. It was so amazing!
It was so good that I used bacon again but this time combined it with squash, broccoli, and cauliflower. Still so very good.
Through this cookie sheet recipe I discovered the joy of roasting vegetables and started searching online on how to roast a specific vegetable I happened to have on hand which lead to some really great meals. Quickly looking up, right now, online for how to roast carrots in the oven reminds me that the two main websites I seem to use the most for these types of answers are Spend with Pennies and The Spruce Eats. And those carrots look so amazing that I’m kind of regretting the plan to boil carrots for supper tonight, but my casserole is stopping me from having the oven that high for that long unfortunately. Maybe a plan for later.
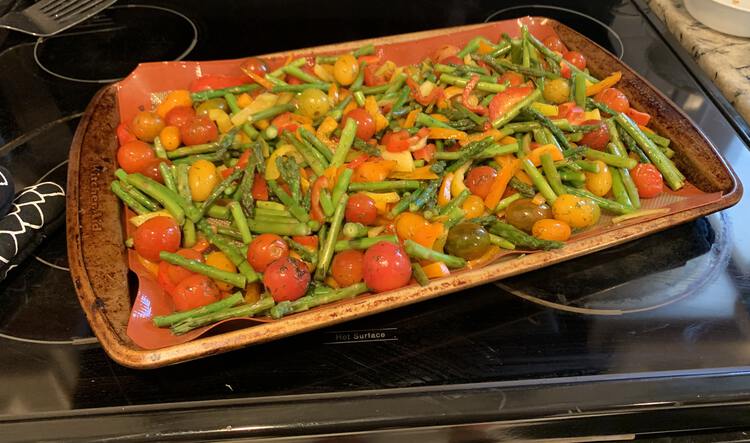
Anyway I wanted to share with you one of the most random cookie sheet meals I made: cherry tomatoes and asparagus. Like before I oiled and seasoned this before dumping it on the cookie sheet and roasting it until the asparagus all browned and the tomatoes all popped.
I can’t remember exactly what we ate with this as I can’t find a photo, though I’m wondering if it was over rice so the kids could have rice and cheese for supper, but I did find a picture of how we used the leftovers. It was so good served over macaroni, tomato, and cheese, topped with tzatziki, and served alongside sliced homemade breadIn5.
Hope you are having a really good day today.
If you’re interested in getting any of my future blog updates I currently come out with a new one every Wednesday and share them to my Facebook page and Instagram account. You’re also more than welcome to join my email list located right under the search bar or underneath this post.