
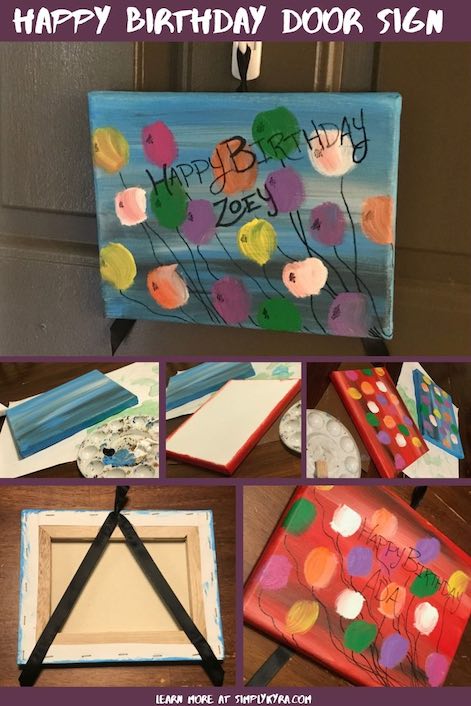
Happy Birthday Door Sign

Back when Zoey was a baby I made several different holiday-themed door signs with them and enjoyed pulling them out each holiday. When Zoey’s second birthday approached last year I realized I should make them each their own birthday sign for the door. I painted Ada and Zoey’s sign at the same time which streamlined the process and made it simpler when it was Ada’s birthday as it was already done. I enjoyed pulling both canvases out when their birthdays rolled around again this year, but somehow forgot until now that I hadn’t posted them yet. I needed to share these with you as I love how easily these canvases can be made and how they can be customized to your child with their favorite colors and maybe by swapping out the balloons for something else.
In case you’re interested in the other holiday-themed door signs I’ve previously painted with the girls I’ve included direct links to them below:
- Halloween footprint ghosts
- Thanksgiving turkey hand prints
- Christmas hand prints, footprints, and fingerprints winter scene
- Valentine’s Day “LOVED” with a hand and footprint
- Child’s hand and footprint wall canvas you could use for Valentine’s Day
- Easter hand print and footprint bunny art
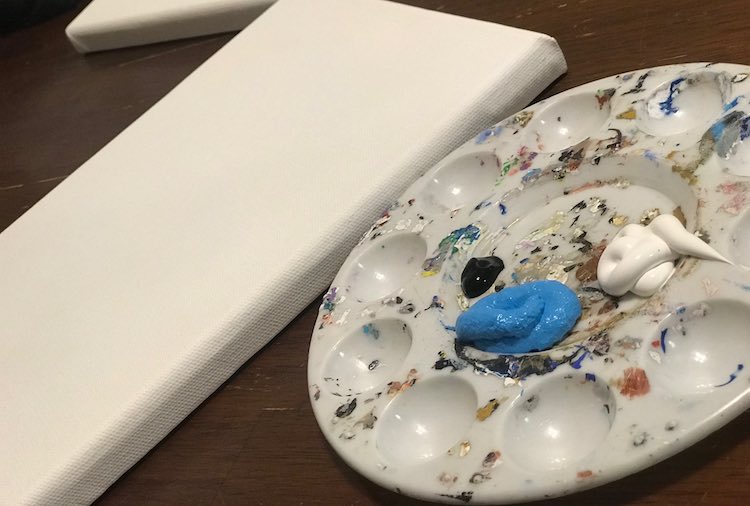
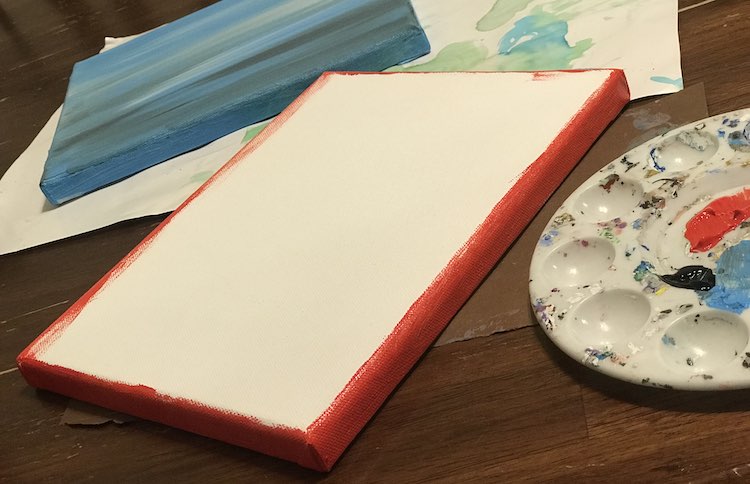
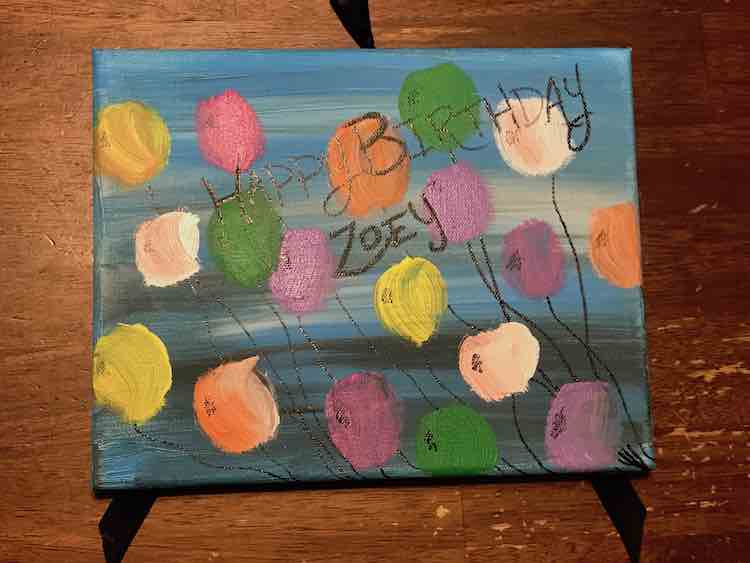
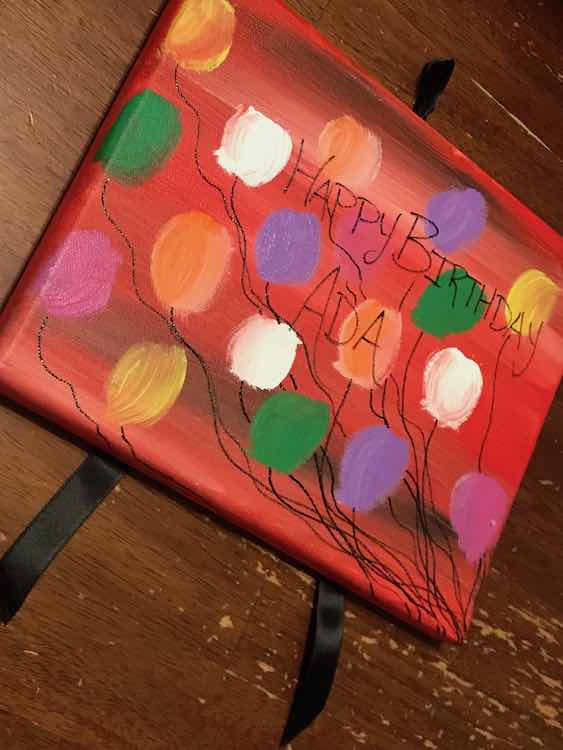
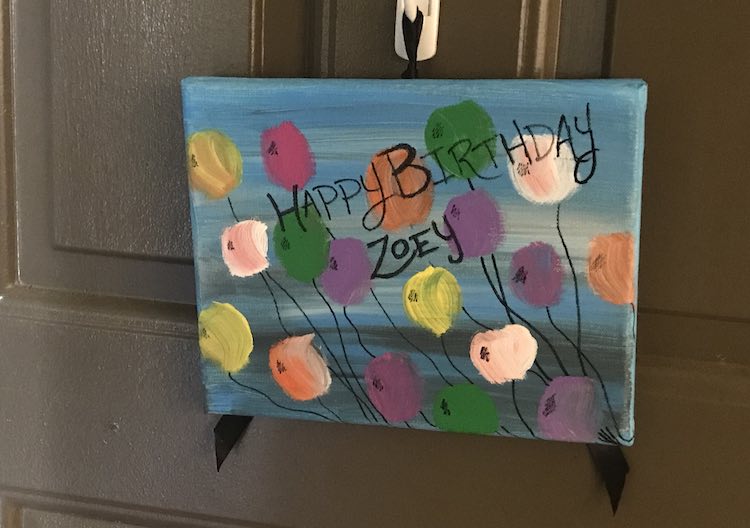
To create these I wanted to start with a good background. At this point Zoey hadn’t found a favorite color yet so for her I decided to grab blue for the sky. Ada was loving red so I made sure to grab a red paint tube for her. I considered keeping the background a solid color but I also wanted something more than that. I ended up including a dab of black and a dollop of white to my palette hoping to get darker and lighter hues of the main color. Instead, as I painted, I loved how the black and white streaks popped within the main color so I didn’t force them to mix like I had assumed I would before.
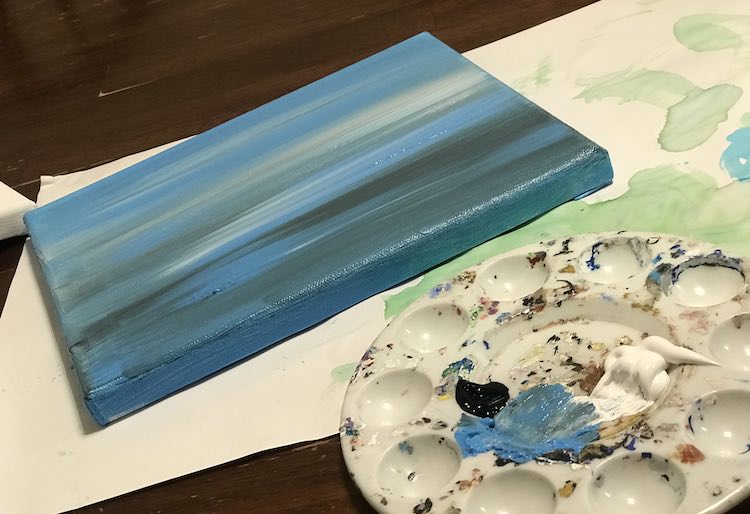
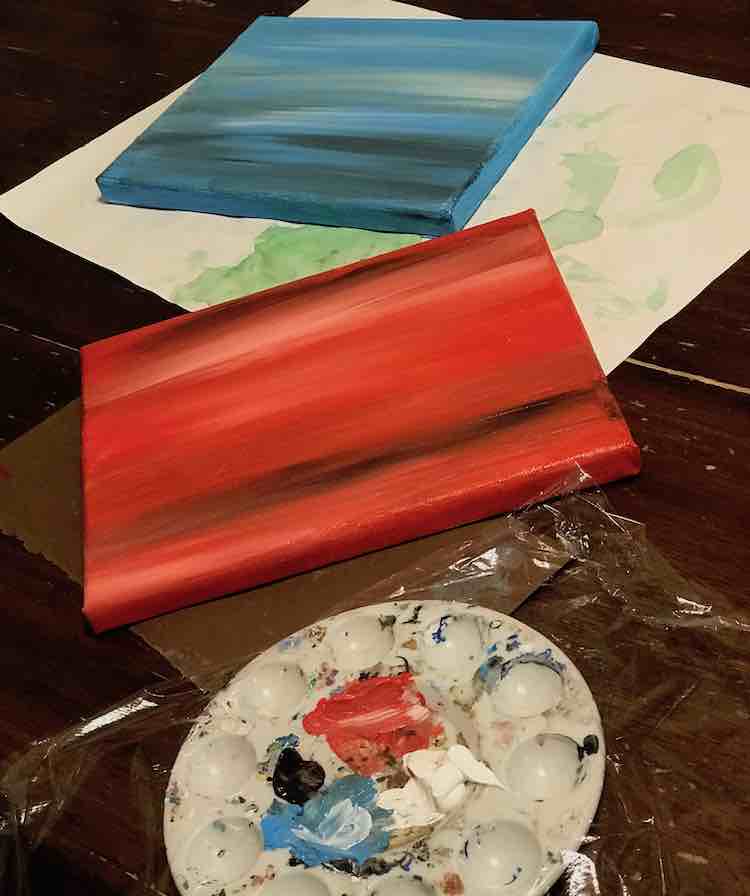
I started by painting the sides of the canvas so I wouldn’t have to fill in any blank spaces after I was finished. I then added dollops of blue (the main color), white, and black onto the canvas before spreading them horizontally with a large brush. If there was a section with too much paint I pulled the excess up or down to a section that lacked paint before returning to my horizontal strokes. I made sure not to blend the white and black into the main color too much as I loved how the shades popped. Since I’d painted the sides of the canvas with the main color I was able to bring the streaked colors onto the sides, to continue the pattern, but didn’t have to worry about coating the sides as the white was already covered. Once I liked how it looked I set it aside to fully dry and then continued onto the next canvas following the same steps with red as the main color.
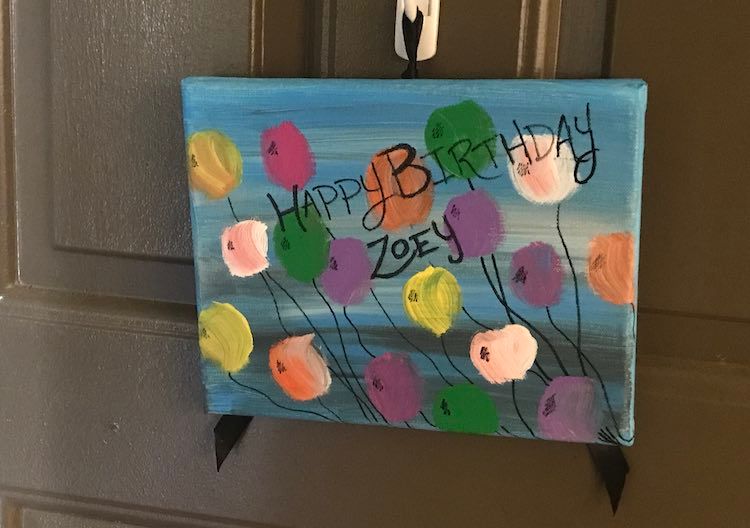
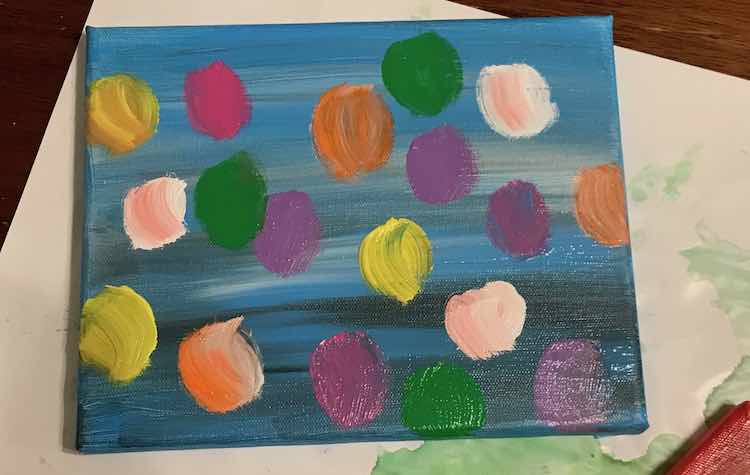
Once the canvases were completely dried it was time to paint the balloons. I chose to use several different colors of paint but you could use a paint pen instead if you prefer sketching and shading instead. Since I needed only a bit of each color I kept each paint in it’s tube laid out on the table, so it would be readily accessible, instead of using the paint palette and the leftovers once I finished. I chose a single color at a time, grabbed a large paintbrush, squeezed the paint directly onto my paintbrush, and got to work creating balloons. For each balloon I wrote two mirrored “C”s with the top and bottom overlapping to create it’s oval shape. I continued adding more balloons of that color to both canvases, squeezing more paint out as I went, until I was happy with the amount of balloons I made. I then wiped the excess paint off my paintbrush with a paper towel, chose my next color, and squeezed it onto my paintbrush to continue adding more balloons. I continued painting the balloons, adding paint and switching colors as I went, until both canvases were filled up with enough balloons. I set aside the canvases to dry, once again, and cleaned up the minor amount of mess that was created.
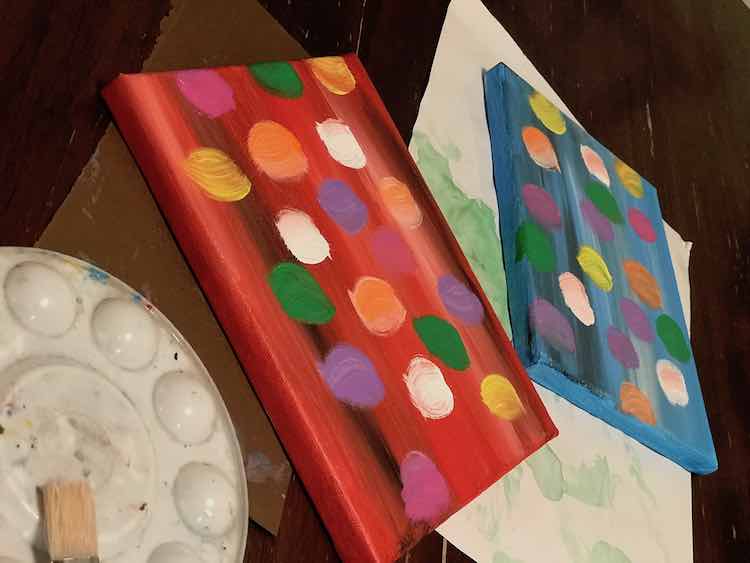
After the balloons on the canvases dried all that left to do was add a message, draw in the balloon strings, and add any needed highlights to the balloons. To do this I decided to take the easier route, compared to paint, and used an oil-based black paint pen so I could get strong clean lines. I started by adding the Happy Birthday message as I wanted it to stand out and I’d then know where not put any added details. I then went on to draw out the balloon strings. I made the higher balloons be further in the back of the picture by drawing the strings behind the lower balloons. Next time I can see overlapping some of the strings in front of the odd balloon to make it more chaotic like a real life grouping of balloons. I love how the added strings make the balloons look like they’re floating in the air and you’re not quite sure if they’re being held in place slightly off canvas or if they’re escaping to their freedom. While I was using the paint pen I also added a quick highlight on each balloon. Normally I use white to highlight so looking back I wish I had either used a dab of white paint instead or bought a white paint pen for this purpose.
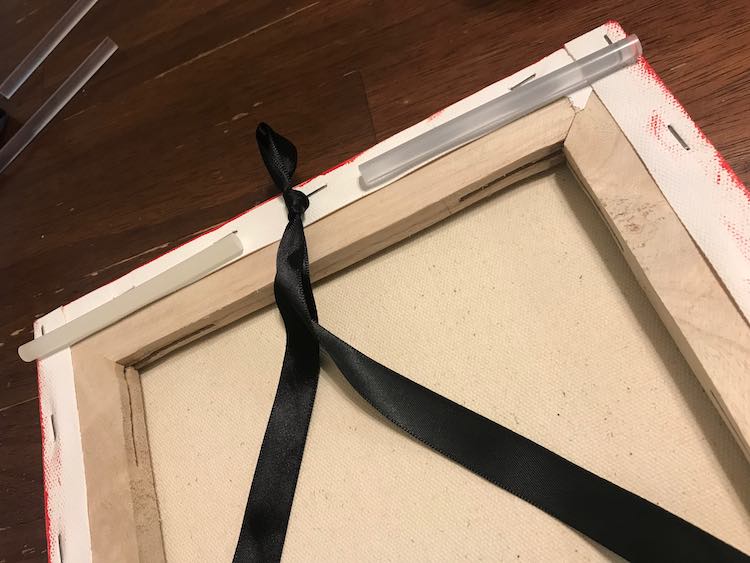
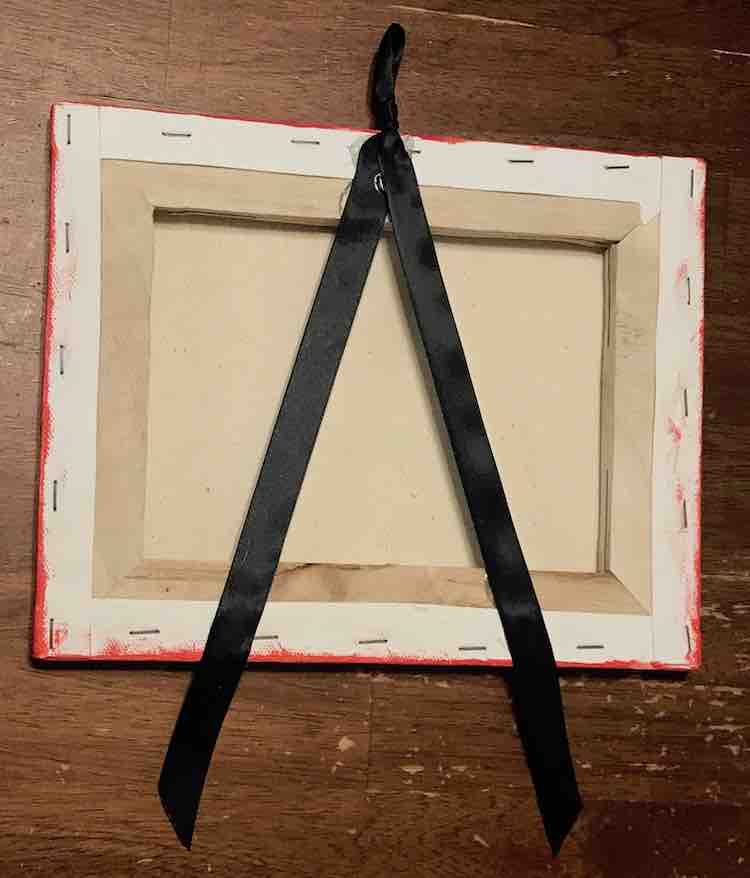
After the front of the canvas was finished all that was left to do was add a ribbon to hang the canvas with. I chose a black ribbon, that matched the paint pen, which I then cut a strip of, used a lighter to melt the edge with, folded the cut strip in half, and tied a knot at the folded end. I plugged in my glue stick to heat up before grabbing some cold glue sticks to help find the top center of the canvas. After figuring out where the ribbon should lay I glued the knot to the top of the canvas making sure the top of the loop poked over the top of the canvas. I then took each length of ribbon and stretched it to the bottom. Once I liked how either end looked I glued them in place too. These ribbons were glued about a third from either bottom corner and their ends are cut at an angle and dangle from the bottom of the canvas. On some of the previous door signs I’ve brought the ribbon to the bottom corners of the canvas (instead of further in) or I might’ve hide the ends behind the canvas so they didn’t dangle free.
And now all you need to do is hang it up. In our apartment we used a command hook attached to our front door so we always got to see the canvas when we came home. After we moved and gained a screen door we chose to use a command hook beside the front door. I love changing out the door signs as the seasons change and love how, after you make them, they’re so simple to pull out and hang up when you’re busy.
Whether you’ve already made a couple holiday-based signs or are looking to start fresh I hope this helps you out. I love how you could take the balloon idea and apply it to a piece of paper for a temporary birthday sign or go bigger with a larger canvas. It’s such a simple idea and so easy to implement. You could also paint a background and add stickers to fit the theme of your party.
I loved being able to pull the sign out this last summer when my daughters’ birthdays rolled around again. So simple and easy. Let me know how your canvas goes. I’d love to hear about it or see a picture in the comments below, on my Facebook page, or through Instagram. I hope it goes great and you enjoy the process!