

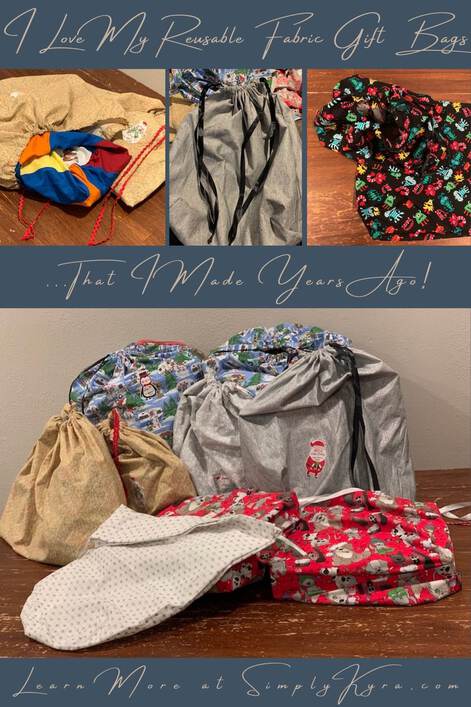
I Love My Reusable Fabric Gift Bags... That I Made Years Ago!

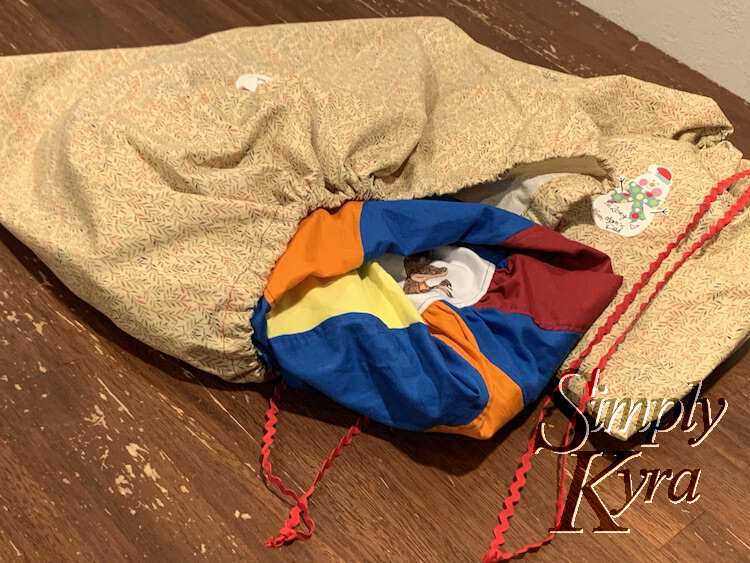
I’d been debating making fabric sacks for gift bags for awhile and as Christmas 2019 approached I decided now was the time. It was perfect as I had Christmas fabric on hand from previous projects I had already sewn up along with some other small pieces that had caught my eye from the remnant bin at my local Joann’s Fabrics. Looking back now I’m so glad I made them as it saved so much time wrapping gifts that year and I’ve pulled them out each year since. On a more specific note that year we also planned a LEGOLAND® trip right before Christmas and I had sewn some themed outfits for the girls that I wanted to surprise them with once we were there. The girls didn’t know where we planned to go so I was able to use these bags to store their gifts which meant they couldn’t see what was inside, I didn’t have to worry about paper ripping, and I could just fold the excess fabric over and stuff it in the suitcase with the rest of the clothing. It was perfect! Just the trip itself and the ability to quickly wrap the presents so they were ready when we got home made making the bags so worth it and now I get to use them without any of the extra work! Fitting since the challenge topic I sewed them for that year was Sew Something for Yourself.
Since I didn’t have time to create a post before Christmas that year I set aside this idea to share with you the next Christmas. I then forgot and this year I knew I needed to share and not put it off any longer. So without any further ado here is what I did to make my reusable fabric gift bags.
Inspiration
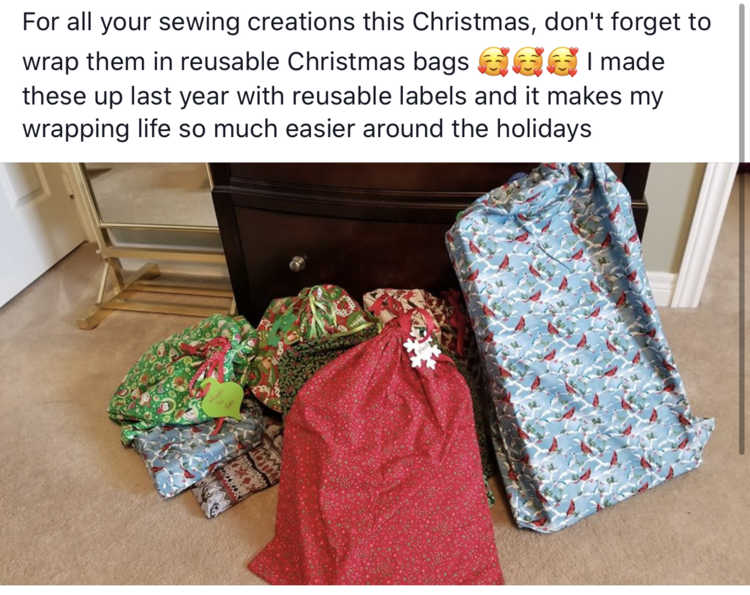
I’d been debating making these bags off and on but what really made me think seriously about it was the below post shared in the PDF Ellie and Mac Sewing Pattern Group on Facebook. The photo, caption, and all the comments written on the post made me think I could easily do the same. Some of the comments included:
- Creating the bags by simply adding a drawstring to a pillowcase
- Making a flat wrap by adding Kam Snaps allowing you to close the wrapping paper
- Embroidering the recipient’s name on the fabric sacks so there’s no need for paper tags
- Still getting the joy of unwrapping paper wrapping by wrapping some of the gifts and putting them all into a larger fabric bag
Overall, I could see lots of people successfully did this each year and it looked amazing.
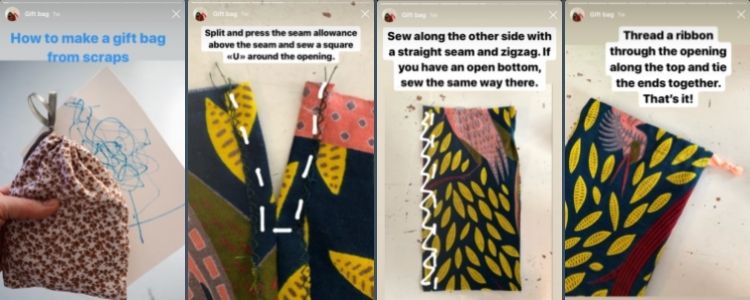
While pondering this someone I follow on Instagram posted an in depth explanation on their stories showing us how they make a gift bag from simple scraps. I quickly snapped several screenshots so I could refer back to them and knew I needed to do the same. Nothing was holding me back now.
Time to Make Them
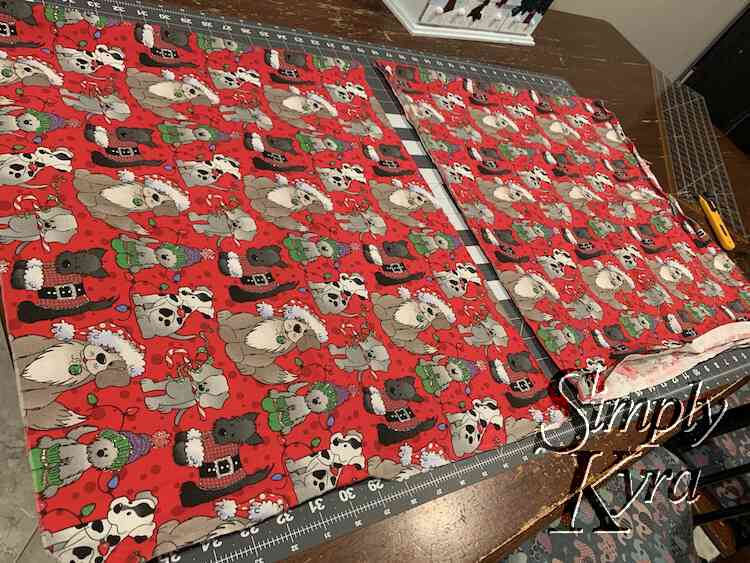
That year I made the kids peppermint swirl dresses for Christmas so while I was at Joann’s getting the supplies Zoey and I wandered over to the remnant section and grabbed all the Christmas-themed cotton fabric we saw and liked. At home I went through my stash and found some winter camping fabric from Fabric.com that I had leftover from some other Christmas gifts so between the sets I knew I was set to make these fabric sacks.
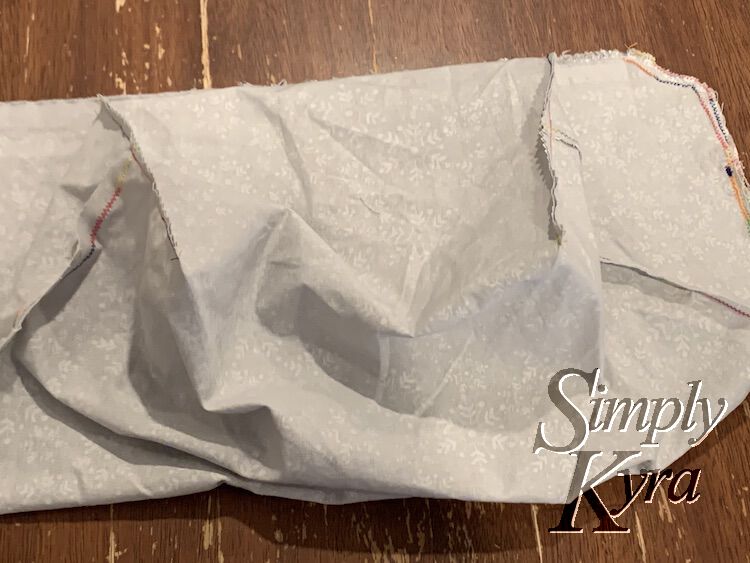
From the Instagram story I knew that I wanted to make the bags by folding them in half and sewing two of the three open sides to create a bag shape. I also wanted to include a drawstring at the top so I knew I needed to keep the top of the sides open. As such, after gathering and pre-washing all the fabric, I next checked the directionality of each fabric piece along with it’s size to determine if it would make one or two bags and how I’d fold it. Some remnants were small with no direction to the print so I simple folded the fabric in half, based on the size I wanted the finished bag, and sewed down the sides to create the bag-shape. Other fabric needed to be cut, to make two bags, or rotated before folding, so I’d then sew along the bottom and a side instead, making the print on the fabric be facing upright instead of sideways.
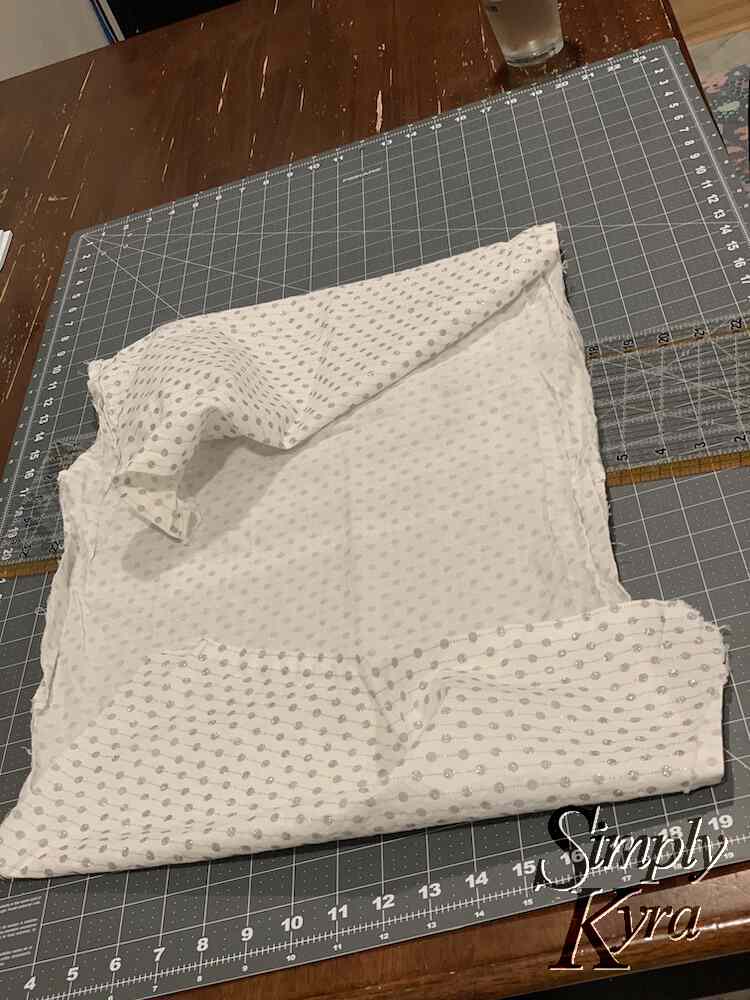
Once I cut and determined the top of each piece of fabric I realized my next issue. Going into this I loved the idea of having a drawstring coming out of either side of the bag so I could simply pull both knots and thus easily cinch the bag in the middle. The directionality of the fabric confused this as some bags were now folded from the side rather than up from the bottom. I could’ve then gotten around this by cutting the fabric in half and thus sew up the bottom and both sides leaving a space at the top for the drawstring channel. Instead I decided to keep the fabric as it was, having a single channel opening and thus a single drawstring, and only sew up the bottom and a single side. I was rushing and thus going for simple rather than perfect.
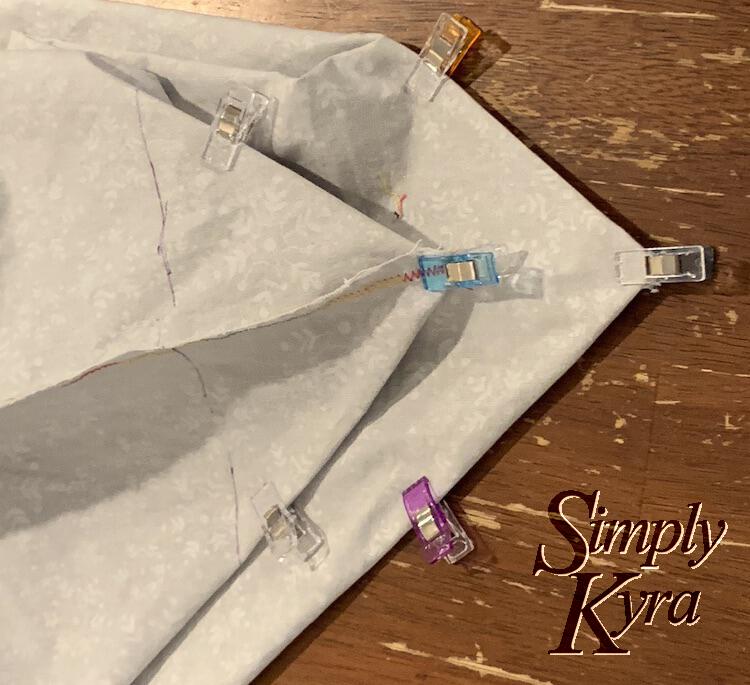
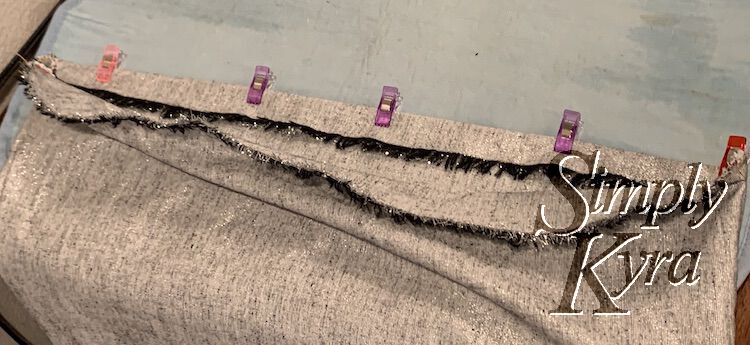
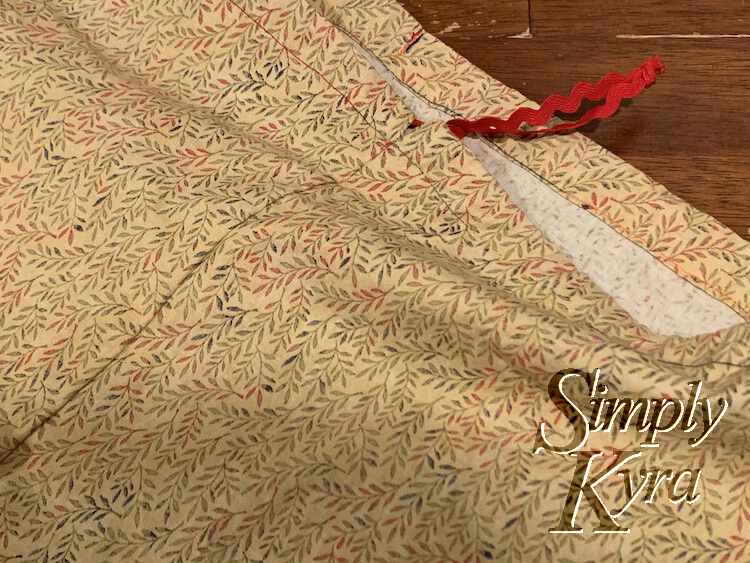
With the top figured out I then finished the top of the side edges by sewing a quick zigzag so the channel end wouldn’t unravel over time. This was a quick hack that I later duplicated using a serger on the cinch bags in our mask command center. That said I’ve seen other bags where you fold the corner in at an angle and sew it down making a more pretty drawstring opening so depending on whether you want quick or look good you could handle this step in other ways. Looking online right how I found a How to make – easy DIY drawstring bag from I Can Sew This who hemmed the sides and top of the fabric before putting together their bag. Looking back this would’ve made mine look nicer if inspected closely.
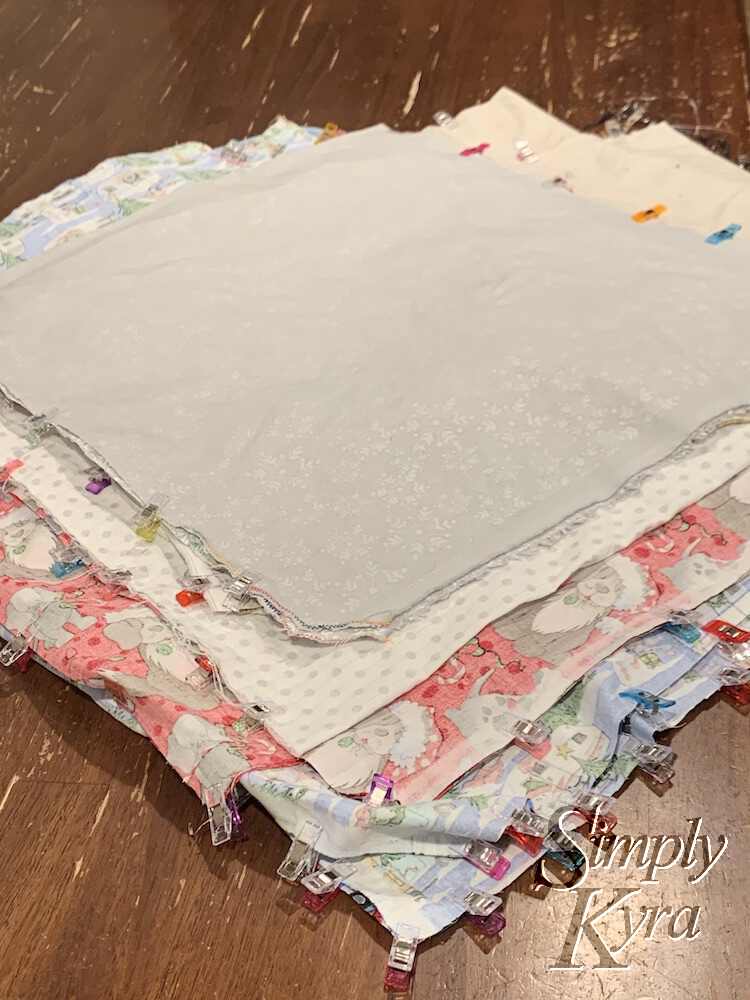
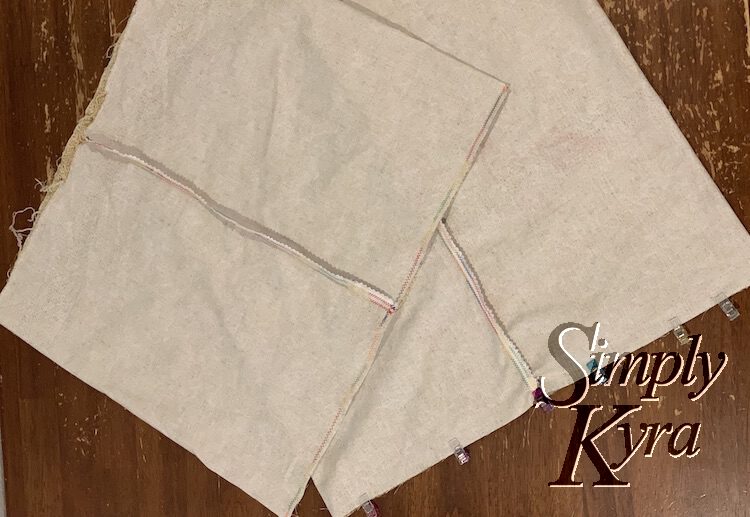
I next decided, for most of the bags, to add box corners so a bag base would be created and there would be more space inside for the gifts. I had previously sewn box corners when making two bags earlier in the year, following Kristin Omdahl’s free tutorial, and remembered what to do. To make them I took both bottom corners, flattened them so the side and/or bottom seam(s) would be centered, and then marked a line equidistant on both at a perpendicular angle from the corner. With the sewing clips in place I took the bags to my sewing machine and sewed along that line and then used my pinking shears to trim the corners off.
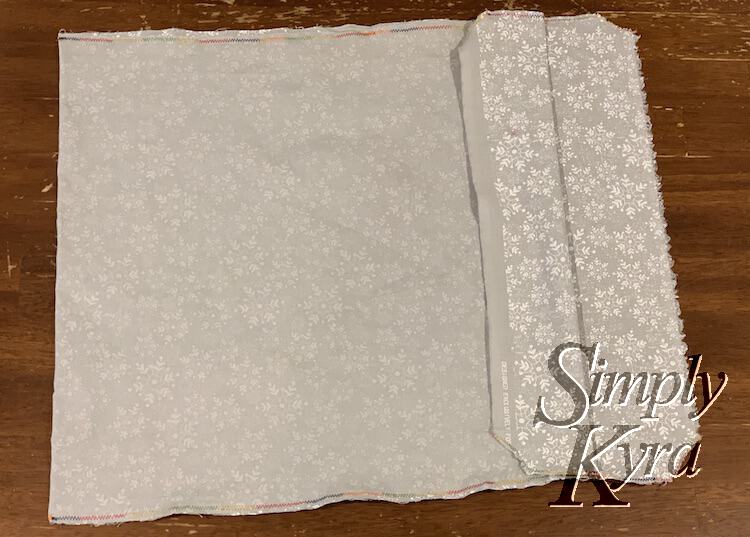
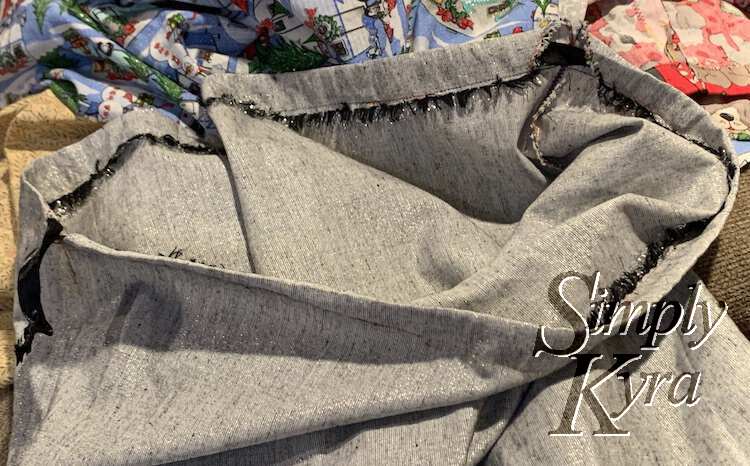
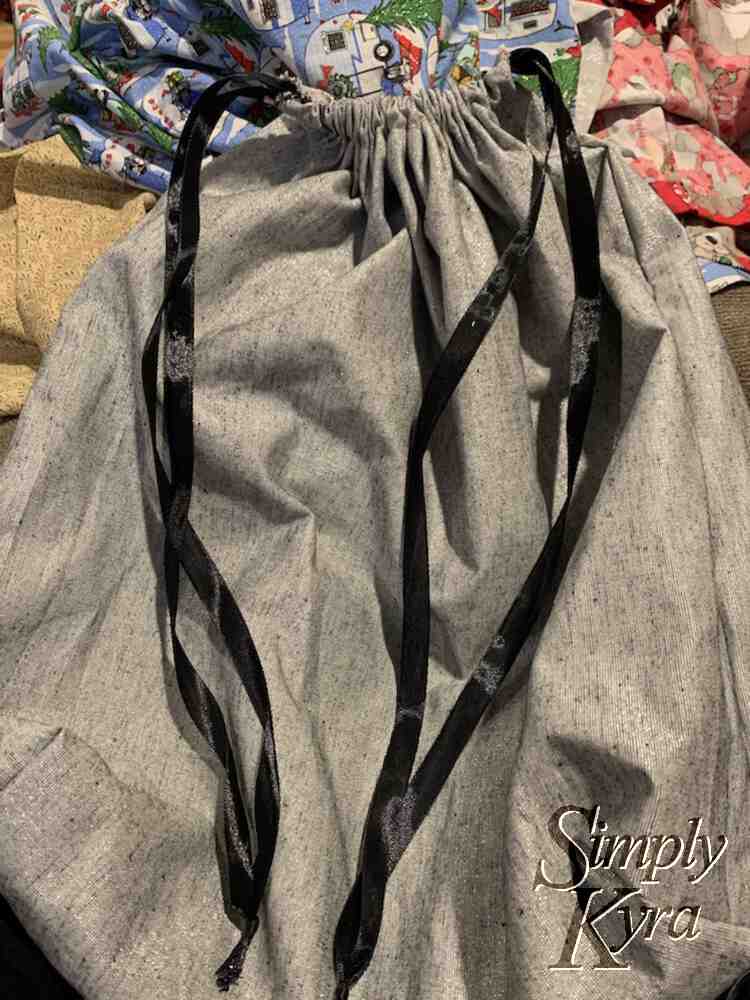
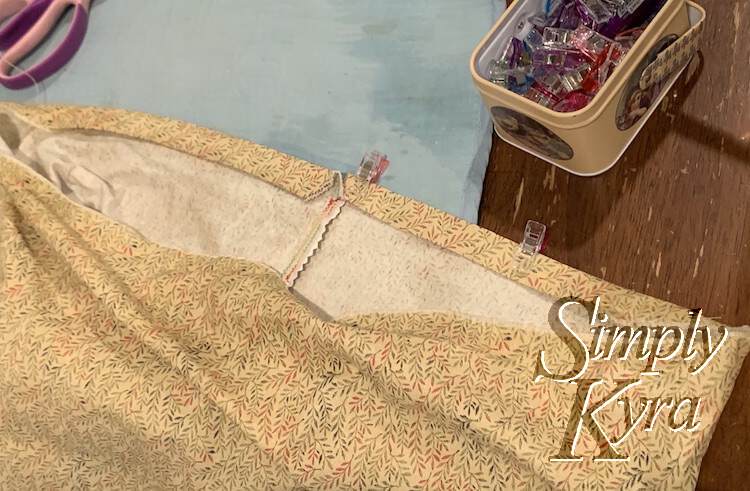
After creating the box corners the only step left is the top of the bag itself. To create the drawstring channel I simply folded over the top of the bag, clipped in place, and sewed along the edge thus creating the channel along the fold. Some fabrics had a selvage so I didn’t need to worry about the edge unraveling. That said I could see also sewing the edge down twice if you wanted to hide the raw edge or hem the opening before folding the edge down to create a channel. In some cases I somehow hadn’t left a large enough opening at the top so my drawstring channel was smaller for those bags compared to the others.
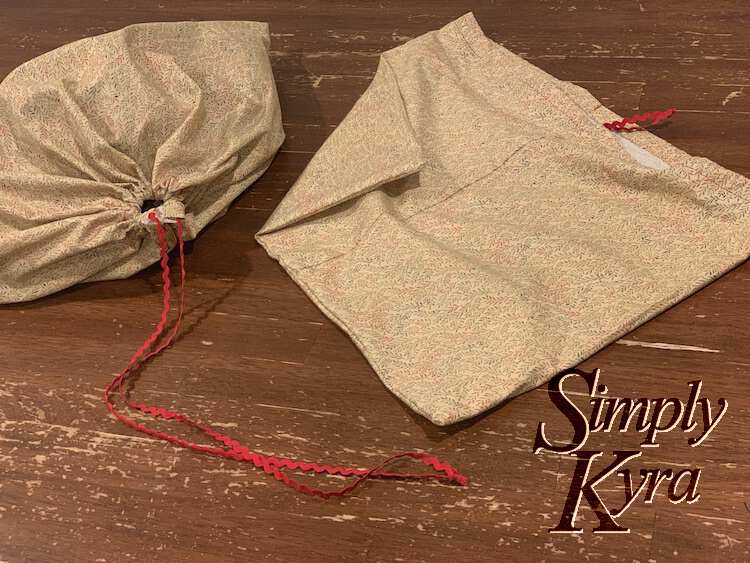
Once the channels were all made I brought my pile of bags to the living room along with my box of assorted ribbons. I then matched a ribbon to each bag and threaded the ribbon through its channels. For the bags with a single drawstring opening I threaded a single ribbon all the way through, making sure the bag isn’t cinched at all, before trimming the ribbon and tying the two ends together. For the bags with two channel openings I did these steps twice, once from either end, so there would be two knotted ribbons I could pull to cinch the bag closed. Hence these bags took twice as much ribbon as the single drawstring bags. To make these steps easier I used a safety pin attached to the ribbon end to help thread the ribbon through the channels.
As I added ribbon to bags I started running out of ribbon and had to start confirming I had enough before going to the trouble threading the ribbon through the channel. If the ribbon ended up being too short I didn’t want to use it as I wouldn’t be able to open the bag all the way.
As a quick aside I had one set of bags that followed a slightly different set of rules. In this case I sewed up the side of the fabric before realizing I didn’t like how tall the resulting bag would be. With the steps already being changed I, for some reason, decided to sew the bottom closed with the seam running up the center of the bag rather than the side. I then chose to leave the box corners off and, after creating the channel, threaded my ribbon from the center opening rather than the side opening like with the other bags.
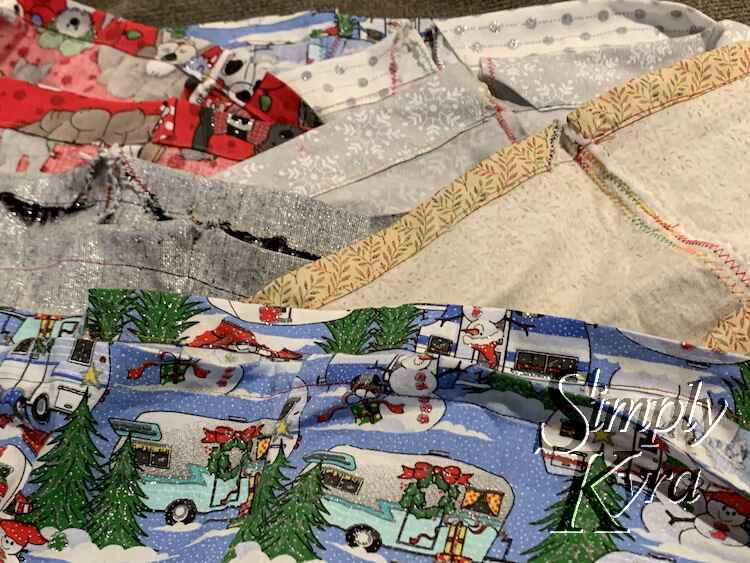
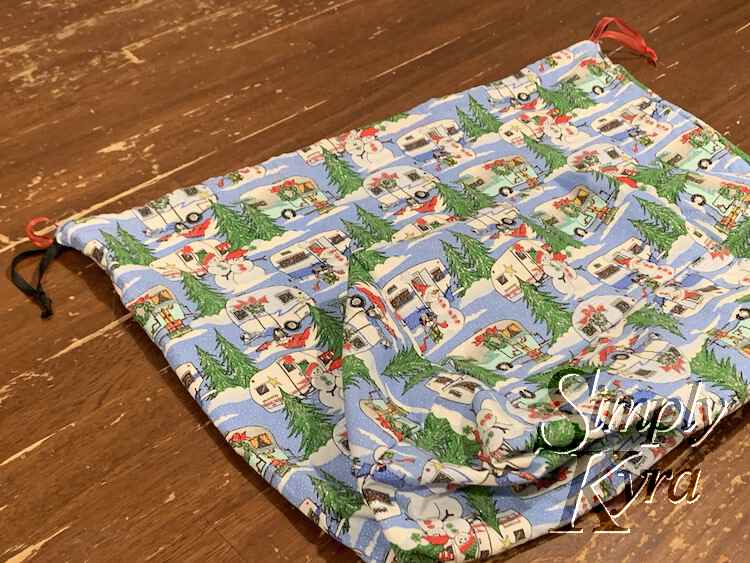
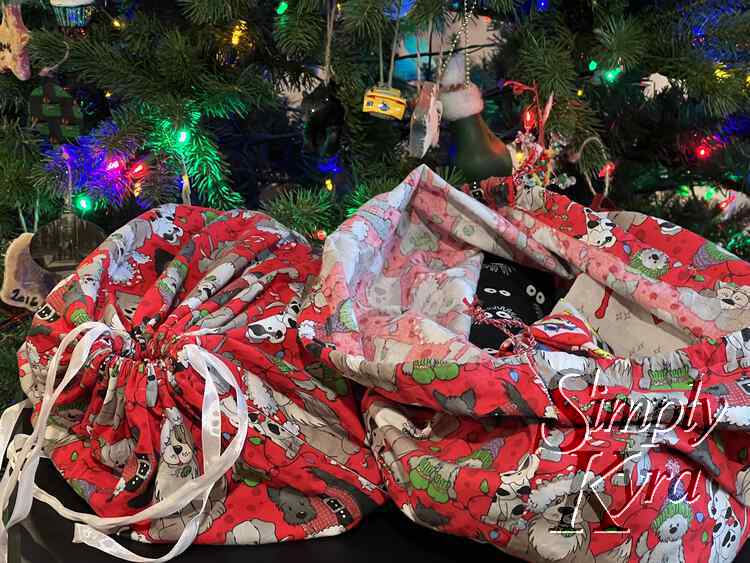
The Finished Fabric Sacks
And with that the bags were finished. I absolutely love how they turned out!
Going into this project I debated whether I should make reusable gift tags but never got around to figuring out how. I had also wondered if I should tie a tag to the drawstring which would also help keep kids away from peaking as the tag wouldn’t be able to be removed until it’s time to open the gift. Rather than either of these I instead, the first year, used sticker labels and just stuck them to each bag. This did mean that the odd one attempted to fall off but with only two kids getting the gifts it was easy enough to know whose was whose. That said if the bags were going to be handled a lot I would want to use a more permanent solution.
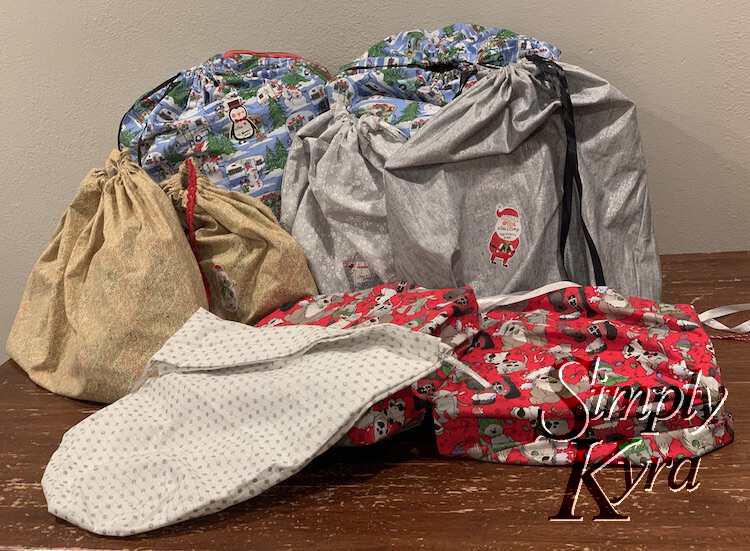
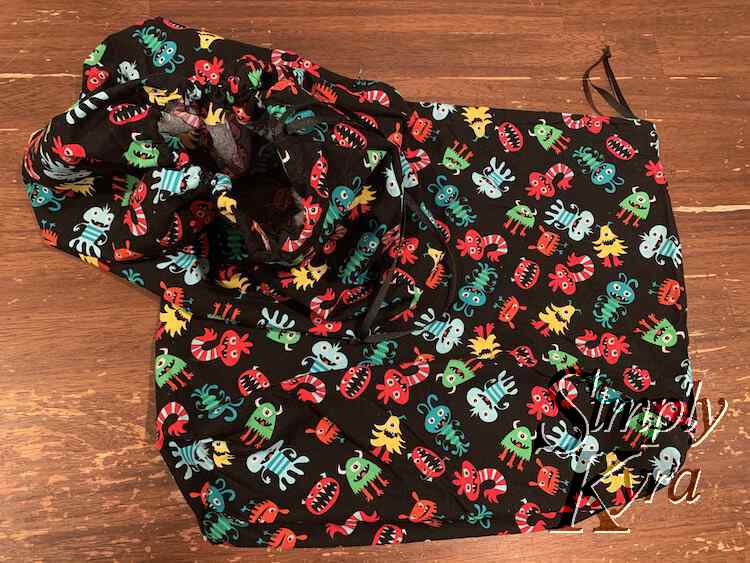
And nothing says these bags have to be Christmas themed. After Christmas that year I grabbed some cute monster fabric, in my stash from Joann’s, and quickly sewed up two more bags. They’re adorable and could be used for Christmas, birthday, or anything else.
I’m still thinking of making some kind of more permanent but reusable tag going into the future. Originally, I was thinking about sewing tags with vinyl and an opening so we could insert paper to customize the tags for each gift. I was also deliberating using chalkboard labels that could be written on each year and erased after the holiday. I never got around to making labels but, thinking about it now, I could see buying wooden Christmas tree ornaments or gift tags and decorating a couple for each member of the family using paints or paint markers. Then when you’re wrapping gifts you could tie one of the tags to each of the drawstrings. If you leave any Christmas imagery off you could use the tags for their birthday or other holidays too. Mixing and matching the bags with the tags could offer new permutations with each holiday. And… now I’m wondering if I should try to do this now or wait until I have more time after Christmas. Writing these ideas out made me curious so I just looked online and quickly came across these three ideas:
- Wooden tags with chalkboard paint through ctrl + Curate: DIY REUSABLE CHALKBOARD GIFT TAGS FOR GREENER GIFT GIVING
- Paper tags coated in duck tape for dry erase marker labels through Mod Podge Rocks: Dry Erase Holiday Gift Tags with Duck Tape
- Embroidered felt or paper tags through The Crafty Gentleman: Reusable embroidered gift tags (with free printable templates)
Have you ever made fabric bags before? If so did you make them the same or different? How did you make them standout and how did you label them? I’d love more ideas so feel free to share your version in the comments below, on my Facebook page, or through Instagram. I hope you’re having a great day and have an amazing holiday season.
If you’re interested in getting any of my future blog updates I currently come out with a new one every Wednesday and share them to my Facebook page and Instagram account. You’re also more than welcome to join my email list located right under the search bar or underneath this post.