
My Tinseled Iteration of the LEGO® Bonsai Tree

Back in October I altered my LEGO® bonsai tree to create an Autumn themed one for the season. I loved how it turned out and immediately started wondering how I should alter it for Christmas. This post shows what I did with it in case you’re also looking to change up your bonsai, or some other LEGO®, for the season.
Sometime after buying the LEGO® bonsai tree (10281) I started following some LEGO® fan groups on Facebook and Instagram. One of the first ones I joined, the Adult Fans of LEGO® (AFOLs), had two people within the group who shared their own take on the bonsai tree including one Halloween themed one along with a more generic Autumnal version that I adored. This lead me to create my own simple and fun autumn themed bonsai tree, that I shared with you right before Thanksgiving, and made me start wondering how I could change up my LEGO® bonsai tree for each season. One thing led to another and this Christmas themed version was created. I wanted to show the final version with you in case you’re interested in making the same and, I figured, share some of the ideas along the way in case another thought interests you more.
Word of warning: I didn’t use LEGO® to change up my bonsai so it you’re a LEGO® purist you may not be interested. That said you’re still welcome to check it out and I share a more LEGO®-related idea near the bottom.
My Plan
Originally, I remembered seeing a pom pom trimmed fabric ribbon in a craft store once and I used that vague idea to trim my bonsai with a Christmas themed one making the suggestion of having Christmas lights without the expense of LEGO® bricks, complication of LEDs, and with a much smaller time and money footprint in case it doesn’t turn out.
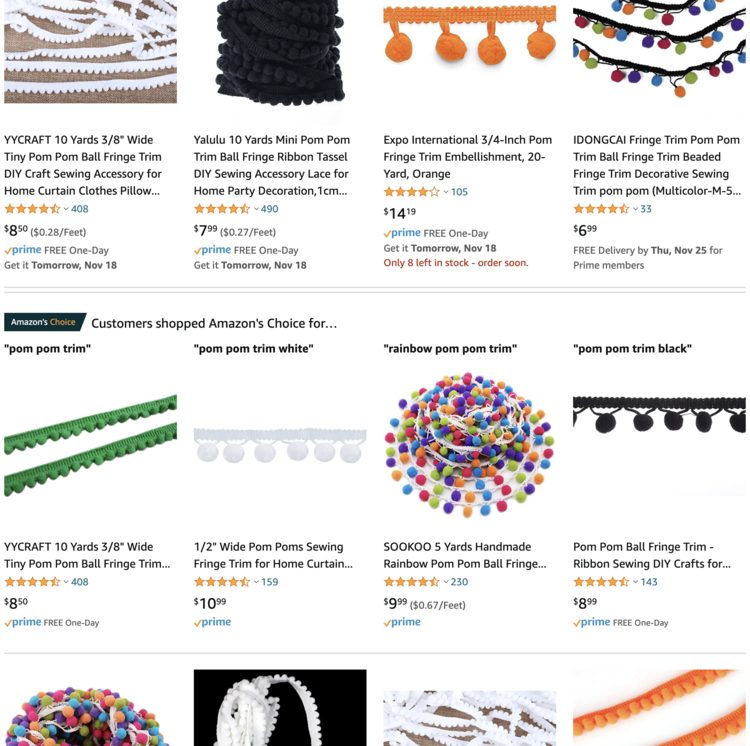
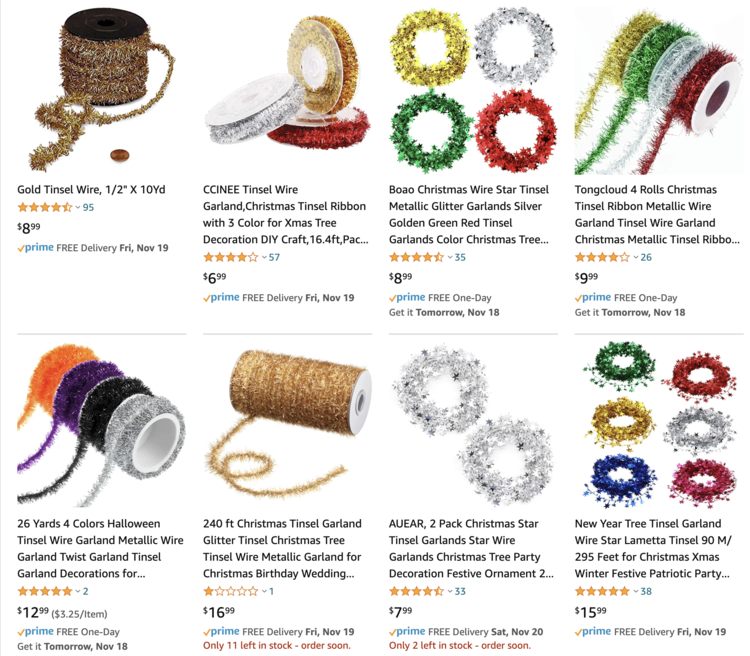
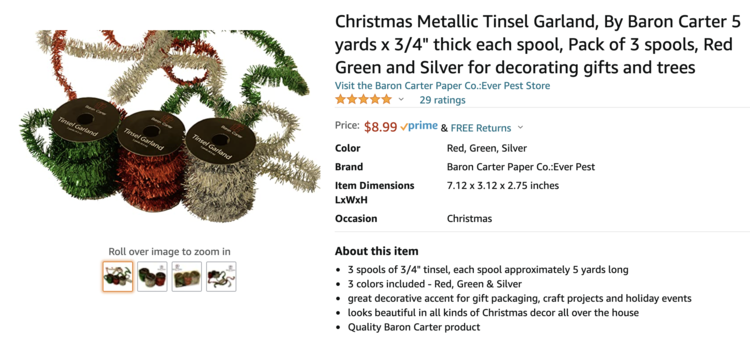
I kept putting off actually visiting any craft stores before finally loading up the app for Michael’s Arts and Crafts and Joann’s Fabrics. Neither app showed stock that fit my idea but I did learn that what I wanted was pom pm trim and not ribbon itself. I next jumped onto Amazon and started looking to see if they had anything that fit my criteria. The pom pom trim wasn’t quite what I pictured but it did lead me to tinsel and then I realized I wanted it to be wired so, if needed, I could position the tinsel easier throughout the bonsai branches. Thus my original search for pom pom trim became more specific with the word Christmas and then went completely different with tinsel wired.

With the tinsel chosen it was time to wait for it to arrive… and then I decided to wait until after Thanksgiving so I could use the Autumn bonsai for a centerpiece which I then forgot.
Making the Christmas Bonsai
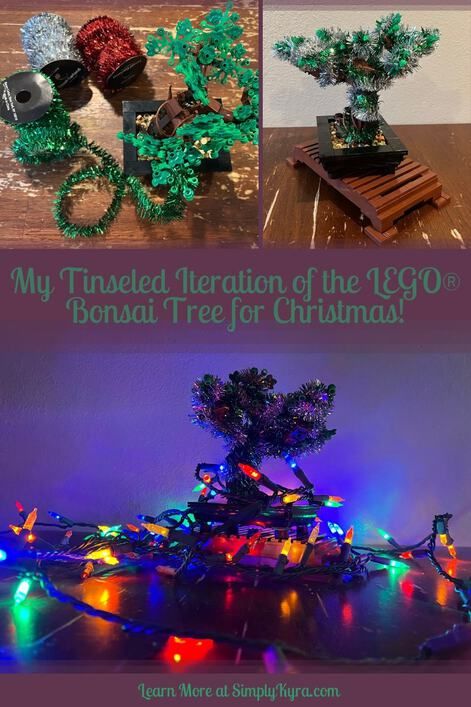
The day after Thanksgiving we pulled out our Christmas tree, set it up, and then, later on, I couldn’t put it off any longer and decided to finally turn my bonsai into a Christmas tree. I started out by removing all the extra pieces I had added for the Autumn theme, uncovered the missing pieces I had removed back in October, found my instruction book, and grabbed the wired tinsel. Another quick aside… I still need to return the autumnal LEGO® bricks to their rightful displays.
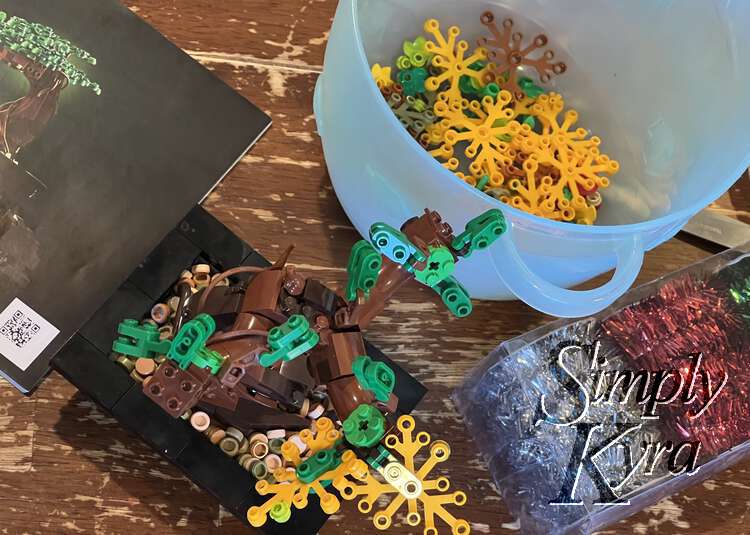
I then separated out my green bonsai LEGO® bricks, found the right page in my instruction book, and got to work rebuilding my bonsai so it would be back to it’s original green-leafed version.
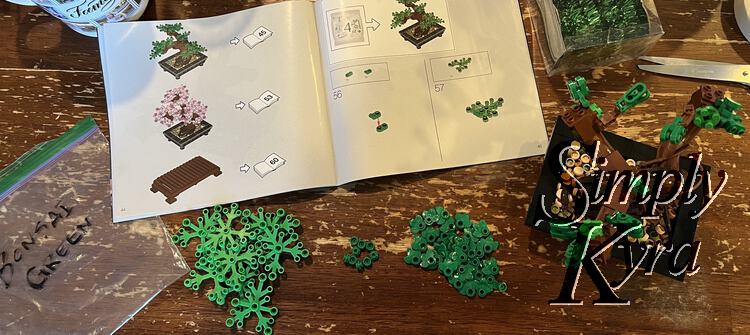
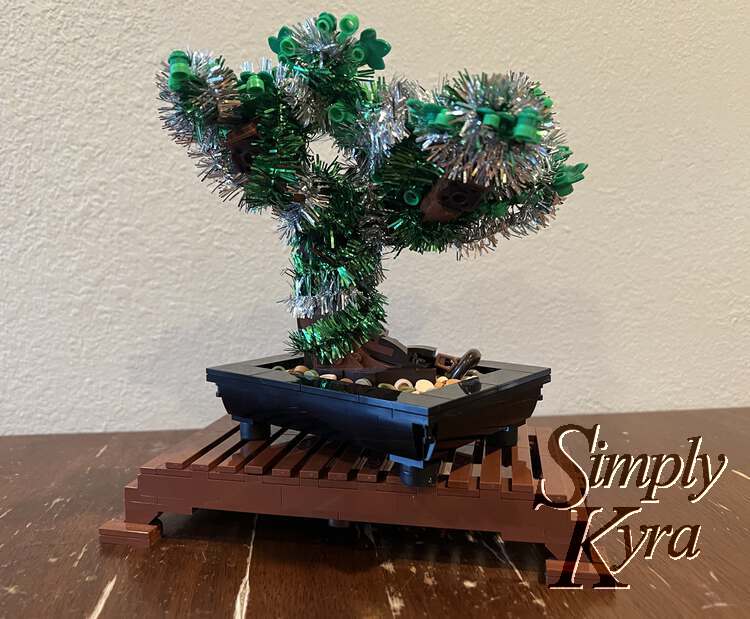
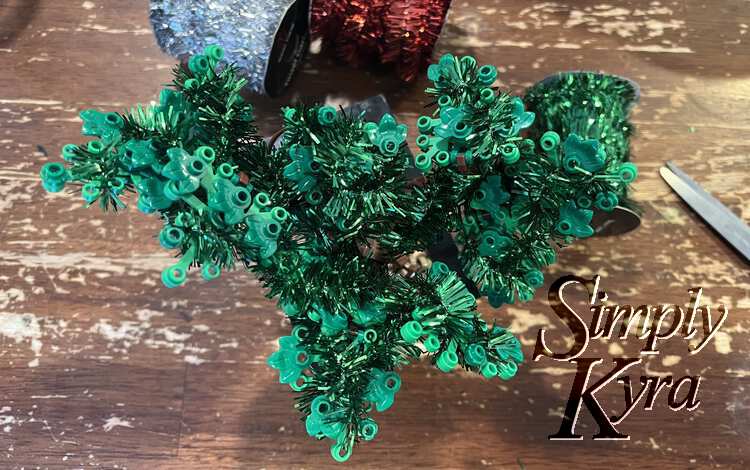
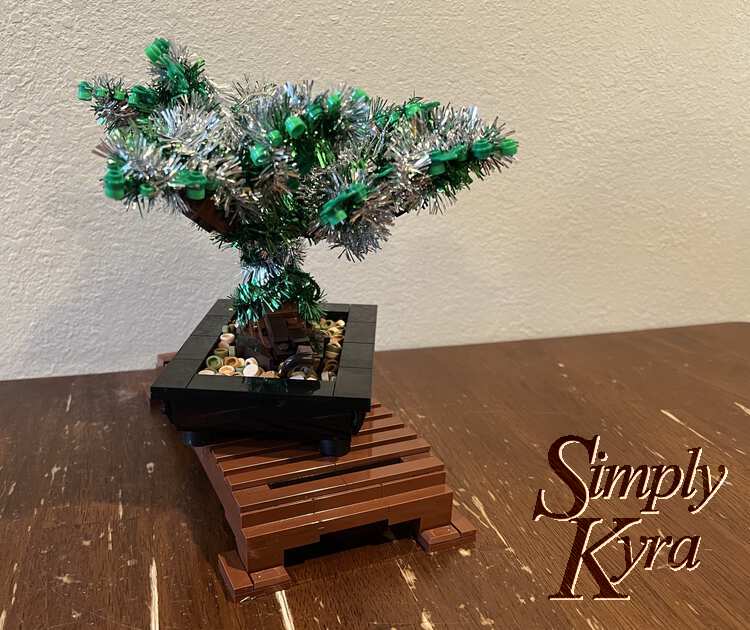
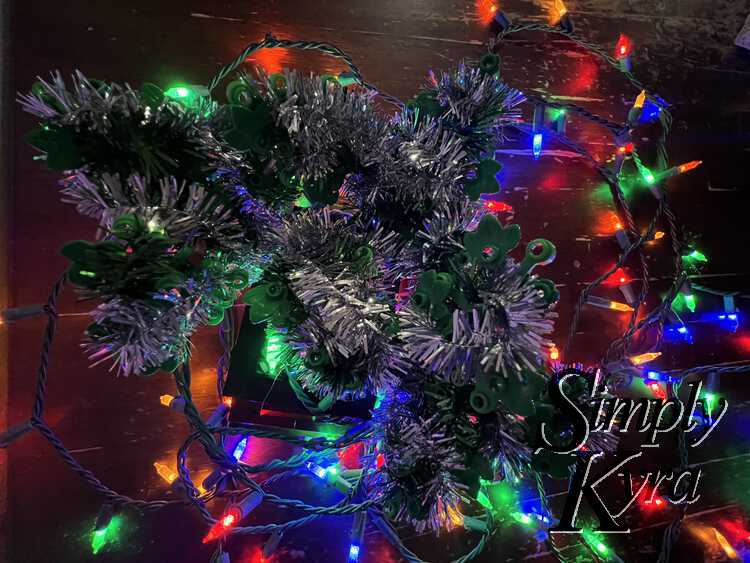
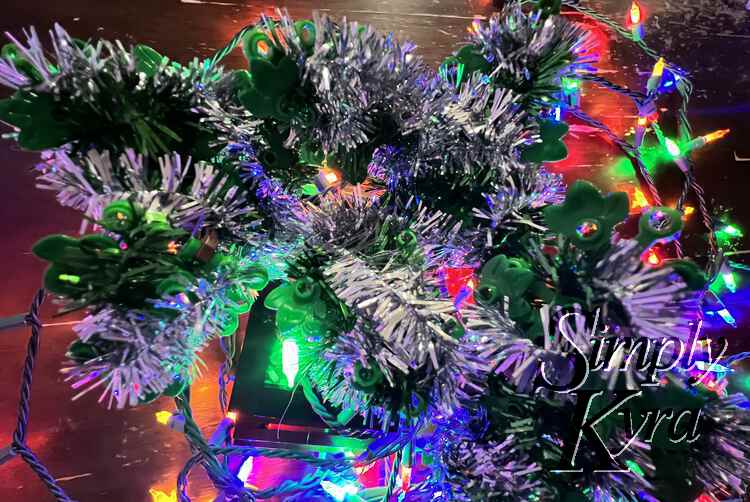
Once returned to its original, for me as I haven’t made the pink version yet, state it was time to break open the wired tinsel, grab a pair of scissors, and decide how to bedeck the tree. I decided to start with the green tinsel to make the bonsai look larger and fuller. I grabbed the end, encircled one of the LEGO® leaves, and twisted the wire to close it to the end. I then unspooled sections of the wire and carefully wrapped it around the leaves traveling up and down the leaves, branches, and trunk until I was happy with the result. I then trimmed off the excess, twisted the cut end into some already placed tinsel to secure it, and was done with the green.
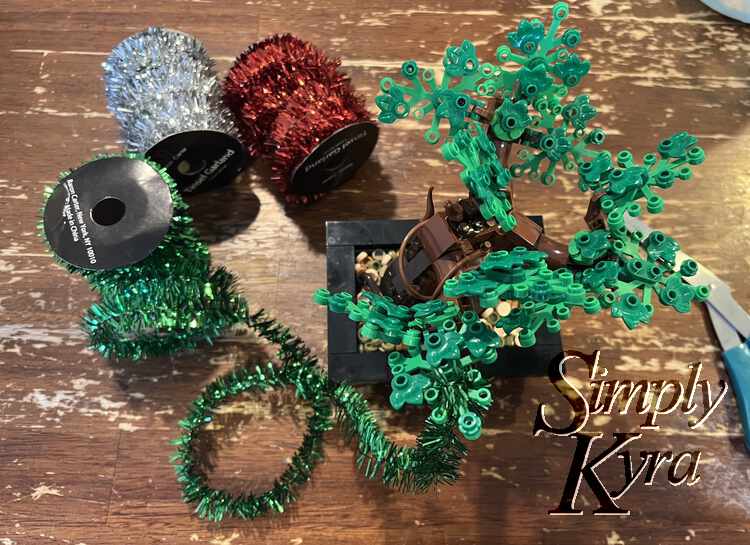

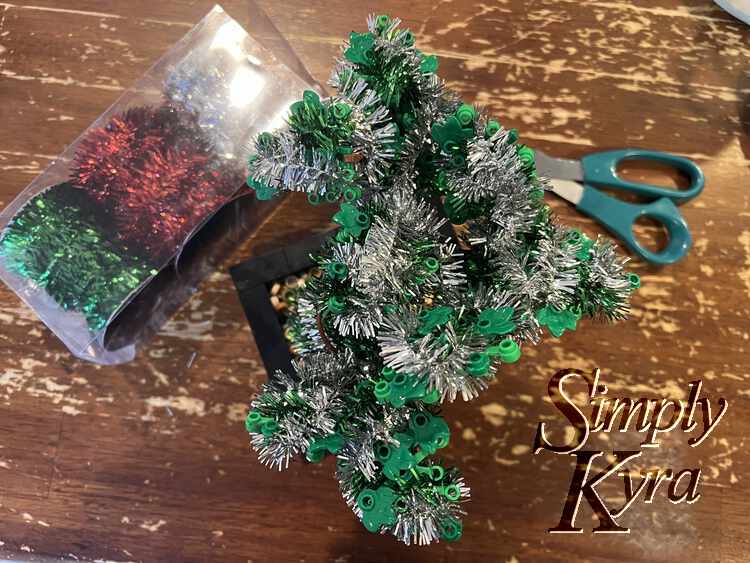
With the green done I had to decide how to proceed as I was just winging it as I went along. I quickly made the decision to leave the red off and instead just use the silver in conjunction with the green. With that decided I then secured the end of the silver wire to another tip of a LEGO® leaf before unspooling the wire bringing the silver tinsel around every leaf, branch, and trunk before securing the newly cut end to another length of tinsel like I did with the green tinsel before.
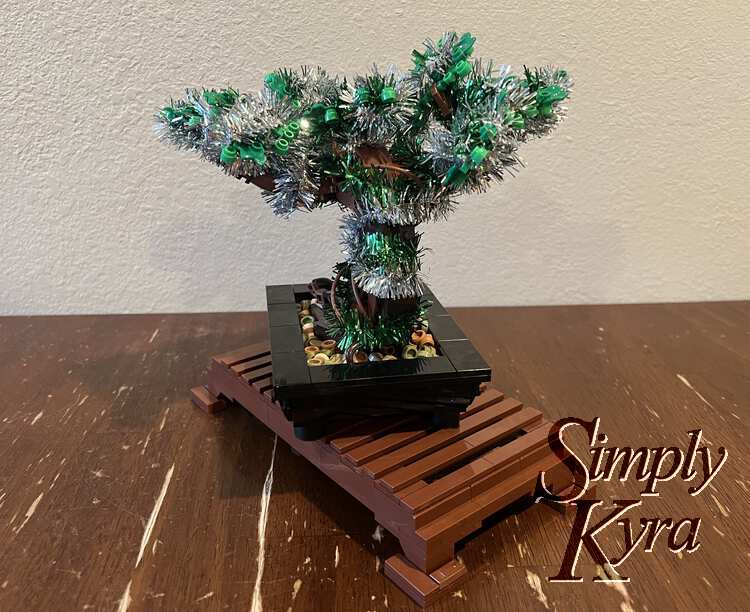
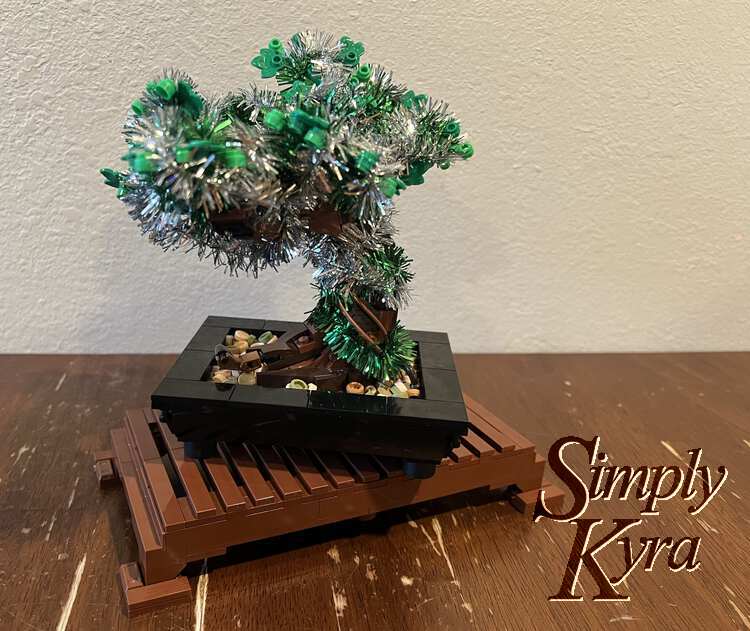
With that the tree was done!
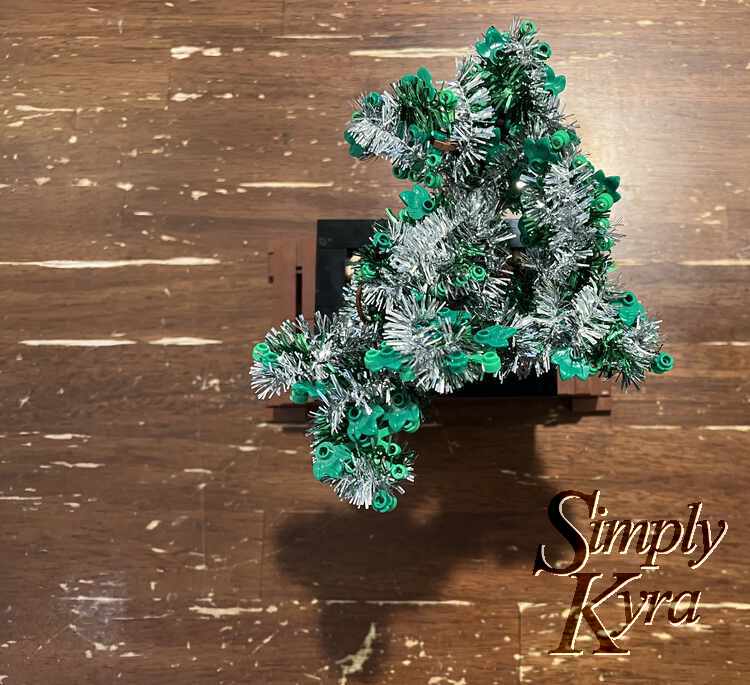
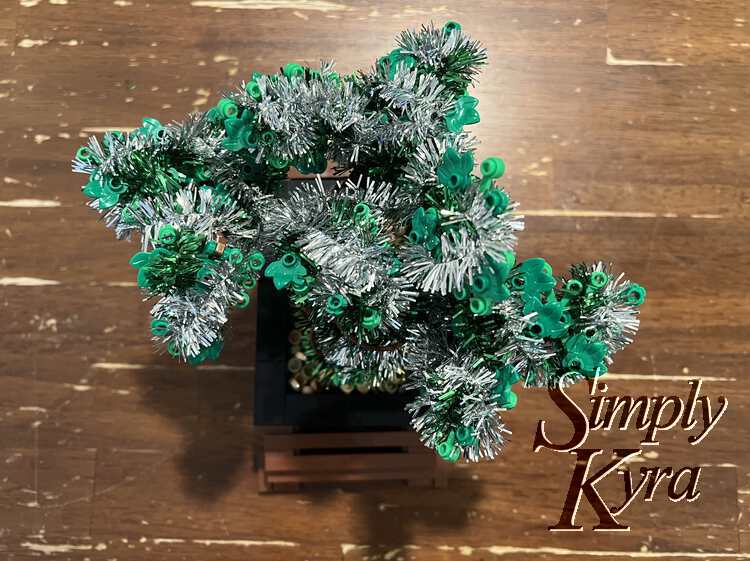
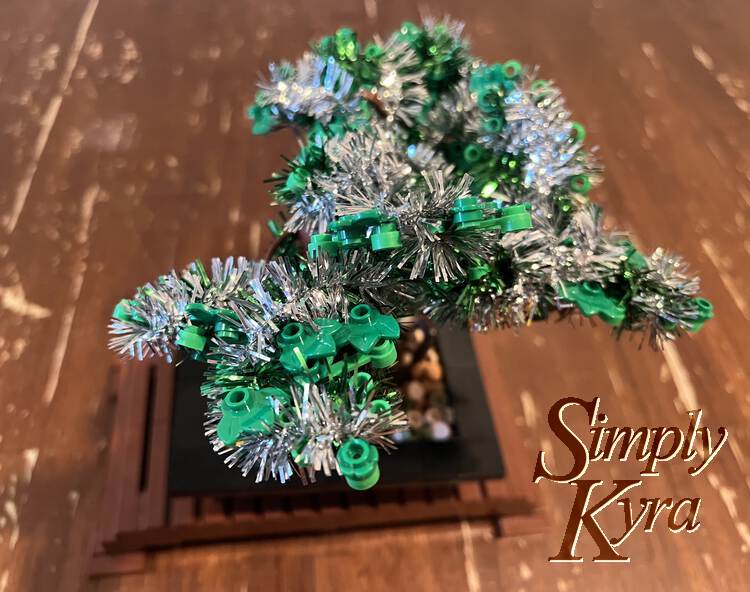
The Final Christmas-Themed Bonsai Tree
Here are all the final photos of my Christmas-themed bonsai tree in all it’s glory!

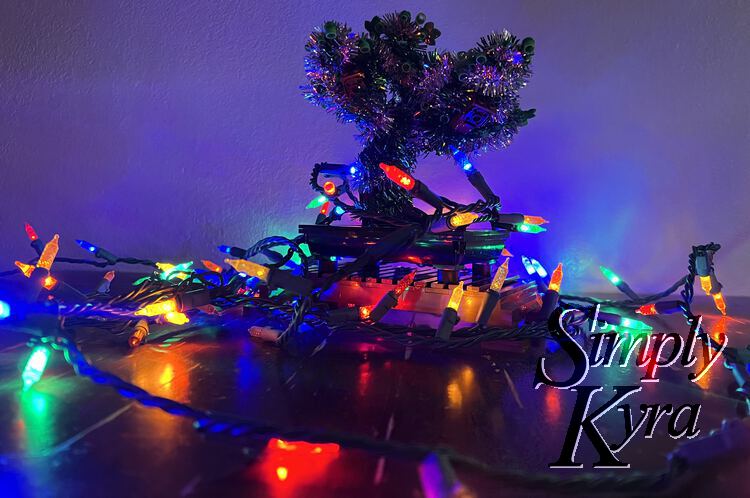
And Now With Lights!
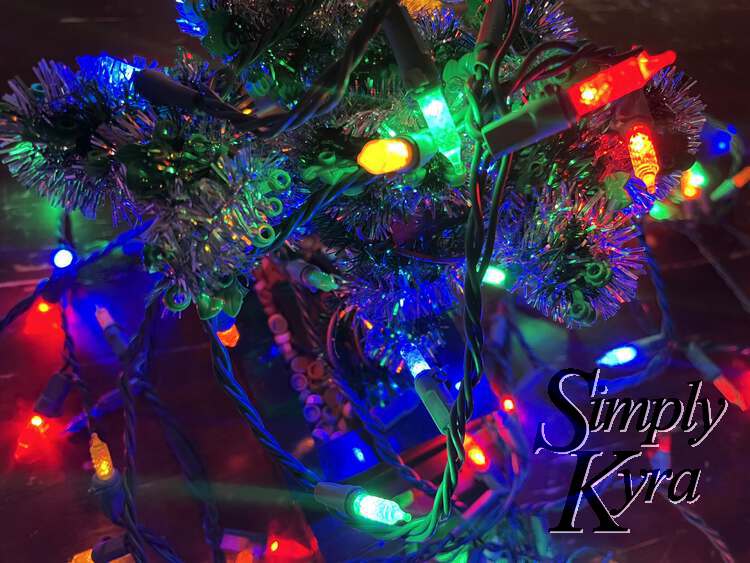
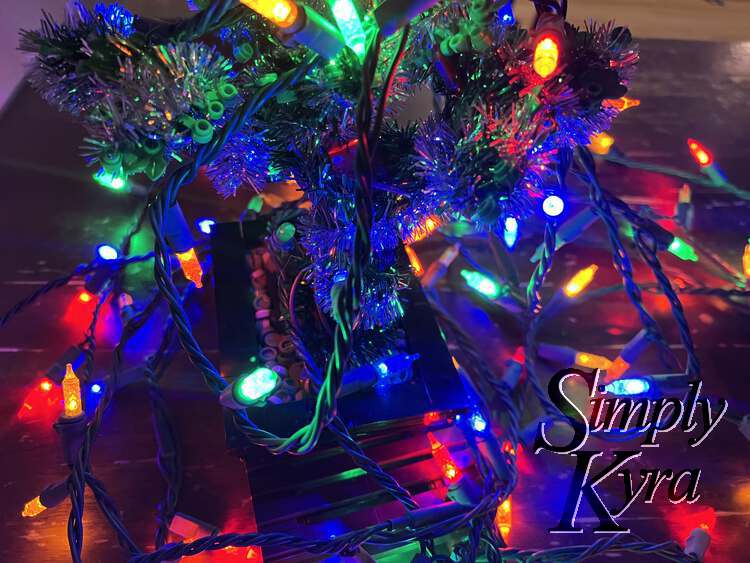
That morning we had just set up and decorated our Christmas tree and we had an extra roll of indoor lights we hadn’t used yet. Something made me thing of them and I realized I should snap some photos of my little Bonsai LEGO® tree surrounded in lit up lights. Here are the results of that quick shoot!


Other Ideas for in the Future
Today I went onto the Joann’s Fabrics website to check out the sale on flannel and spotted some Christmas themed apparel trim… so I guess I could go back to my original idea and just use trim to trim the tree in the future. They even have one with Christmas lights on it and I really love the little candy canes and snowflakes too. That said, I don’t know how they’d look against the bonsai tree. This is a slightly more gaudy version of what I was originally looking for and I almost bought some but forgot before checking out.
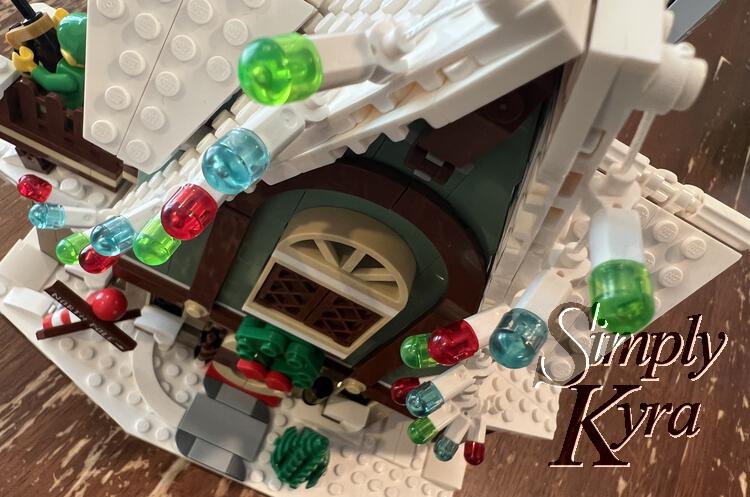
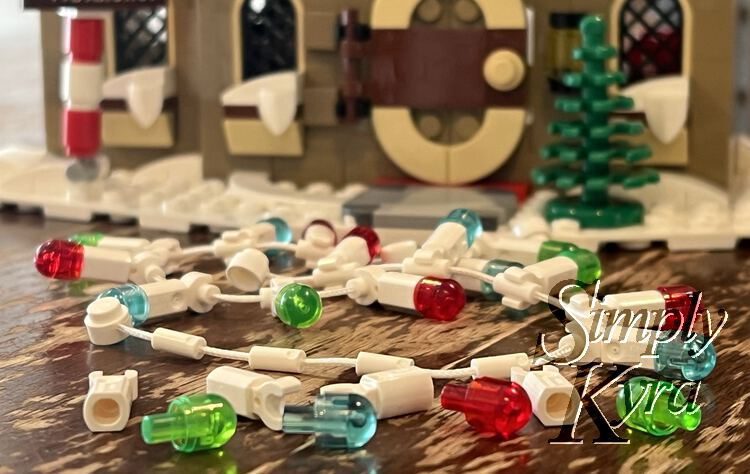
This year we decided to buy the three Christmas LEGO® kits that LEGO.com came out with and adored building them together throughout November. The one kit, the Elf Club House (10275), has a string of non-lit LEGO® Christmas lights across the front of its roof that I love the look of. I wonder if I bought the parts to make, say five of them, if I could wrap, drape, and dangle them over different parts of the bonsai with the ends attached to a leaf or trunk. The white string and multicolor lights would pop against the brown and dark green bonsai. I could then take it a step further by using lights or leaves to try to hide the ends of the strands so it would be hard to tell where they’re connected. Checking the instructions each strand (6096959) takes nine white connector pieces (6052824) and nine lights composed, in this case, with three of each color: red (6171762), blue (6171877), and green (6171864). Although, looking right now, the first two pieces only come in white their design IDs are: strand 14210, connector 11090, and non-functional lights 28624.
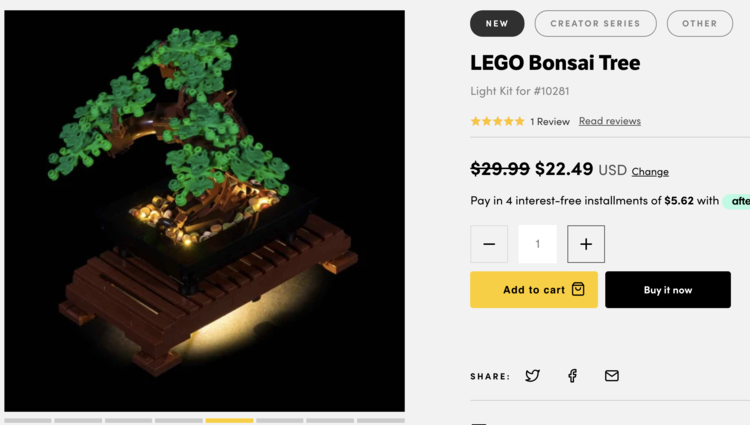
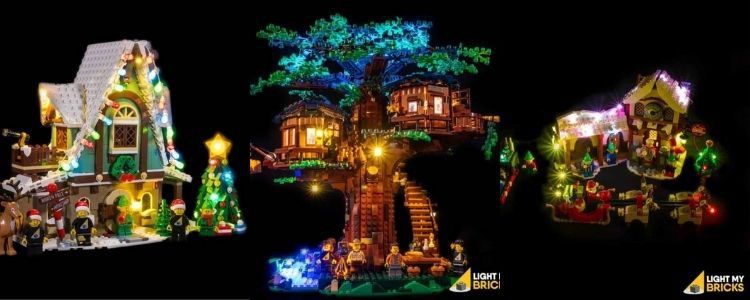
Adding the Christmas lights for the photoshoot made me wonder how the bonsai would look with a smaller version of either white or multicolored functional lights on it. I wonder if, after Christmas, I should go looking for a battery operated strand of LEDs to bedazzle the bonsai with next year either on it’s own or in combination with the tinseled wire. That said, just the other day, I’ve saw LED lighting kits put together to go with LEGO® sets through an Australian company called Light my Bricks so for fun I decided to check out their website and found that they picture the bonsai being lit from the base. Looking up Christmas and tree, separately, on their site made me love the idea of the lights on the top branches of the tree house and the roof of Santa’s workshop. That said, building on my LEGO® Elf Club House Christmas light strand idea in the previous paragraph, their version of the lights were amazing. I have never bought from Light my Bricks and just came across them yesterday but figured I had to share since we’re talking about a Christmas-themed tree and they, or some derivative idea, seems perfect.
I have no idea if next year I’ll still be festooning my LEGO® bonsai tree with different themes so I decided I needed to share these ideas here in case I don’t use them later and they’d interest you now.
Have you made your own Christmas themed MOC (my own creation)? If so what was it? I’d love to hear about it in the comments below so feel free to share! If you did make one did you add lights and if so how did you go about it?
I hope your December goes well and any builds go superb!
If you’re interested in getting any of my future blog updates I currently come out with a new one every Wednesday and share them to my Facebook page and Instagram account. You’re also more than welcome to join my email list located right under the search bar or underneath this post.
Did this save you time?