
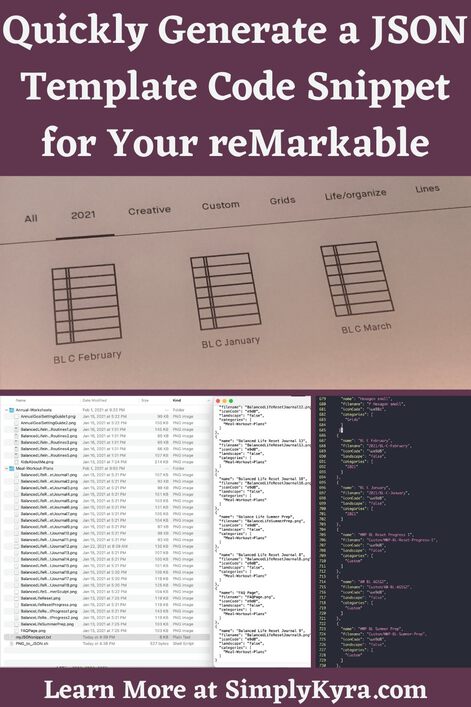
Quickly Generate a JSON Template Code Snippet for Your reMarkable


After learning, and posting, about how you can upload a PNG image to your reMarkable to use as a template I realized I wanted to significantly speed up this process with multiple images at once. I came up with a simple directory (folder) layout for the PNG images I wanted to upload and wrote a bash script that finds them, uploads them, and generates a JSON snippet so I can simply copy and paste it into the templates.json file on my reMarkable2. This significantly speeds up my template creation process so I wanted to share it with you. Going over the entire script in one post would make this really long so I decided to split it up. In this first post I’ll share how I organized my images and how the script generates my corresponding JSON snippet. I chose to use this order since it’s the same process I used when creating the script. The next post will go over the first part of the bash script, that I wrote last, and includes the variables used, error handling, and show how I upload my images programmatically to my reMarkable2’s templates directory.
If you want to see the whole bash script in it’s entirety I already posted the code to my GitHub repository. The script’s JSON creation section, shown below, starts on line 55.
As another aside I figured I’d share the two Facebook reMarkable groups I came across in case you’re looking for general answers. I first came across the reMarkable usergroup and then later came across How to get the best of my reMarkable? which I find much more helpful than the first.
Issues With the Names and Categories
Before going over how I organized the images or how I generated the JSON snippet I figured it was best to show an issue that popped up for me during this process. The first time I worked through coding the script I had two big ideas on how I wanted to organize my templates; however, when I finished and restarted my reMarkable2 I immediately realized that neither of these ideas would work.
The first idea was to create many simple template categories so I’d have a category that fits each scenario I may want a template for. I pictured this making it easier when selecting my template as choosing a category would limit the templates shown to only the ones I may want to use. I quickly realized that my reMarkable2, running version 2.5.0.27 of the software, only shows a single line of categories when I choose my new template. This meant that once my reMarkable2 ran out of room listing the categories on the first line it would stop and not render any of the remaining categories. This is also dependent on the length of the category names, since a longer category name would take more room, you could technically create a category name that would stop the rest of the categories from showing up if it was long enough and shown first. I didn’t test this out although I assume it’s true from what I saw. I quickly realized I needed to use less categories to organize my templates and I needed to try to keep those category names small and simple. I remembered seeing someone in one of my reMarkable Facebook groups mention using a single Custom category for all their custom templates so I chose to, mostly, default to that.
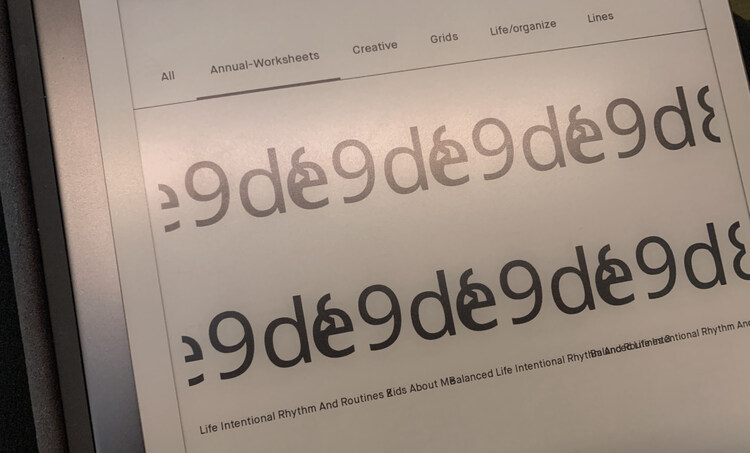
The second idea I had was to use long descriptive names for each template. This would better help me recognize what each template was and to which sub-category it probably belonged to more easily. I felt this was needed as there are only a limited number of icons I can use to represent each template and thus I figured it would be easier to leave the icon the same for all the custom templates and instead rely on the descriptive name to be the only indication of what the template contained. Once I loaded up my new templates I realized that the name of each template is centered below the icon and doesn’t wrap. This means that each template name could overlap with the names to the both the left and right. I knew I needed to shorten each template name but I didn’t want to lose the ability to differentiate each template from the others especially now that the template categories are less restrictive. I decided to switch my names to abbreviations and started a legend on my computer in case I later need help remembering what each abbreviation truly means.
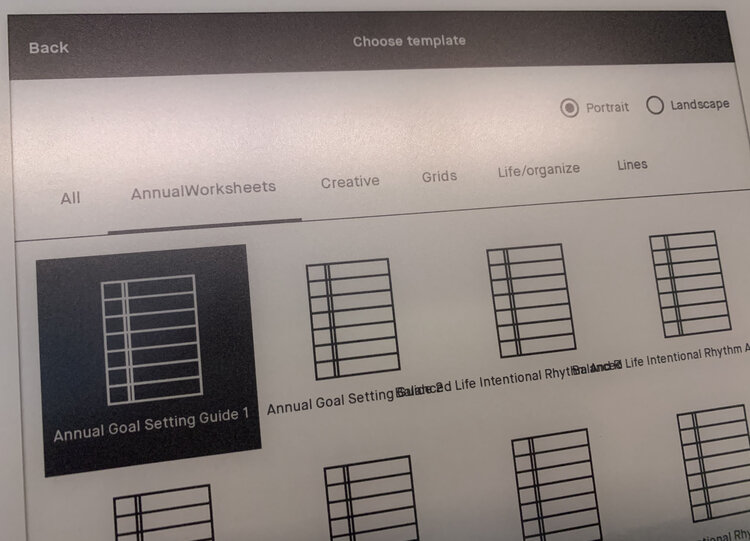
AnnualWorksheets category along with it’s templates so I knew the upload and JSON file edit worked. I didn’t; however, see my other two custom categories at the end although I could still find those templates when I clicked on All. I also noticed the longer template names were overlapping and making it very hard to read.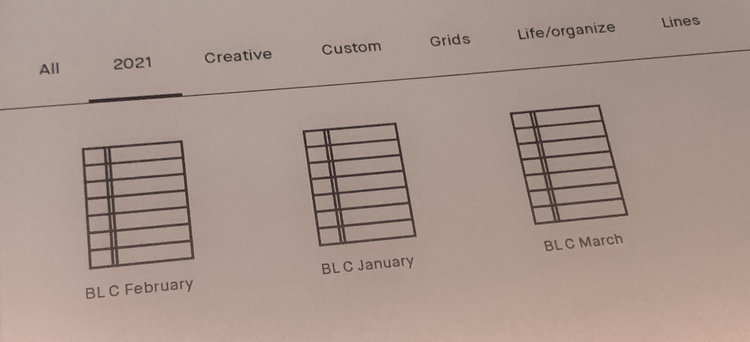
Custom or 2021 so all the categories could easily fit on the single line. I also used abbreviations to shorten the templates’ names without losing any of the information conveyed to me… once I memorize the abbreviations. In this case BL is Balanced Life (my Pilates program), C is calendar, and then it shows which month the calendar is for. These are my monthly workout plans from the Balanced Life Sisterhood.Image and Directory Layout
Before writing the bash script I needed to come up with some way to organize the images that I could easily work with programmatically. I decided to start out by looking at what information I already knew for the templates’ JSON file and what information I’d need to determine for each template as I’d need to deduce that information in some manner. To do this, like before while manually creating a custom reMarkable template, I checked out the reMarkableWiki tips:templates to make sure I wasn’t forgetting anything.
I knew all my templates were based on PDF files in portrait mode so I knew the optional landscape value would always be set to false. I also decided to keep the iconCode the same for each template since there’s so little choice for unique icons anyway and any choice wouldn’t accurately represent what that template showed anyway. The remaining values I knew I’d need to determine on the fly. These include the file name itself, the template’s displayed name, and the category the template is organized under. I figured I could handle the template’s name and filename in one go if I rename my PNG files to easily deduce it’s name. I then chose to handle the category name by placing the PNG files into a directory (also called a folder) bearing the name of the category it would belong to. And with that the organization of the images was decided and all the JSON values were assigned.
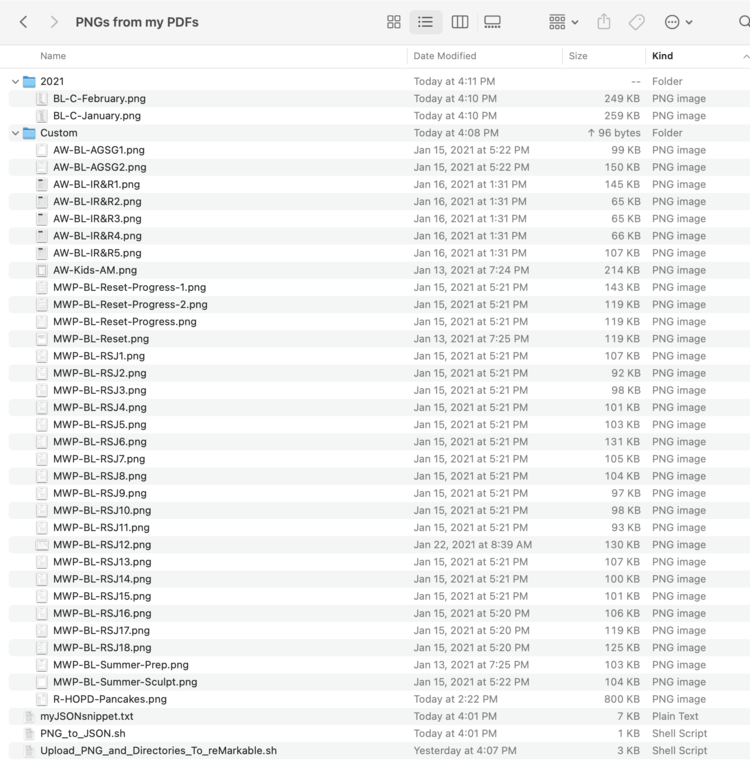
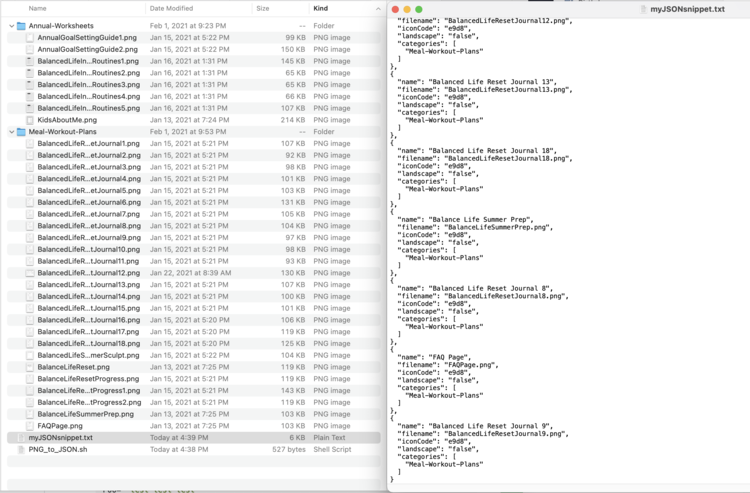
PNG I wanted to uploaded needed to be named in a way I could easily identify later. I chose to use abbreviations for this so it would take less room; as explained in the previous section. Each image also needed to be in a directory bearing the category name. This file structure shows files belonging to either the 2021 or Custom categories. At the bottom is the text file containing the generated JSON code snippet, and two bash scripts. One generates the JSON snippet, shown below, and the other the image upload. Both of these were combined into one bash script and uploaded to GitHub.Assumptions I Made For The Script
- As told above each
PNGfile (the future reMarkable template) needs to be within a single directory contained within the current working directory that this script is run from. This directory becomes the template’s category. If the image is within the current directory that category would then be set to.(the current directory). If the image are nested within directories (for example./firstFolder/secondFolder/innerFolder/imageName.png) then the innermost one will become both the directory and category (so in this caseinnerFolder) and you’ll need to edit theJSONsnippet after the fact for the templates to show up. - Your
PNGfilename cannot contain a period. I use the period as a way to trim off the extension (for example.png) so we’re left with the filename itself. Any extra periods may throw that off.
The Bash Script
Overview
This bash script can be found on GitHub (specifically line 55 and down) or at the bottom of this post. The GitHub version also includes how I upload the images to my reMarkable2 although if you want it in detail you can check out the follow up post here.
When the script is run it goes through the current directory, where the script is saved, and looks through all the subdirectories (the folders within your current folder) which contain the PNG images that will become the new templates. After finding all the images it next goes over each one and uses that image’s pathway to find the category (the directory it’s stored in) and it’s name/filename (from the filename itself) to create the needed JSON snippet. Once the JSON snippet contains all of the formatted image data it then outputs that entire snippet into a text file, that it creates in the current directory, and adds that snippet to your clipboard so you don’t even need to use that file. You can then go into your reMarkable’s templates.json file and immediately paste that snippet in. I love how much quicker this process makes it whenever I want to add more custom templates to my reMarkable2.
Explained
And now without further ado here’s each line of the code explained:
##### Generate the JSON snippet #####Since this code section starts out in the second half of a bash script it doesn’t need to start with the shebang, #!, characters or share the interpreter needed to run the script as that already appeared in the first section. I still wanted this part of the bash script to stand out so I created a heading, starting with a pound or hashtag (#) symbol so the script sees it as a comment, to make it stand out as the beginning of this section. This particular statement shows up on line 55 of the script if you’re looking at it in it’s entirety.
# Creates an empty string to store the JSON snippet as it's being assembled.
declare jsonString=""
I chose to save the JSON snippet to a string variable so I can append to it as I go and then finally output the entire assembled string all at once at the end. Thus I needed to create (declare) an empty string variable.
# Uses find to find any PNG images within the current directory and any
# sub-directories. It then uses each filename (within the while statement)
# to generated the needed templates.json code snippet.
for f in $(find . -iname "*.PNG" | sort); do
I then use a for loop to go over each image found within the current directory. Specifically, the code within this for loop will be run against each item returned by the find command, one at a time, and the loop will be exited once each item is run. The find command is looking within the current directory (.) for any file ending with .PNG (the * matches to anything and the -iname flag ignores the case so it’ll match with PNG, png, PnG, and so on). It then pipes (|) those files found from the find command into a sort so they’ll be run through, by default, alphabetically. Each time through the loop it takes the next image, from the find command, and saves it to the f variable so within the loop the image can be used and referred to with $f. Now for the contents of this for loop:
jsonString="$jsonString,\n {\n"This is setting the jsonString to itself and adding the text ,\n {\n to the end of it. I do this as I don’t want to overwrite the jsonString with the new text and instead use the variable, with the $ in front so the value is used, within the double quotes. The \n shows a newline character which is also called a carriage return or you make it whenever you press Enter on the keyboard. This means the first time through the for loop this line will make the jsonString equal:
,
    {
For each time through the loop this text will be appended to whatever is already in this jsonString variable and will thusly create the template snippet; the whole point of this part of the code.
# Creates a variable and saves the name, taken from the filename, to a
#    variable. There are two ways:
# This is the way I did it before when I wanted full names for the
#    templates. It splits the name based on capital letters while taking
#    into account some instances like FAQ.
#    Example: "BalancedLifeResetJournal5" would become
#    "Balanced Life Reset Journal 5"
# declare name=$((basename $f | cut -f 1 -d '.' | sed -e 's|\([A-Z0-9][^A-Z0-9]\)| \1|g' -e 's|\([a-z]\)\([A-Z0-9]\)|\1 \2|g') | sed -e 's/^[[:space:]]*//');
# I then chose to shorten my names and went with abbreviations. Since
#    that would make it more difficult I now simply split the name by
#    replacing the dash (-) with a space
declare name=$(basename $f | cut -f 1 -d '.' | sed 's,\-, ,g')
Essentially this section is all comment, or commented out, except for the very last line. I figured I’d go over that last line first and then go on to explain the way I used to do it (four lines above it starting with # declare name) in case you prefer my original way. Either of these lines takes the filename of the current image, $f, and determines what the template’s name will be and saves it to the new variable name. It does this in sections and each section is separated by the pipe (|) symbol as the information from the previous section is piped to the next one until you’re left with the final name that you save. I’ll break down that last line for you here:
- The image’s filename,
$f, includes the pathway to the image that I don’t want included so I use the commandbasenameto remove that path so I’m left with only the filename and it’s extension. So for example~/Desktop/temporary/images/group1/image-1.pngwill turn intoimage-1.png. This filename and extension is then piped (|) into the next section. - I then remove that extension so, in the above example, I’d be left with
image-1. I do this by running thecutcommand over the filename, splitting it on the.(-d .), where I use the first section (-f 1) as the output and the rest (thepng) is dropped. I’m left withimage-1, if I use the above example, which I then pipe into the next section. If you want more information about this I used StackOverflow’s How can I remove the extension of a filename in a shell script? to get me started. - This last section uses the
sedcommand to replace any dashes with a space. It knows to do the substitution by thesat the beginning and knows to replace all occurrences of the dashes because of thegat the end for global. I had to escape the dash with a slash (\) so it knows to look for all the-and replace it with aimage 1, that will be saved to thenamevariable. Here’s more information aboutsedfrom nixCraft if you’re interested.
Before going with abbreviations separated by dashes I named my PNG files with words I needed to separate based on capital letters. After starting out this way I realized that the template names overlapped, shown near the top of this post, so I had to shorten the names by going with abbreviations and then changed this line to the dash substitution above. In case you want this way I decided to comment it out and explain here rather than simply deleting it. First here’s that line again with the comment (#) removed from the beginning:
declare name=$((basename $f | cut -f 1 -d '.' | sed -e 's|([A-Z0-9][^A-Z0-9])| \1|g' -e 's|([a-z])([A-Z0-9])|\1 \2|g') | sed -e 's/^[[:space:]]*//');The first part remains the same with the basename command and cutting off the extension so you go from, for example, pathway/AnnualGoalSettingGuide1.png to AnnualGoalSettingGuide1. From there the sed gets more complicated than before as I named my image files using camelCase thereby needing to split my filename on the capital letters to get the final template name. I ended up coming across this StackOverflow question, How can I cut(1) camelcase words? that I used to cut the filenames on the capital letters. I then had difficulty with one or more digits at the end of some of my filenames (when they were originally multiple pages in a single PDF) so I returned to that question and used the example of FAQPage to help me come up with how to to fix the issue when I have multiple numbers or capital letters in a row. Before changing this method to the abbreviations and dashes I had this working for all of my file names including, for example:
- FAQPage –> FAQ Page (used the example from the page)
- AnnualGoalSettingGuide1 –> Annual Goal Setting Guide 1
- BalancedLifeResetJournal18 –> Balanced Life Reset Journal 18
jsonString="$jsonString\n \"name\": \"${name//_}\","I then took that final name, saved to $name in the last line, and removed any underscores it had ({name//_} before adding it, with the proper formatting, to the jsonString variable. I want to keep the JSON code properly formatted so I made sure to add the proper newline characters, quotes, and spaces to the text. Since this value needs to be set, within the JSON, surrounded by a set of quotes I have to escape those quotes, within the string, by using a slash (\). If this $name value is set to My Template Name this formatted text I’m adding will end up looking like:
"name": "My Template Name",and will be added to the end of the string since I started the text with $jsonString.
# Takes the last folder before the filename as the parent directory.
declare directoryName=$(basename $(dirname $f));
I next need to determine the name of the innermost directory the image file is in so I’d know what category I should categorize it as. I do this by taking the entire filename with path, $f, and calling dirname on it. This removed the far right section, in our case the filename, so you’re left with only the pathway. I then call basename on my result so I’m left with only the far right section now while the rest of the pathway is removed. This innermost directory name is then saved to the variable directoryName and will be used in two places below. So, again with an example, pathway/innerFolder/AnnualGoalSettingGuide1.png becomes pathway/innerFolder with dirname and then innerFolder with basename.
jsonString="$jsonString\n \"filename\": \"$directoryName/$(basename $f | cut -f 1 -d '.')\","I then added the properly formatted filename to the jsonString variable and set it to the location where the new template will be at. In this case it’s the category, determined above and set to $directoryName, followed by the image’s filename without the extension as reMarkable doesn’t want to include the extension as all templates are PNG files. Similarly to the start of finding the template name I use basename on the file’s name and then use cut to remove the extension (cut -f 1 -d). Thus, using the above example, the filename would be set to "innerFolder/AnnualGoalSettingGuide1".
jsonString="$jsonString\n      \"iconCode\": \"\ue9d8\","
jsonString="$jsonString\n      \"landscape\": \"false\","
jsonString="$jsonString\n      \"categories\": ["
jsonString="$jsonString\n        \"${directoryName//-/ }\""
jsonString="$jsonString\n      ]"
jsonString="$jsonString\n    }"
The final lines of the JSON snippet creation are pretty straightforward so I figured I’d leave them together so I could explain them in one place. Like before I included the value of the jsonString in each line along with the newline characters, spacing, and quotes. I had decided to use a single iconCode for each template so I could simply hardcode, or preset, each one; although, I did later find that the icons didn’t work as I needed to add a slash (\) to escape the beginning and have it come out right. The next item to set was landscape and since all of my templates came from a PDF in portrait mode it was simple enough to mark this as false with the knowledge that if I ever want to convert a PDF in landscape mode I’d need to upload only those landscape mode images and change the script to true. Finally I set the categories using the name of the directory, $directoryName, and nade sure to replacing any dashes with spaces so it’s a proper name. After closing the required bracket sections the JSON snippet for that image is now done. If there are any more images the for loop is entered again for the next one and another JSON snippet is added to the previous one(s); which is why I started the snippet with a comma. Once all the images have had their snippet added the loop will be exited.
doneThe done command shows the end of the for loop. Once you’re out of the loop you can assume that all of the PNG files have been added to the jsonString so it’s now time to output that string to the user running the script.
# Outputs the text to a new file named "myJSONsnippet.txt so you can use the
# JSON snippet at your leisure.
echo -e "$jsonString" > myJSONsnippet.txt
Here I echo the jsonString using the parameter -e so the newline characters are recognized as actual new lines rather than just as the string \n. I also encircled the whole variable, $jsonString, in quotes so the spaces will be read properly. Instead of outputting the JSON snippet to the user directly I add the character > and a filename, myJSONsnippet.txt, so the string is instead outputted directly to the file. If that file doesn’t exist already it will be created. If it does exist then it’s contents will be overwritten by this new data.
# Also sends the snippet to your clipboard so you can paste it in right
# away without needing to open the file.
echo -e "$jsonString" | pbcopy
I decided to repeat the previous line yet instead of outputting it to a file I instead pipped (|) it to the clipboard (like when you copy something) so I don’t even need to open that created file if I don’t want to. This streamlines the process to get the JSON snippet into the templates.json file.
Heads Up: Icons
When I first uploaded the templates to my reMarkable2 the icon code got screwed up and the icons looked weird. At first I was confused what had happened but then realized I needed to escape the icon code by adding a slash to the beginning. The next time through it worked perfectly. In case this, or some variant, happens to you I wanted to show what happens if the icon code doesn’t match one of the reMarkable’s predefined codes.
iconCode text that I used.Heads Up: Template Order
The reMarkable sorts the templates as they appear in the templates.json file. This means that if I upload and edit the file for ZZZ.png last week and then this week upload AAA.png and place the newer item at the bottom of the file it won’t appear alphabetically. As such I chose to add a sort command within my for loop, on line 63 in the script, so at least the currently uploaded images will be in alphabetical order. If you don’t like the order after adding more templates or just want a new order you’ll need to rearrange the JSON file manually… or, like I did when realizing this, rerun this section of the bash script to generate a newly sorted JSON snippet and overwrite what you added before to the file. Voila, my custom templates were now sorted… until I added more, once again, to the bottom.
JSON file itself and not on the PNG files or their template’s name. I removed the new templates from the JSON file, added a sort to my script, reran the script, and added the templates’ JSON snippet back in. The ordering between the original and custom templates still make no sense but at least the templates within my custom categories are sorted properly.The Code… in It’s Entirety
I wanted to include all of the code in one place so you can more easily copy it, at once, or view it without any of the explanations being in the way so I embedded a GitHub Gist for you. This post only went over lines 55-87 of the script below. If you want to go over the first part in detail check out the first part of this post here.
I hope this helps you out if you’re looking at speeding up your template making process. This is especially great if you need to upload several PNG templates at once. I’m planning on keeping all the custom templates I use organized in a safe spot and then if my reMarkable2 is updated or something happens to cause my changes to be lost I can easily re-upload them with minimal issues.
Update: I’ve since come out with a video that combines several posts together including connecting via SSH, uploading the templates manually, and my bash script. You can find it here.
Let me know if this helps you or whether you have any questions. If you’re looking to upload your images through a script you can check out the first section of my bash script, that deals with that, here. If you have any comments at all feel free to share them in the comments below. I you’re doing well.
If you’re interested in getting any of my future blog updates I currently come out with a new one every Wednesday and share them to my Facebook page and Instagram account. You’re also more than welcome to join my email list located right under the search bar or underneath this post.