

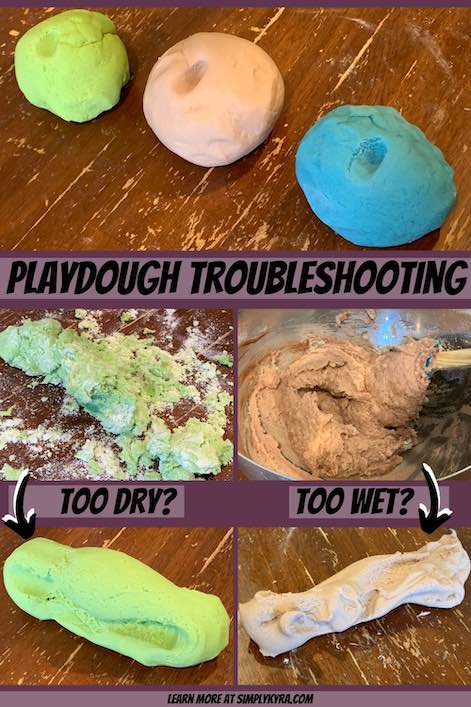
Playdough Troubleshooting

I’ve noticed recently that my most popular blog post is Playdough Coloring Alternatives where I use four different kids’ paint I have on hand (liquid watercolors, tempera paint, washable kid’s paint, and washable finger paints) to add color to my playdough recipe. As an aside if you don’t have food dye or kids’ paint you could also leave your playdough un-dyed and use washable markers to color on it instead. Anyway, seeing these numbers made me wonder if I should film a way to fix your playdough if it ends up too dry or too wet, a common issue when adding paint, and so this troubleshooting your playdough post was born.
tl;dr
Basically this whole post can be boiled down to (if you use this recipe):
- If it crumbles too easily and/or breaks apart it’s too dry. Add a bit of water and knead until it comes back together. Keep checking, adding water, and kneading until you like how it feels.
- If it’s too sticky, either to you or on the table, then it’s too wet. Sprinkle some flour on the table and knead it in. Keep checking, sprinkling, and kneading until it easily separates from you and the table.
Takeaway: With flour being much harder to get than water it’s overall better to make your playdough with less water than you’d probably need as it’s easier to add water in until the playdough texture is perfect for you than making it too wet and having to add more flour in. That said if you add more water than needed you can always bring it back if you have the flour.
If you want to see the playdough being made either too wet or too dry and then brought back to the proper texture you can watch the video above. I also included pictures of each stage below if you’d prefer that over video.
Playdough Consistencies
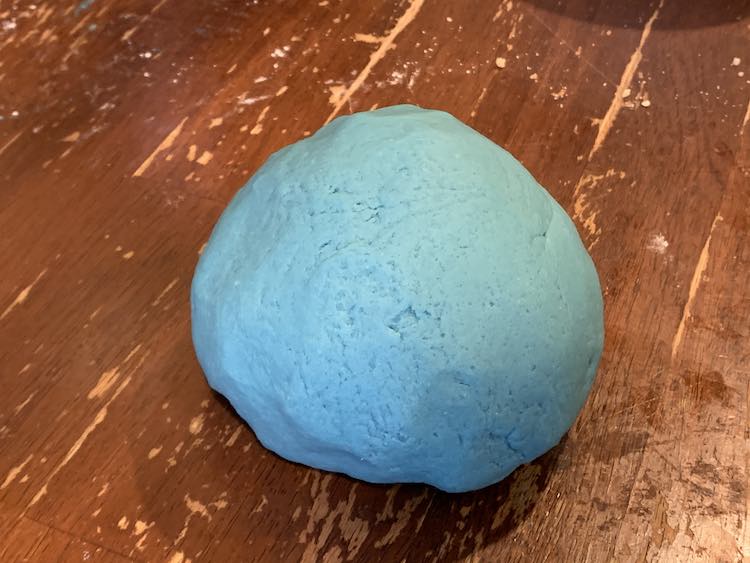
Just Right
I first started by making blue playdough using my regular method. I mixed together the flour, table salt, cream of tartar, and canola oil. I then boiled some water, combined the water with blue food dye, and poured it over the mixed dry ingredients. Normally, when I do this, I do chose to add a bit of flour while kneading so if you’re short on flour I recommend leaving some of the water out and you can add as you need it, showcased in the next batch. If you want to see my playdough recipe or watch a video in which I make it you can check it out here. If you just want the recipe you can use the button right under the video to jump directly there or use this link.
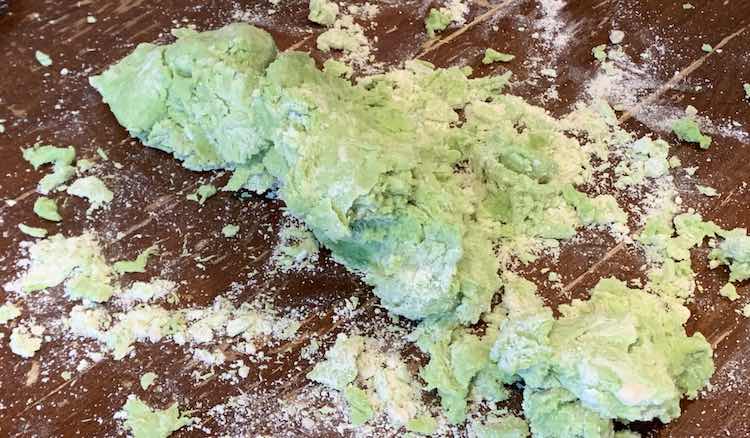
Too Dry
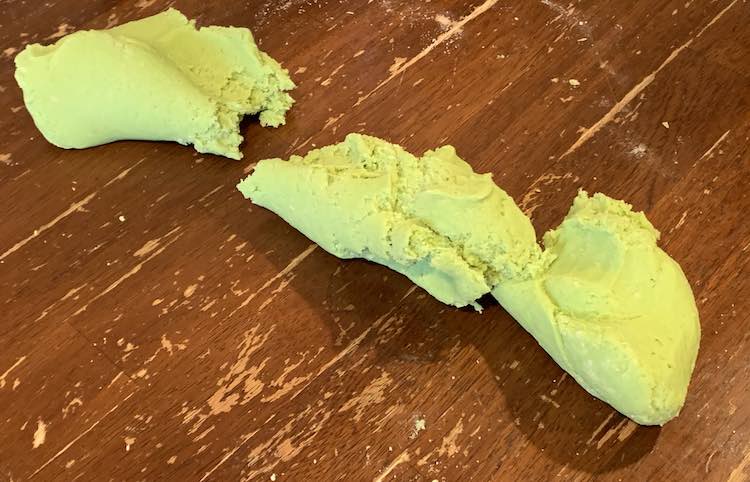
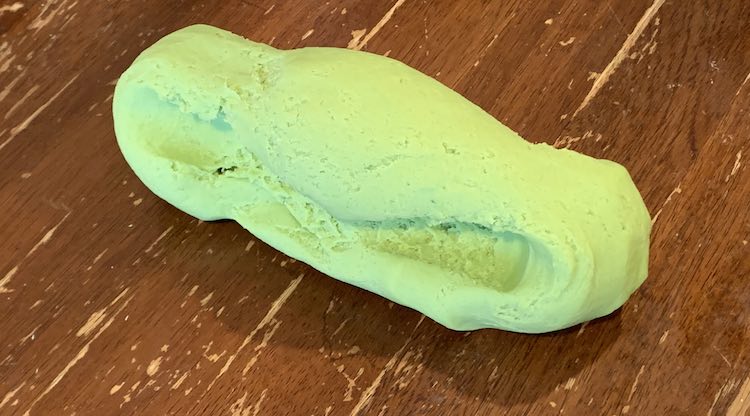
For the next batch of playdough I used the same recipe. I chose equal amounts yellow and blue food dye, added to the measured and boiled water, to make green and then only poured about half to two thirds of that water so the resulting playdough would be too dry. I attempted to mix it as much as I could in the bowl, letting it cool down, before dumping it out onto the table. After trying to knead it together I formed the playdough into a little volcano and poured a bit of water in the center. I then put some of the excess dry bits in the hole, to soak up some of the water, and then attempted to knead it all together again. Once it was fully mixed in I checked if the playdough was too dry by grasping the playdough on either side and slowly pulling it apart. It broke in half easily and had small bits of playdough crumble off so I knew it was too dry. I, again, formed a volcano and poured a bit more water in and, again, kneaded it together. I kept repeating this process until the playdough was the right texture for me. If you add too much water, see the next color, you can always add some flour and knead it in to fully recover the playdough.
Too Wet
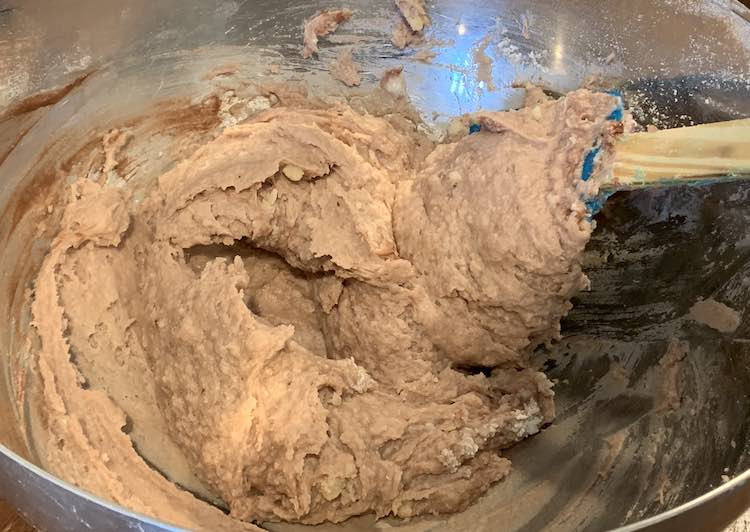
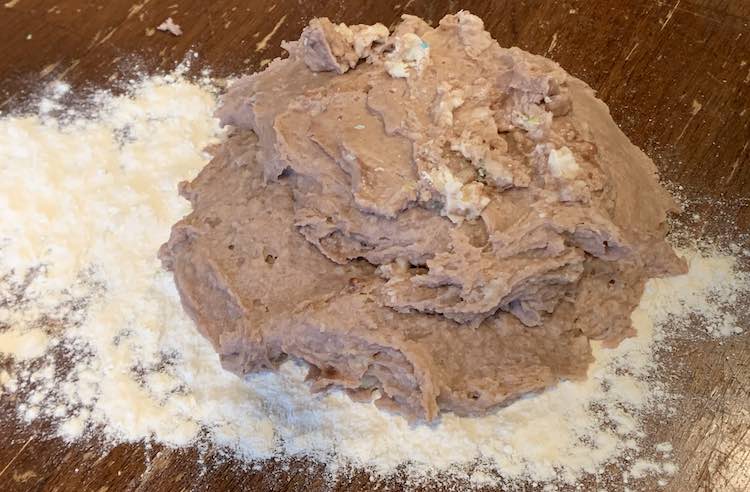
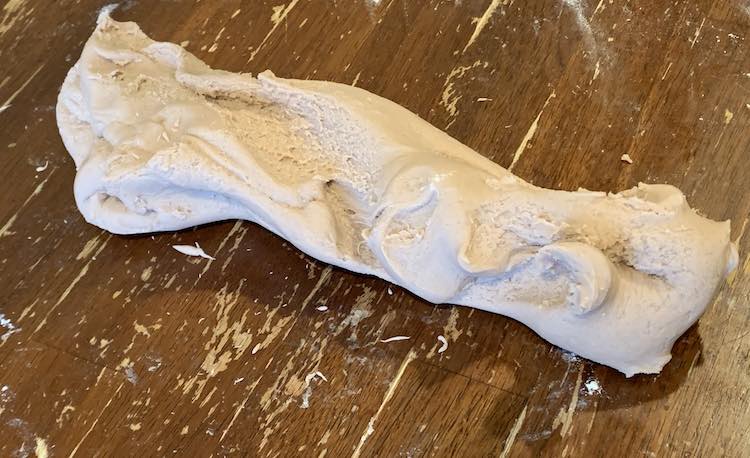
For the final batch of playdough I wanted to make it too wet to show the opposite problem. I knew the easiest way to make too wet playdough would be to dye it with kids’ paint rather than with food dye. Since I was making the playdough too wet on purpose I dumped in all of my, plain, water before dying it by adding brown tempera paint, twice. This ended up being much more liquid than I had bargained for as I ended up with a slushy mess in my bowl. Instead of attempting to recover the playdough in the bowl I, instead, sprinkled the table liberally with flour, dumped the playdough on top, and then attempted to mix it together with the spatula. Once it had cooled enough and was a bit less sticky I switched to kneading the playdough while pausing, frequently, to sprinkle on more flour or scrape the playdough off the table with my spatula. After a lot more flour was added it was finally feeling almost like the first two playdoughs and was ready to be played with.
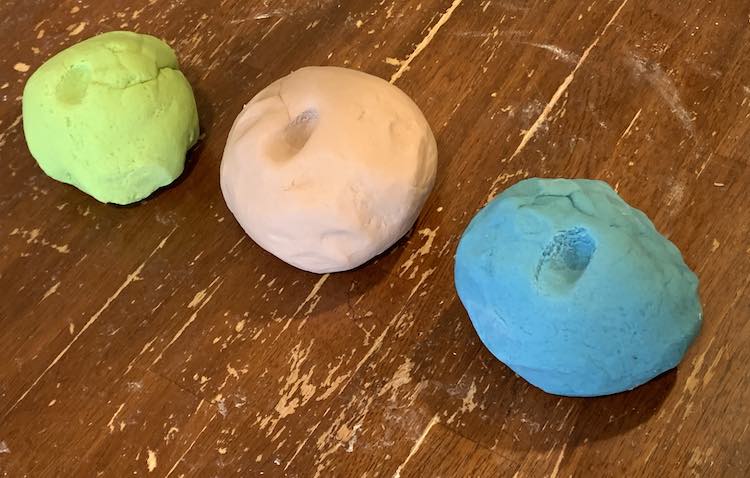
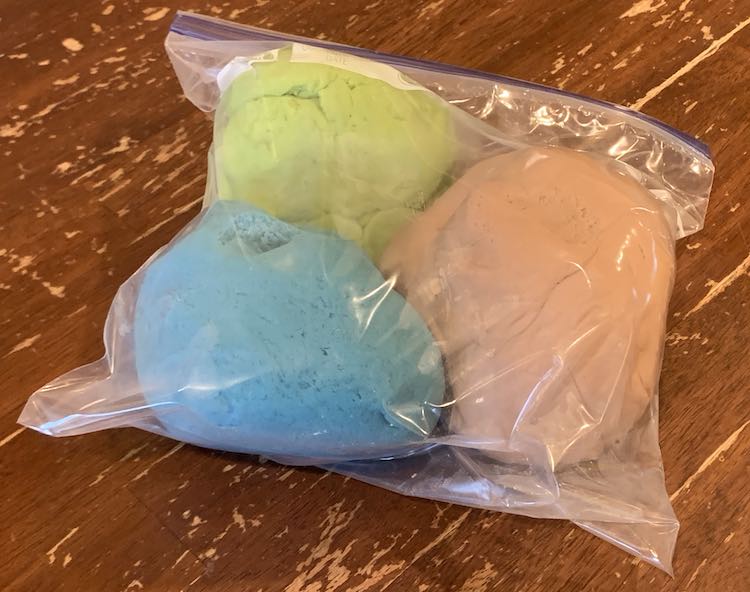
And with that the three playdoughs were done and ready to be played with. After rolling them into balls for a picture I transferred them to a freezer bag to keep them sealed and fresh for whenever we are next ready to play with them.
I hope this post helps you whether you are gathering your courage to make your first batch of playdough or whether you’ve already made some and might be looking to recover it. Have you made a lot of playdough before or are you new to it? I’d love to hear from you in the comments below.
EDIT: March 22nd, 2023:
I lost my comments when moved my website but wanted to share this comment in case it helps you. Back in December of 2020 Sita Swarbrick asked
How long will it keep and also after a week found made dough has gone sticky and moist
I shared that I haven’t had trouble with mine going bad although I seal mine in either a freezer bag or with plastic wrap whenever we’re not using it. We normally only toss it after the colors get mixed together and the kids want fresh stuff. Although my six year old has started making playdough cupcakes and leaving them out to dry out.
If you’re looking for any future updates you can easily follow my blog by subscribing to my email list. The signup is located in two spots on each page including at the very bottom and, if on a wider screened device, to the left. If you’d rather follow me on social media I also post any updates to my Facebook page, Instagram account, and to Twitter.
I hope you week is going, overall, good.