
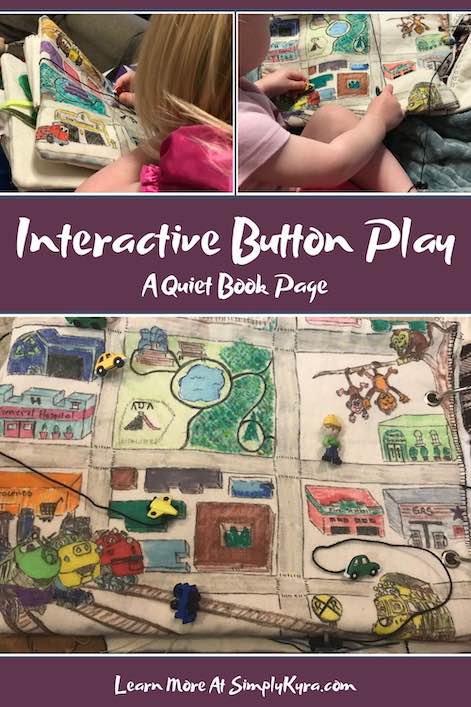
Quiet Book Page - Interactive Button Play

One of the first major projects I worked on when I learned to sew were quiet books for my kids. Looking back I see that I may have planned them a bit too complicated and larger than they needed to be. Instead of being a perfect book they frequently used it, instead, kept being abandoned and eventually the books were left on a shelf out of the way. About a year or two after making them I wanted to revitalize the books so the kids would get excited playing with them again. At that time Zoey loved buckles so I chose to make her a peek-a-boo buckled page and decided on a ‘how to tie your shoes’ page for Ada even though she was a bit too young to care at that point. I wanted to add something fun and interactive to the opposing side of their pages and decided on making an interactive button page. These were made over two years ago, now, and I had kept planning on sharing these with you but as the pages didn’t revitalize the quiet books for the kids I kept second guessing whether these would be interesting enough to share. I’d debate with myself, set the photos aside, forget about it for awhile, re-find, and debated again. My main issue with these pages were how easily the buttons (and the embroidery floss and fishing line) kept getting tangled. I eventually gave up untangling them unless the kids asked. I’ve recently come across these images again and decided it was time to share in case you’re thinking of making something similar and can learn from my mistakes.
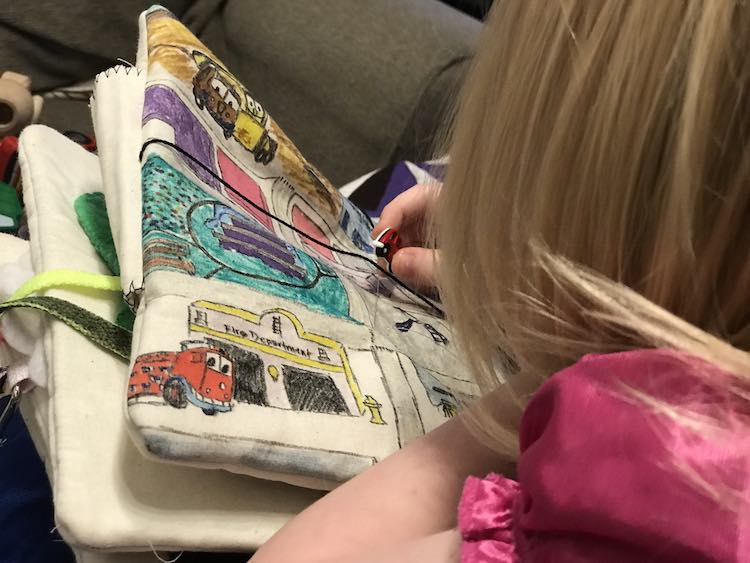
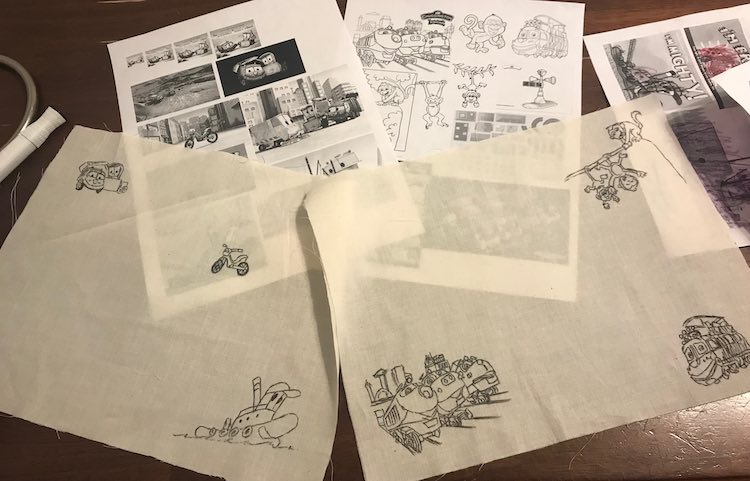
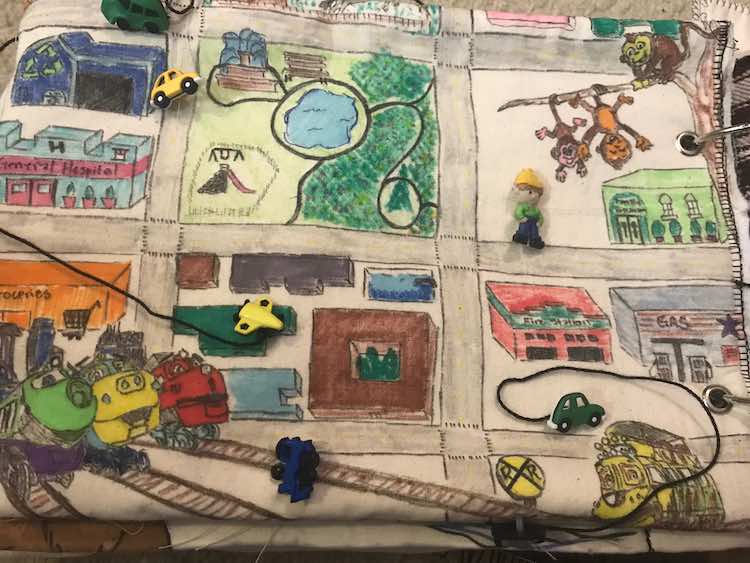
I wanted to create a quiet book page for the girls that encouraged open-ended pretend play. After thinking about it I decided to use my decorative buttons and attach them to the page in such a way that the girls could move them around and yet not lose them. I wanted to keep it fun and pretty so I decided to draw onto the base page an overhead map of roads and buildings so the buttons had somewhere to go. Since I wanted this page to revitalize the books I decided to bring some of their favorite characters into the book for them. To do this I decided to focus on two shows, Chuggington and Stinky & Dirty, and instead of mixing the characters up I chose to use Chuggington for Zoey’s page and Stinky & Dirty on Ada’s. I started by going online to find the main characters and, using GIMP, created printable pages showing the characters at different sizes. After cutting out the white fabric for the quiet book pages, you can read more about creating the quiet book base page here, I traced out my favorite characters onto them. Once I had the characters down I worked around them to add roads, buildings, and any other details I could think of to fill in the blank spaces. At this point all the drawings were outlines with my black fine-tipped fabric marker. I didn’t attempt to add too many details flush against the edges of the page but I did try not to leave blank spaces as I’d rather something be cut off in the seam allowance of the page than have a blank space showing afterwards. Once I was happy with the level of detail I used my iron to press the fabric and set the ink.
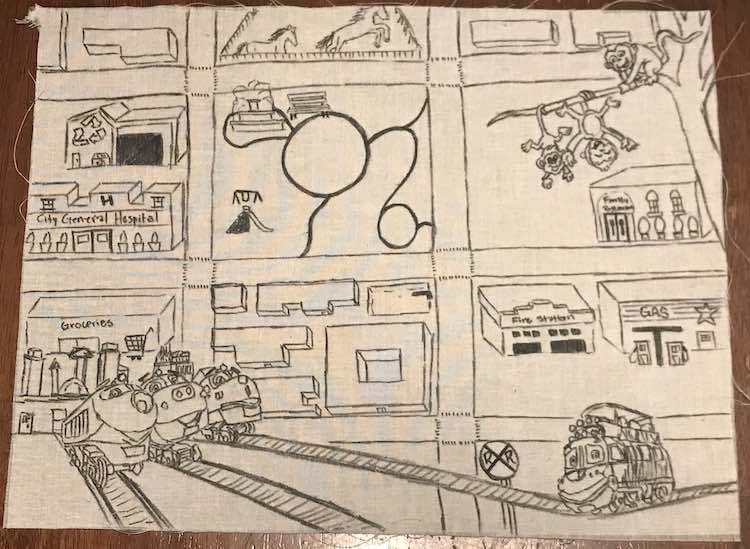

Once the black ink was set I had fun coloring in the scenes. I’d set the ink first as I didn’t want the black to bleed into any of the scenes later on. Once all the coloring was done I, once again, set the ink to be sure it wouldn’t fade or bleed in the future. At this point I also attached the fabric to fusible interfacing to give the quiet book page more body.
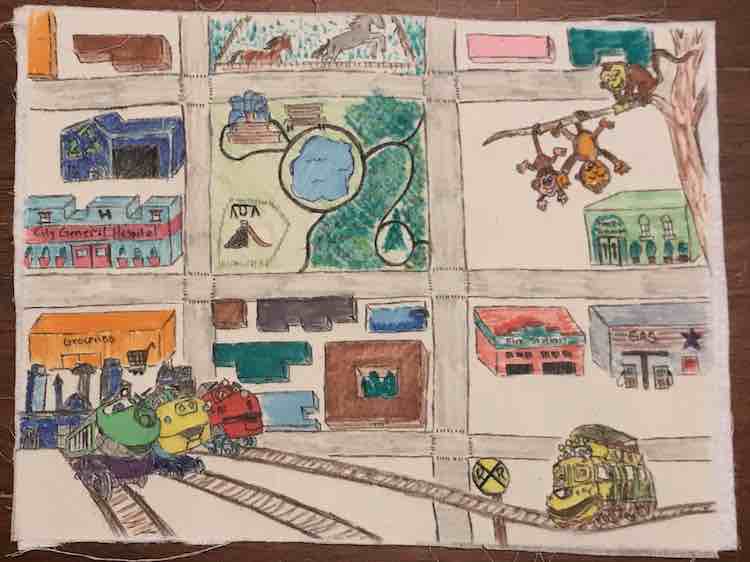
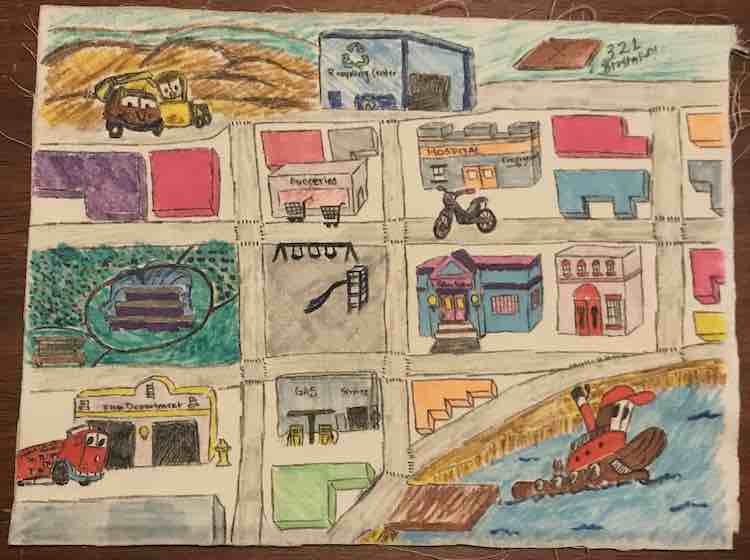
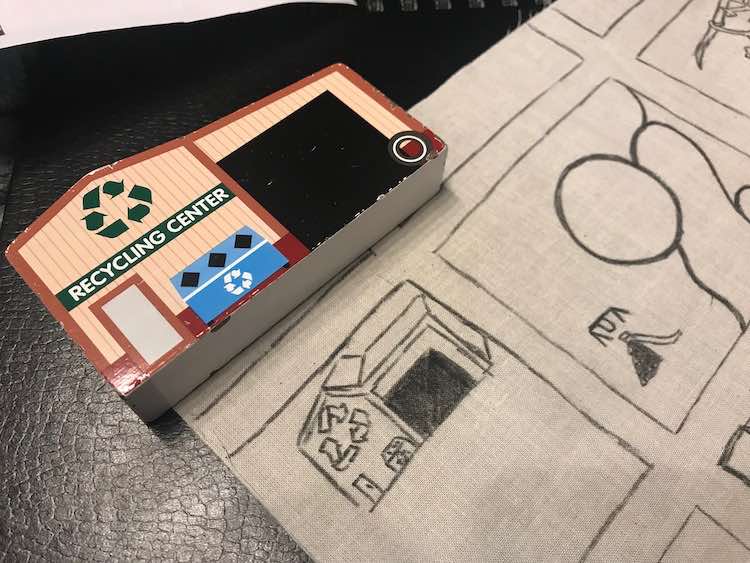
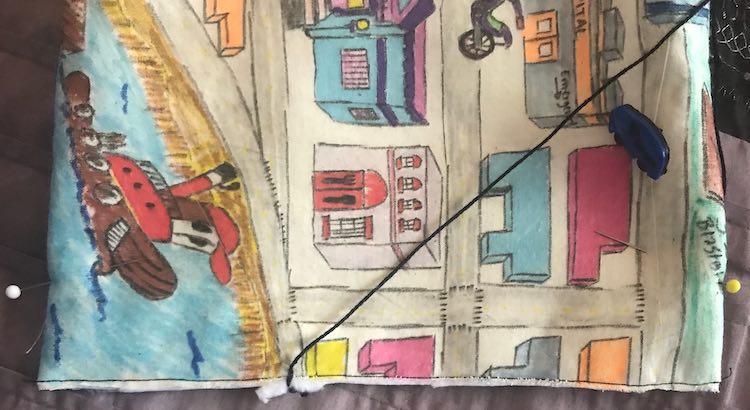
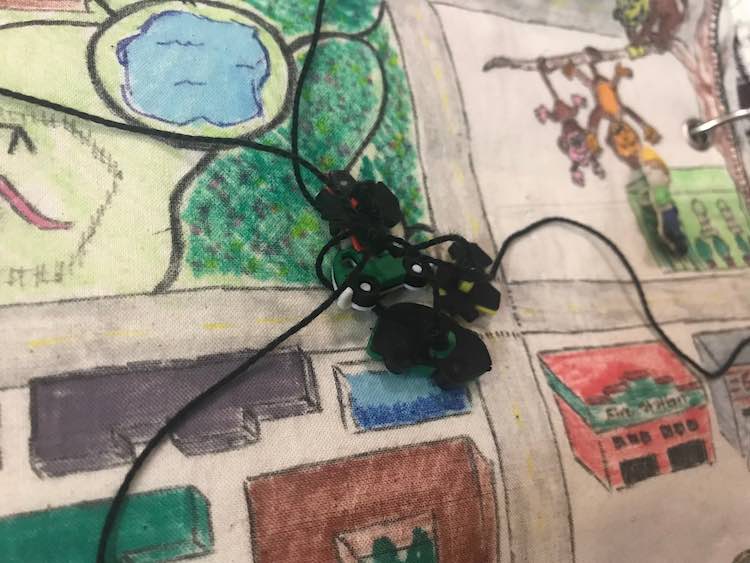
After coloring the pages and attaching them to the interfacing it was time to lay out all of my decorative plastic buttons and decide what to use. I wasn’t sure how to divide them up at first, but since both pages had roads I ended up halving the cars and rocket ships between the two. Since Zoey had Chuggington she got all the train buttons while Ada’s Stinky & Dirty page got all the construction vehicles. I then had to decide how to attach the buttons so they don’t get lost but still remain moveable for the kids. I ended up using two different methods to do this. For most of them I used black embroidery floss attached to the page making sure the floss would allow the button to reach the length of space I thought it needed to be able to travel. The second way used transparent fishing line I had where I added the button to the line before tying either end of the fishing line to the quiet book page leaving the button able to easily travel the length of the fishing line following a path. This worked perfect for a car following a road (going forward and backward), a train along the tracks, or a construction vehicle along going on to and off a dock. Since the fishing line was pulled, mostly, taunt and knotted at either end you had just enough room to pinch the button and move it along it’s pathway.
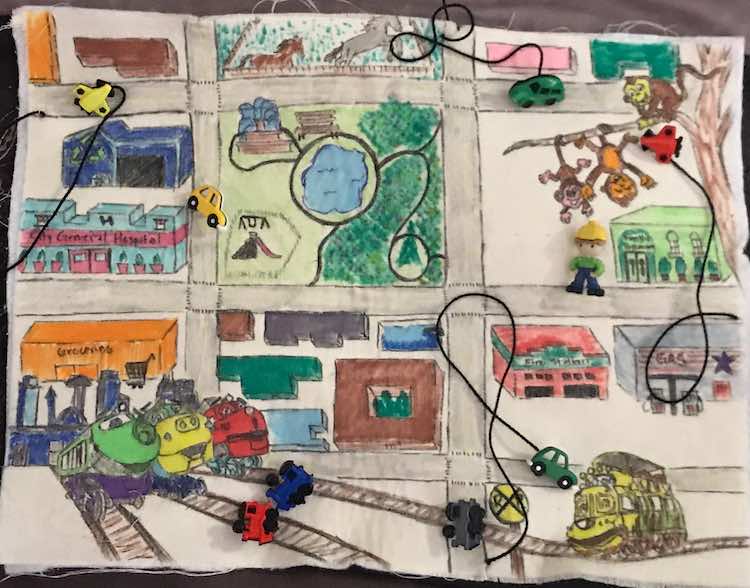
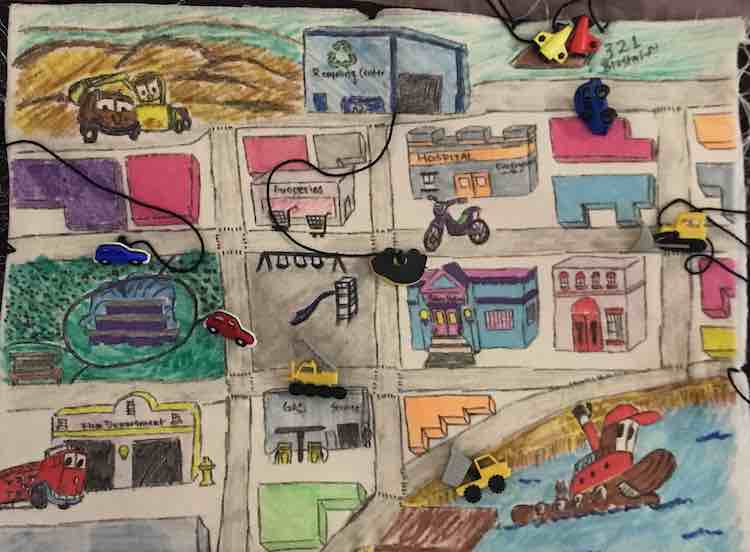
Once all the buttons where fastened to the page I made sure they were as close to the center as they could get and used the odd pin to make sure they wouldn’t fall back to the edge.
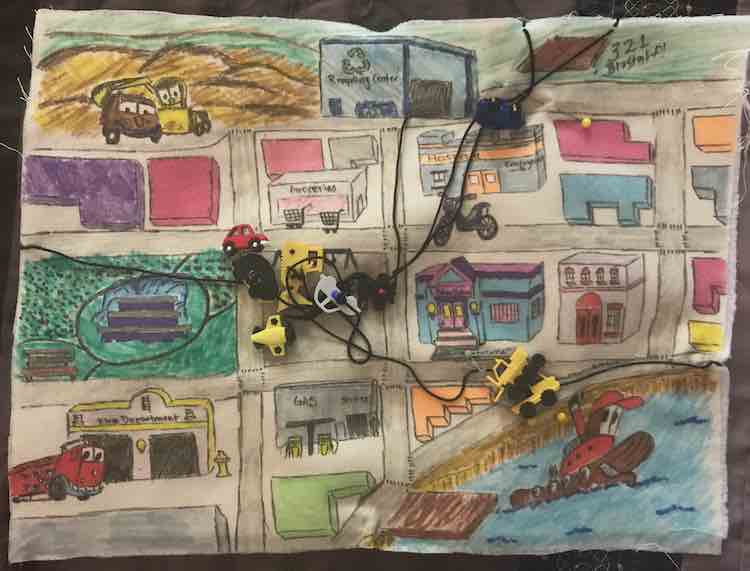
All that was left to do was use my sewing clips to clip the page to it’s reverse, right sides together, and sew the two sides of the page together. And here is where I made my first major mistake. I decided to trim the excess seam allowance so the seam wouldn’t be too bulky at the edges. I then turned it right side out, through the open end, and made sure to poke the corners out. At this point I noticed the odd button that wasn’t attached anymore and wondered what had happened… to discover that these buttons were no longer tied or sewn down as I had trimmed the knot that attached it to the page while trimming the seam allowance earlier. Luckily, I still had enough buttons that were secure enough so I decided to just leave behind the buttons that had fallen off, although I had to cut the other end of the fishing line so it wouldn’t be hanging off the page. I can say after turning the page right side out, poking the corners out, and discovering the buttons I was so much more careful trimming the excess fabric on the side after the open end was topstitched closed.
Now all that was left to do was add the grommets, insert the pages into their respective quiet book, and untangle the embroidery floss… for the first of many times to come.
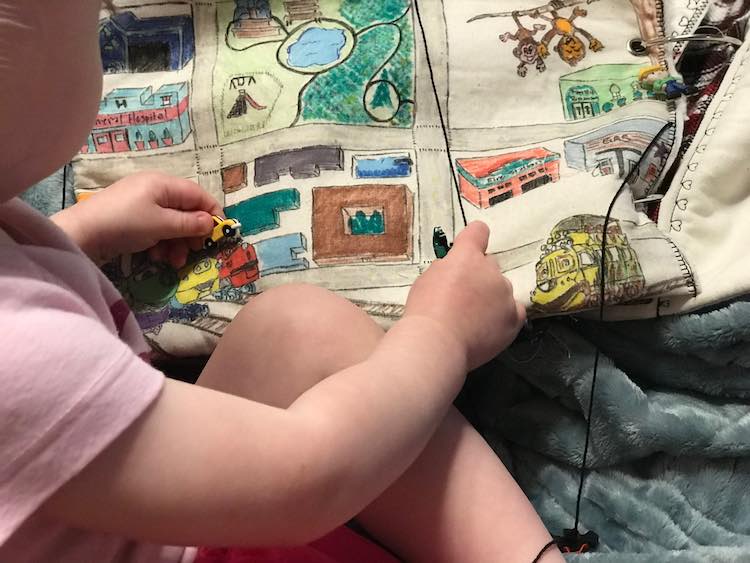
Although the books were once again ignored and forgotten the kids did enjoy the pages for awhile first.

Things to Keep in Mind Next Time…
- One fishing line and one button on each page fell off in assembly. If I were to do this again I would still chose to attach the fishing line near the edge of the page, but I’d mark the seam allowance by the attachment point so it’s obvious and I can later trim around that spot instead of through it.
- My other issue with this is how easily the buttons, attached via the black embroidery floss, get tangled. I spent so long untangling them after I sewed my pages together and then went on to untangle them each time the kids asked. Next time I could see doing a combination of adjustments to fix this:
- Shorter embroidery floss – though then the kids will be limited in how far the button could travel
- Move the attachment points further apart from each other – then there’s less opportunity of tangling as each button’s play space, or range, wouldn’t overlap as much with other button’s spaces
- Make each button’s embroidery floss a different color – then when it tangles it’s, theoretically, easier to tell them apart and separate.
Looking back I think I needed to make both girls another quiet book page more than they needed one. My main reason was I really wanted to create a how to tie your shoes page so making the peek-a-boo page and these button pages were a great justification to go ahead with it. I also needed to prove to myself that the books weren’t the best thing for my kids and I had tried. Maybe this would’ve been better if the embroidery floss and buttons didn’t get tangled so easily and then the kids may have been enthralled with it for longer and it would’ve felt more worthwhile and I may have gone on to make more pages. As it was these were the last pages I’ve made, so far, and by now most of the the pages I had made are now outgrown. I can totally see keeping the books around though and, overall, I’m glad I created them.
Thank you for reading this and I hope it helped you out whether you’ve made quiet book pages before or not. If you’re interested in more information about my quiet books you can check out my previous posts. Specifically I created a four part series on creating my quiet book covers, a three part series on how I joined my quiet book pages together, and have posted all of the individual pages I’ve made. If you sew up your own I’d love to hear and see what you make. Either way I’d love to hear from you in the comments below, through my Facebook page, or on Instagram. Hope your day is going great.