
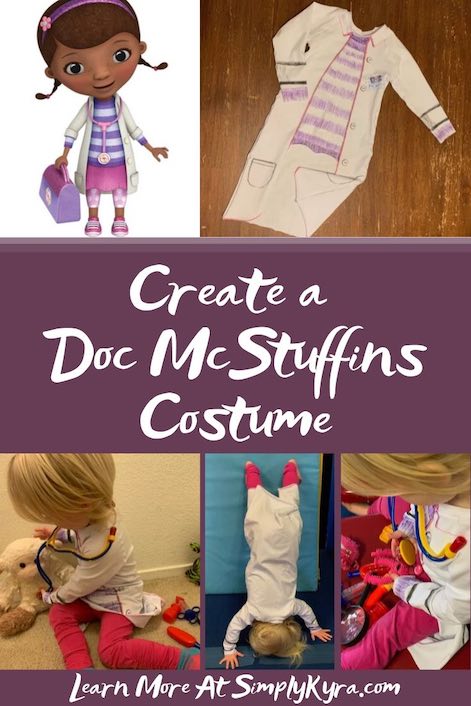
Create a Doc McStuffins Costume

Originally, for Halloween last year, after Ada stumbled across a firefighter costume at our local Costco, Zoey was going to be a firetruck. After I finished the costume Zoey tried it on and loved it… but later refused to wear it. After sewing down the seam allowance on the pants and her refusing to wear it once again I decided to attempt to make Zoey a Doc McStuffins costume and this was born.
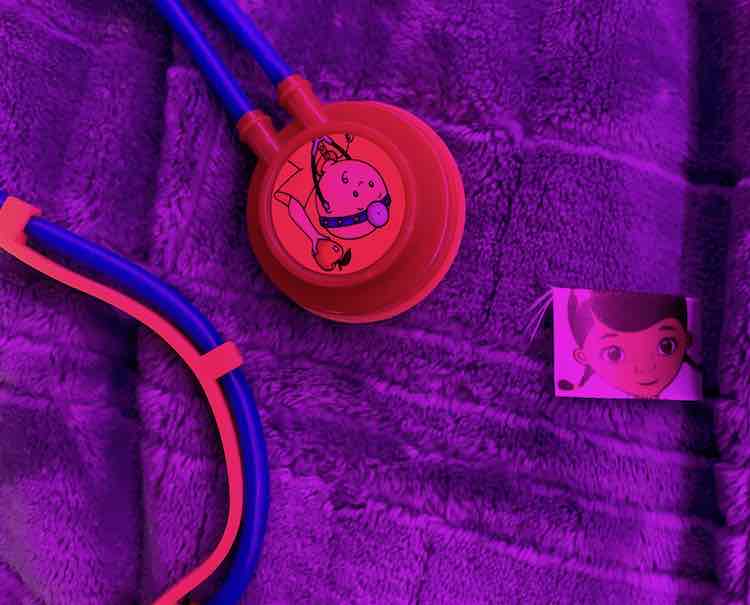
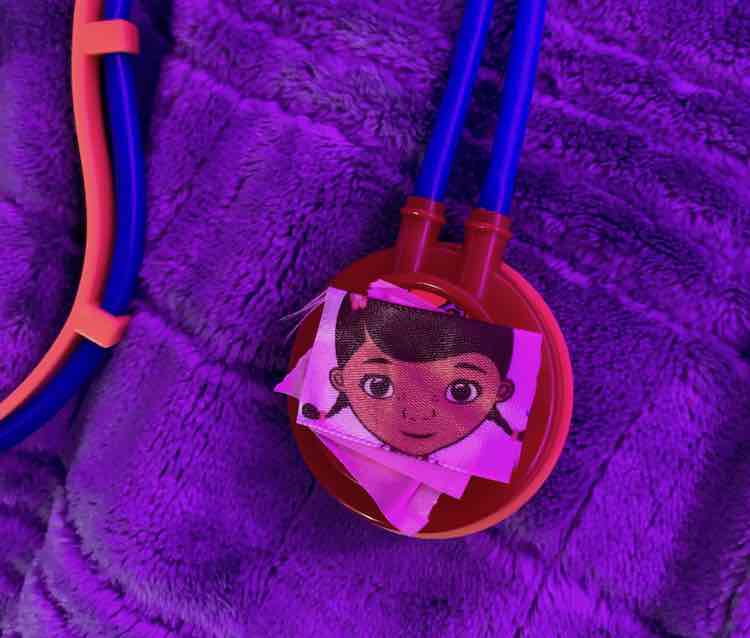
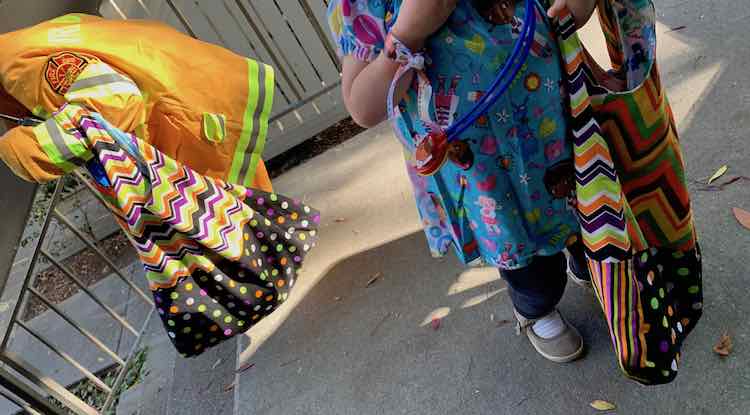
For Halloween last year I made Zoey a firetruck costume that she ended up refusing so I hand stitched a stretch stitch on the seam allowance of her leggings hoping it would make them more comfortable. The day before Halloween my husband had a family Halloween party at work right at the end of Zoey’s nap time. When I woke Zoey to get ready and head out she was excited about being a firetruck but while I was helping dress her in the pants and shirt she lost it. I couldn’t even get the dress on her and knew I wasn’t going to make her wear something she didn’t like. I ended up calming her down with Doc McStuffins and after going through her dresser drawers gave her the choice between two previously sewn Doc McStuffins outfits (Candy Castle Patterns Marshmallow dress and a Rebecca Page Olivia top). I then went searching through her doctor kit before turning her Caillou stethoscope into Doc McStuffins one by taping a piece of a ribbon I had. I then cut off another stripe of ribbon and tied it around her wrist as a bracelet. The kids were excited to use their new Halloween bags even though we weren’t trick-or-treating that day so I threw their water bottles and their costume’s accessories (including doctor tools for Zoey) into the bags and off we went.
That night I was trying to figure out a way to make the Doc McStuffins outfit more legit for trick-or-treating the next day. I knew that if she were to wear the Olivia top again I’d have to get a load of laundry in quickly but at the same time I knew I wanted her to look more like Doc McStuffins if this was going to be her actual Halloween costume. I started looking up ideas online but didn’t have a plain white shirt or dress shirt I could use as a lab coat. Ten minutes before the kids headed to bed I started hunting through Zoey’s drawer for any outfit that might meet the Doc McStuffins criteria. I ended up with a striped dress, pink leggings, and a zippered onesie with polka dots that matched Doc’s leggings (though I then realized later that one leg was mostly white). I even searched through the stuffed animals and found a dragon (Stuffie) and a lamb (Lambie) that didn’t quite match the show but were close. I considered using the clothing and stuffed animals but I didn’t want the toys to be required for the costume to be recognizable as I figured Zoey wouldn’t want to carry them for too long. I wanted the costume to work without accessories so if there were accessories they’d just be the icing on the cake.
While getting the kids ready for bed I asked Zoey what she wanted to be for Halloween the next day and she replied that she wanted to be a fire truck…. I really wanted to believe her but wasn’t sure if the third time would truly be the charm. After debating some more I came across “Halloween DIY: 15-Minute Costume for your Budding Scientist/Doctor/Vet” through Super Mom Hacks where she used a white garbage bag, scissors, and a black marker to make a lab coat. Although I didn’t have a white garbage bag on hand I did have a fabric stash and realized I may be able to make the Doc McStuffins coat out of white fabric and sketch in the details with my fabric markers. I easily found some muslin I had bought but it seemed too stiff to be comfortable and might take too much time to make as I hadn’t made a button up top or lab coat before. (That said Rebecca Page has since come out with a free lab coat pattern though I haven’t tried it yet.) I then saw my white knit cotton lycra! I decided that would be perfect and grabbed my already cut Ellie and Mac Unisex raglan pattern pieces as I was comfortable sewing that up as I’d already used that pattern to sew the kids swimming suit rash guard that last summer and had just made Zoey’s firetruck costume.
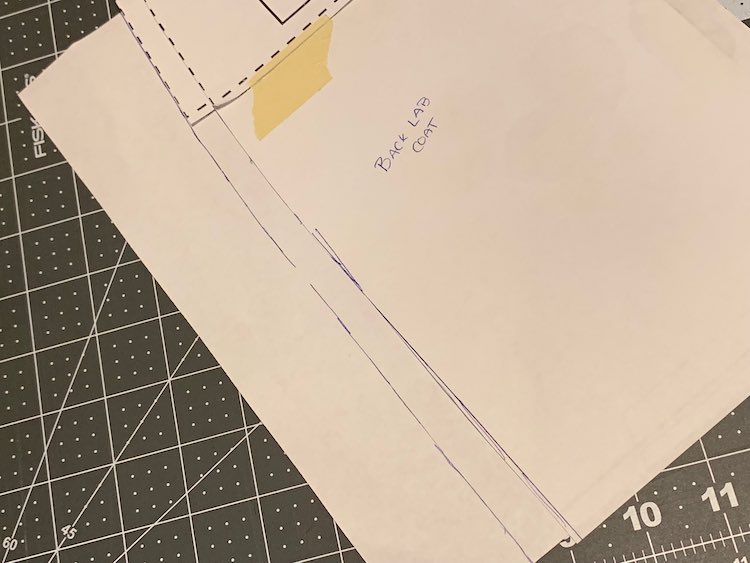
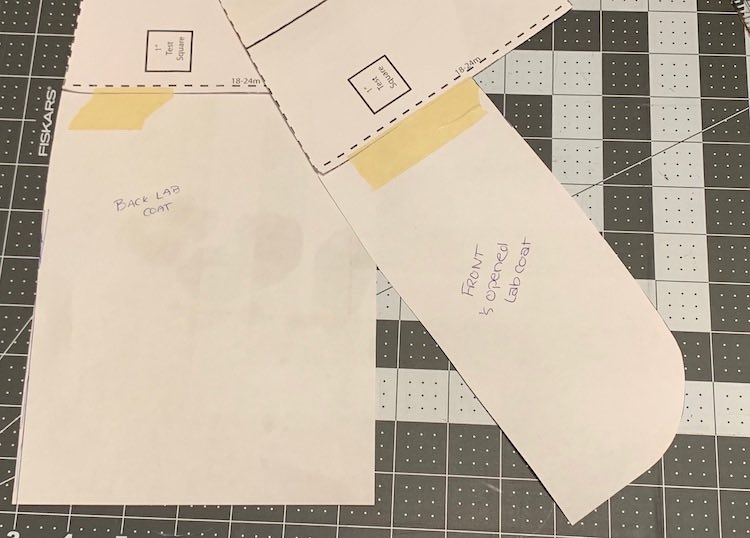
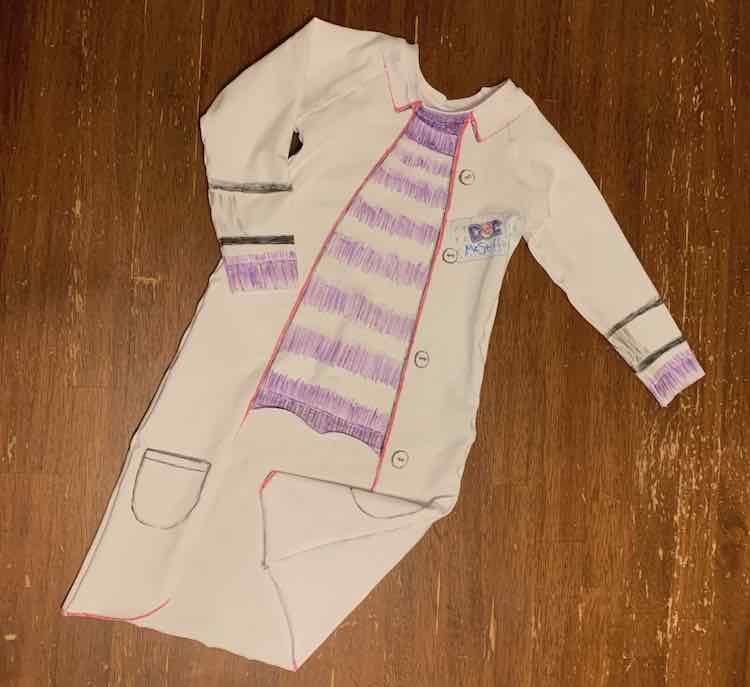
Since I was making this costume I knew I could change the shirt to fit whatever I wanted to do. I also knew I already had pink pants for Zoey so I was only concerned about her shirt and jacket. While planning I realized that I didn’t have a shirt or fabric that matched Doc McStuffin’s shirt and since I didn’t want Zoey to have an opened jacket that might fall off why not combine the shirt and jacket into one. Instead of worrying about what fabric to combine to make Doc McStuffin’s outfit why not just sketch the details in. With that in mind it was time to tackle the pattern pieces. I started by extending the back bodice the length I wanted her jacket to be. I then took the front bodice piece and extended the outer edge (side away from the center fold line) to match the length on the back bodice. I took that length and added a curve before bringing it up to meet the regular shirt length, about midway on the pattern, and then left the rest of the pattern the same up to the fold line. This was going to give the top the appearance of actually being a shirt with an opened lab jacket overtop. After getting the pattern pieces ready it was time to cut the fabric.
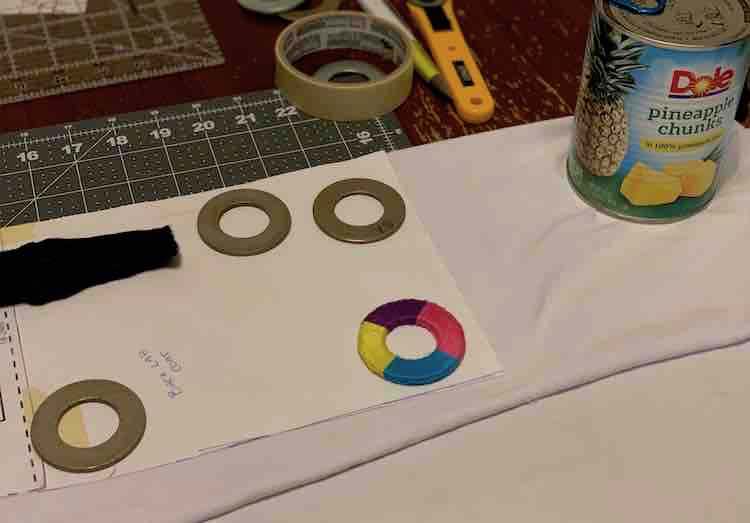
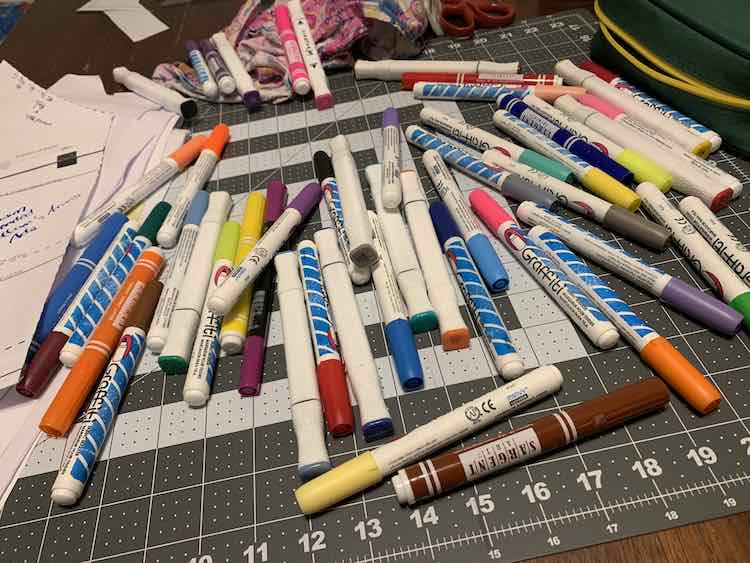
After cutting the white knit fabric the next step was to color it with fabric markers while the fabric pieces were still flat. I dumped out all my markers and tried to pick out all the colors that matched with Doc McStuffins shirt and lab jacket before putting the extra ones away.
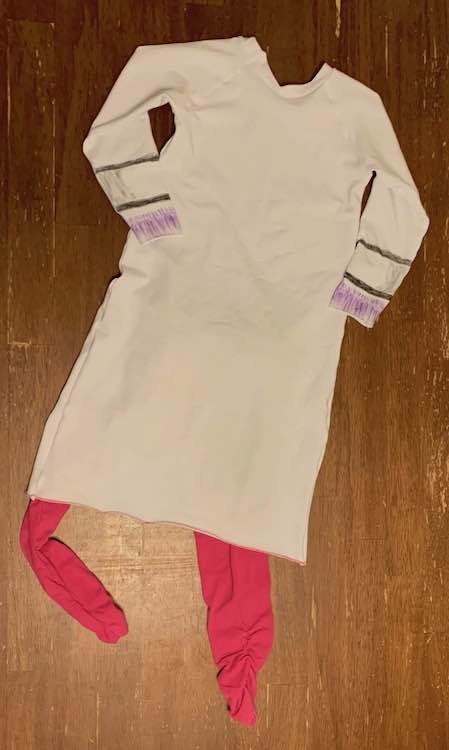
I started with the sleeve pattern pieces before going to the bodice pieces. Technically if you look at the photos of Doc McStuffins her white coat is folded up and her sweater sticks out but doesn’t reach her wrist. I had kept it simple and cut out long sleeves for Zoey instead and had already decided not to hem them. Since I wasn’t hemming I knew I could color all the way down to the end of the arms without it being hidden in a hem. I also knew the sides would disappear into the seam allowance but I still decided to color close to the edges anyway because I wanted to be sure there wouldn’t be a blank space after I sewed the sleeves up. After bringing up a photo of Doc McStuffins on my phone for reference I used a fine tipped black fabric marker to add the main details of the sleeve in.
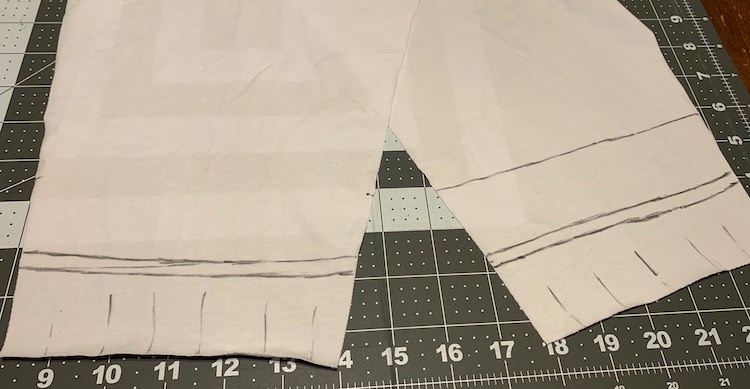
After getting the base figured out I started to fill in more of the details with the black marker before grabbing a purple marker to work on Doc McStuffins’ sweater. I realized I didn’t leave as much space as I should’ve for the sweater but I made sure to show the ribbing and two of the stripes under the cuff so it would be more apparent. I started adding some shading to the cuff but then realized I didn’t want to be shading the whole sleeve and bodice so I kept the shading to only cuff.
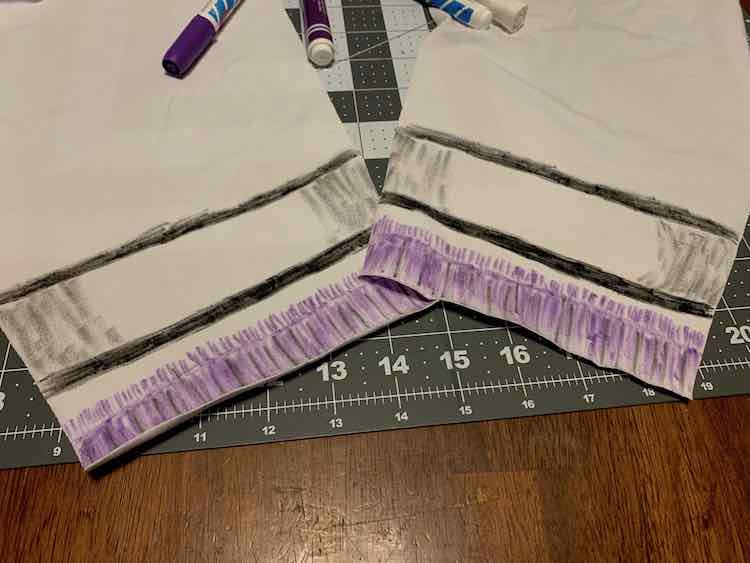
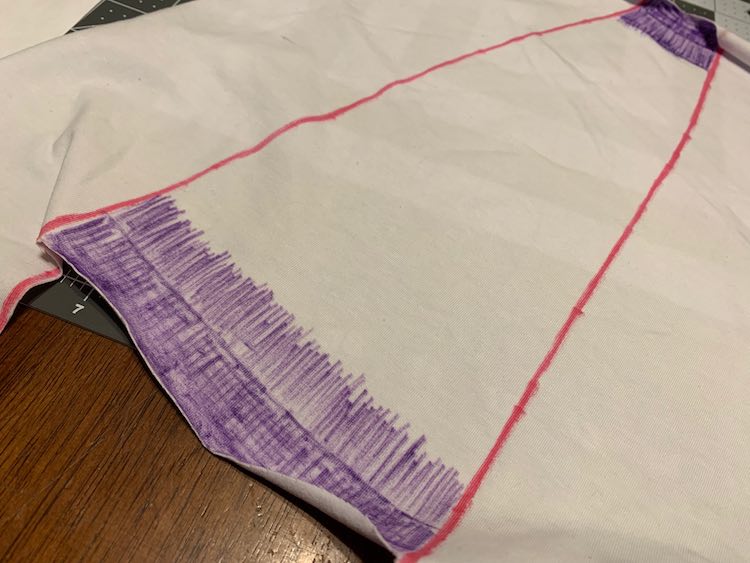
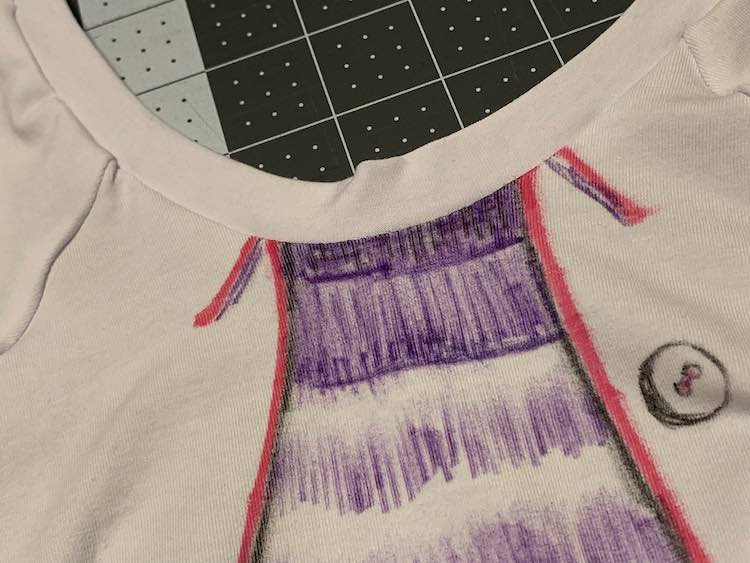
Next up was the bodice pieces. I started by figuring out where the edge of the front of the jacket should be by starting at the bottom of the front bodice piece and going up. I then took my bright pink fabric marker and added pin striping along the edge of the jacket going down from the collar and along the bottom of the bodice. On the back bodice piece I continued the pin striping along the bottom. Since the pin striping is the only part of the jacket that connects over the front and back I didn’t have to worry as much about pattern matching or losing part of the image into the seam allowance like I had for the sleeves. While adding these details to the top of the front bodice I decided to leave the edge of the collar undone. I knew once I sewed the bodice to the sleeves the edge of both would be cut off, including the drawn on collar, while I was also worried about the collar being mismatched. Instead I decided to not finish drawing the collar and neckband until after it is sewn together. You can see an image of it further below.
After adding the pink I grabbed my purple again to color in the striped sweater that Doc is wearing underneath the jacket. I made sure to copy the same technique I used before on the sleeves so they’d be cohesive together. I started by adding the ribbing at the waist and part of the neckband at the top along with a stripe at the bottom and top. Once that was done I continued adding stripes to fill in all the empty places between the two.
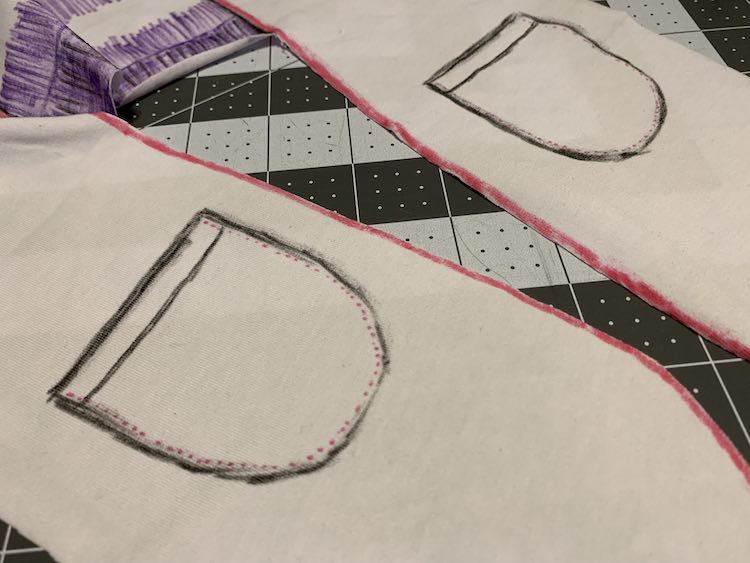
After adding the sweater and edging I went on to add the pockets at the bottom of the jacket. I figured it was simplest to just color them in like the rest of the details instead of creating usable pockets. I started with my black fabric marker again before adding some pink dots to denote the stitching. If I had more time it would’ve been adorable to draw something sticking out of the pocket.
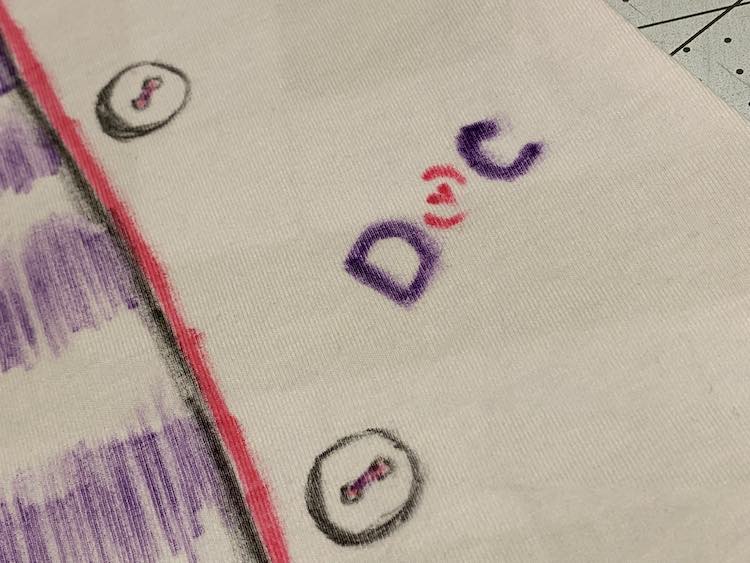
I then added buttons going up the one side of the jacket. I again drew the button with black and used pink as the thread holding it on the jacket. For simplicity sake I left the button white.
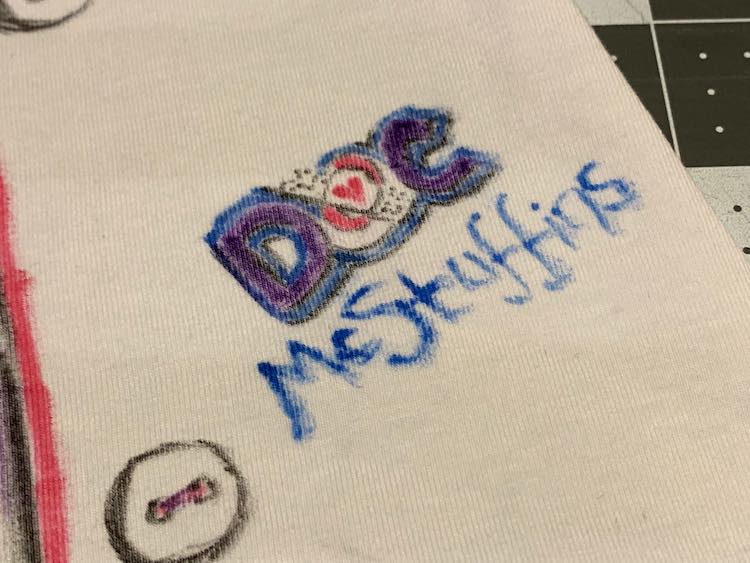
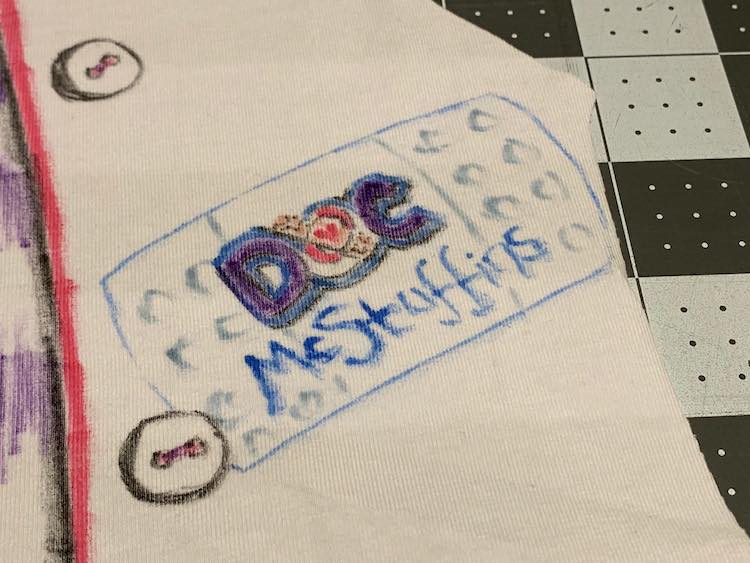
Next step was the name tag. I knew with the seam allowance the edge of the name tag was probably going to get trimmed off but decided it was simplest to draw it in and worst case I can always draw the rest of it on the back bodice piece after they’re sewn together. In this case only a bit was trimmed off so I didn’t add anything to it later on. Looking at the name tag I decided it was best to start with the Doc. I grabbed my pink marker to do the heart and circle before going onto purple to add the D and C. After this was done I grabbed the black and blue markers to add in the shadow along with the detail of the band-aid and outer letters. Since I knew where Doc was now I was able to use the blue to add McStuffins underneath. After I was happy with how it looked I grabbed a peach marker to color on the band-aid and then a blue-grey marker to create the large band-aid surrounding the name tag.
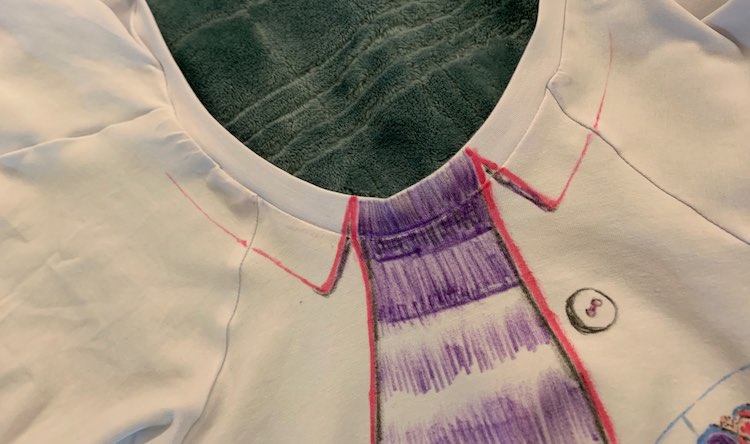
Once I was done coloring the bodice and sleeve pieces I used my iron to set the ink. I then sewed both sleeves to the front bodice and one of the sleeves to the back bodice so the neck would still be open and flat to sew the neckband on. I attached the neckband on at this point as it’s easier to sew flat rather sew it later on the round. Once the neckband was sewn I pressed it with my iron before drawing the sweater on the neckband and extending the collar over the front of the sleeves before, again, setting the ink. I decided to have the collar only running into the sleeves and not the back bodice so I didn’t have to worry about the collar matching up when I sew the back bodice to the other sleeve.
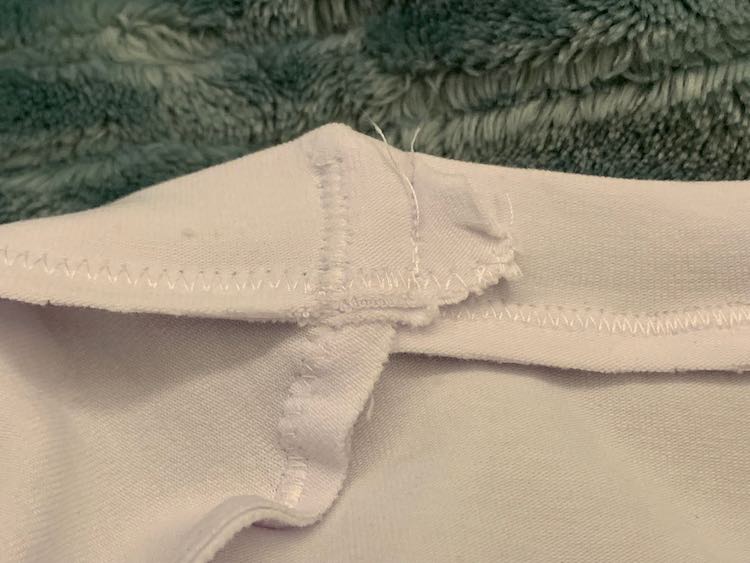
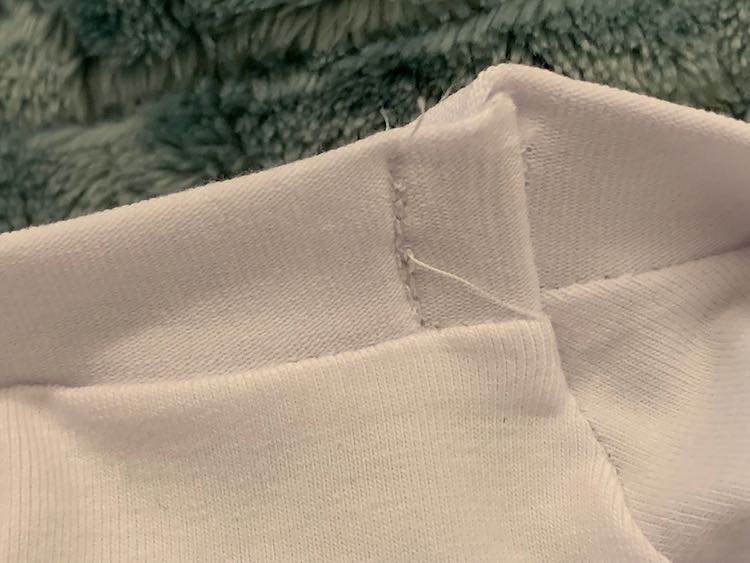
The only issue with sewing the neckband on flat is it can cause a larger seam allowance bump on the join point since you’re sewing a larger amount of fabric in one place. This makes it more likely that the seam will pop up so I find tacking the seam down whether visibly or invisibly helps.
I then finished the shirt by sewing up the side seams and sleeves. I didn’t hem the bodice or the sleeves so it ended up being a quick sew after having altered the pattern pieces, cutting, and coloring. I had debated adding a tulle skirt to better match Doc McStuffins but the remnant I had on hand was too small for a full skirt and I imagined it might be too scratchy. Looking back I wonder if I should’ve added a portion of a skirt to the front of the shirt sewn between the ‘opened jacket’. That way it would’ve used less fabric and could’ve been easy to imagine it stretching out underneath the lab coat. Instead I decided to pair the top (without the tulle) with Zoey’s pink pants to best match Doc McStuffins outfit. If I had the time it would’ve been adorable making a mini tulle skirt for the lamb stuffy I had to make it look more like a matching Lambie. I then chose coordinating doctor tools and the costume was done.
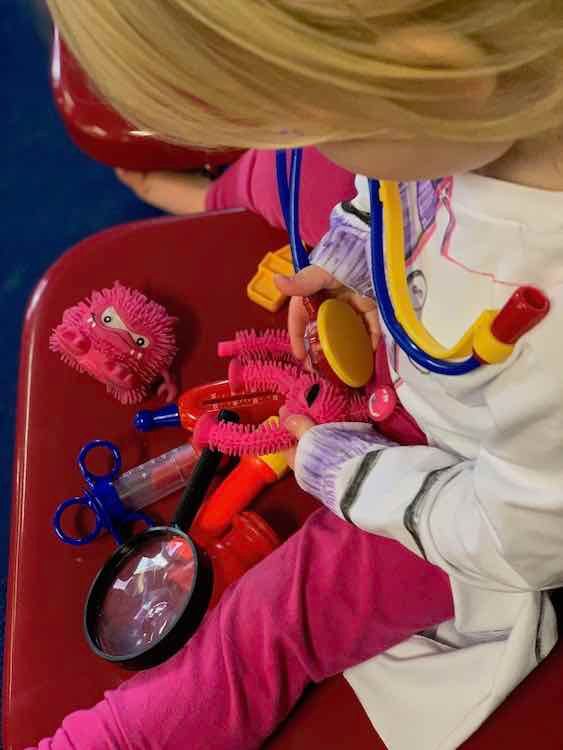
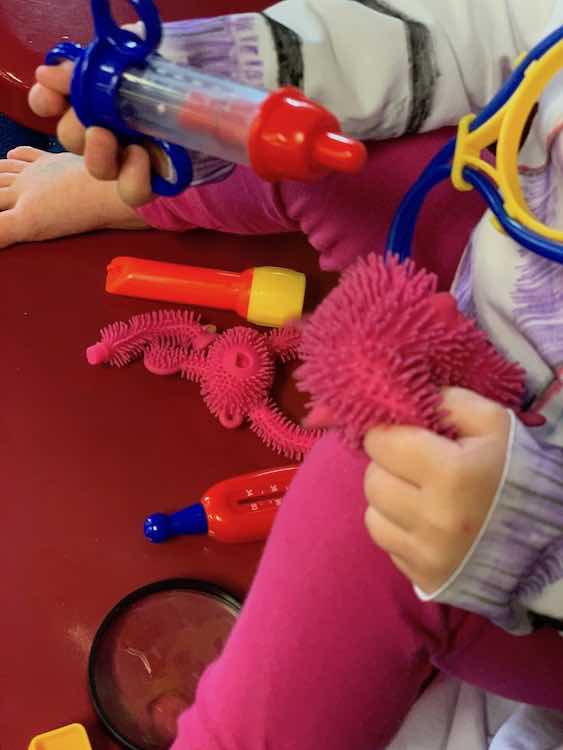
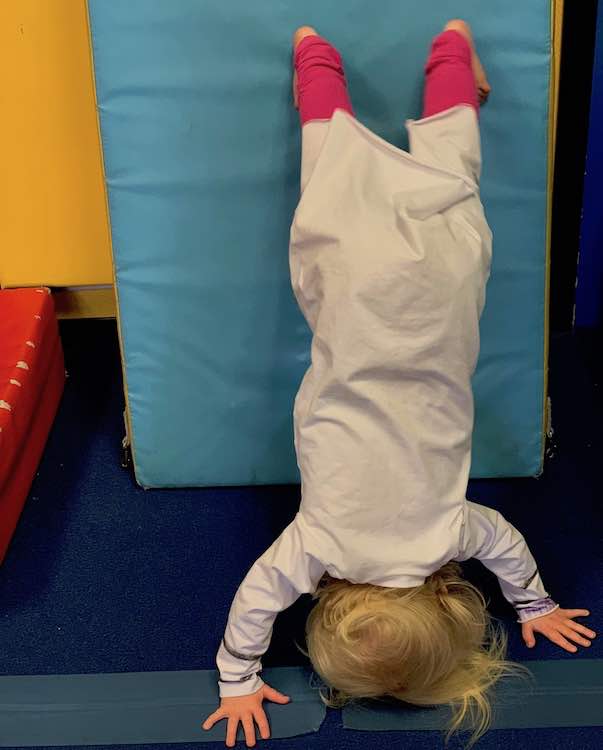
Funny story… after staying up late the night before Halloween so Zoey could have this costume she then woke up from her nap that afternoon requesting to be a firetruck. I figured she’d change her mind when I started dressing her like before but she didn’t. Zoey was happy and even asked if I made it… so the Doc McStuffins costume wasn’t even pulled out and Zoey didn’t know it existed. The day after Halloween we had gymnastics. Beforehand Ada picked out pink heart leggings and a unicorn shirt that seemed a bit costume-y and we were running a bit early so I decided to show Zoey the Doc McStuffins outfit. Since the shirt and pants are knit and comfortable I figured it should work for stretching although I wasn’t sure if it would be too long for gymnastics itself. I did make sure to bring a backup outfit in my bag in case Zoey had to change. She loved it! And bonus I brought her doctor tools so she had something to help keep her occupied before her class while we watched Ada.
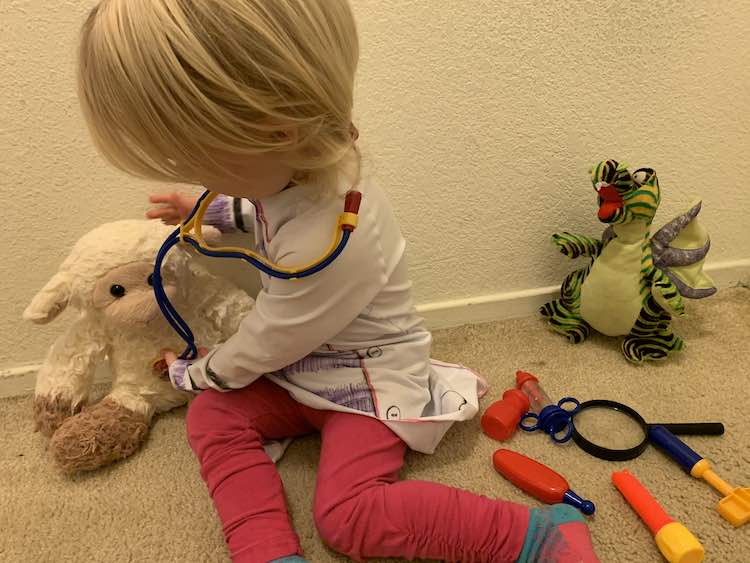

She wasn’t hampered at all during gymnastics and had a blast in her Doc McStuffins costume.
The ink faded a bit after bringing the costume home and washing it. I was afraid to wash it again but last week I bit the bullet and tried and it didn’t fade anymore so I’m assuming the ink is now set and the fading was maybe from the remnant of ink that hadn’t set.
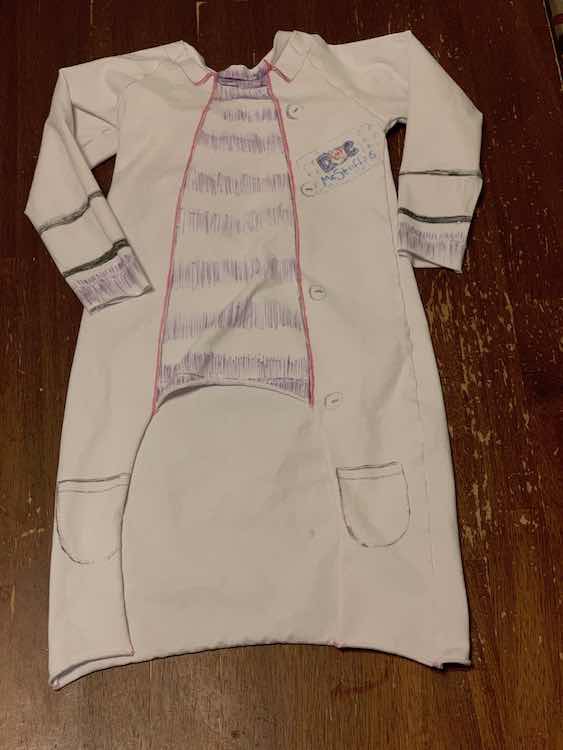
I love how this makes a comfy long shirt that looks like Doc McStuffins without needing anything else. You could keep it simple like this or add extras like a matching skirt, leggings, and shoes along with doctoring tools and stuffed animals. This can be as simple as you want or you can deck it out even more… maybe for a kids birthday party. We’ve previously washed toys in soapy water to clean them from the ‘dusty musties’ which is a simple clean but wet sensory bin you could always have your kids use while wearing this costume.
I hope this helps you make your child a perfect costume. If so I’d love to hear, or see, about it so feel free to share your costume in the comments below, on my Facebook page, or through Instagram. Hope your sew goes great and your child has a great time pretending!