
Two Person Hand and Footprint Canvas Art


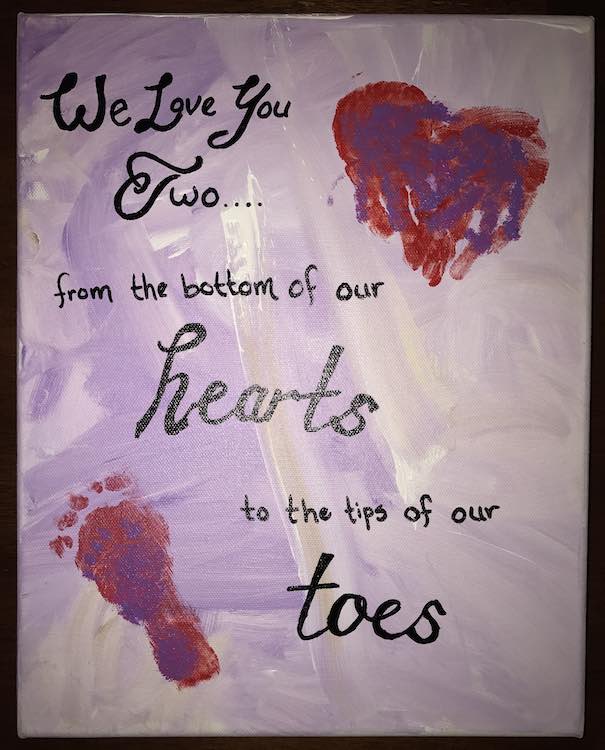
When Zoey was a baby I wanted to find some way to save both Ada and Zoey’s hand and foot prints in a way I (and them) could easily see them. After looking online I found a print on AngelsEyeCreations’ Etsy page that you could add foot and hand prints to but even though it was pluralized it still seemed directed to a single child. I loved how the pluralization allowed it to be from both parents but also wanted to make it obvious the message was to both Ada and Zoey so I could make one adorable wall art with both of their prints on it.
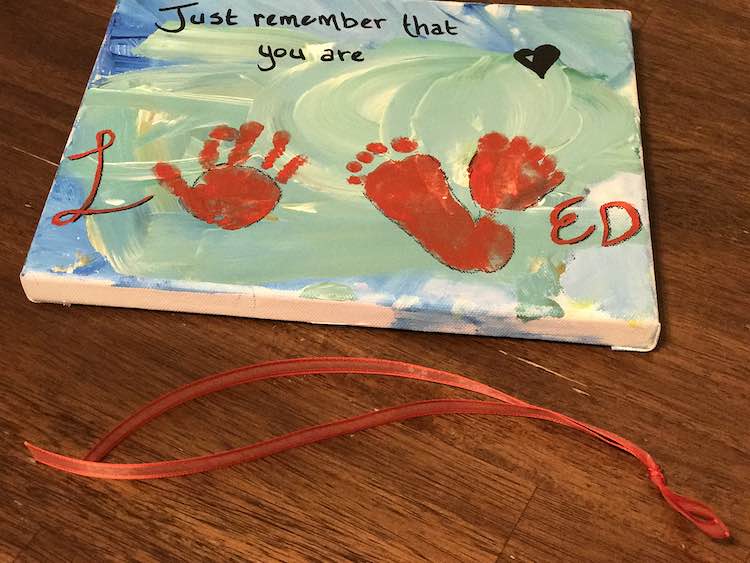
Since starting the blog I was waiting to write this post to share over Valentine’s Day but forgot about it once February came… twice. I finally realized I hadn’t shared it with you yet and decided to stop waiting for the next February and just share it now in case you have a growing little one (or more) at home and would love to make something similar. I made a different ‘love’ print at the same time as this that I’ve posted about previously if you’re interested in something similar yet different.
Materials You’ll Need
- Canvas
- Paintbrush
- Acrylic paints
- Oil-based paint pen
- Method of hanging
- Ribbon and hook: ribbon/string, hot glue gun, glue sticks, and command hook
- Stick it onto the wall: picture hanging strips, mounting putty, or Joe’s sticky stuff
- Put it into the wall: balance the picture on two push pin in either upper corner or use the ribbon idea above and a nail or pin
Creating The Painting
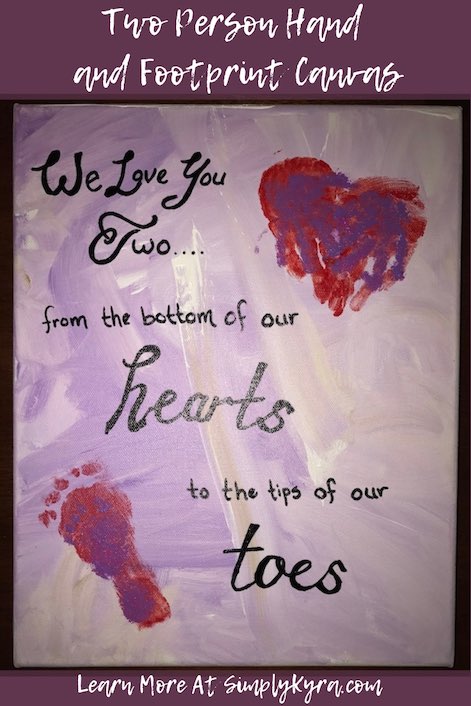
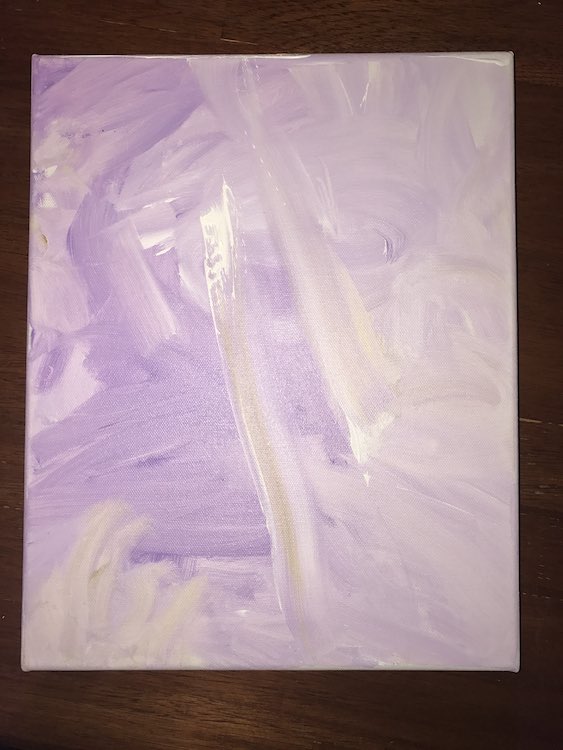
I started by choosing a canvas that seemed the right size for this project. Next I had to decide what to use for the hand and foot prints so I looked through what acrylic paints I had. I wanted to choose two colors that would stand out from each other (so the smaller print doesn’t disappear within the bigger one). Since I did this at the same time as our Valentine’s Day sign I ended up choosing red and purple for the prints. The next step was choosing what to do with the background. I knew the text was going to be done with a black oil-based paint pen so I wanted a light-ish colored background that would allow for both the text and the prints to stand out but still work together. I ended up choosing white and purple and after plating them let Ada go to town covering the canvas.
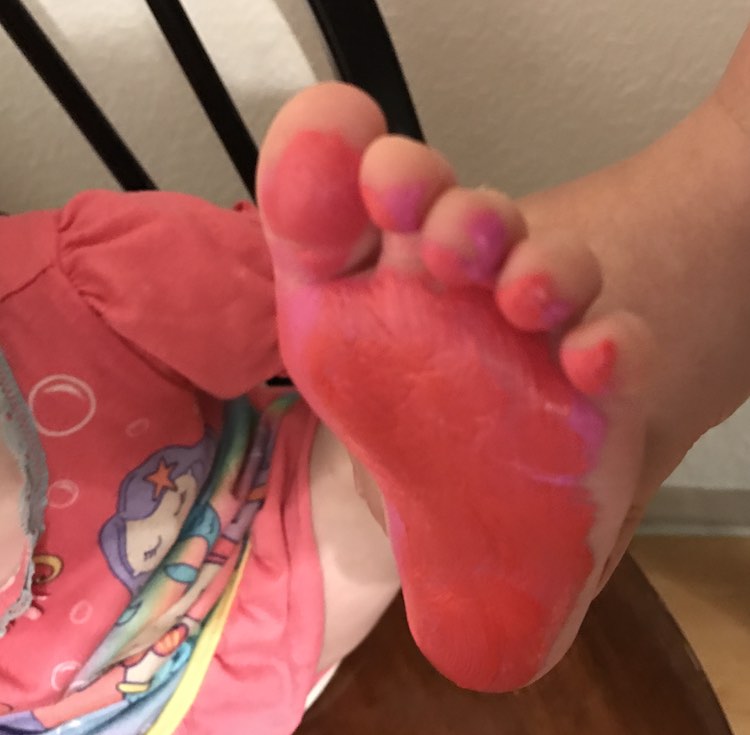
After giving the canvas time to dry it was time to stamp my kids’ hands and feet onto the canvas. Before starting I made sure I had diaper wipes, paint, and paintbrush available and within easy reach. Looking back I can’t remember how long I waited between stamping Ada’s prints (the larger background ones) and Zoey’s (smaller foreground). just be sure you know where each print should go before you paint the foot or hand so you’re ready to go.
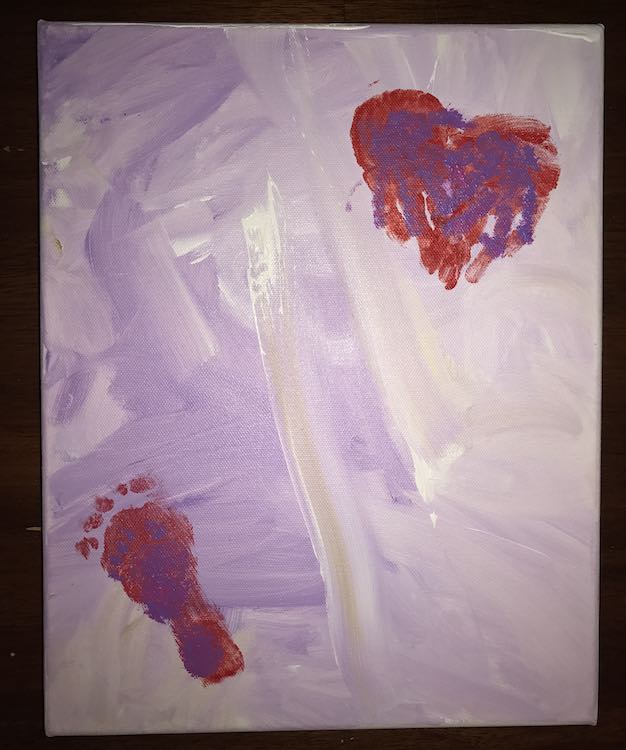
You can now choose to let this dry so the paint doesn’t smear before going ahead. Now I took my oil-based paint pen and drew out the quote making sure to include “two” to make it obvious it’s for both girls from us (their dad and mom).
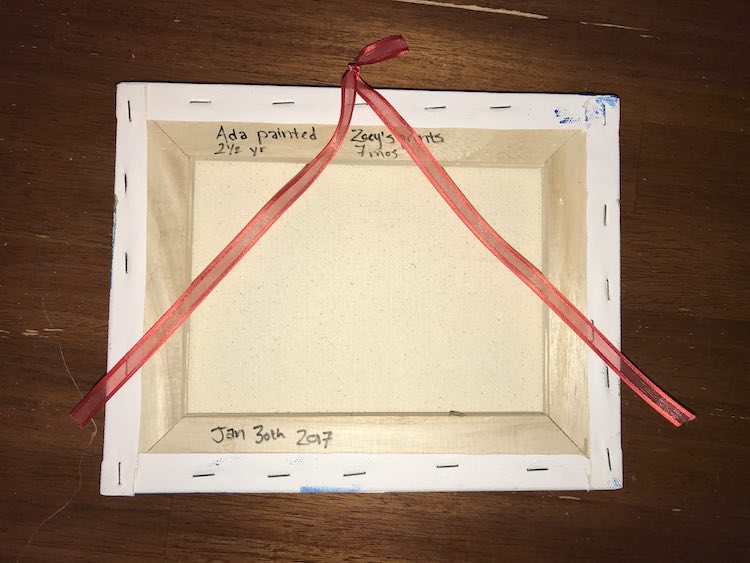
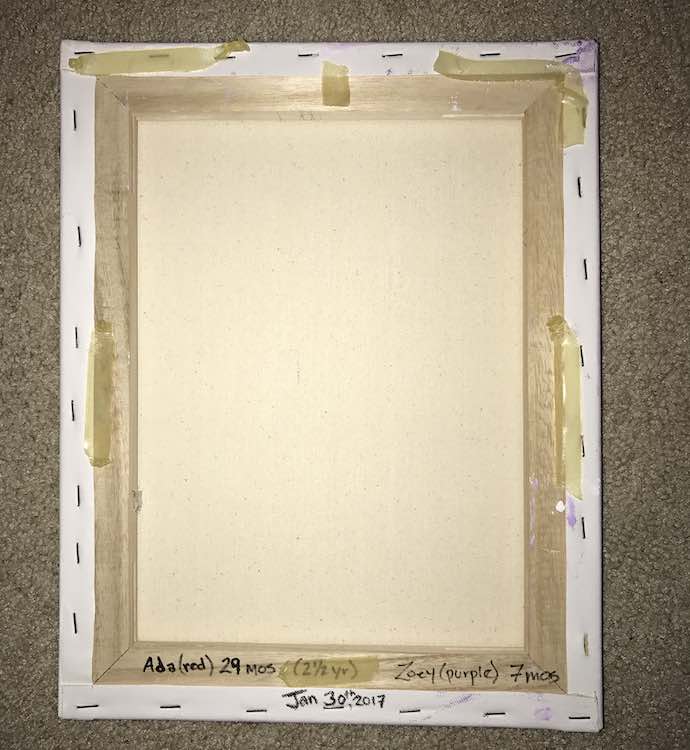
Once dry you can flip the painting over and add the date and/or the age of your children to help you remember.
Hanging Up The Painting
Since posting the Valentine’s Day painting I’ve since found some of my in progress photos that show how they were hung up so I figured I’d share two options with you.
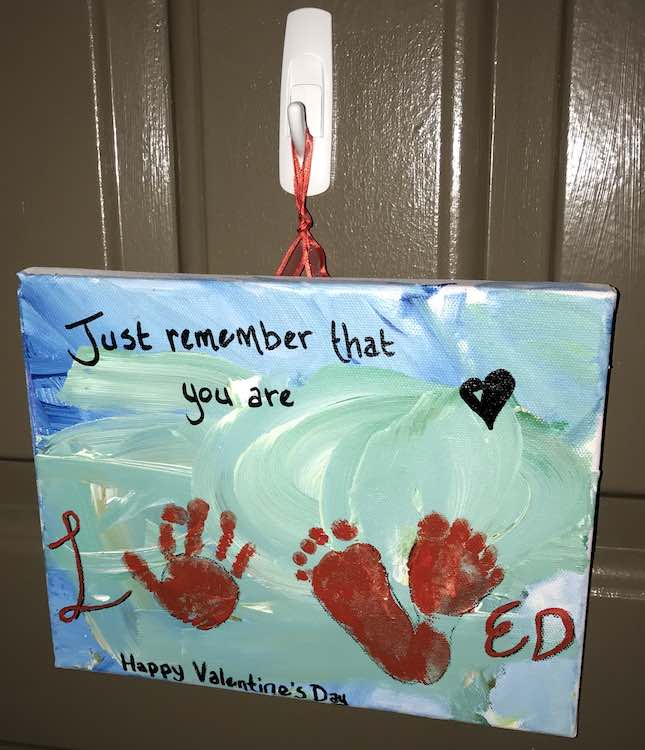
Ribbon Loop To Put On Hook
I cut out a length of ribbon (could also be string or yarn) that matches the painting. This needs to be long enough go from the top center to the bottom (or bottom corner) of the painting twice and have room for a loop on top. If you cut it too long you can have some extra length hang from the bottom or trim to hide the ribbon afterwards. Fold the ribbon in half and tie a knot at the folded end making sure there’s enough loop to hang the painting on your hook. I used a command hook on my front door to hang this on once done.
I then centered the loop and knot above the painting and made sure the ribbon reached to the bottom corners. Once I was happy with the placement I glue gunned the ribbon in place at the top and then glued either end in place at the bottom corners. If your ribbon is too long and you want it hidden you can line it up, trim the excess, and then glue it into place. Previous paintings I’ve let the ribbon extend past the bottom of the painting and then cut decorative triangles out of the ends.

Once dry you can easily hang it up wherever you want. I used a command hook but you could also use a small nail or pushpin depending where you’re hanging it
Using Removable Putty
I’ve also used several other removable methods in the past too including Command™ picture hanging strips, Scotch mounting putty, or in this case Joe’s sticky stuff I had on hand. These all have their pros and cons. I find Joe’s sticky stuff is harder to pull off but stays up until you want it down. I find it easier to remove things if you twist the object off so it’s simpler if you have a smaller items with a single twisting point. I’ve used many mounting putty over the years and some have worked better than others. I’ve had smaller lighter paintings randomly choose a day to fall off my walls and you have to get new putty to hang it up again. Lately I’ve taken many items off my wall and the putty has gone rock hard and needed to be chiseled off my shelves (used it on the outside of my Ikea bookshelves and not the wall) although it’s come off in a single chunk. I find command hooks easiest since you can pull on the tab to easily get it off the wall (though it hurts if you aren’t using two hands when the hook suddenly chooses to release and hit you) and have found picture hanging strips that work with the same idea attaching hooks and eyes to the wall and painting to hang easier.

I love how simple this idea was and even though I didn’t chose the print as it was on Etsy I’m so glad I was able to continue that idea and customize it for us. I’d love to here from you and see your version. Feel free to share in the comments below, on my Facebook page, or through Instagram. I hope you have a great day!