
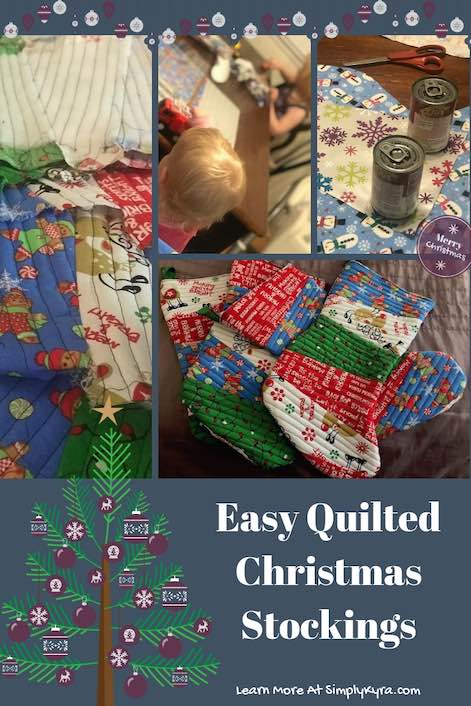
Easy Quilted Christmas Stockings


Last year after Christmas I decided to create some heirloom-quality Christmas stockings for my family. The previous years we had been using stockings I bought from the Dollar Tree and hastily wrote our names on and had been deliberating making long-term replacements for awhile but hadn’t quite made time to look into it. After joining the 52 week sewing challenge I noticed the second week had a challenge to sew using your last purchased fabric… well the last fabric bought was discounted Christmas fat quarters from Walmart so I decided this was a perfect time to make a more permanent solution and finally tackled the Christmas stockings.
Materials Used
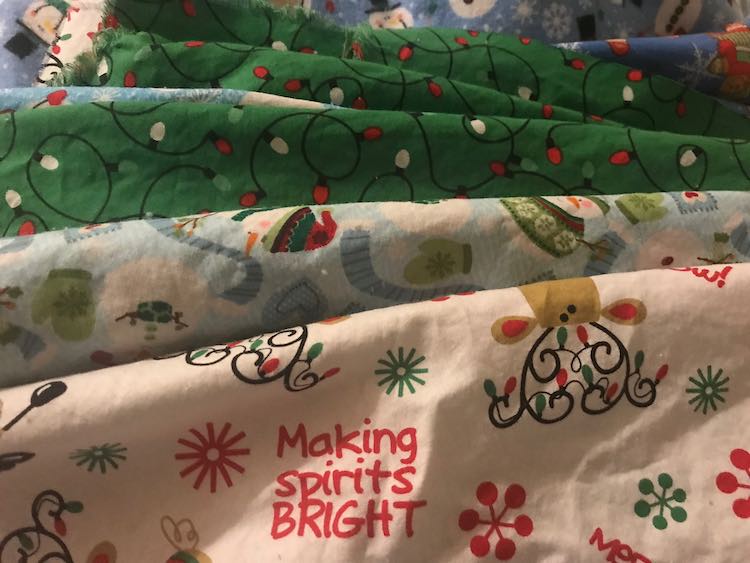
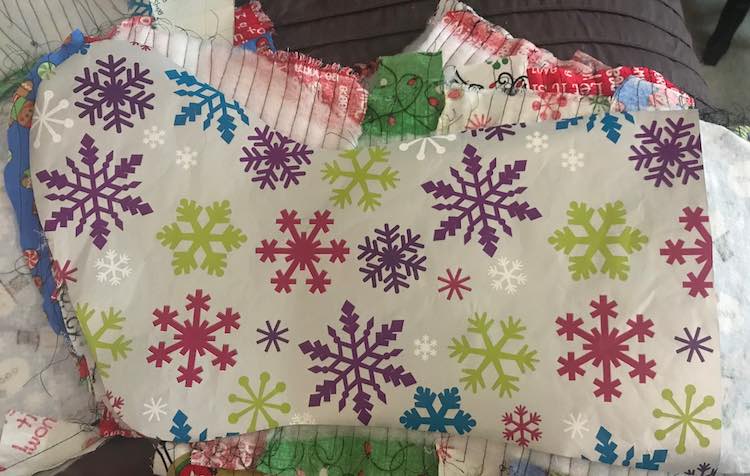
- The outside of the stocking is great for stash busting if you have leftover woven fabric. I used Christmas themed fat quarters from Walmart.
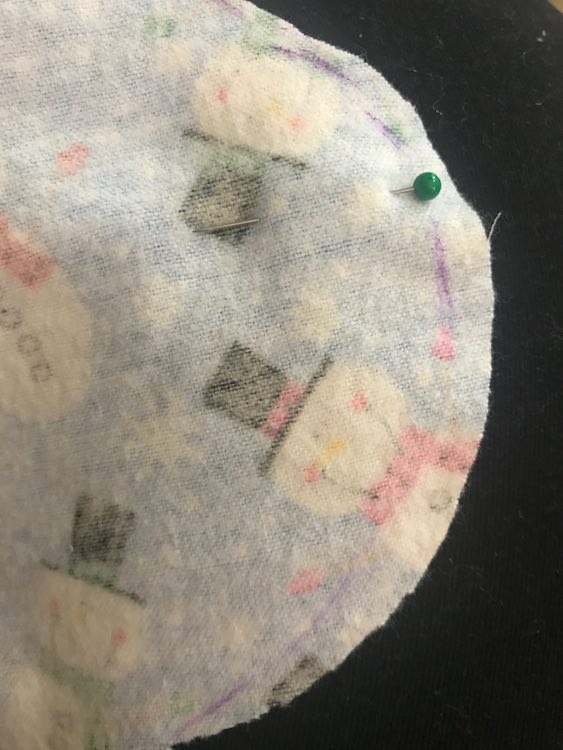
- For the stocking liners I went to JOANNs Fabrics and bought fuzzy cotton snowmen fabric.
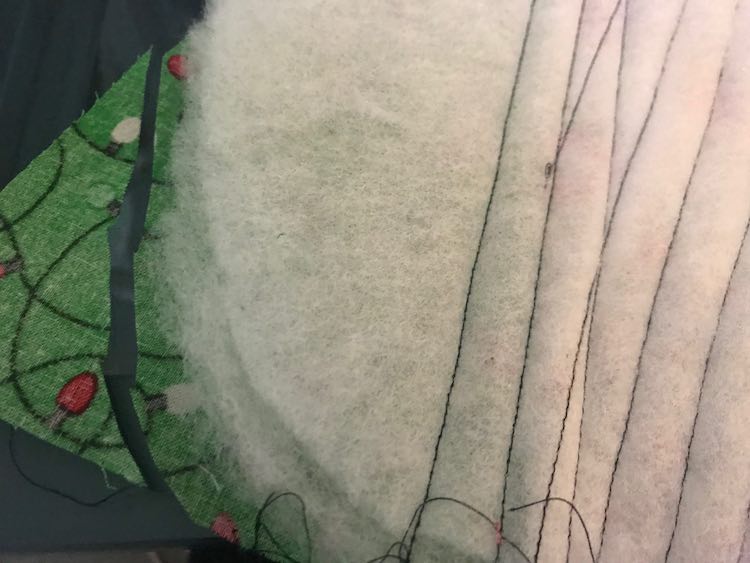
- Batting to add the awesome rippled effect on the quilted part of the stocking. I used two layers of Soft n Crafty Twin Size Loft 2 (72″ by 90″ / 1.83 m by 2.29m) cut to size.
- Sewing machine and complementary thread
- Cutting mat, rotary cutter, scissors, weights (cans), wrapping paper (me-made pattern), and an old stocking (for pattern tracing)
Inspiration
I used two main websites as my sources to make my stockings. My main outer design came from the falling flakes quilt as you go stocking tutorial by Rachael Gander on Imagine Gnats. She cut 5 by 15 inch polygons (5 inches wide on one end that narrows to 2 inches on the other end) that she then quilted onto rectangular batting. This was then cut to stocking size. I loved the simple way to create an amazing quilted puffy texture. I also followed two Christmas stocking tutorials on Diary of a Quilter by Amy Smart; specifically her Christmas Stocking Tutorial and Easy Stocking Tutorial. The first post also has a quilt as you go technique but she uses skinnier rectangular strips of fabric for hers and cuts the batting to size before sewing them on. I ended up cutting my batting before quilting like she did and also followed these two sites when assembling my stockings.
Pattern and Cutting the Pieces
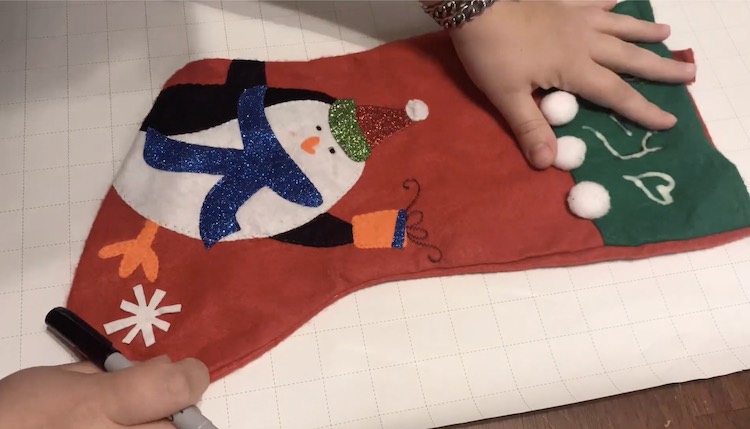
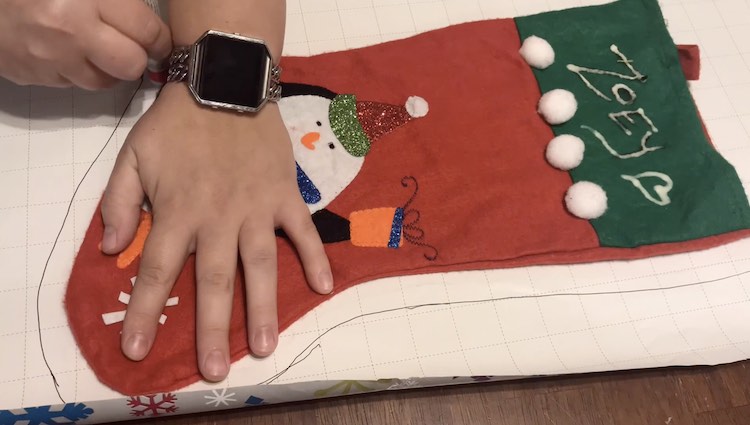
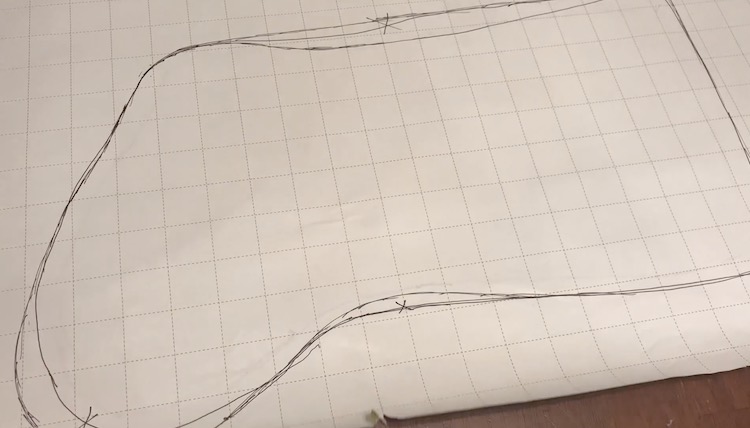
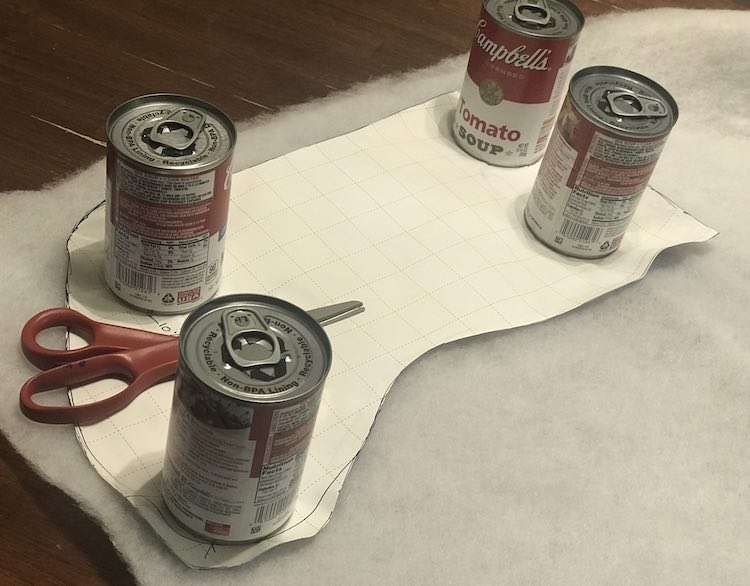
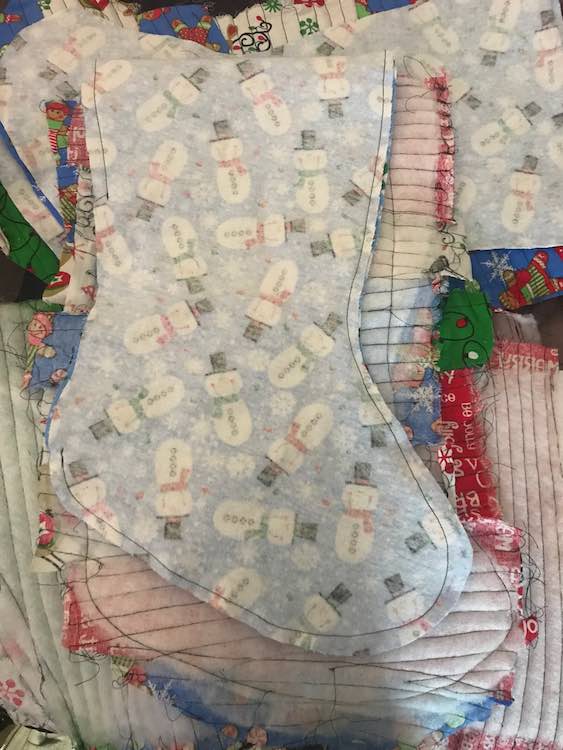
To start with I wanted a stocking pattern and figured it would be easiest to create my own by tracing around one of the stockings I already owned. Since I wanted the pattern to be larger than the Dollar Tree stocking and would also need to include a seam allowance I added space while tracing by using two pens at once. The one pen remained capped and was used to create more space between the stocking and the drawing pen. After I had the vague outline I further shaped my pattern before then cutting it out.
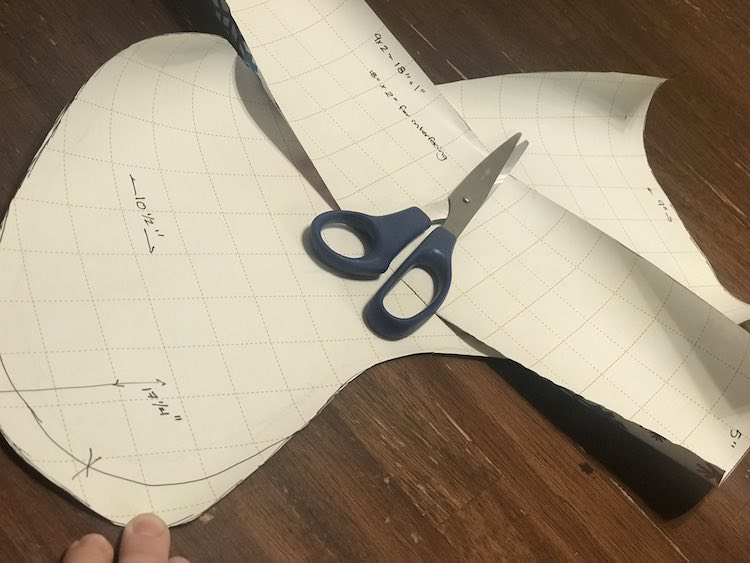
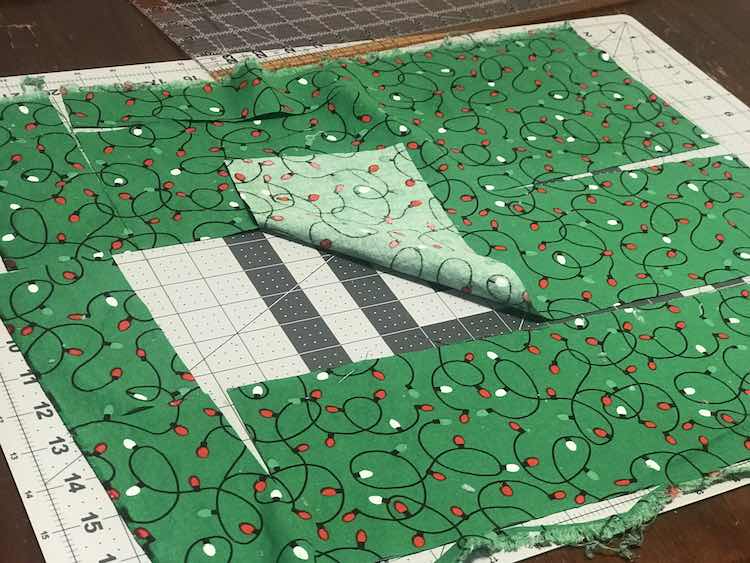
I immediately used this pattern to cut out sixteen mirrored layers of batting and eight mirrored layers from my lining fabric. I needed four layers of batting per stocking (two for each side) as I wanted to double the stuffing for adding puffiness in the quilting. If you’re making one stocking you only need two layers (mirrored) of the lining fabric.

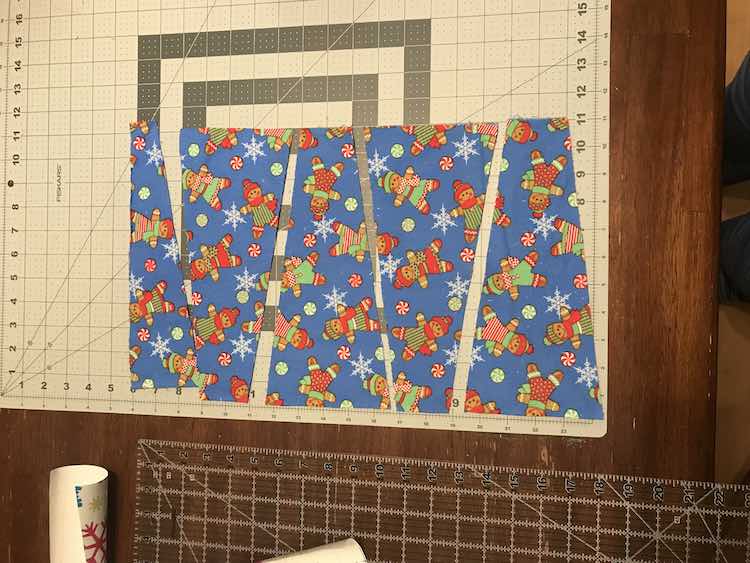
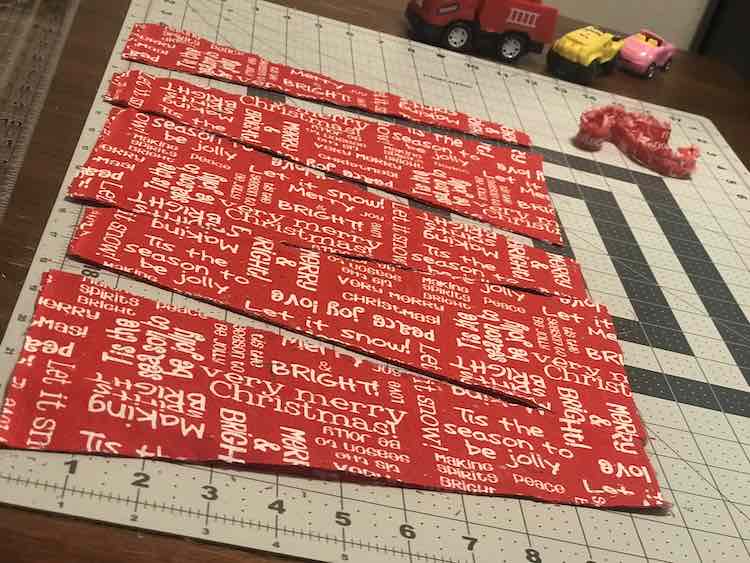
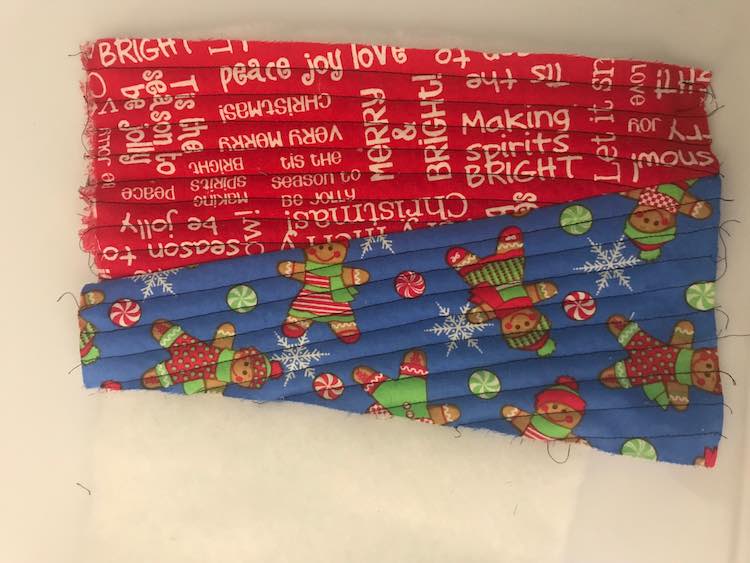
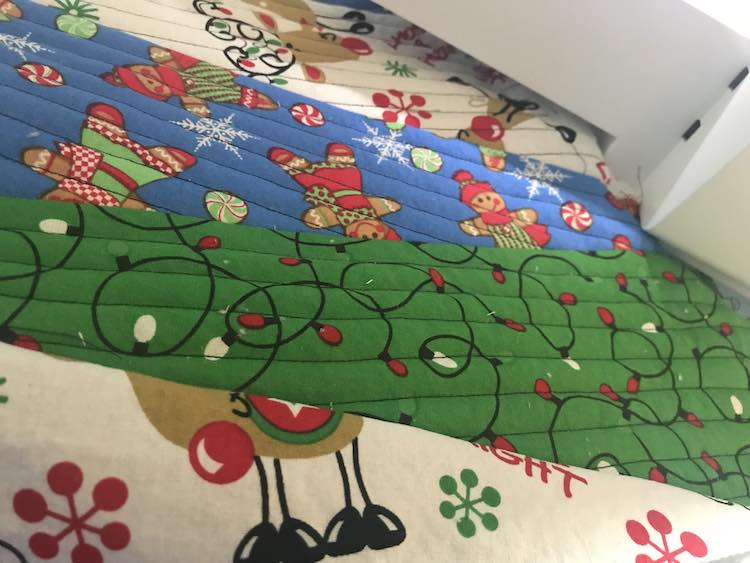
Next up is cutting the fabric for the outside of the stockings. I decided to follow the quilting as you go design by Imagine Gnats who cut her strips five by fifteen inches long (with 5 inches on one end which tapers to 2 inches at the other end). I had planned to make my polygons (triangle-esque) the same length but after measuring the width of my cut batting and realizing that half a fat quarter was about eleven inches wide I decided it was safe and simpler to use shorter polygons. At this stage in the process I started designing a pattern piece to follow before later deciding it was easier to just use my quilting ruler.
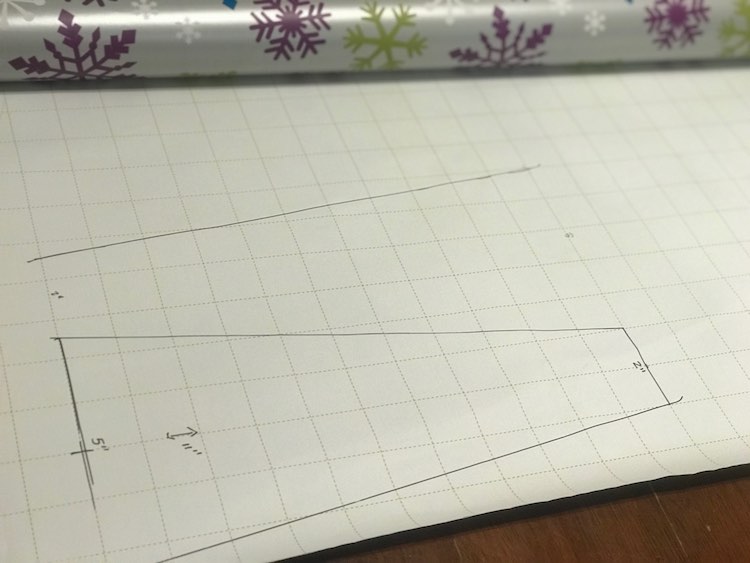
The easiest way to do this was to fold the fat quarters in half along it’s length and cut along the fold. This made two strips of fabric, from each fat quarter, that were about eleven inches wide. I then took these strips and stacked them so I could easily cut out out twice the amount of ‘triangles’ with my rotary cutter as a single layer. Your measurements may end up slightly different as my fabric unraveled at the edges and got tangled when I prewashed them. Earlier on I had determined that I needed a one and a half inch difference between either end of the polygon (since one end was 5 inches and the other 2) and since the centers of each measurement were centered I just had to draw (or cut) a line between the two end points. I realized if I keep ‘flipping’ each polygon I could cut them out in a single row. To do this I set one end of my quilting ruler on the five inch wide side and then dragged the other end of the ruler one and a half inches into the fabric. After using my rotary cutter to cut along the ruler I then moved the last side of the ruler (from the skinny two inch end) over five inches before moving the other end over two inches (previously was at five inches) and then cutting again. I kept repeating this zig zag shuffling along the fabric while cutting my polygons until I didn’t have enough room to cut the last one. At this point I saved the resulting smaller angled polygon since I may need the smaller scrap for the end or perhaps beginning of each stocking. This was simpler because the height of the polygons were already pre-cut from when I cut the fat quarter in half so I didn’t have to cut the top and bottom of each polygon.
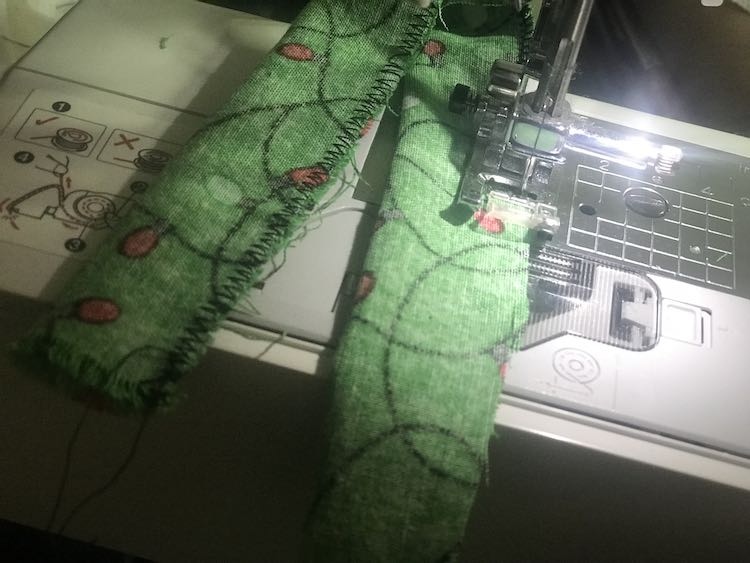
I also took one of the Christmas light fat quarters to cut a long strip to turn into my stocking hangers. I also cut four long rectangles that I had hoped to turn into stocking cuffs but later left off.
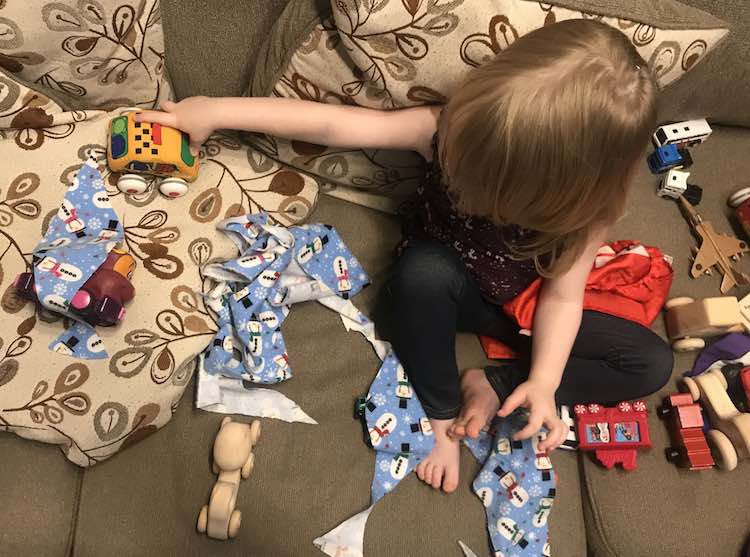
While I was working on cutting my pieces the kids, mostly, played.
Creating the Quilted Sections
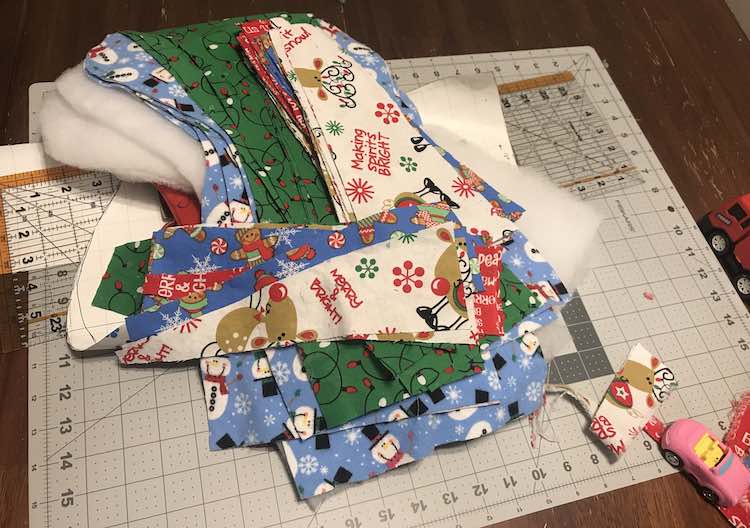
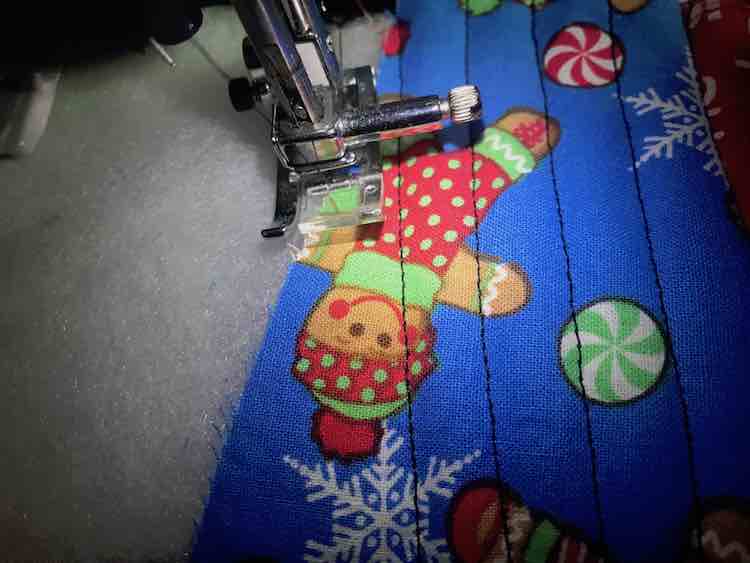
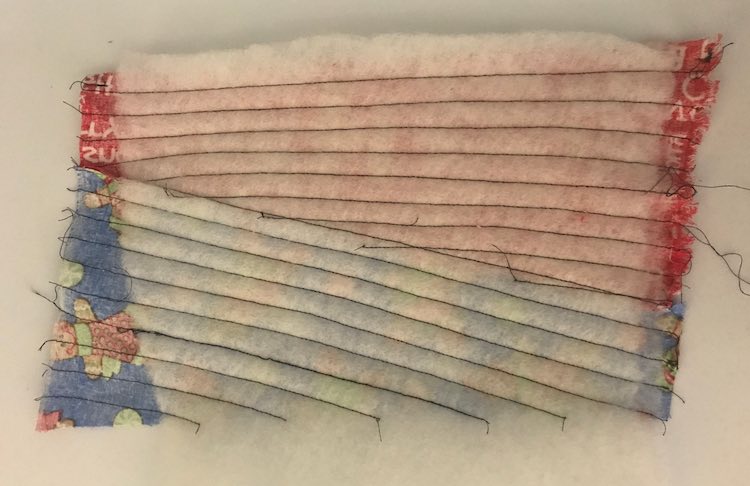
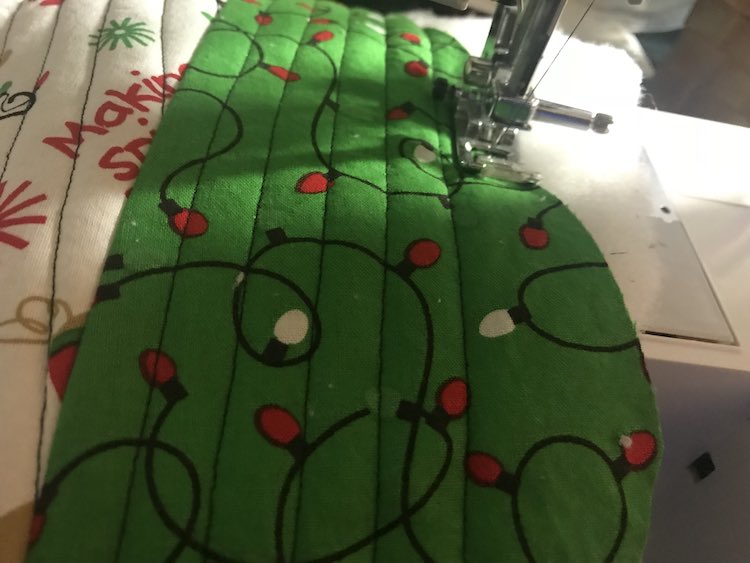
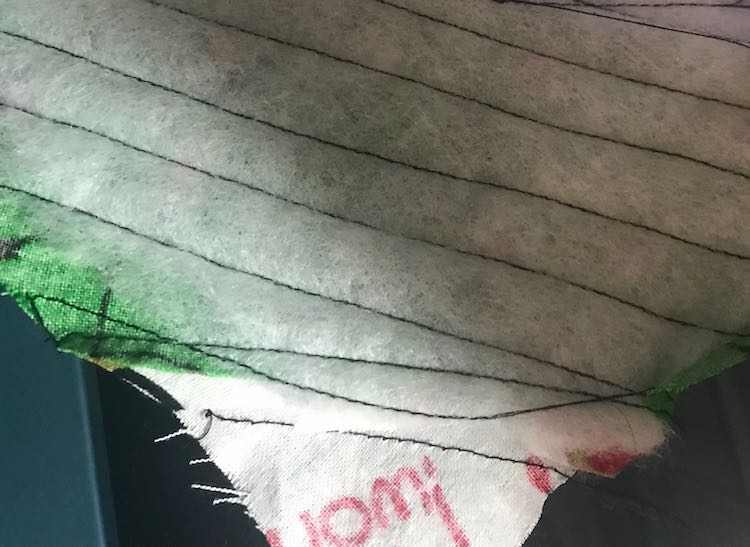
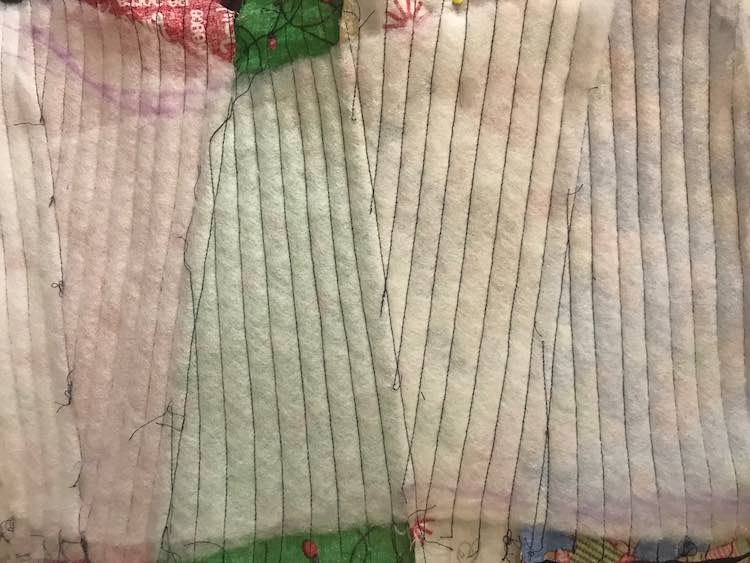
Now you finally get to sew! You can choose to pin your fabric down or hold it in place. I found it easiest to pin your first polygon and hold the other pieces in place as you come to them. For each quilted portion I started by taking two layers of batting and placed a polygon on it right sides up. You can choose to start at the top of your stocking or in the middle. I started at the top, but the Diary of a Quilter Christmas Stocking Tutorial started in the middle and worked her way both up and down. With this first strip you sew a straight stitch line across your fabric using the raw edge of the fabric as your guide. Then you sew another line using the first line of stitches as your guide and repeat using the previous line of stitches again and again until you run out of space. I found this easiest with my sewing needle in the center position (for my Brother HC1850 stitch 00 does a straight stitch on the left side of my machine and 01 does the same stitch in the center) so I could keep rotating my batting 180 degrees, moving it over a bit, and sewing back the way I came using the presser foot as my guide against the last row of stitches (since the left and right sides of my foot are the same width with the needle in the center).

Once your first polygon is on you can choose the next color you want to add and place it over the first with the right sides together. You want to be sure that the raw edges are lined up and the small end is over the large end and vice versa. If you aren’t sure you can hold onto the raw edge and fold the top of the new piece over to confirm it’s in the right place. Then sew along the edge as if the batting wasn’t there and you were sewing two pieces of fabric together normally.
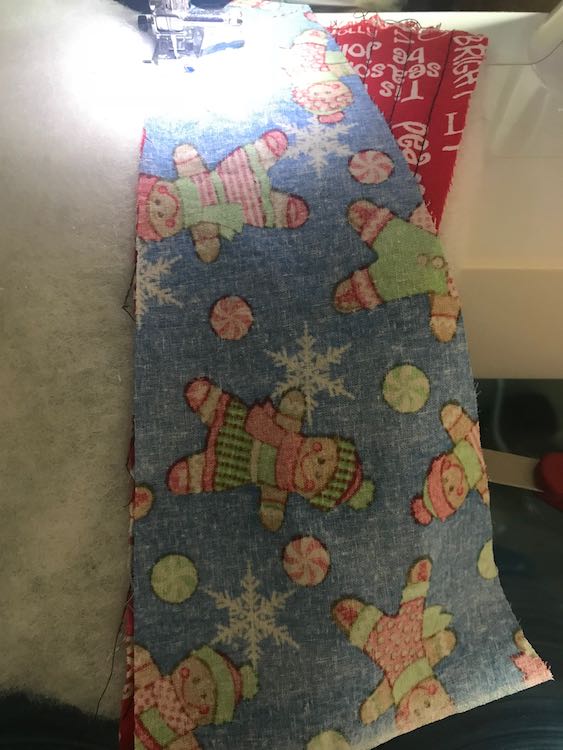
Once sewn flip the second fabric over so both are facing upright and if needed press into place. I was partially lazy and not 100% sure the batting wouldn’t melt so I skipped pressing and liked how the seam ended up looking. Now you continue sewing your equidistant lines again just like the first only instead of the raw edge at the beginning you’re now using the seam for your guide. Since I didn’t press the seam before sewing I held the new fabric (in this case the blue gingerbread people) taunt while I sewed the first line of stitches. Again keep sewing as your stitch lines get shorter and shorter until you run out of fabric.
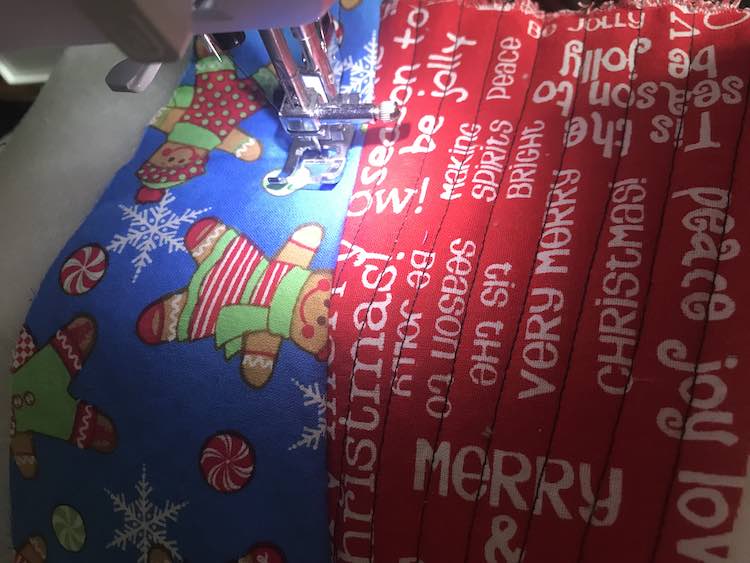
And then continue these steps until you run out of room making sure to cover up the batting with each added polygon of fabric.
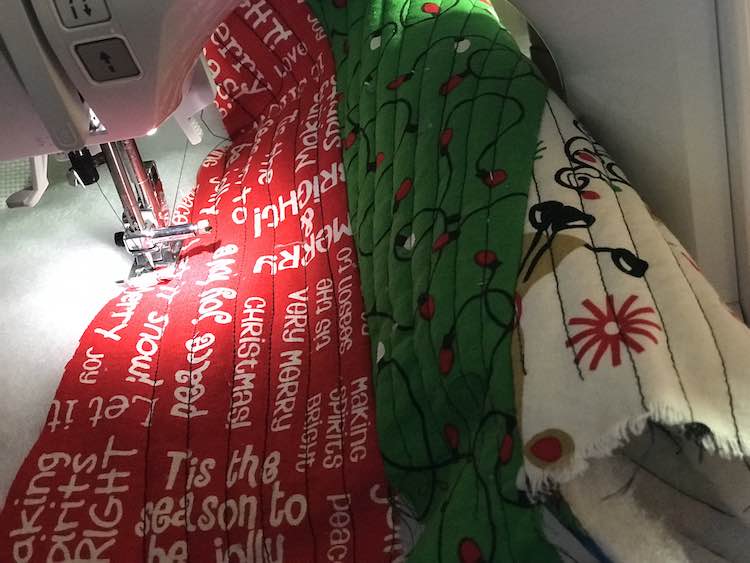
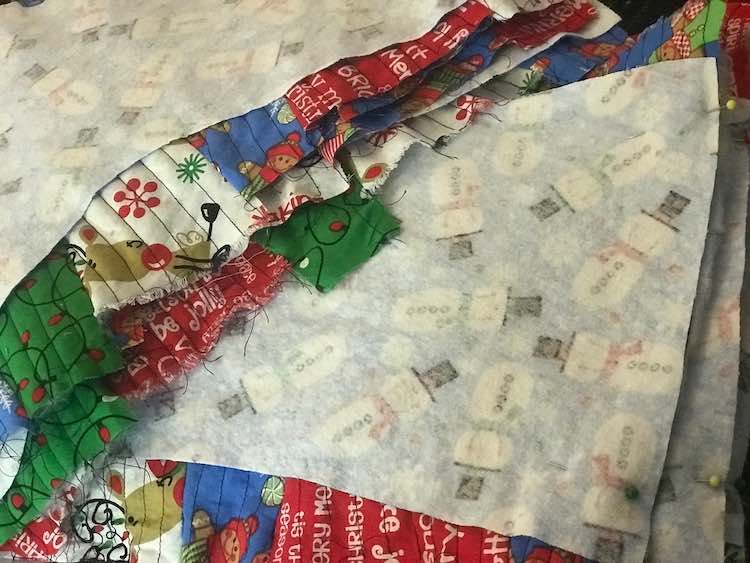
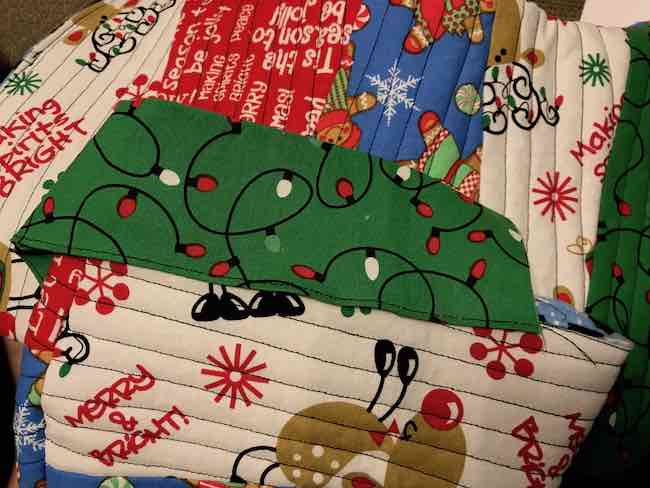
When the stocking started becoming the foot part my last piece of fabric didn’t fully cover the batting so after sewing the gingerbread people on I positioned the next piece of fabric (green Christmas lights) a bit further in so after it was sewn on and folded open it would cover the batting.
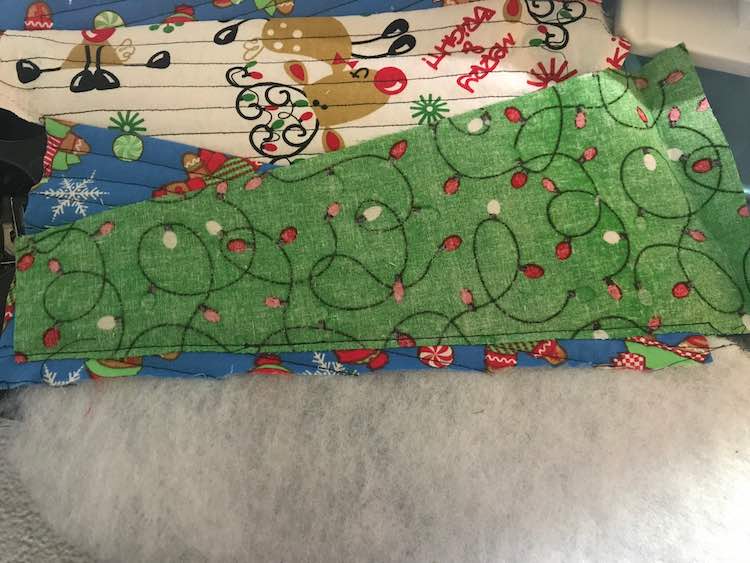
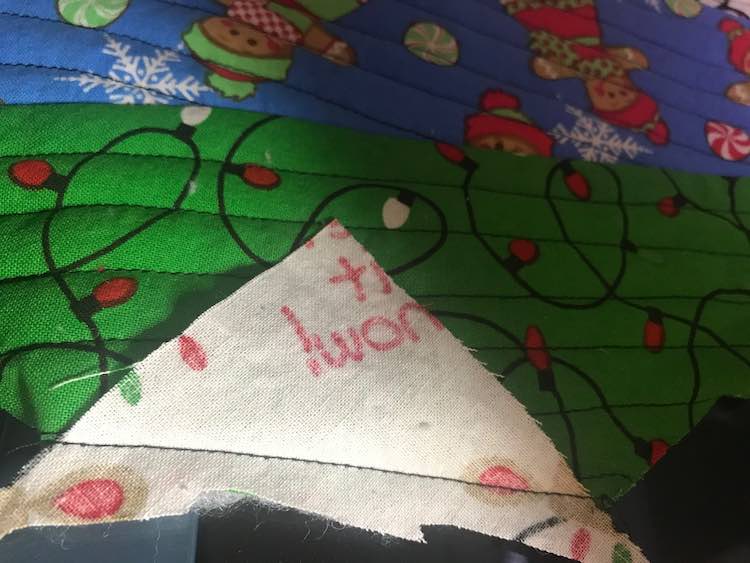
At the bottom of the stocking when there isn’t much batting left you can cut a scrap to size. In this case I covered the space by sewing the scrap on, unfolding, trimming it to size, and then sewed over the fabric and batting like before.
If you’d rather you can trim the fabric after sewing the stocking together later on. In this case after sewing the scrap on you fold it open and sew your lines until there’s no batting left to sew over. This may make your quilted section messier, but for me I had the batting move around a bit while I was sewing so there was already some mismatched trimming I had to do later on anyway.
And then repeat this as many times as needed. If you’re making stockings where only one side is quilted then each stocking faces the same way. If you’re making double sided stockings then you need to make twice as many and make sure half are facing the one way and the other half are facing the other way.

Assembling the Stockings
And now all you have to do is assemble the stocking. For assembly I followed the Diary of a Quilter tutorial. To start with I pinned each lining piece right sides together with an outer quilted piece before sewing along the top. After sewing along the top you can press the seam open or to one side if you prefer so it’s not as bulky later… although last year I skipped that step.
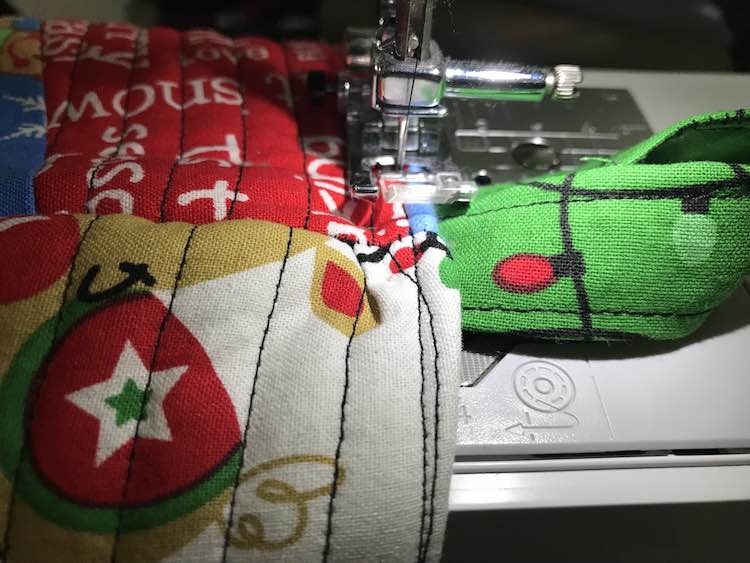
If I were to do this again I could see including the hanging strip at this point if it doesn’t have to be centered at the back or front of the stocking. If I included it here I’d place it between the lining and outer shell with the loop on the inside since right sides are facing. If you want to sew the hanger loop on last I included how I did this closer to the bottom of the post.
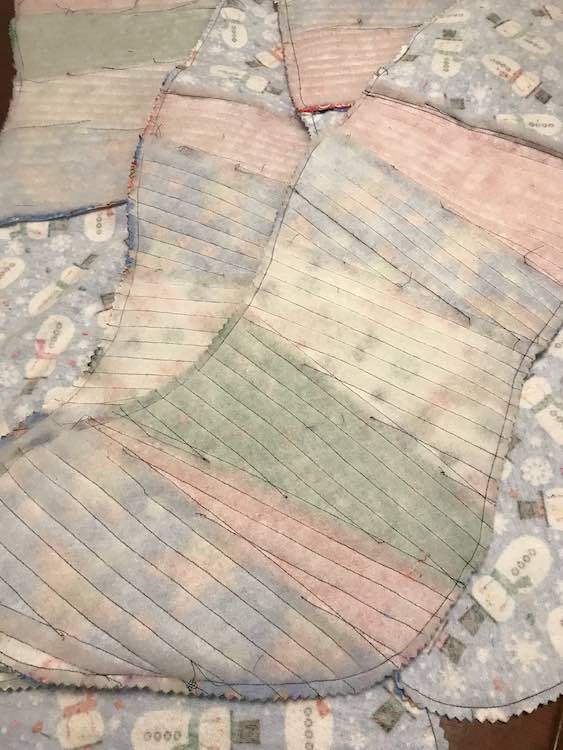
Next I took the front and back of the stocking and pinned them together right sides together. Since the lining is already sewn to the outer stocking layer at the top this creates a long doubled stocking where one end consists of the two front and back outer layers pinned together while the other end is the liner. When I quilted the outer layer the batting moved around a bit so the stocking ended up looking a bit different than the original shape so I took the pattern piece I made earlier and used a disappearing ink pen to trace it out again so I’d know where to sew. If there were any drastic changes (for example the stocking juts in a bit too much) then you can trace out the new shape onto the lining so you don’t end up with a too big bunched up liner inside the stocking later.
Once your stocking is pinned or clipped together you can sew along the edge leaving a space in the liner fabric to turn it right side out later.
I then trimmed the seam allowance with my pinking shears and you can now notch any curves to reduce the bulk at this point too.
Turn your stockings right side out.
Before tucking the liner inside the stocking I closed the hole with my sewing machine. I wasn’t too worried about the stitching standing out since this will be inside the stocking but I could see using a better matching thread or hand stitching the hole closed if preferred.
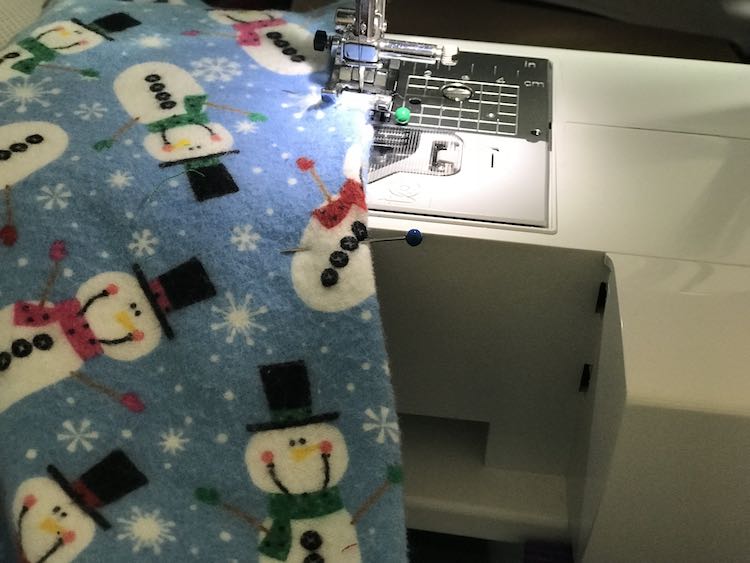
Now tuck the liner inside the stocking and either press (or pin) the edge so it’s crisp and doesn’t move before topstitching along the top.


At this point I debated adding the cuffs I’d cut out before but decided to leave it off since I liked the stockings better without. If you follow the Diary of a Quilter Easy Stocking Tutorial she creates her cuff by folding over the top of her stocking. I knew my stocking would be too sturdy to easily fold over like her so I had created a separate cuff, but wasn’t sure how to attach it nicely or if I liked it. If I were to do this again and wanted to try a cuff I could see extending the liner height and adding plain non-batting fabric at the top of the quilted stocking the same height as my cuff so I could fold it over to show off the liner.
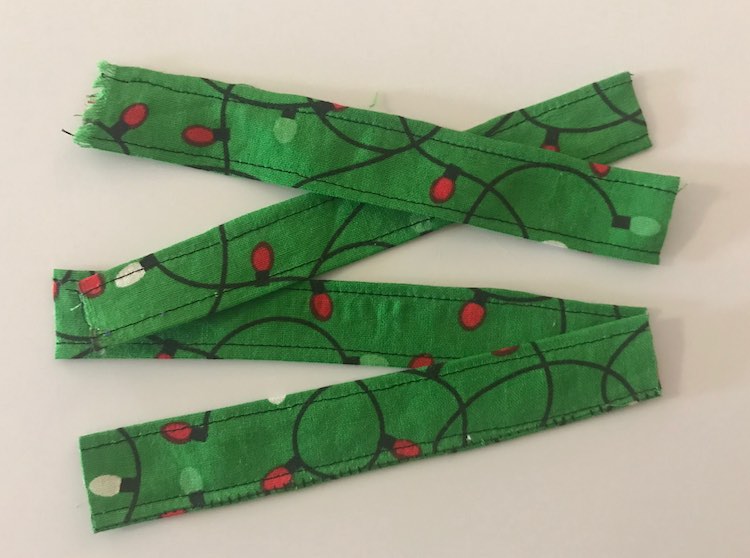
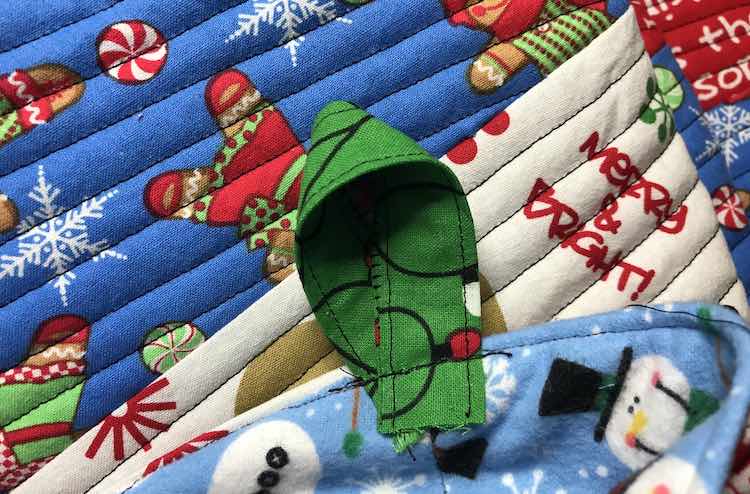
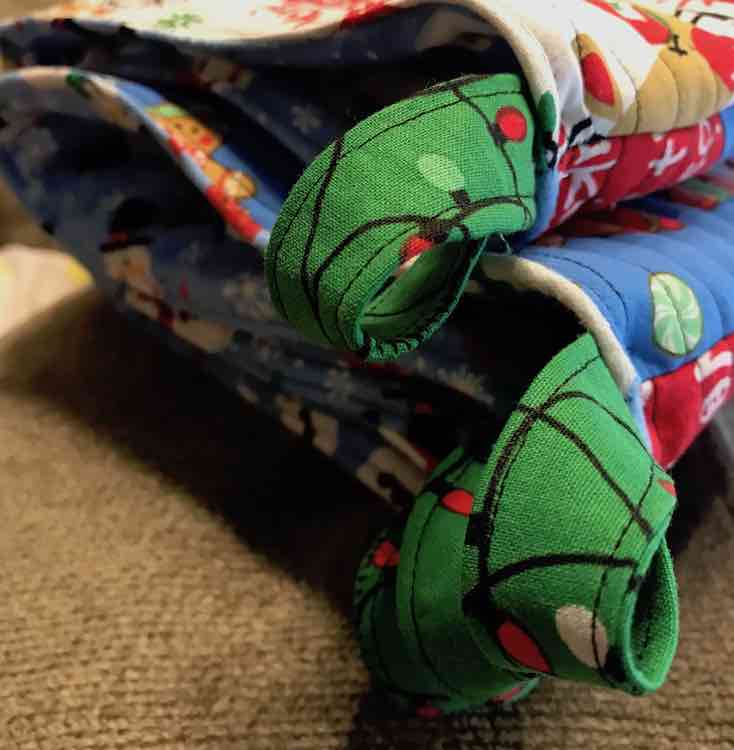
I was originally going to figure out a way to attach my hanging loop to the cuff but instead decided to sew it to the stocking. To create the hanging strip I took a long length of fabric and folded it in half right sides together before sewing it into a tube. I then turned my tube the right way out, pressed it flat, and topstitched down either side. Afterwards I cut it into four equal pieces; one for each of my four stockings.
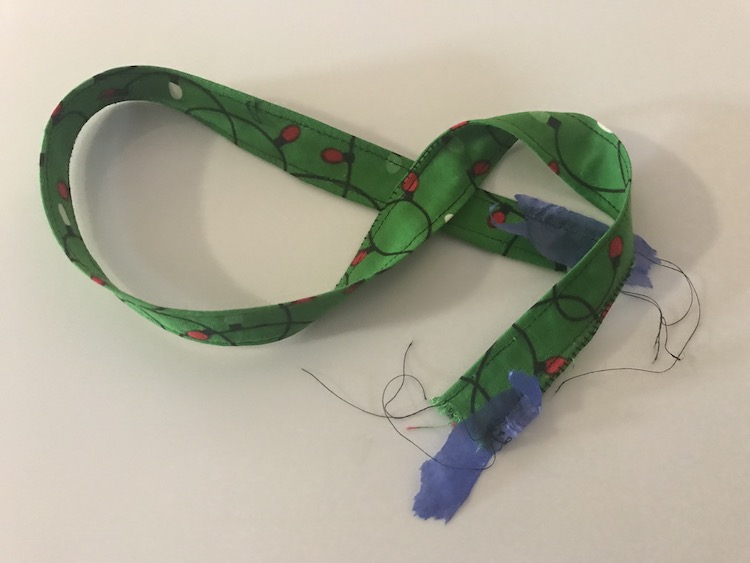
To attach it to the stocking I folded it in a half with a slight twist and pinned it to the back of the stocking. To attach it I then stitched in the ditch to without any obvious outward appearance. Next time I could see finishing the edge of the loop and maybe attaching it in more than one place to be more secure.
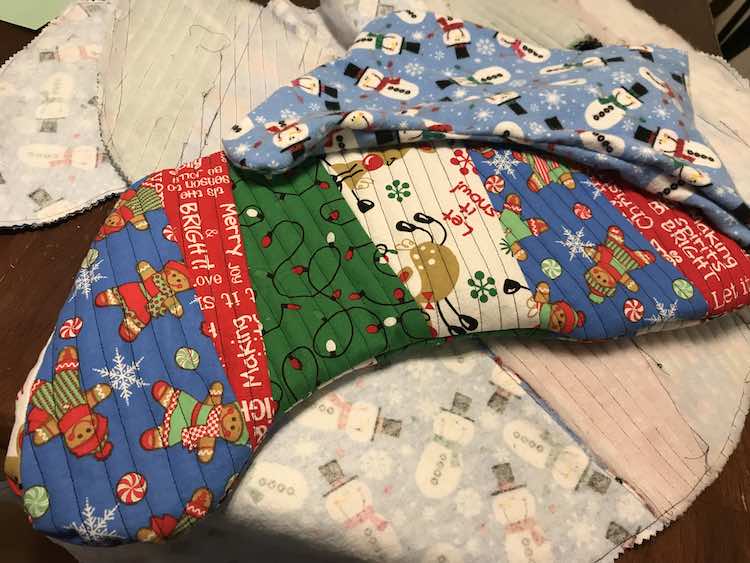
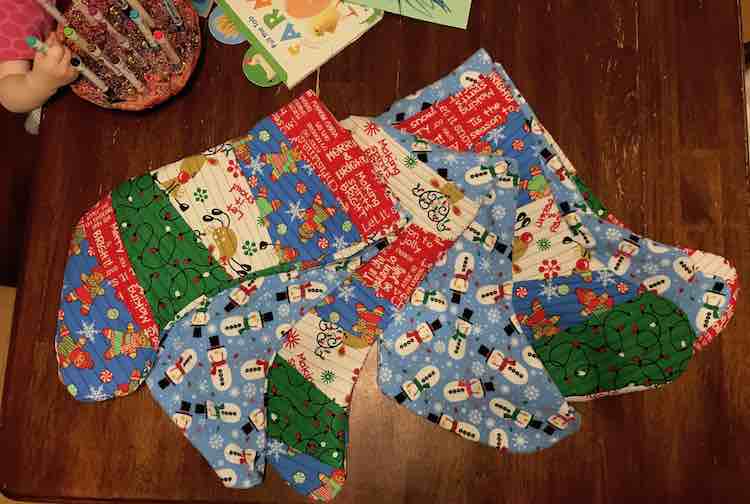
And then my stockings were done!
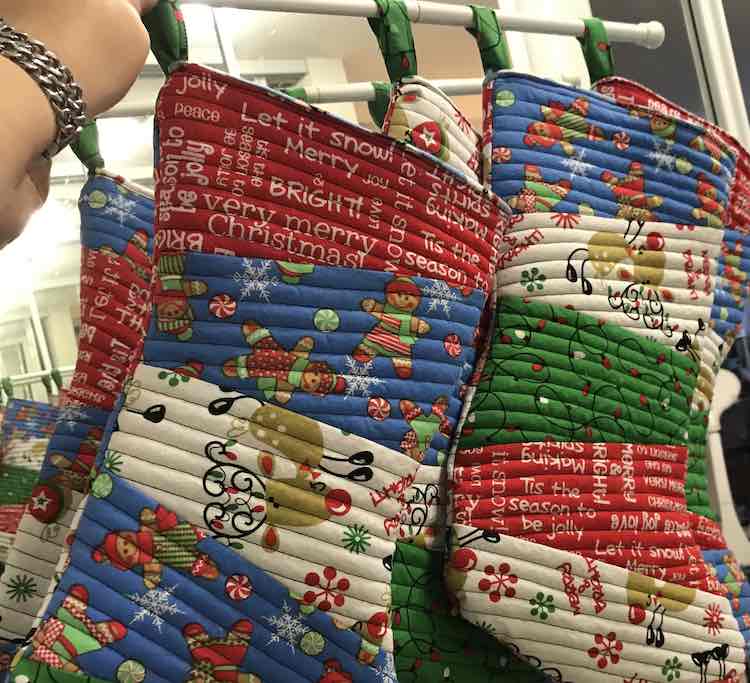
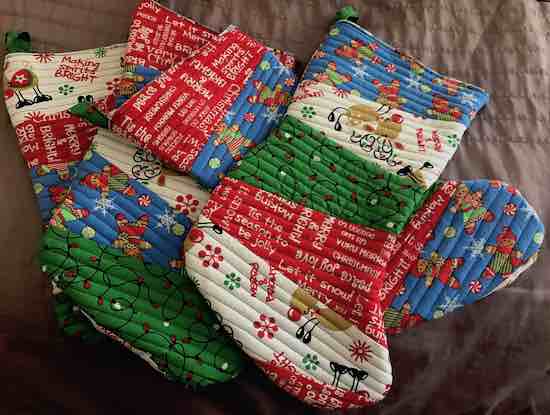
I loved how my stockings turned out. All they need now are name tags. I ended up procrastinating mine for almost a year but quickly made them before we put our tree up this year.
I’d love to hear from you especially if this gave you a great idea on how to make your own Christmas stockings. Did you make your stockings similar or did change you change them drastically?
Feel free to share in the comments below, on my Facebook page, or through Instagram. I hope you have a great day!