
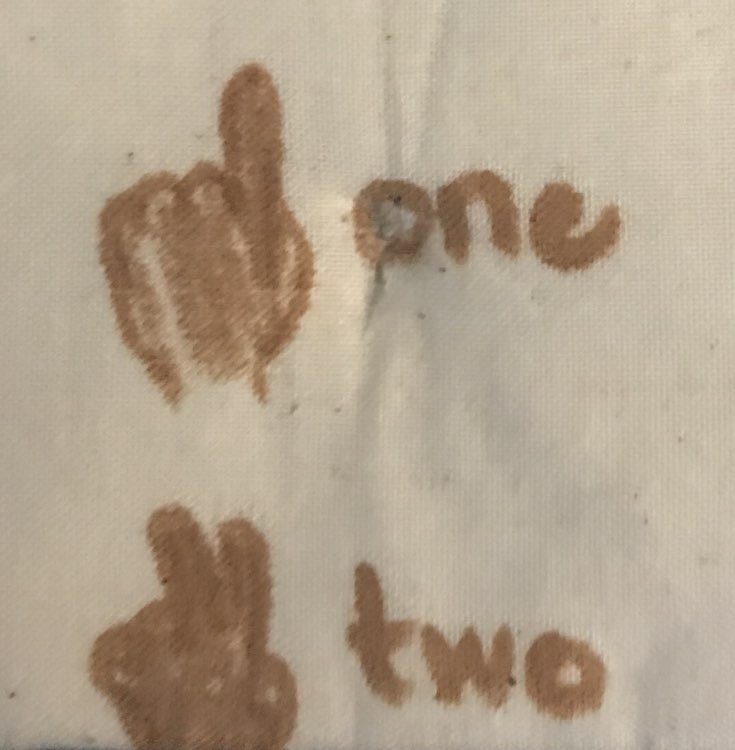
Quiet Book Page - Counting Using your Hands from One to Five

When Ada was starting to learn what putting my thumb up meant she started copying it back to me, but instead of putting her thumb up she would use her pointer finger. It was absolutely adorable. If I was a bit further away from her or it was quiet around us I would catch her eye and give her a thumb’s up (saying ‘how are you doing?’) and she would smile and point upward. I never corrected her and she eventually learned to use her thumb instead of extending her pointer finger… which was vaguely disappointing.
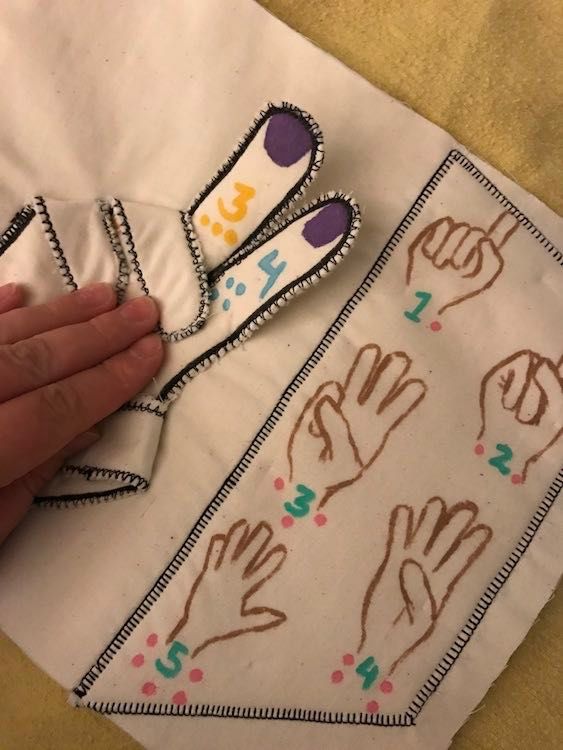
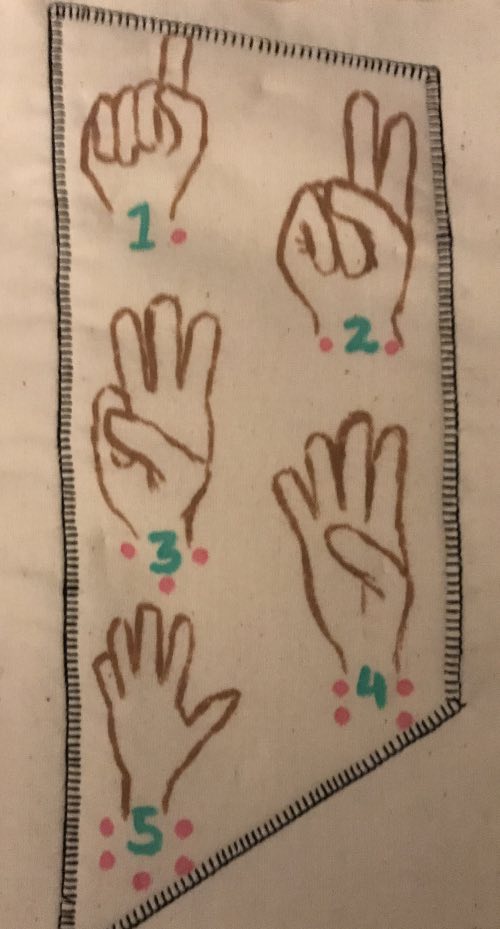
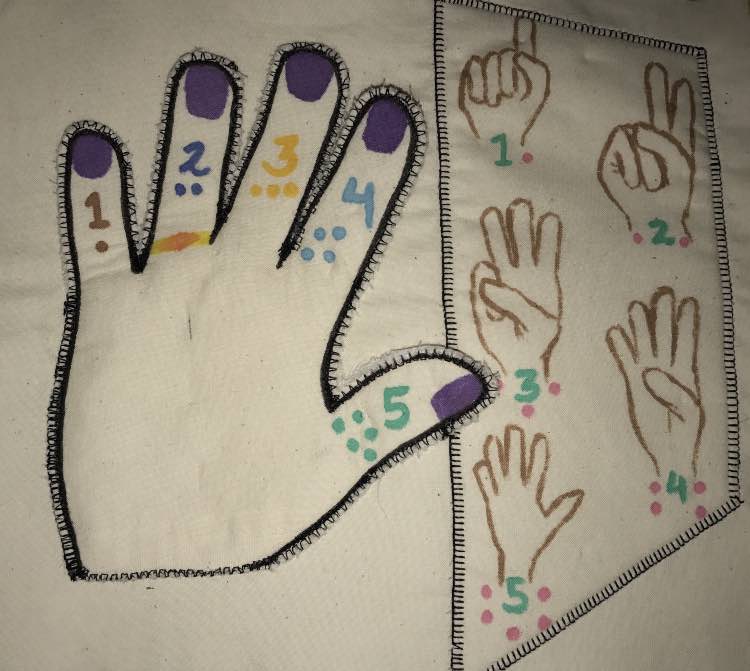
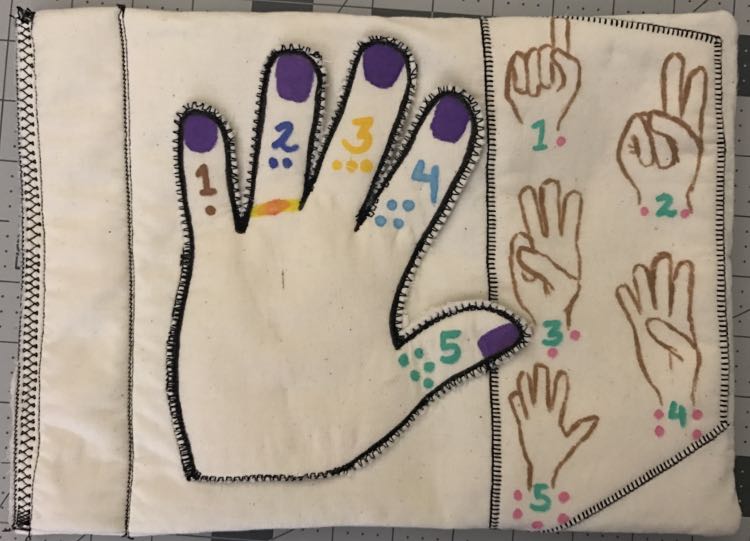
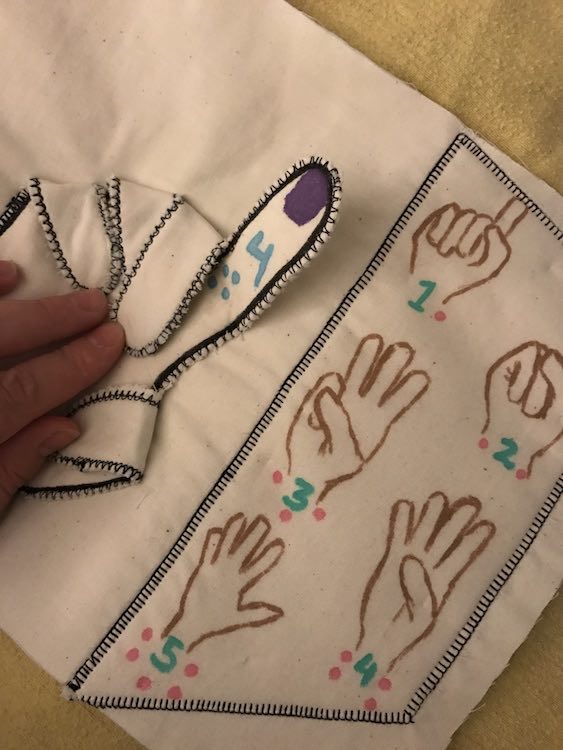
Anyway between remembering her adorable thumbs up and wanting to include another counting page I decided to create a page with hands to help her learn how to use her fingers to count. When I first came up with the idea I was going to include two hands so she could count from one to ten, but as the idea grew it changed. I ended up deciding to make the hand separate and blanket stitch it onto the page which lead me to leaving the bottom of the hand open so Ada could put her own hand into it like a glove. From there I decided to use my own hand to trace it out and if I did that then two hands wouldn’t fit onto the page. Once I decided to go down to one hand I realized there would be extra room on the page so I decided to include a diagram so she’d see what all the numbers looked like when you use your hand to show them. Of course this led to the fingers of the hand being free to bend away from the page. So I went from a simple count the fingers on the page to an interactive hand that shows how to make your own numbers from one to five.
Materials Used
- 108″ Unbleached Muslin Natural Fabric by the Yard
- Pellon Fusible Thermolam Plus White Fabric by the Yard
- Fabric Markers
- Fusible Interfacing – if you want to add height/cushioning underneath the hand and diagram
- (optional) Heat’n Bond Lite Iron-on Adhesive – used to attach a muslin backing to the hand
- Iron– depending on the instructions on the markers
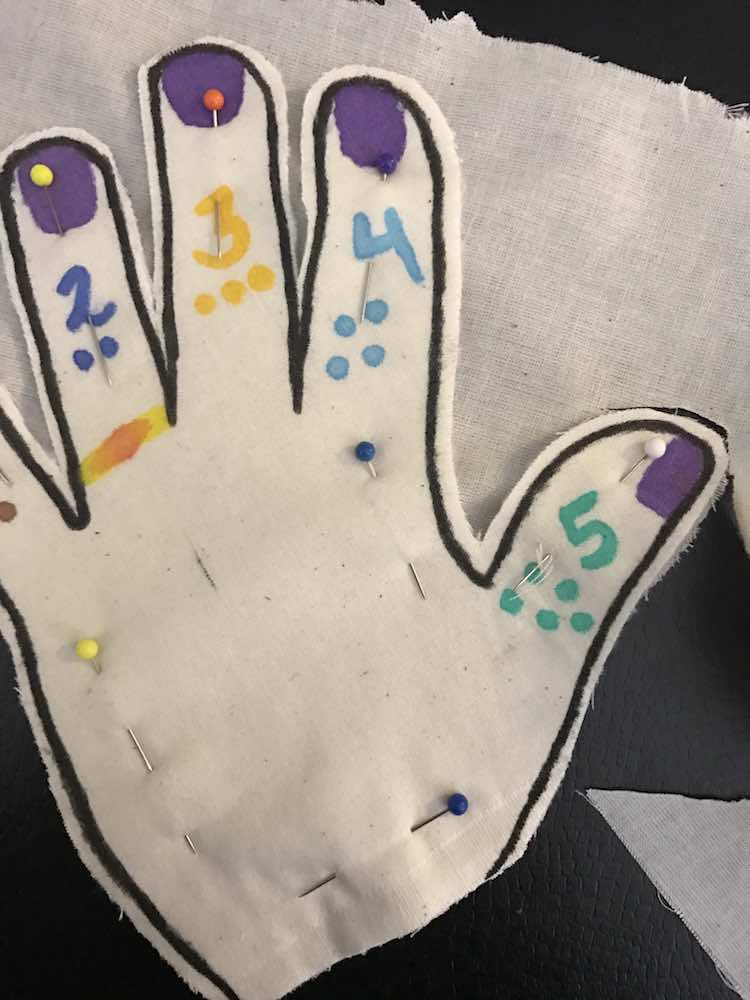
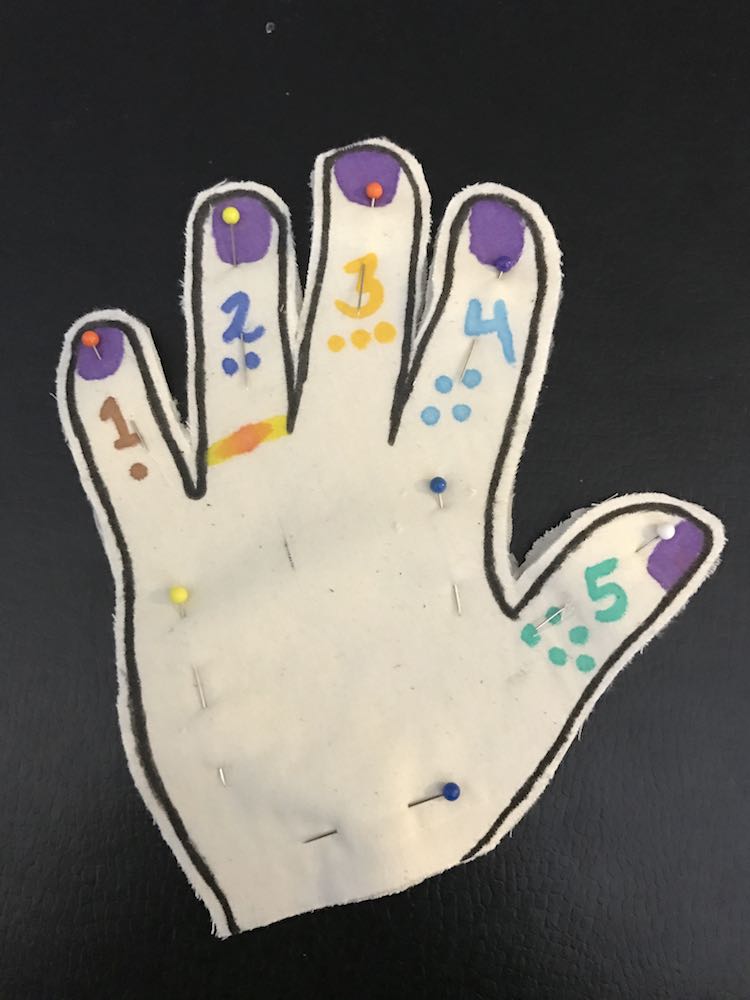
To create the hand I used a black fabric marker to trace around my hand onto white cotton fabric. I then numbered the fingers from one to five using digits and dots so Ada would be able to count the dots and correlate it to the digit. I used a different color on each finger to make it more interesting. I then went on to add fingernails (figured adding painted fingernails would be simpler and easier than a black outline) and added a wedding ring since I was looking at more ways to decorate it. Unfortunately, I hadn’t waited (at all) for the yellow fabric marker to dry so when I added the center decoration to the ring the ink spread, but overall it just makes the ring look more unique. Once I finished and gave the ink time to dry I then set the colors by ironing it and went on to iron it to a fusible interfacing so it would be thicker. I cut around it, then decided to add another backing to the hand by pinning the hand to muslin, sewing around the outside of it, and then trimming the excess muslin. You could also use Heat’n Bond to stick the two together before sewing if you’d rather.
I debated decorating the hand further with glow paint or something on the fingers for the numbers but figured it would look nicer without; plus it’s not like she’s going to be using it in the dark.
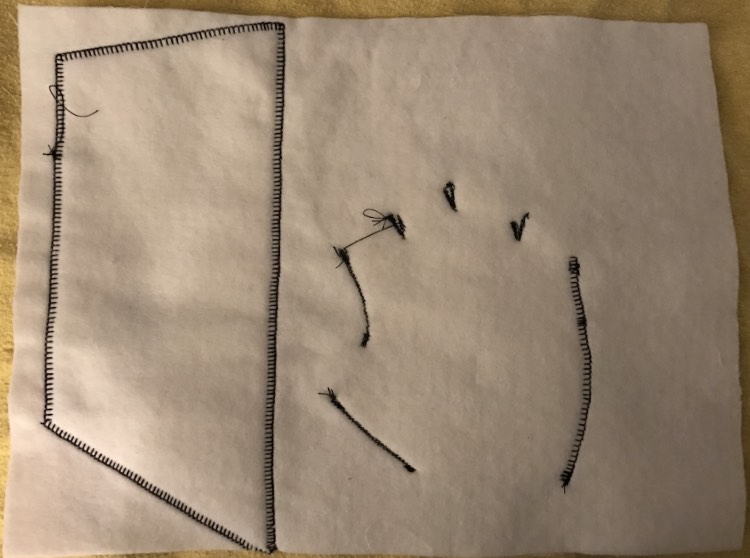
I then went on to draw out the diagram. I started by creating a quick trial sketch on discarded muslin to see if I could do it. I decided it was hard to differentiate the fingers from the rest of the hand when I used only one color. I also decided I wanted the hands to be a bit bigger and face the other way so you can see the palm of the hand along with the folded fingers… like the hand I cut. Once I had a better idea of what I wanted and looked up a reference image online I drew out the hands onto more white cotton fabric backed with fusible interfacing. This time around I only drew the outline so each finger would be easier to differentiate from the rest of the hand. While drawing them out I included the proper number of dots representing which number it matched and the digit. I paid attention to the space I had on the main page and staggered the images on the page so it wouldn’t be too tall to get cut off in the seam allowance. Once I finished I waited to dry the ink, used an iron to set the colors, and then cut around the image.
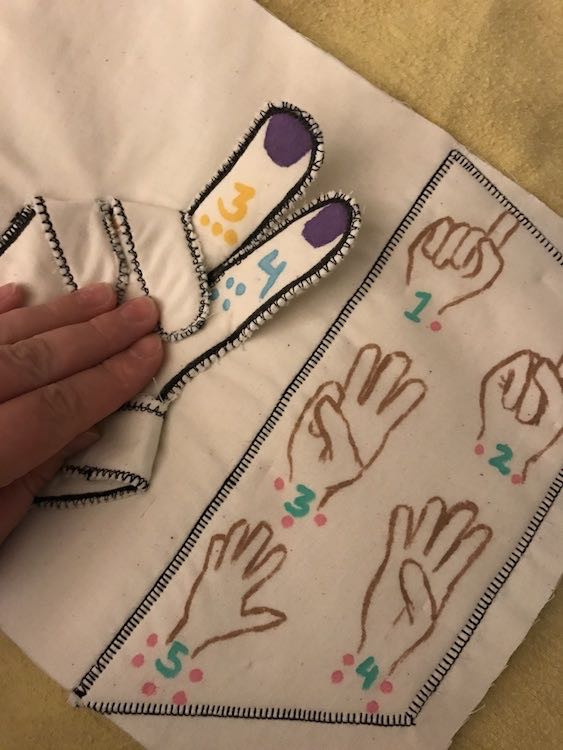
After I finished the hand and diagram all I had to do next was add it to my base page. While paying attention to where the seam allowance and grommets would go on the page I laid them out and pinned them in place. As I was going to leave the fingers and thumb unattached so they’d be able to bend upward I decided to let the thumb overlap the diagram without covering the images.
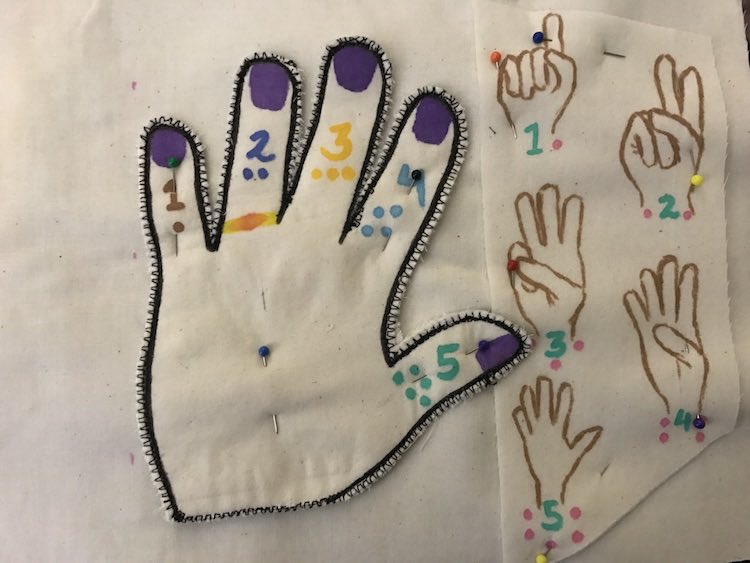
I then sewed around the entire diagram with a blanket stitch. For the hand I sewed up either side of the hand, leaving the thumb free, and in the divot between the fingers.
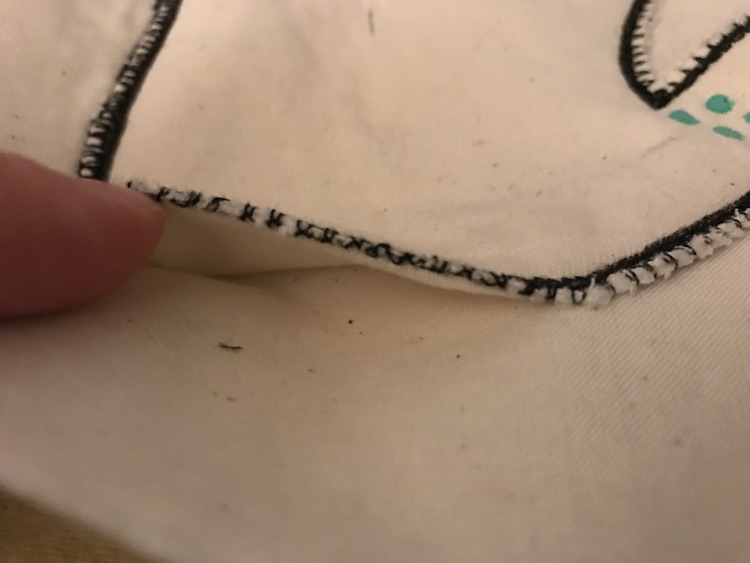
I debated using my fabric markers to add text or objects to count underneath the fingers that Ada would only be able to see when she lifted them but decided that might be too much and I didn’t want to go too far and regret it. As the page was done I waited until the reverse page was completed and then pinned them together right sides together, sewed them together, put it right side out, sewed closed the opening, sewed down the other side of the space for the grommets, and then finally (later after I finished all the pages) added grommets.
And I had a quiet book page that would let you use the fingers to make the numbers even if you can’t figure out how to bend some fingers and while keeping others straight… yet.
If I were to do this again I would…
- maybe number the fingers on the hand differently. I love how I have the diagram to show Ada how to make each number with her fingers but when you’re counting the main fingers it seems a bit backwards. At the same time if I numbered it with the index finger as one, the middle finger as two, the ring finger as three, the pinky finger as four, and then finally the thumb as five (so it matches the diagram better) than it might seem backwards having it go 4, 3, 2, 1, 5 if you go from left to right. I don’t know which way would be better, but figured I’m mention it in case you’re thinking of the one and would prefer it the other way.
If you want more information on how I joined the two sides of the quiet book page together you can check out my In Depth Guide to Joining Quiet Book Pages. I’ve also created a series on my quiet book covers. If you want to check out the other quiet book pages I’ve created you can see them all here. I can’t wait to see what you come up with! Feel free to reach out at any time in the comments below, through a post on my Facebook page, or tag me through Instagram