
Adding a Collar and Leash to a Stuffed Animal Backpack

A year ago one of my sisters gave my daughters each an adorable Christmas gift from her travels to Australia (Thanks Kelycia!). They were each given a toddler sized backpack with a stuffed animal that attached to the back. The stuffed animal sits in a pocket with Velcroed straps over their shoulders. We loved the bags, but I was leery about the stuffed animal falling out during their travels. I tried to do an online search for ideas to attach the stuffed animal to the backpack, but only came across ideas on how to add a leash for your kid and not for the stuffed animal. I thus decided to hack my own idea.
Materials
- Fabric for the collar and strap. I used muslin I had on hand
- Thread
- (optional) D-Ring
- Buckle – to fasten the collar on
- Scissors or rotary fabric cutters
I knew I didn’t want to attach the stuffed animal permanently to the backpack, but I did want it securely attached when the kids wear the backpacks. To solve this I decided to make the stuffed animals their own removable collars to allow them their freedom. I had buckles on hand that I hadn’t used for my quiet books so I decided to use them to make my collar detachable. With the removable aspect (the collar) solved the next was to attach the collar to the backpack permanently. To do this I decided to make a leash/strap. I had a package of D-rings I bought for a bumblebee quiet book page so used them to attach the leash to the collar. I ended up making the leash fixed to the collar and not removable so you could easily just sew the two together instead of using the D-ring.
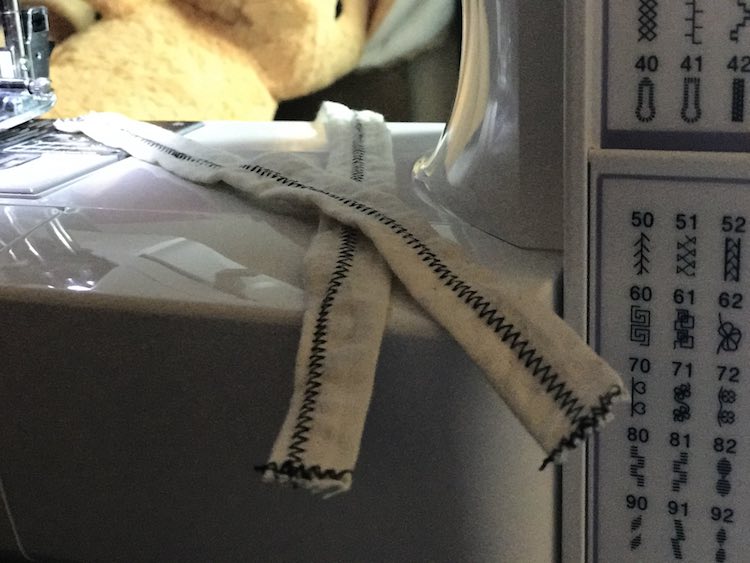
To make the collar and the leash I used the muslin I had on hand from making the quiet books. You’ll want to cut two different lengths of strips so you end up with the collar and the leash. The strip for the leash will need to be long enough that the stuffed animal can be pulled out of the backpack, but short enough that the animal doesn’t drag if it falls out when your child is walking. Your other strip, for the collar, will need to be long enough to go around the animal’s neck and have excess to attach either end to the buckle. I also cut them twice as wide as I wanted.
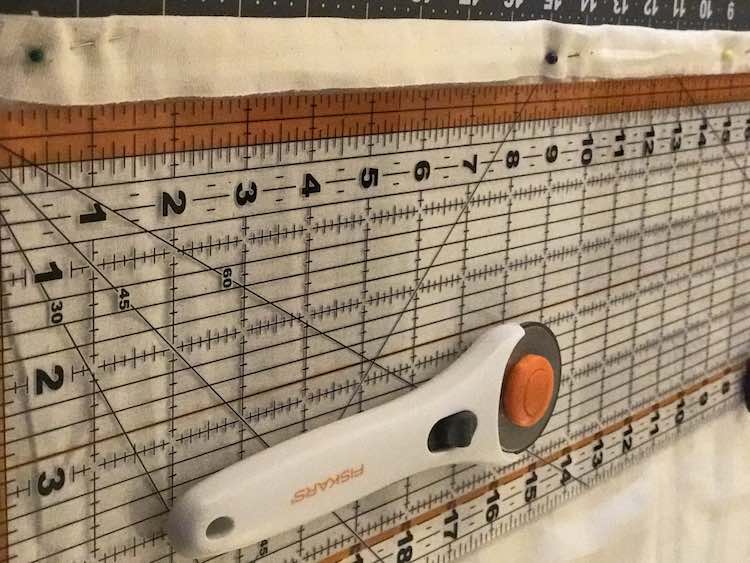
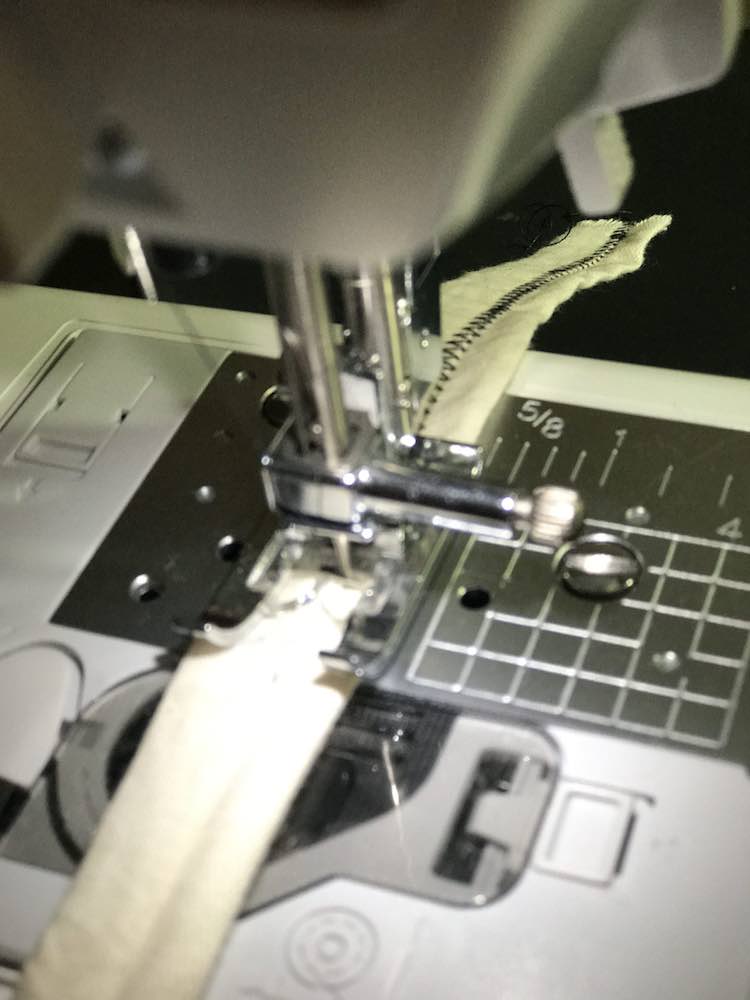
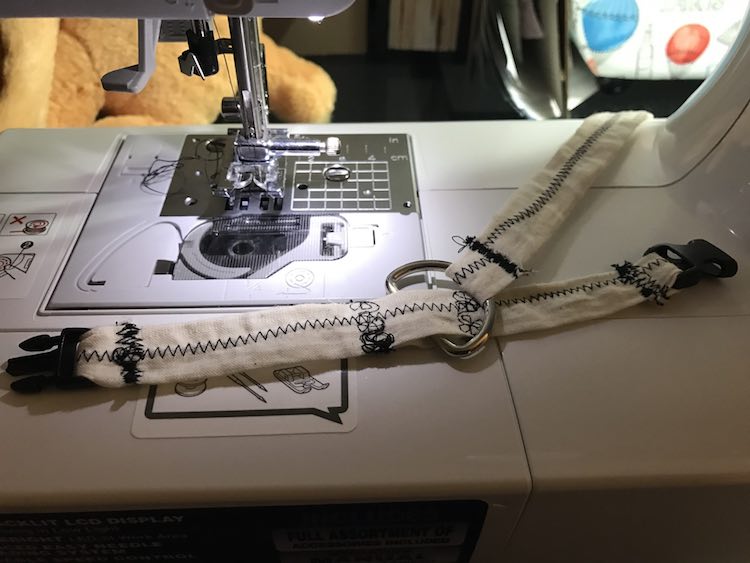
Once cut with my rotary cutter I then folded them over and pinned them so they ended up being one and a half times wider than the plastic buckle I was planning on using. I then sewed down the edge to create a tube. If you pin your fabric perpendicular to the edge you could always cut the fabric first and then pin (or line it up as you sew) but this seemed easiest for me.

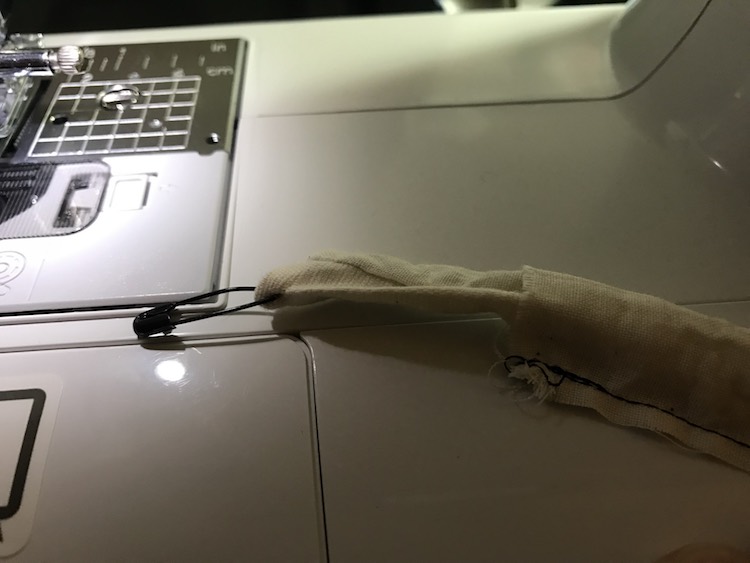
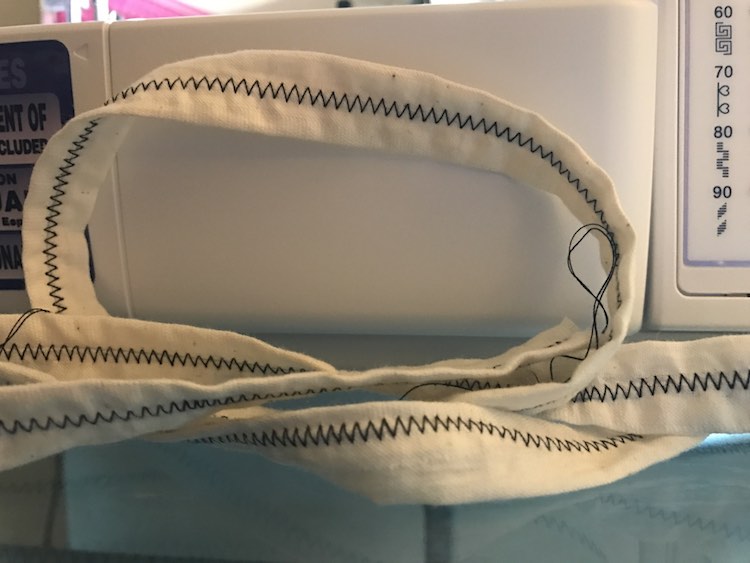
To put the tube the right way out I attached a small safety pin to one end and then pulled the safety pin and the following fabric through the tube to the other side. You can then iron it flat and topstitch. I noticed my seam wasn’t fully connected so instead of putting it the wrong side out again and sewing it closed I decided to instead flatten it so the seam was in the center and sew over it with a zig zag stitch to close it.

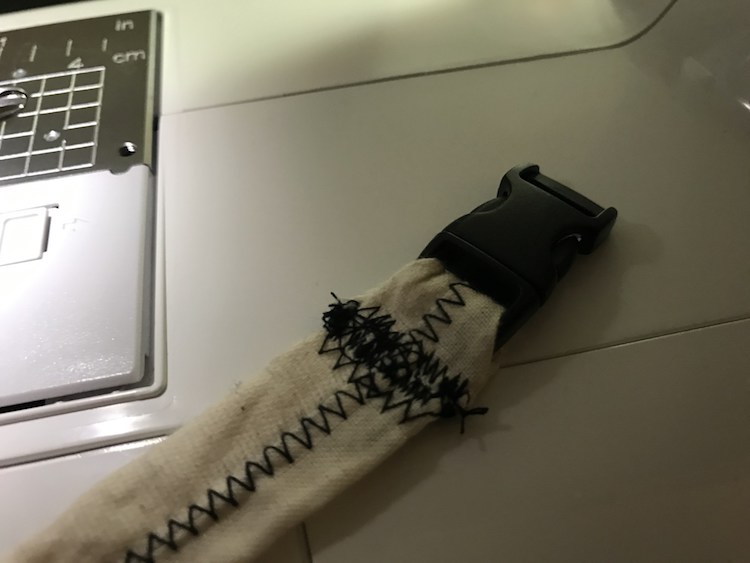
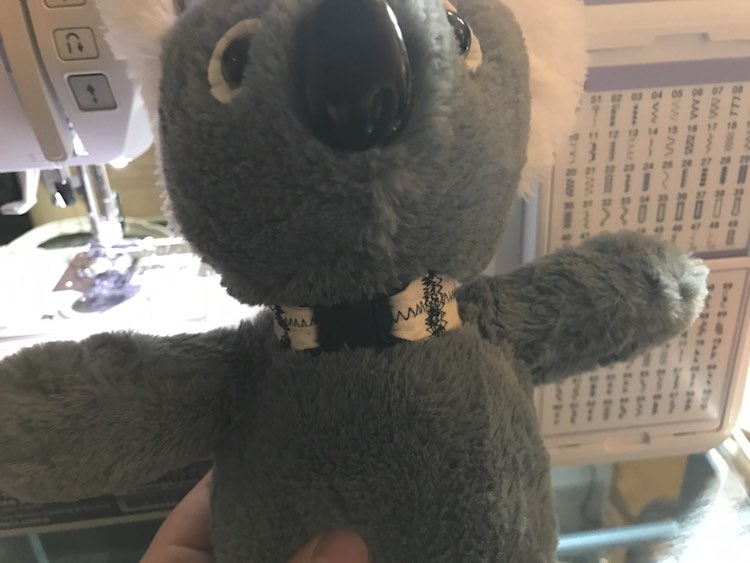
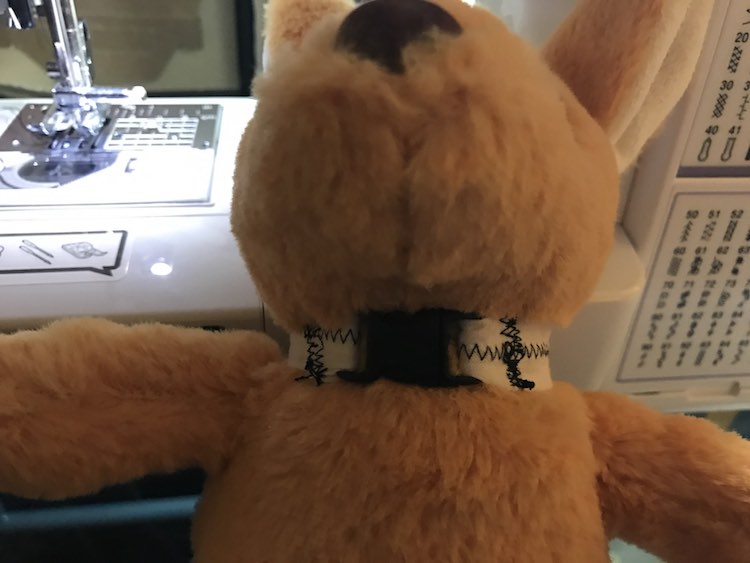
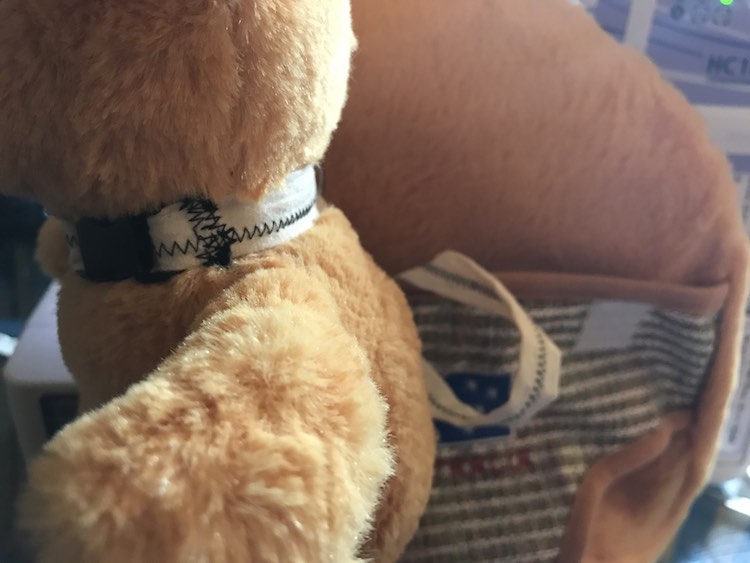
To make the collar I took the shorter resulting muslin and attached the buckle to one end of it by threading it through the buckle, folding over the fabric, and sewing it closed. This would’ve looked better if I hand sewn it closed as I had to work to keep the fabric under the sewing needle as it kept getting pushed to the side. I ended up going over it several times to make sure that it would remain secure.
Before attaching the other end of the collar to the buckle you should first check to see if the D-ring (or what you’re using to attach the leash to the collar) can fit over the buckle. If not you should size the collar and then attach the D-ring (or leash) to the collar first. If it fits you can finish attaching the buckle first.
To finish off the buckle I started by sizing the length of collar you need by wrapping it around the neck of the stuffed animal. I then cut it to size, detached the buckle, threaded the collar through the other end of the buckle, folded it over, confirmed the length again, sew it closed, and then trimmed any excess fabric. You could also thread the buckle on first, size it, fold it, pin it, confirm, sew, and then trim too. Maybe next time that’s the order I will use.
With the collar done the next step is the leash that will connect the collar to the backpack.
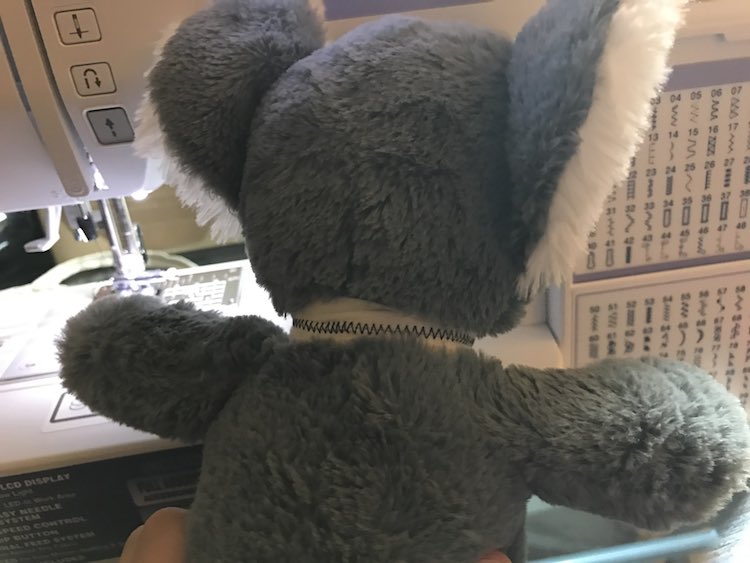
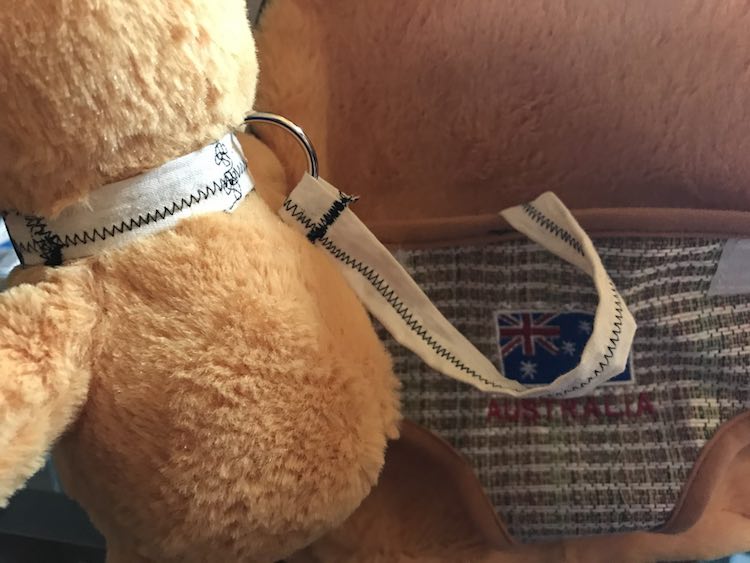
You can sew the leash directly to the collar if you’d like but as I had a bag of D-rings on hand I decided to use one to attach the collar to the leash. Luckily for me the D-ring fit over the buckle so I didn’t need to take anything apart; however, as it fit over the buckle I decided to sew it in place so the collar couldn’t be lost in the future. To attach the D-ring to the collar I first slid it to the center of the collar and then used a small portion of leftover muslin from trimming the collar to sew the D-ring in place. This way the collar won’t be able to detach from the backpack and be lost.
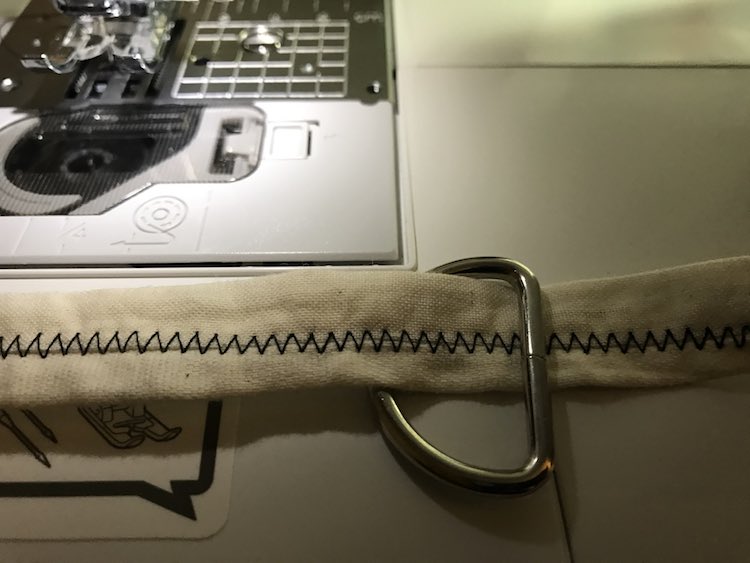
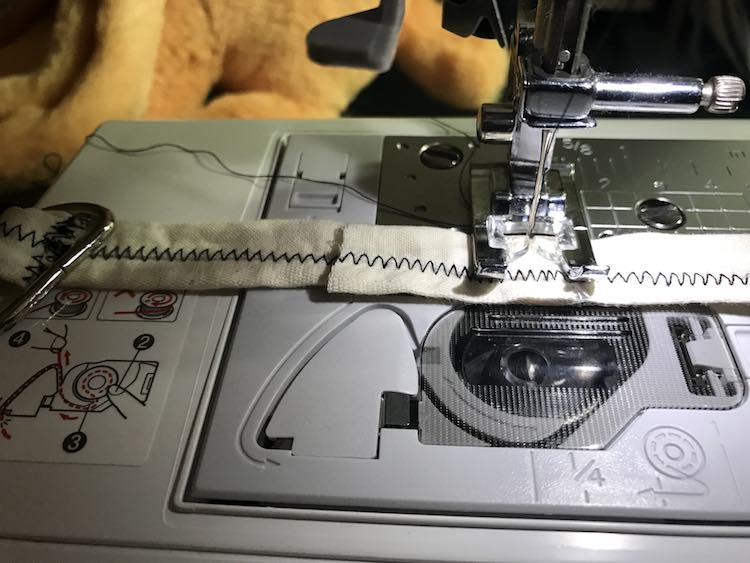
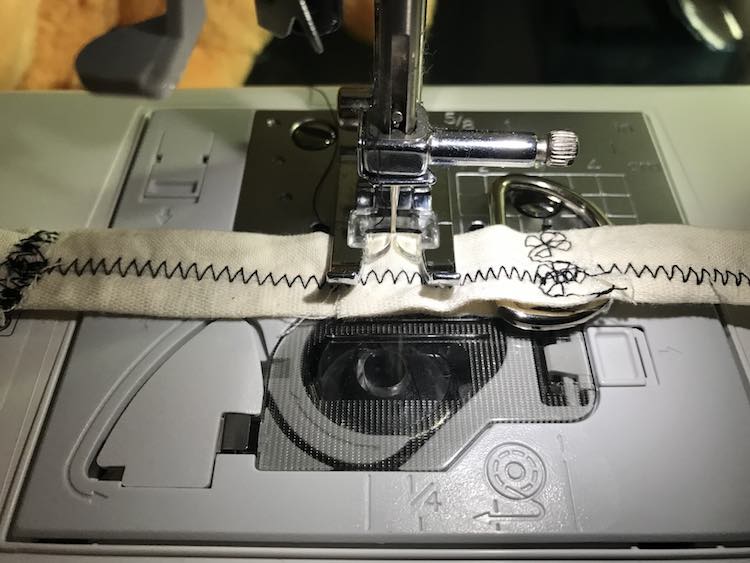
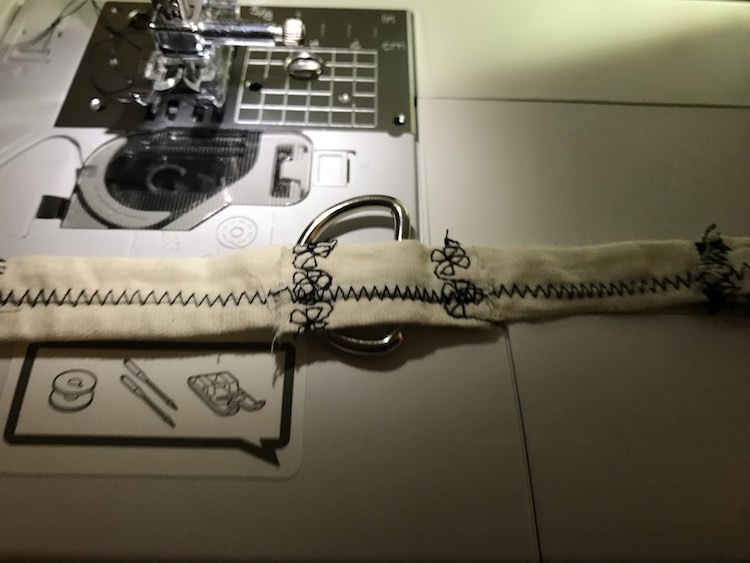
I then took the leash, threaded one end through the D-ring, folded it over, and sewed it in place.
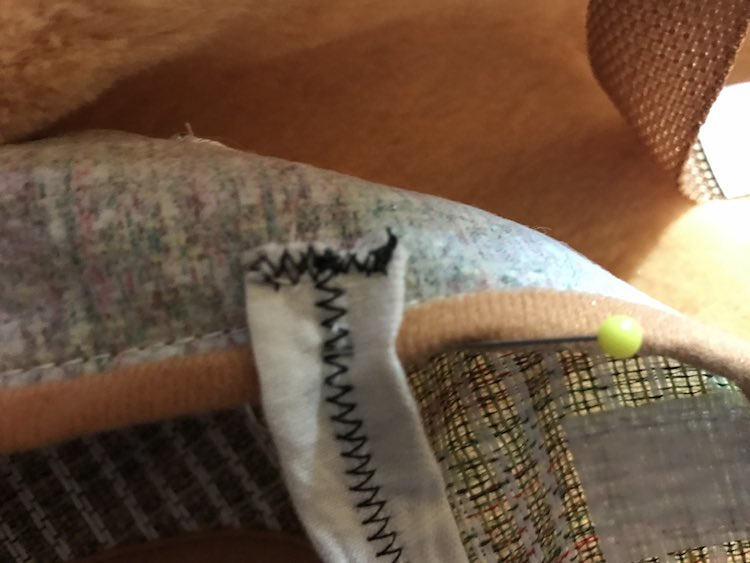
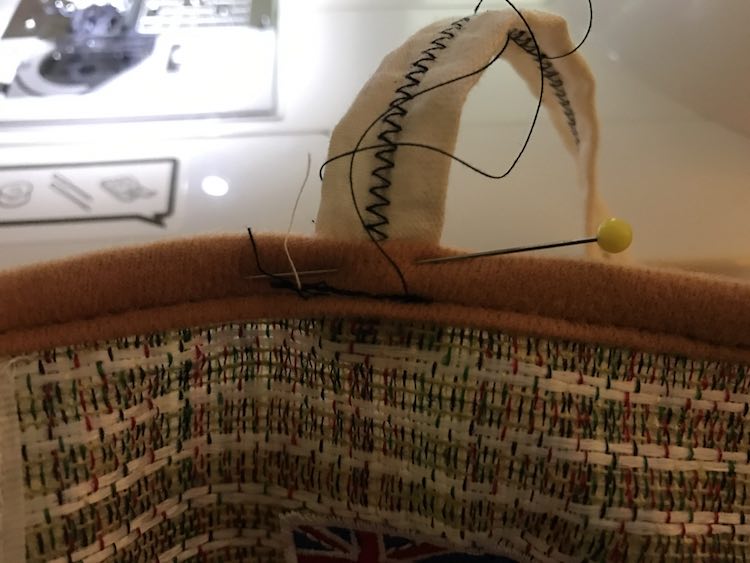
The other end of the leash was sewn closed (so it doesn’t unravel), pinned inside the front of the backpack, and sewn down with a straight stitch so it isn’t too visible when in use.
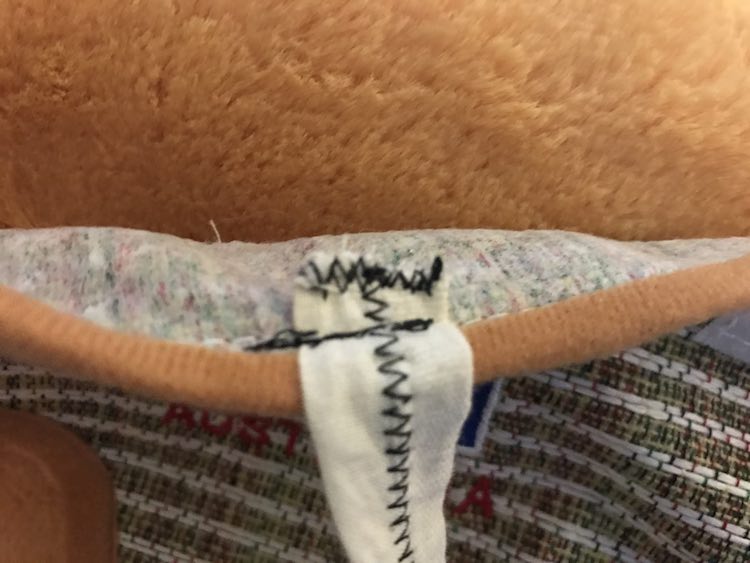
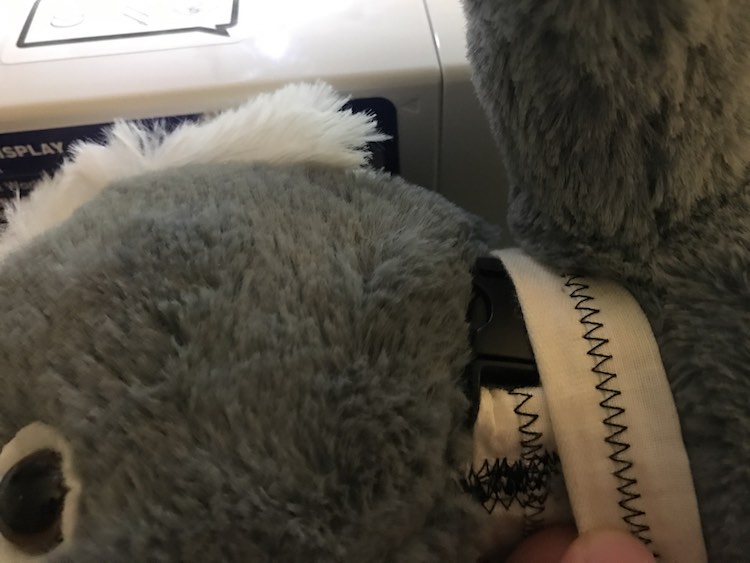
Now all that’s left is to attach the collar to your stuffed animal and tuck it inside the backpack.
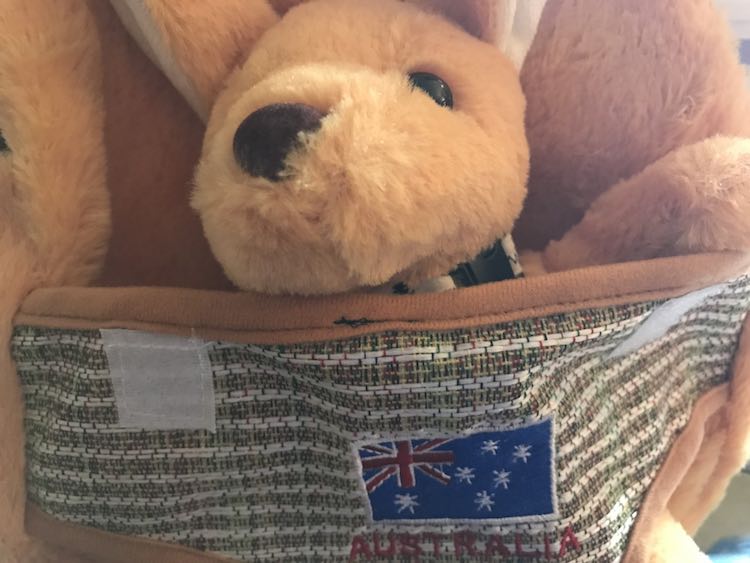

And you’re done!
I love this solution so the stuffed animal can’t get lost when it falls out. In use I’ve found it falling out frequently if you fill the backpack with toys. I love how the leash is short enough that the stuffed animal dangles without being dragged and stained. My plastic buckles are a bit hard to use but right now if I undo it my toddler can easily put it back together. It’s a perfect sensory toy they can grow into and bonus when you’re on the go you don’t have to worry!
If I were to do this again I would…
- use a better fabric and/or thread for the collar/leash. I love how thin it is but I wish I hid the thread in the fabric better so it looks nicer overall.
- potentially sew the leash directly to the collar. It works and slides easily but as I sewed the D-ring to the collar it would probably work just as easily if I had sewn them together.
If you don’t have a sewing machine I’m sure you’d be able to hack this together with an animal collar and hand sew a cord between the backpack and the collar. You could also do the same with a cord, strap, or non-fraying fabric and hand sew the connection points.
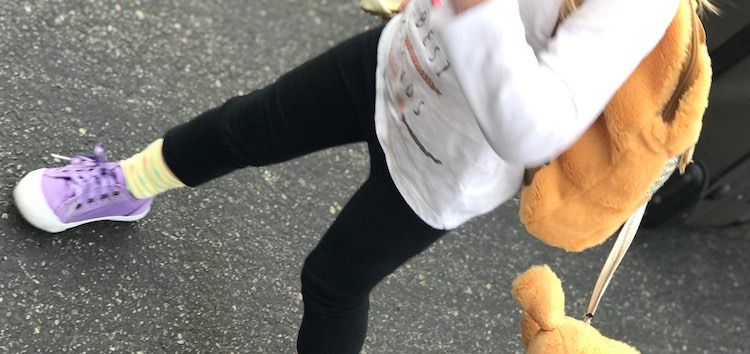
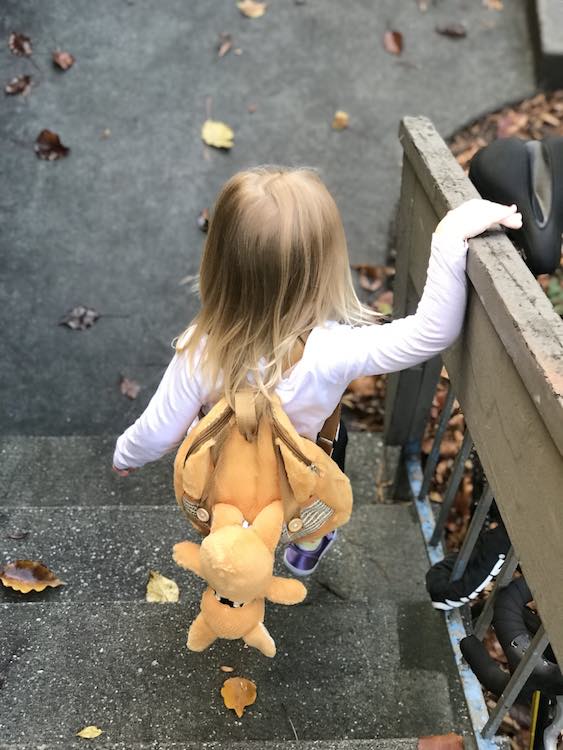
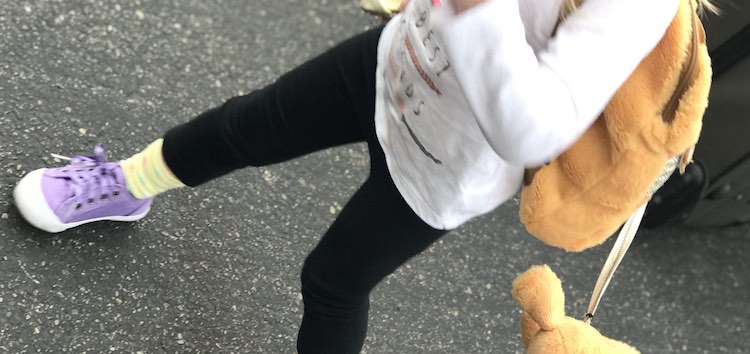
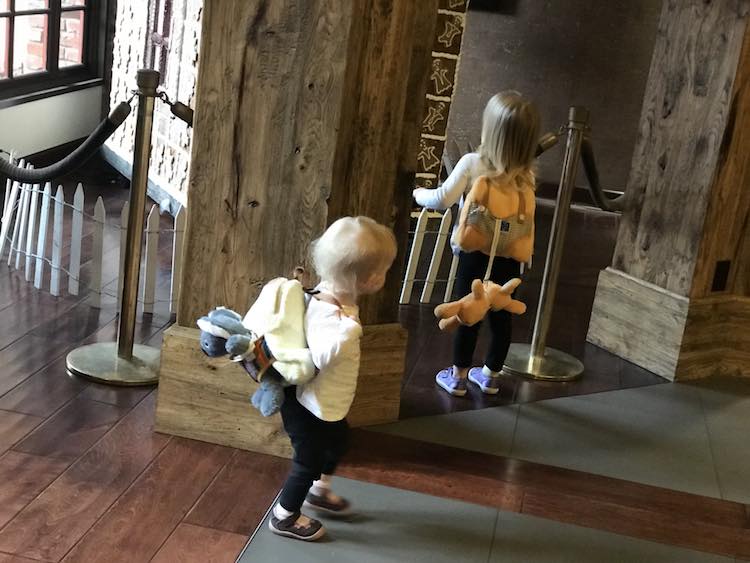
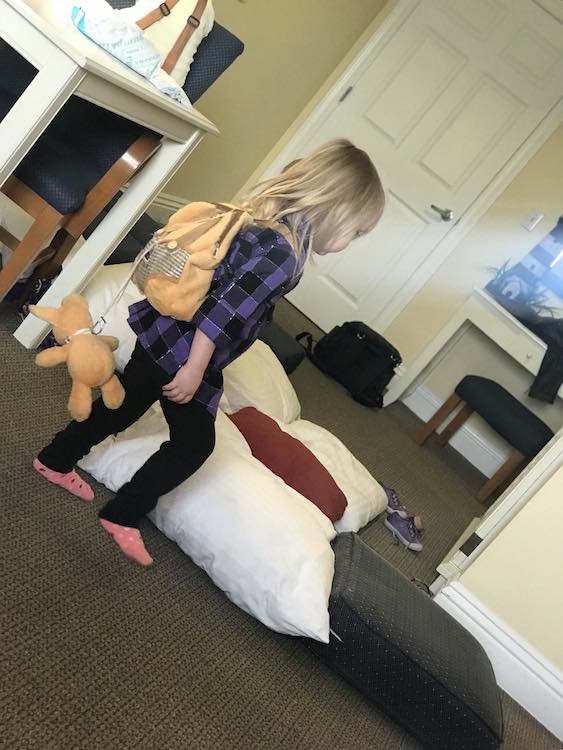
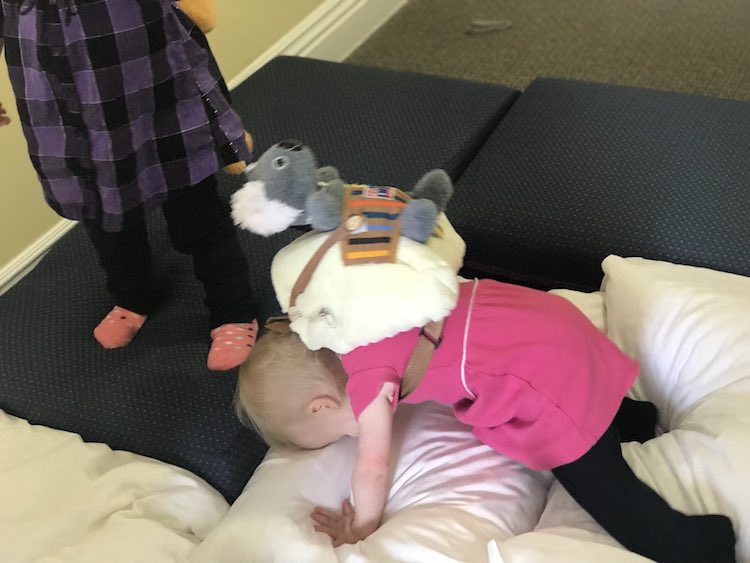
Here’s some pictures of it in action on our last vacation:

I would love to hear from you in the comments below, tag me on Instagram, or post on my Facebook page if you have any questions or to show me your stuffed animal backpack hack. I can’t wait to hear from you!