
Quiet Book Page - Appliqué Animals

Over the past month I posted a four part series on how I created my quiet book cover. I wanted to go on to show you both sides of one of the quiet book pages I had already made before I go into the in-depth guide on how I joined my quiet book pages together.

Materials
You need
- Fabric for the page
- Interfacing to reinforce the page
- (optional) Heat’n Bond for easier applique
- 108″ Unbleached Muslin Natural Fabric by the Yard
- Pellon Fusible Thermolam Plus White Fabric by the Yard
- Thermoweb Heat’n Bond Lite Iron-on Adhesive
- Quick Dry Tacky Glue
- Premium Rainbow Color Embroidery Floss
- Dritz Disappearing Ink 2 Pen Pack
- (optional) Fabric or felt glue
- Embroidery Floss
- Felt or decorative fabric; several different colors or textures are perfect for a baby
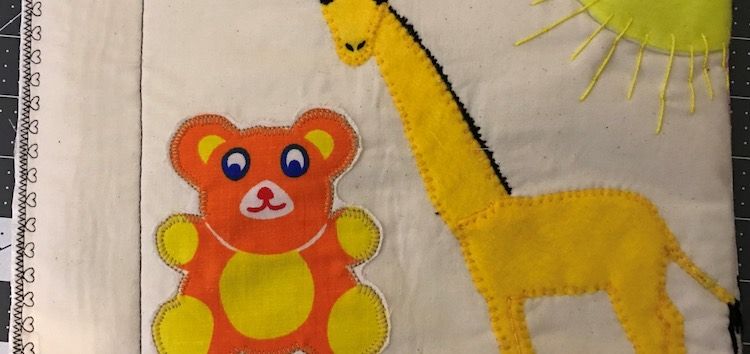
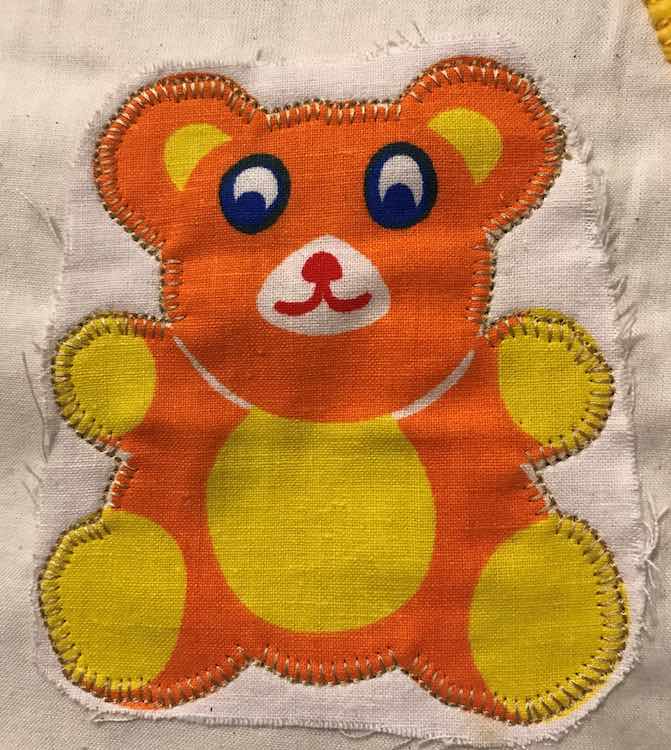
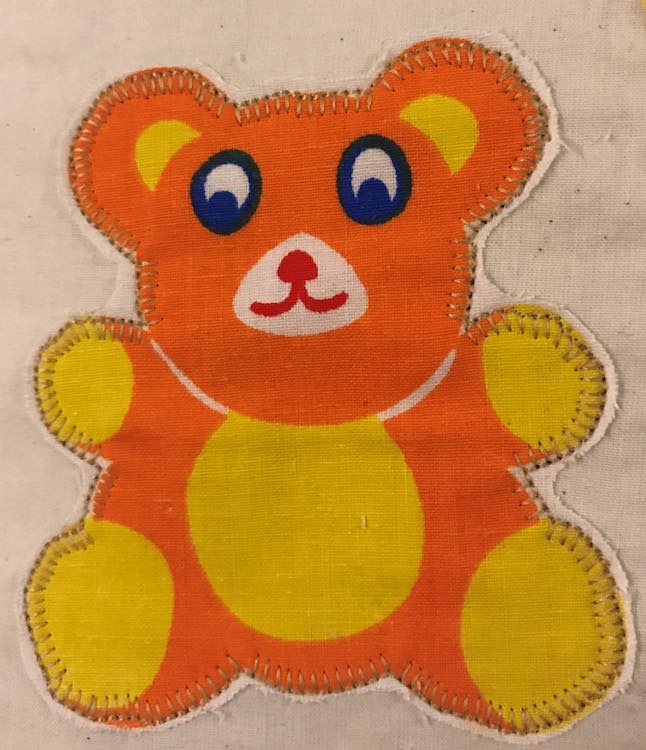
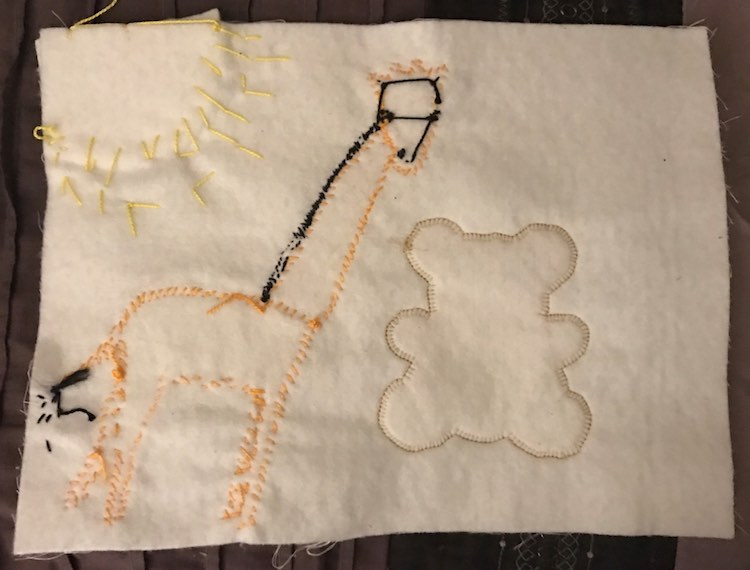
The reverse side of this page was going to be assorted colorful animals created with fabric markers and thus be only one overall texture. To keep with the animal theme and to add more textures to Zoey’s quiet book page I decided to create two animals with their own textures. One animal will be made of fabric and the other through a felt applique. I also chose to machine sew the fabric patch on and hand sew the felt applique so the stitching used to attach the animals will each add another level of texture to the page. I had a scrap of fabric with a teddy bear on it so that easily became my first animal choice. I pinned the fabric scrap to the page, machine sewed around the edges with a blanket stitch, and then trimmed the excess fabric from around the bear.
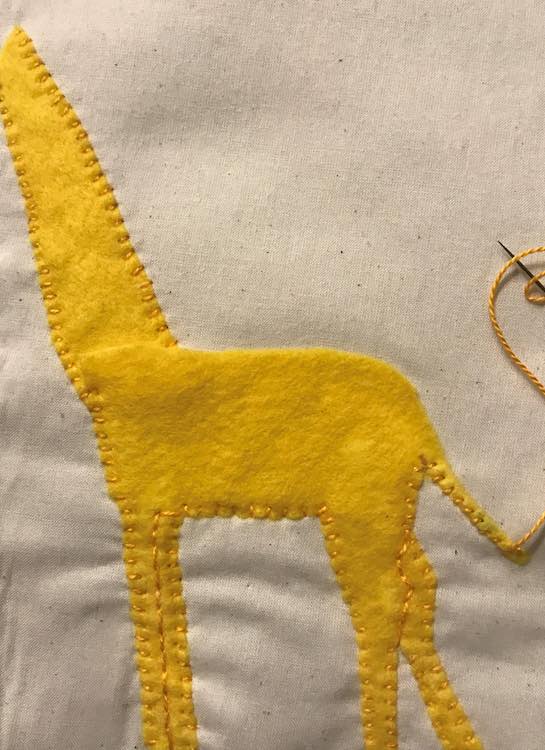
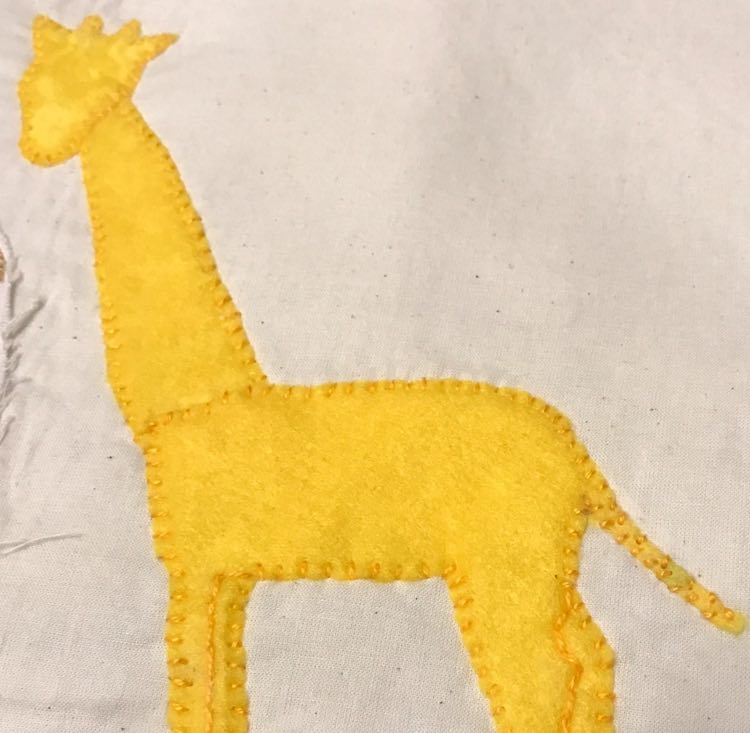
I liked how the felt was fuzzier than the cotton fabric I had chosen for the bear. I chose to make a giraffe as I was hoping the yellow felt would match the bear, though after I created the giraffe I noticed it was a shade off. I wanted to take advantage of the entire page and as my felt wasn’t large enough for the height of the page I choose to create the giraffe in three separate pieces: the body and legs in one piece, the neck, and the head. After designing, cutting out, and then figuring out where the pieces will lay on the page I started attaching them. As the pieces of the giraffe will overlap each other I decided to make the neck go underneath the head and body and so started by gluing the neck down. I then quickly hand sewed around the edges with matching embroidery floss before the glue dried and was too hard. I then did the same with the body where I chose to add depth to the legs by straight stitching within the leg area to imply overlap depth. Finally I attached the head in the same manner.
I had decided to use tacky glue to glue the giraffe pieces down and help reinforce the giraffe to the page as the felt was thin and I didn’t want the center of the giraffe to easily rip. When hand sewing around the edges the glue gummed up the sewing needle a bit and, at times, I had to start using a thimble when I came across hard already dried sections so I could get the needle through. In this case the ‘quick dry’ part of the tack glue I had on hand probably wasn’t too helpful.
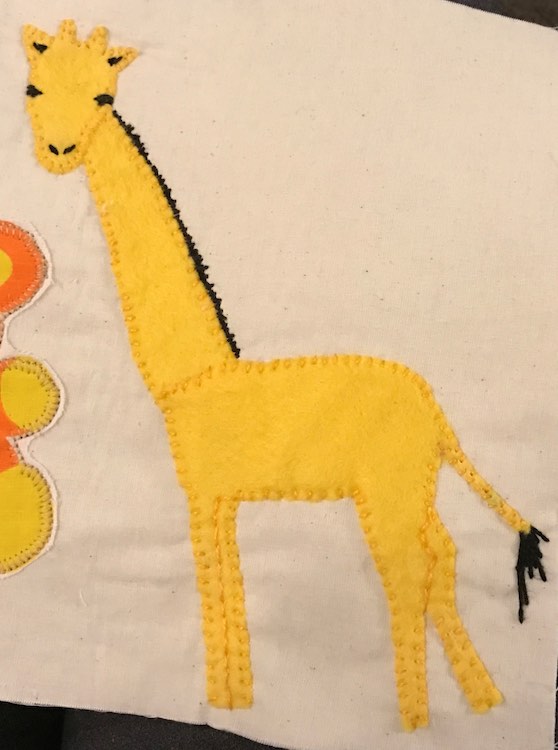
After sewing the giraffe to the page I then added details by using black embroidery floss for the ears, eyes, nose, mane, and tail. When adding the mane and tail I tried to stagger the length of the hair to make it more believable. I also considered using brown embroidery floss to add spots but decided I didn’t want to bog the giraffe down and this way the black embroidery floss will pop more.
I felt like the page was missing something so I chose to add a sun. The felt I chose is a different shade of yellow than the giraffe but was closer in hue to the yellow on the teddy bear so overall I was hoping it would help tie the page together. Instead of doing a blanket stitch around the sun I sewed it down by adding sun rays and then lengthened them by one or two additional stitches to create staggered sun rays. I didn’t sew along the top and side of the sun as those edges overlapped the page and would be sewn down when attaching the page to its reverse side.
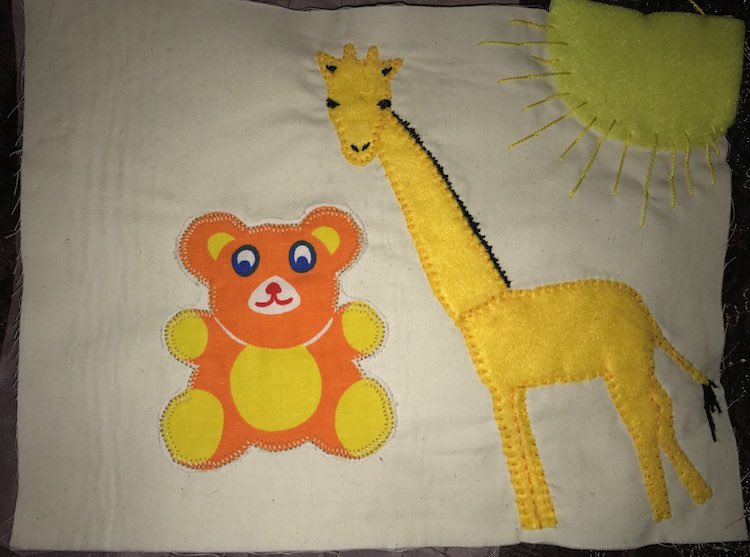
And with that this side of the page is also finished!
I hope this helps you come up with your own appliqué page. I’d love to hear what you create through the comments below, on my Facebook page, or through Instagram.