
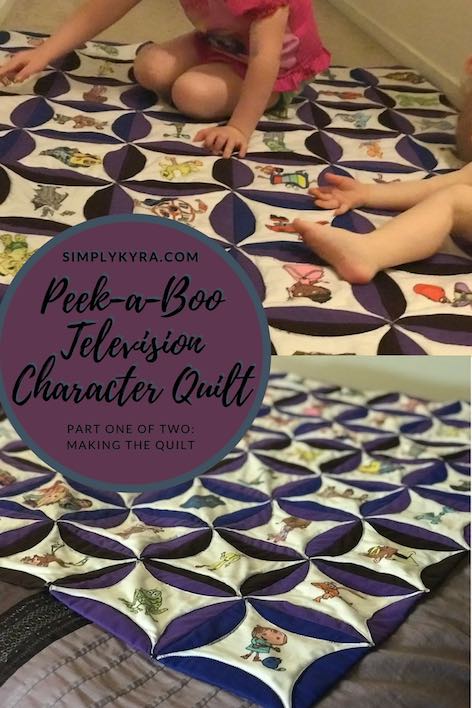
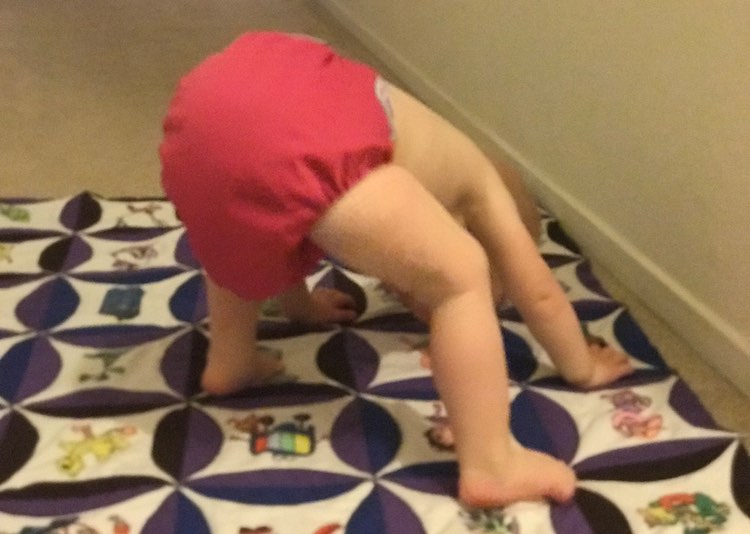
Peek-a-Boo Television Characters Quilt - Part One of Two

Looking through a library book I discovered called “Scrap Quilts” by Judy Martin I found a “Peek-a-Boo” quilt that I just had to try. I immediately pictured it with characters peeking out from the windows on the quilt. When I was little we used to sit on a blanket in the living room eating popcorn and watching the Sunday evening Disney movie. This quilt made me want to make that kind of quilt for my kids even though we haven’t started snacking in the living room yet. I haven’t made a quilt yet… but I knew I wanted this quilt and figured it would be simpler to start with as you join the squares as you go.
Choosing my characters
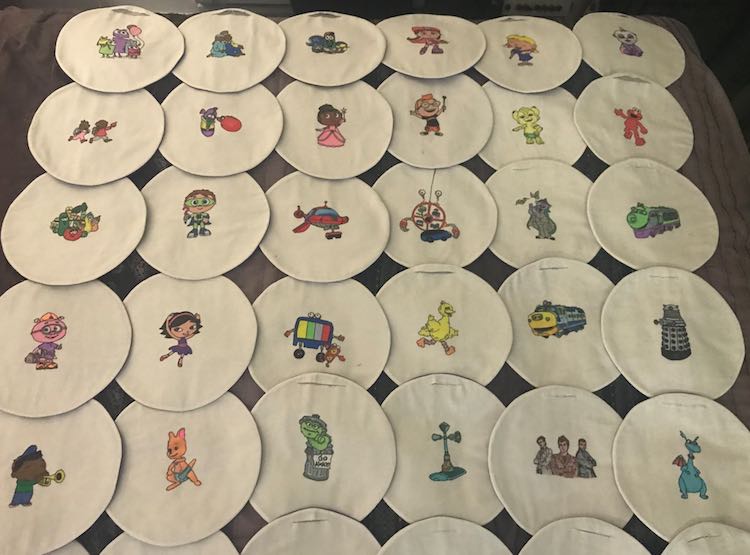
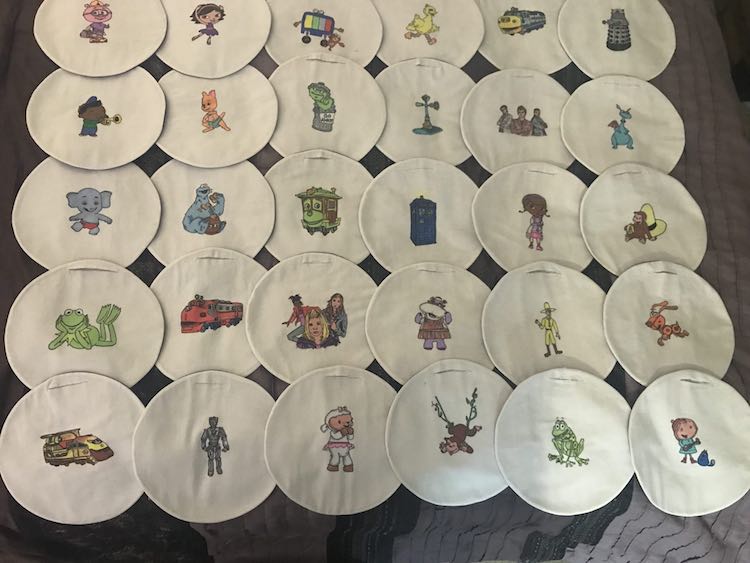
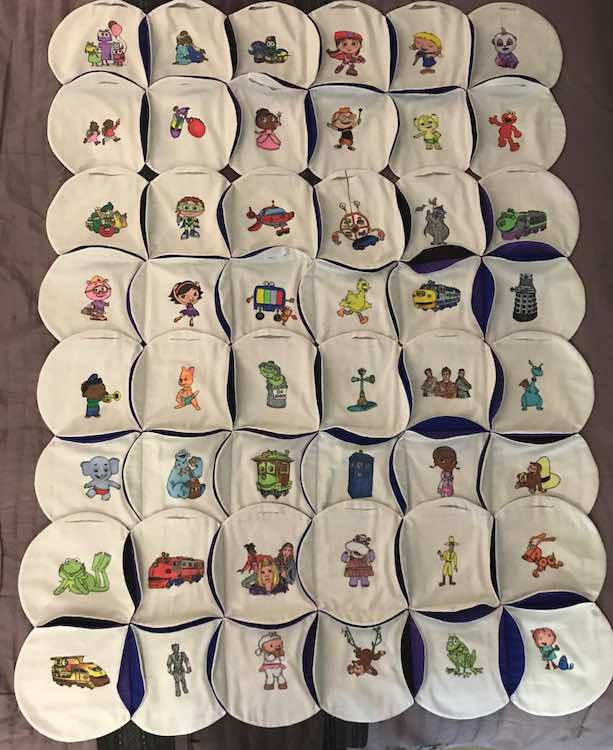
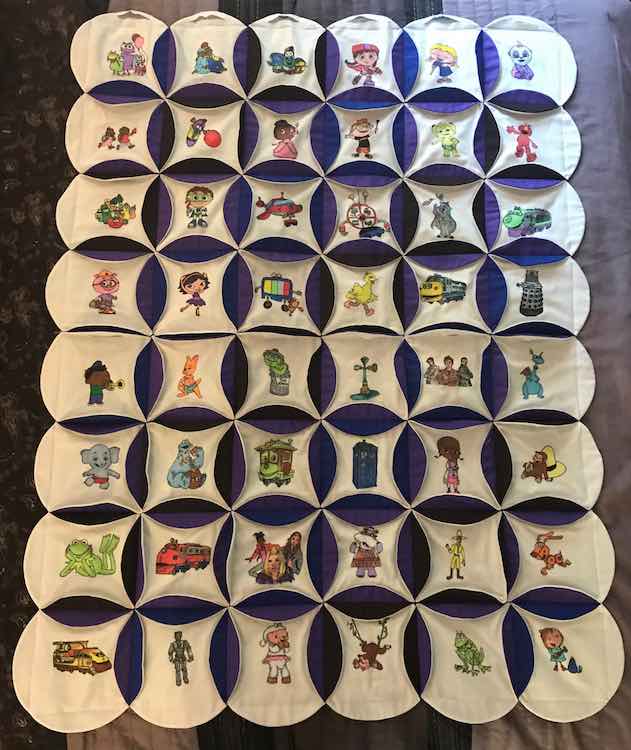
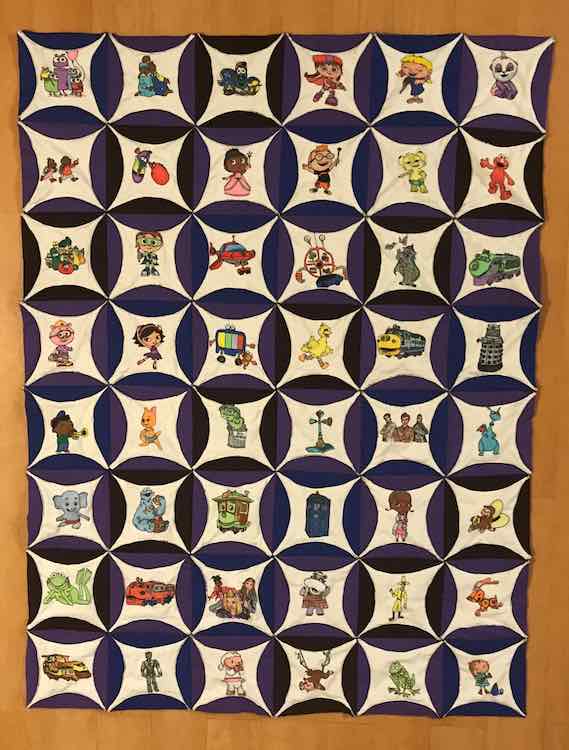
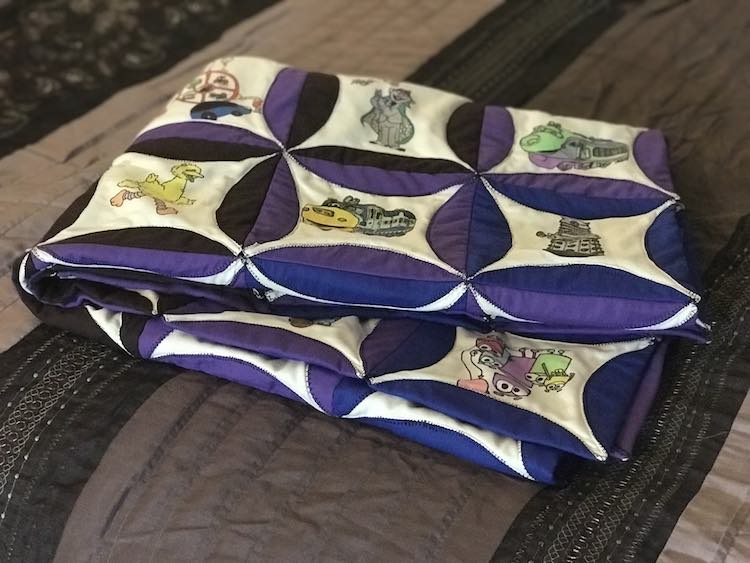
I decided to start with the objects in the windows of the quilt since I knew that I wanted and what hopefully will be my daughter’s favorite characters. I started by planning out which television shows would be featured as I had decided to limit it to just television shows. At this time my then two-year old was mainly watching Word Party and a bit of Little Einsteins. Beyond those two shows I decided to try to find shows I knew were good and that had a higher probability of being watched (currently we subscribe to Netflix). By the time I finished the quilt I was wishing I had included The Magic School Bus as it’s her current favorite after watching The Magic School Bus Returns, and with that the quilt is already out of date.
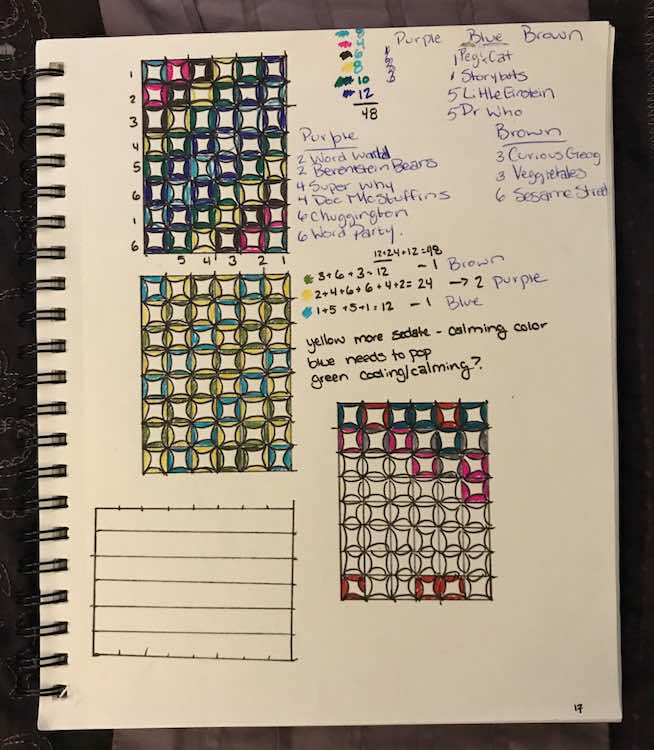
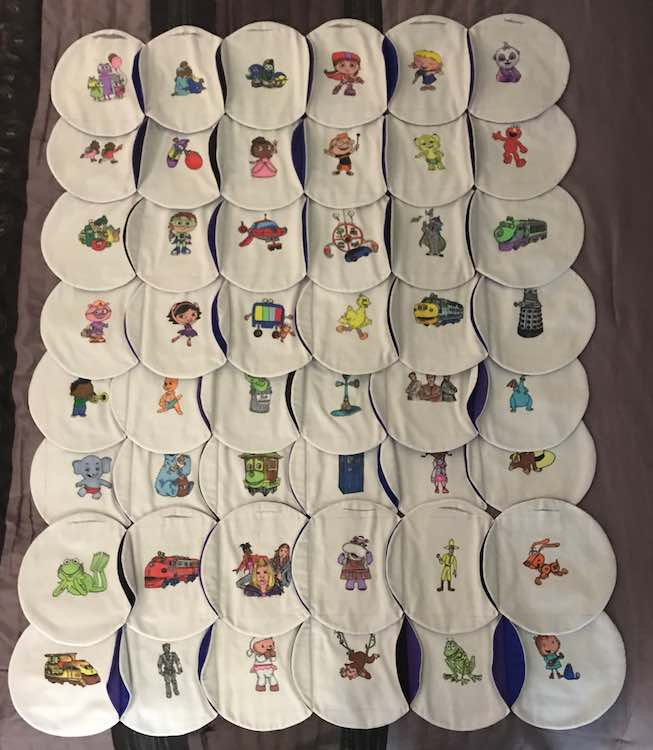
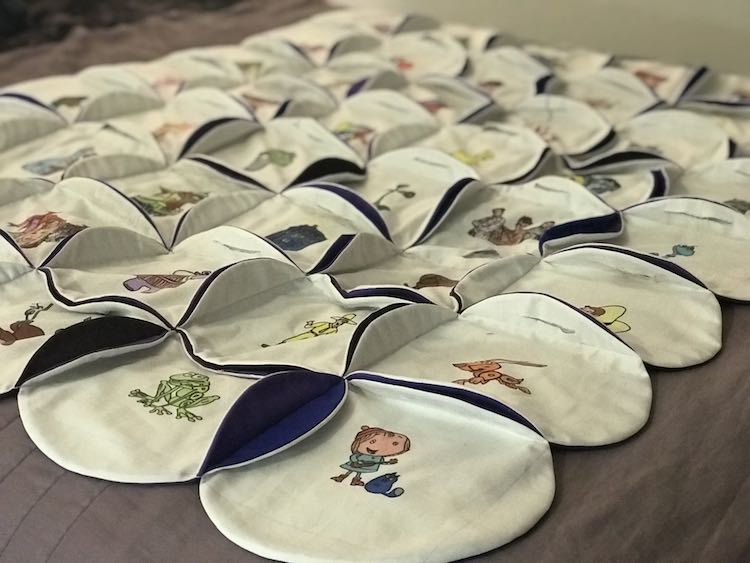
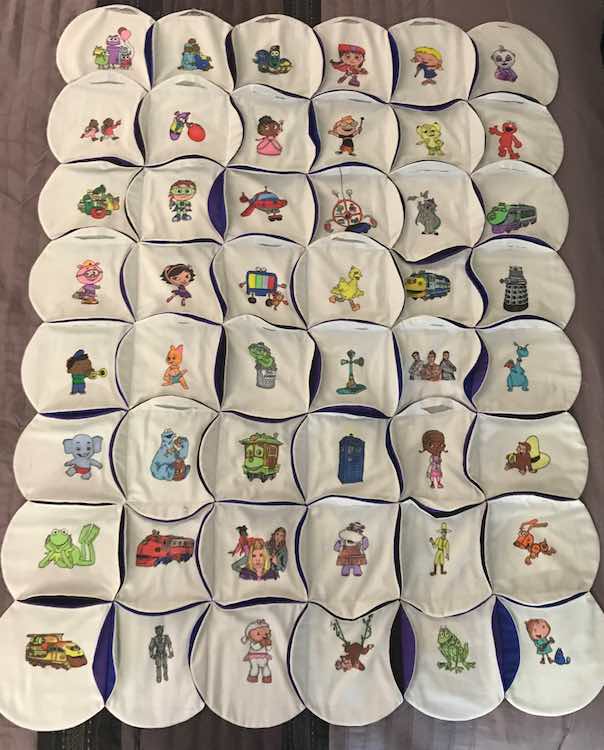
I decided to design the quilt so that the television shows lay at a diagonal on the quilt meaning that I would need two television shows with one square each, the two furthest corners, two shows with two squares each, one diagonal in, two shows with three squares each, and onward to three shows with six squares each. Since they lay at a diagonal I knew I would be able to choose television shows with a variety in the total main characters without being limited to six shows of eight squares or eight shows of six squares which would’ve happened if I had set them into rows or columns.
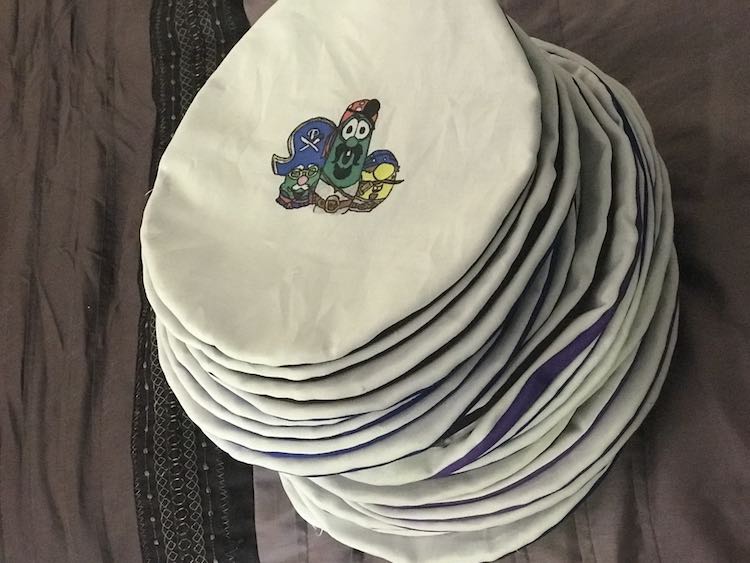
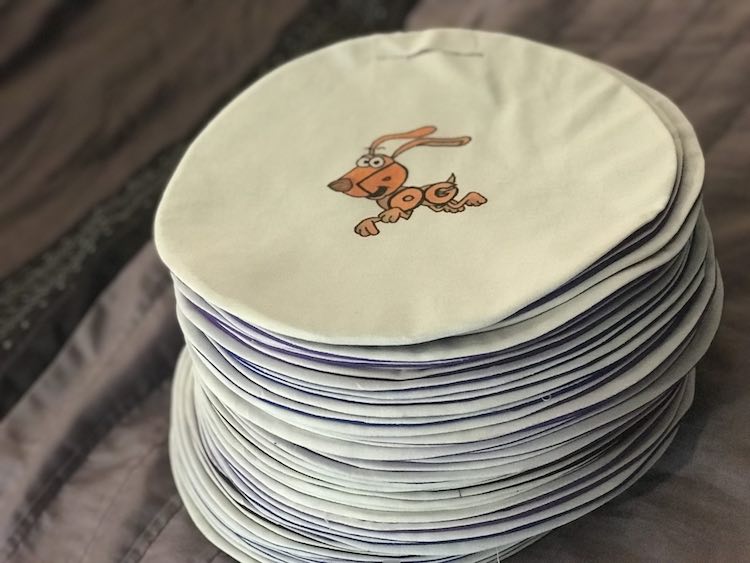
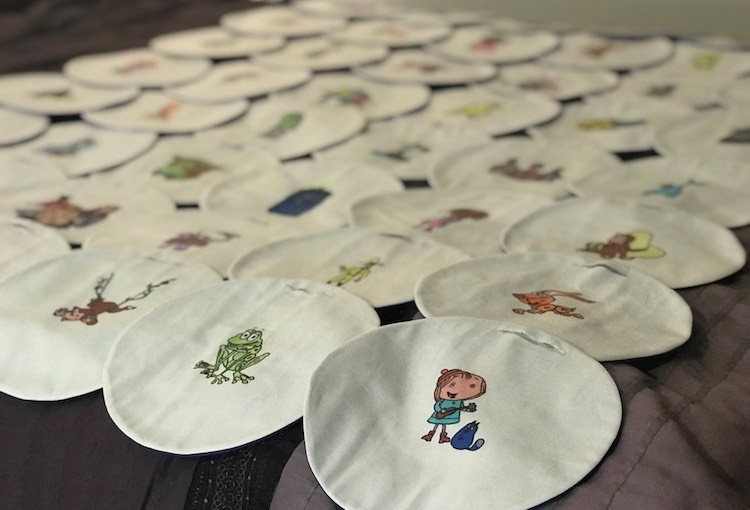
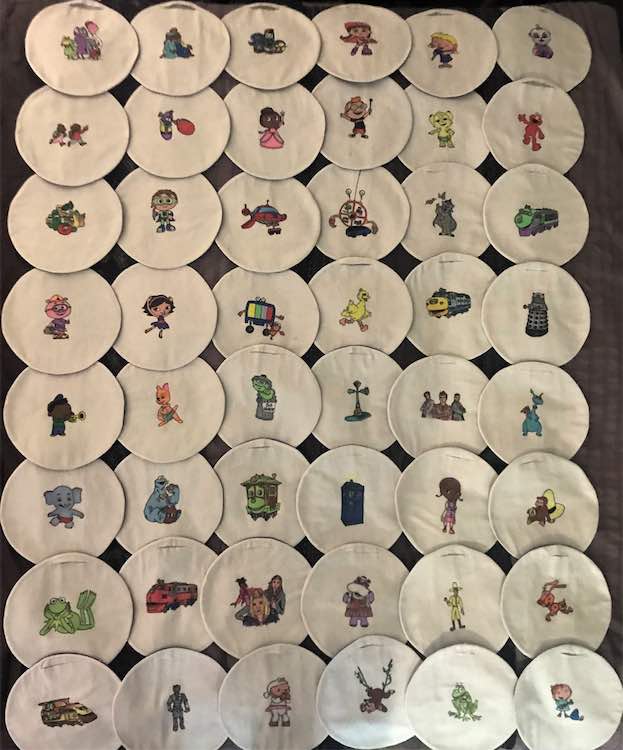
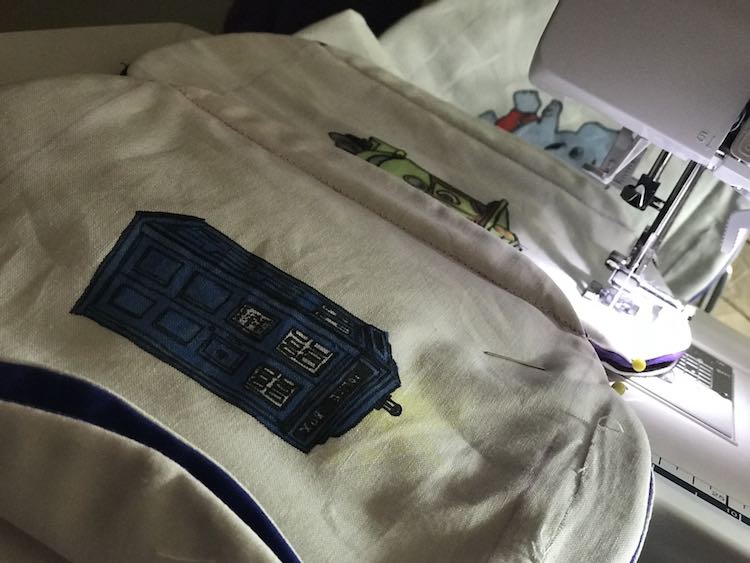
After brainstorming as many shows as I could think of, I ended up going through blogs that listed their favorite children’s shows. Some shows I had to include, like Doctor Who, as they’d grow into it… eventually. Other shows were based on which spaces needed filling. While deciding which shows to pick I was also figuring out how many characters or squares I could fill so as I went along I was restricted by what diagonals remained. Overall, after much indecision, I decided to go with StoryBots (1 square), Peg + Cat (1 square), Berenstain Bears (2 squares), WordWorld (2), Curious George (3), Veggie Tales (3), Doc McStuffins (4), Super Why (4), Doctor Who (5), Little Einsteins (5), Word Party (6), Chuggington (6), and Sesame Street (6). If you want more information on the specific characters, and their images, I picked I will go into it with more detail in the next Peek-a-Boo quilt post.
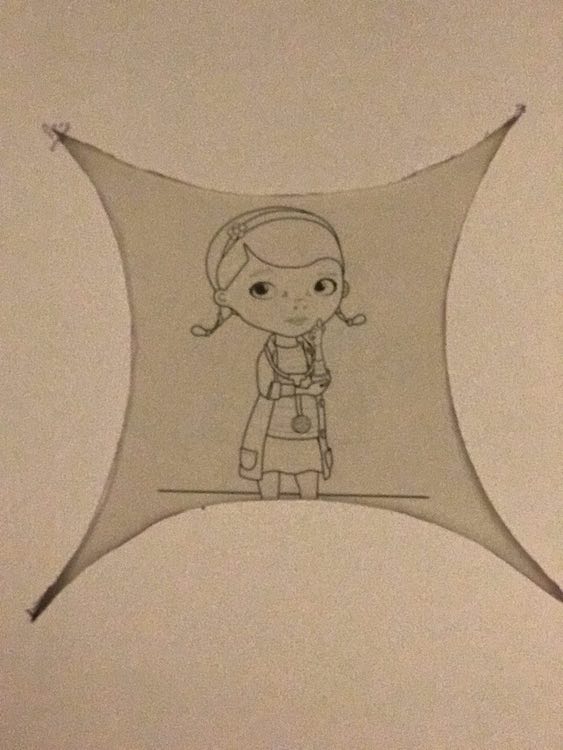
Printing the coloring pages
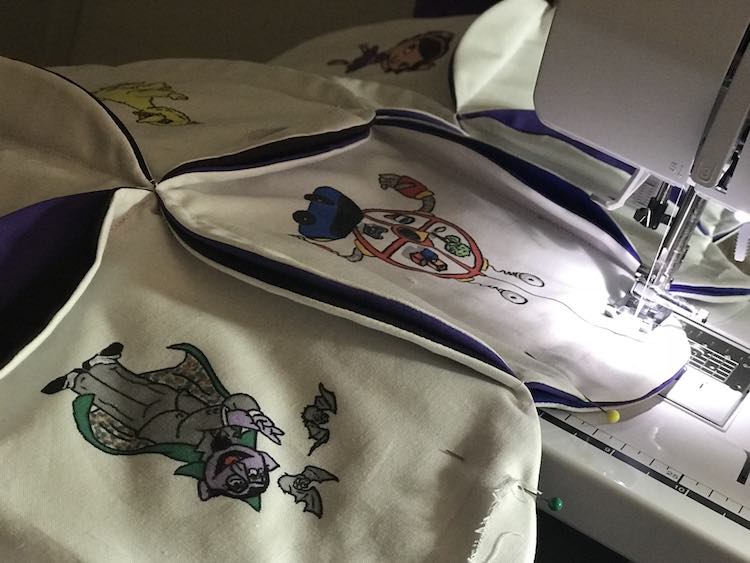
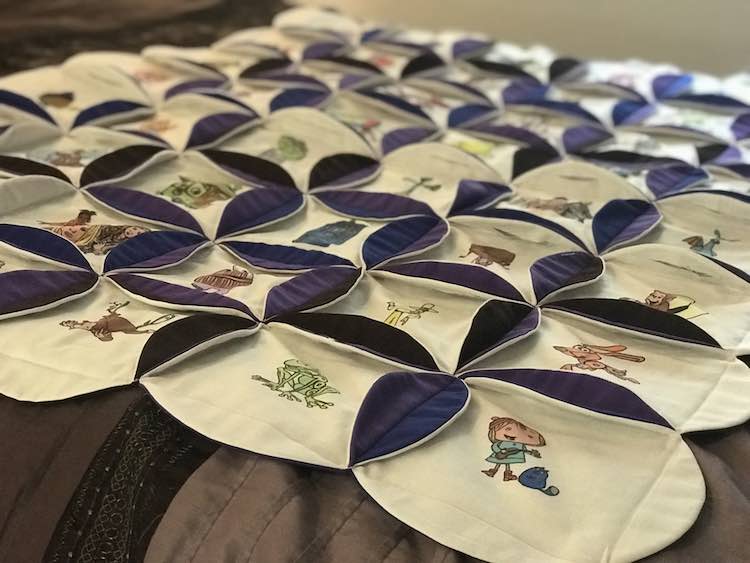
While picking my television shows I also looked into free coloring page printables online so I would know for sure if using that television show in my quilt would work and how easily I’d find coloring pages to use. Before beginning, I cut the required templates as per the book’s directions and then went on to create an additional template on what the finished window on the quilt would look like so I could estimate how big the coloring page should be when printed. For each printable chosen I copied it into a word document and resized it to the size I thought I’d need. Once I had an entire show’s cast I printed it out and laid the template window over each character to see if it was the right size. If the character was too big (or very rarely too small) I resized it in the document, deleted temporarily the ones that worked, printed the document again, and checked the images printed against the window another time. I hoped this meant that the final images wouldn’t be hidden within the quilt.
Choosing Materials
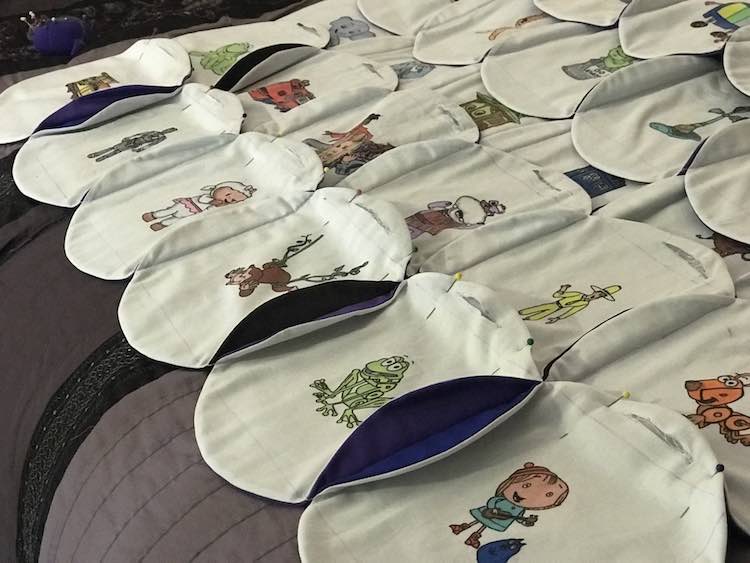
After deciding which television shows to include and how many squares/characters I needed for each show, I then went on to decide which fabrics I should use for the quilt. I wanted to use white cotton for the center of each square to draw the characters on, so there would be an optimal contrast. I also debated adding interfacing to the square but decided I’d be fine with just the two layers of cotton and the flannel that the pattern called for, then it wouldn’t be too thick to sew through.
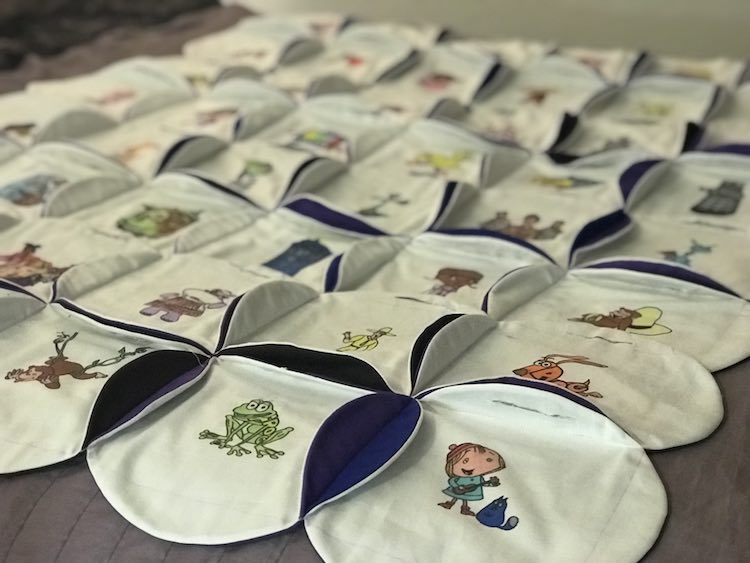
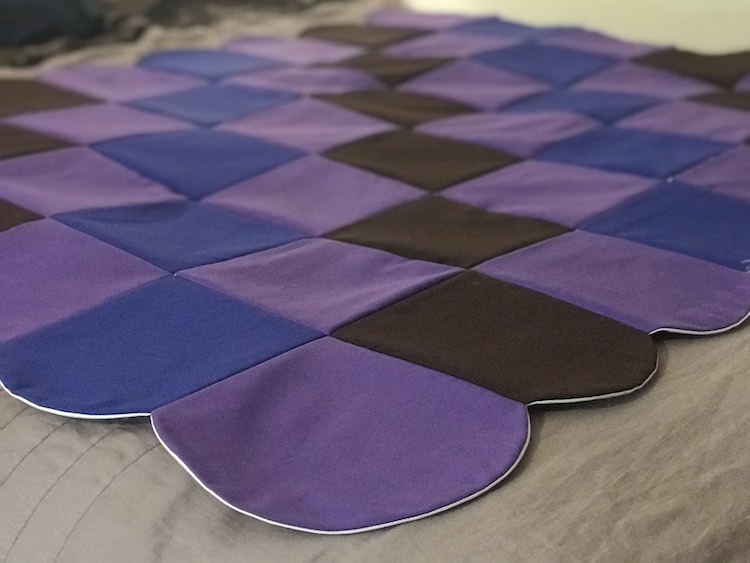
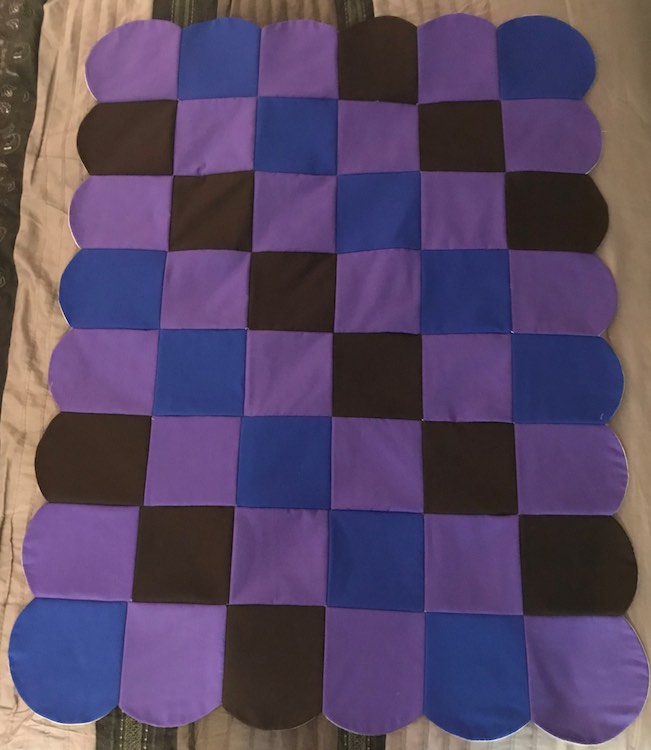
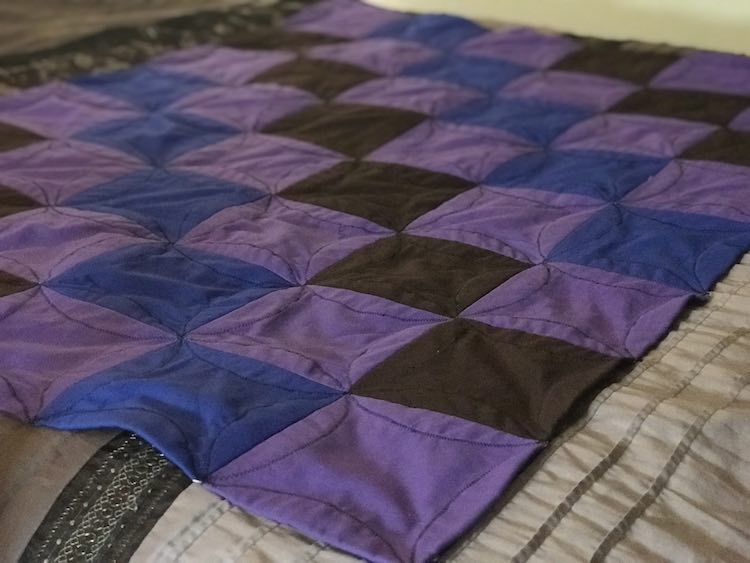
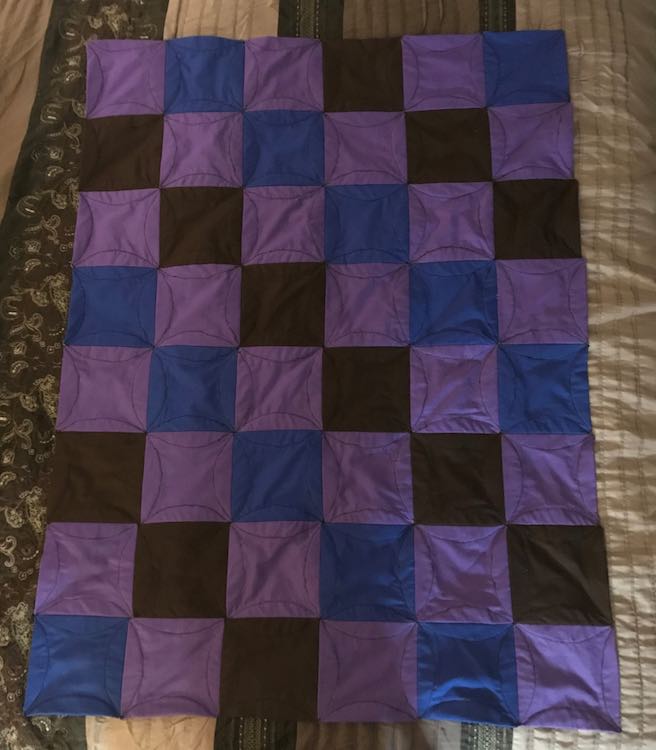
I found the pictures in the book a bit too busy for me and even though I figured the white character squares would calm the quilt down I also decided to limit the color on the back of the quilt, and thus the window frames, to solid colors. To choose how many solid colors and the layout I decided to draw out a diagram of the quilt, six by eight squares, and tried out a few combinations. I focused on the layout and number of colors rather than the specific color choice. Once I decided my layout, three colors on a diagonal (a b a c a b a c a b a c a), I went on to calculate the total squares of each colors (24 squares of the main color and 12 squares of the other two colors) and then the total yardage I’d need of each color. I ended up buying two yards of purple, one yard of brown, and one yard of blue cotton broadcloth. The original plan was to reverse the diagonals so the colors were going against the diagonals of the television shows on the front, but I forgot that decision until halfway through sewing them together so I ended up placing each show on it’s own color diagonal. This way I was able to assign a show to it’s color, make the circles, lay out all my pieces, and then decide on the character layout within each television show’s diagonal. If I had gone with my original plan I would have had to decide everything before I started sewing.
The flannel sandwiched in the middle is hidden so I went with a simple grey. I didn’t want to use a loud and/or patterned flannel as I didn’t want it to show through the front of the quilt through the white cotton.
Making the quilt
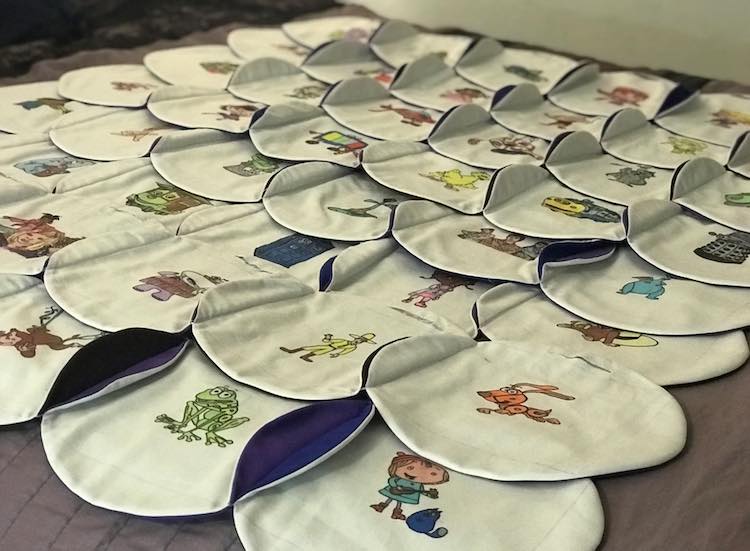
After cutting the all the squares and designing my front character squares I simplified my sewing process by creating a pile with the right sandwiching of character, flannel, and solid squares. I then followed the book’s instructions to make my quilt.

Mistakes I’d attempt to correct if I did this again
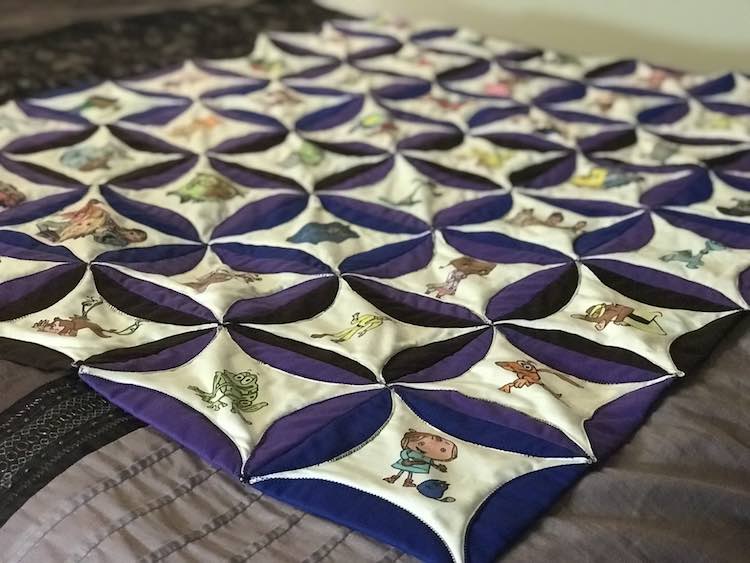
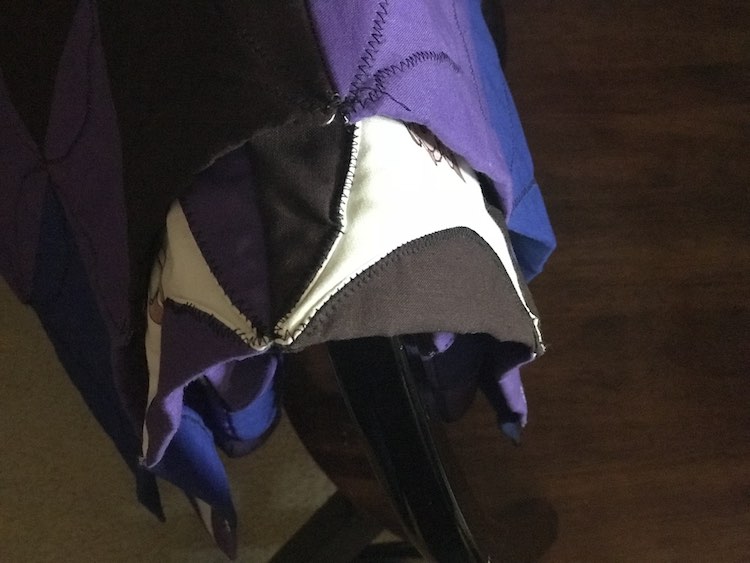
- My circles weren’t perfect circles so the joins on the edge of the quilt dip inward and the intersections where the squares join sometimes have visible holes.
- I expected my quilt to drag off the table due to it’s size and gravity at my sewing machine but I need practice working with this and many times the quilt jerked enough that there are jumps in the stitches while working the half circles flaps down.
- Some of the characters ended up getting covered up a bit when I folded my flaps over but this was to be expected. If I made this again I would make my template window a bit smaller and triple check that I centered each and every character on it’s square so this would have less chance of happening.
Steps I followed to create my template window
I followed the steps in the book with a piece of paper to follow what the fabric would end up looking like. I created the circle with computer paper, drew out the square, folded in the flaps at the square edges, traced around the flaps, unfolded them, cut along where I had traced, and then used this reversed window template to trace onto a second piece of paper. This resulting shape on the paper was then cut out and that became the template window I used. I’m sure there is probably a better way to do this, but this was a quick-ish way to help me confirm the printables weren’t too large and helped me confirm steps along the way.
You can connect with me through the comments below, on my Facebook page, or through Instagram. I’d love to hear what you think.